
Using unions in Multiple Forms
The Multiple Forms Extension for GravityView combines entries from different Gravity Forms forms in a single View. It supports two ways of combining data: joins, which match related entries using a shared field, and unions, which stack entries from several forms into one list.
This article shows you how to set up a union, map fields between forms, and understand how searching, sorting, and editing work in a combined View.
Note: Unions require GravityView 3.3.0 or newer and Multiple Forms 0.7.0 or newer.
Prefer to watch the video? #
What’s the difference between a join and a union? #
A join matches related entries from different forms and displays them side by side in the same row. Joins need a shared field, such as an email address or ID, so there is something to match on. Use a join when different forms hold information about the same person or thing, like a member profile form and a renewal form.
A union stacks entries from several forms into one list, with one row per entry. Unions don’t need a shared field or any connection between the forms. Use a union when you want everything in one place, like displaying registrations from an in-person event form and a virtual event form in a single table.
This article covers unions. To learn about joins, read Getting Started With Multiple Forms, or see joins and unions for an animated comparison of the two.
1. Choose your primary form #
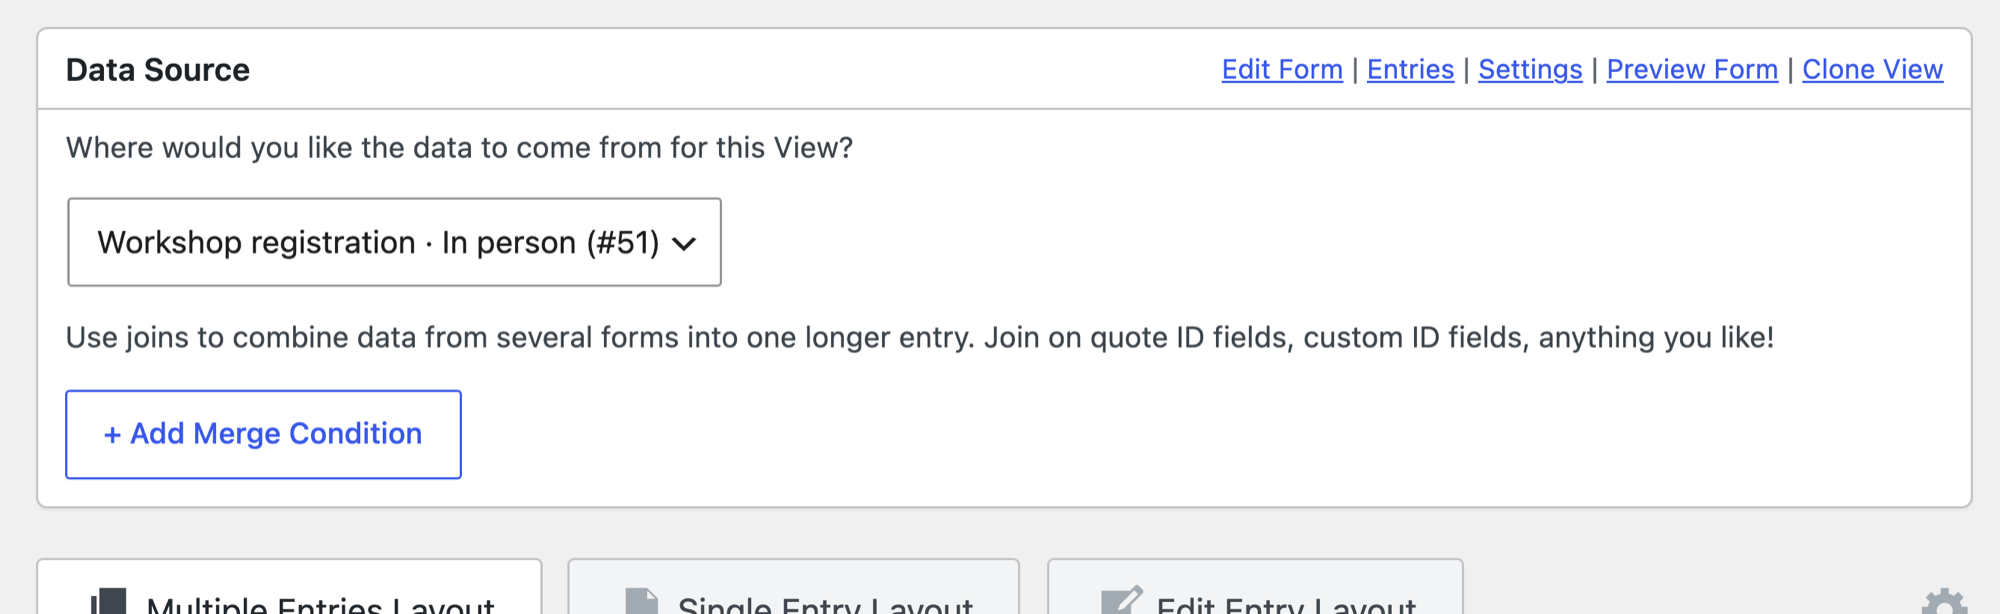
Create a new View (or open an existing one) and select a form as the data source. This is your primary form: its fields become the View’s columns, and every other form you add to the union maps its fields into those columns.
If you’re starting from scratch, choose the form whose fields best represent the combined data, then configure your layout as usual.
2. Add a union #
In the View editor, below the Data Source box, click + Add Merge Condition.
Under How do you want to merge?, select Union.
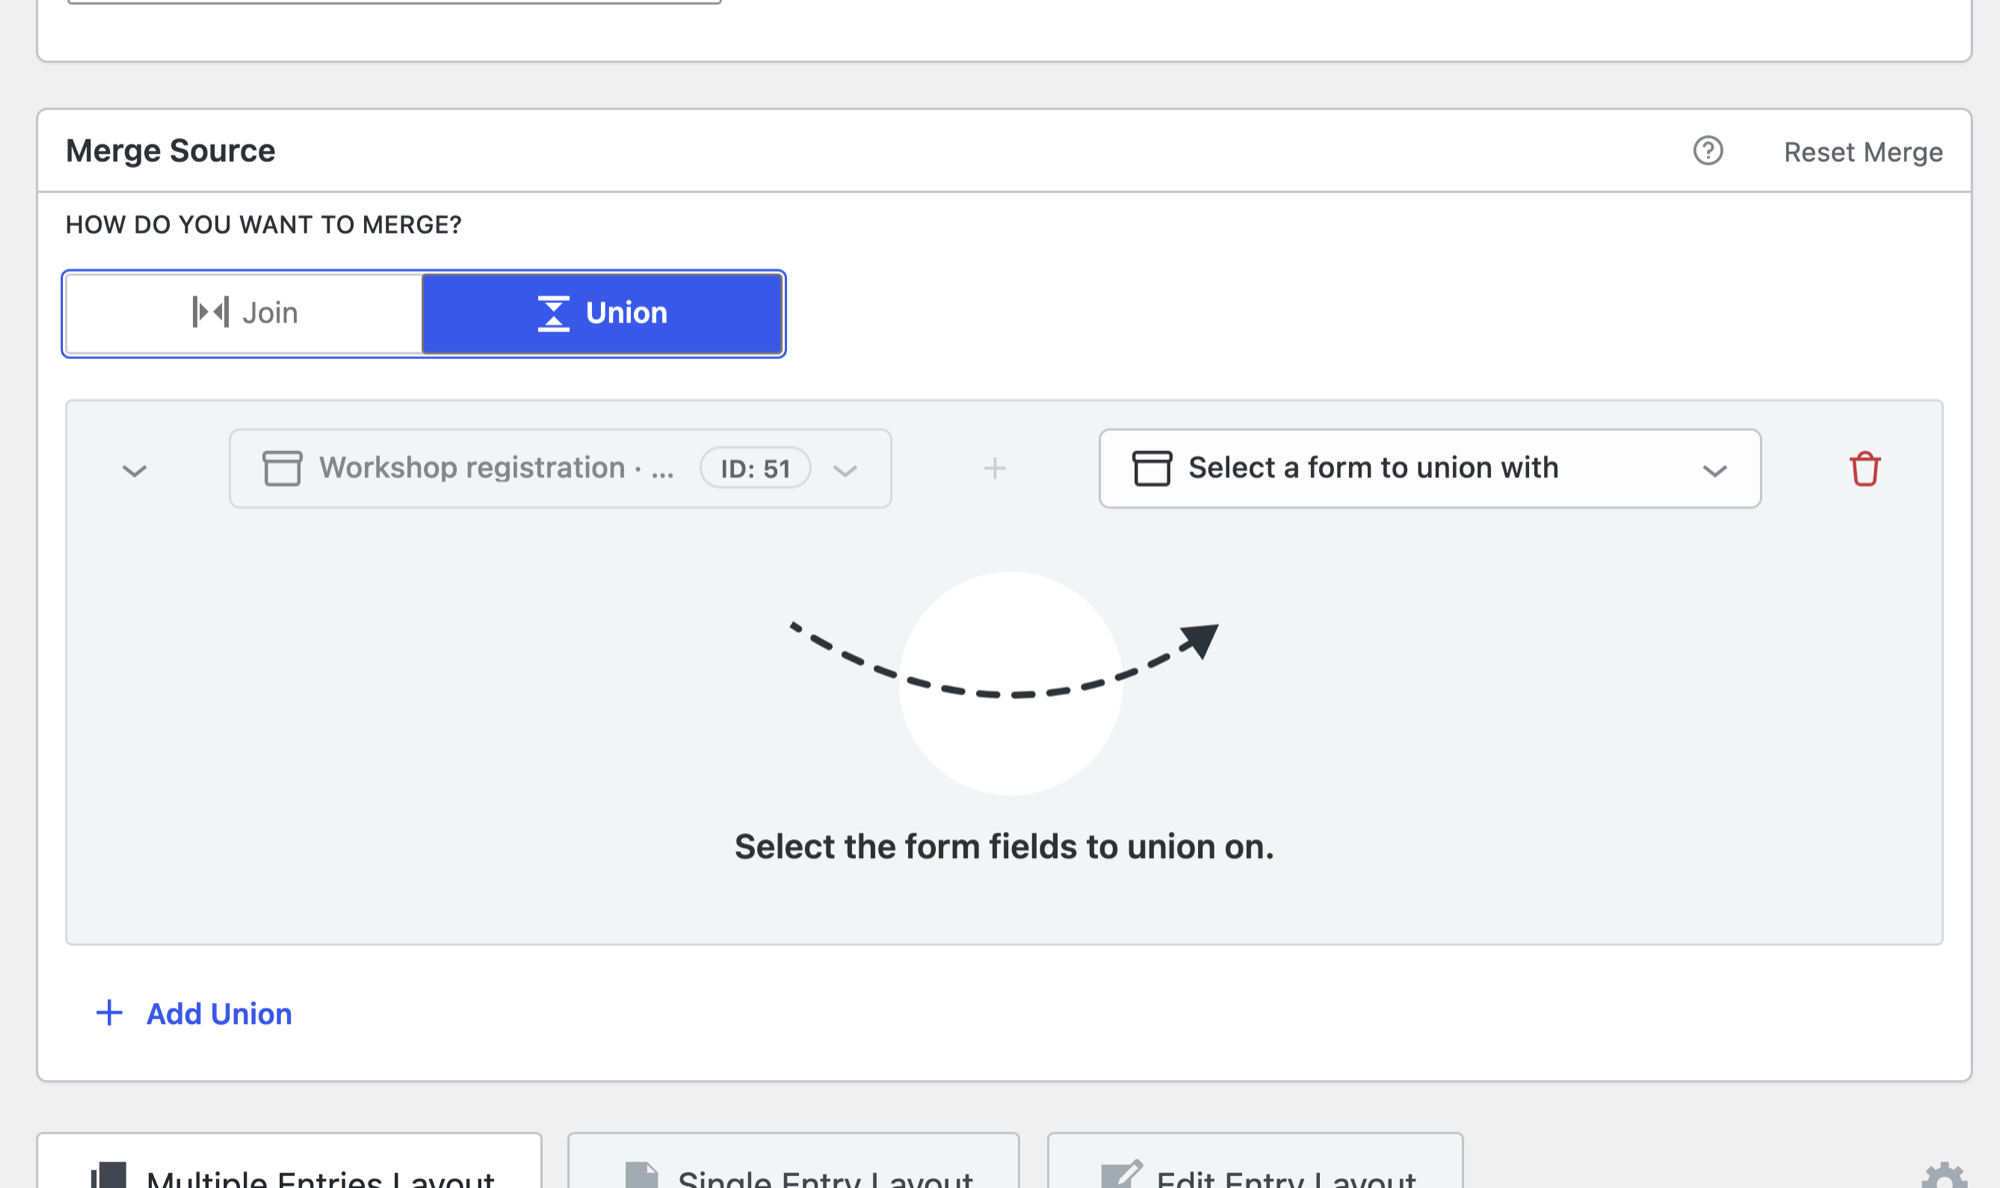
3. Select a form to union with #
Click Select a form to union with. A searchable list of your forms appears, with each form’s ID displayed next to its name. Select the form whose entries you want to add to the View.
4. Map the fields #
After you select a form, a field mapping table appears with two columns: Source Fields lists your primary form’s fields, and Field Mapping shows which field from the newly added form fills each column.
Multiple Forms detects fields with identical labels and maps them automatically. For example, if both forms have a field labeled “Email”, they are mapped for you.
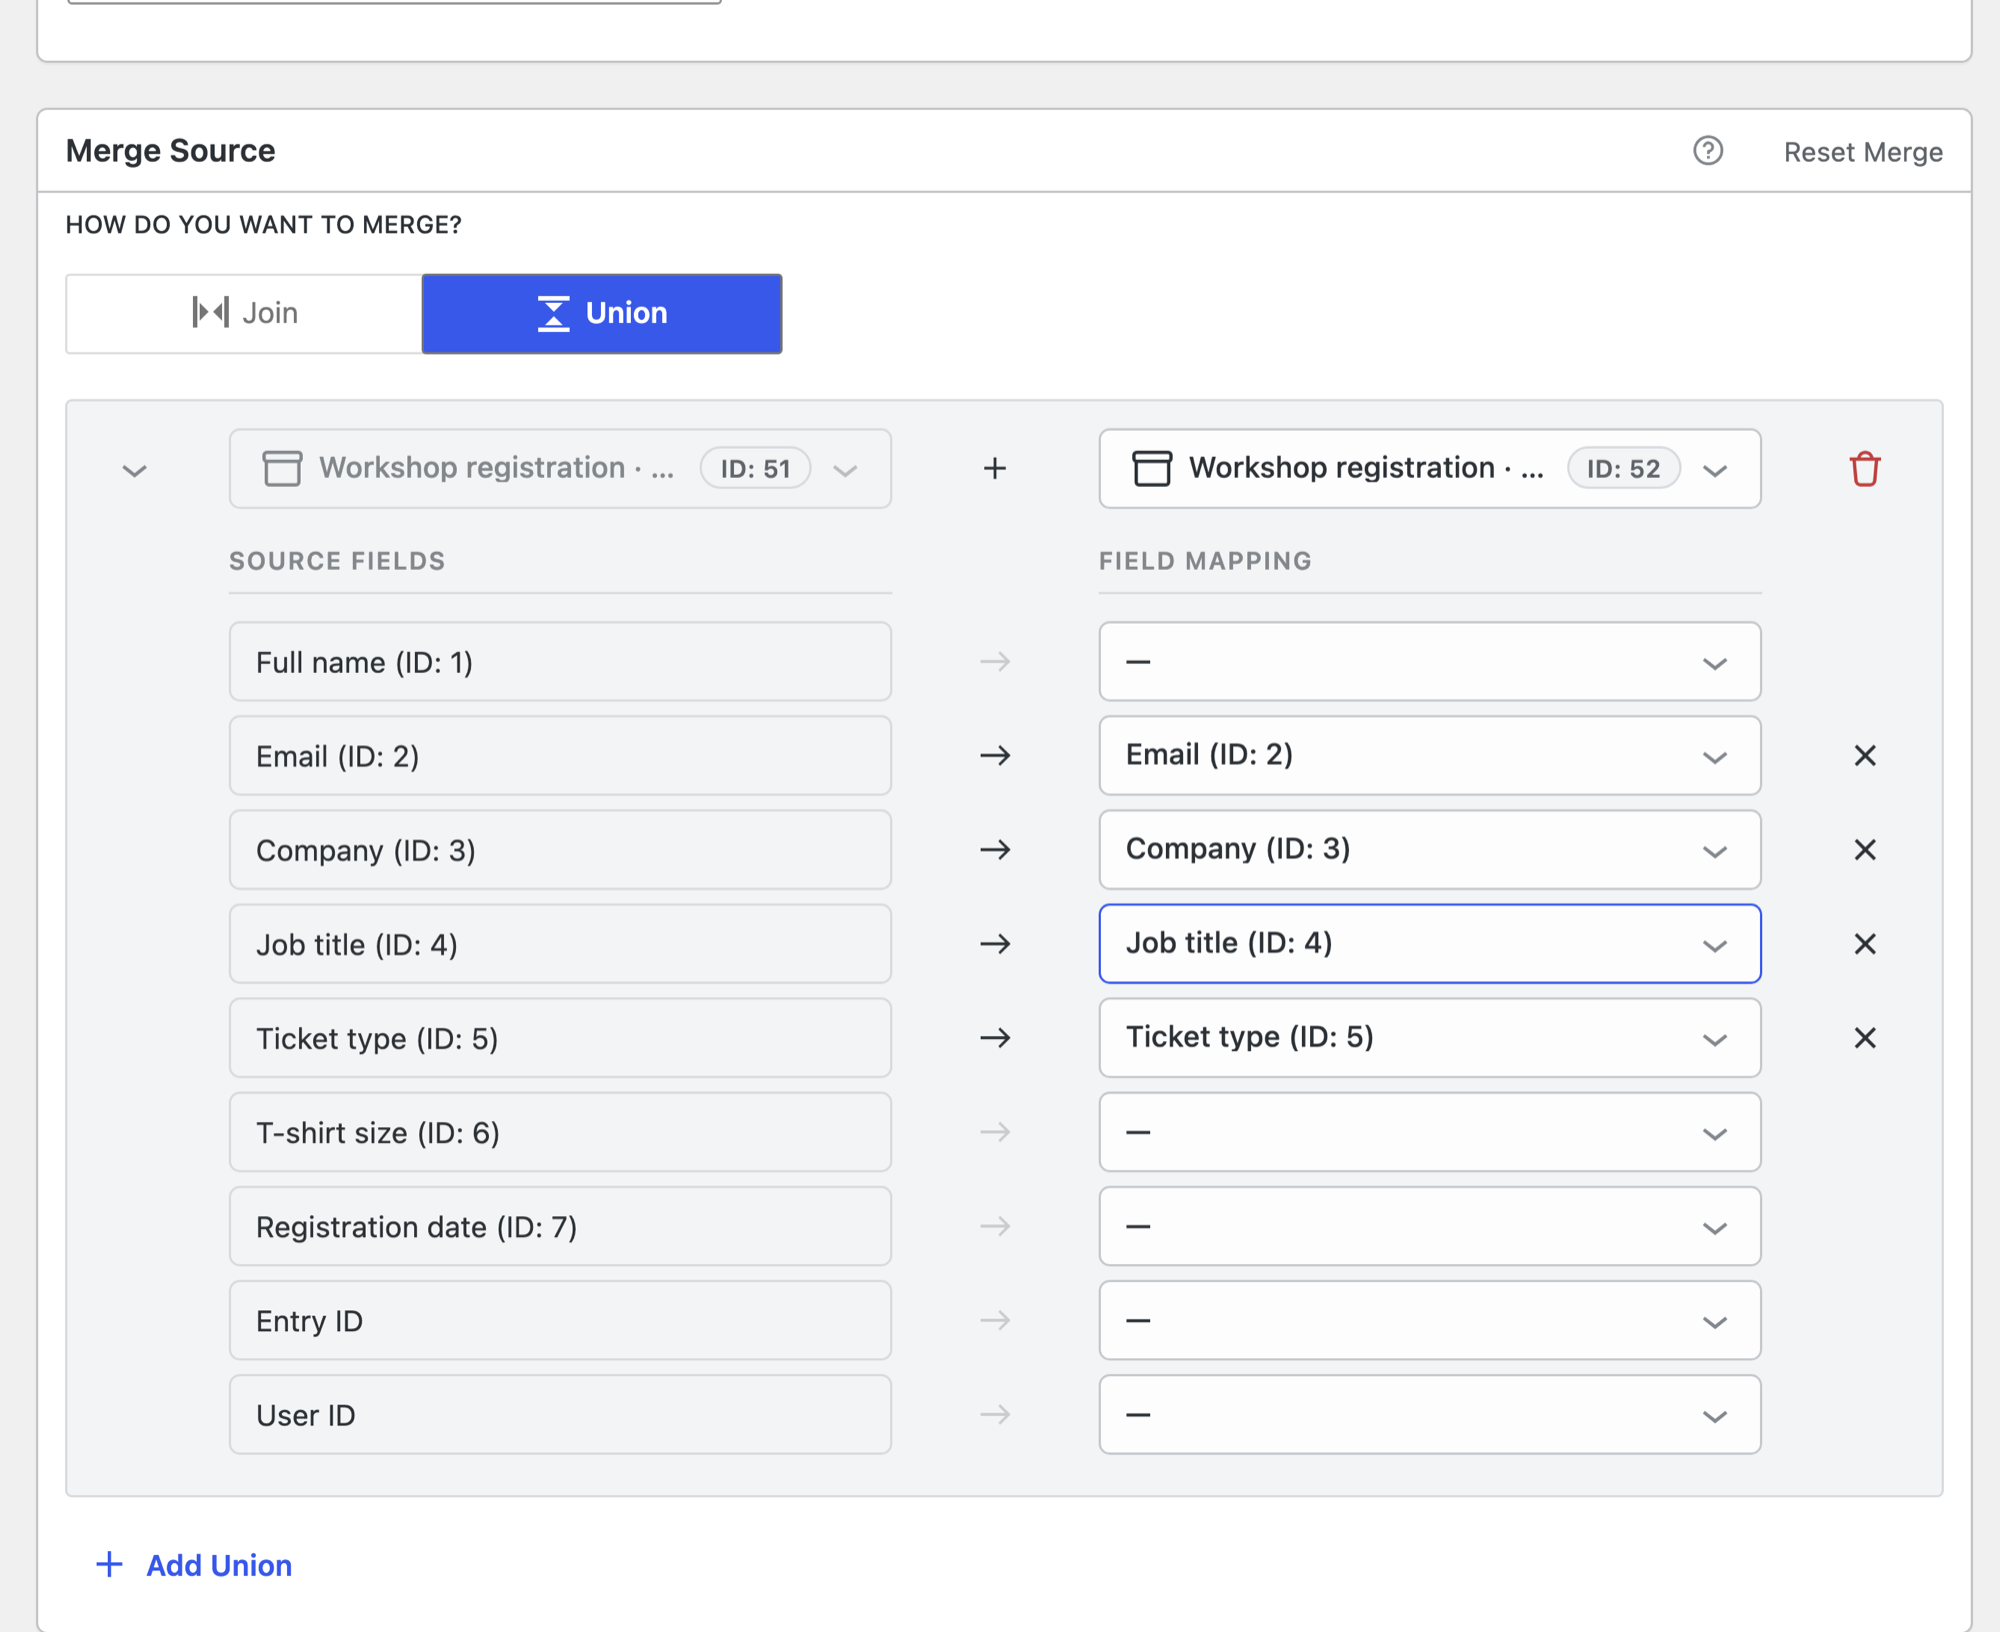
For fields with different labels, set the mapping yourself:
- Click the dropdown next to the source field.
- Search for or select the matching field from the list. Form fields appear under Field Data, and entry properties like Entry ID and User ID appear under Non-Field Data.
A few things to know about mapping:
- You don’t need to map every field. If the added form has no equivalent for a source field, leave it unmapped. Entries from that form simply show an empty value in that column.
- You can map any field to any field. Mappings aren’t restricted to matching field types, so you have full control over which data fills each column.
- To remove a mapping, click the x icon next to it.
5. Add more forms (optional) #
To combine entries from additional forms, click Add Union and repeat the form selection and field mapping steps. Each form maps its fields into the primary form’s columns.
Each union appears as its own collapsible block. Click the toggle on a block to expand or collapse its field mapping.
6. Save and view the results #
Click Update to save the View, then check it on the front end. The View now displays every entry from all of the combined forms, with one row per entry.
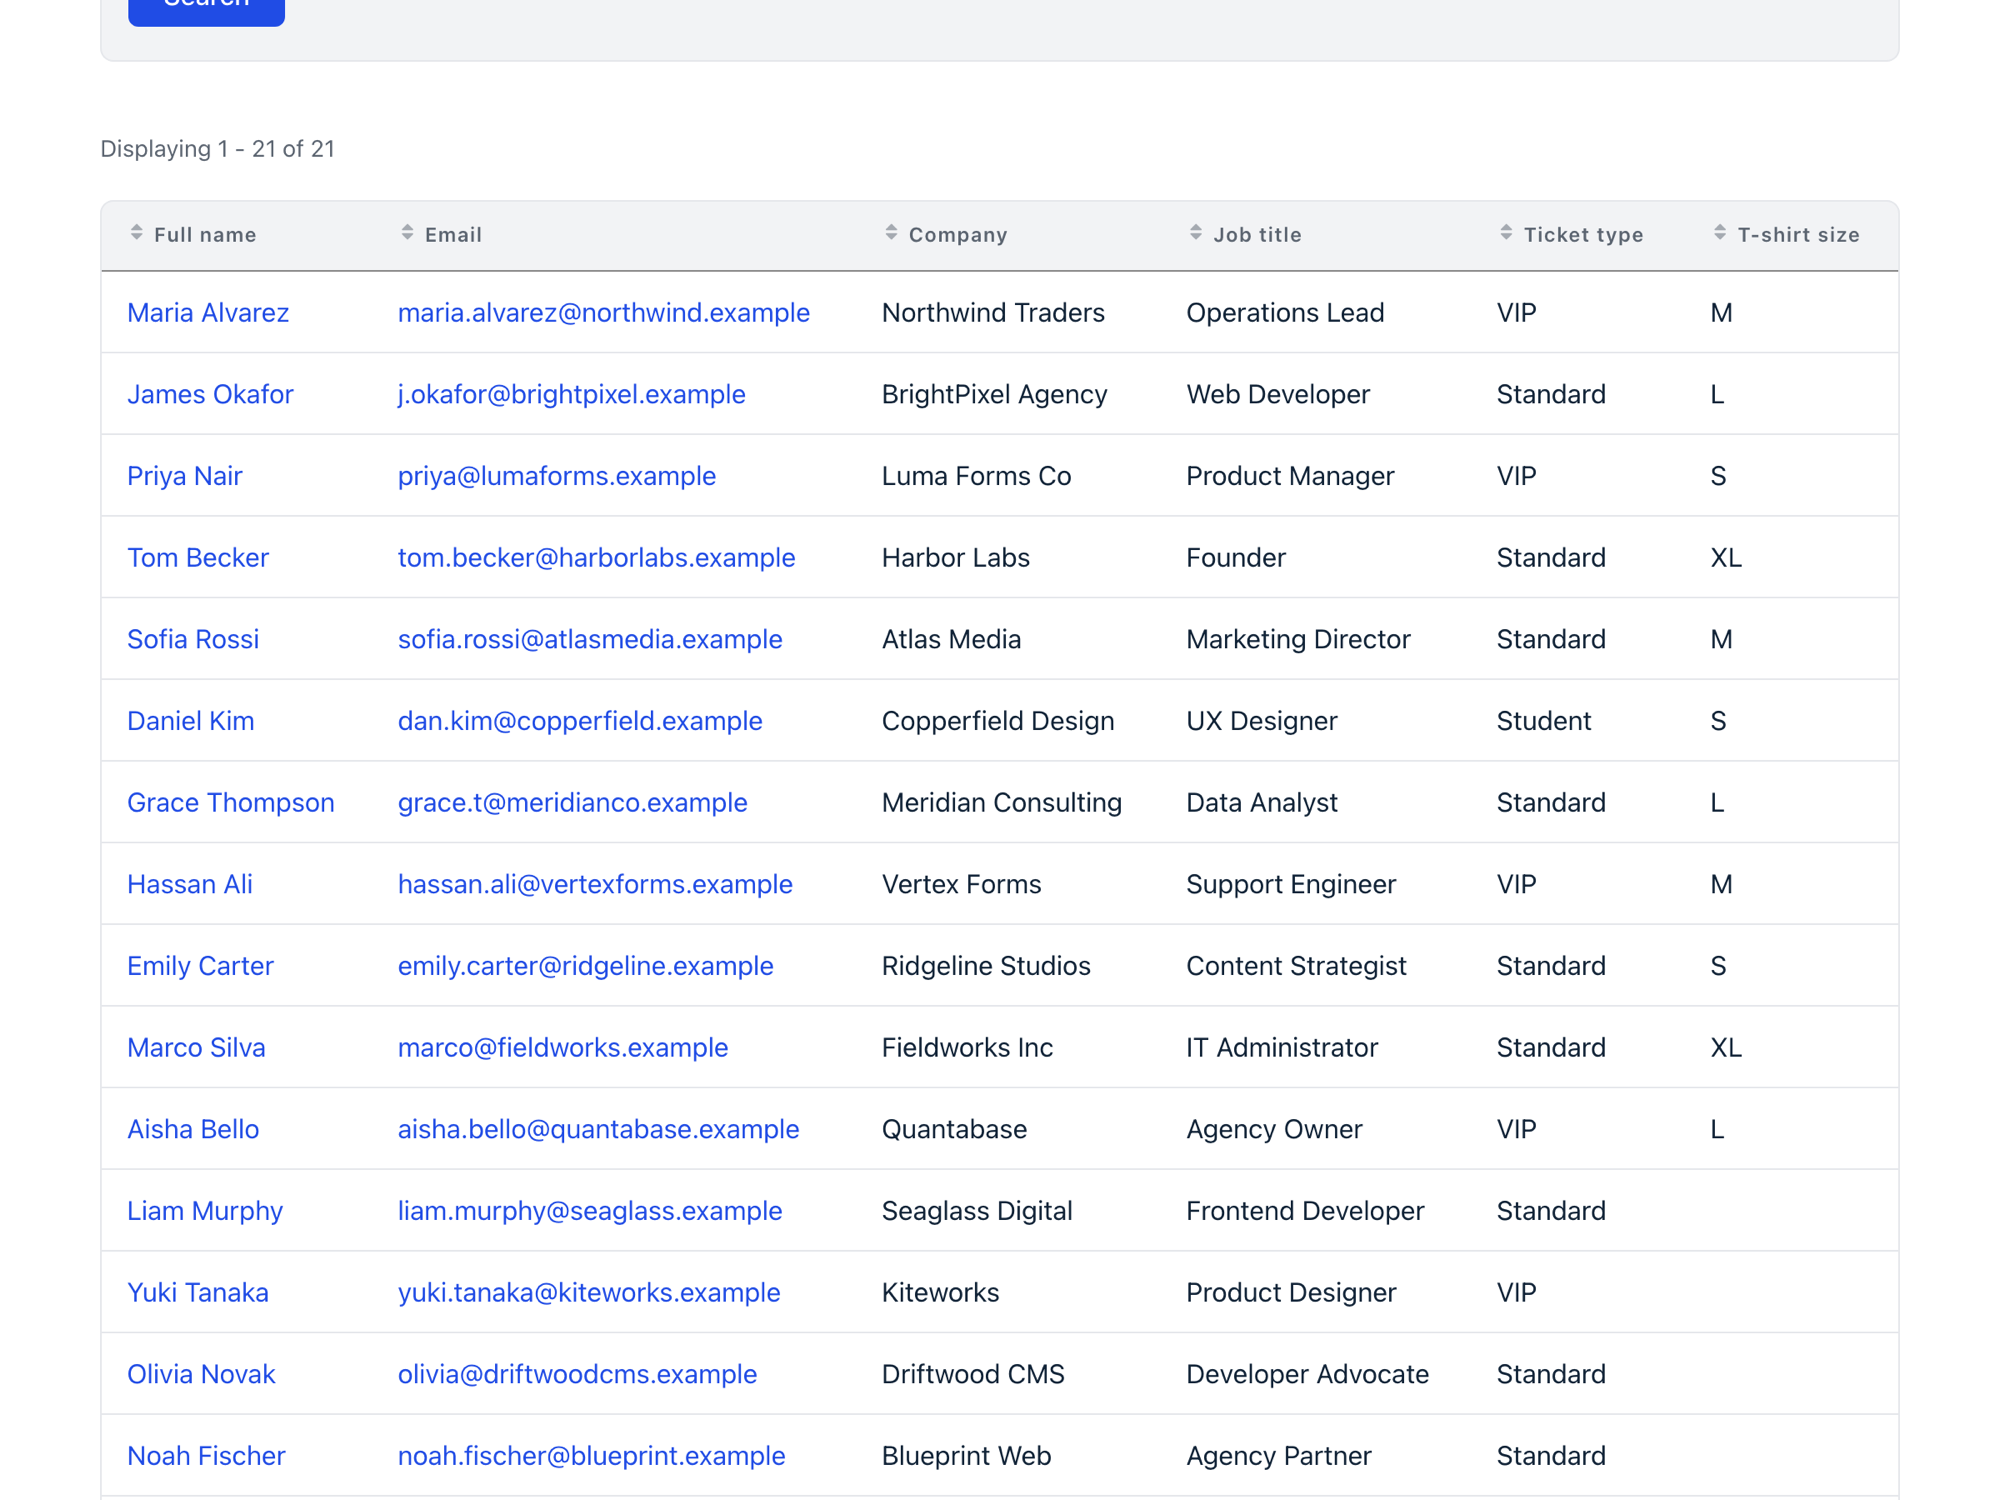
Entries from different forms are interleaved and sorted together as one dataset, not grouped by form.
How unions behave on the front end #
- Searching works across all forms. The Search Bar searches the mapped columns, so one search field covers every combined form.
- Sorting works across all forms. Sorting a column arranges every entry in the View, regardless of which form it came from.
- Single Entry pages work for every row. Clicking through to an entry works the same whether the entry belongs to the primary form or an added form.
- Edit Entry uses each entry’s own form. When you edit an entry, you edit its actual fields, even if they differ from the primary form’s fields. This holds while the Edit Entry Layout tab is empty: fields added to that tab are matched by field ID on every form, as Known limitations of Multiple Forms explains.
Limitations #
- Filter conditions on an added form’s own fields aren’t available. Each row in a union is a standalone entry, so Advanced Filtering conditions apply through the primary form’s mapped columns rather than a secondary form’s own fields.
- All matching entries are displayed. There is no option to show only the most recent entry per user. If you need that behavior, add a status field to your forms and use Advanced Filtering to display only entries with a specific status.
Managing your unions #
- To remove a union, click the remove button on its block. A notice tells you which form’s fields were removed from the View.
- To start over, click Reset Merge to clear the merge configuration.
Related articles #
Was this page helpful?


- Prefer to watch the video?
- What’s the difference between a join and a union?
- 1. Choose your primary form
- 2. Add a union
- 3. Select a form to union with
- 4. Map the fields
- 5. Add more forms (optional)
- 6. Save and view the results
- How unions behave on the front end
- Limitations
- Managing your unions
- Related articles