
Setting an editing deadline with Edit Window
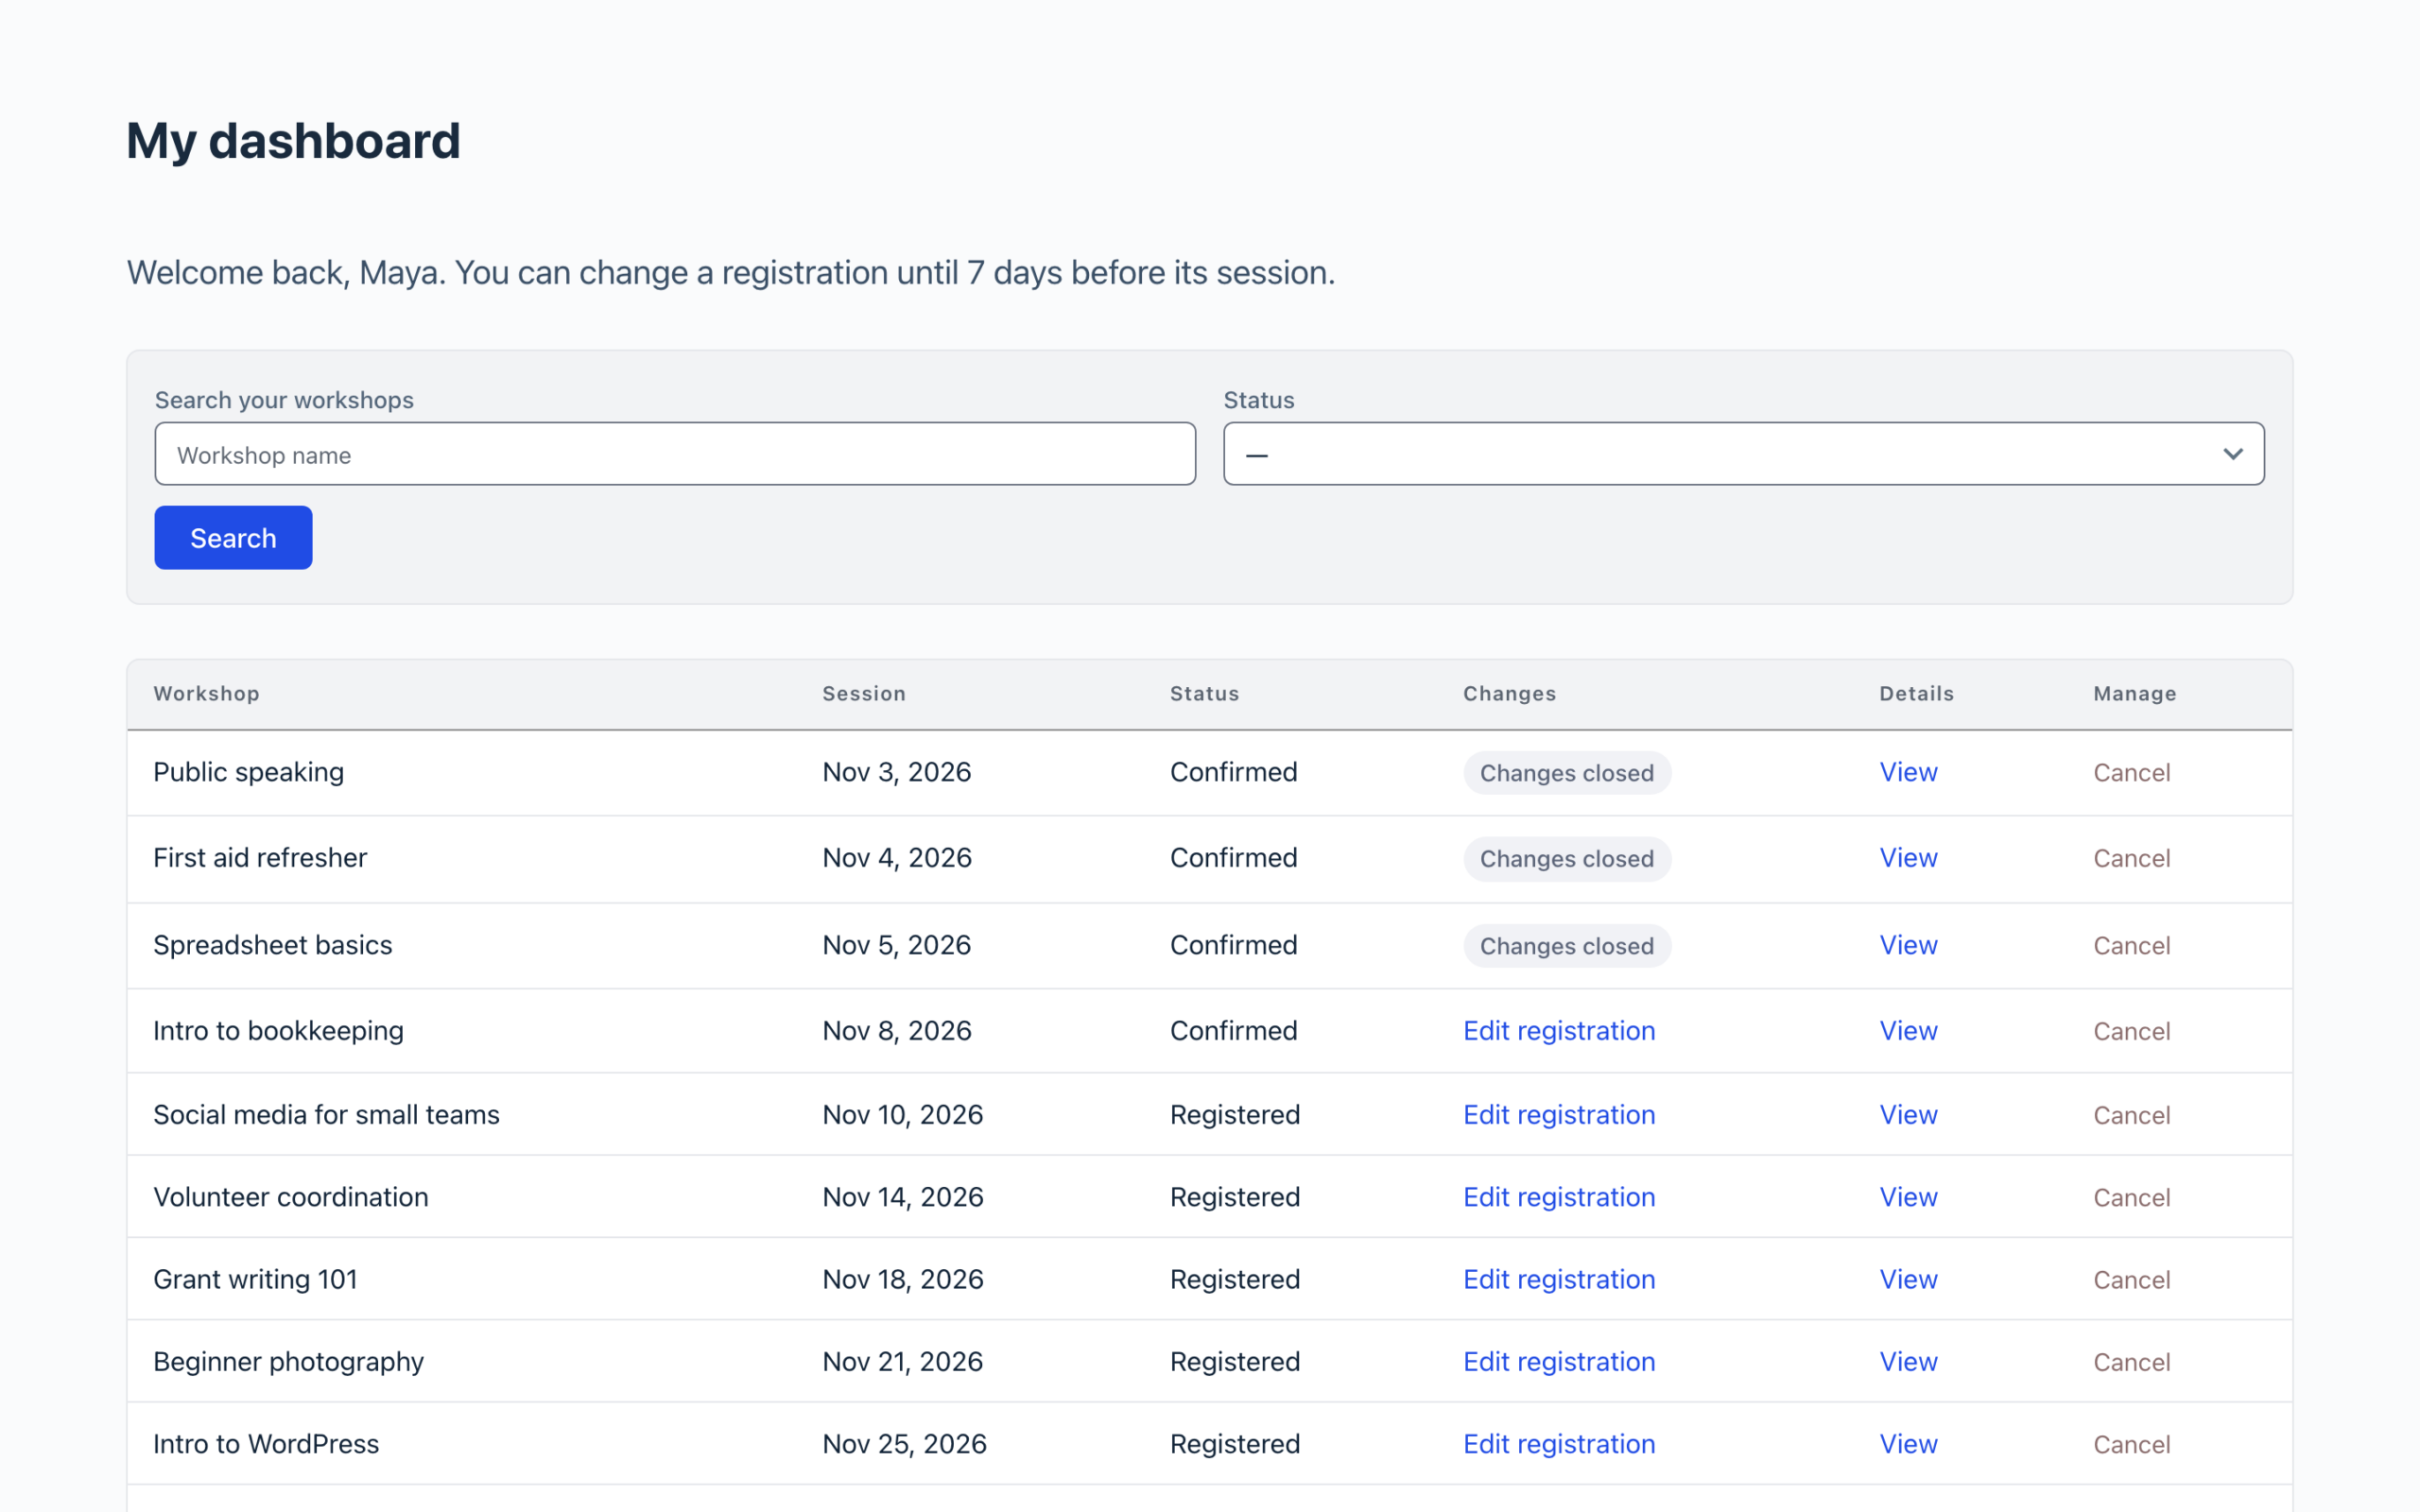
Edit Window lets the people using a View edit their own entries until a deadline, then closes editing while the entries stay visible. A workshop site, for example, can let members edit a registration until 7 days before its session. This article explains how to turn it on, choose a deadline, add custom closing rules, and decide what happens to deleting.
Edit Window is part of GravityView Pro. The All Access Pass includes GravityView Pro.
How Edit Window works #
Edit Window is a setting on one View. Once the window closes for an entry:
- The Edit link for that entry disappears from the View, and nothing replaces it by default. The entry stays in the View.
- Anyone who opens an old edit link sees a message instead of the edit form.
- A form opened before the deadline and saved after it is refused, and the entry stays as it was.
Users who can edit other users’ entries, such as administrators, aren’t affected. The setting doesn’t change editing anywhere else: another View of the same form can still allow editing, and edits in the WordPress admin, imports and the Gravity Forms API work as before.
Before you begin #
- Install and activate the latest version of GravityView Pro.
- Set up a View that lets people edit their own entries, with an Edit link in the View. See Allowing users to edit their own entries.
- For a deadline based on a date in each entry, make sure the form has a Date field.
Step 1: Turn on Edit Window #
- Open the View in the View editor.
- In the Settings box, click the Edit Entry tab.
- Turn on Edit Window.
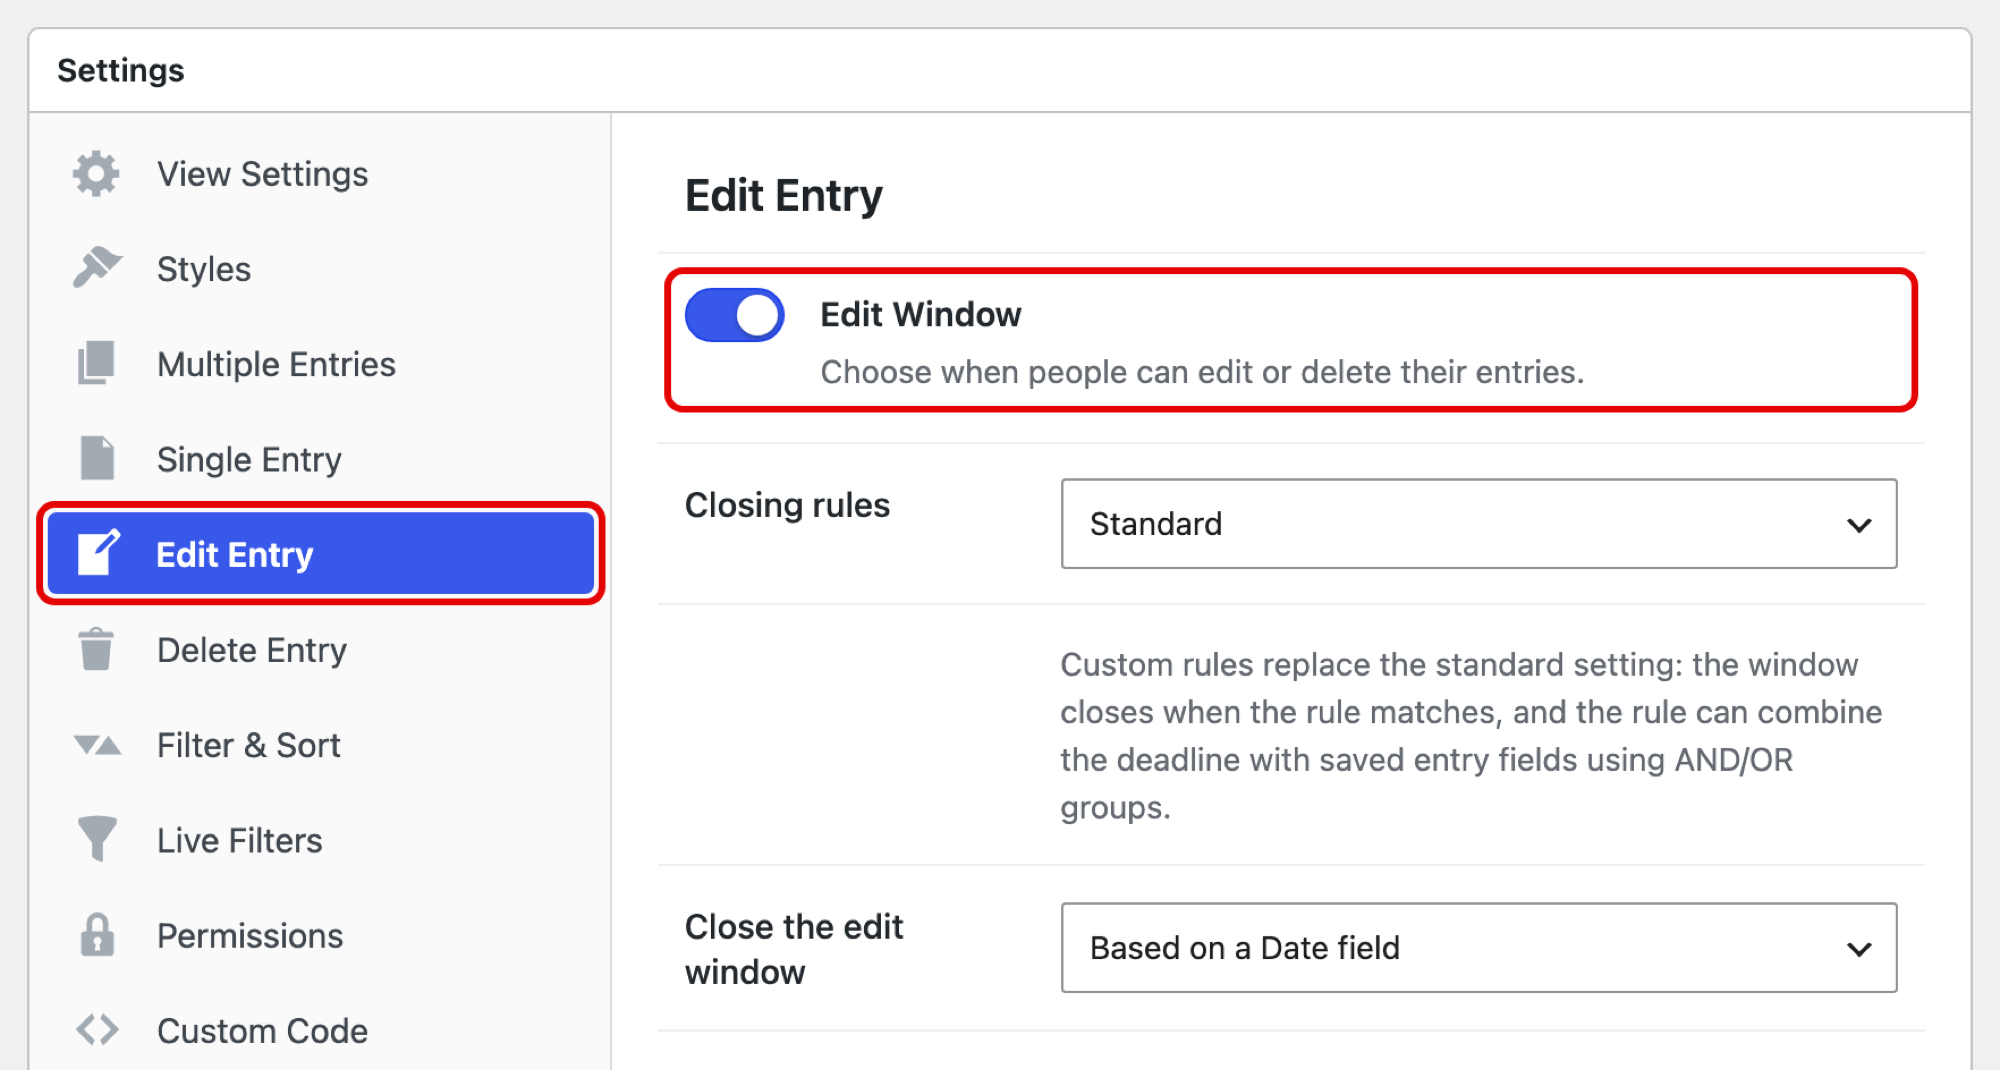
Once it’s on, these settings appear below it:
- Closing rules: leave it on Standard unless you want custom rules (Step 3).
- Close the edit window: when editing closes (Step 2). More settings appear below it, depending on the deadline you choose.
- Also apply to deleting entries: whether deleting closes too (Step 4).
- Message when the window is closed: what people see instead of the edit form (Step 5).
Step 2: Choose when the window closes #
In Close the edit window, choose the deadline that fits:
| Option | Use it when | Example |
|---|---|---|
| When the form’s schedule ends | Editing should close when the form stops accepting entries | Attendees can edit a conference sign-up until registration closes |
| A set time after the entry was submitted | Everyone gets the same amount of time after they submit | People can fix typos in a listing for 48 hours |
| On a specific date | One cutoff applies to every entry | Applicants can edit until the review starts on March 1 |
| Based on a Date field | Each entry has its own date | Members can edit a registration until 7 days before their session |
Each option adds its own settings below Close the edit window.
Option 1: When the form’s schedule ends
Editing closes at the end date and time in the form’s schedule settings in Gravity Forms. The schedule’s start date and entry limit don’t affect editing. If the form has no schedule end, editing stays open. Click Configure form scheduling to set one.
Option 2: A set time after the entry was submitted
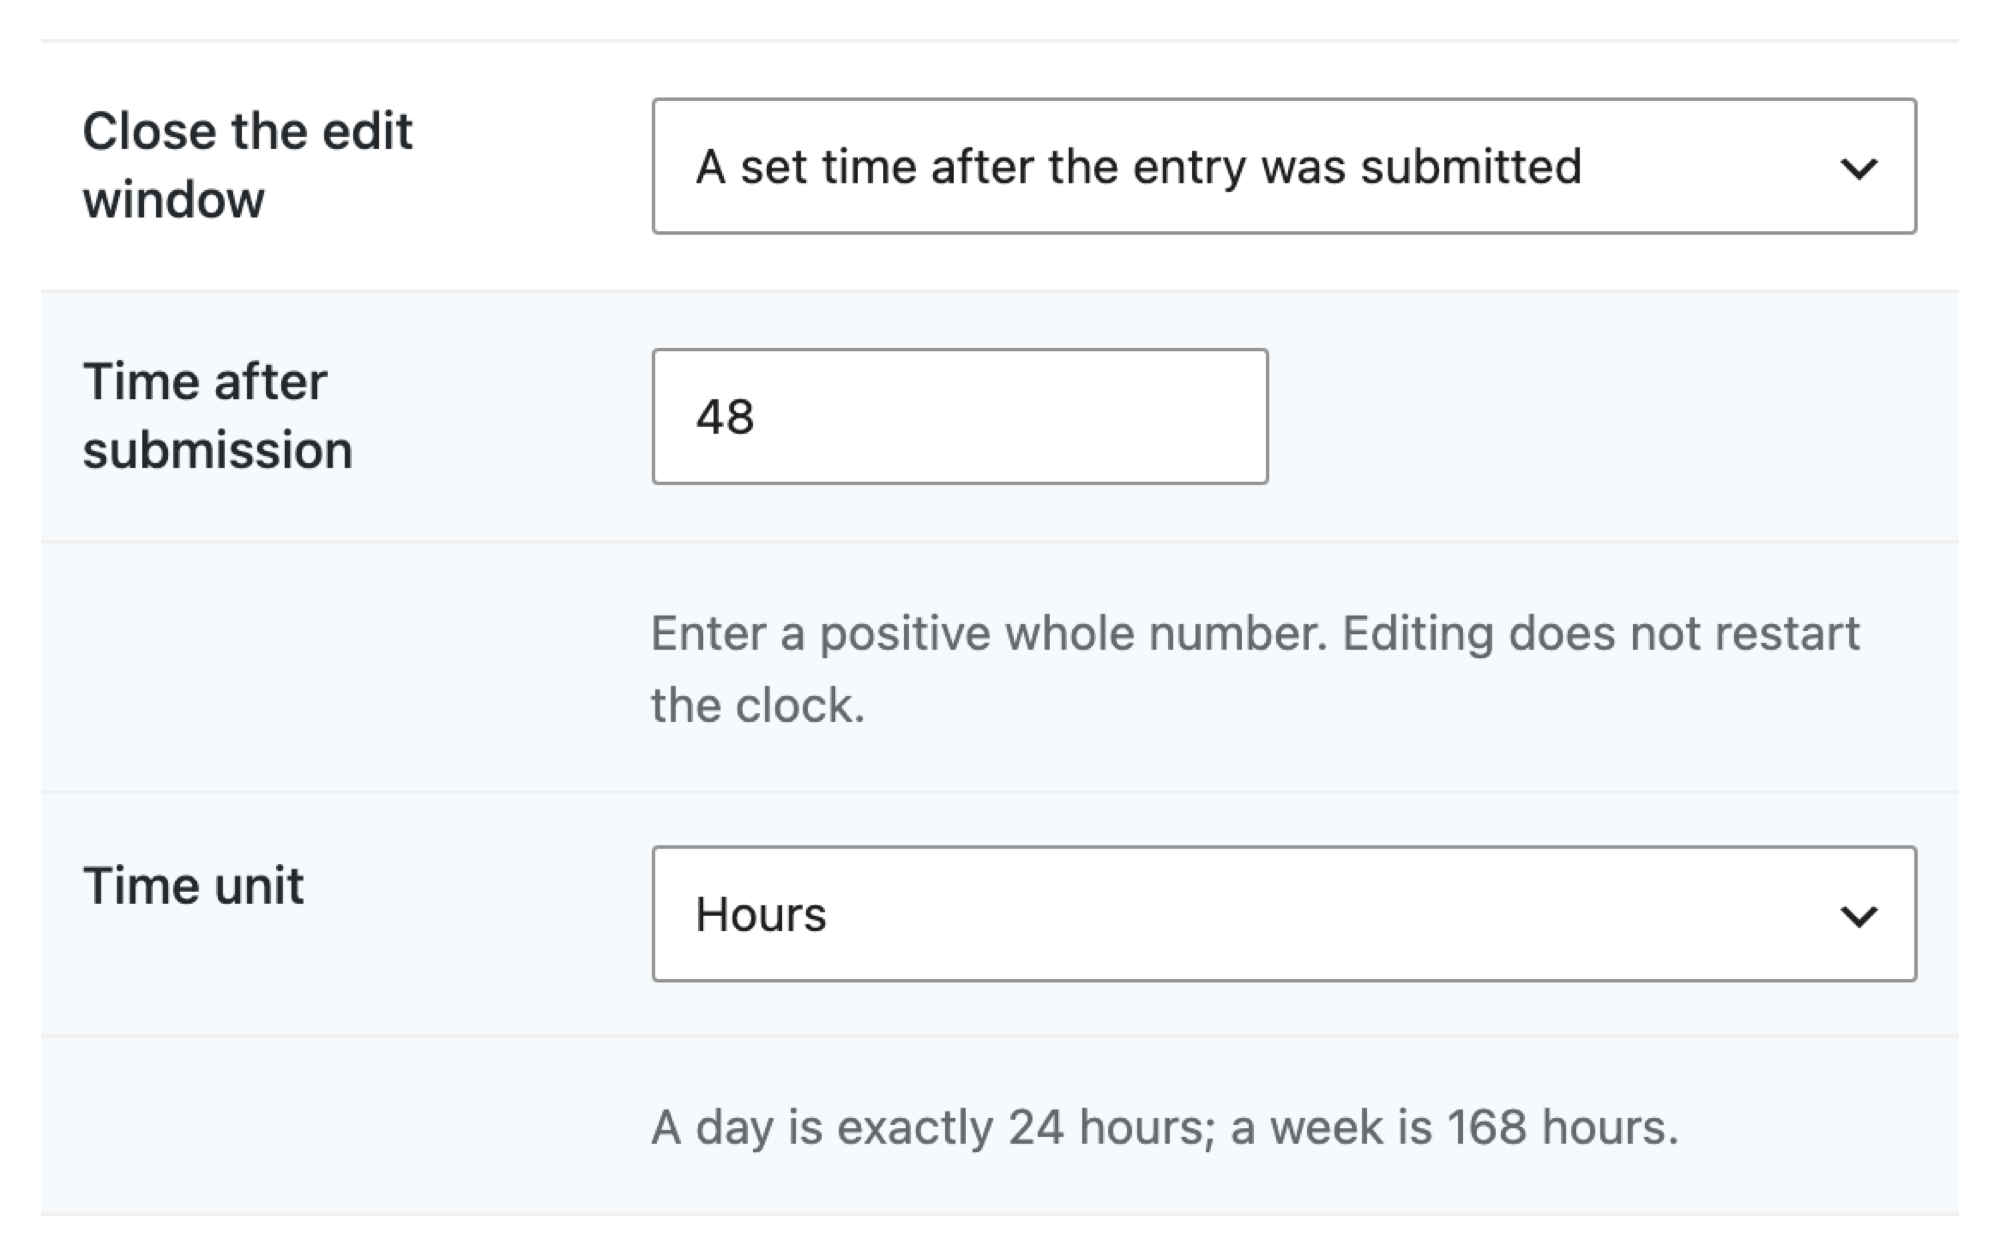
Enter a whole number in Time after submission and choose Hours, Days or Weeks in Time unit. A day is exactly 24 hours. Editing an entry doesn’t restart the clock.
Option 3: On a specific date
Enter a Deadline date and a Closing time. The date belongs to this View and doesn’t depend on the form’s schedule.
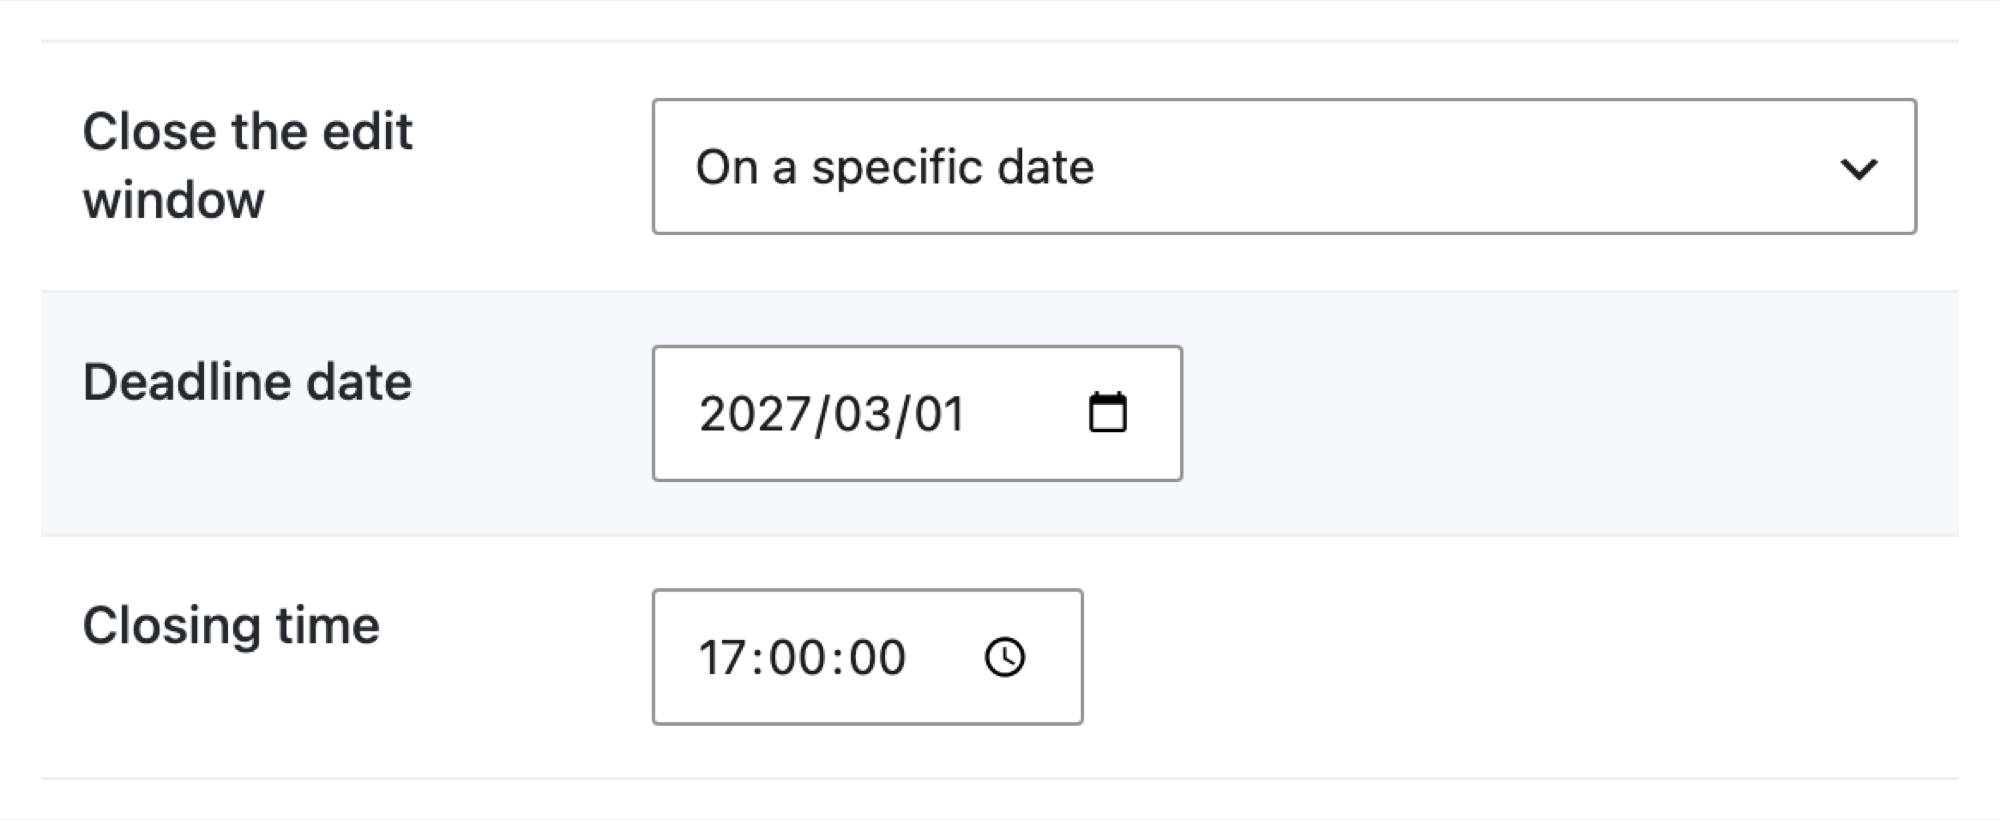
Closing time defaults to the end of the day (23:59:59) in your site’s timezone. Editing stays open until that exact time and closes one second after it.
Option 4: Based on a Date field
Choose the Deadline Date field, then choose On the date, Before the date or After the date in Close relative to the date, and enter the Days before or after. Closing time works the same way as for a specific date. A GravityBoard Due Date field works here too.
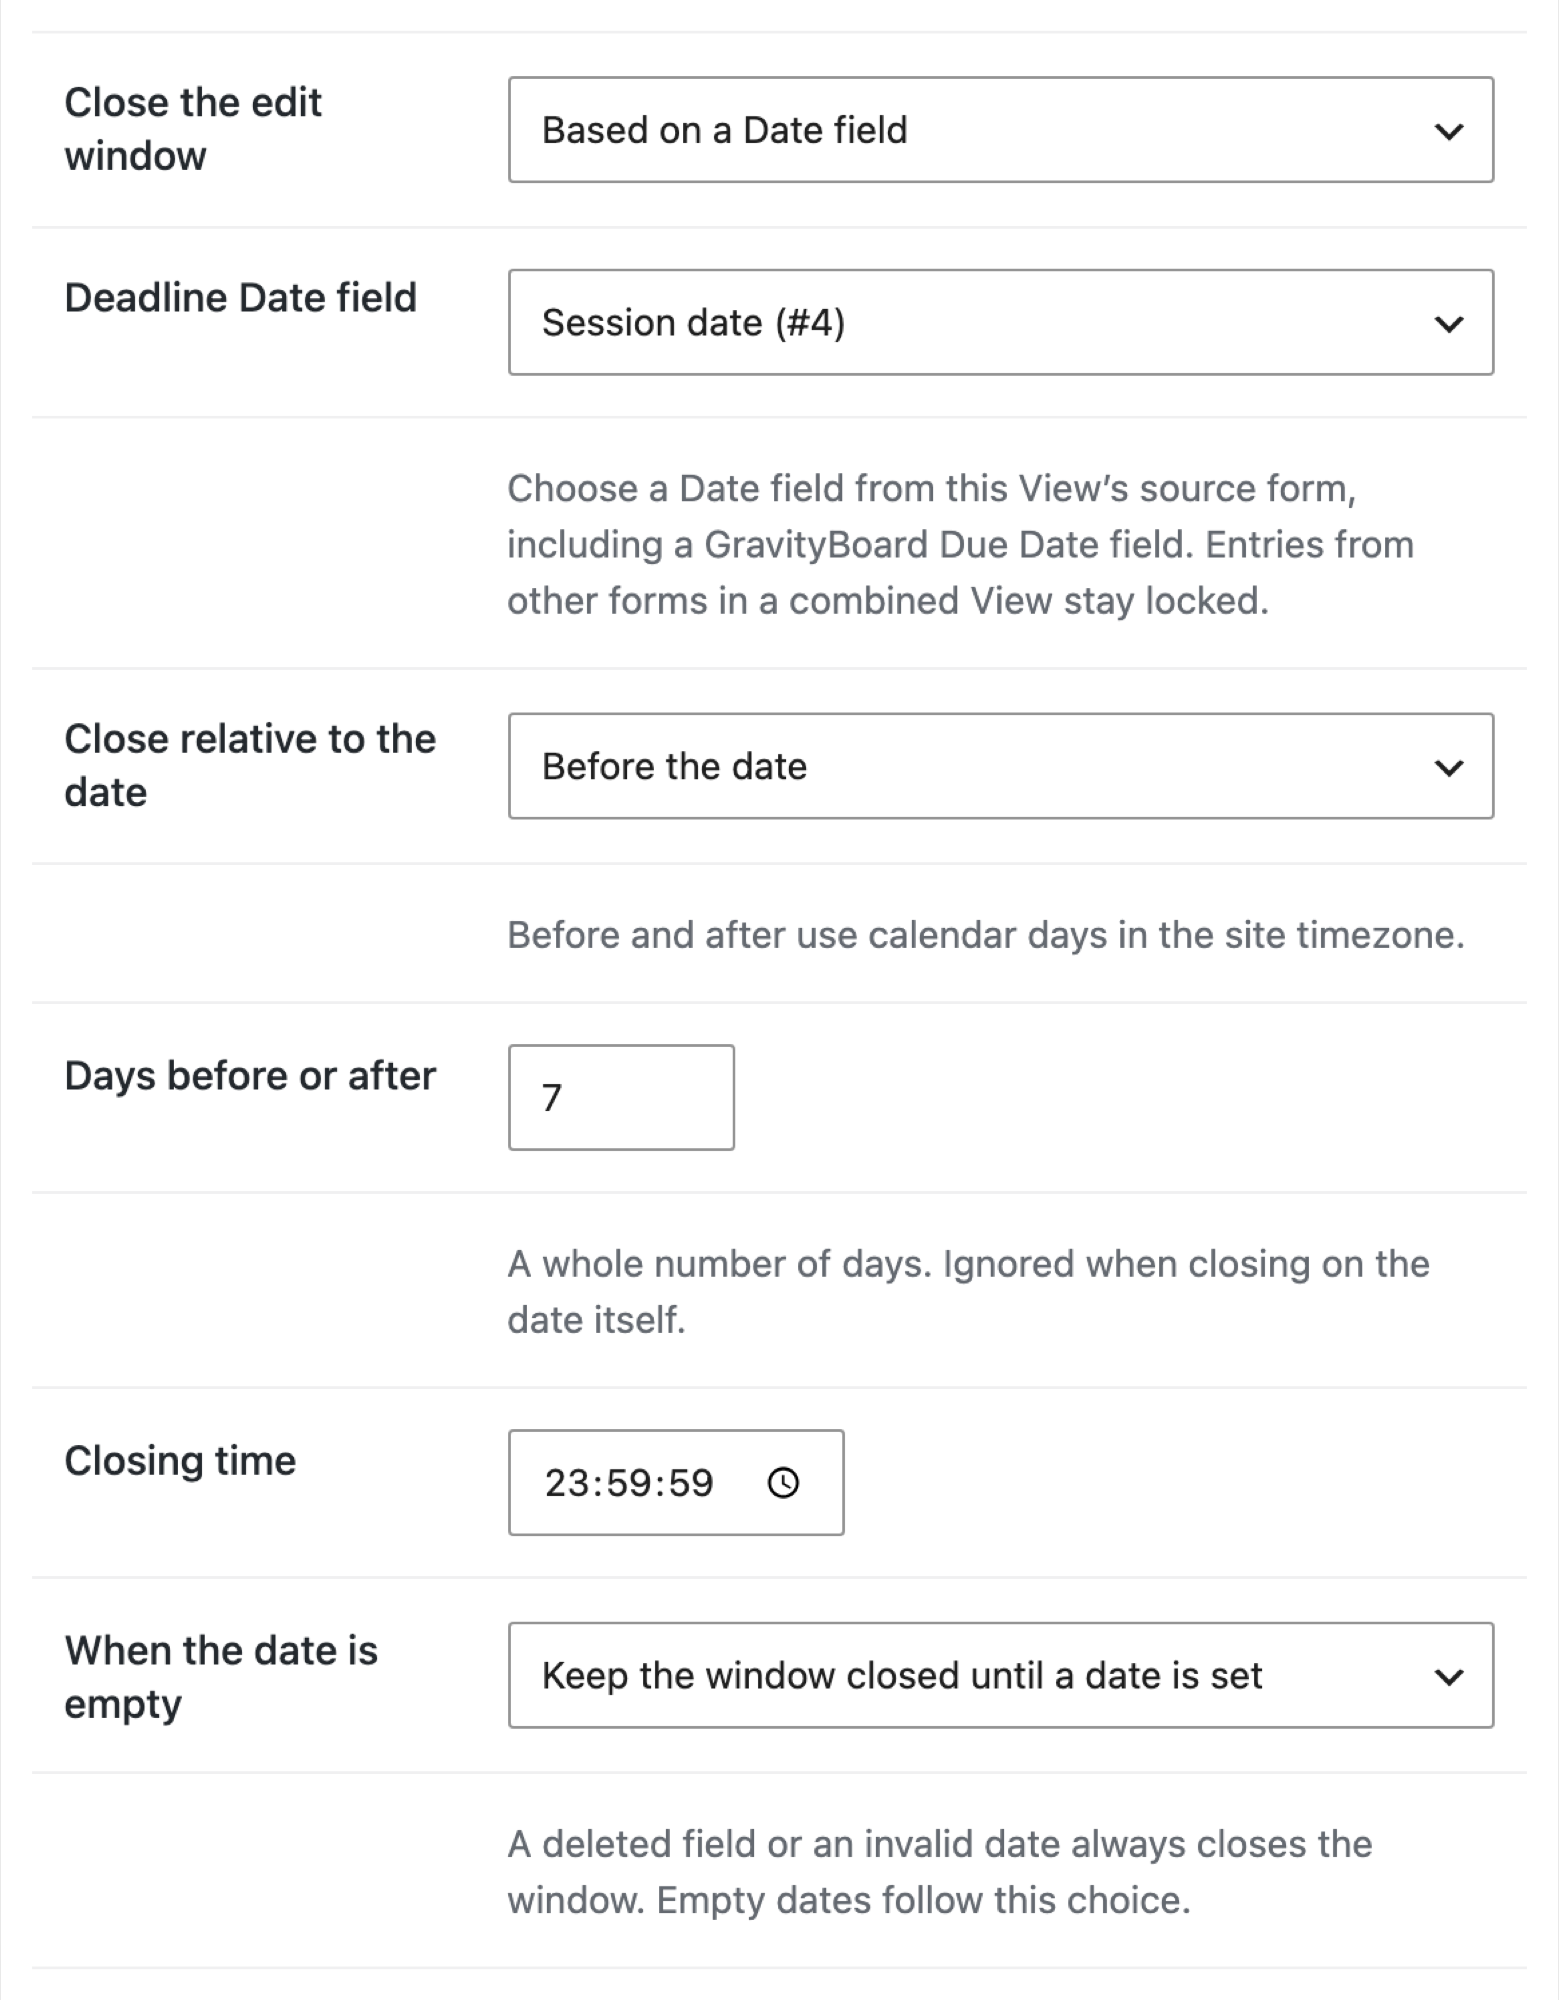
For example, to let members edit a registration until 7 days before its session, choose Based on a Date field, select the session’s Date field, choose Before the date and enter 7. For a session on November 8, editing stays open until 23:59:59 on November 1.
When the date is empty decides what happens to entries with no date: Keep the window closed until a date is set (the default) or Leave the window open.
Note: Anyone who can edit the Date field the deadline is based on can move their own deadline. Leave that field out of the View’s Edit Entry layout, or limit who can edit it in the field’s settings. An entry whose window has already closed can’t reopen it this way.
Step 3: Add custom closing rules (optional) #
Custom rules close the window when the rule matches. They can combine the deadline with values saved in the entry.
- In Closing rules, choose Custom.
- Under Close the window when, build the rule with conditions and AND or OR groups.
The Deadline reached condition uses the deadline you chose in Step 2. If your rule doesn’t include Deadline reached, that deadline doesn’t apply, and the window closes only when the rule matches. In the example below, a registration closes at its deadline or as soon as its Status is Confirmed, whichever comes first.
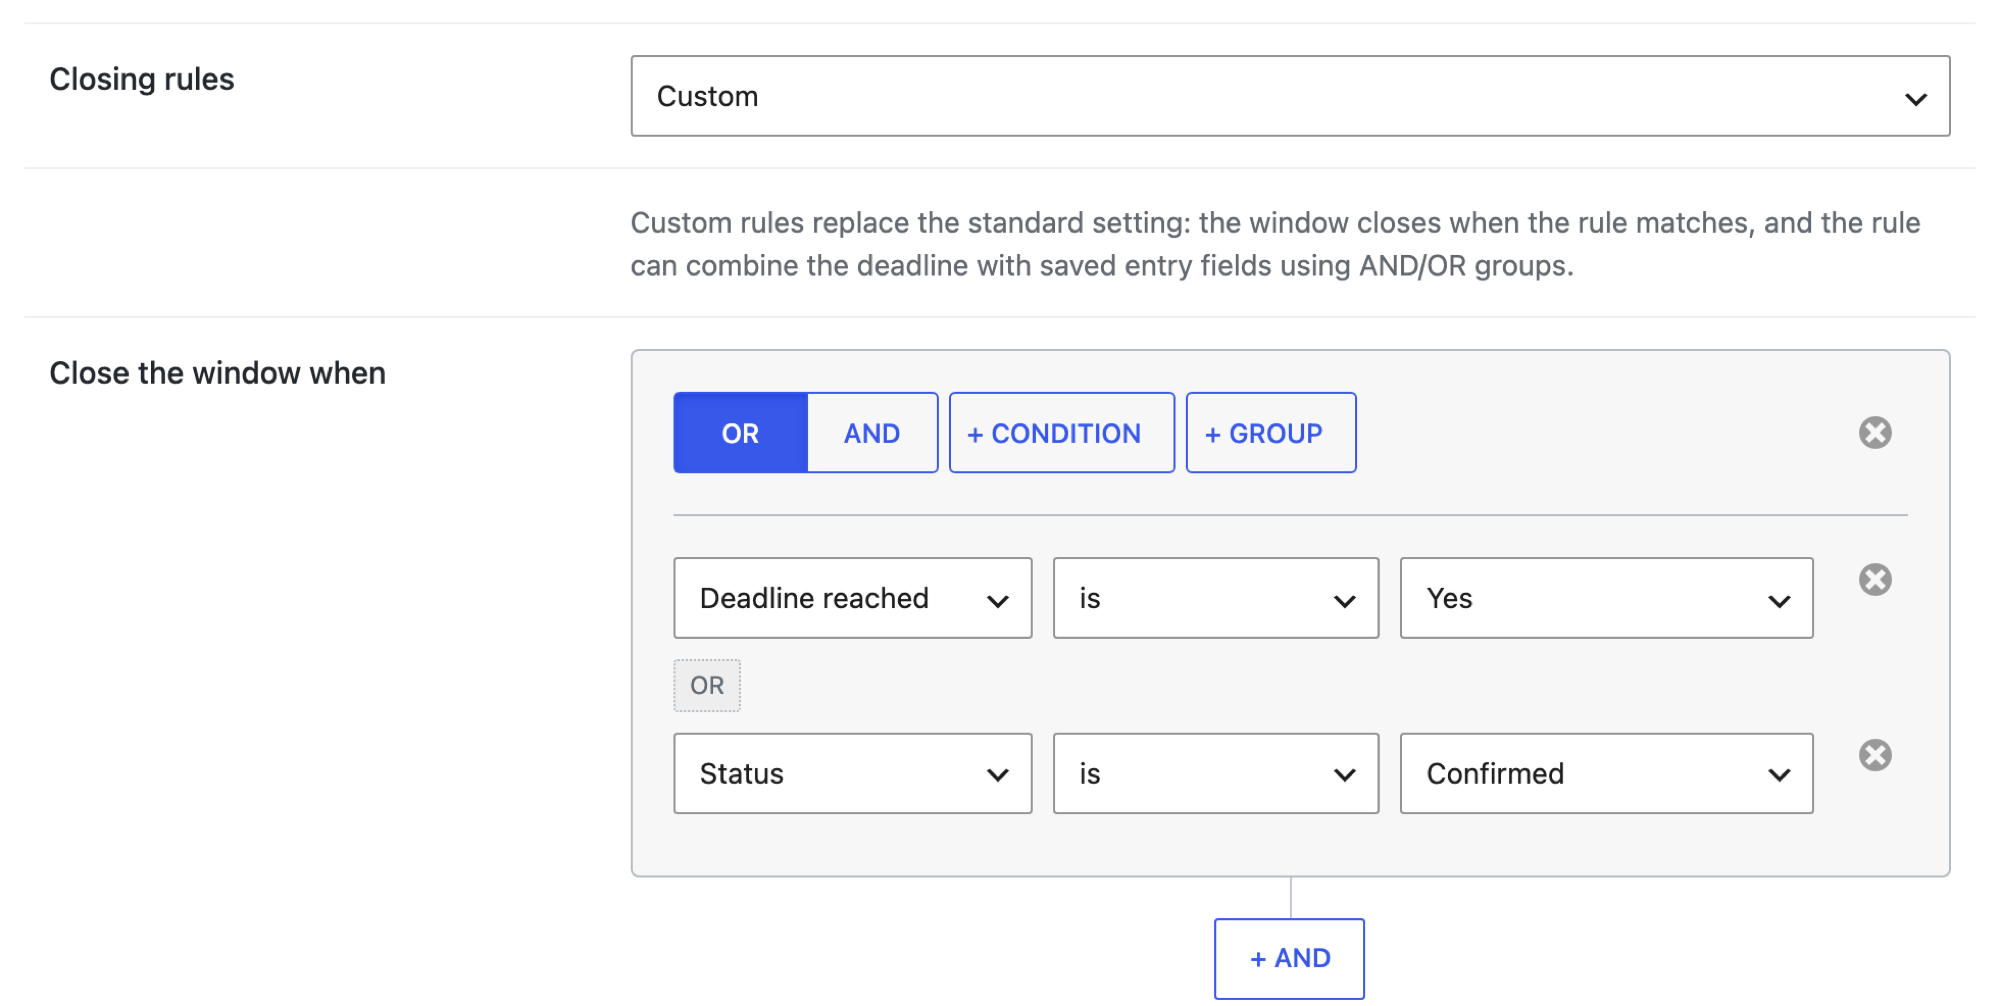
To close the window on field values alone, choose No deadline (custom rules only) in Close the edit window and use only field conditions.
Rules can use Single Line Text, Paragraph Text, Number, Drop Down, Radio Buttons, Date, Email and Hidden fields from the View’s form. Rules check the values saved in the entry, so anyone who can edit those fields can change whether the window is open.
Switching back to Standard keeps your custom rule but ignores it.
Step 4: Decide whether deleting closes too #
Also apply to deleting entries is off by default. While it’s off, people who can delete their own entries can still cancel after editing closes, using a Delete link in the View. The Delete button on the edit form isn’t available once editing closes, so add a Delete link field to the View if you want people to keep that option.
Turn it on to close deleting at the same deadline.
Step 5: Write the closed message (optional) #
In Message when the window is closed, enter the plain text people see instead of the edit form, such as Editing closes 7 days before your session.
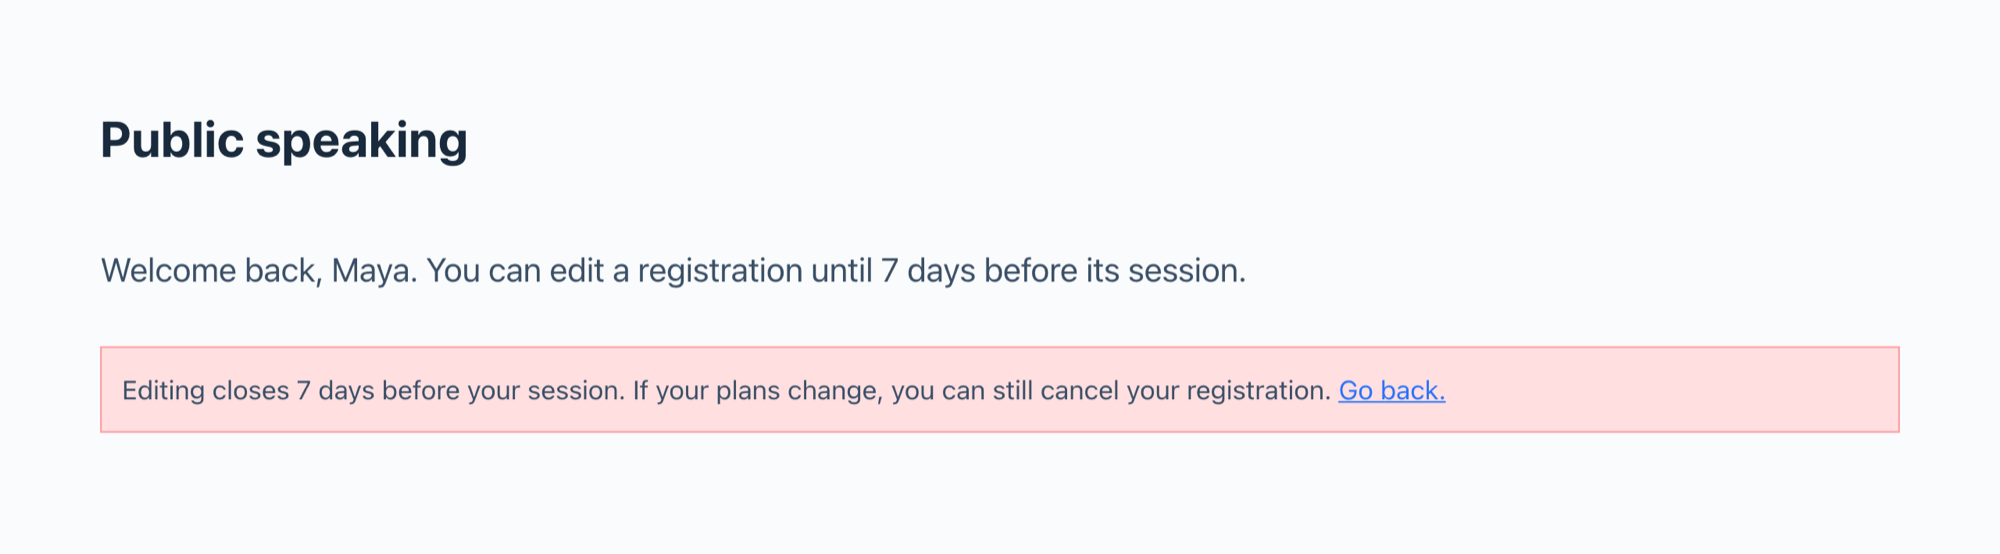
Left empty, a deadline based on the form’s schedule shows the form’s schedule message, and the other deadlines show “The deadline for editing this entry has passed.” Deleting uses its own message: “The deadline for deleting this entry has passed.”
Step 6: Save and test the View #
Click Update to save the View.
Users who can edit other users’ entries, such as administrators, aren’t affected by Edit Window, so you’ll still see the Edit link if you test while logged in as one. To test it, log in as a user who owns an entry past its deadline, then:
- Open the View and check that the Edit link is gone for that entry and the entry is still there.
- If you have an old edit link for that entry, open it and check that you see the closed message instead of the edit form.
- If you turned on Also apply to deleting entries, check that the Delete link is gone too.
Things to know #
- Changing the settings applies straight away. A later deadline can reopen editing for entries that had closed.
- Combined Views use the primary form. In a View that shows entries from more than one form, a Date field deadline and custom rules apply to entries from the View’s primary form. Entries from the other forms stay locked.
- Edit Window doesn’t send reminders or stop new submissions. To close the form itself, use the form’s schedule in Gravity Forms.
- Magic Links has its own setting called Edit Window. That setting belongs to Magic Links and is separate from this one. When both apply to an entry, the one that closes first wins.

