
Published
•
Updated
How to build a conference website on WordPress (attendee registration + abstract submission)
Build a conference registration and abstract submission site on WordPress with GravityKit, no code: forms, an attendee directory, sessions, and PDF certificates.

Running a conference means juggling a lot at once: people need to register, presenters need to submit talks or abstracts, someone has to build the program, and attendees want to see who else is coming.
In this tutorial, I’ll show you how to build a complete WordPress conference website using Gravity Forms and GravityView. By the end, you’ll have attendee registration, abstract submission, a searchable attendee directory, a program of talks, a session calendar, and self-service editing so presenters can update their own profiles.
To make this concrete, I built the whole thing on a demo site for a fictional event, the Meridian Open Science Summit 2027. Let’s dive in!
Sneak peek
Before we start building, here’s what the finished conference site looks like.
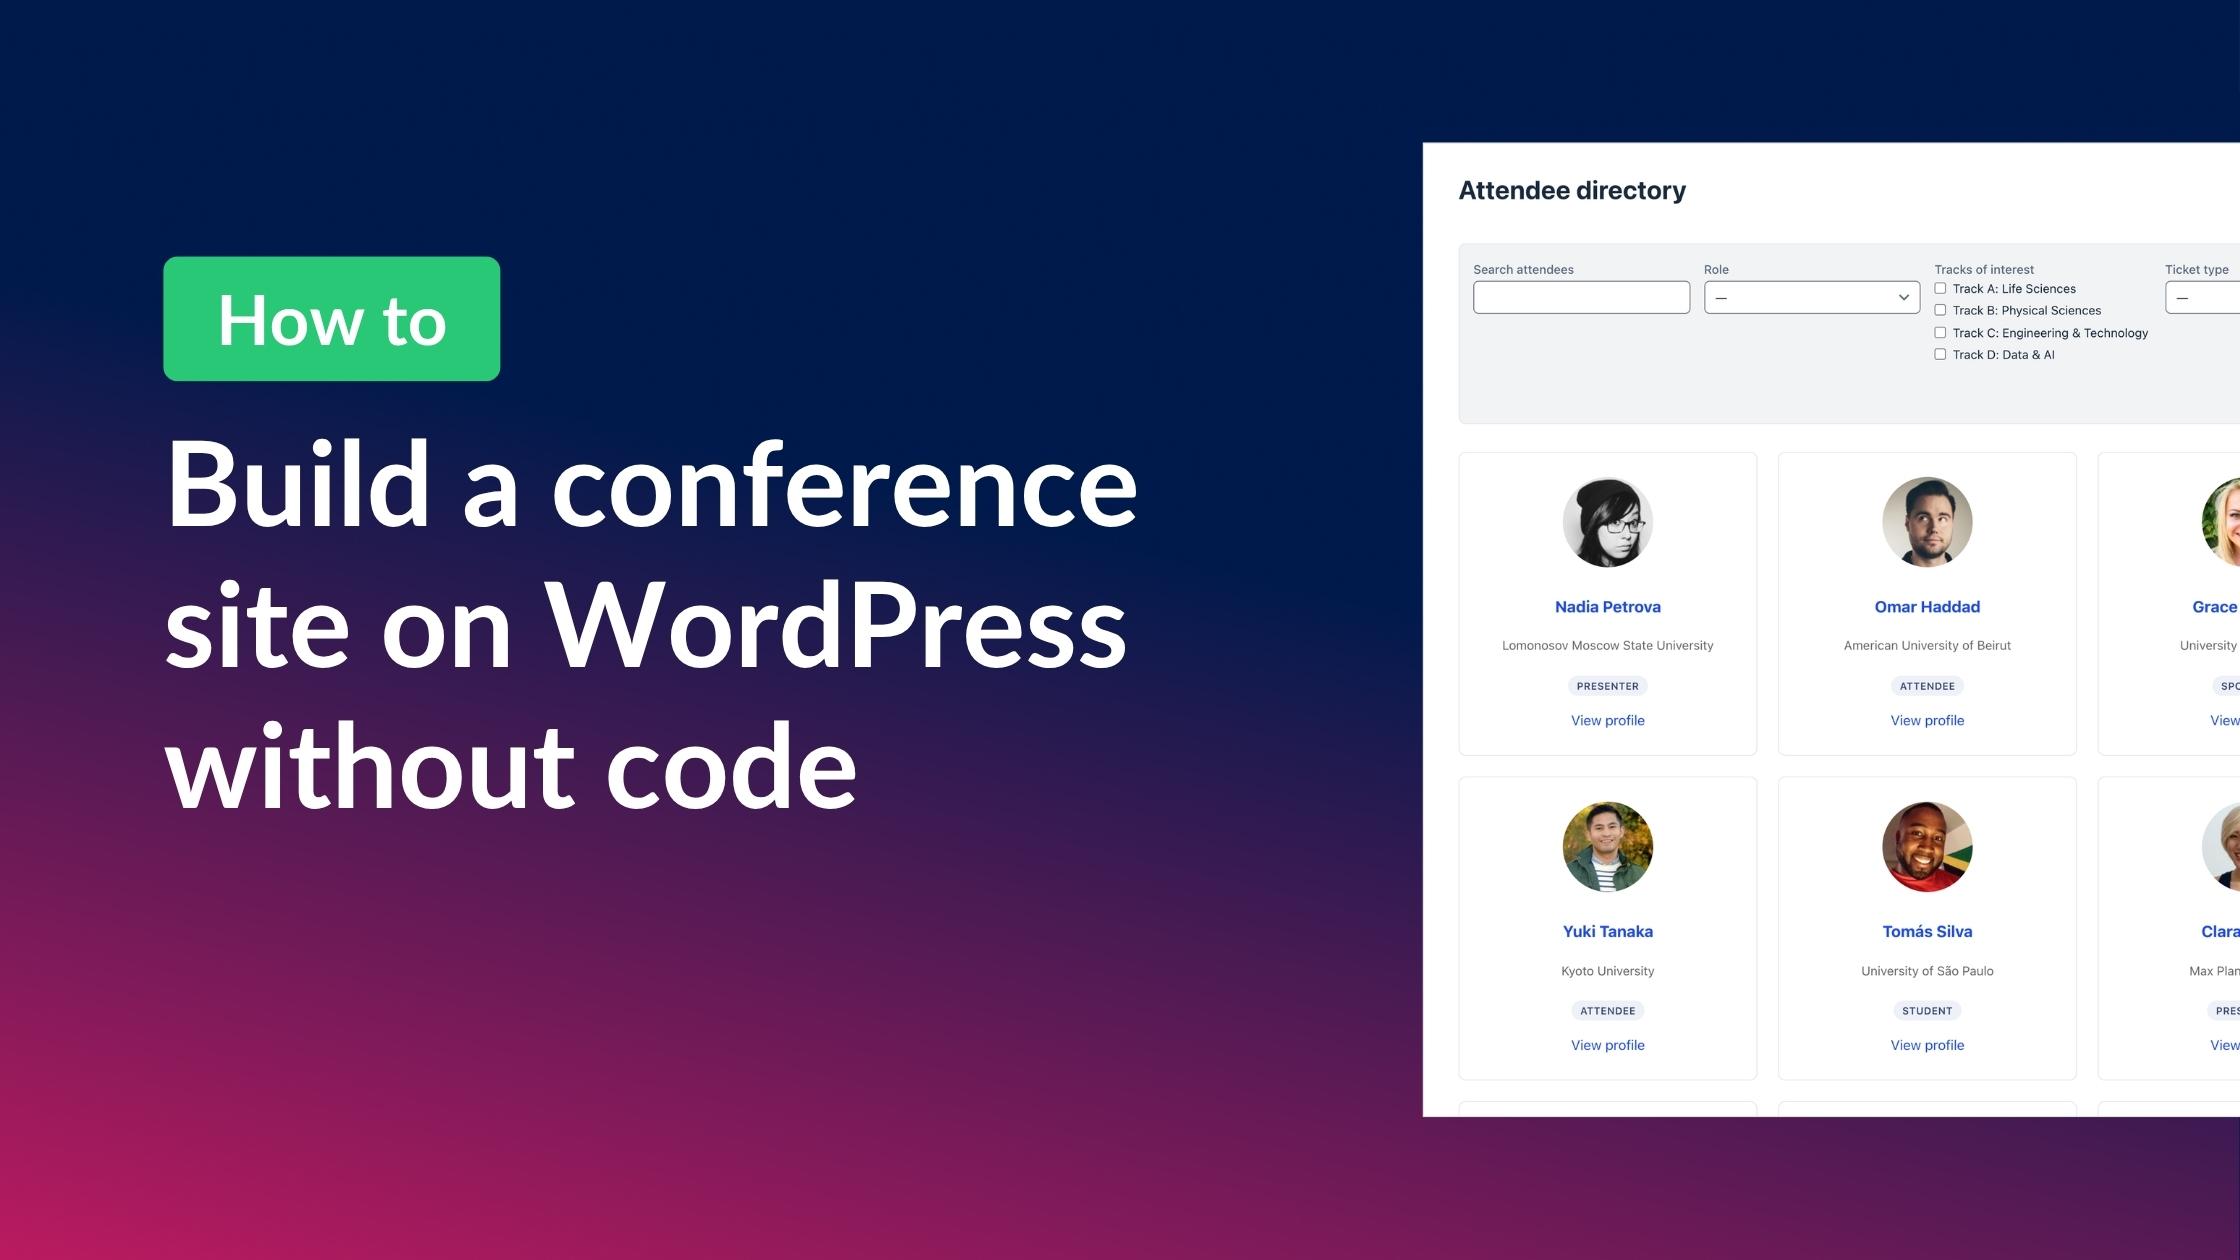
Attendees browse a searchable directory of everyone who has registered, laid out as a clean card grid. They can filter by role, track, or ticket type to find the people they want to meet.
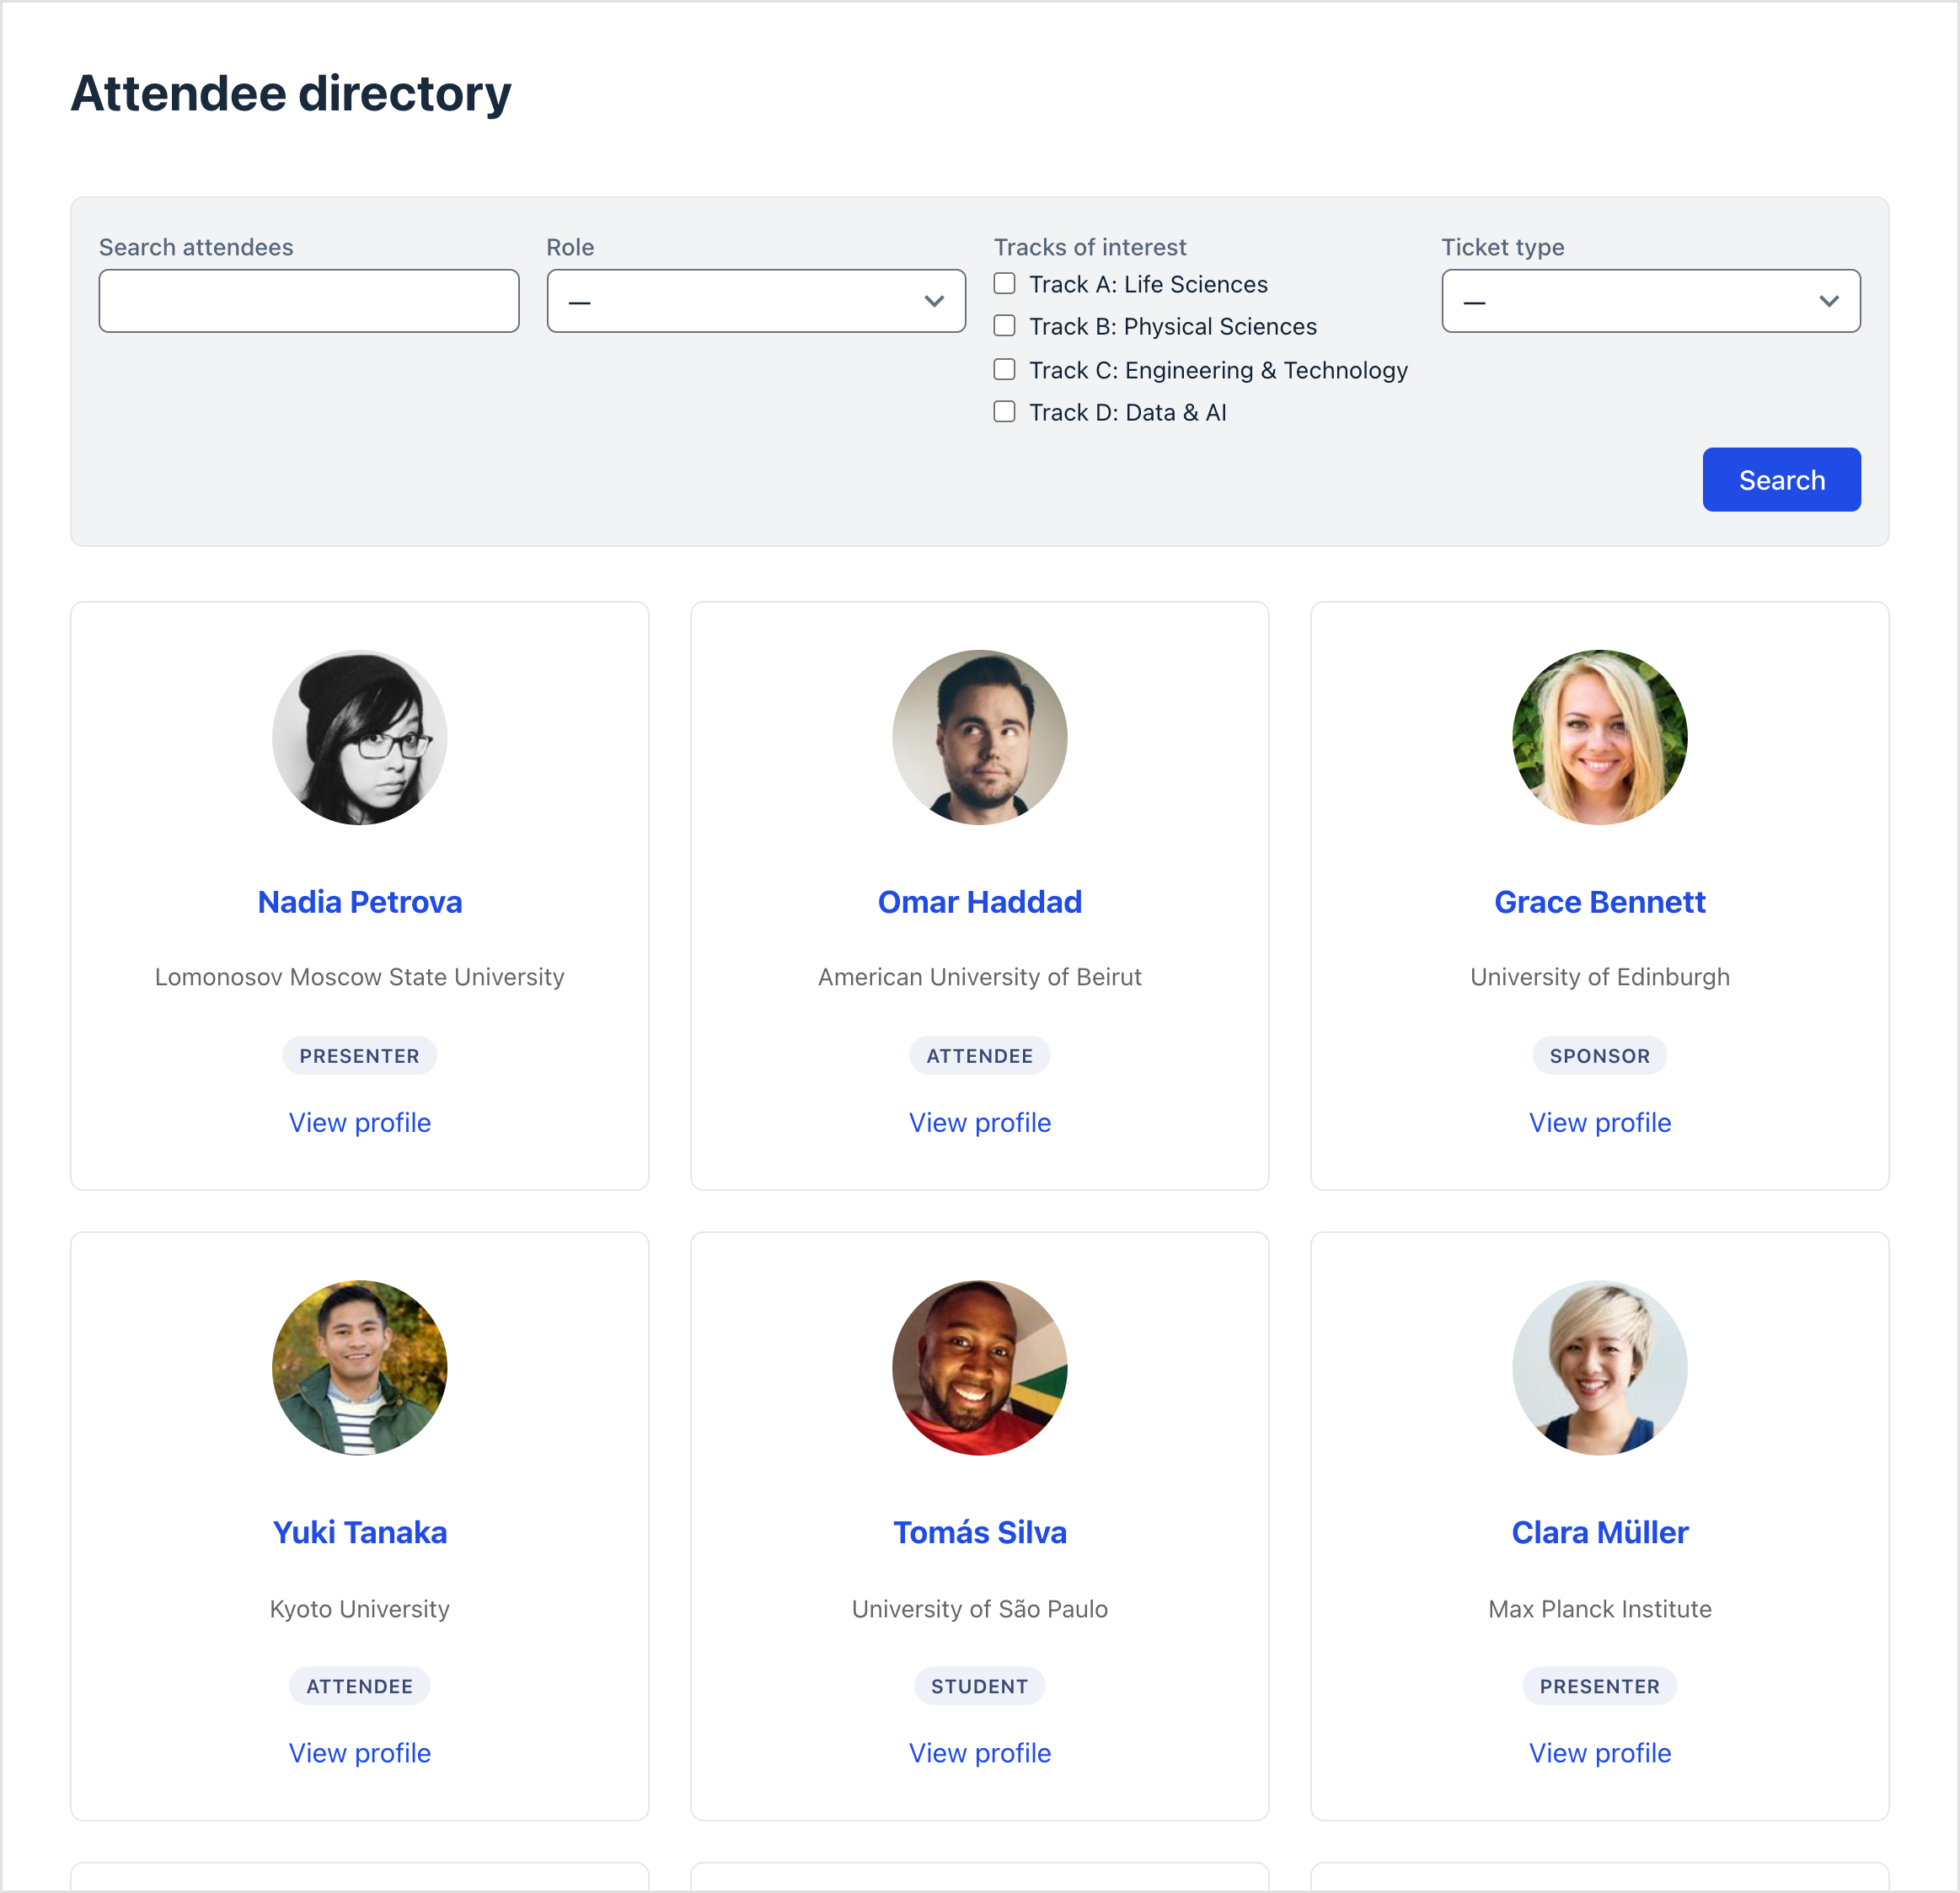
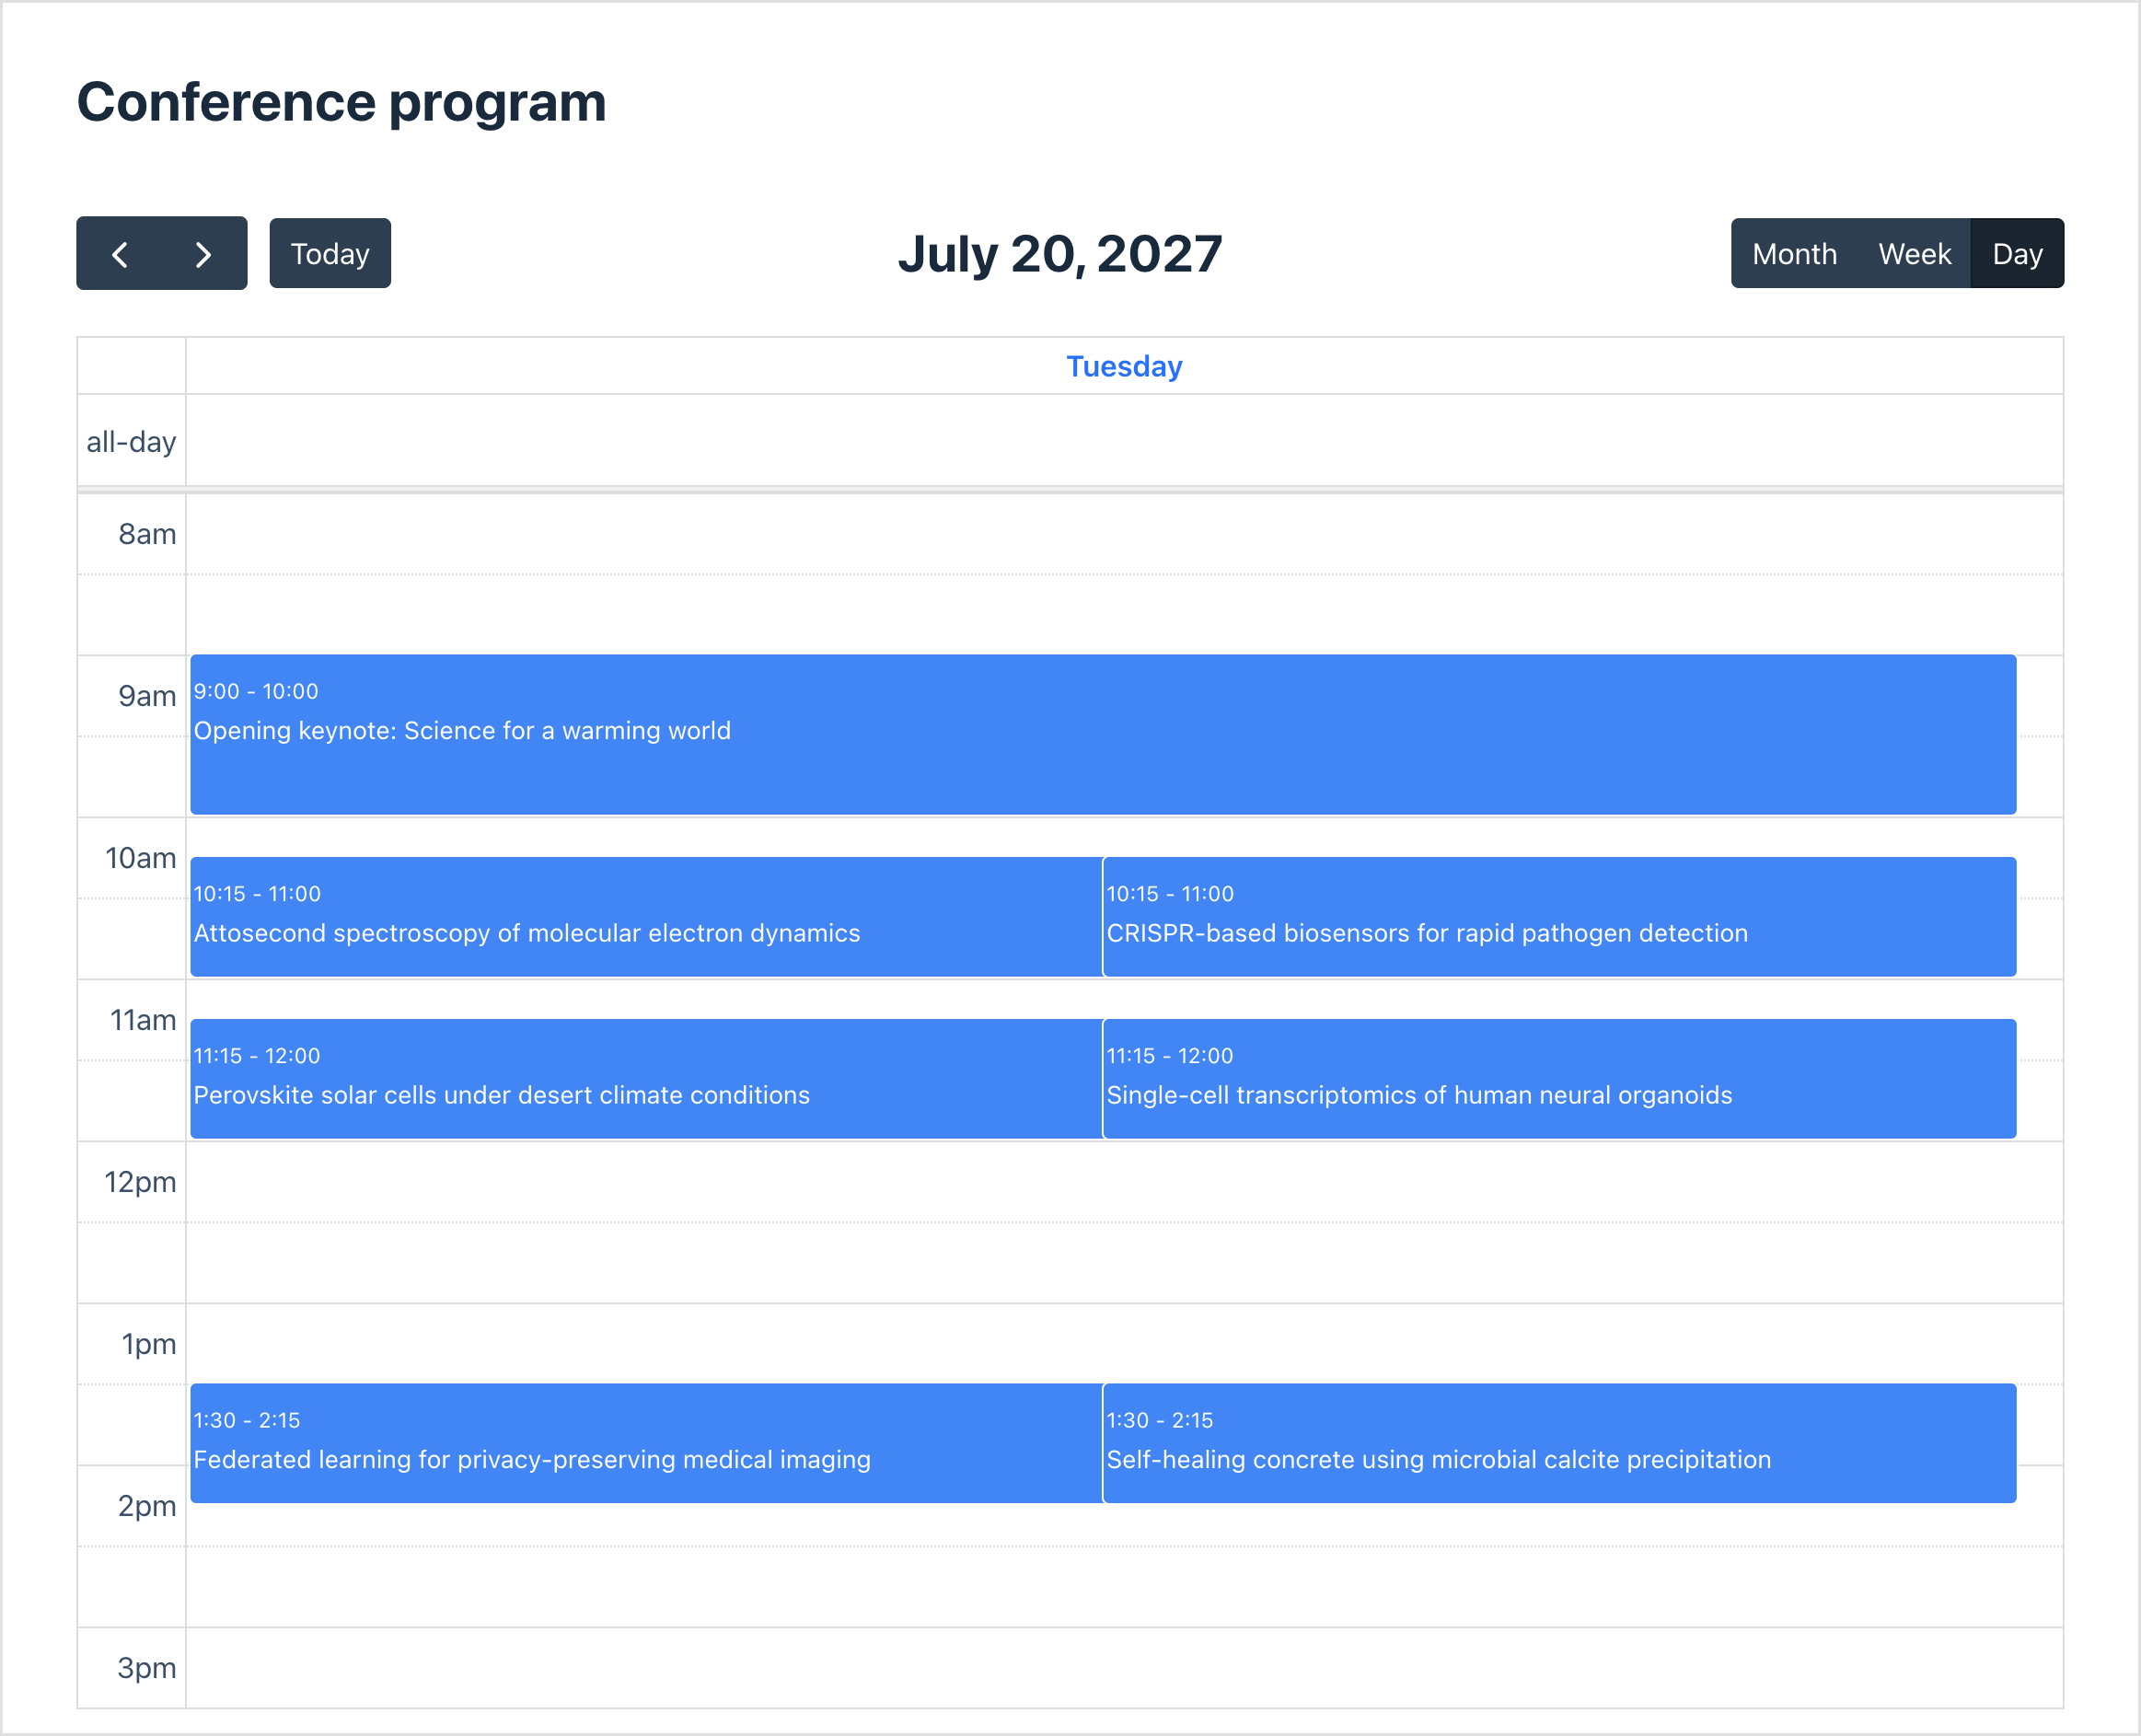
The full program of accepted talks lives on an interactive calendar, where visitors switch between month, week, and day views to plan their schedule.
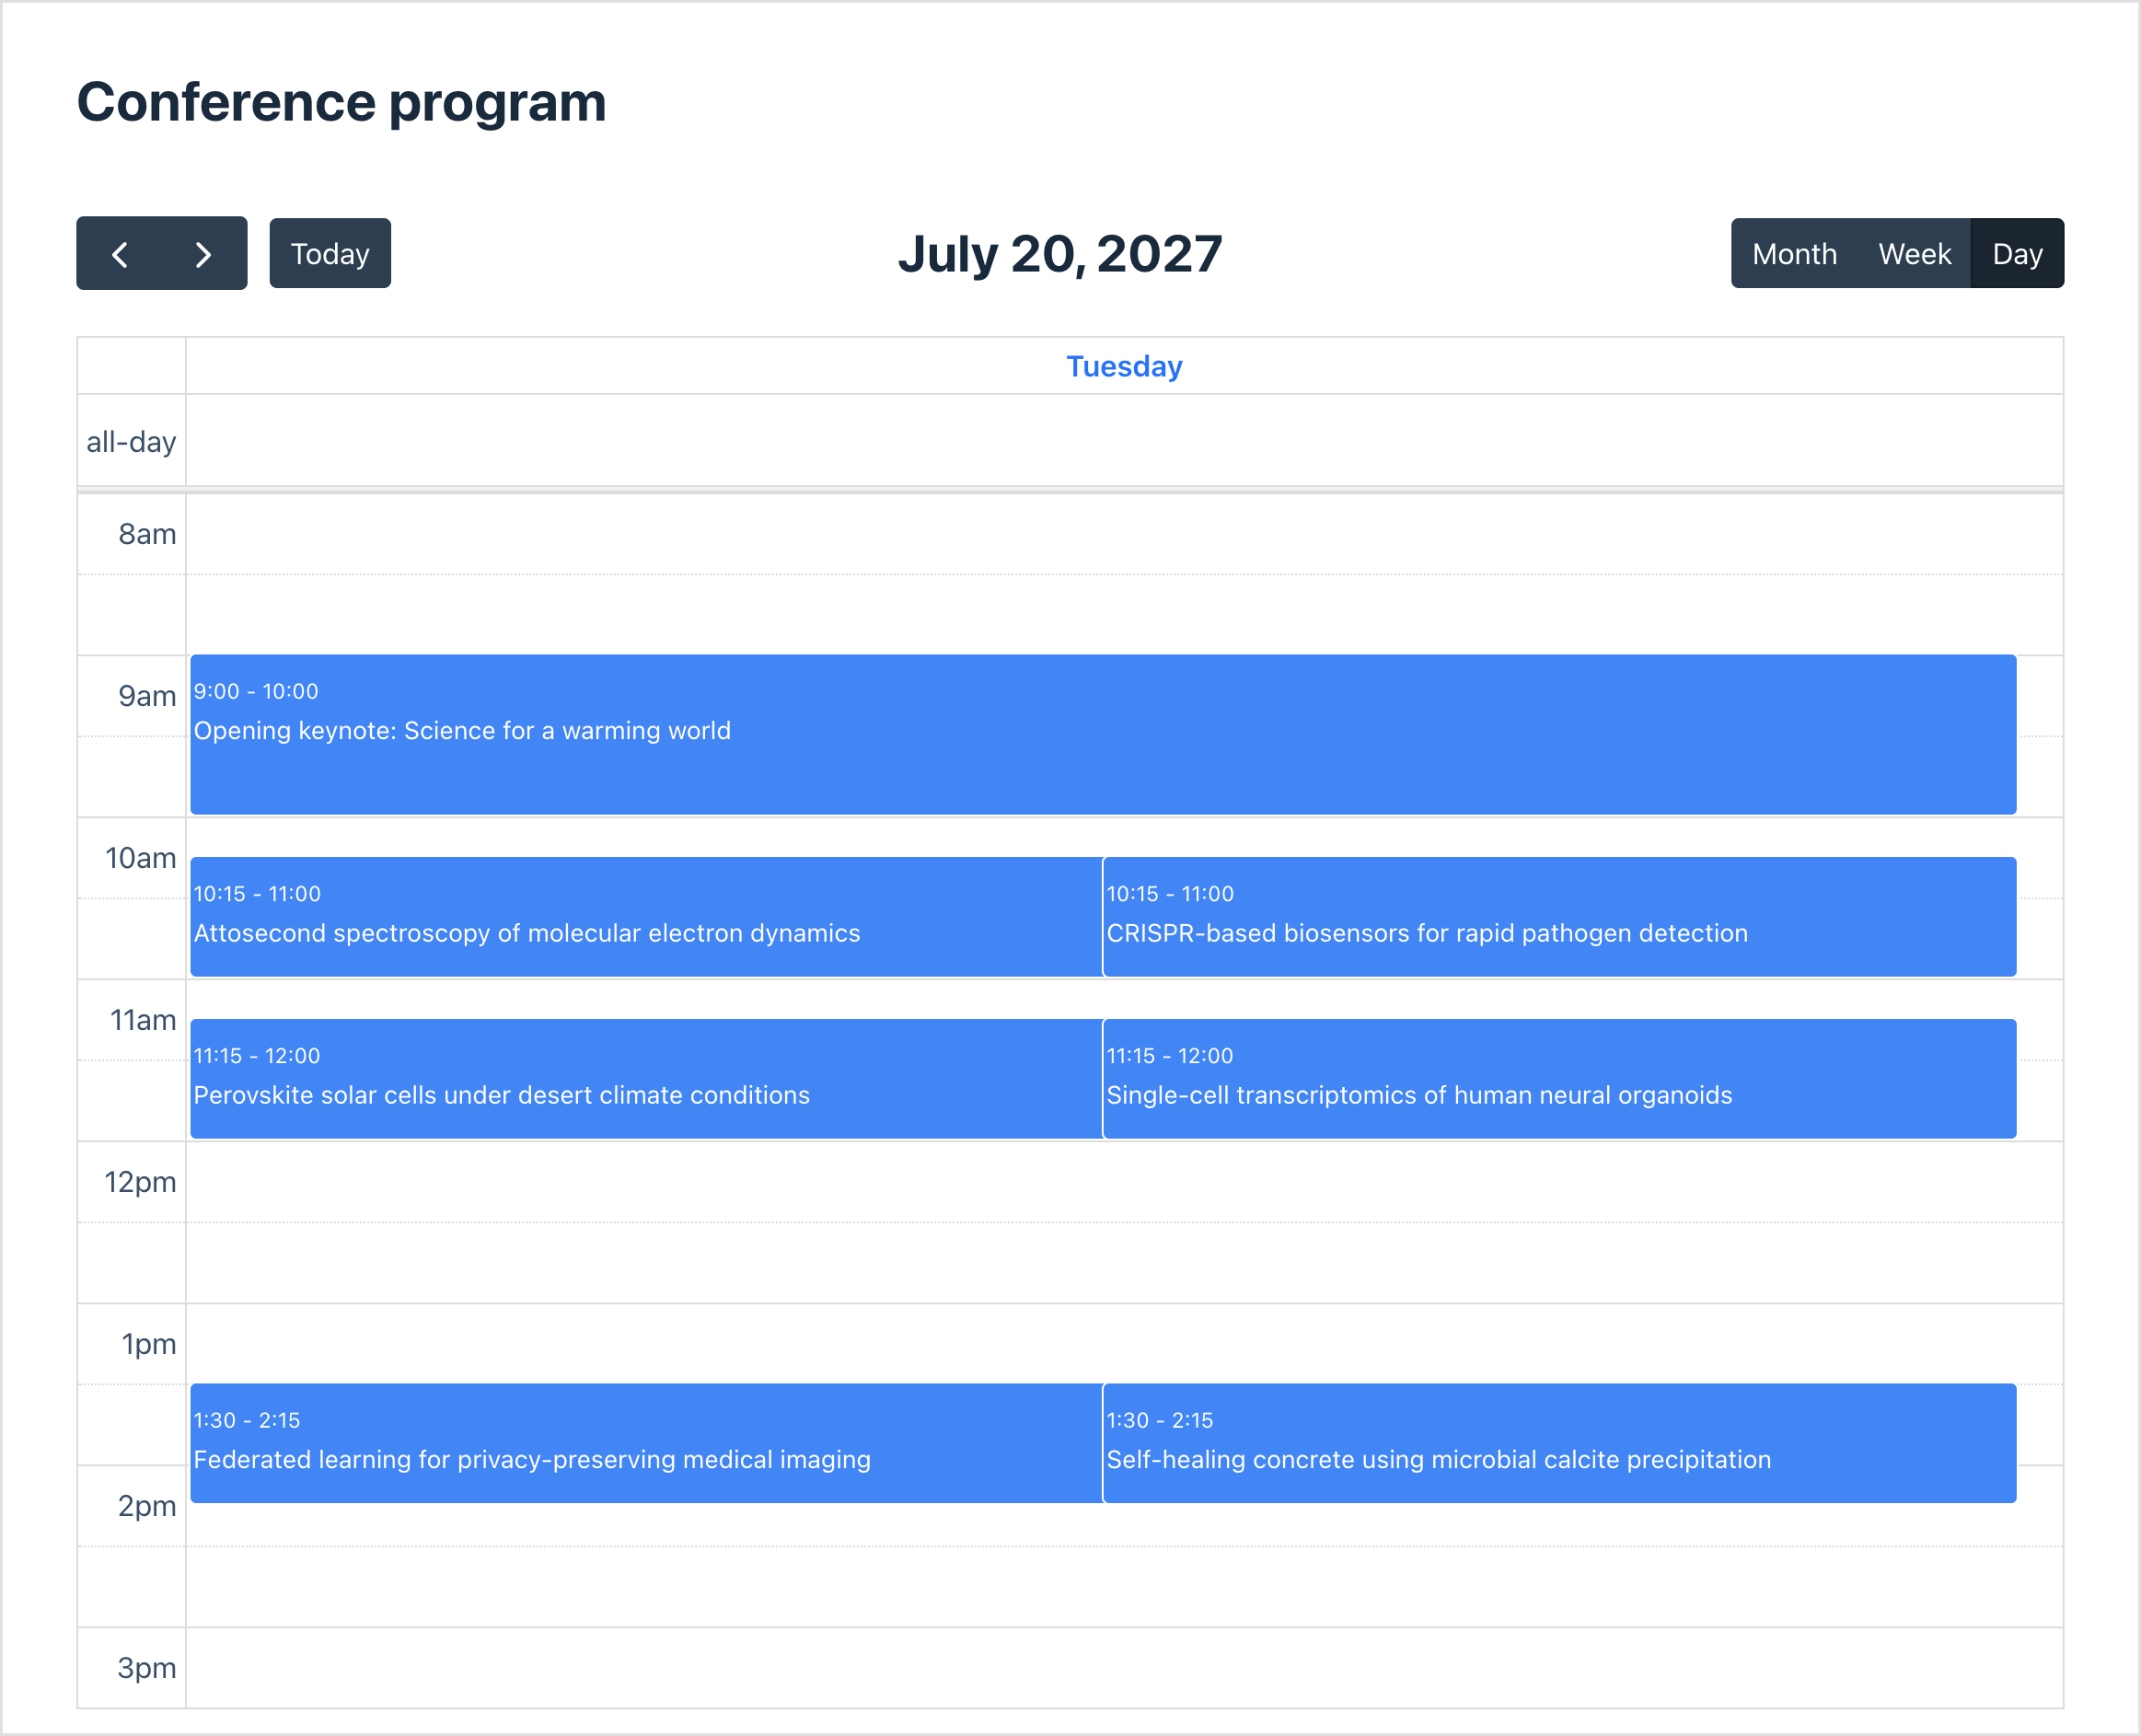
Submitted abstracts show up in a directory with an optional approval system for conference organisers to review.
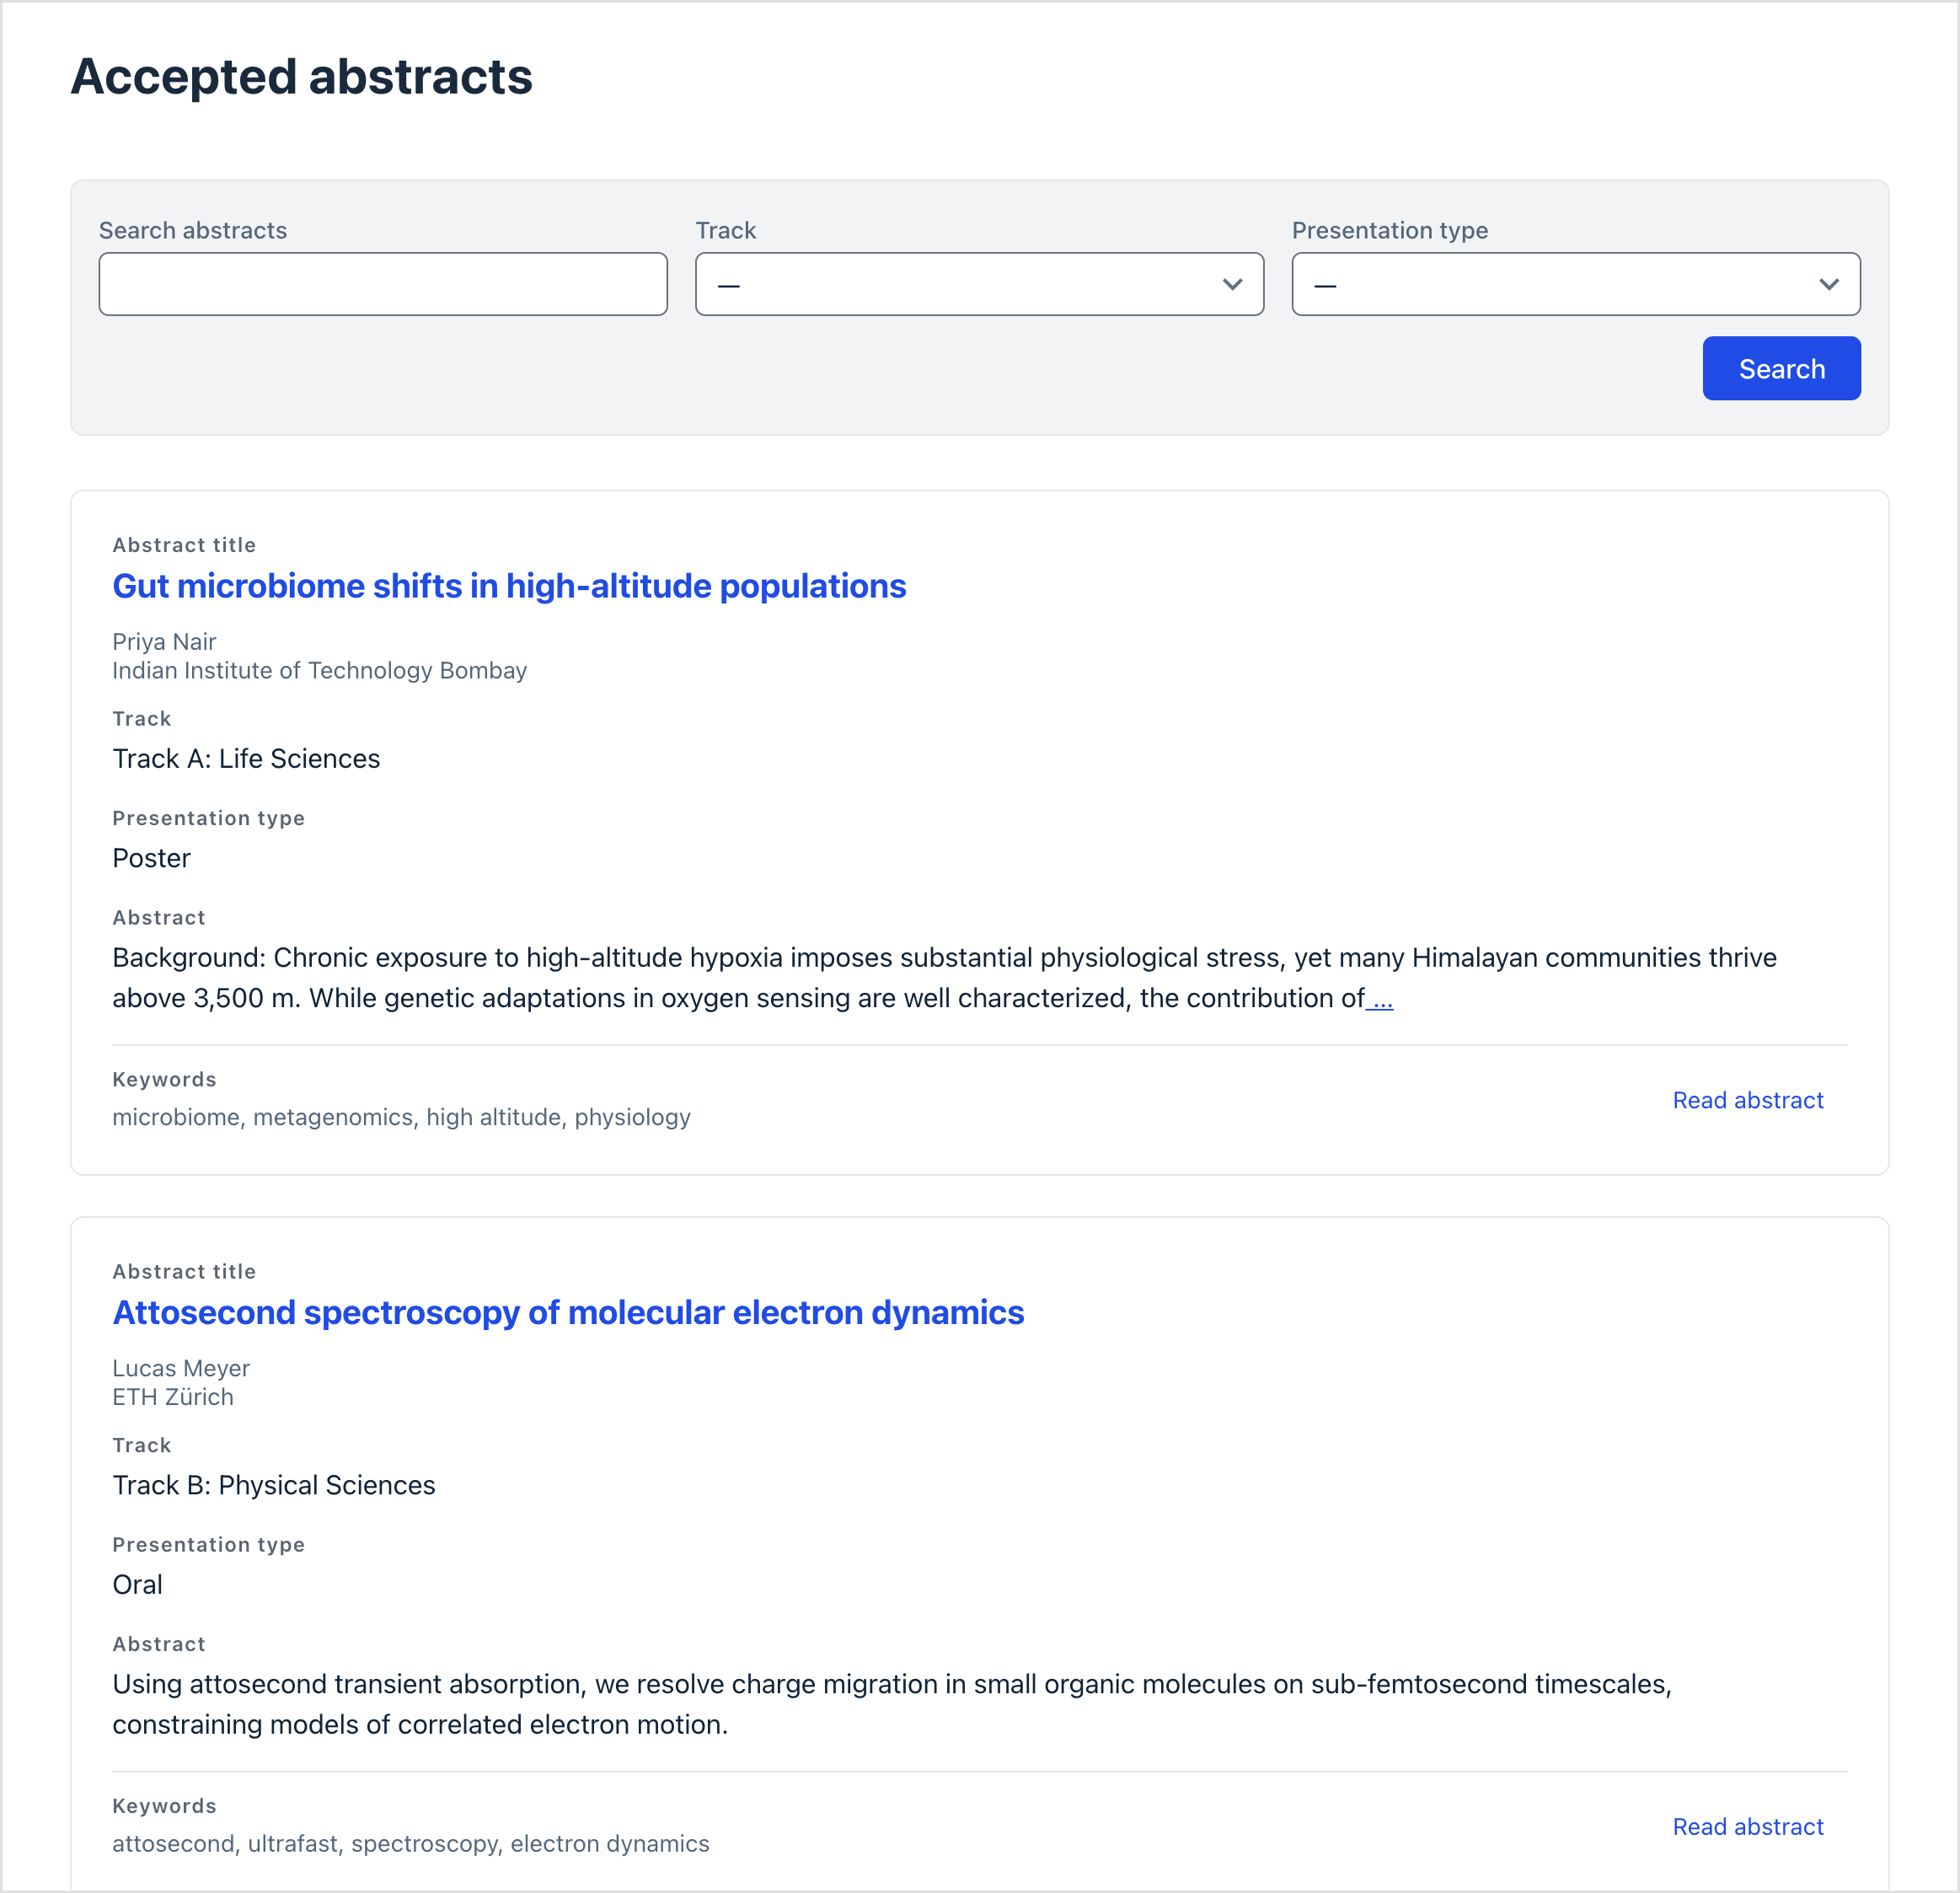
Every abstract gets its own page with the complete submission, and the whole program is searchable by track and presentation type.

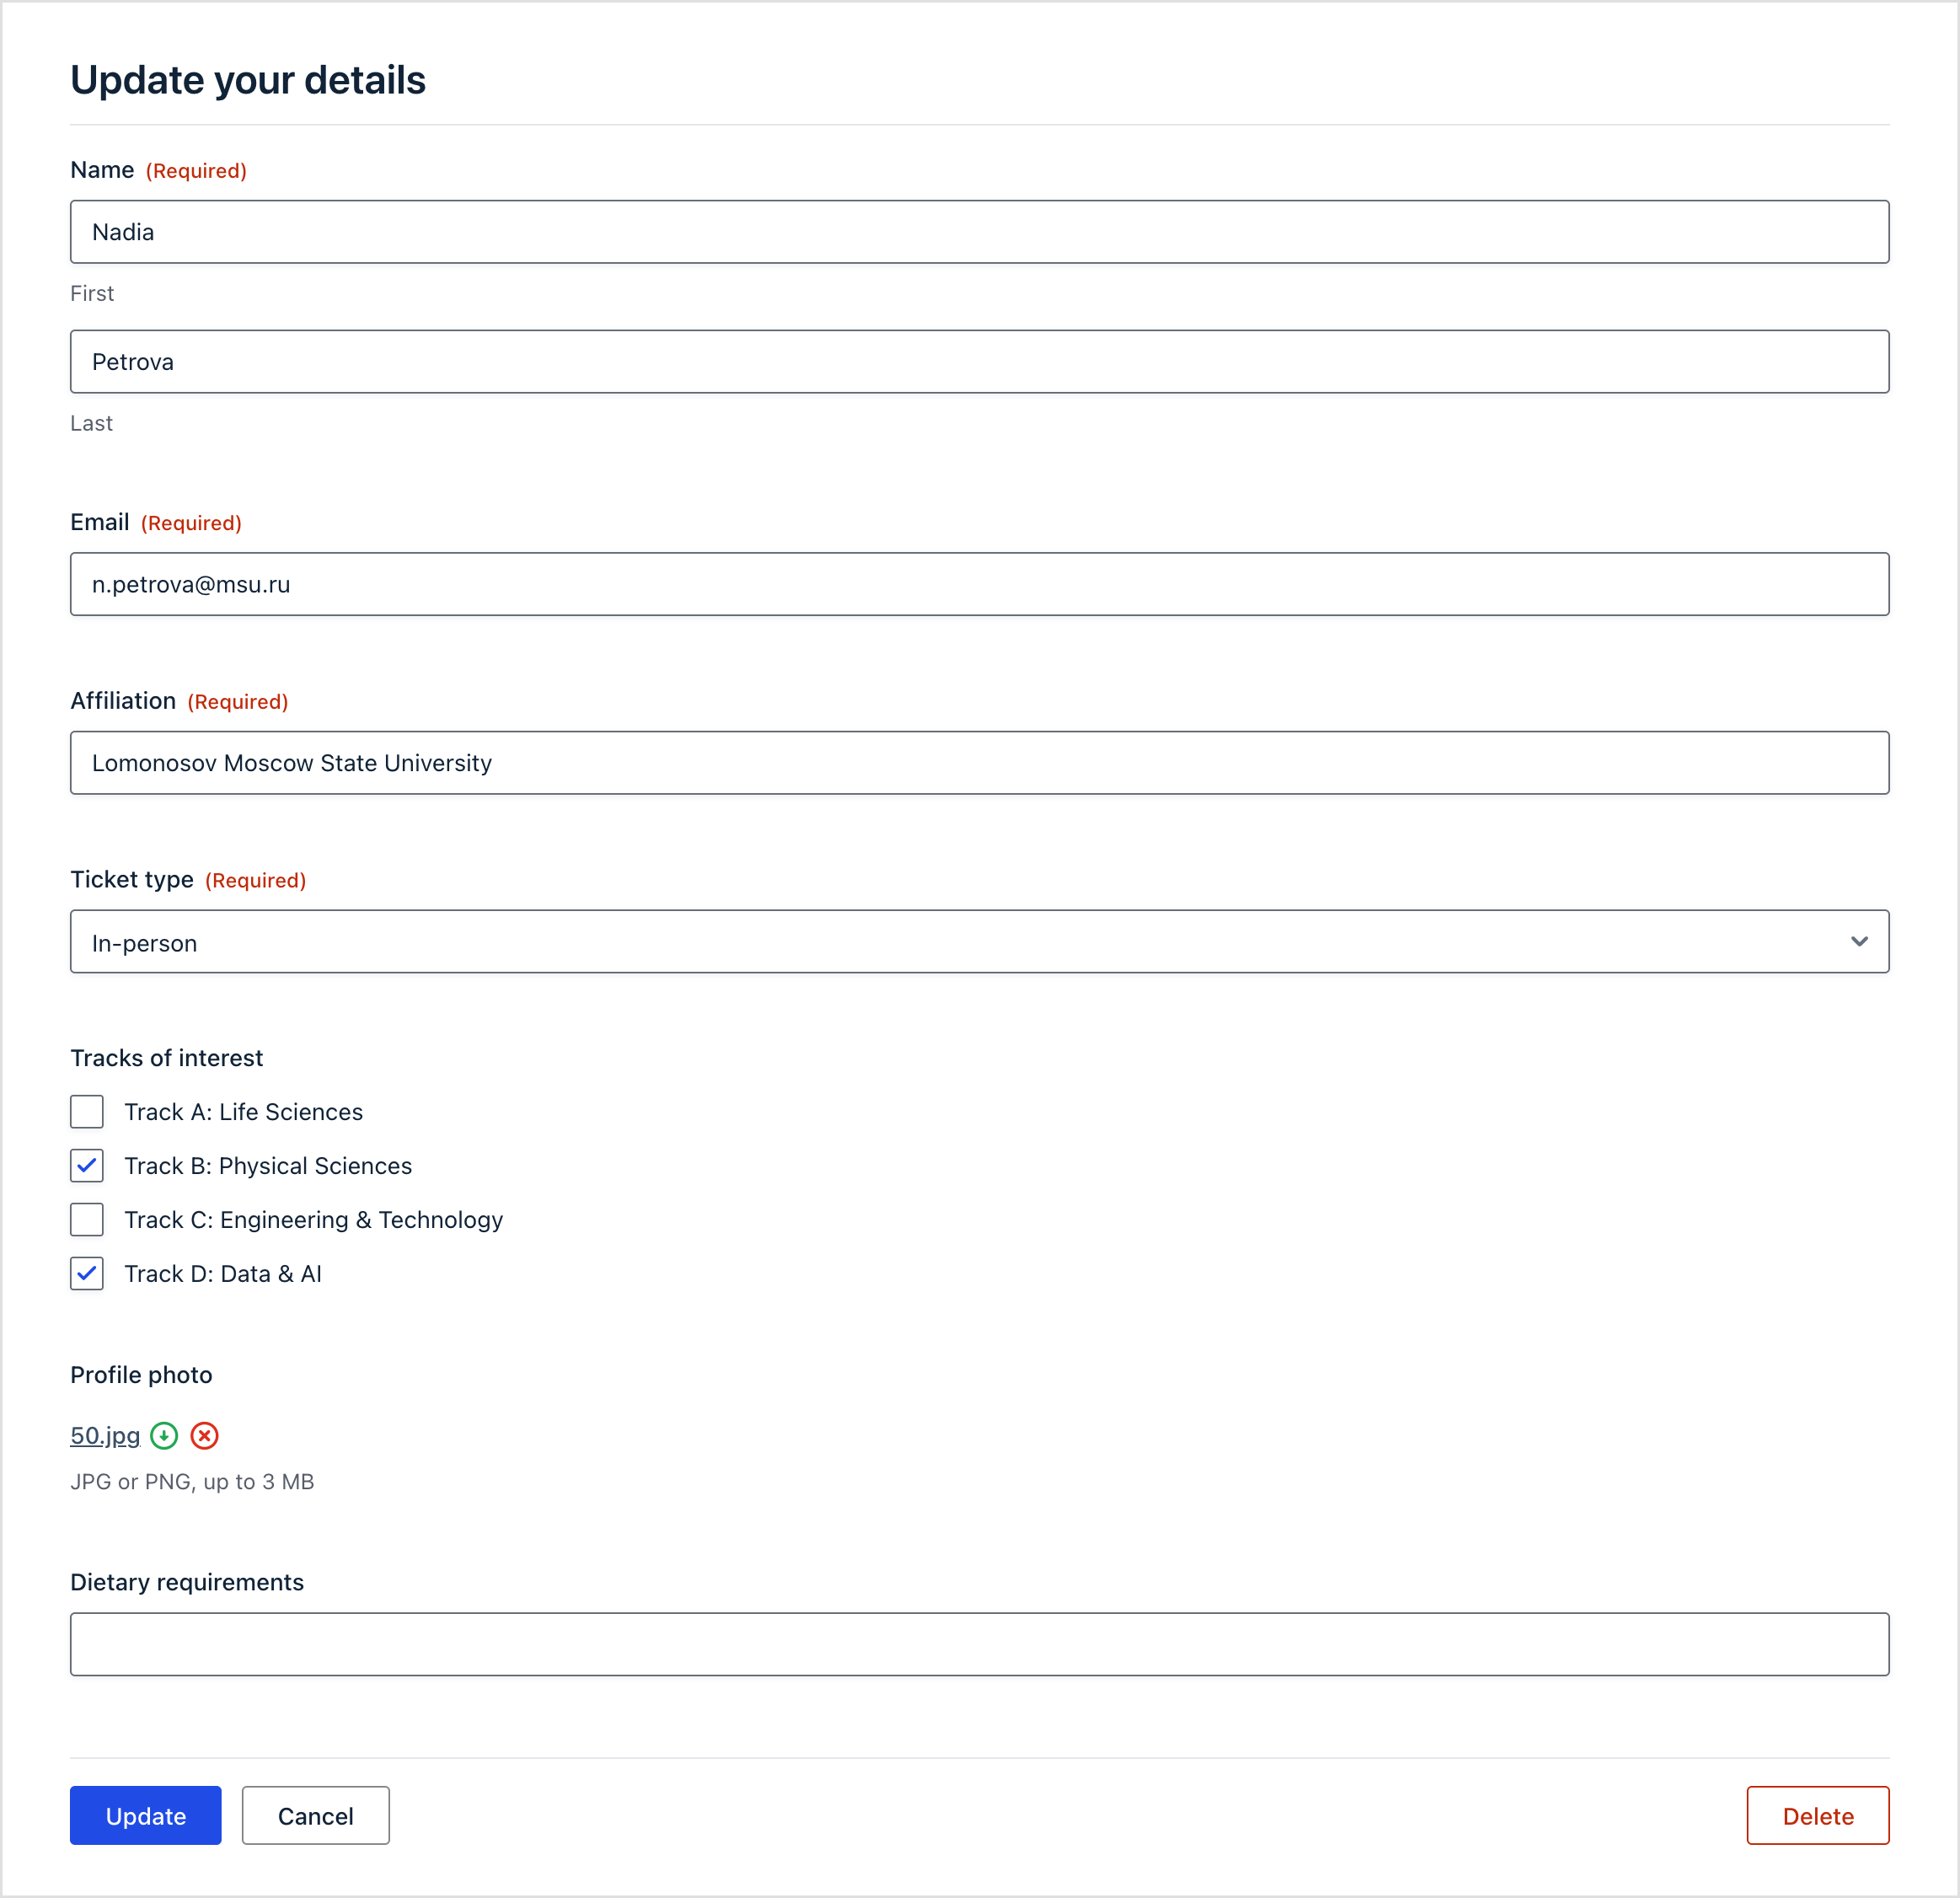
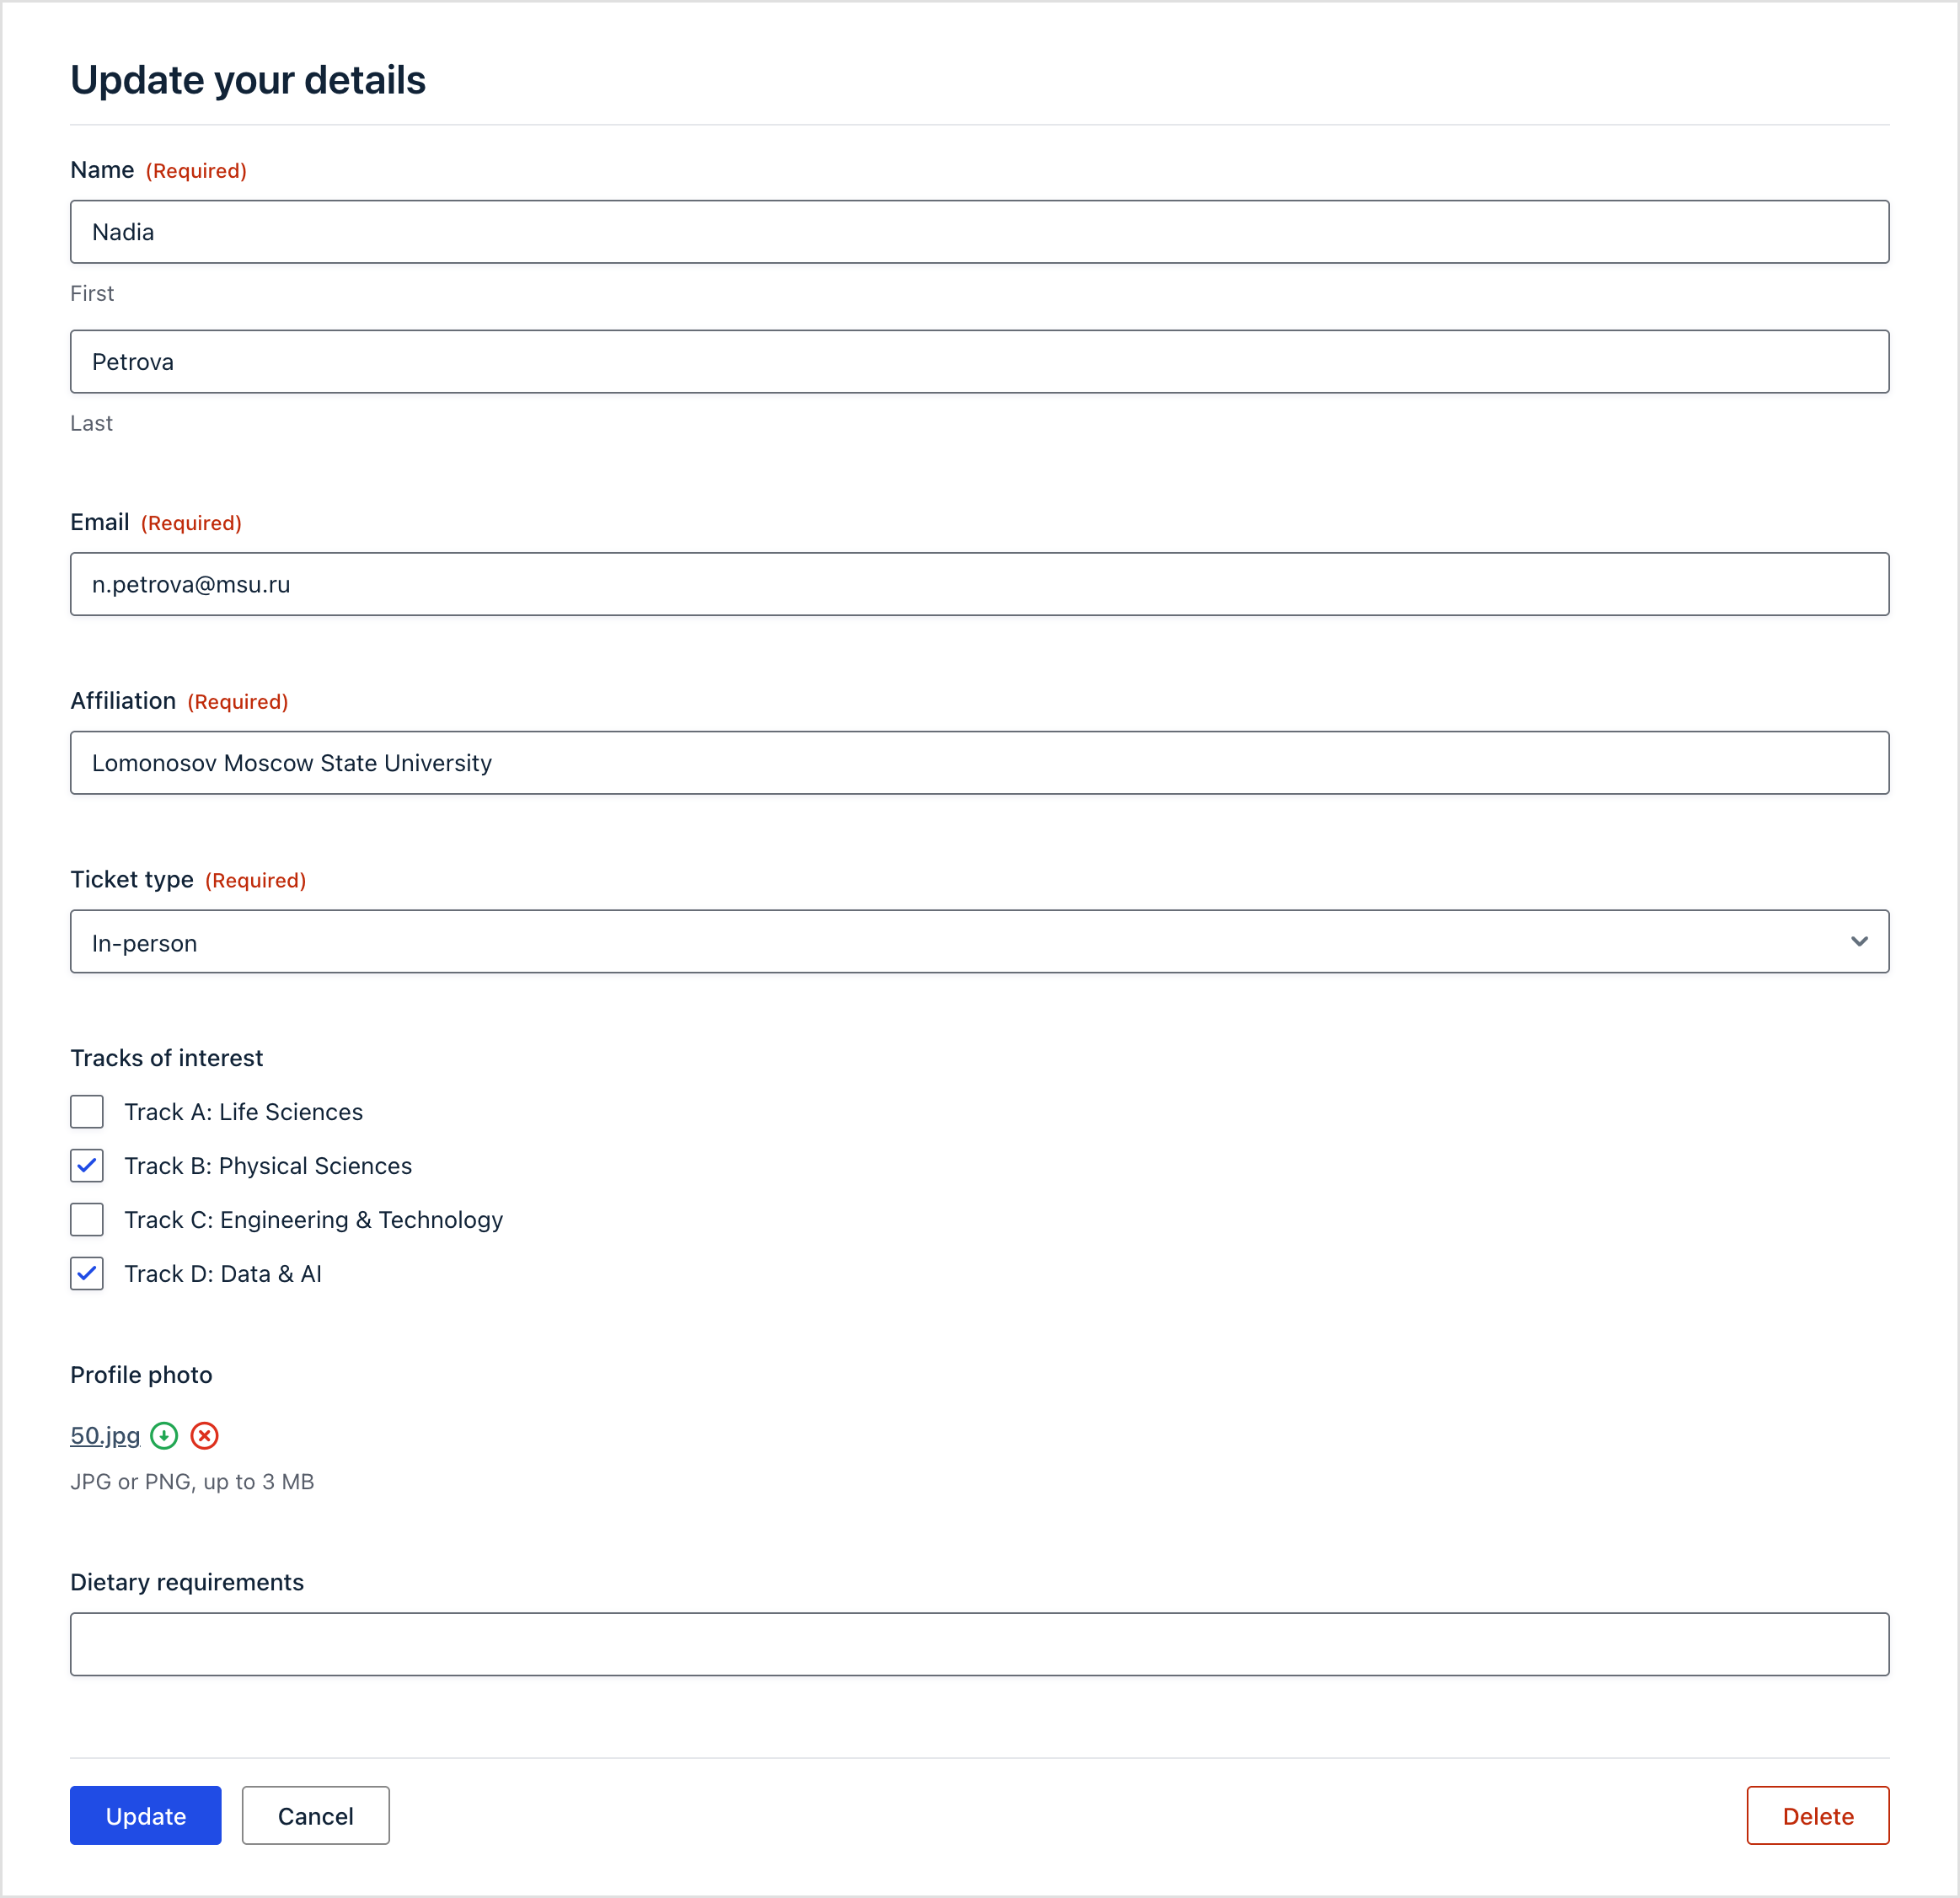
Best of all, presenters and attendees manage their own records from the front end. They log in, see only their own submissions, and update details (even their profile photo) without ever touching the WordPress dashboard.
Wanna try it?
Spin up a demo
See live applications built with GravityView or spin up your own to test out the plugin in full.
What you’ll need
- Gravity Forms – for collecting registrations, abstracts, and sessions
- GravityView Pro – for displaying and managing that data on the front end (directories, single entries, and front-end editing). Pro is needed for the per-user filter in Step 6.
- GravityCalendar – for turning sessions into a browsable program
Attendees and presenters will also need the ability to create an account on your site before registering or submitting their information. Gravity Forms can handle this too via the User Registration Add-On.
Step 1: Plan your forms and data
Before building anything, it helps to sketch out what you’re collecting. A conference breaks down into three kinds of records, and each one becomes its own Gravity Form:
- Registrations – who is attending, in what capacity, and which sessions they care about
- Abstracts – the talks and posters people submit for review
- Sessions – the accepted talks placed into the actual schedule
The single most useful planning decision is to pick one Track taxonomy and reuse it everywhere. On the demo I used four tracks (Life Sciences, Physical Sciences, Engineering & Technology, and Data & AI), plus a Plenary category for keynotes. Because the same track names appear on every form, I can later filter the directory, the program, and the calendar by track without any extra work.
Step 2: Build the registration form
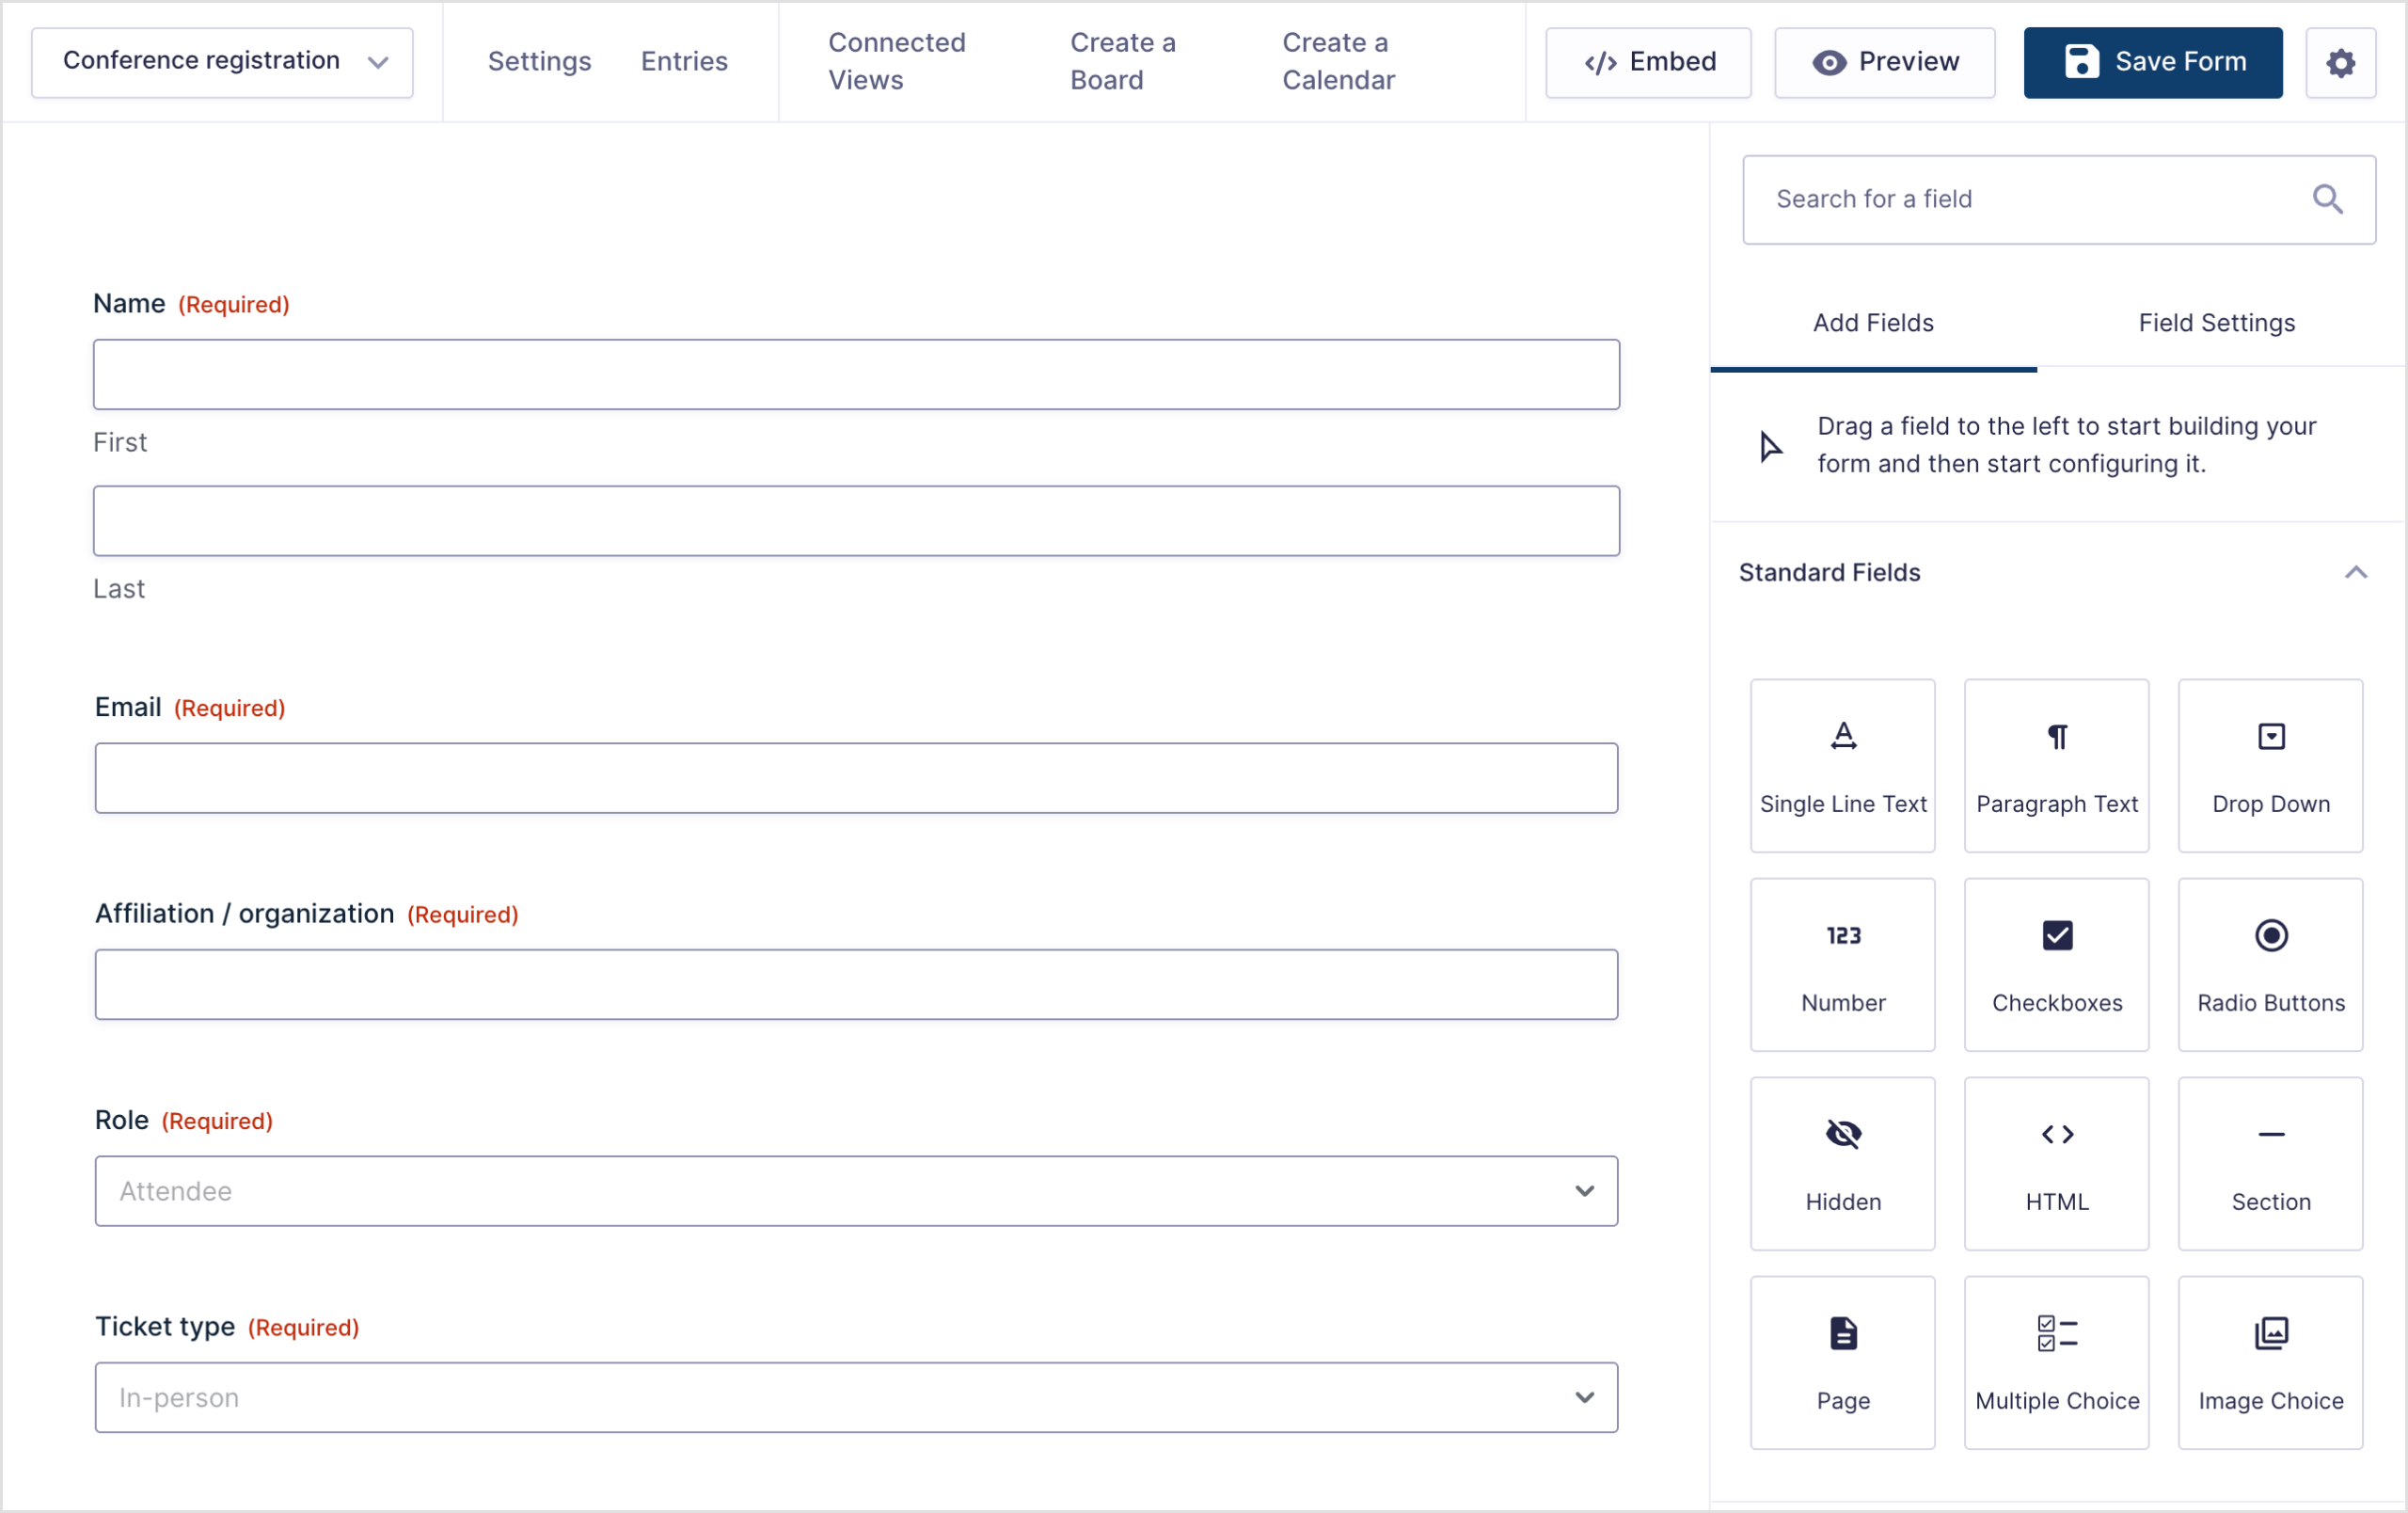
First we’ll create the form attendees can use to sign up. In Gravity Forms, hover over Forms, click New Form, and give it a name. Then add these fields:
- Name and Email
- Affiliation / organization (a single-line text field)
- Role (a Drop Down: Attendee, Presenter, Student, Sponsor)
- Ticket type (a Drop Down: In-person, Virtual)
- Tracks of interest (a Checkboxes field using your four tracks)
- Profile photo (a File Upload field, so the directory has a face next to each name)
- Dietary requirements and an Agreement consent checkbox
With the fields in place, set up what happens after someone submits. Open the form’s Settings tab, click Confirmations, and write a friendly confirmation message. Then click Notifications and add one email to the attendee and, optionally, one to yourself so you know a registration came in. If you’re new to this, Gravity Forms has a thorough guide to form email notifications worth bookmarking.

Pro Tip
If you want to charge for registration, add a Gravity Forms payment add-on (Stripe or PayPal). Payment collection is handled by Gravity Forms itself.
Step 3: Build the abstract submission form
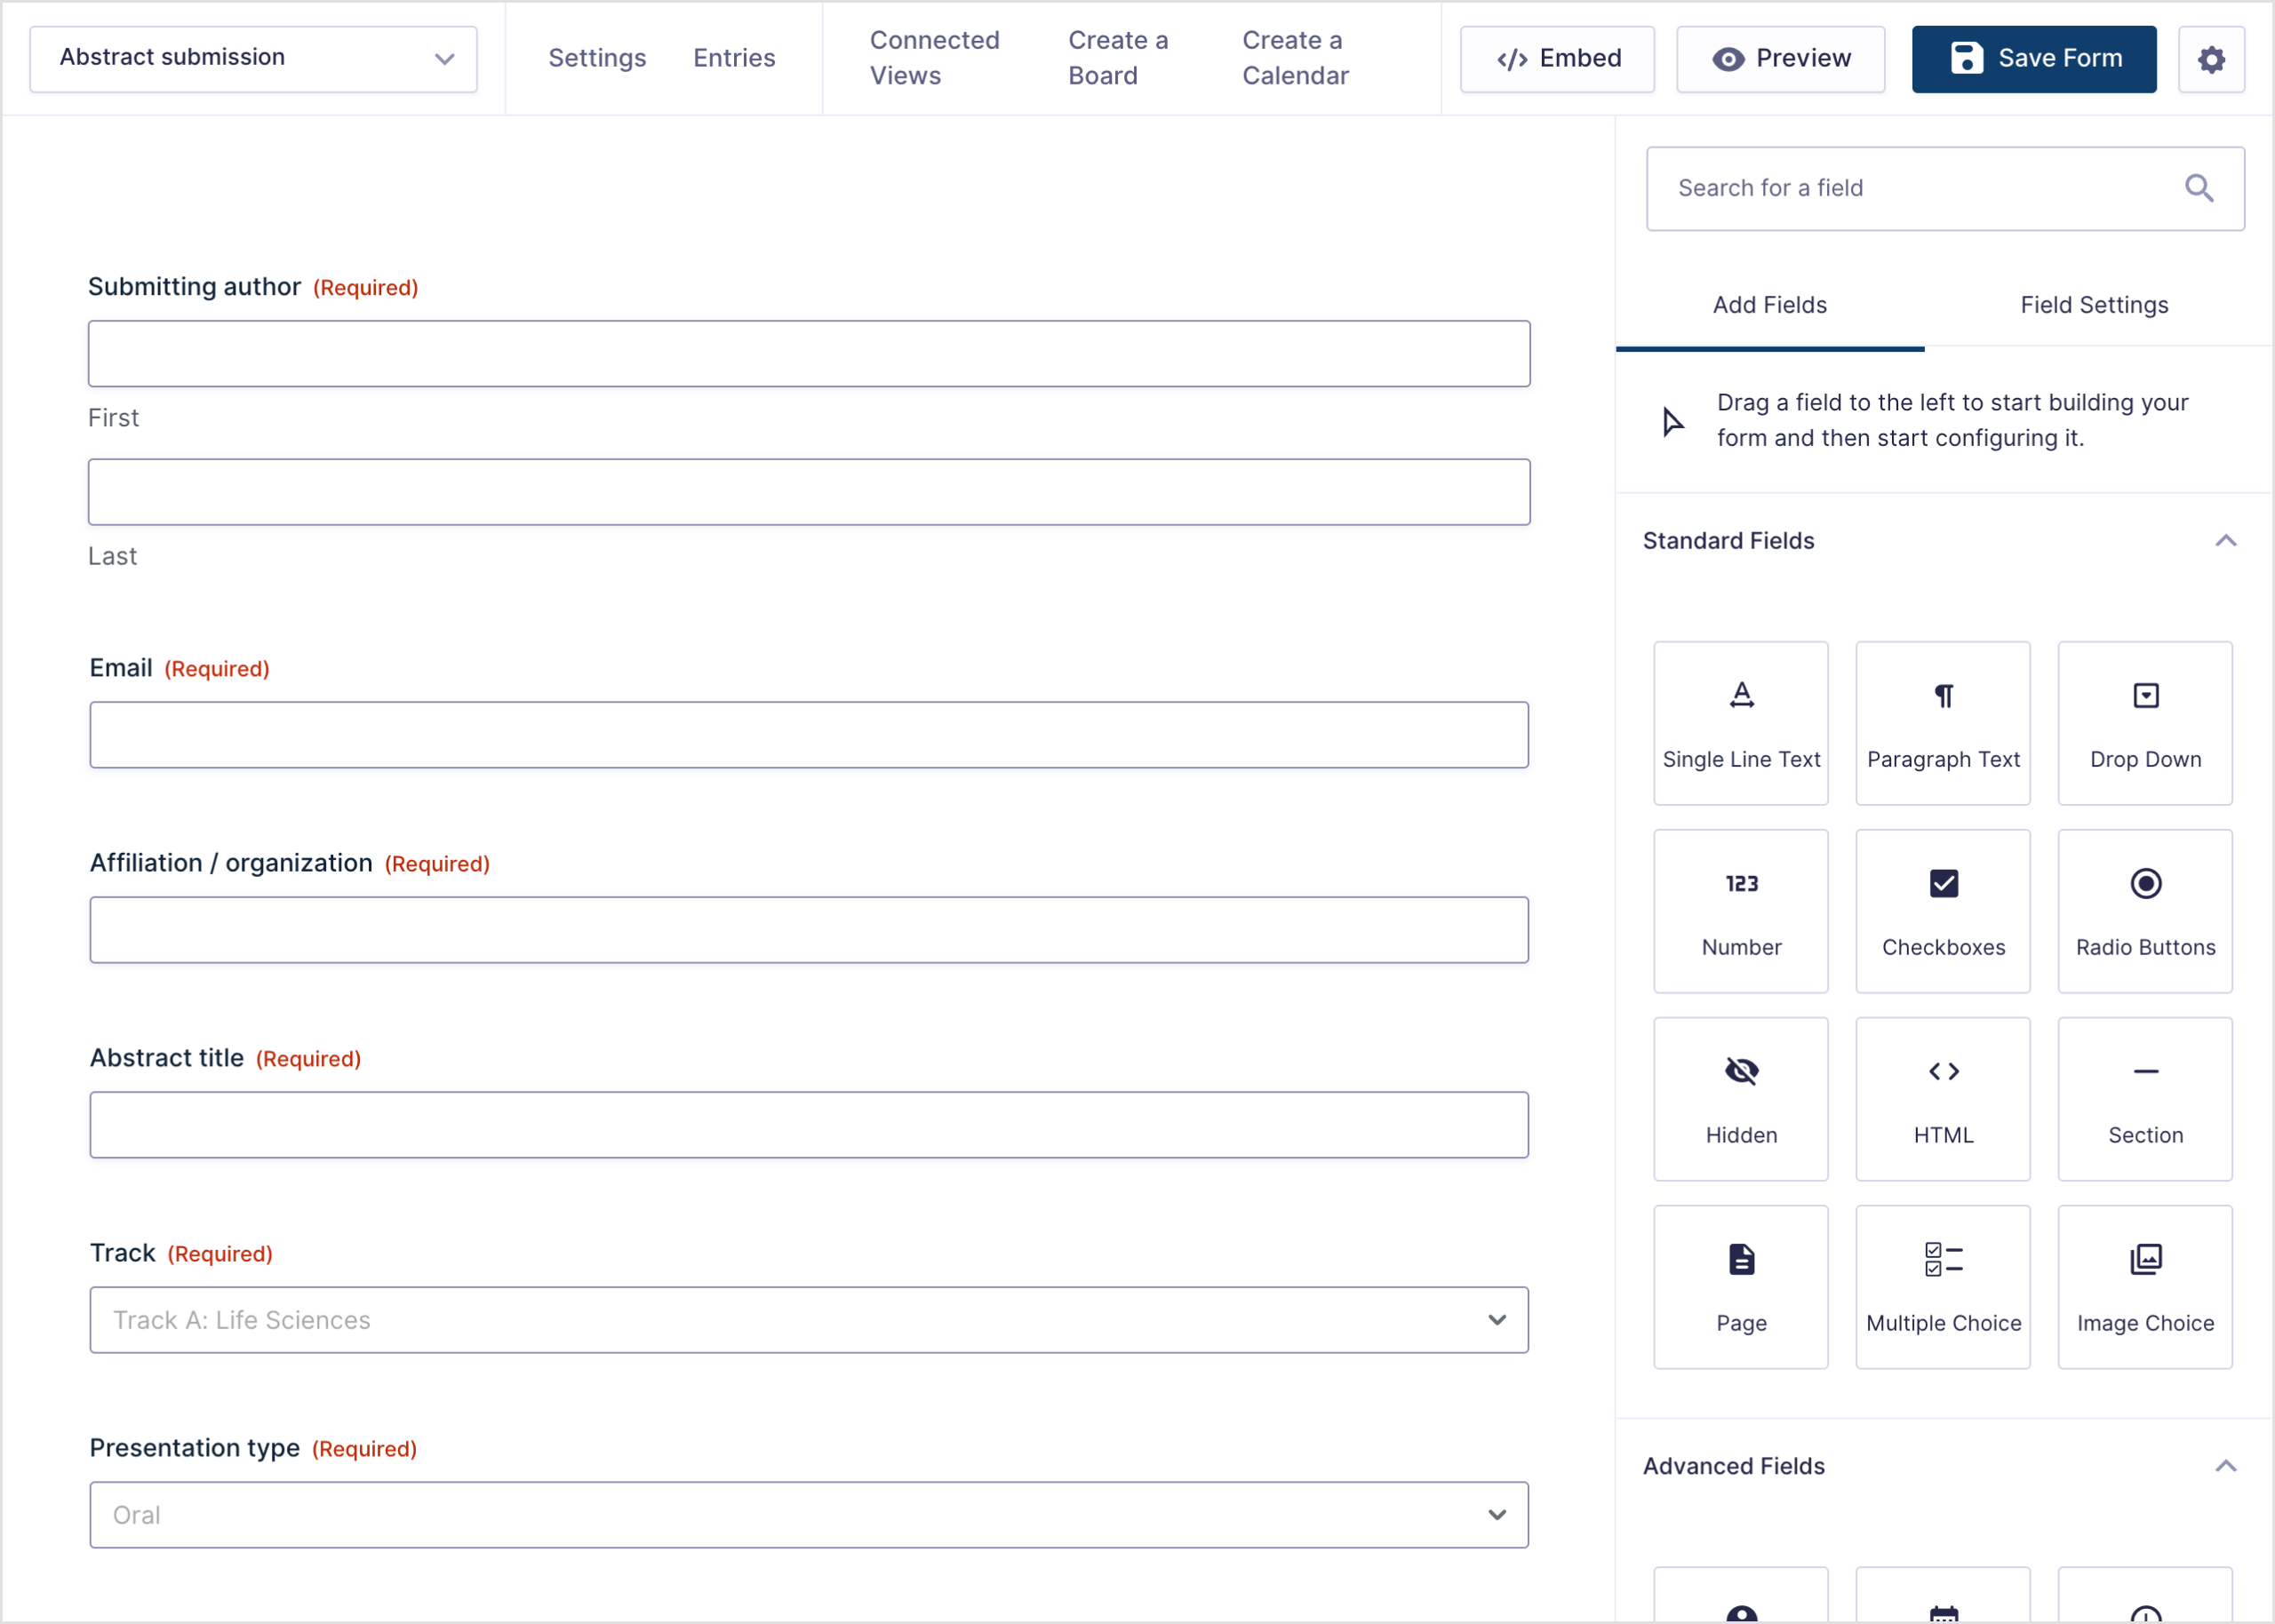
Next we’ll create the call for abstracts. Create a second form with fields for the submission itself:
- Submitting author, Email, and Affiliation
- Abstract title (single-line text)
- Track (a Drop Down matching your track taxonomy)
- Presentation type (a Drop Down: Oral, Poster)
- Abstract (a Paragraph Text field)
- Co-authors (a Paragraph Text field, one per line)
- Keywords and a Paper File Upload field for the full PDF
Add a confirmation and a notification here too, so authors get a receipt and your review committee gets a heads-up. That’s the data collection done. Everything from here is about displaying and managing what comes in, and that’s where GravityView takes over.
Step 4: Create the attendee directory
Hover over GravityKit and click New View. Give it a name, choose your registration form as the data source, and pick a layout. I used the Layout Builder layout because it gives full control over how each attendee card looks.
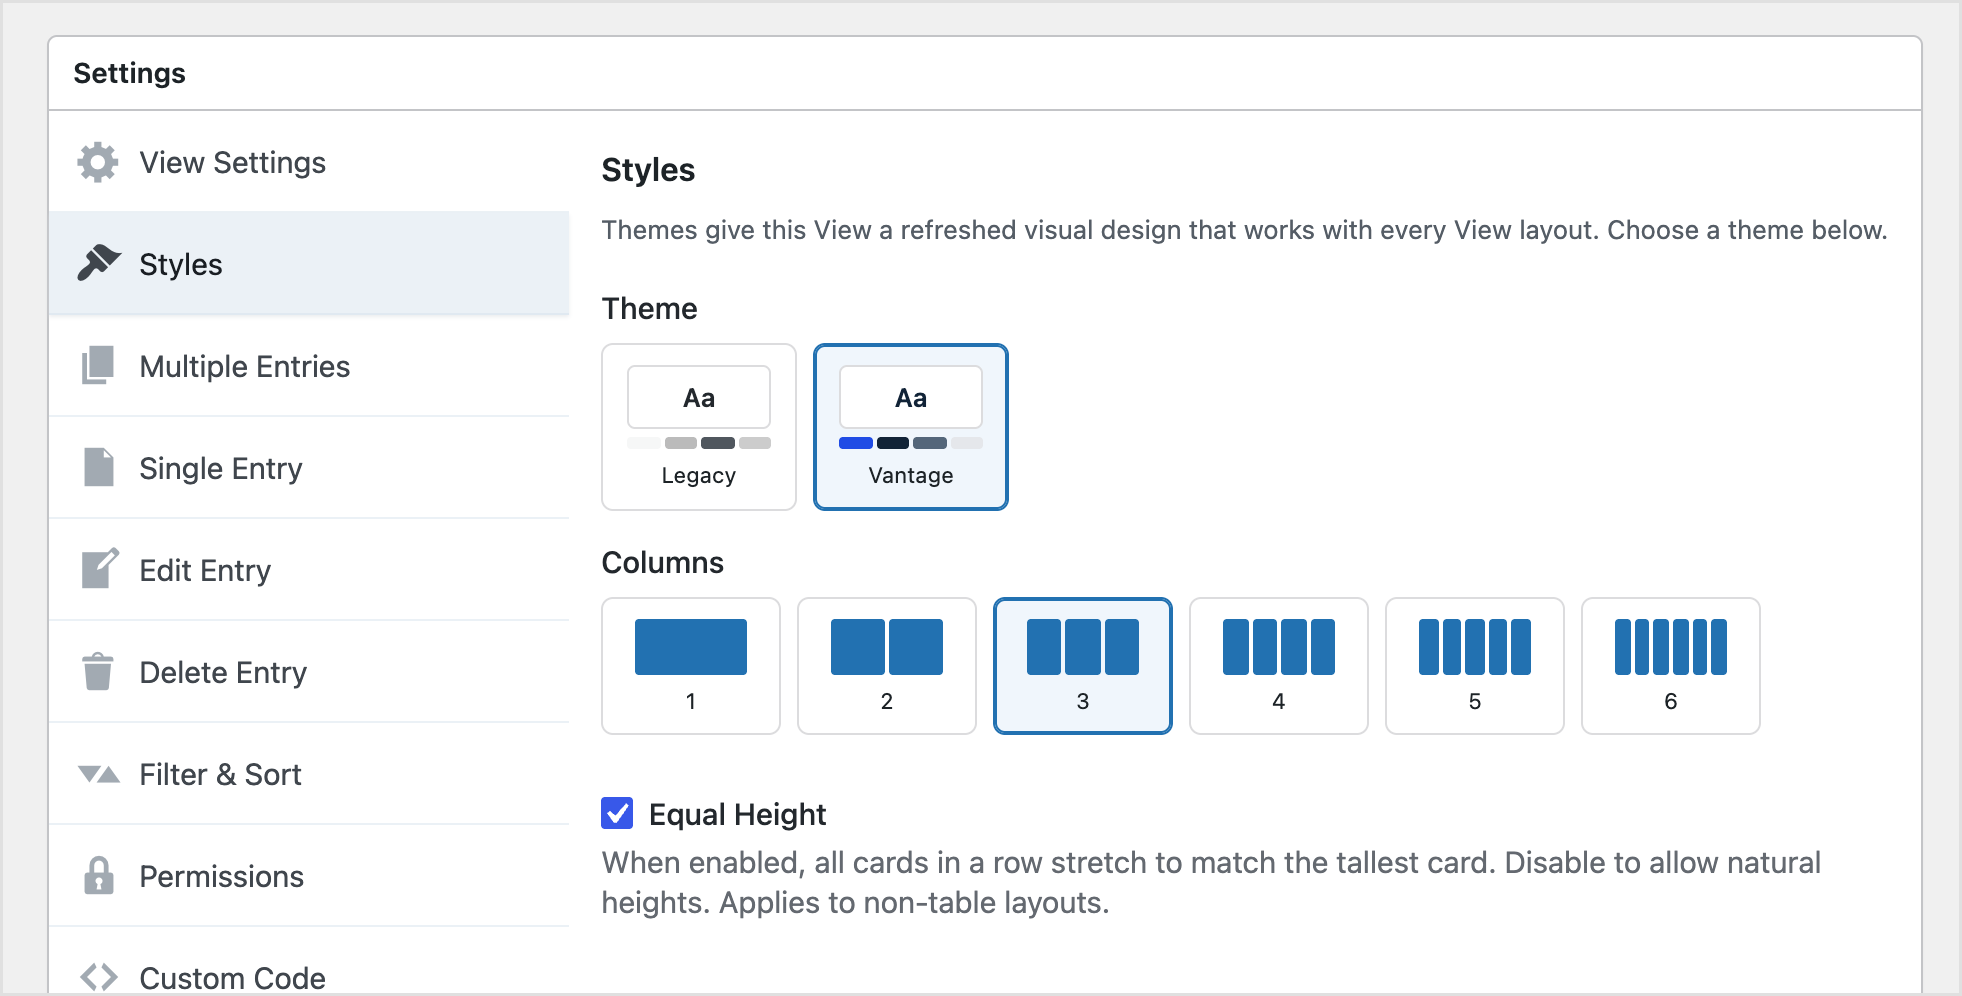
Under Settings, open the Styles tab and switch the theme to Vantage. This is GravityView’s modern theme, and it also controls the grid: set the number of columns (I used three) and Vantage arranges the entries into a clean card grid for you, no custom CSS required. Then add the fields you want on each card: the profile photo, name, affiliation, and role.
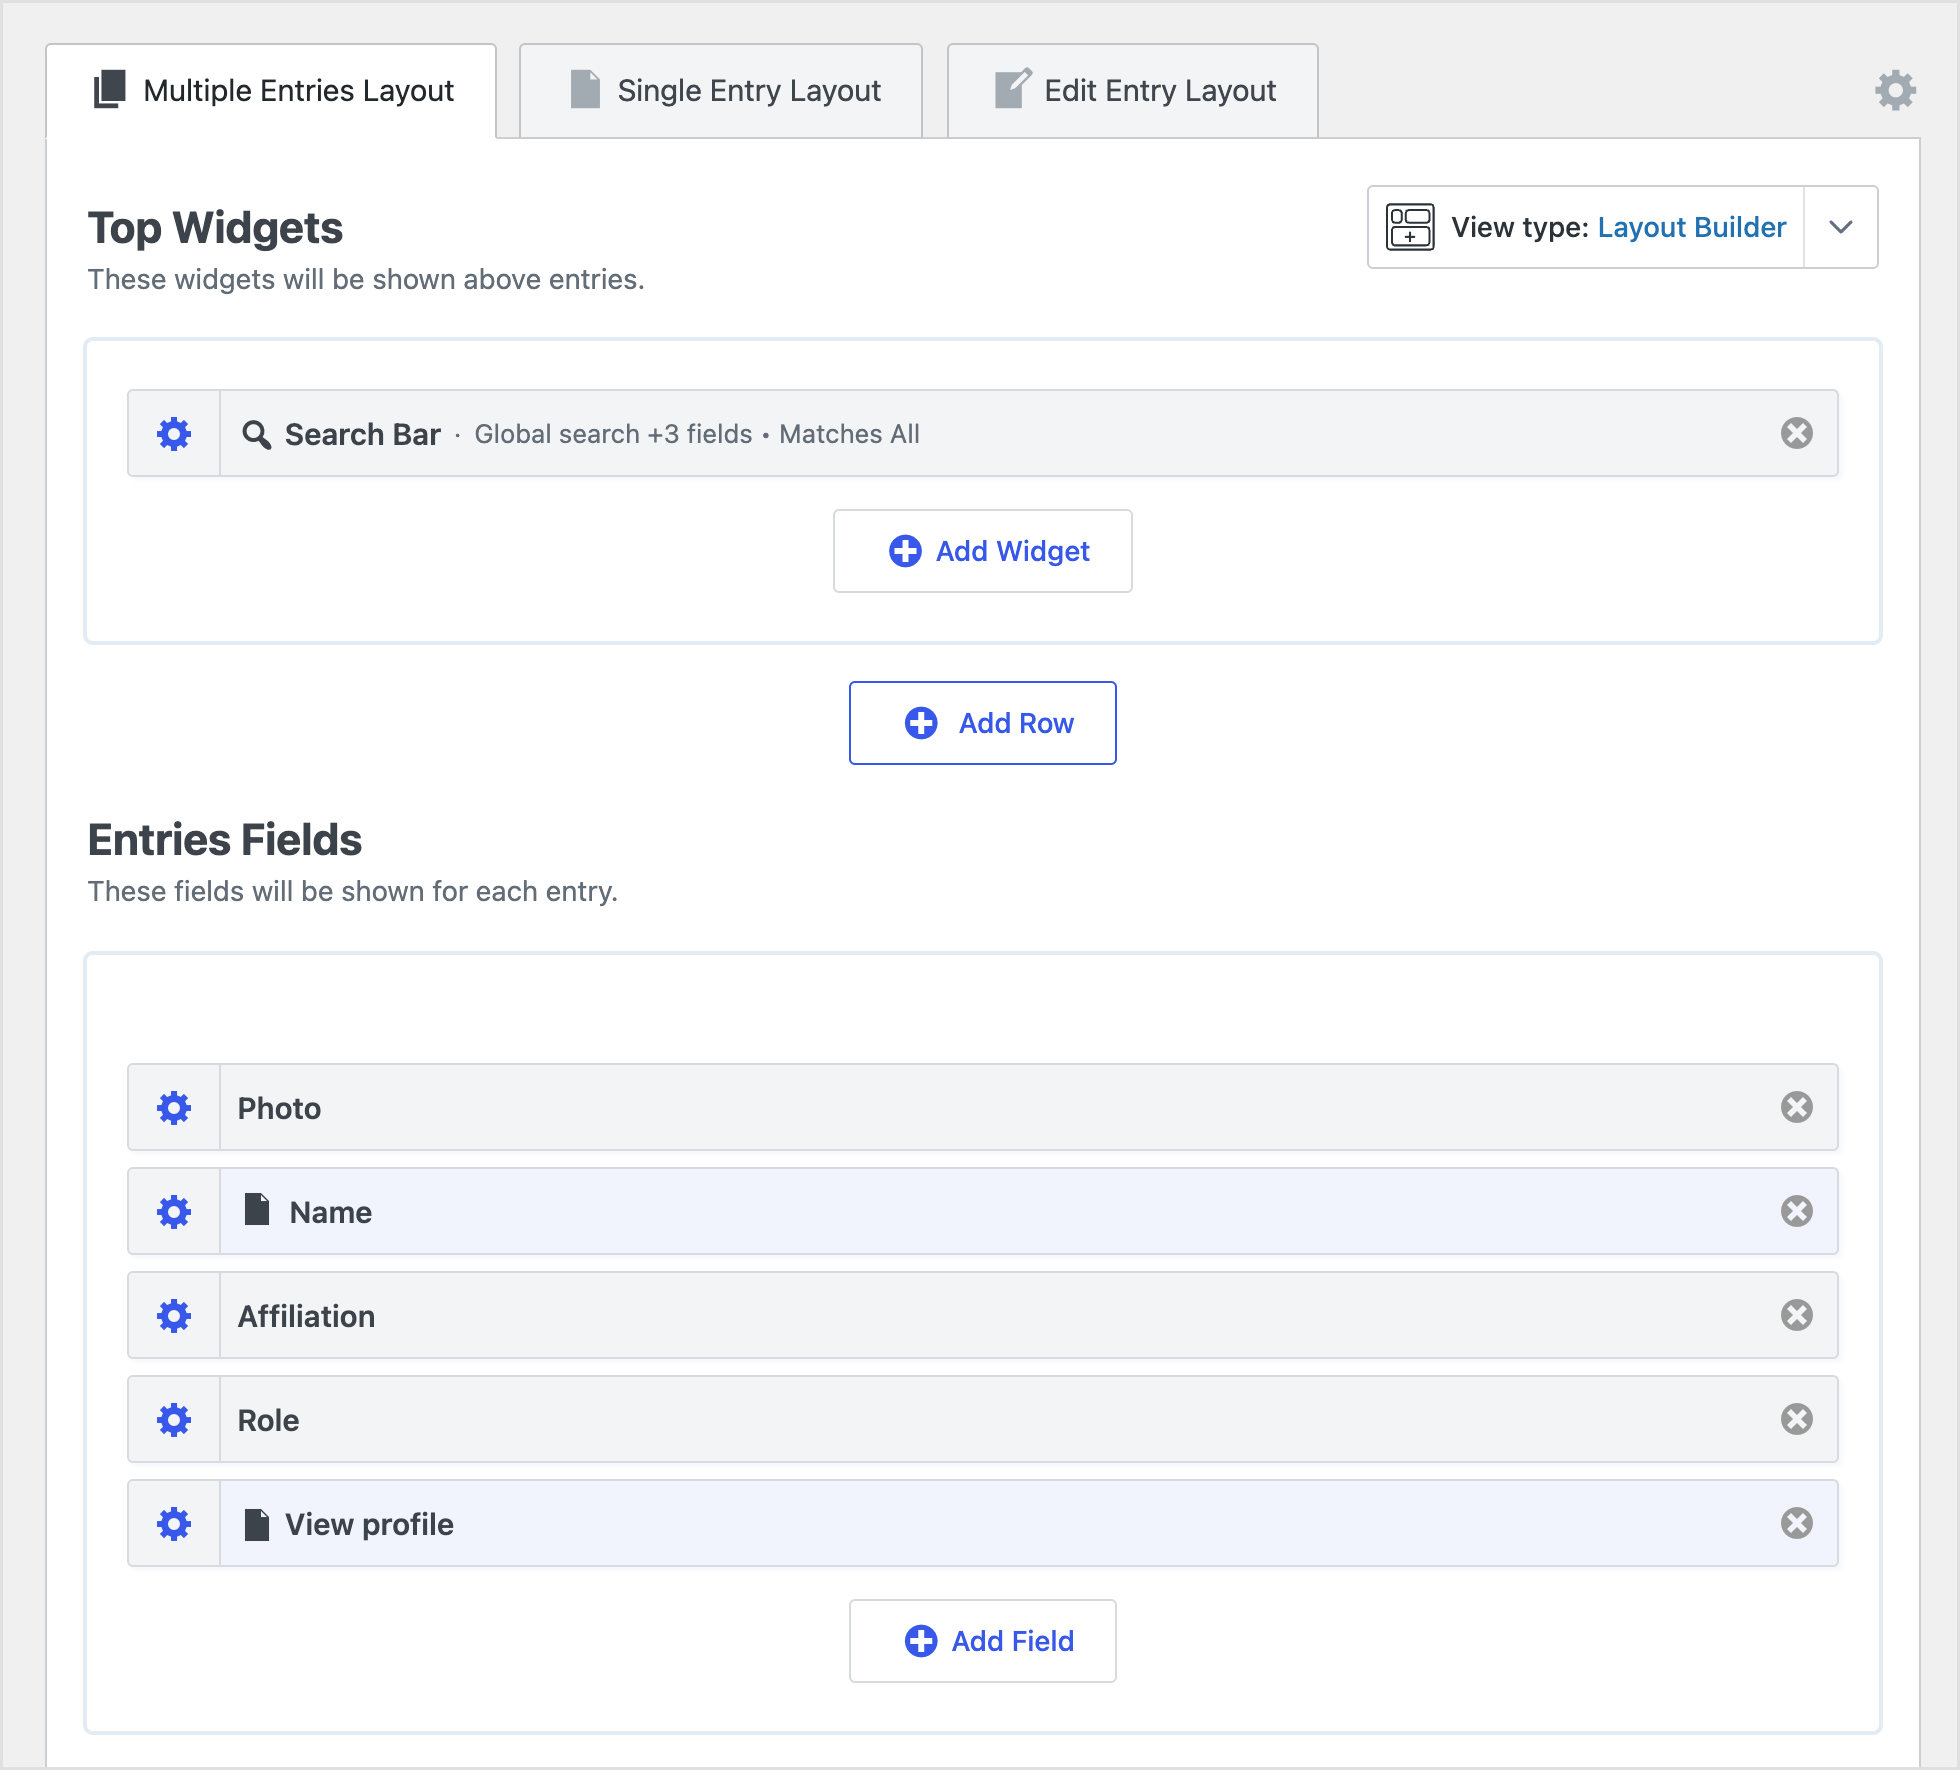
To make the directory searchable, add a Search Bar widget to the top of the View and give it a keyword search plus a few filters (Role, Tracks, and Ticket type). By default the search fields stack vertically, which eats space. Click the area settings cog on the row holding your fields and set the arrangement to Horizontal so the filters sit in one horizontal row, then drop the Search button onto its own row beneath them.
Here’s what the finished directory looks like on the front end:
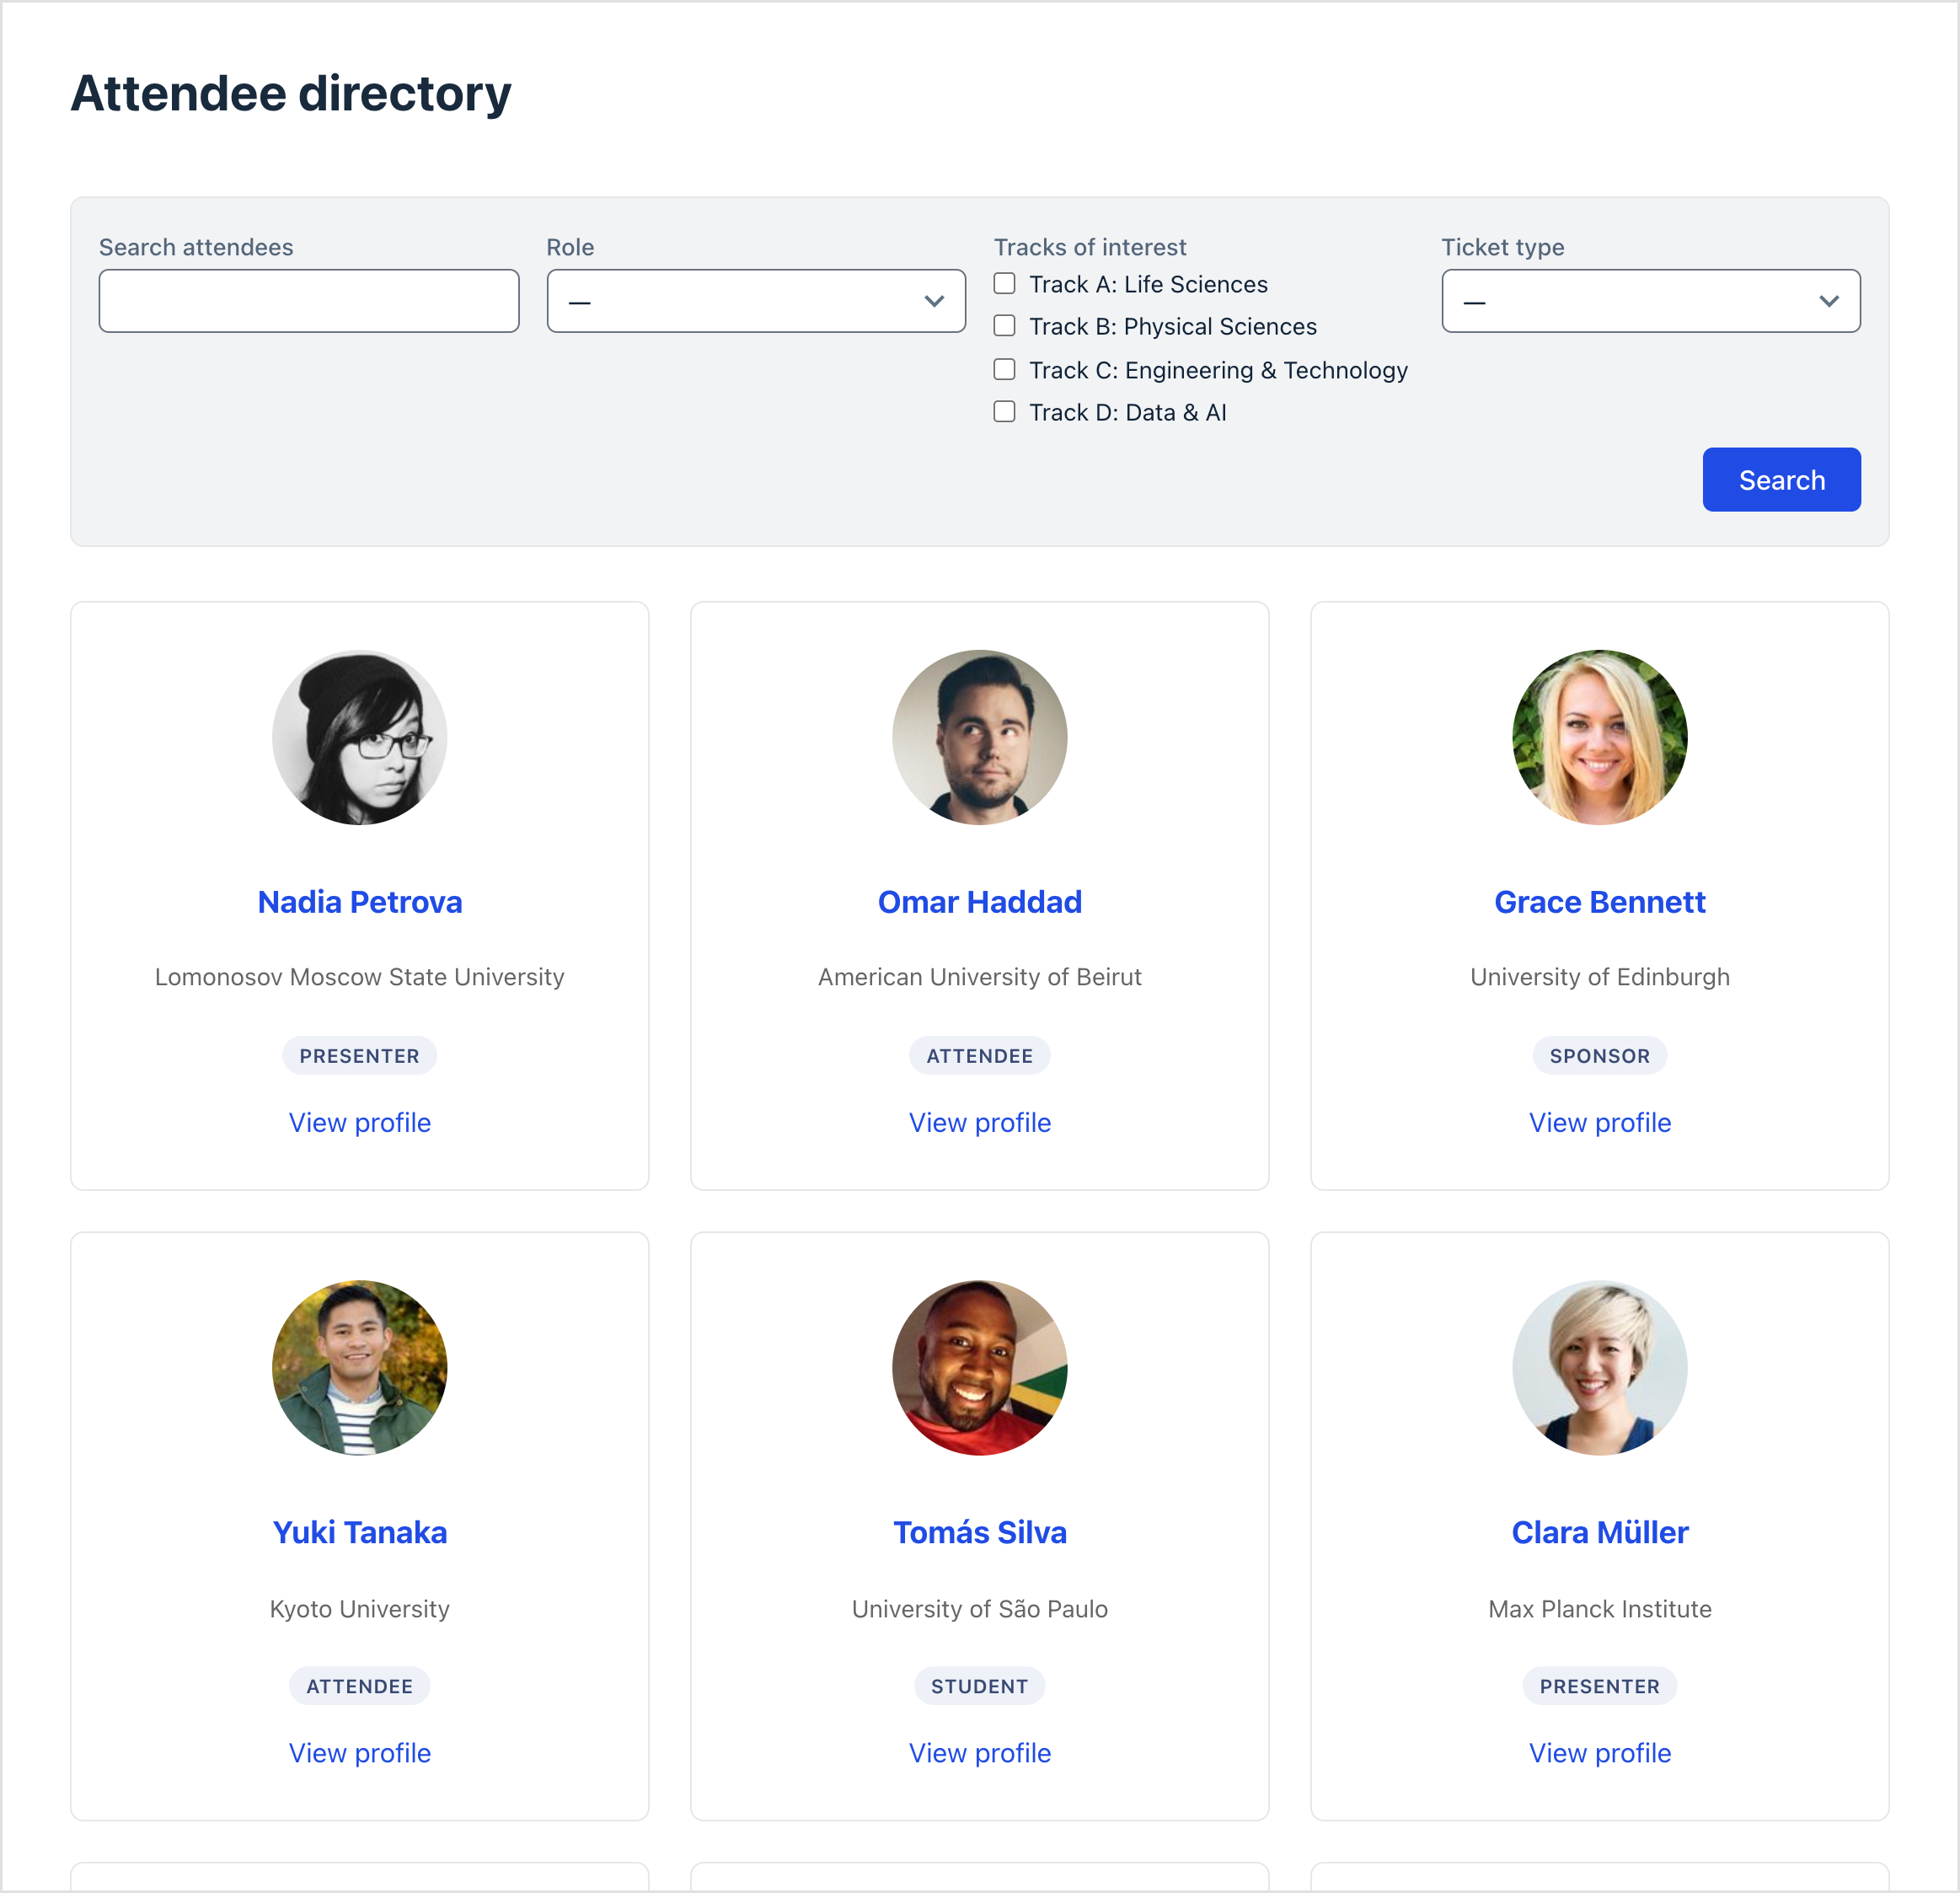
One thing worth calling out: I deliberately left the Email field off the public directory. Just because a field is on the form doesn’t mean it belongs on a public page, and GravityView lets you choose exactly which fields appear.
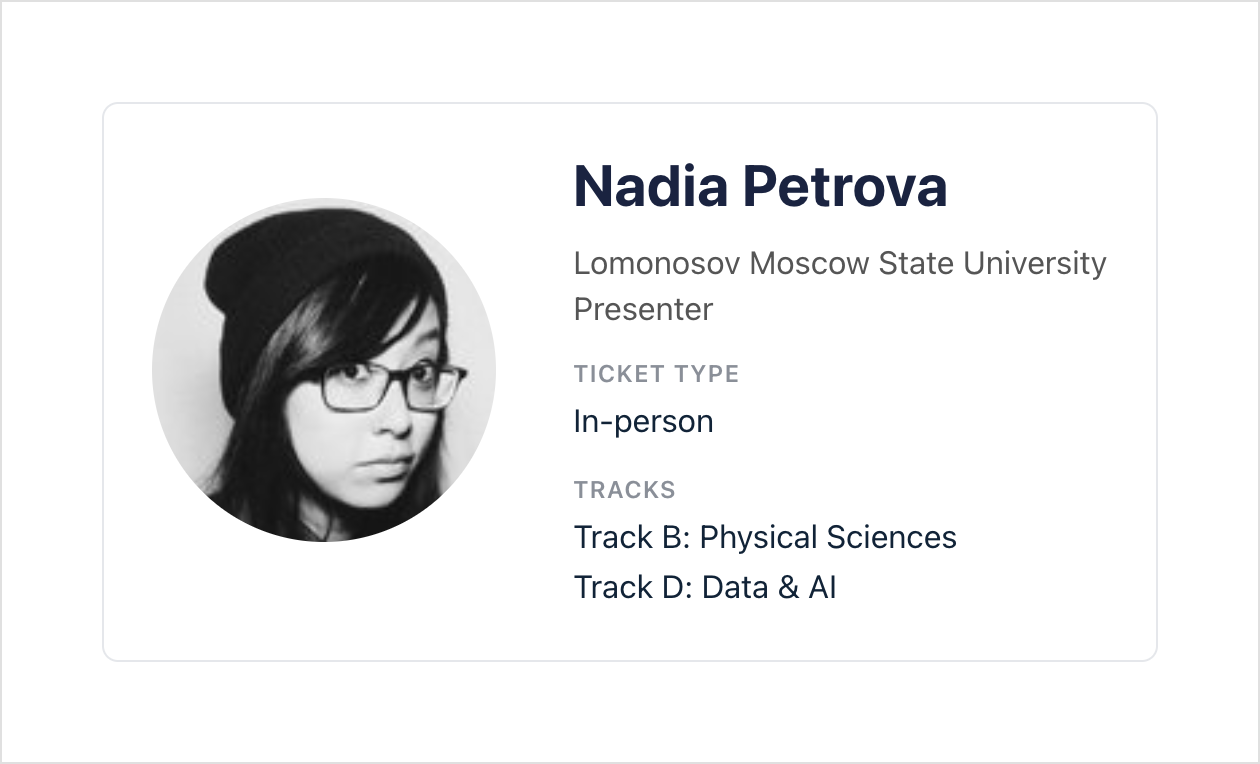
The single attendee profile
When someone clicks a card, they land on that attendee’s profile page. GravityView generates this single-entry page automatically from the fields you place in the Single Entry tab.
Step 5: Create the program
Repeat the process for a second View built on your abstract form. This time I used the List layout with the Vantage theme, which reads well for longer content: each row shows the abstract title, author, track, presentation type, and a snippet. Add a search bar with a keyword field plus Track and Presentation type filters, laid out horizontally the same way.
The single-entry page for an abstract shows the full submission, which is exactly what a reviewer or attendee wants to read.

Pro Tip
Use GravityView’s built-in approval system to review abstracts before they show up publicly on the front end.
Step 6: Let people manage their own submissions
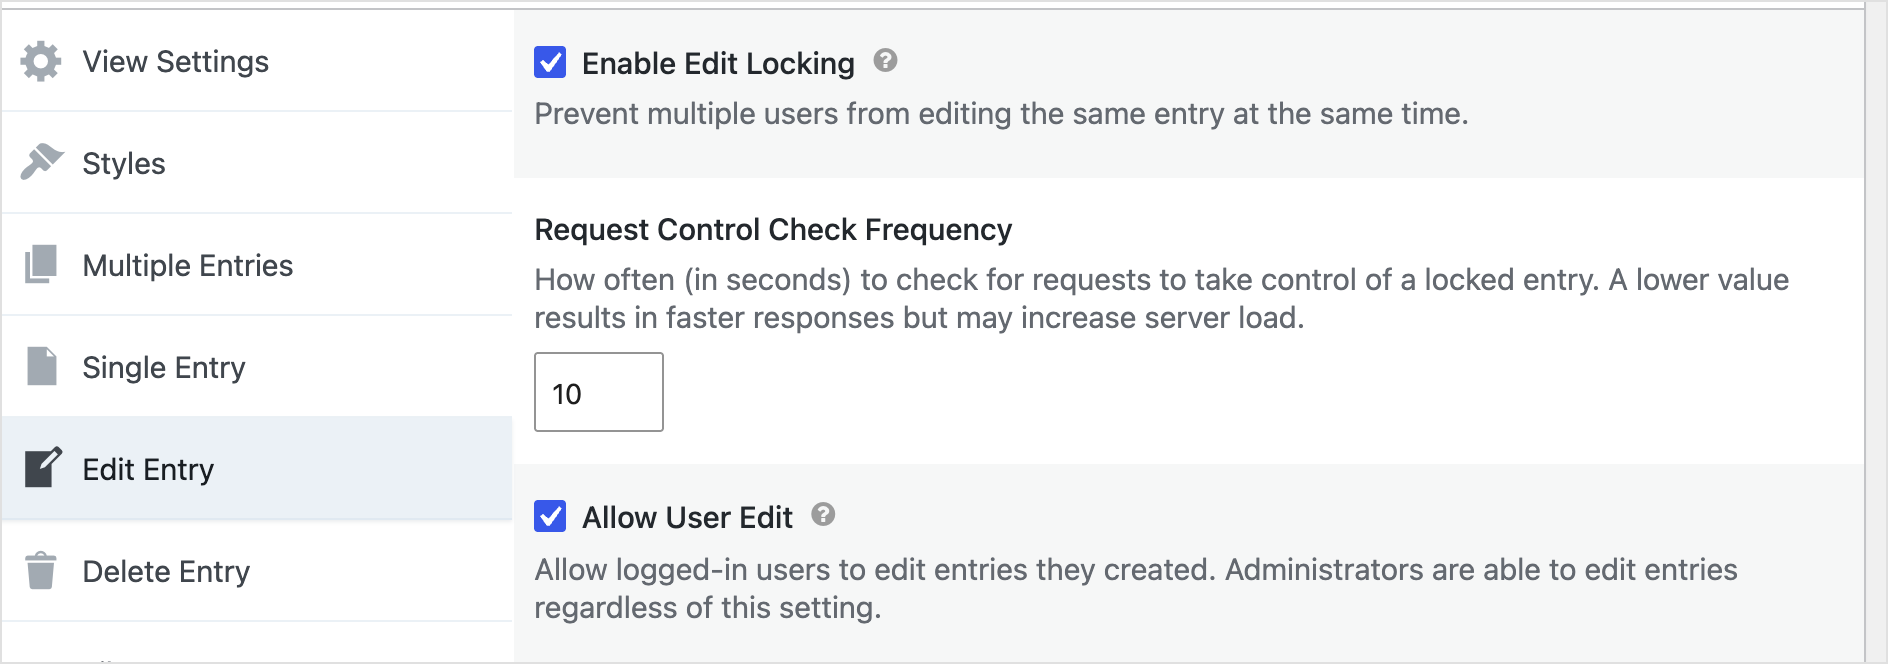
Presenters will inevitably want to fix a typo or swap a photo, and you don’t want those requests landing in your inbox. GravityView’s Edit Entry feature lets logged-in users edit their own entries from the front end, no dashboard access needed.
Create a new View linked to your registration form, then under Settings turn on Allow User Edit. Add the fields you want people to be able to change on the Edit Entry tab, including the profile photo.
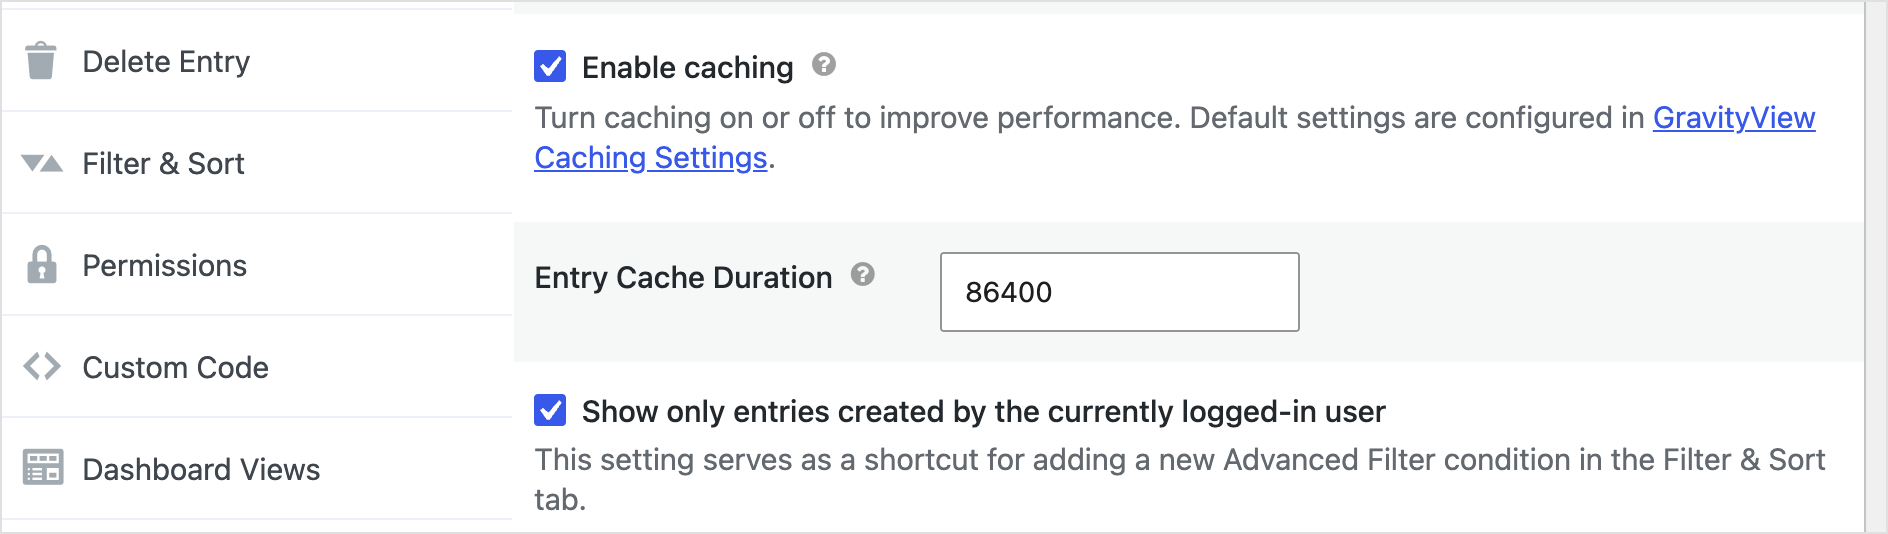
To make sure each person only sees their own record, enable Show only entries created by the currently logged-in user.
You can build the same kind of per-user View on the abstract form so authors get a “My abstracts” page listing only their submissions, each with an edit link.
Step 7: Publish the program on a calendar with GravityCalendar
A list of accepted talks is useful, but attendees really want to see the schedule. GravityCalendar plots Gravity Forms entries on an interactive calendar, and it works on its own without GravityView.
First, create a Sessions form with fields for the schedule: session title, speaker, track, room, a Date field for the session day, start time and end time fields, and a description. Add one entry per talk.
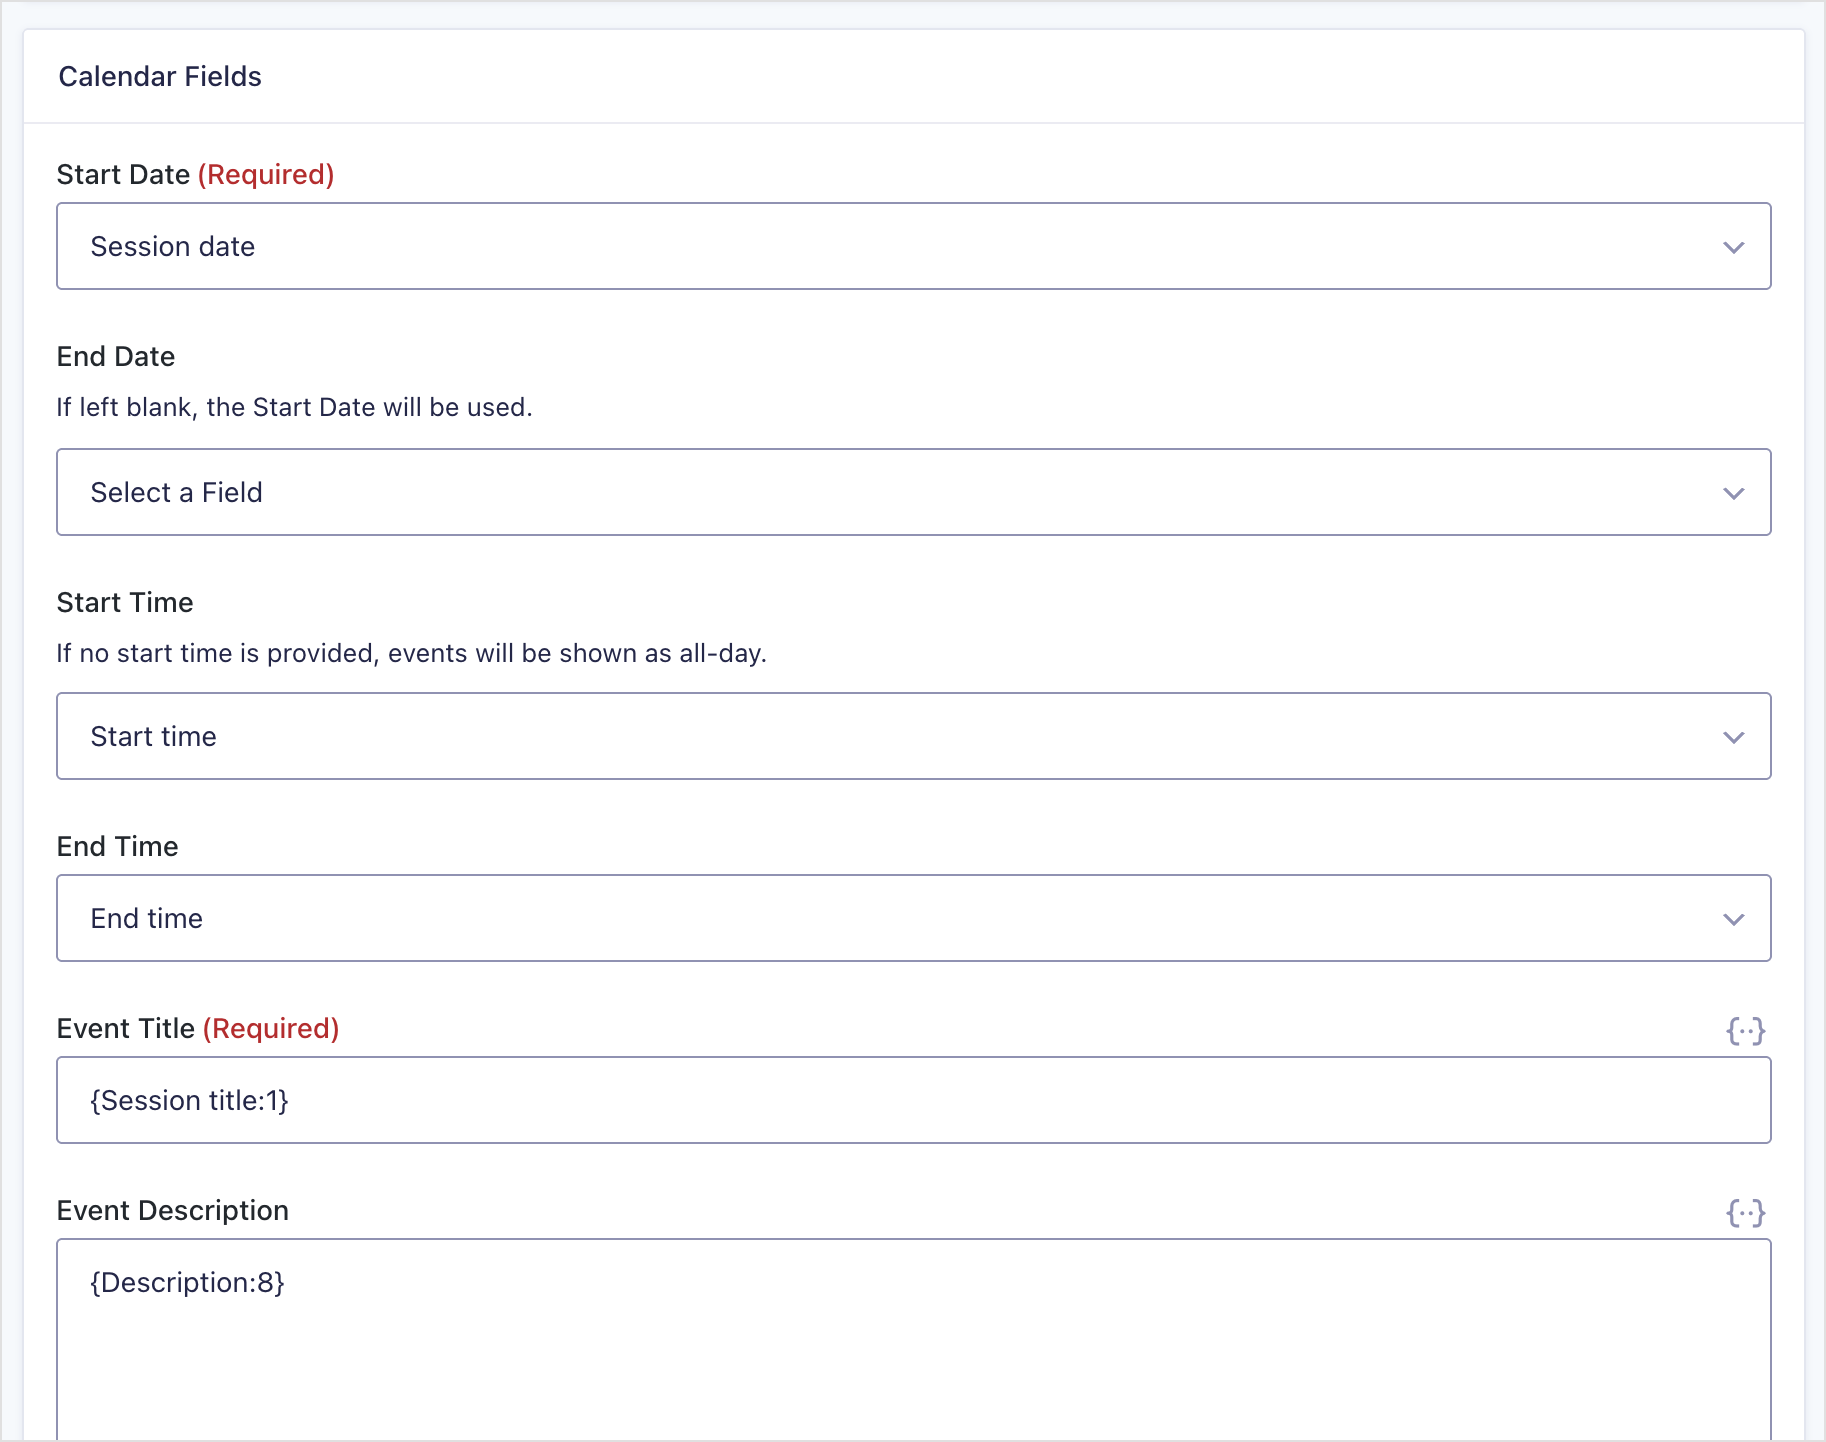
Next, create the calendar. GravityCalendar works as a Gravity Forms feed, so a “calendar” is just a mapping of your form’s fields to calendar events. Create a new calendar on the Sessions form and map:
- Event title to Session title
- Start date to Session date
- Start time and End time to your time fields
- Description to the description field
Then embed the calendar with its block or shortcode on any page. Attendees can browse the program by month, week, or day.
Step 8 (bonus): Generate certificates with Gravity PDF
Once your event wraps up, presenters and attendees often want a certificate of participation, and finance teams want registration receipts. Gravity PDF generates polished PDFs from your form entries: you design a template once, drop in merge tags for the attendee’s name, role, and session, and each person gets a personalized document to download or receive by email. It’s the natural finishing touch on the same dataset you’ve already built, without exporting anything to another tool.
Step 9: Optional enhancements
Once the core is in place, GravityKit gives you room to grow:
- Approval workflow – Hold abstracts for committee review before they appear publicly using entry approval and notes.
- Registration stats – Chart sign-ups by track or ticket type with GravityCharts.
- Badges and imports – Export the attendee list for name badges with GravityExport, or seed the directory with past attendees using GravityImport.
- Access control – Restrict submission and editing to logged-in users.
Build your conference site today
That’s a full conference platform, built from one connected Gravity Forms dataset: registration, abstracts, a searchable directory, a program, a live calendar, self-service editing, and certificates on top. No specialty conference plugin, no custom development, and no data locked away in someone else’s system.
The best part is that everything talks to everything else, because it’s all the same data underneath. Ready to build your own? Learn more about GravityView, or check out the All Access Pass to get the full toolkit.

Get better at Gravity Forms, one email a week
New GravityKit releases, practical Gravity Forms tutorials, and subscriber-only discounts. One short email every week, unsubscribe anytime.
More articles
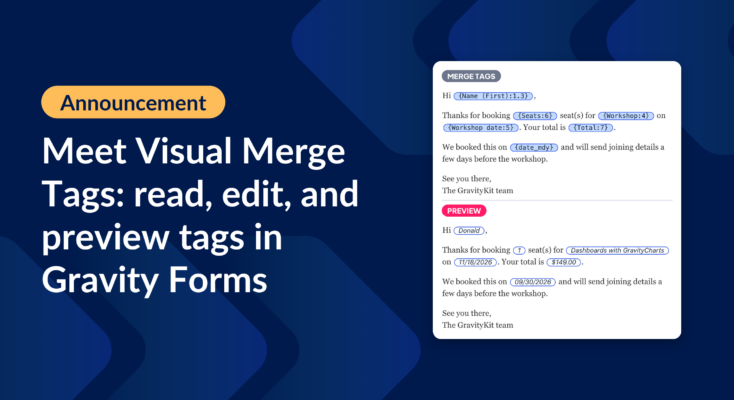
Announcing Visual Merge Tags: tags you can read, edit, and preview in Gravity Forms
Visual Merge Tags turns Gravity Forms merge tags into chips you can read, change from a settings panel, and preview with real entries before you save.
Launch Log: Visual Merge Tags, Elementor widget style settings, and security updates
Visual Merge Tags arrives with Foundation 1.35.0, GravityView and Magic Links get security fixes, and the Elementor widget gains the form block’s style settings.

10 school apps you can build with Gravity Forms and GravityKit
Ten apps schools and universities build on Gravity Forms without custom code: application review, enrollment, student portals, report cards, libraries, calendars, and more. Walkthroughs for each.