Published
•
Updated
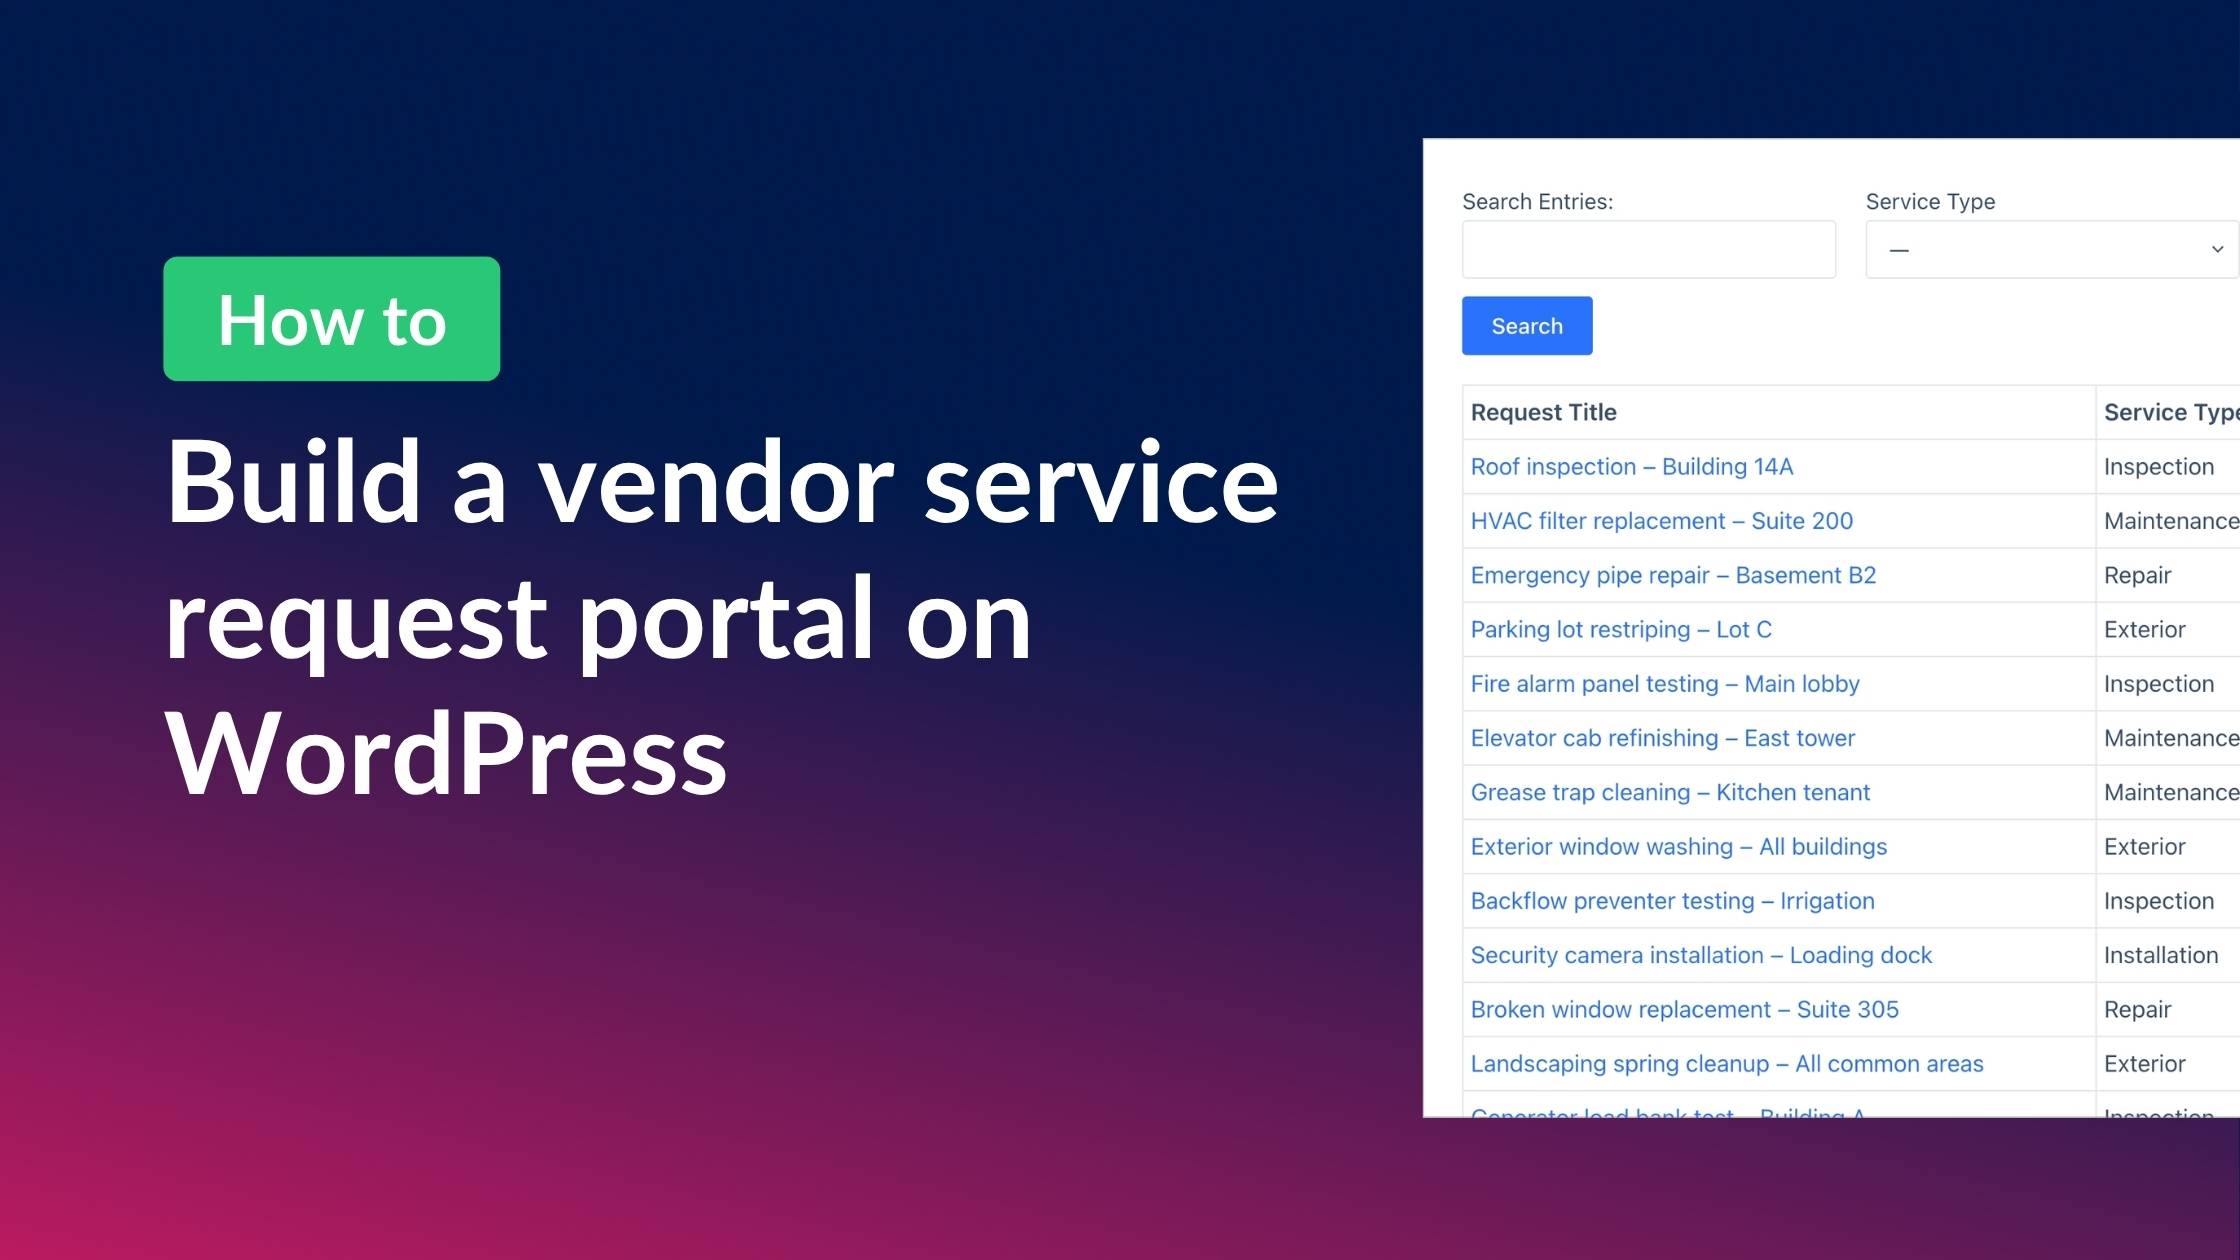
How to build a vendor service request portal with Gravity Forms and GravityView
Learn how to build a vendor portal where users submit, track, edit, and cancel service requests using Gravity Forms and GravityView Pro.
If you manage service requests for vendors, clients, or tenants, you know how quickly things can spiral when everything runs through email. There’s no central place to track request status, no way for vendors to self-serve, and no audit trail when things go wrong.
In this tutorial, I’ll show you how to build a fully functional vendor service request portal on your WordPress site using Gravity Forms and GravityView Pro. Vendors will be able to submit service requests, track their status, edit details, and even cancel requests, all from the front end. Meanwhile, admins get a powerful dashboard to manage incoming requests, update statuses, and attach completion reports.
Let’s get started!
Sneak peek
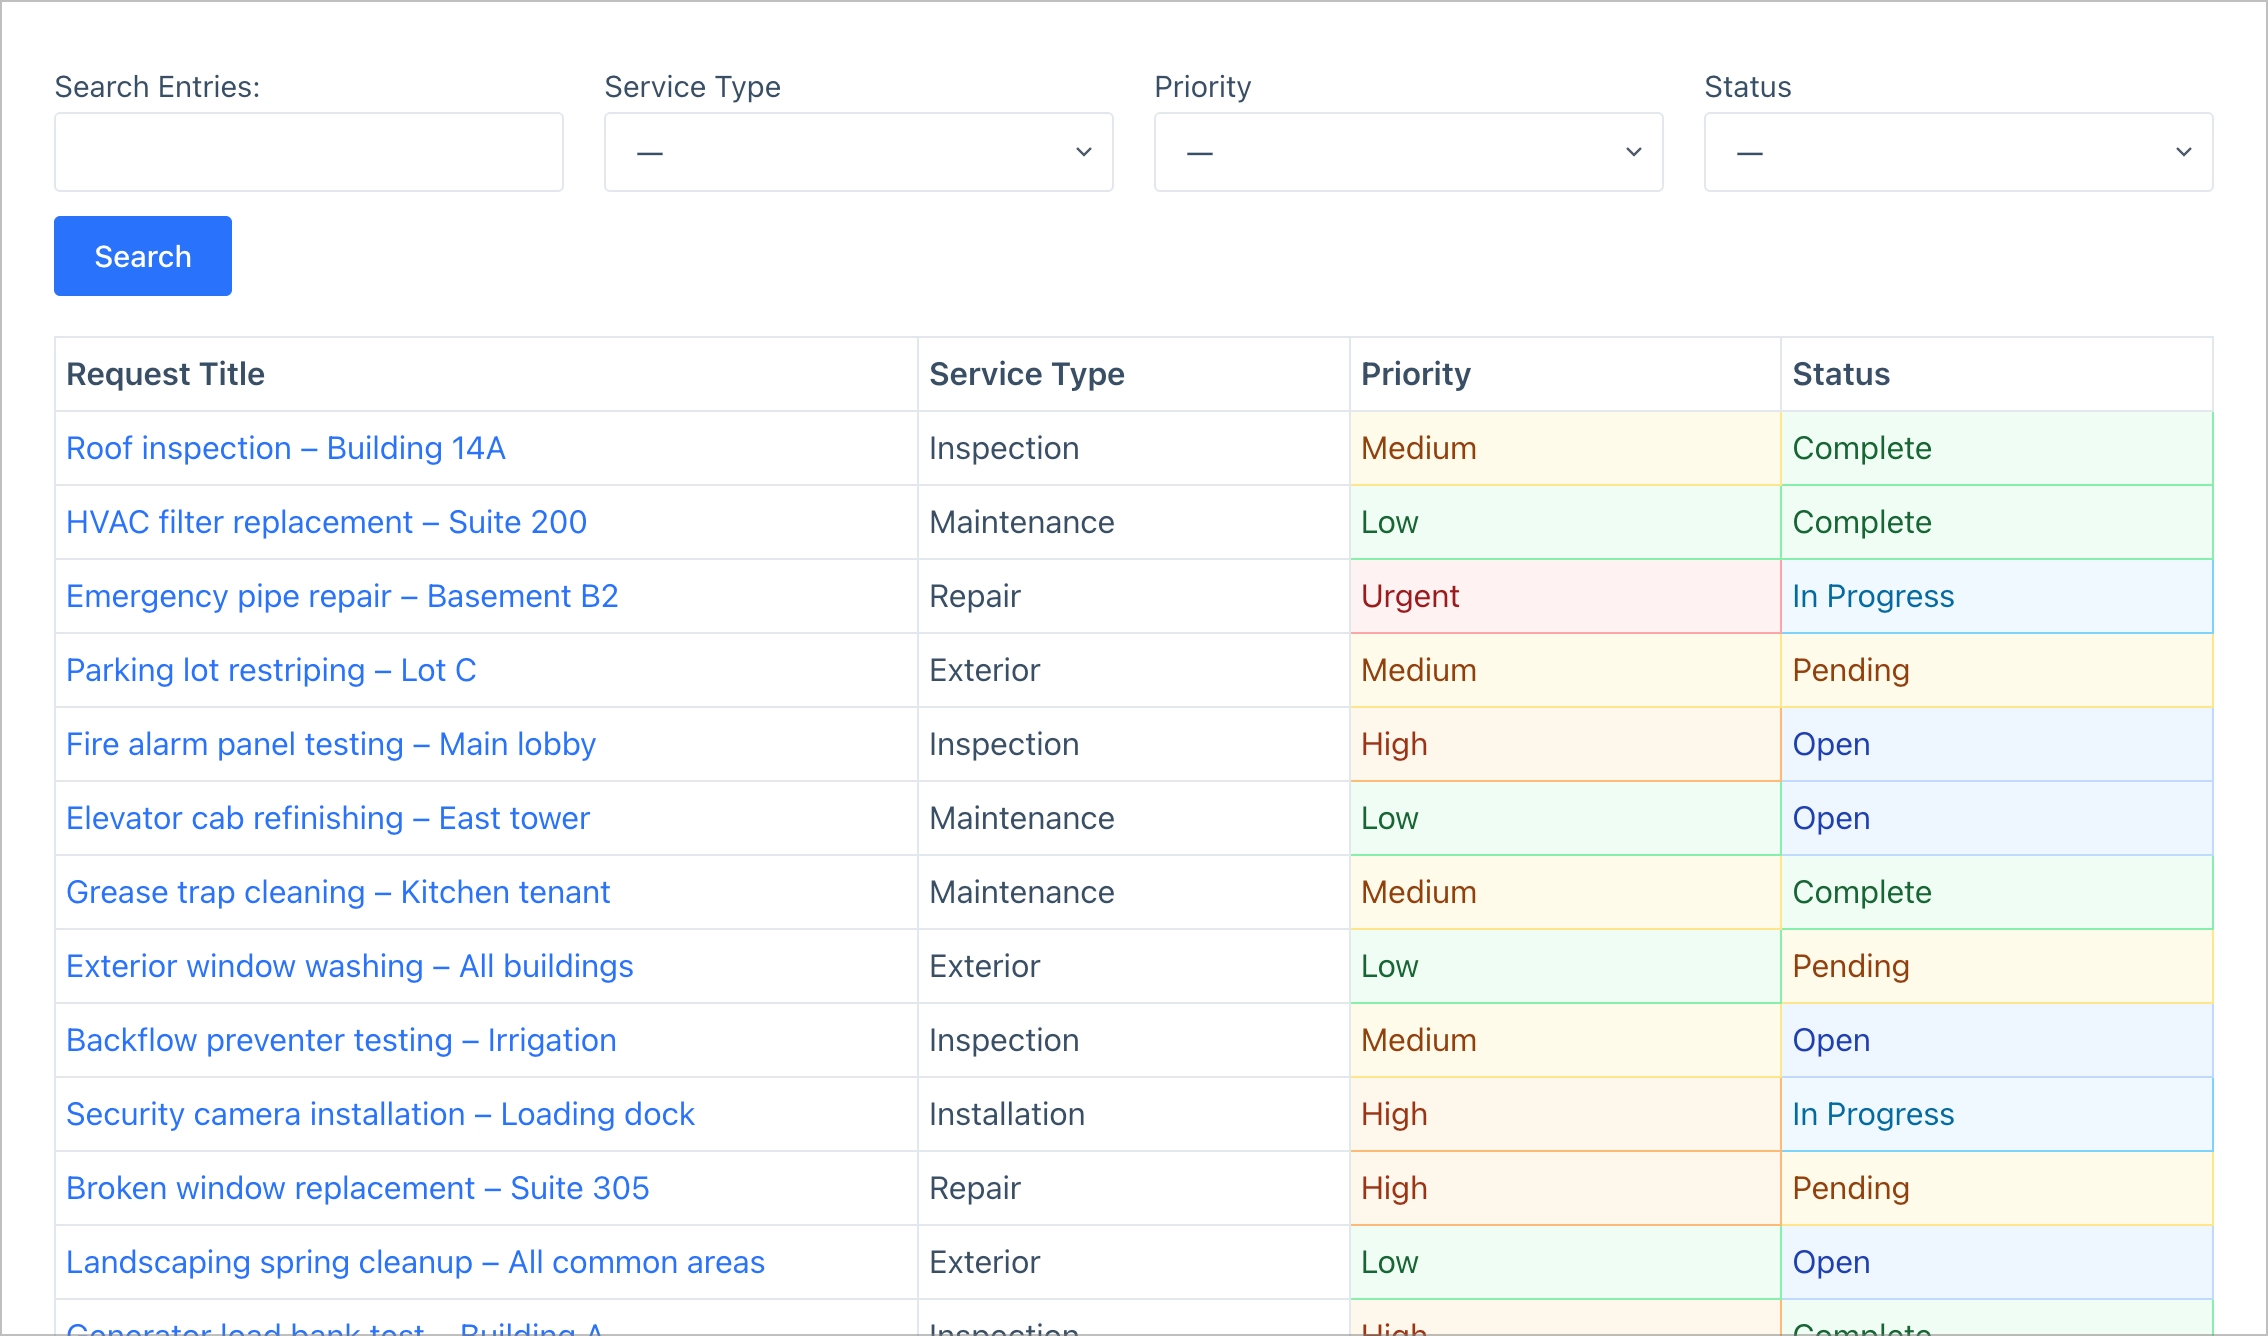
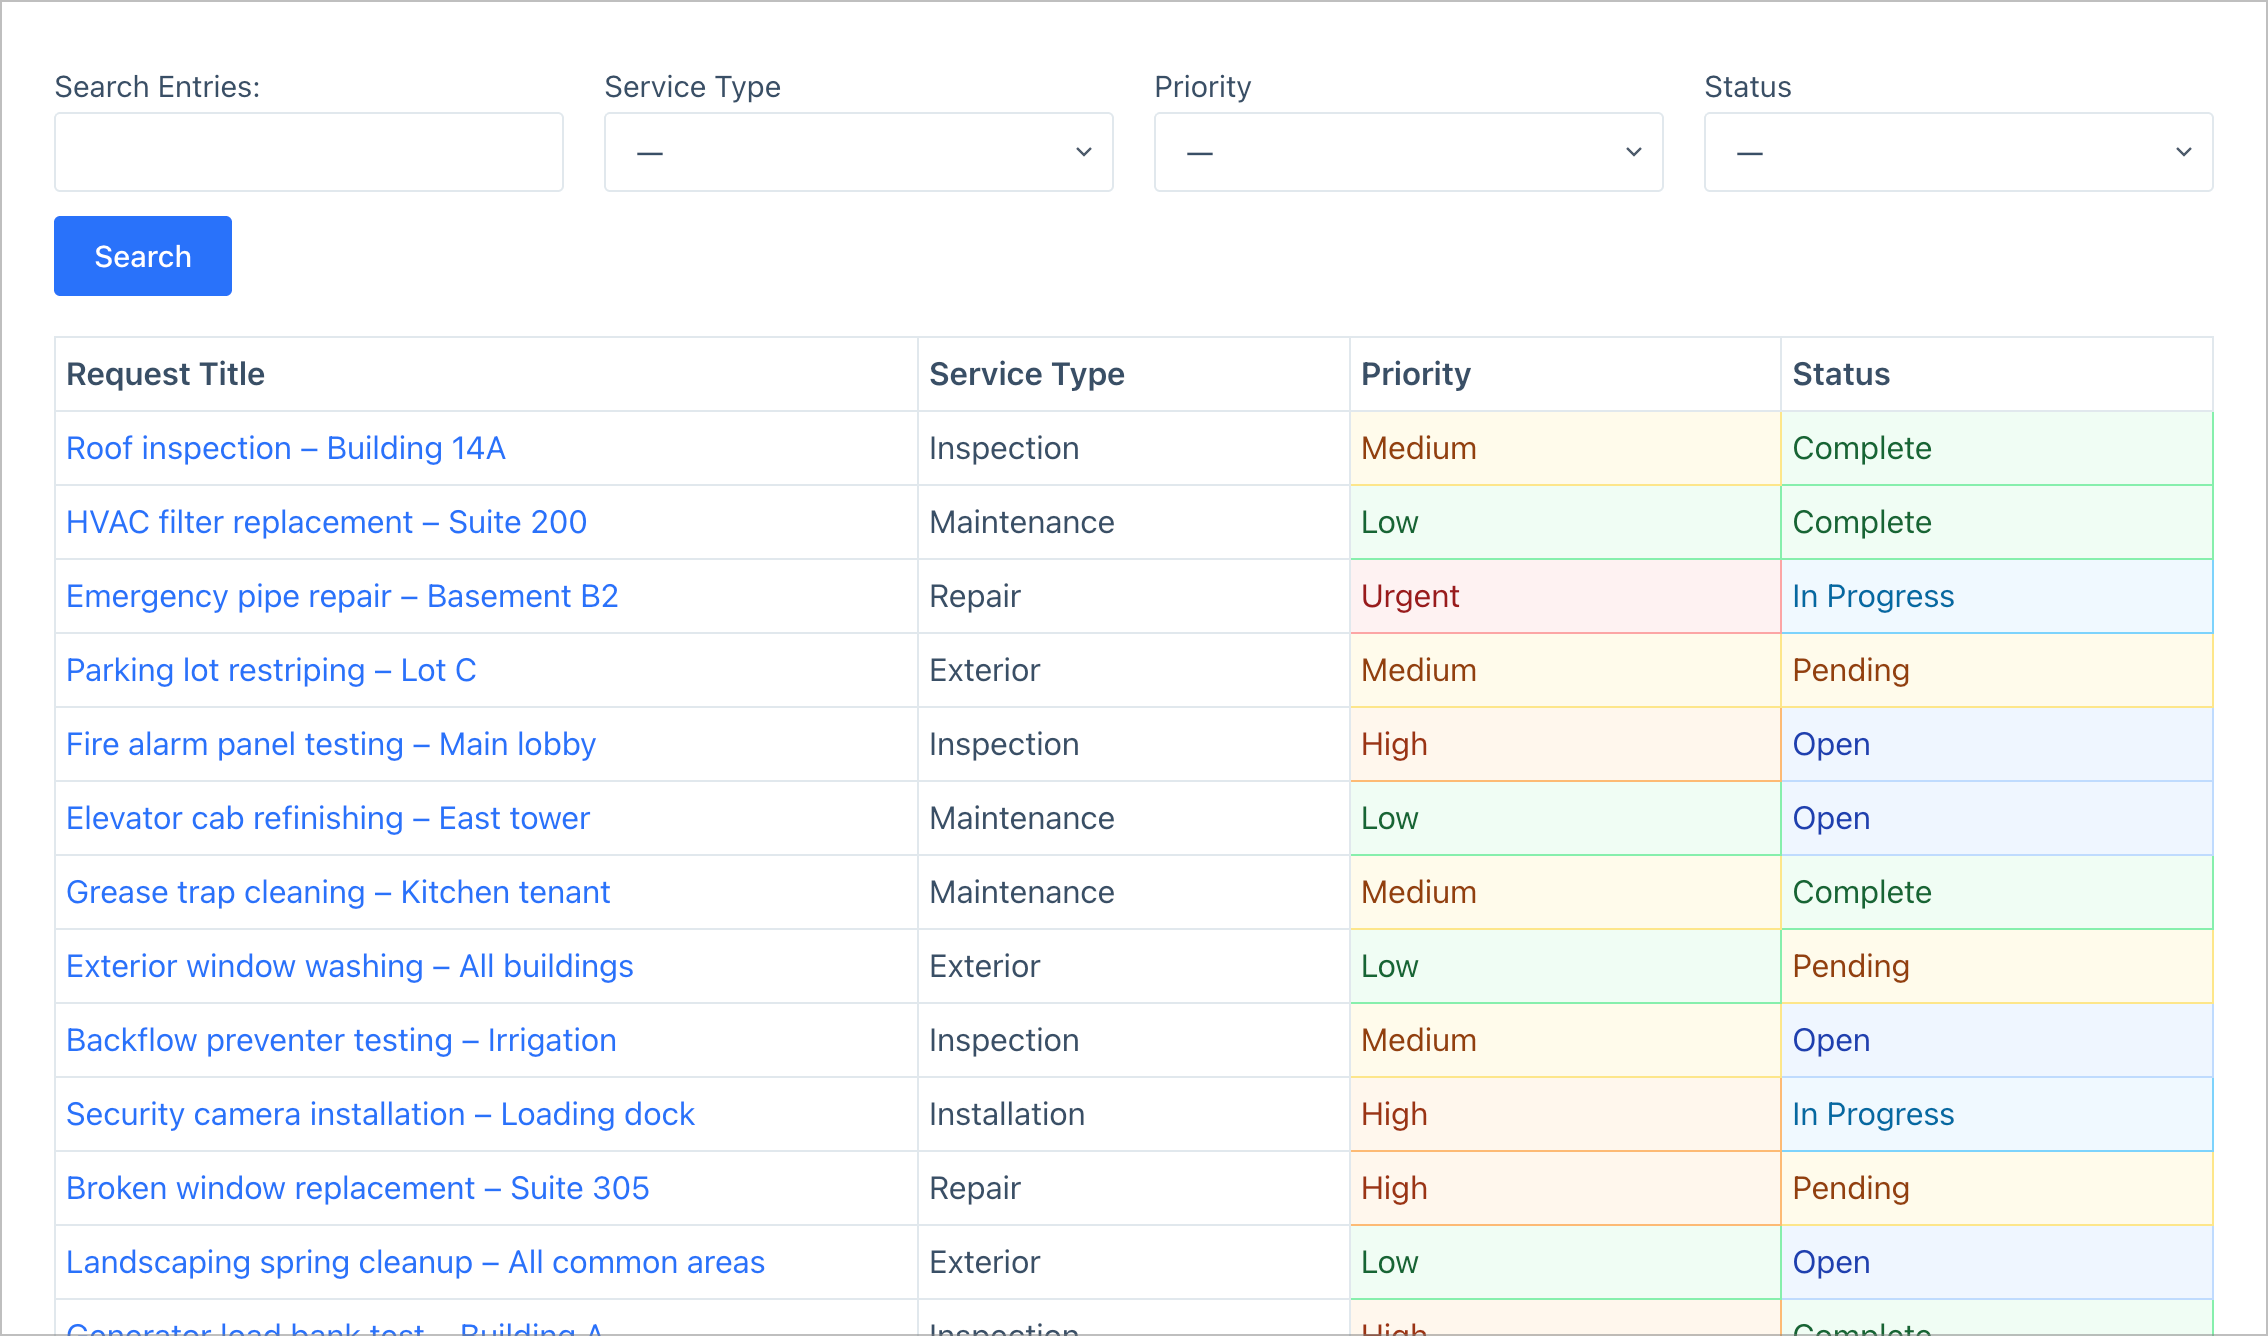
Before we dive in, here’s what the finished portal looks like. Admins get a searchable dashboard where they can view and manage all incoming requests:
Clicking into a request reveals full details, where admins can update the status and add completion notes:

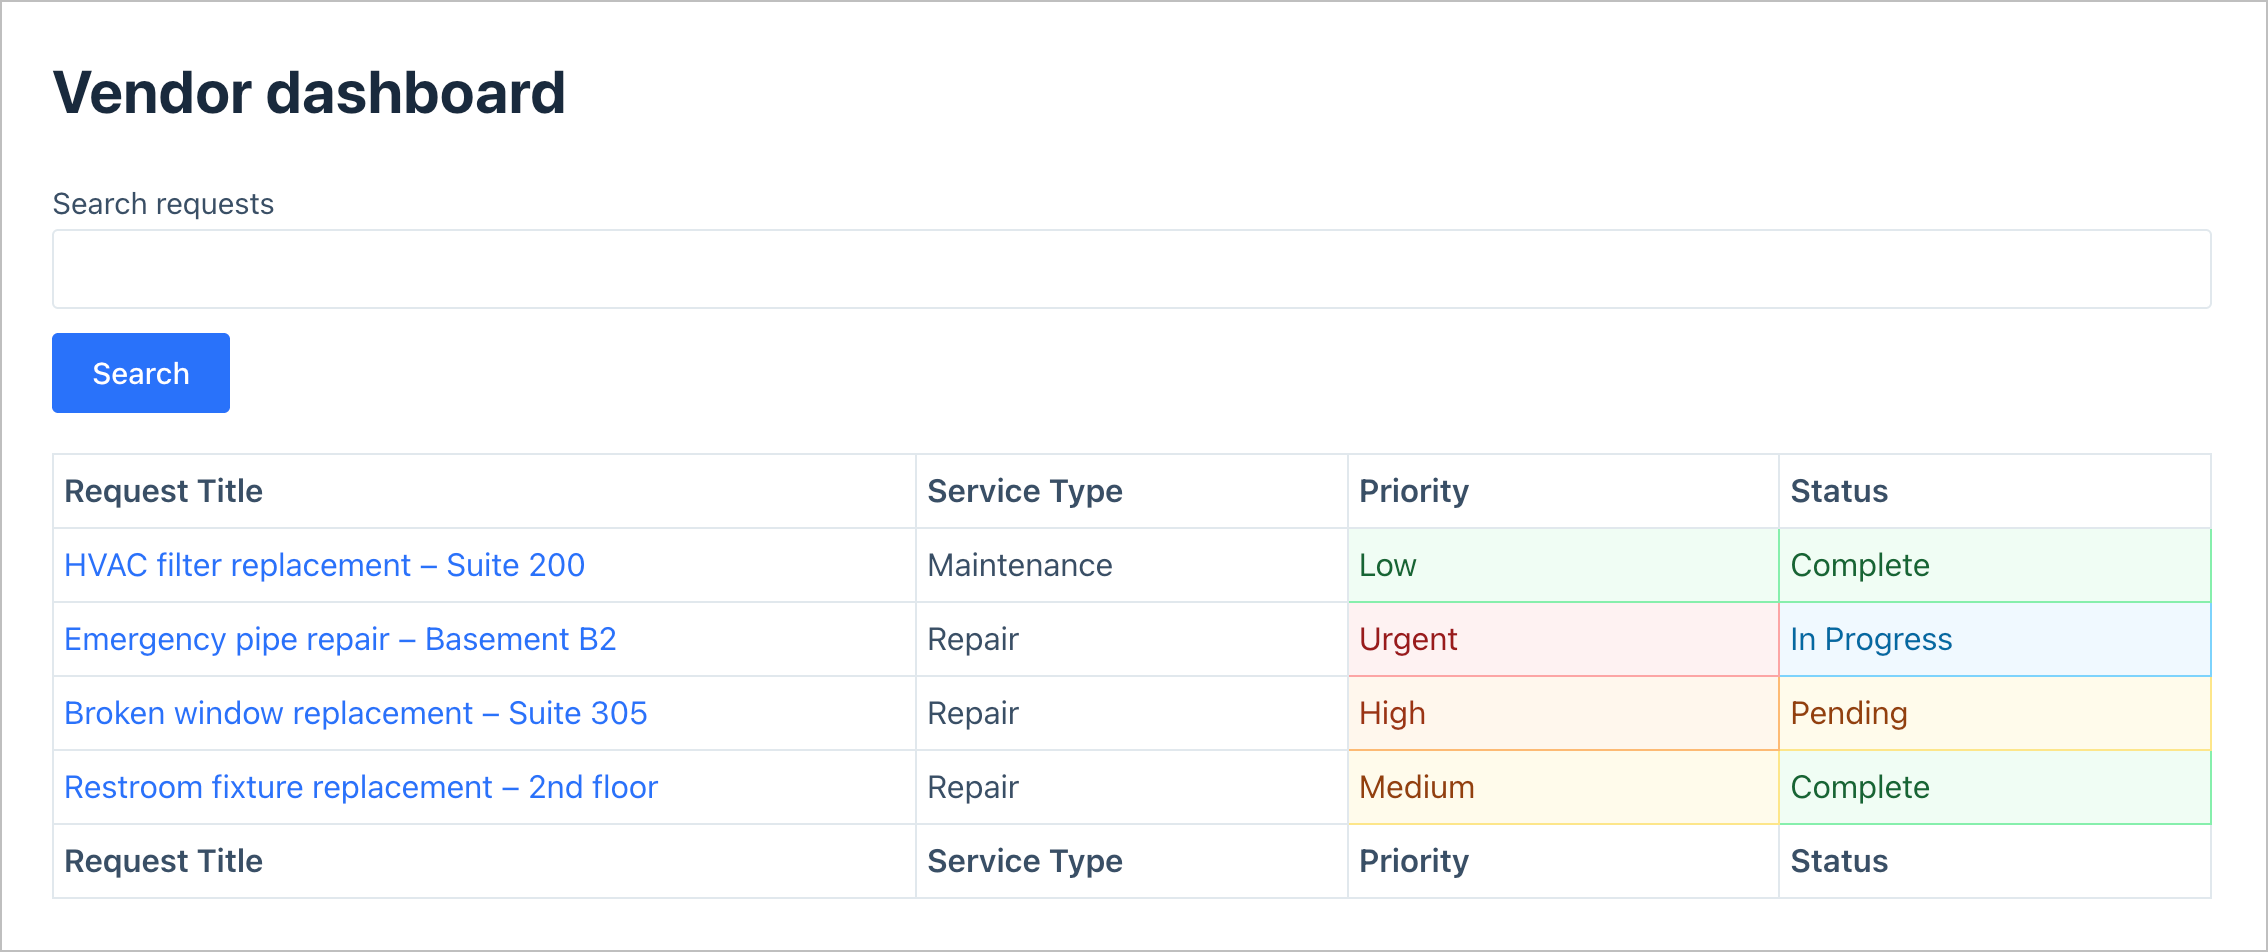
Vendors have their own dashboard where they can monitor their requests, check the status, and update details—all from the front end:
Wanna try it?
Spin up a demo
See what you can build with GravityView — explore the live demo.

What you’ll need
- Gravity Forms – for building the service request submission form and configuring notification emails
- Gravity Forms User Registration Add-On (optional) – for allowing vendors to register and log in to your site
- GravityView Pro – for displaying entries on the front end, enabling front-end editing, and filtering entries by the logged-in user
Step 1: Create the service request form
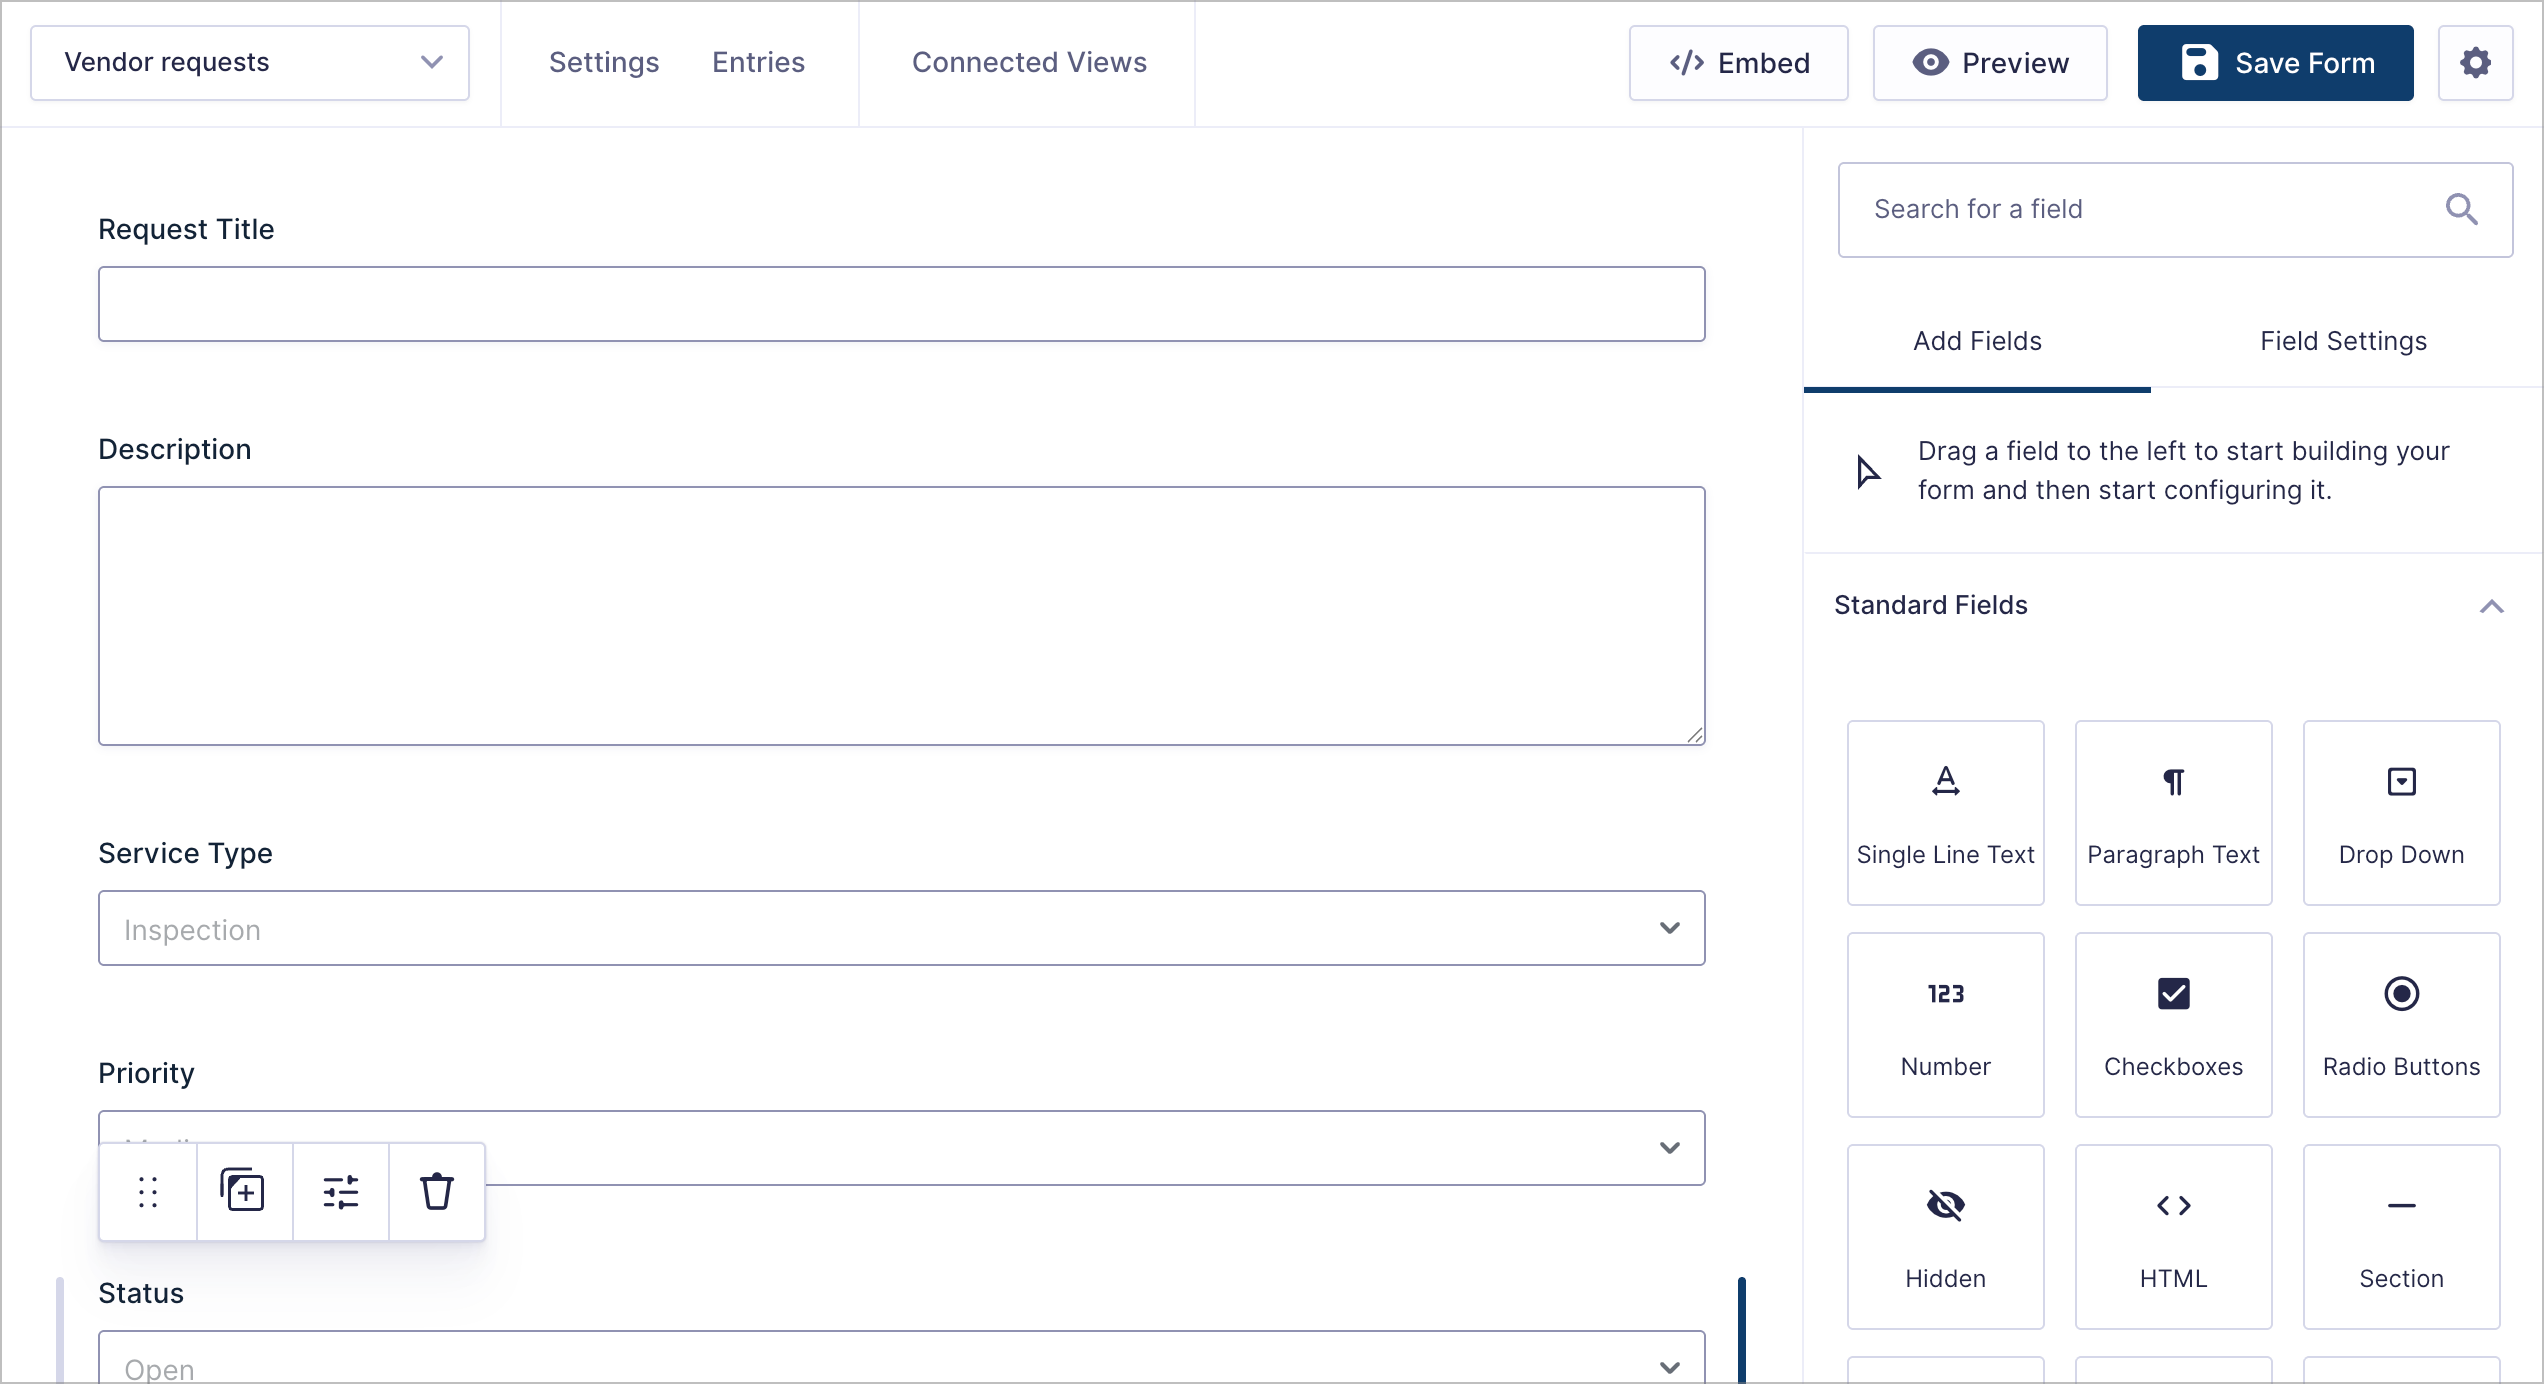
First, we’ll create a new Gravity Forms form to collect service requests. Hover over Forms in the WordPress admin menu and click New Form. I’ll name mine “Vendor requests.”
We’ll add the following fields:
- Request Title (Single Line Text) — a short summary of the request
- Description (Paragraph Text) — detailed information about the service needed
- Service Type (Drop Down) — options like Inspection, Maintenance, Repair, Exterior, and Installation
- Priority (Drop Down) — Low, Medium, High, or Urgent
- Status (Drop Down) — Open, Pending, In Progress, and Complete, with a default value of “Open”
- Vendor Notes (Paragraph Text) — a space for vendors to add special instructions or access details
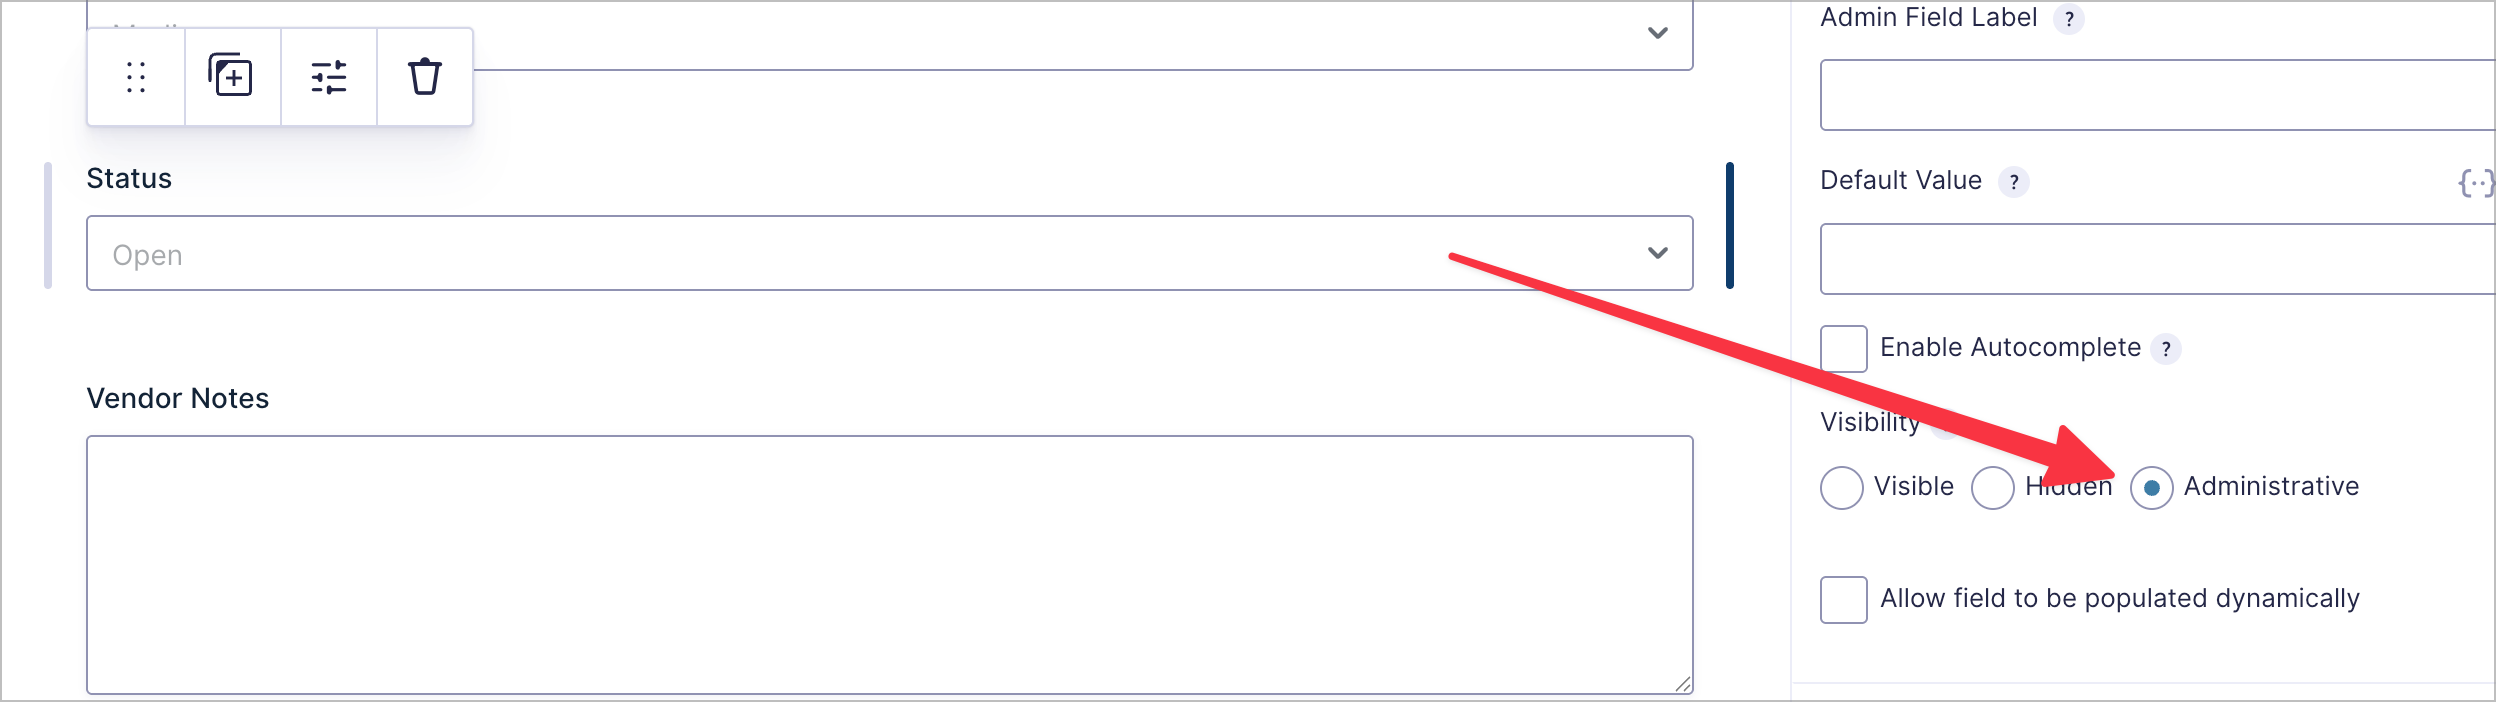
The Status field is key as this is what admins will use to track progress. Since vendors shouldn’t be able to change the status themselves, we’ll set its visibility to Administrative. Click on the Status field, then under Visibility in the field settings panel, select Administrative.
Next, we’ll add a Cancel request field. This is a Radio Button field with a single option: “Confirm cancellation.” We only want this field to appear when a vendor is editing their request through GravityView, and only when the status is still “Open” or “Pending.”
To set this up:
- Set the field’s visibility to Administrative (so it won’t appear on the initial form submission)
- Enable Conditional Logic so the field only displays when the Status field is “Open” or “Pending”
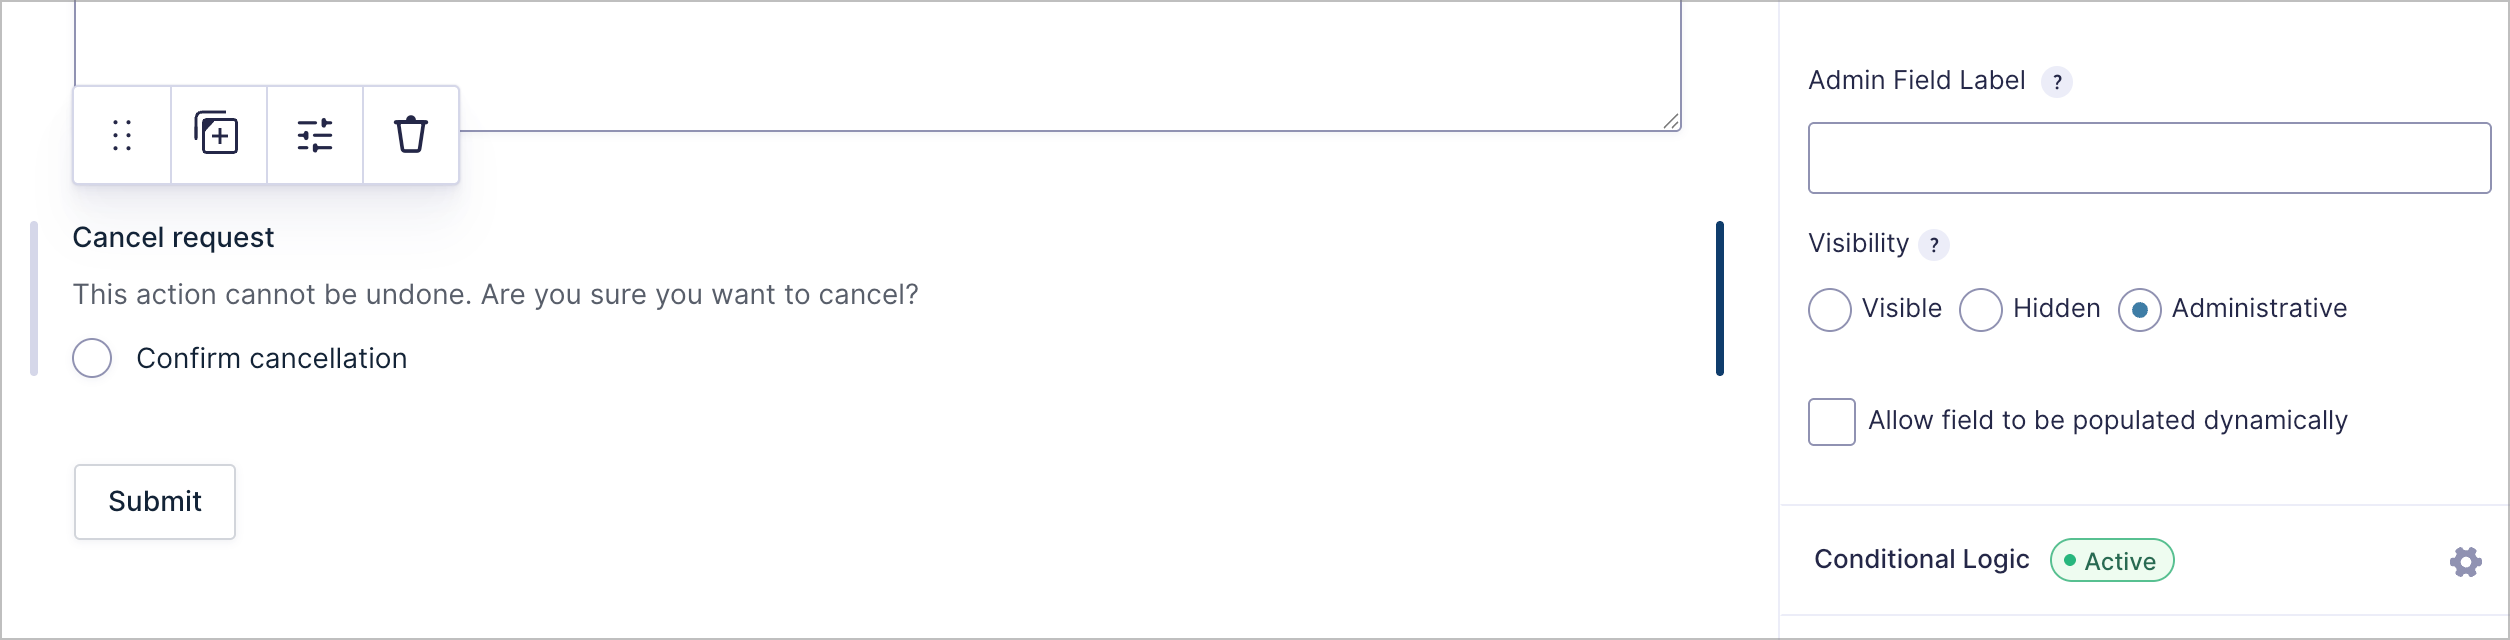
The conditional logic ensures that once a request is marked “In Progress” or “Complete,” the vendor can no longer cancel it. This prevents vendors from canceling work that’s already underway.
Step 2: Create the vendor dashboard View
Now that our form is ready, we’ll create the vendor-facing dashboard. This is where logged-in vendors will see a table of their own service requests.
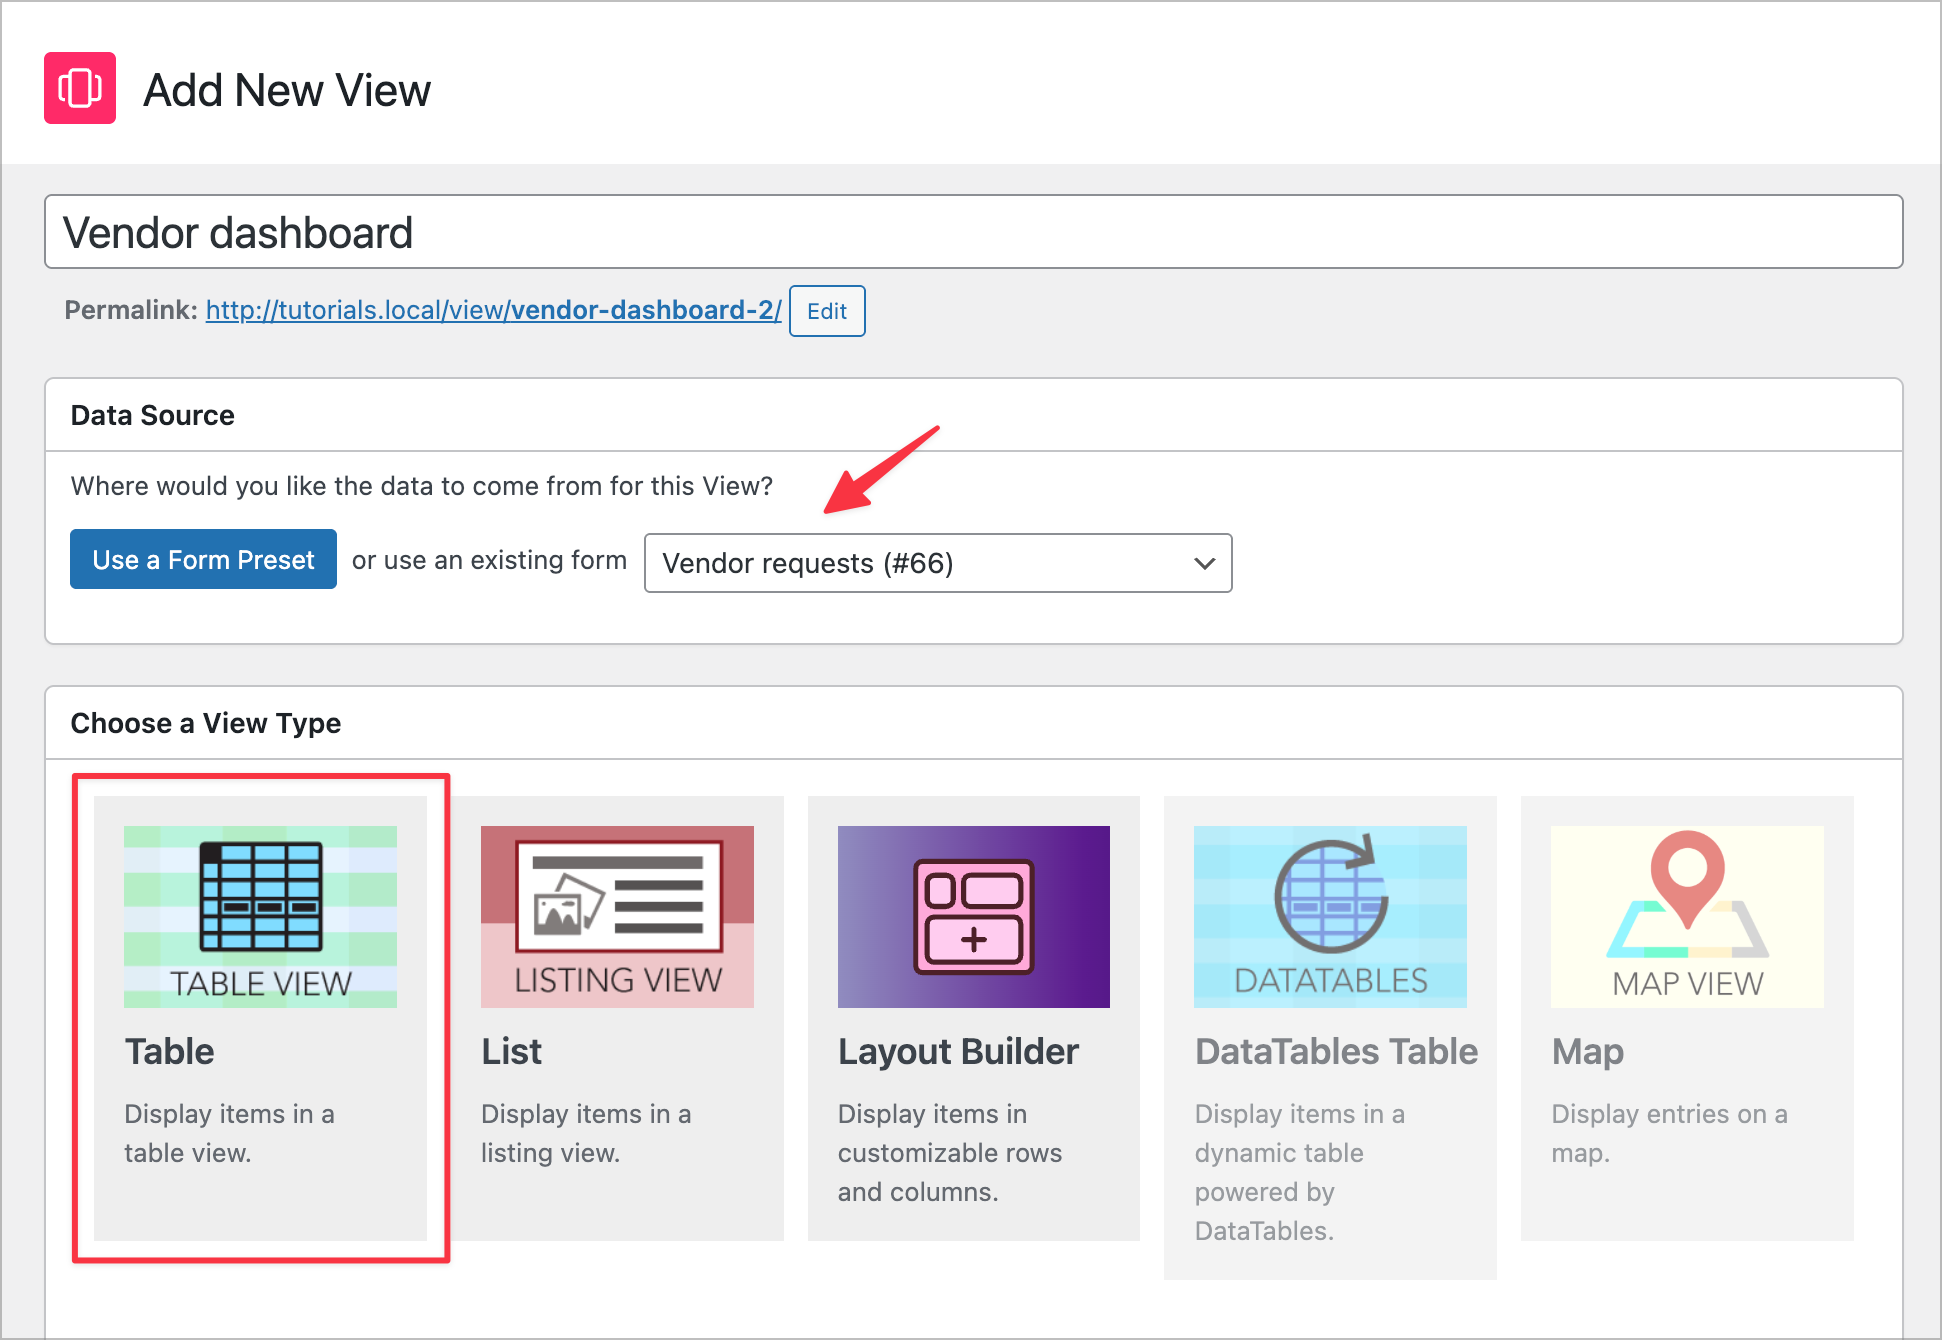
To create a new View, hover over GravityKit in the WordPress admin menu and click New View. Give it a name like “Vendor dashboard,” select the Vendor requests form as the data source, and choose the Table View type.
Configuring the Multiple Entries page
On the Multiple Entries Layout tab, we’ll add the following columns:
- Request Title
- Service Type
- Priority
- Status
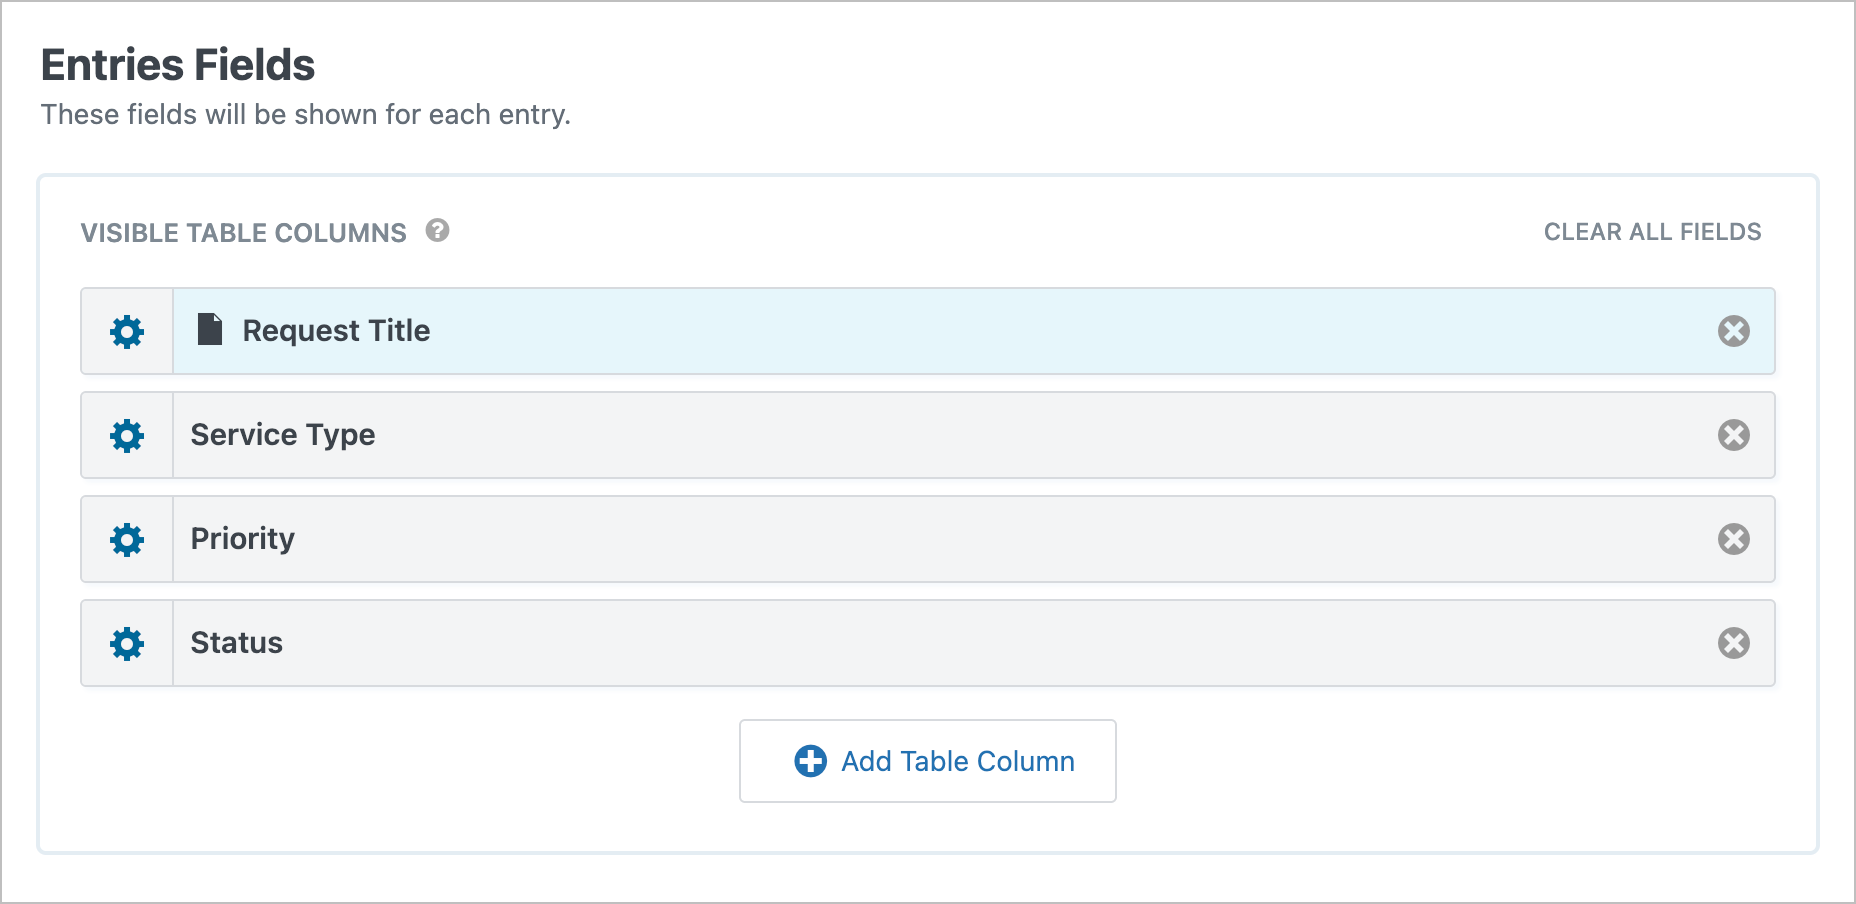
We’ll also configure the Request Title field to link each row to the Single Entry page, so vendors can click through to see full details.
Here’s the most important step: we need to make sure vendors can only see their own requests. Scroll down to the Advanced Filter section and add a conditional logic filter where Created By is Currently Logged-in User.
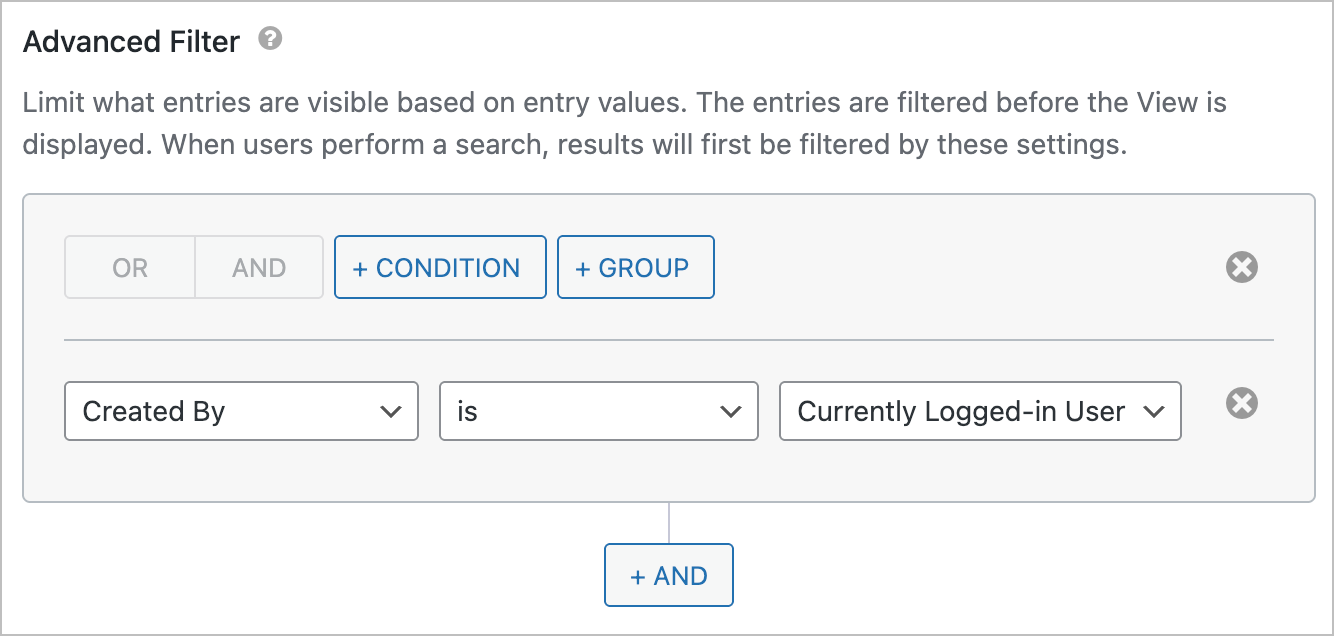
This filter ensures that each vendor only sees entries they submitted—no one else’s requests will be visible.
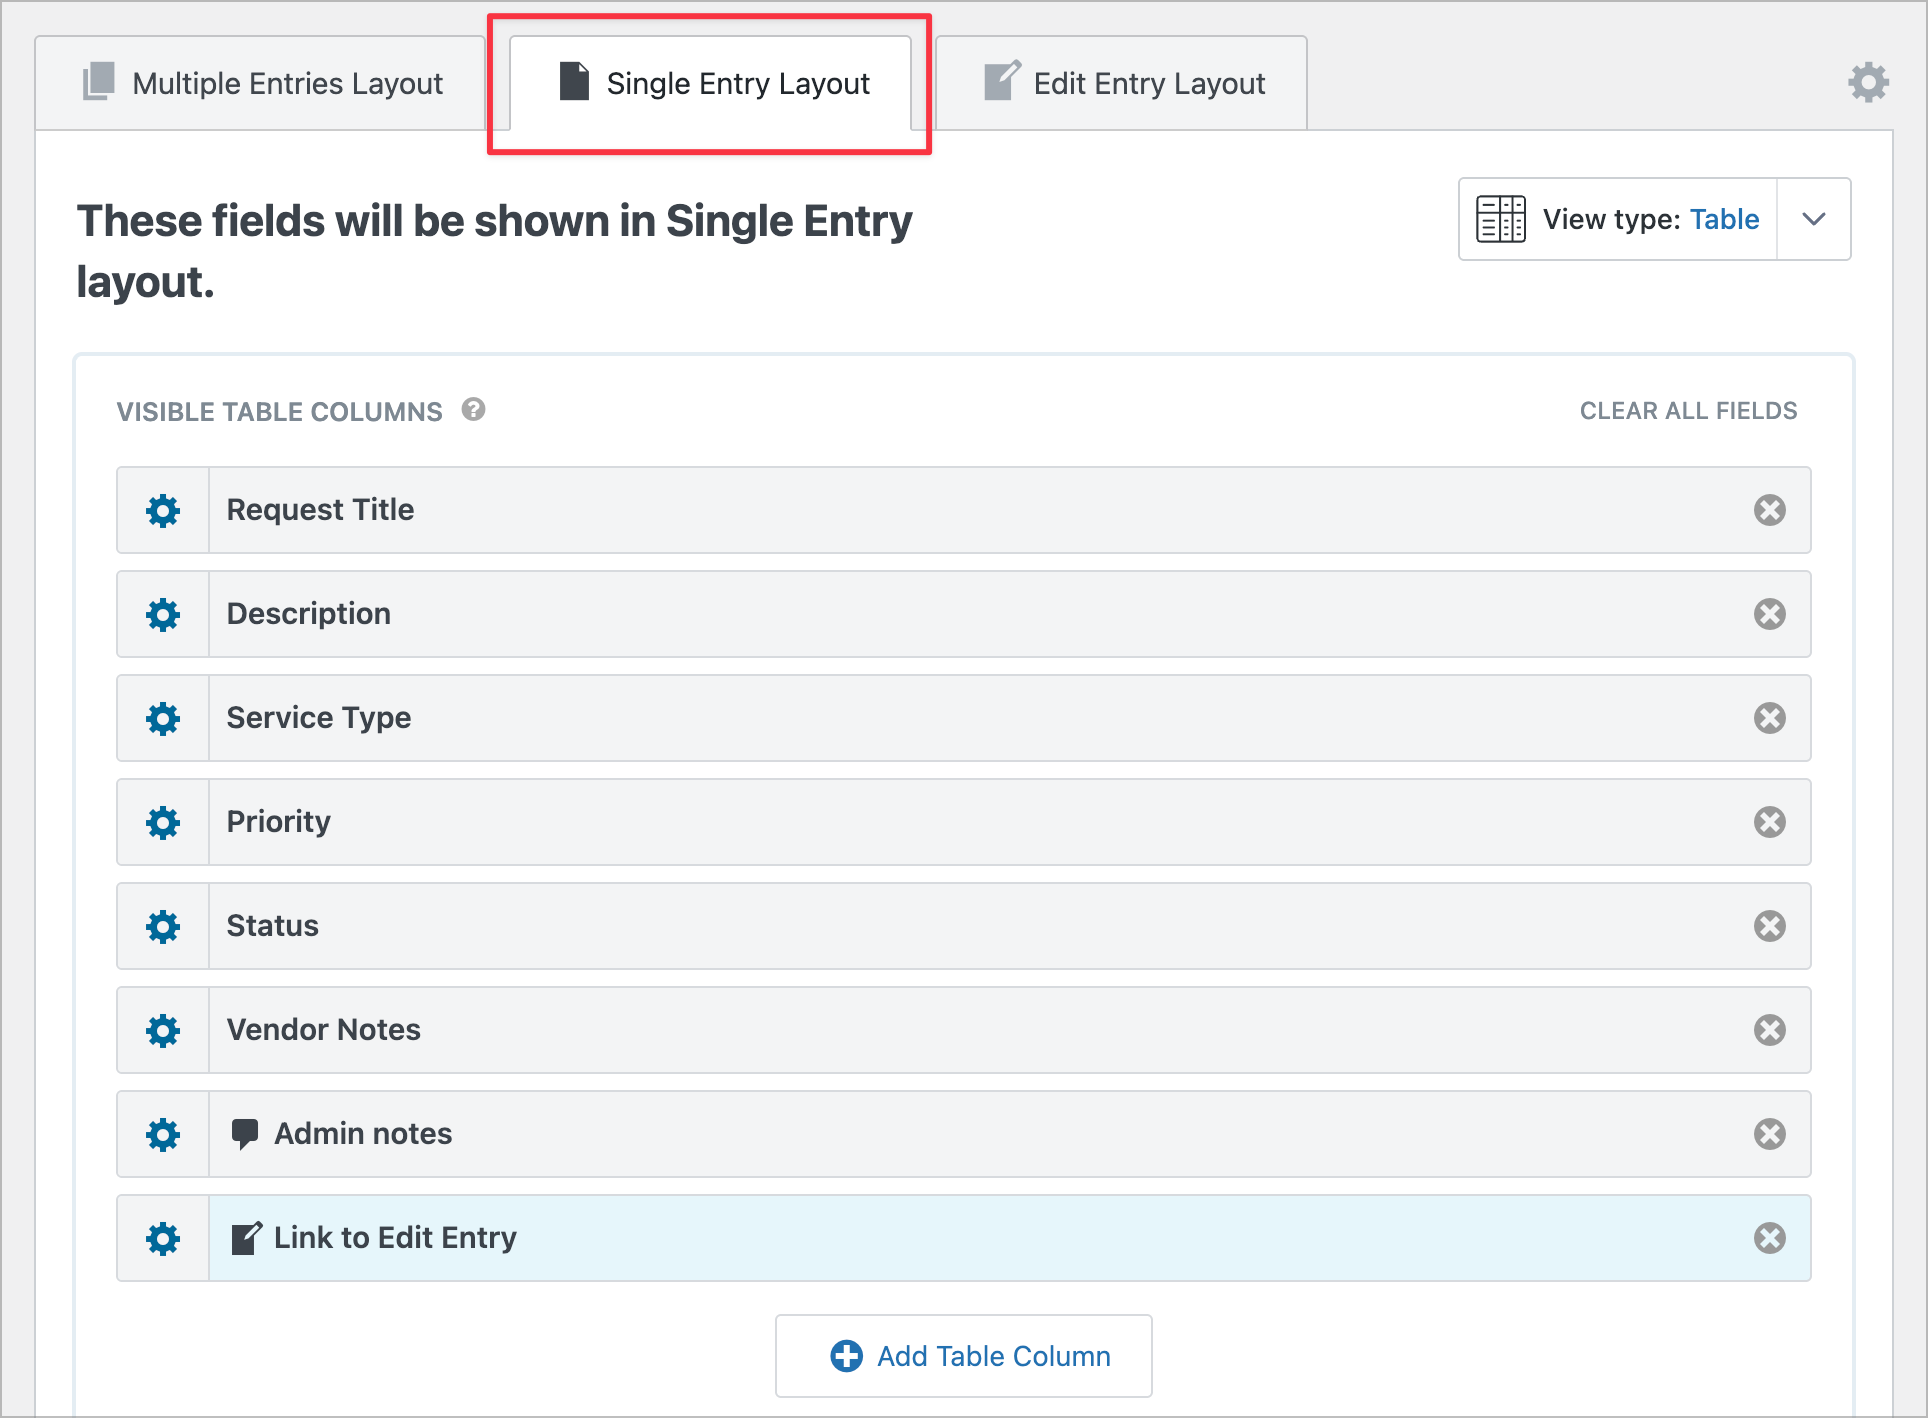
Configuring the Single Entry page
Next, click on the Single Entry Layout tab. Here we’ll add all the fields so vendors can see full details of their request. We’ll also include two special fields:
- Notes — a Gravity Form field that lets users attach notes to entries. This is a great way to communicate progress updates to vendors.
- Link to Edit Entry — this allows vendors to update their requests from the front end.
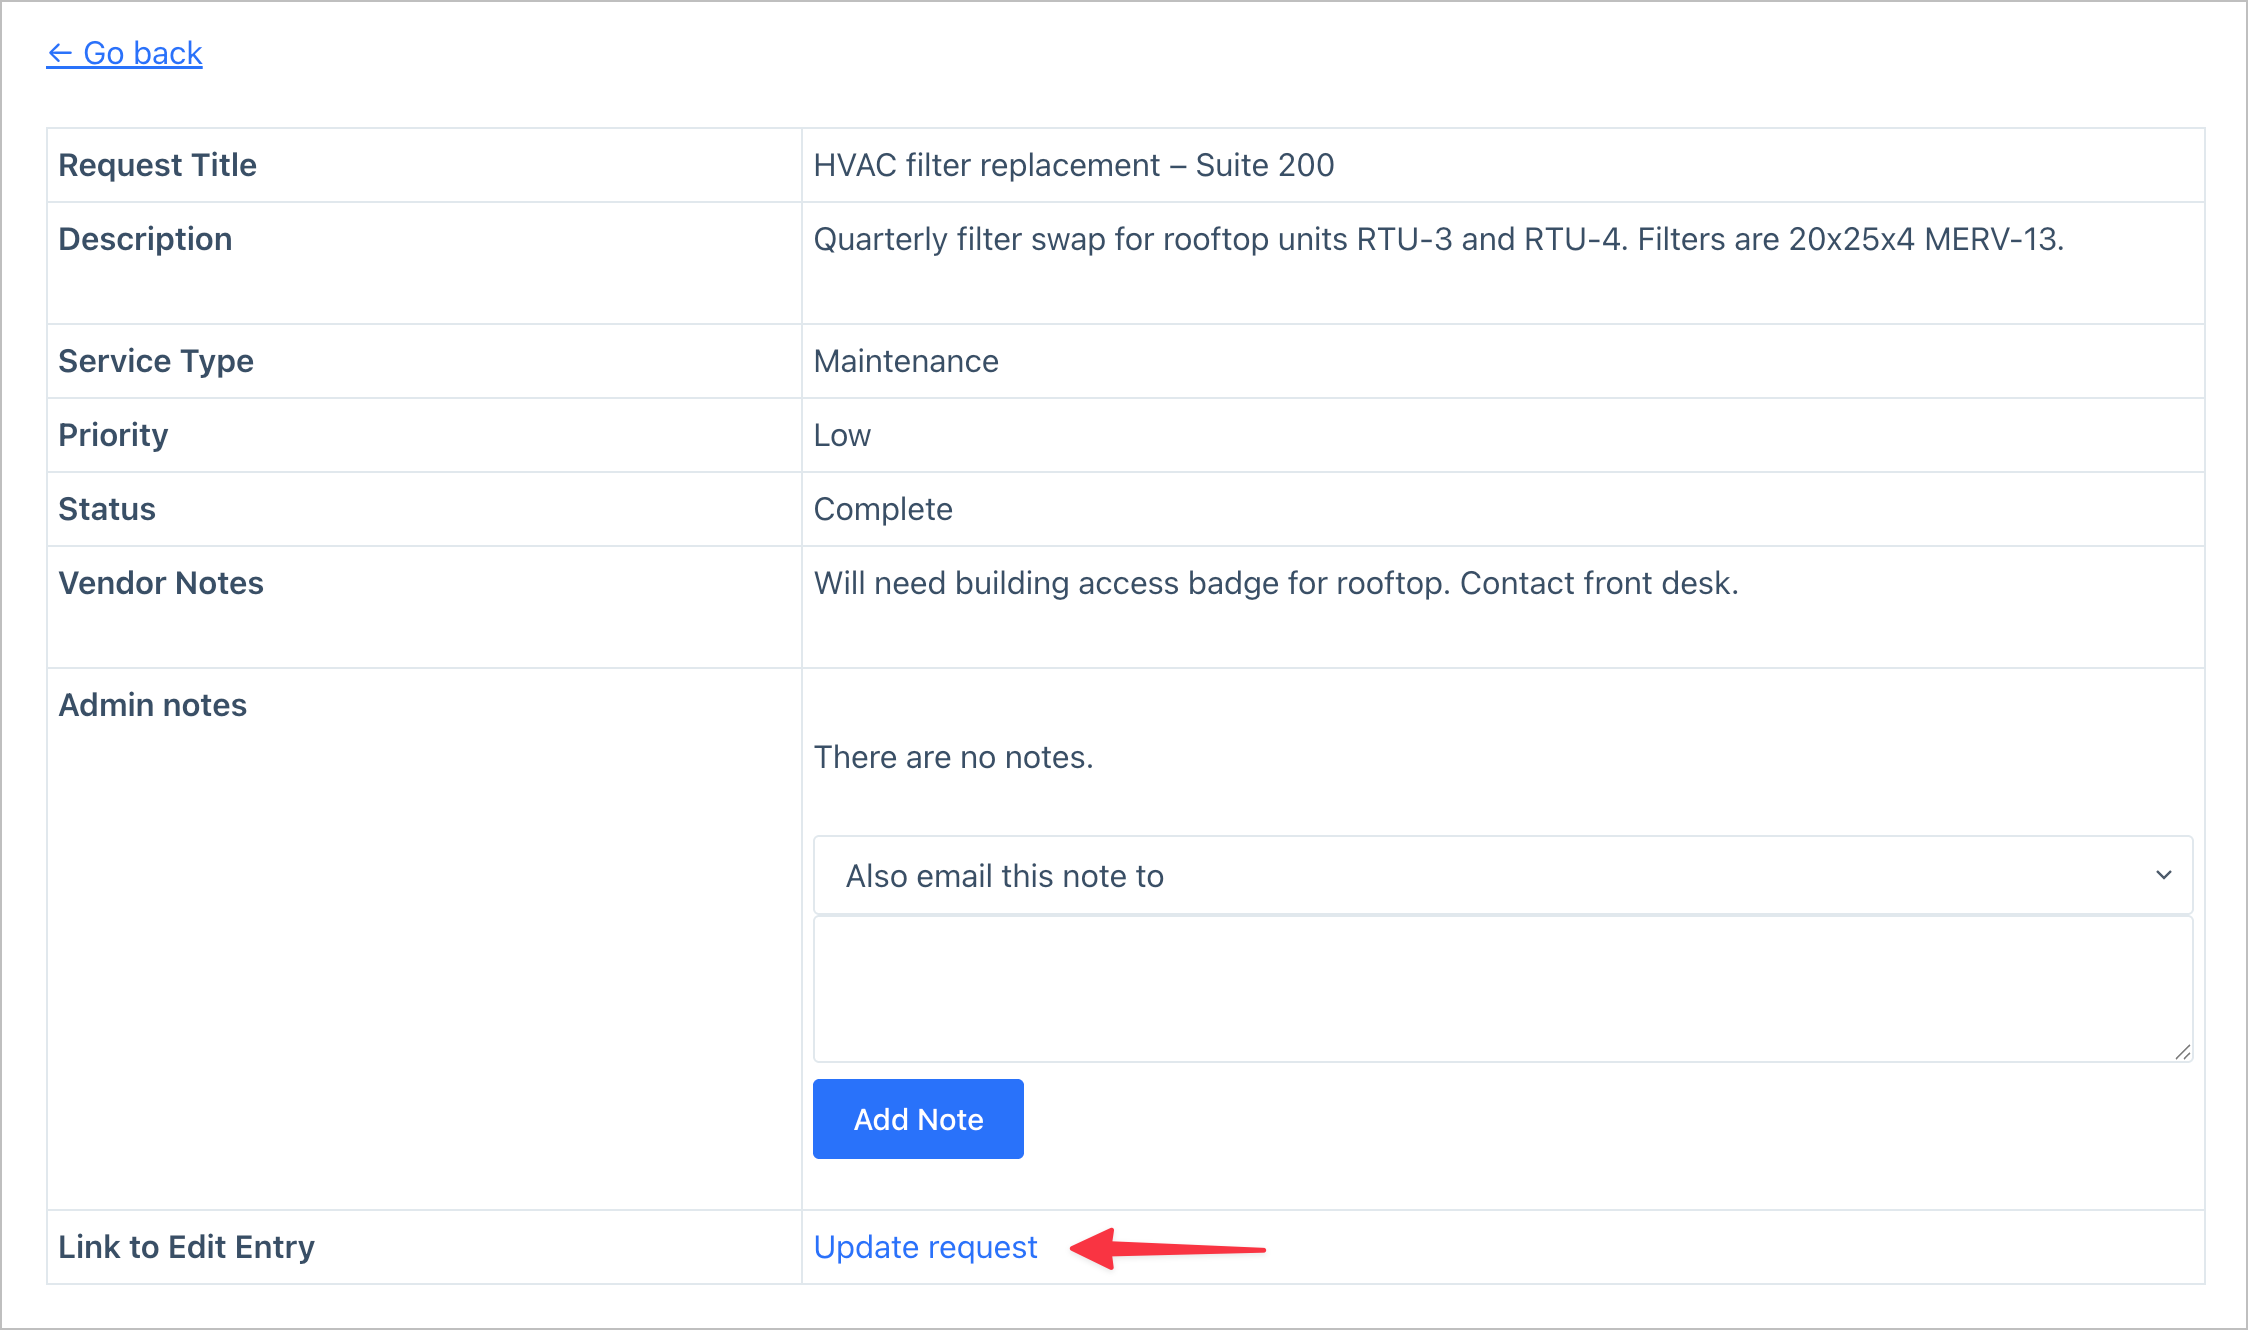
Here’s what the Single Entry page looks like on the front end. The vendor can see all request details, any admin notes, and an “Update request” link at the bottom:
Step 3: Make requests editable
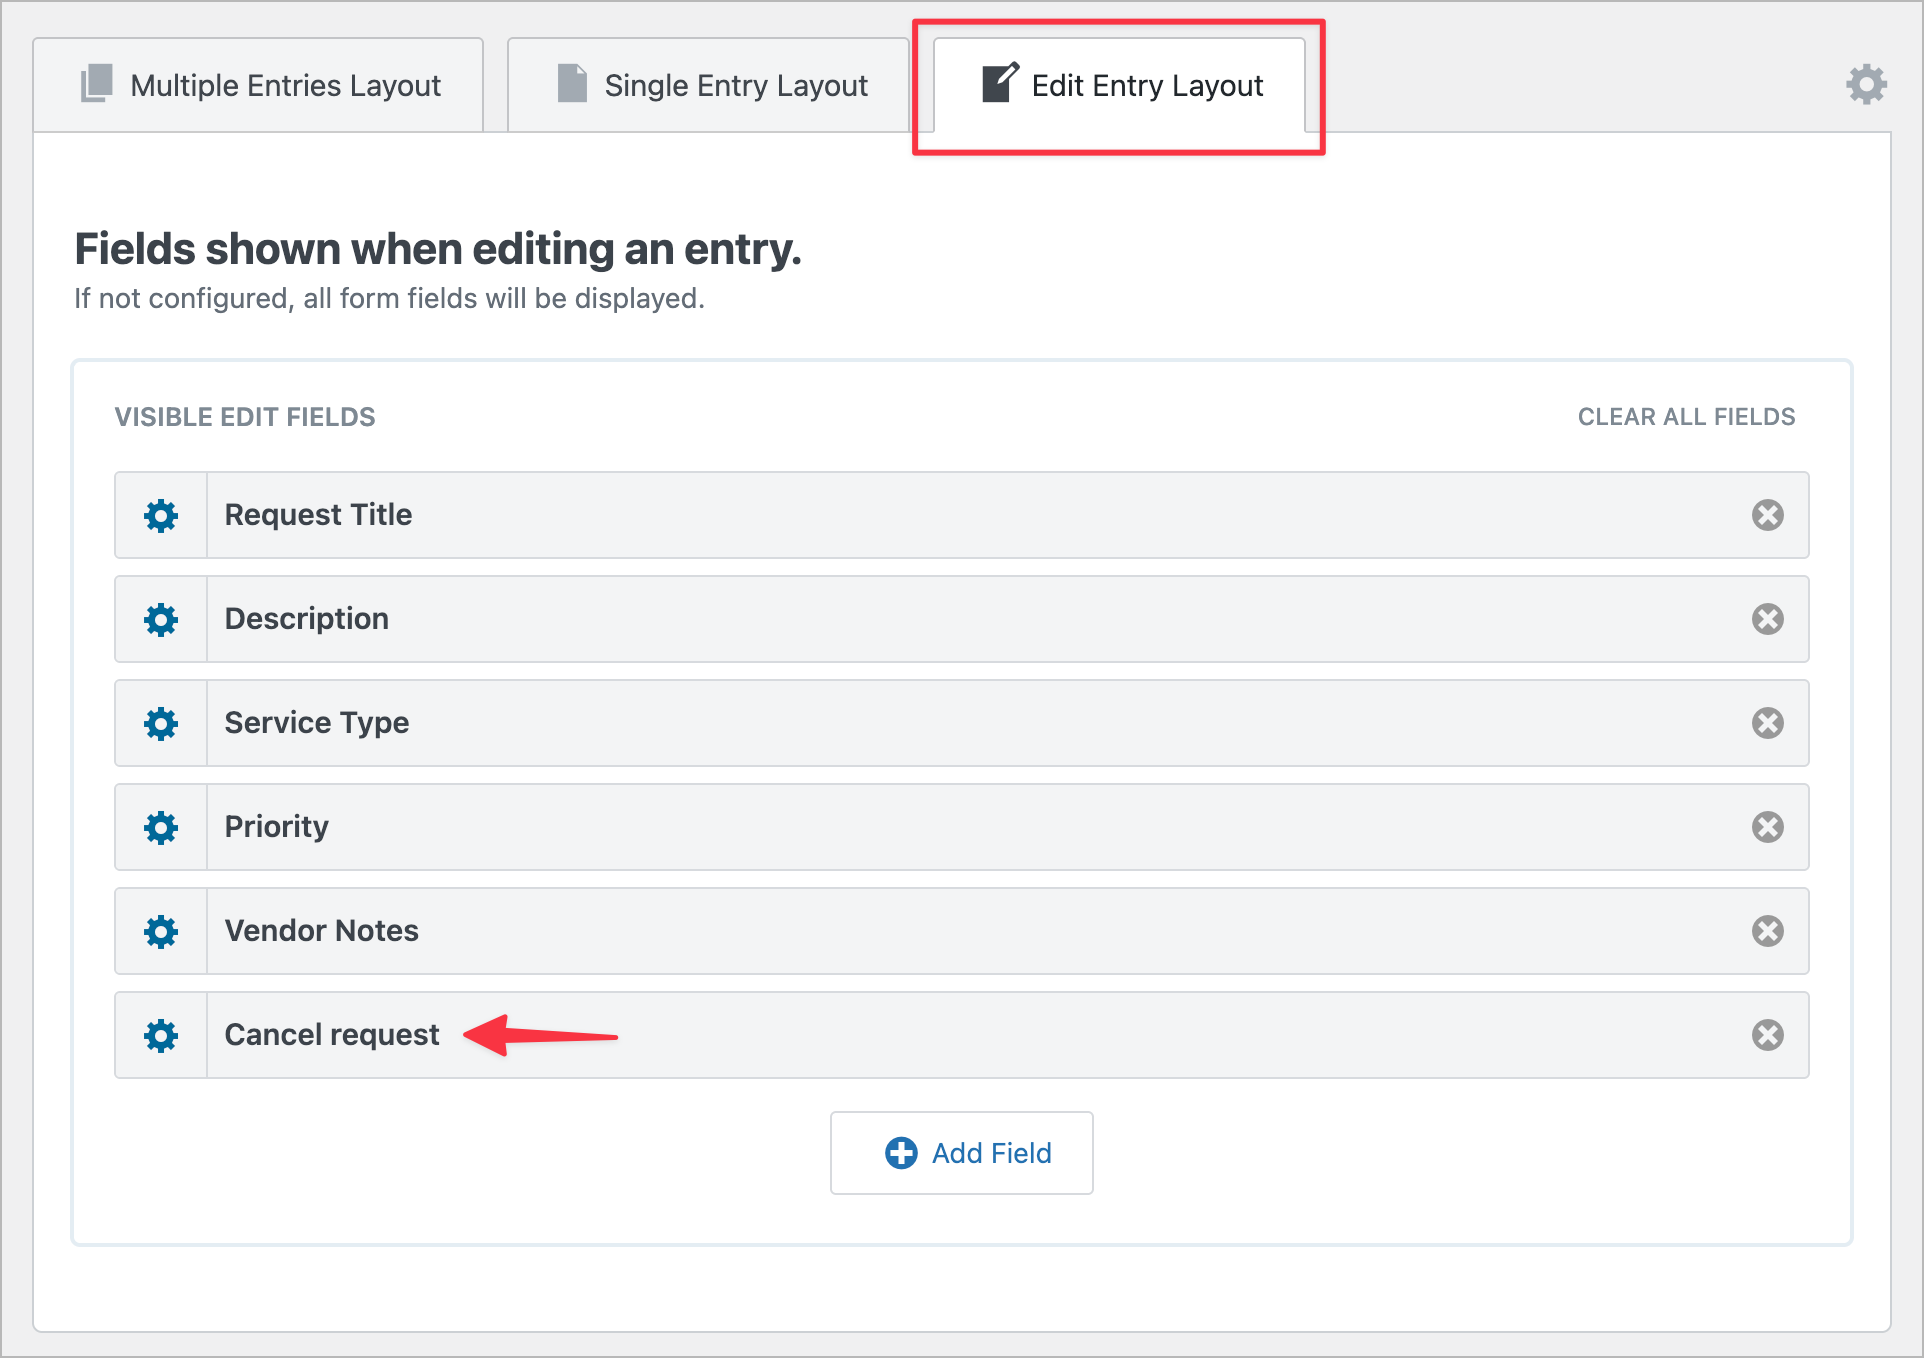
To let vendors edit their requests from the front end, we’ll need to configure the Edit Entry Layout tab in GravityView. Click on the Edit Entry Layout tab and add the following fields:
- Request Title
- Description
- Service Type
- Priority
- Vendor Notes
- Cancel request
Notice that we’re deliberately excluding the Status field as we don’t want vendors to change the status themselves. We are including the Cancel request field, though. Thanks to the conditional logic we set up earlier, this field will only appear when the status is “Open” or “Pending.”
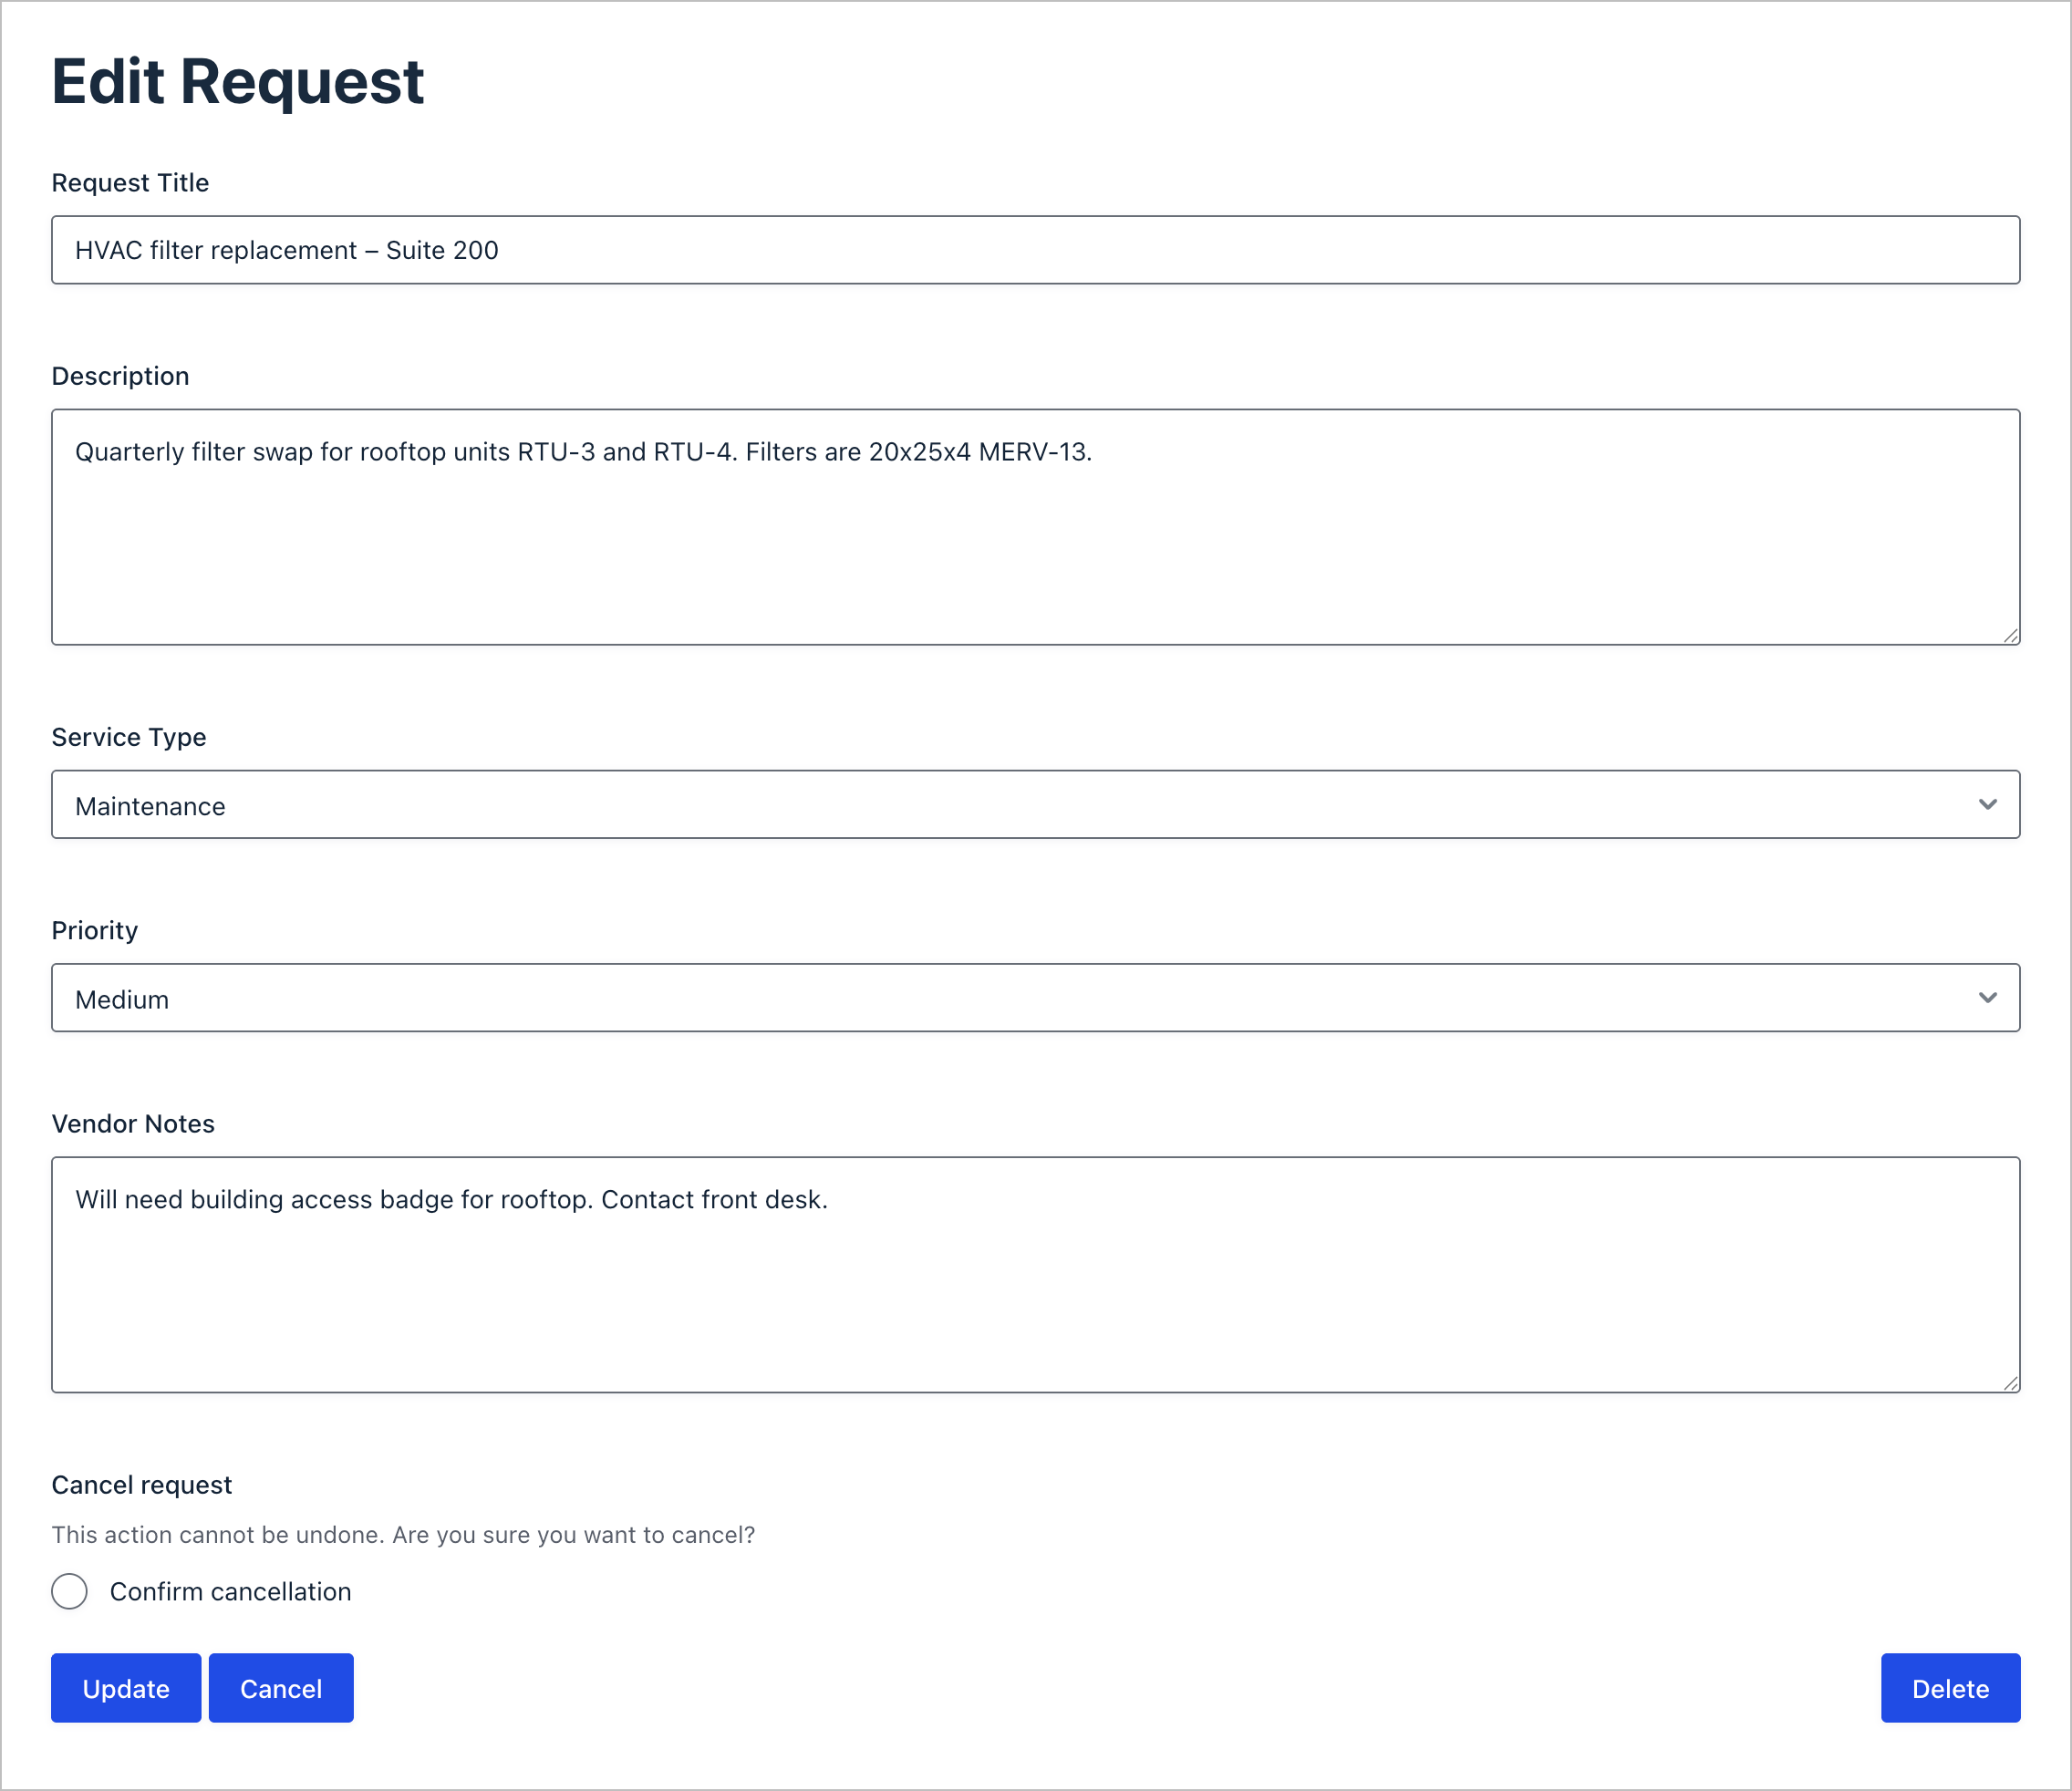
Here’s what the edit form looks like on the front end. Vendors can update their request details and, if the status allows it, cancel the request:
Step 4: Configure email notifications
To keep everyone in the loop, we’ll set up four notification emails in Gravity Forms. Navigate to your form settings by hovering over Forms, clicking on your Vendor requests form, then clicking Settings and Notifications.
1. Admin notification – this is the default notification that fires when a new request is submitted. It alerts the admin that a new service request has come in.
2. Vendor confirmation – this notification goes to the vendor to acknowledge receipt of their request. You can include merge tags like {Request Title:1} and {Status:5} to personalize the email.
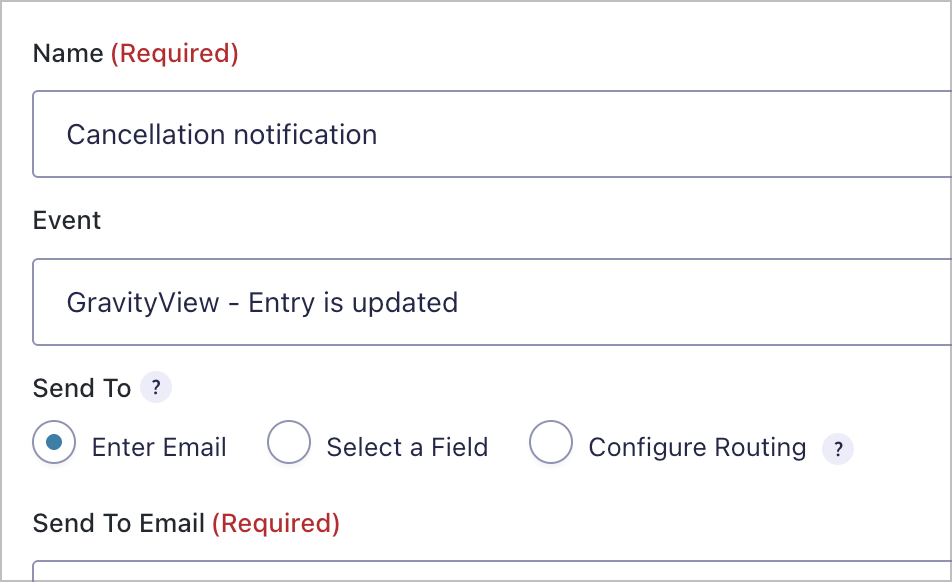
3. Cancellation notification – this one fires when a vendor cancels their request. Set the Event to GravityView – Entry is updated so it triggers when the entry is edited through GravityView.
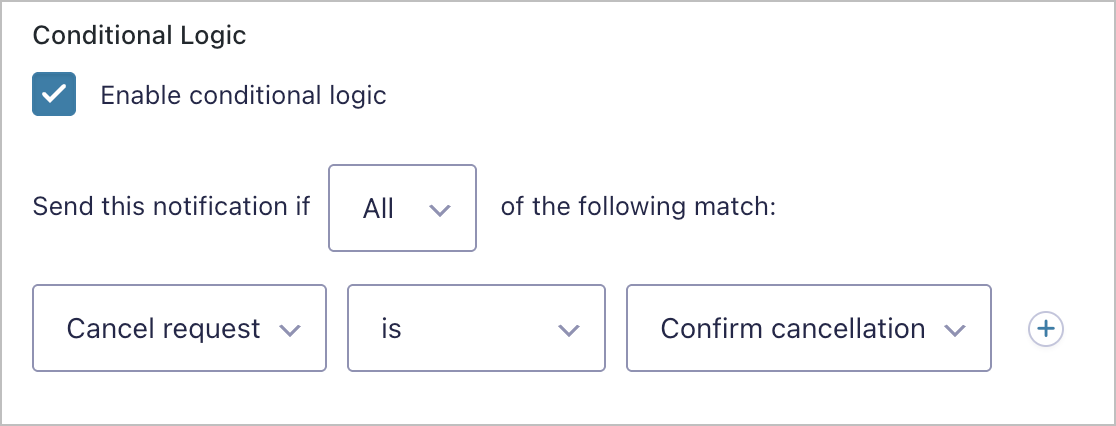
Then, enable Conditional Logic and configure it to send the notification when the Cancel request field is Confirm cancellation.
4. Completion notification – this notifies the vendor when their request is marked “Complete.” Set the Event to GravityView – Entry is updated, and add conditional logic so it only fires when the Status field is “Complete.”
Step 5: Create the admin dashboard
Finally, we’ll create a separate View for admins. This one won’t have the “Created By” filter, so admins can see all requests from every vendor.
Create a new Table View connected to the same Vendor requests form. Add a search bar with filters for Service Type, Priority, and Status so admins can quickly find and manage specific requests.
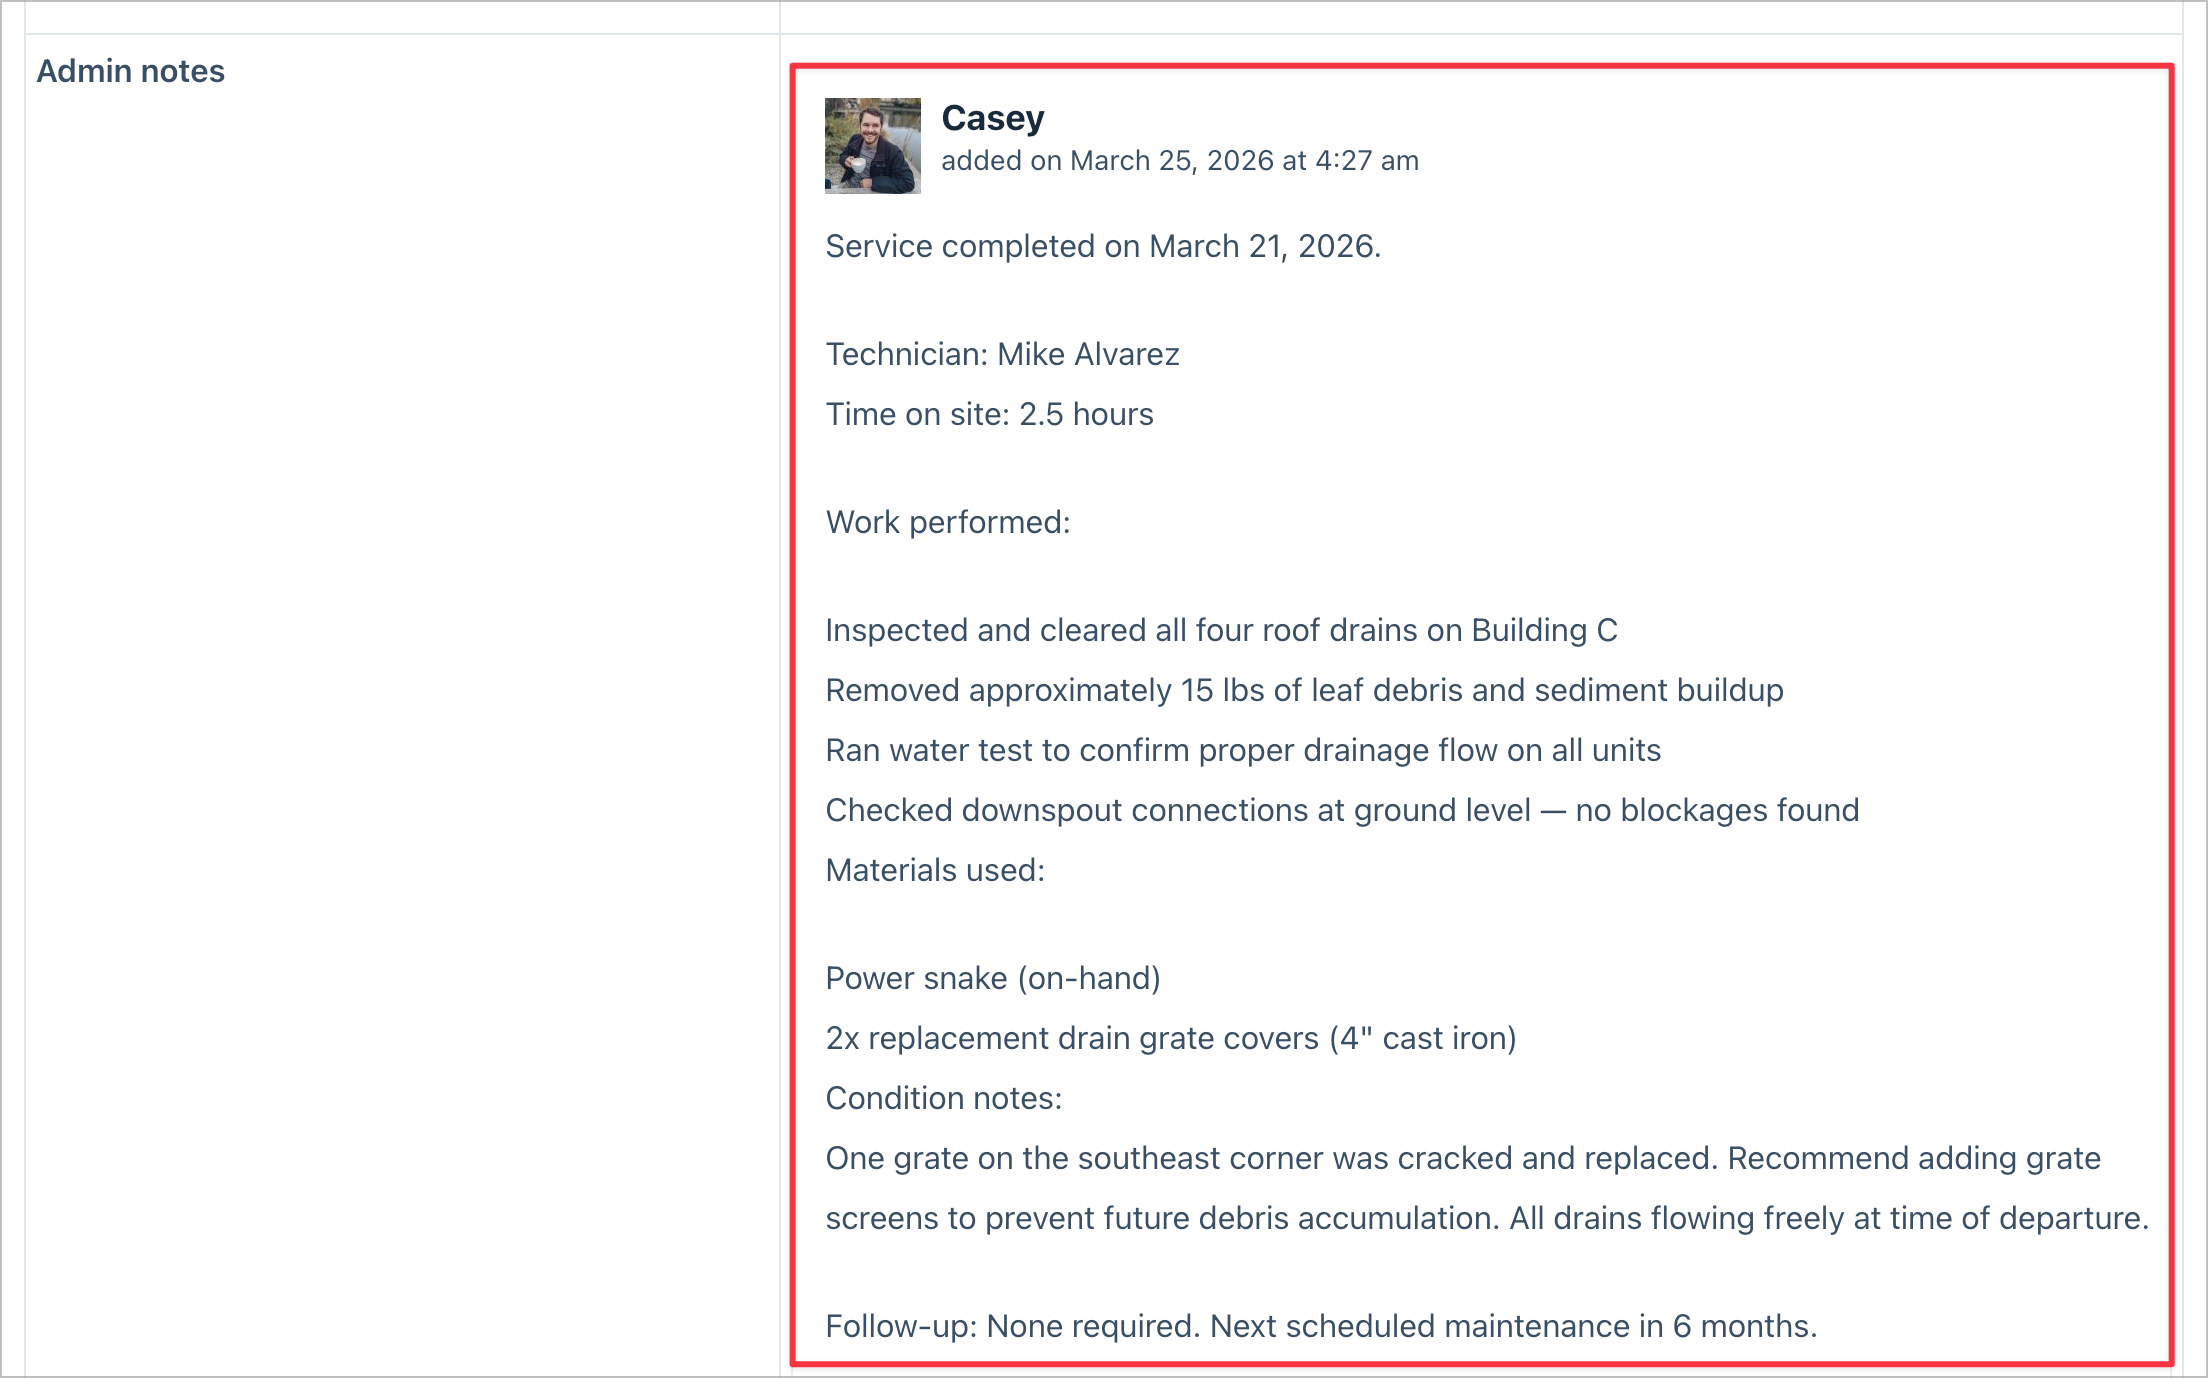
On the Single Entry page for the admin View, include all fields plus the Notes field (renamed to “Admin notes”). This is where admins can attach completion reports, progress updates, or any other notes that will be visible to the vendor in their dashboard.
Admins can also update the Status field directly from the Edit Entry page—changing it from “Open” to “Pending,” “In Progress,” or “Complete” as work progresses.
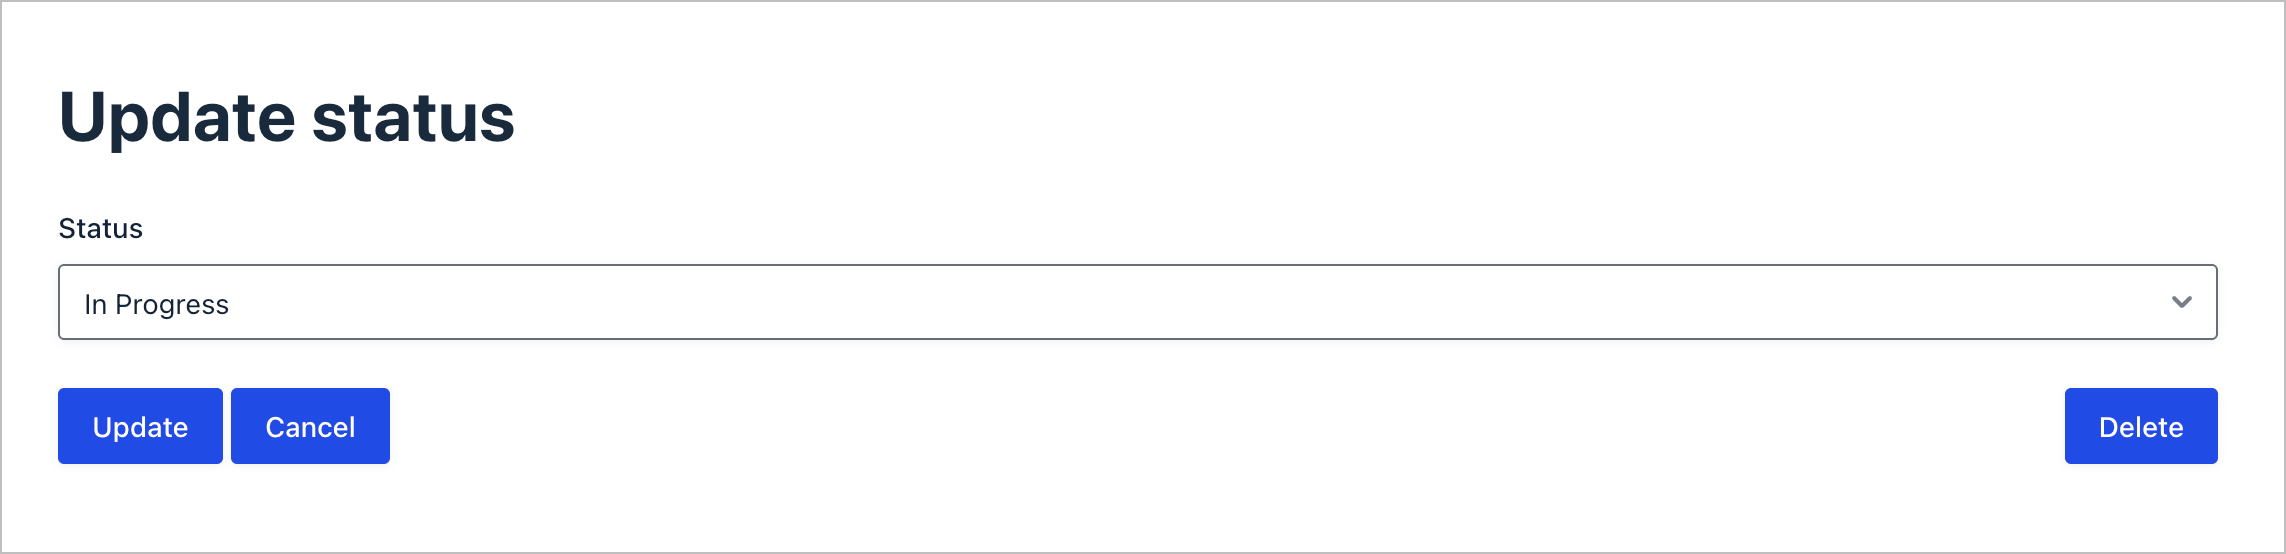
When the status is set to “Complete,” the completion notification fires automatically, letting the vendor know their request has been fulfilled.
That’s it!
Bonus: Optional enhancements
Want to take your vendor portal even further? Here are a couple of optional enhancements you can add:
- DataTables layout – swap the standard table for a DataTables-powered layout with built-in sorting, searching, and pagination. This is especially useful if you expect a high volume of requests.
- Entry Revisions – track every change vendors make to their requests, giving you a complete audit trail of all edits.
Ready to build your vendor portal?
In this tutorial, we built a complete vendor service request portal on WordPress entirely with Gravity Forms and GravityView Pro. No custom code required! Your vendors can submit requests, track their status, edit details, and cancel when needed. Admins get a centralized dashboard with search, status management, and notes for completion reports.
The best part? This same setup works for any scenario where you need a self-service portal. This includes client project requests, tenant maintenance requests, field service work orders, and more.
So what are you waiting for? Check out GravityView Pro and start building your vendor portal today!

Helpful tips right in your inbox.
Subscribe to get the latest articles, information on releases and helpful Gravity Forms tips!
More articles

10 things you can ask AI to do with Gravity Forms (using the free GravityKit MCP)
See 10 practical things you can ask AI to do with Gravity Forms using the free GravityKit MCP: create forms, manage entries, build Views, and more.

Launch Log: theme template editing in Block MCP, Shield silentCAPTCHA for Zero Spam, and GravityView fixes
Block MCP adds safe theme template editing, Gravity Forms Zero Spam gains Shield silentCAPTCHA support, and GravityView fixes lightbox and notice bugs.

GravityKit turns 12: a year in review, and 30% off Lifetime All Access
GravityKit turns 12. A look back at a year of GravityView 3.0, GravitySearch, and AI-assisted building, plus a birthday sale on the Lifetime All Access Pass.
