Published
•
Updated
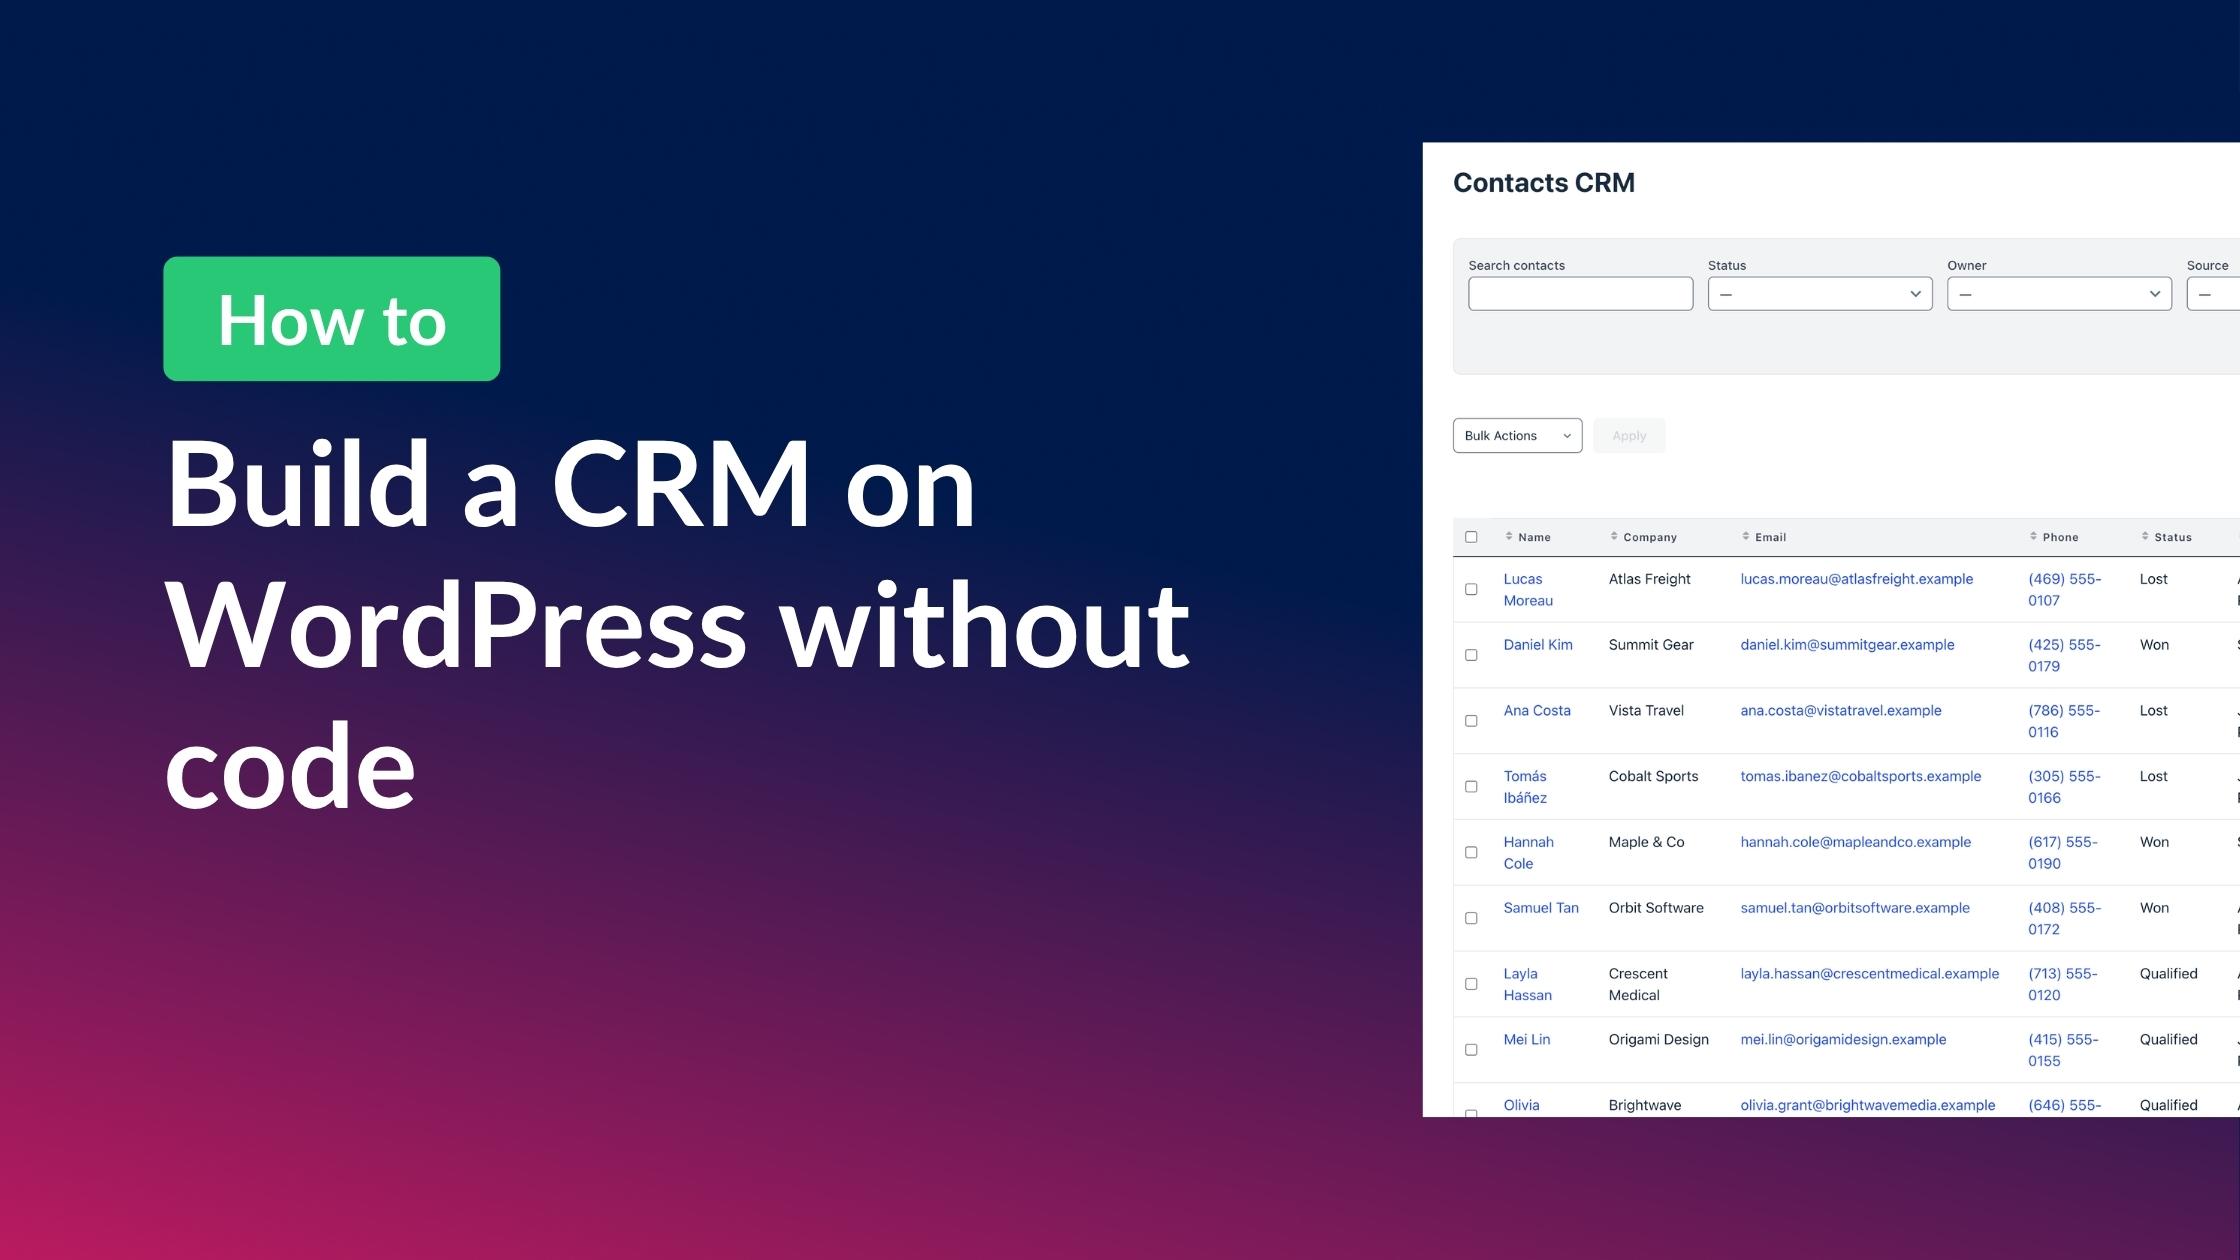
How to build a WordPress CRM without code (a contact database you own)
Build a simple WordPress CRM with GravityView. Turn the Gravity Forms entries you already collect into a no-code contact database you own, with no monthly fees.
If you collect contacts or leads through Gravity Forms, you already have the start of a CRM. The data is just stuck on the entries screen in your WordPress admin, where only you can see it. Most “WordPress CRM” advice tells you to install a separate CRM plugin or pay for a hosted service. But you don’t need either to keep a simple contact database.
In this tutorial, I’ll show you how to turn the form data you already collect into a working WordPress CRM using GravityView, a searchable, editable contact database that lives on your own site. No code, no monthly SaaS bill, and your data stays on your server. Let’s dive in.
Sneak peek
Before we build it step by step, here’s a preview of the finished system: a searchable, editable contact database running on your own WordPress site.
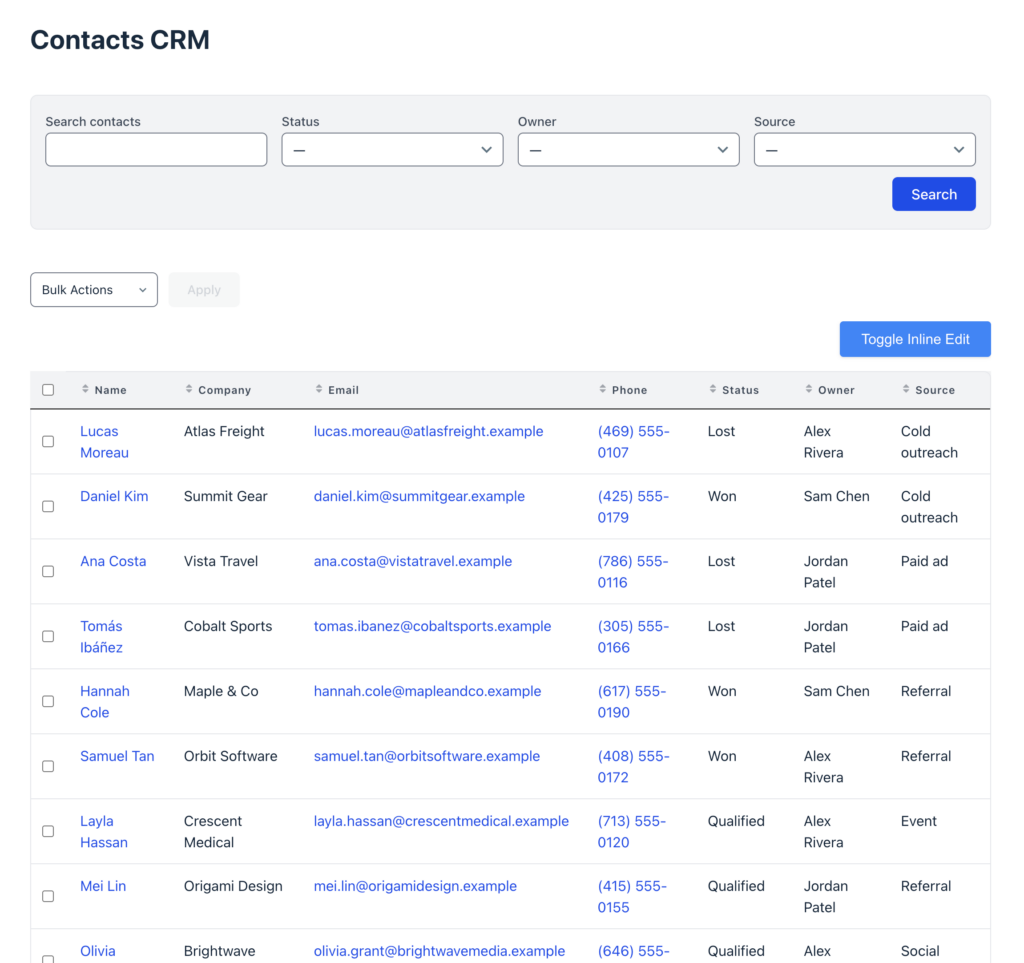
From this one screen, your team can search and filter contacts by status, owner, or source, open any contact’s full record, and edit entries inline or in bulk. It’s all powered by the data you already collect in Gravity Forms, with no monthly fees and nothing stored on someone else’s server.
Bulk actions enable you to export contacts, download file attachments, and update every selected record at once, so you can reassign an owner, move a batch to a new status, or clear out dead leads without opening a single entry.
What a GravityView CRM is (and who it’s for)
A CRM, at its simplest, is a list of people you track with a few details about each: who they are, how to reach them, where they sit in your pipeline, and who owns the relationship. GravityView builds exactly that from your Gravity Forms entries and puts it on the front end of your site, searchable, filterable, and editable by the team members you choose. It’s a simple, self-hosted contact database, not a replacement for Salesforce or HubSpot, so there’s no email automation or sales forecasting here.
That makes it a good fit if you already collect leads in Gravity Forms and want a lightweight contact database you own, rather than another monthly subscription. It suits solos, small teams, nonprofits, and agencies who need a few people to view and update records, not a full sales department. If you need automated email sequences or multi-step pipeline automation, you’ll be happier pairing this with a dedicated tool, which I’ll come back to at the end.
What you’ll need
- Gravity Forms – the form plugin that captures and stores your contacts.
- GravityView Pro – turns those entries into your front-end contact database. Pro is needed for the Advanced Filtering extension.
- GravityEdit (optional) – adds front-end inline editing and bulk actions in Step 5.
- GravityBoard (optional) – display entries on a kanban board with drag-and-drop.
Step 1: Capture contacts with a Gravity form
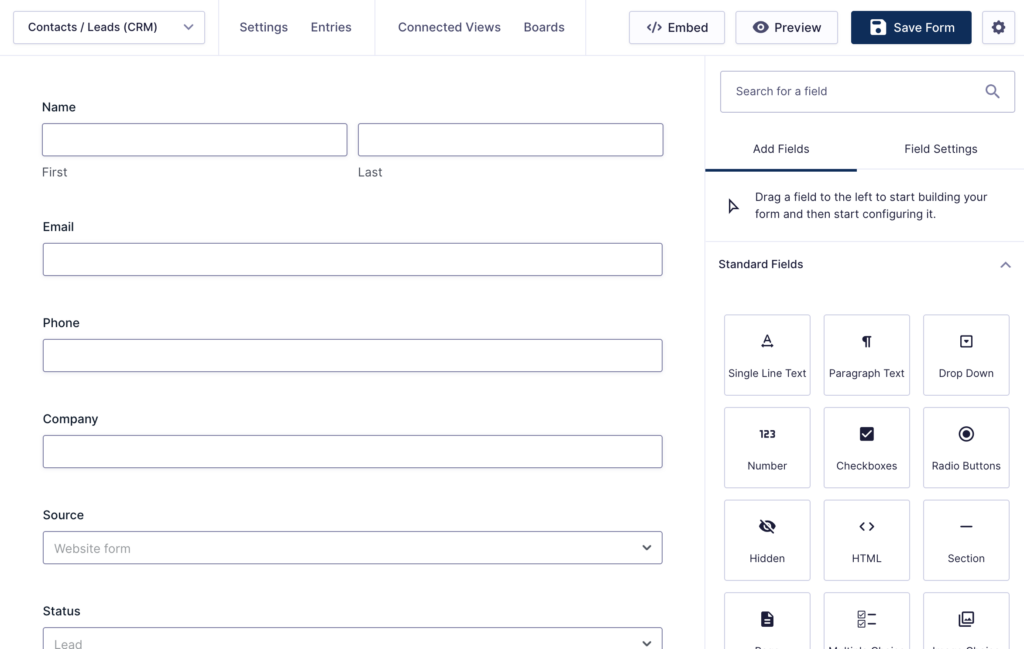
Your form is the data layer of the whole CRM, so it’s worth setting up thoughtfully. Create a new form in Gravity Forms (call it something like “Contacts / Leads”) and add the fields you want to track. A practical set looks like this:
- Name, Email, Phone, and Company for the basics
- A Source drop down (Website form, Referral, Event, and so on)
- A Status drop down for your pipeline stages (Lead, Contacted, Qualified, Proposal, Won, Lost)
- An Owner drop down for the team member responsible
- A Notes paragraph field for context
Pro tip: the Status and Owner fields are what turn a flat list of submissions into a real CRM. They’re how you’ll filter by stage and assign records later, so add them even if your process is informal today.
Fill the form yourself or embed it on a page to collect new leads. Either way, every submission becomes an entry, and every entry becomes a contact in the next step.
Step 2: Turn your entries into a contact database
Now we’ll put those entries on the front end. In GravityView, create a new View, connect it to your Contacts form, and choose the Table layout. That familiar spreadsheet feel is exactly what you want for scanning a contact list.
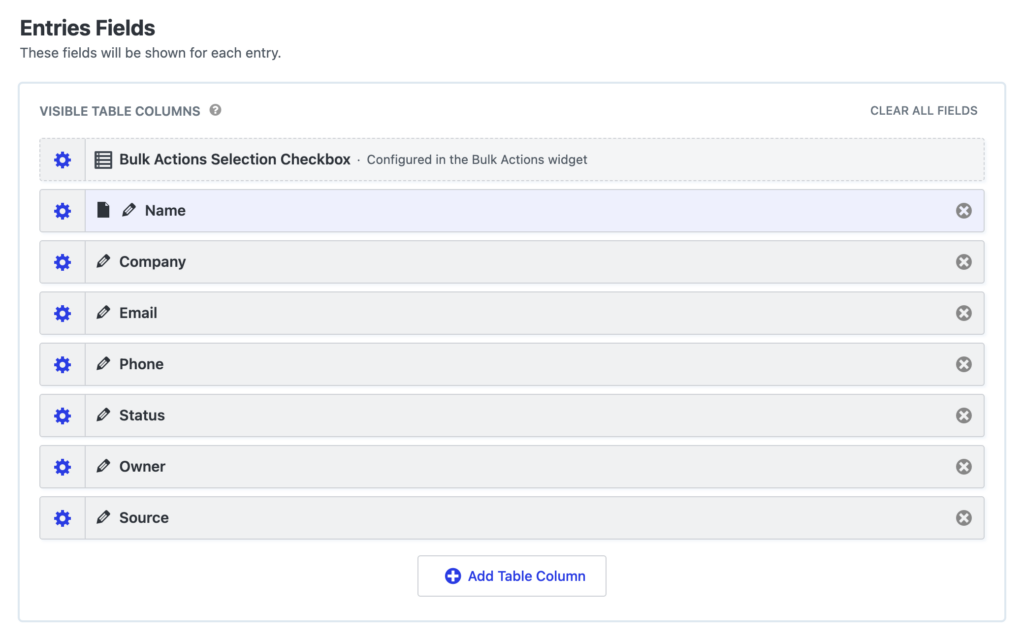
In the View editor, the Entries Fields section is where you choose which columns appear. Add Name, Company, Email, Phone, Status, Owner, and Source for a clean, readable row.
Set a sensible default sort (newest contacts first works well) and embed the View on a page with the block or shortcode. Here’s what it looks like on the front end:
You might notice a Bulk Actions dropdown and a Toggle Inline Edit button in these screenshots. Those come from the Bulk Actions widget and GravityEdit, which we set up in Step 5, so don’t worry if your own View doesn’t show them yet.
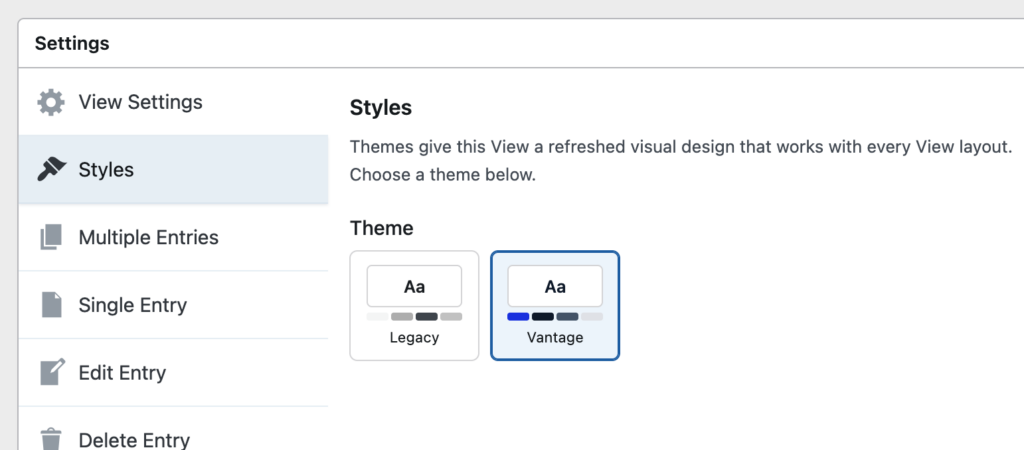
Ensure you open the Styles tab in the View settings and switch the theme to Vantage for a cleaner, more modern look. It’s what gives the table and search bar above their polished styling.

Pro Tip
If your list grows into the thousands, the DataTables Layout swaps the static table for an interactive one with instant search, sorting, and pagination. For most contact databases, the standard table is plenty.
Step 3: Make it searchable and filterable
A contact list you can’t search isn’t much of a CRM. GravityView’s search bar lets your team find people fast and slice the list by exactly the fields that matter.
Add a Search Bar widget to your View and configure it with a text search (for name or company) plus drop-down filters for Status, Owner, and Source. Now anyone can pull up “all Qualified leads,” “everything owned by Alex,” or “contacts from the last event” in a couple of clicks.
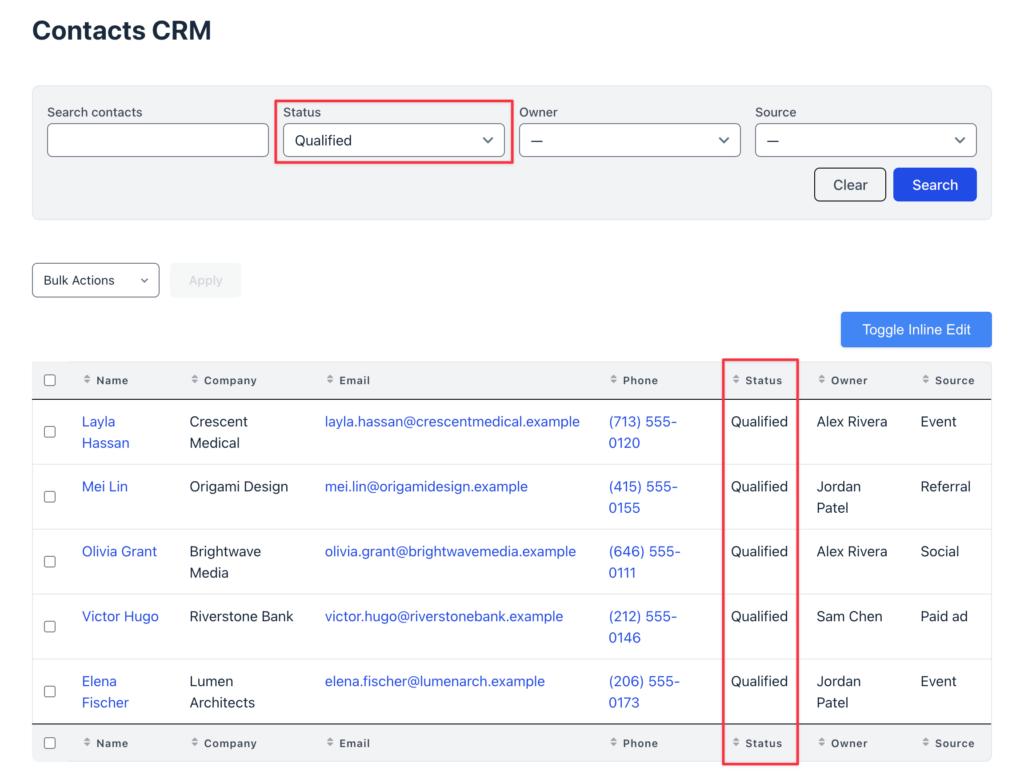
That status filter is the everyday heartbeat of the CRM. It’s how you answer “who do I need to follow up with?” without scrolling.
Step 4: Open a single contact record
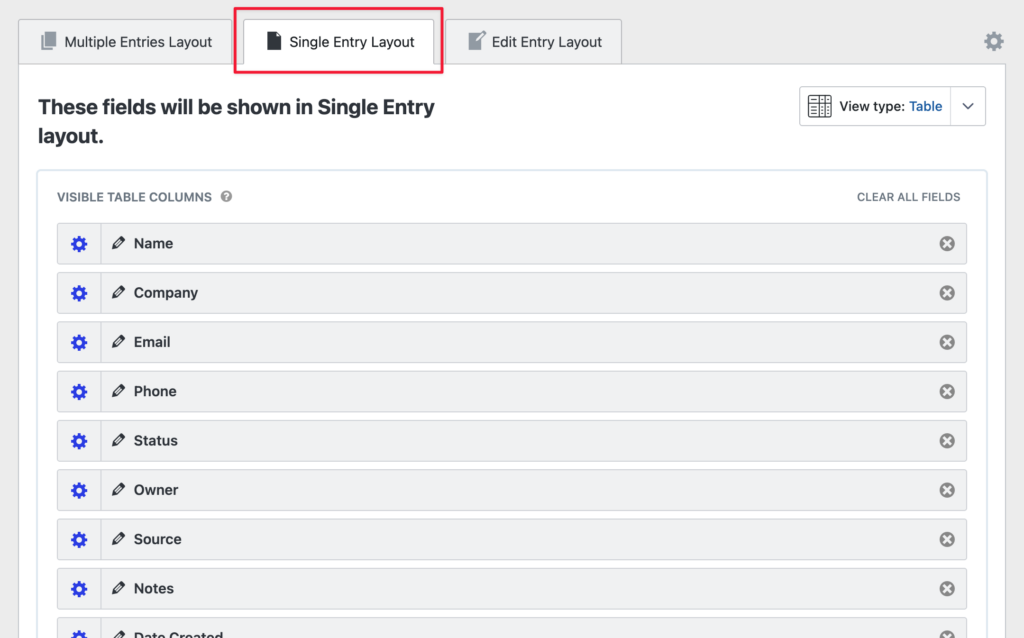
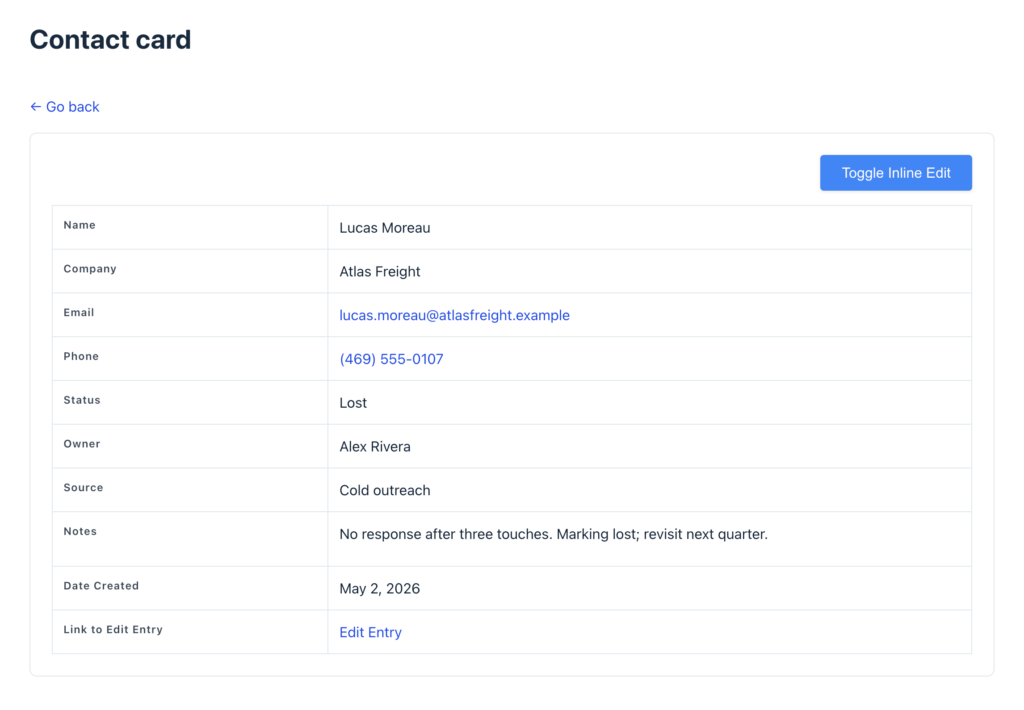
Tables are great for the overview, but sometimes you need the full picture for a single contact. In the View settings, configure the Single Entry Layout to show everything you collected, including all the contact details plus the Notes field, so each contact gets their own record, or “contact card.”
By default, clicking a name in the table opens that contact’s record. Add an Edit link to the layout and your team can jump straight from the card into making changes.
Step 5: Edit and update contacts from the front end
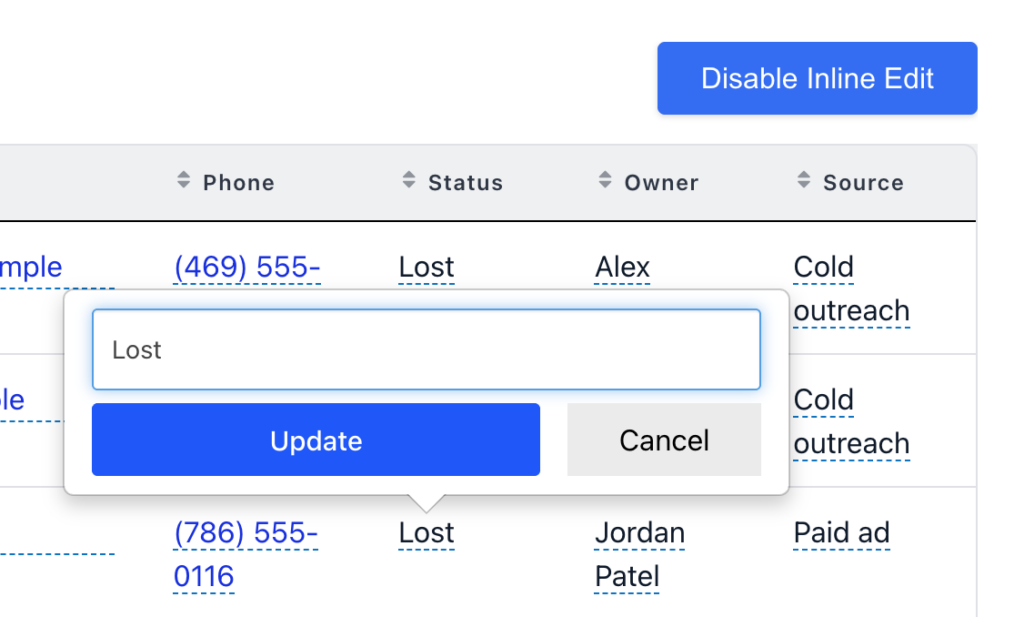
Here’s where it starts to feel like a tool your team works in every day. With GravityEdit, you can update records inline without needing to open the Edit Entry page. Simply toggle inline editing on, and a click on any cell (say, a contact’s Status). This lets you change it in place and save without leaving the page.
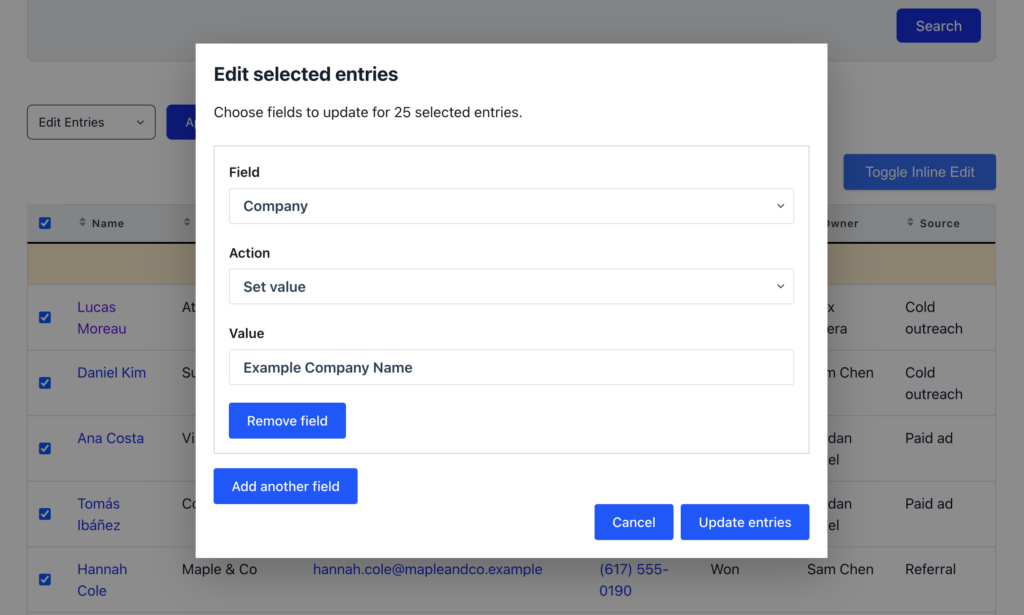
The real time-saver is front-end bulk actions. After adding the Bulk Actions widget to your View, choose which actions to offer in the widget settings:
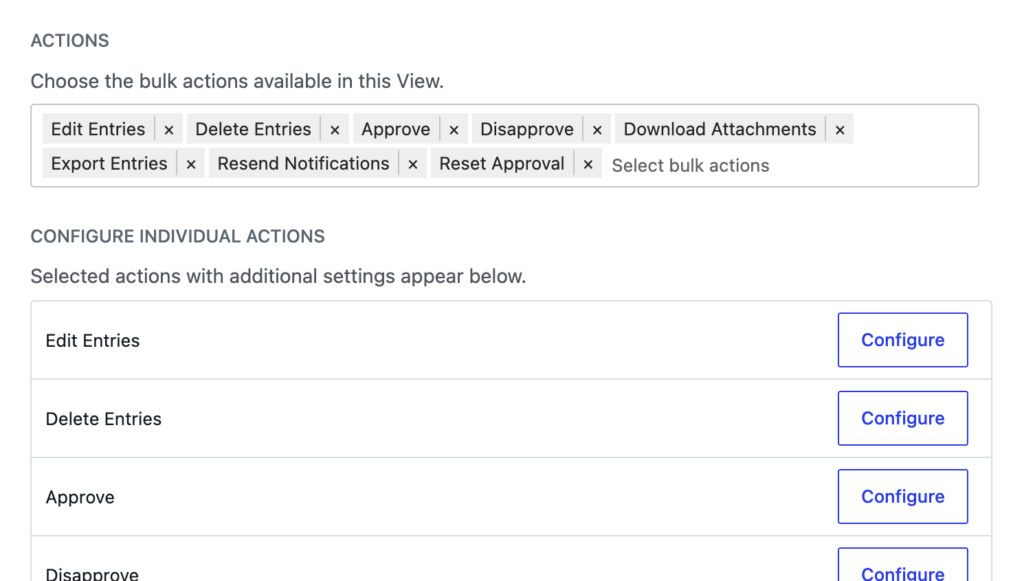
Then, on the front end, tick the checkboxes next to several contacts and choose an option (e.g., Edit Entries). A dialog lets you pick a field, set a new value, and update every selected record at once, so you can reassign an owner, move a batch to a new status, or clear out dead leads without opening a single entry.
Step 6: Control who sees what
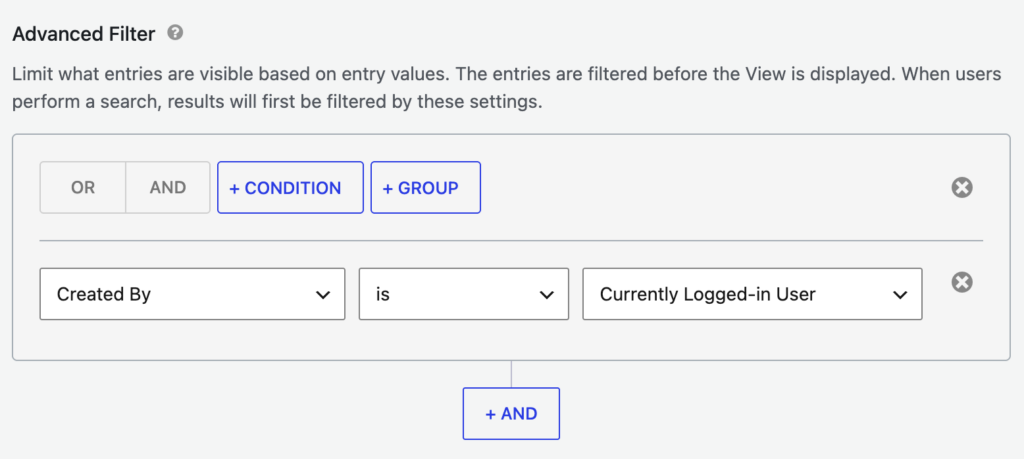
If more than one person uses your CRM, you probably don’t want every rep seeing every contact. GravityView’s Advanced Filters (included with GravityView Pro) let you tailor what each user sees.
The most common setup is a single filter condition: Created By is Currently Logged-in User. Add that, and each rep sees only the contacts they created, while managers and admins still see everything.
On the front end, a rep now lands on a focused list of just their own contacts, with nobody scrolling past records that aren’t theirs.
Level it up with the rest of the toolkit
Your CRM is complete at this point. But if you want a fuller workflow, a few optional GravityKit products plug into the same form data, with no rebuilding required.
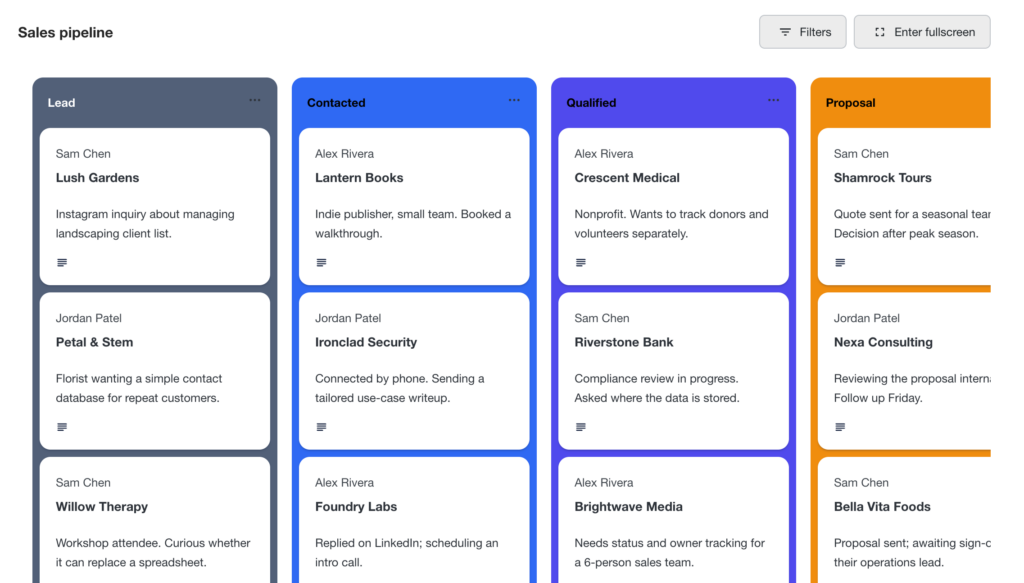
See your pipeline as a board
GravityBoard turns your contacts into a drag-and-drop kanban board, with a column for each Status. Drag a card from Lead to Contacted to Won and the underlying entry updates automatically. You can color each lane to match your stages, and it’s a much nicer way to visualize a pipeline than a table.
Schedule follow-ups and reminders
GravityCalendar displays your contacts on a calendar by date, perfect for plotting follow-up dates or next actions so nothing slips through the cracks.
Report on your contacts and pipeline
GravityCharts visualizes the same data as charts (contacts by source, leads by status, or how your pipeline shifts over time) so you can spot trends at a glance.
Bonus: import and export your contacts
Already have contacts in a spreadsheet? GravityImport brings them in from a CSV, so you can seed your CRM in minutes instead of retyping. And when you need your data elsewhere, GravityExport sends it back out to CSV, Excel, or PDF, because it’s your data and you should be able to take it with you.
Pro Tip
GravityBoard, GravityCalendar, GravityCharts, and GravityEdit, and all other GravityKit plugins are included in the All Access Pass, which is the natural pick if you want the full workflow rather than picking products one at a time.
What this approach is (and isn’t) good for
Great for: an owned, fully customizable contact database; no monthly SaaS fees and no per-seat pricing; your data stays on your own server where you control it.
Not for: sending email sequences, syncing with Gmail or Outlook, or running heavy automation and enterprise pipeline rules. If you need those, keep this as your contact database and pair it with a dedicated tool like FluentCRM.
Ready to build your WordPress CRM?
You don’t need another subscription to keep track of your contacts, just the form data you’re already collecting and a way to put it to work. GravityView turns that data into a contact database you own, search, edit, and share with your team. The same no-code approach works for plenty of other builds, like a business directory.
Get started with GravityView, and when you’re ready for the board, calendar, charts, and front-end editing too, the All Access Pass unlocks the full workflow.

Helpful tips right in your inbox.
Subscribe to get the latest articles, information on releases and helpful Gravity Forms tips!
More articles

How to build a WordPress CRM without code (a contact database you own)
Build a simple WordPress CRM with GravityView. Turn the Gravity Forms entries you already collect into a no-code contact database you own, with no monthly fees.

Launch Log: Distance sorting for radius searches, DataTables search improvements, and import reliability fixes
The latest GravityKit releases add distance sorting to map searches, bring built-in search to DataTables, and fix GravityCharts and GravityImport edge cases.

WordPress page builder market share 2026: Elementor leads at 32.67%
Elementor reaches 32.7% of WordPress sites. WordPress Block Editor 20.6%, wpBakery 8.5%, Divi 5.7%. Latest HTTP Archive crawl, share-of-WordPress basis throughout.