Getting Started With the Featured Entries Extension
In this article, we’ll show you how to get set up with the Featured Entries extension.
Prefer to Watch the Video?
Installing the Featured Entries Extension #
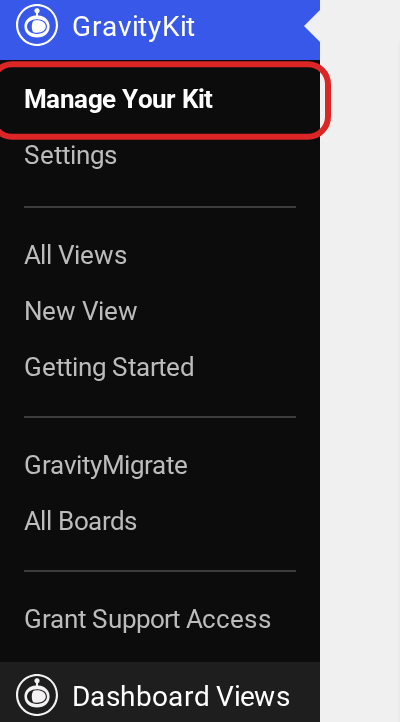
You can install the Featured Entries extension from inside WordPress. First, hover over “GravityKit” and click “Manage Your Kit”.
Then find “Featured Entries” under “Extensions” (the search at the top of the plugins list helps) and click “Install”.
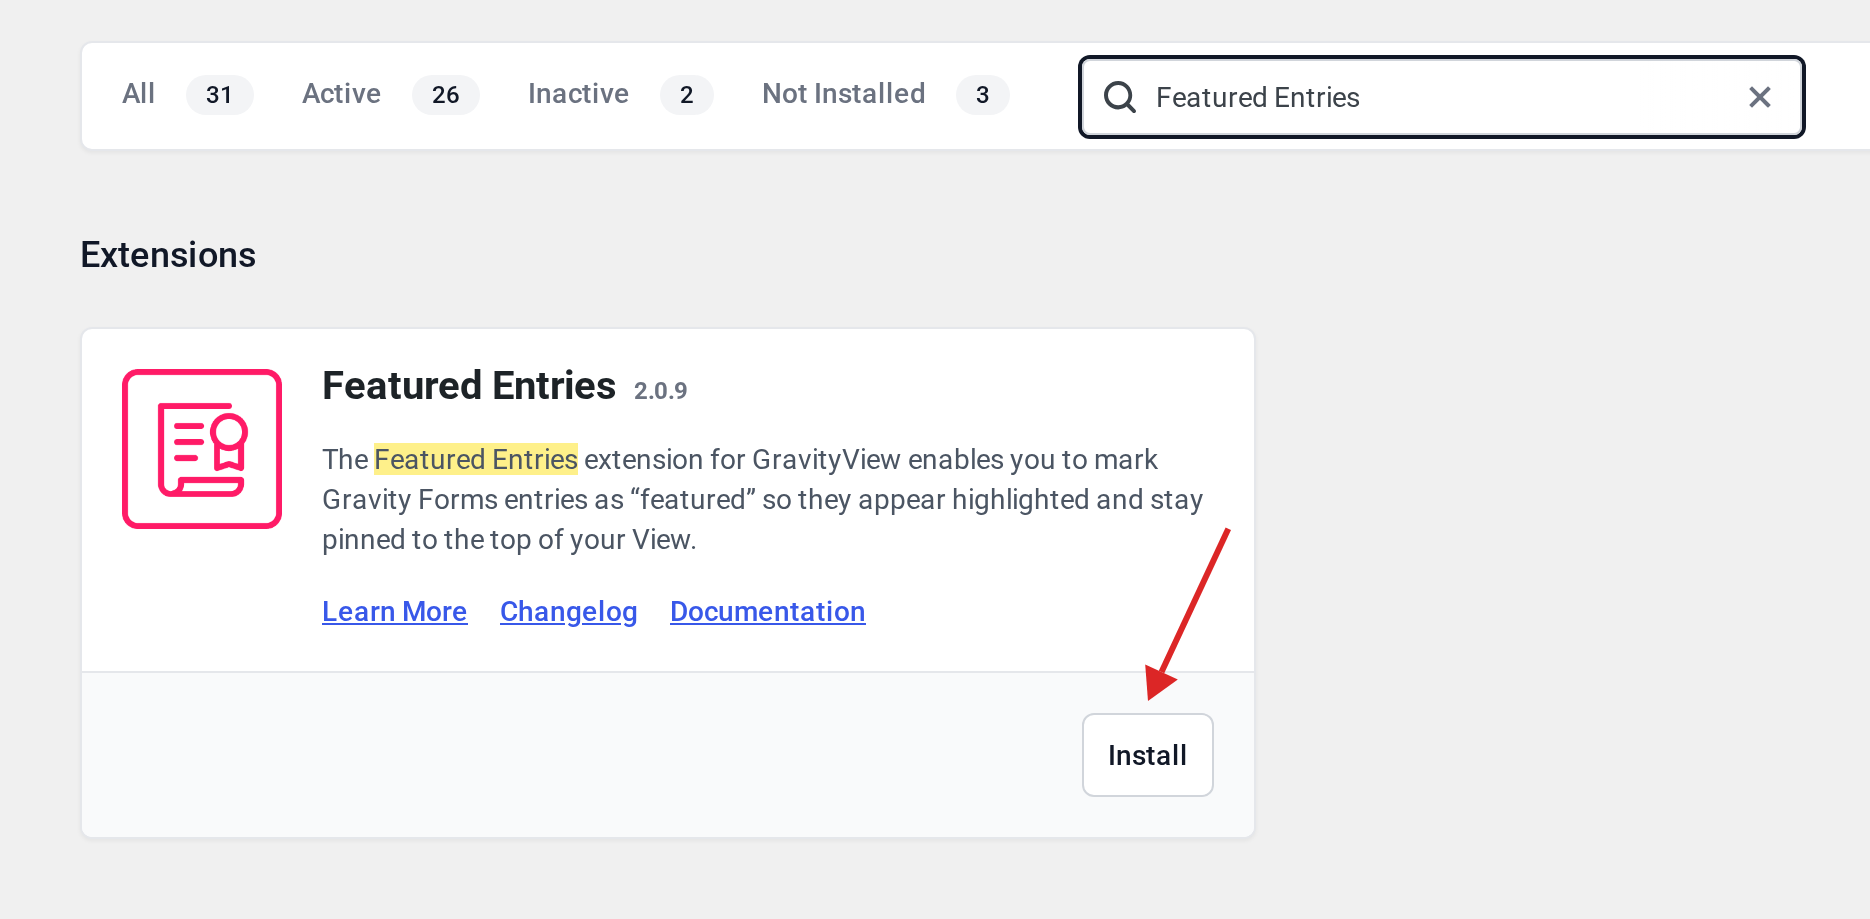
When the extension has finished installing, click Activate. Now you can start marking entries as “featured”.
Marking Entries as “Featured” #
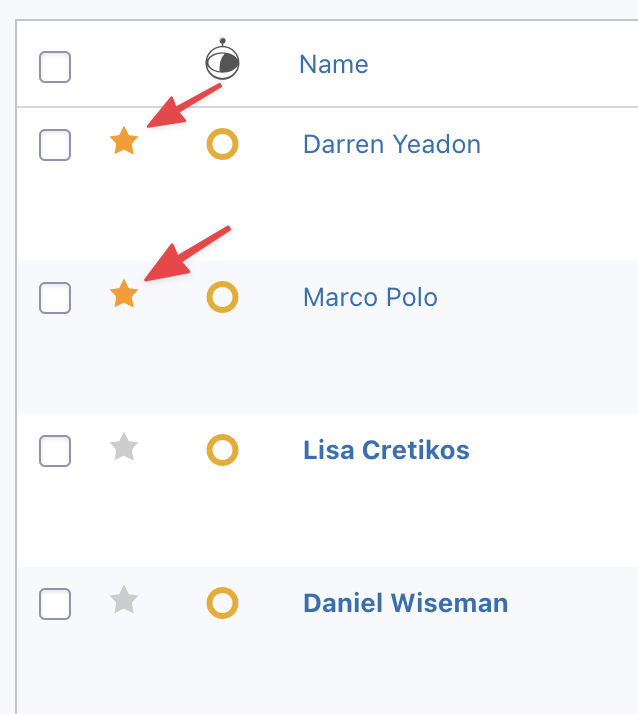
First, hover over Forms and click Forms. Now hover over your form and click on the Entries link. On the Entries page, you’ll see a list of all your form entries. To mark an entry as featured, simply click the star icon on the left.
The star will turn orange for entries that are featured.
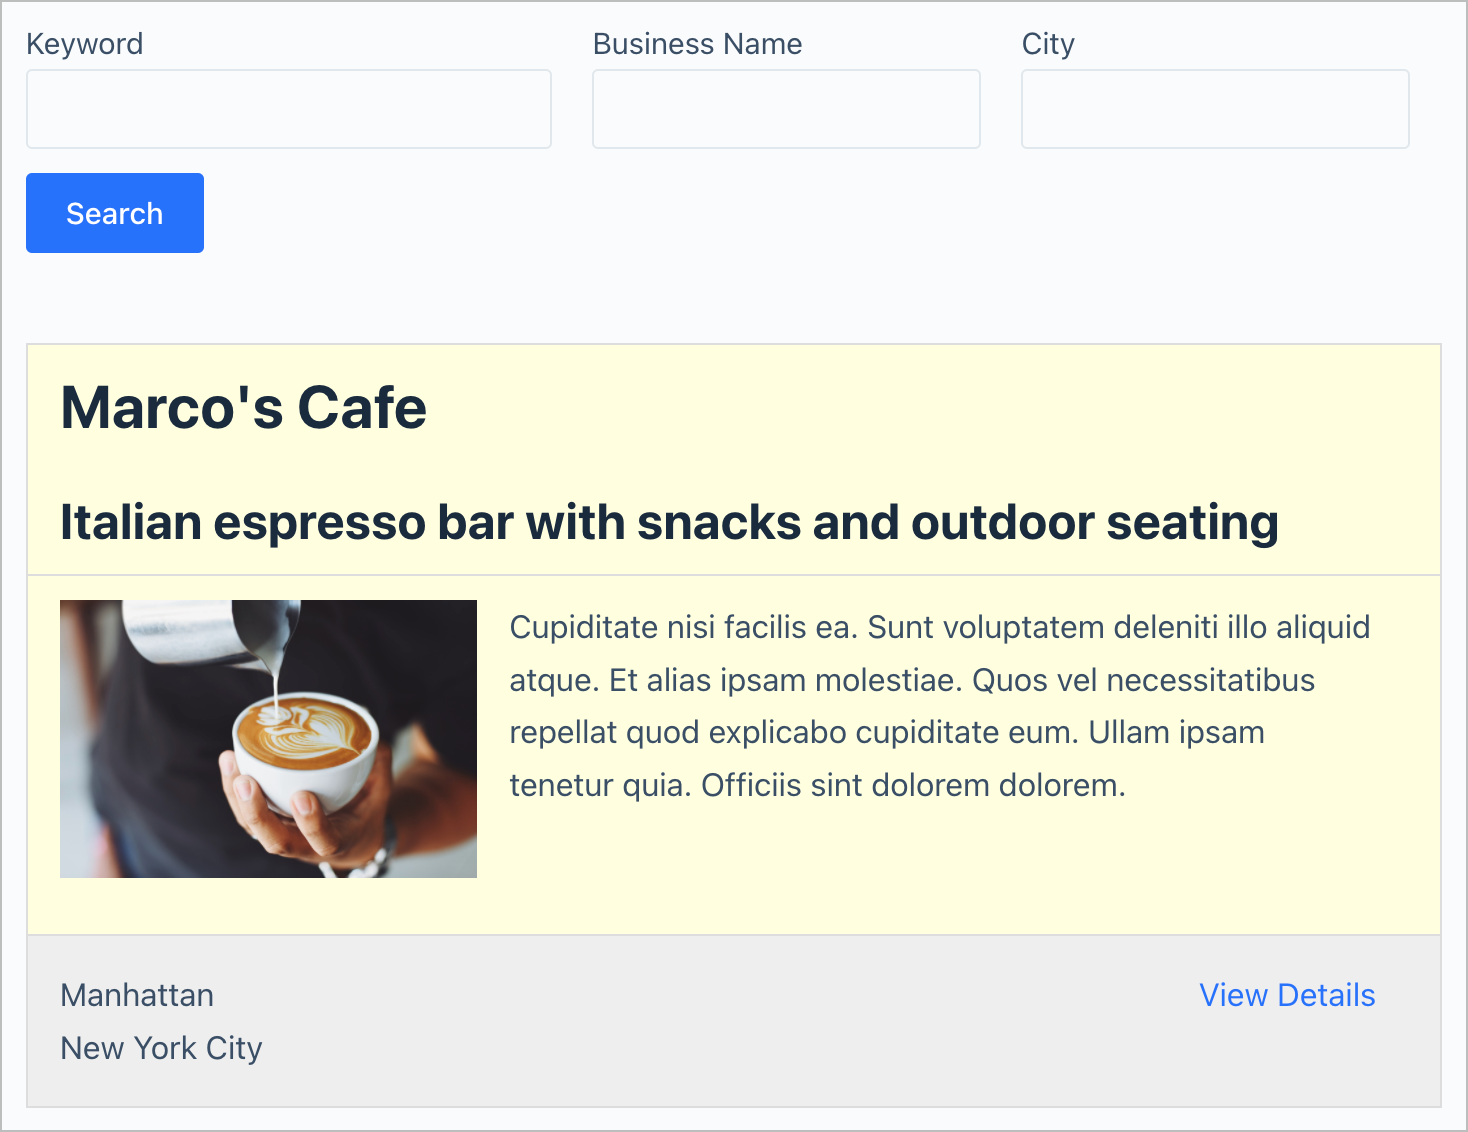
After featuring some entries, head back to your View. Featured entries will be highlighted in yellow.
To change the highlight color of featured entries, read this article.
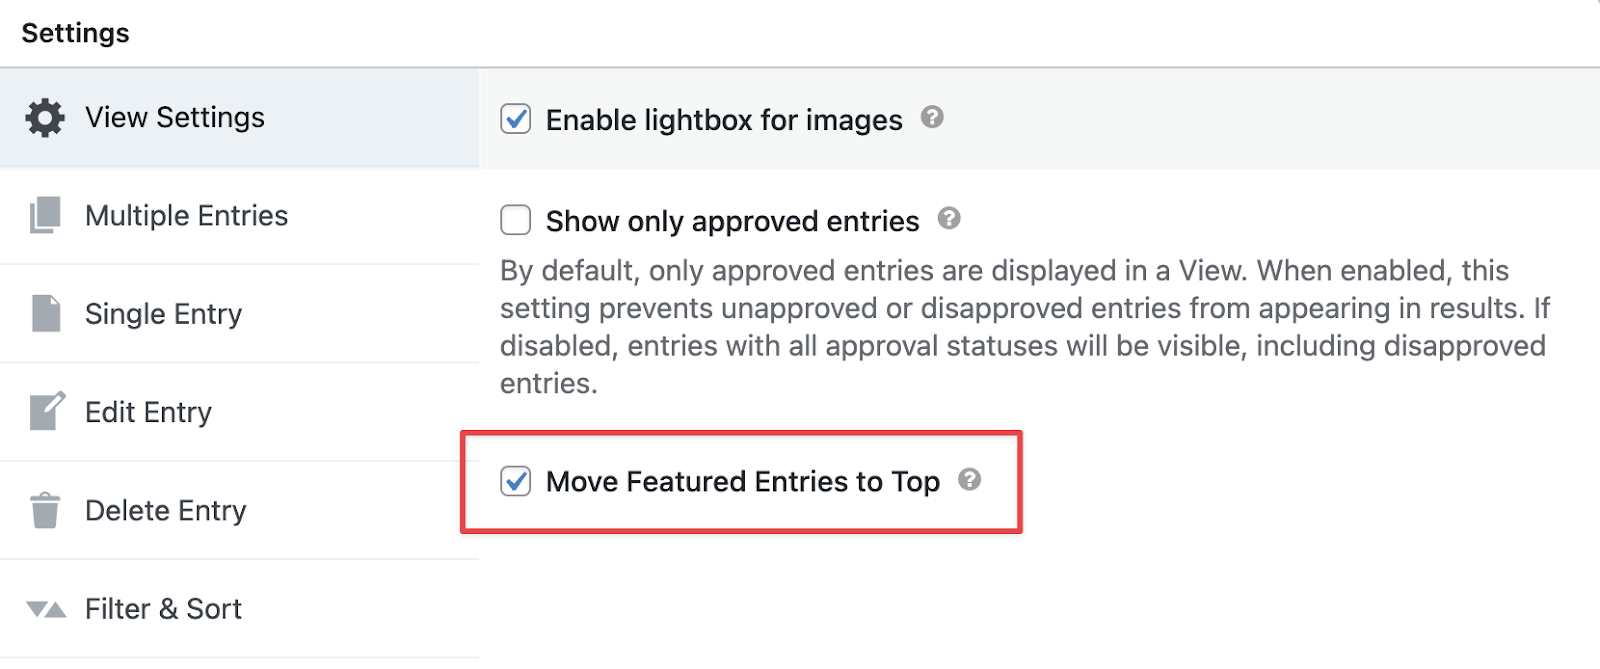
Moving Featured Entries to the Top of the Results #
If you want featured entries to show up at the top of the results, open your View editor, scroll down to the View Settings and check the box that says “Move Featured Entries to Top”.
That’s it!
