
Selling listings and featured spots that end on their own
When you charge for listings, such as job posts or featured spots in a directory, each one should stay up only for the time it was paid for. A View can take care of that on its own. Each listing appears as soon as its payment goes through and drops off after the time you choose, so nobody has to remember to take it down. The entries and their payments stay in Gravity Forms.
What you need #
- GravityView Pro, which includes the Advanced Filter extension.
- A Gravity Forms payment add-on, such as Stripe or PayPal Checkout. Gravity Forms explains the payment side in Setting Up the Stripe Add-On and Setting up the PayPal Checkout Add-On.
Step 1: Build the order form #
To charge for the listing itself, add a Product field with the price to the form people already use to submit listings. Gravity Forms describes the field in Product.
To sell a featured spot on a listing that already exists, make a short order form instead. It holds what the spot will show, such as the business name, a headline, and a short message, plus a Website field where the buyer pastes the address of their listing. Add a Product field with the price, for example $25 for four weeks.
Then add a feed for the form in your payment add-on. The add-on records whether each order is paid, and the View uses that in the next steps.
Step 2: Show only paid orders #
- Create a View of the order form and add the fields the spot should show. For paid listings, edit the directory View of your listing form instead.
- In the Settings box below the layout, click the Filter & Sort tab.
- Under Advanced Filter, click Add Condition and set it to Payment Status,
is, Paid. - Click Update.
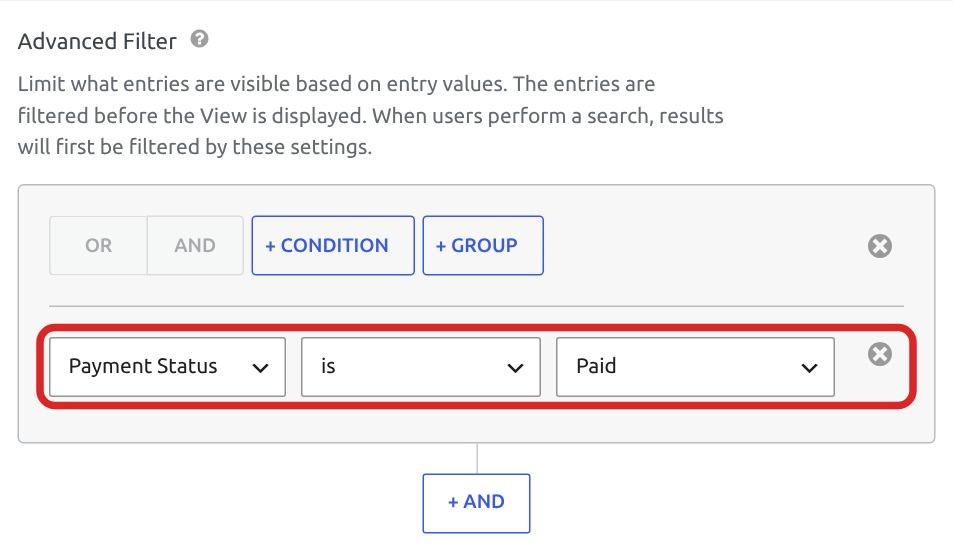
The View now lists only paid orders and leaves out the rest, such as failed or refunded payments. Some payment add-ons mark a new order Processing or Pending at first, and it appears in the View once its status changes to Paid.
Step 3: Set how long each one shows #
- On the same Filter & Sort tab, type
-4 weeksin Filter by Start Date. - Click Update.
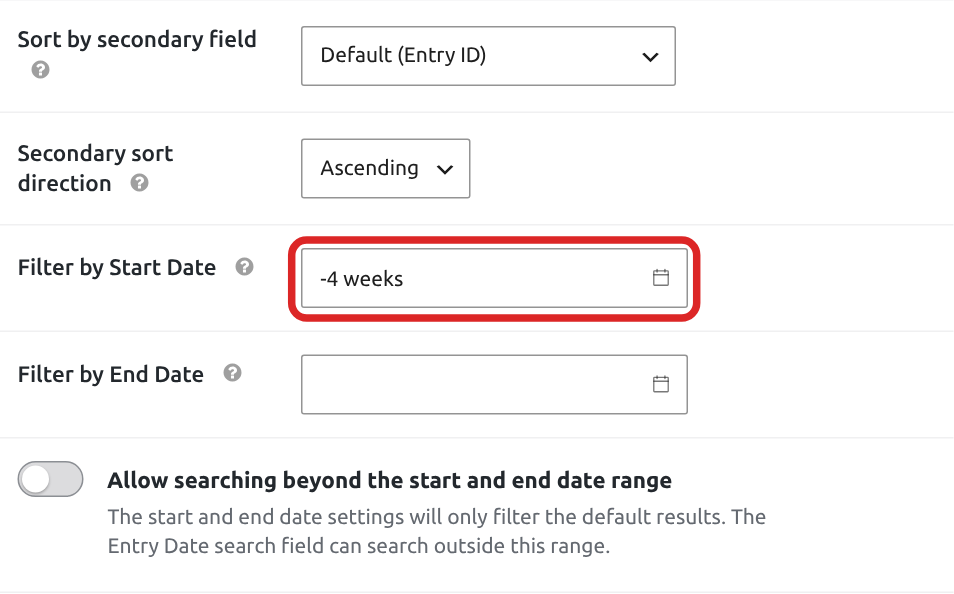
The four weeks count from when the order was submitted, so an order placed at 10 a.m. on June 3 shows until 10 a.m. on July 1. If a payment is confirmed a little later, the spot appears then and still ends four weeks after the order was placed.
Other lengths work the same way, such as -30 days or -3 months. Using relative Start Dates and End Dates lists the formats you can type.
Step 4: Let paid orders show without approval #
New Views show only approved entries, so a paid order would wait for someone to approve it. To let it appear right away:
- Click the View Settings tab in the Settings box.
- Turn off Show only approved entries.
- Click Update.
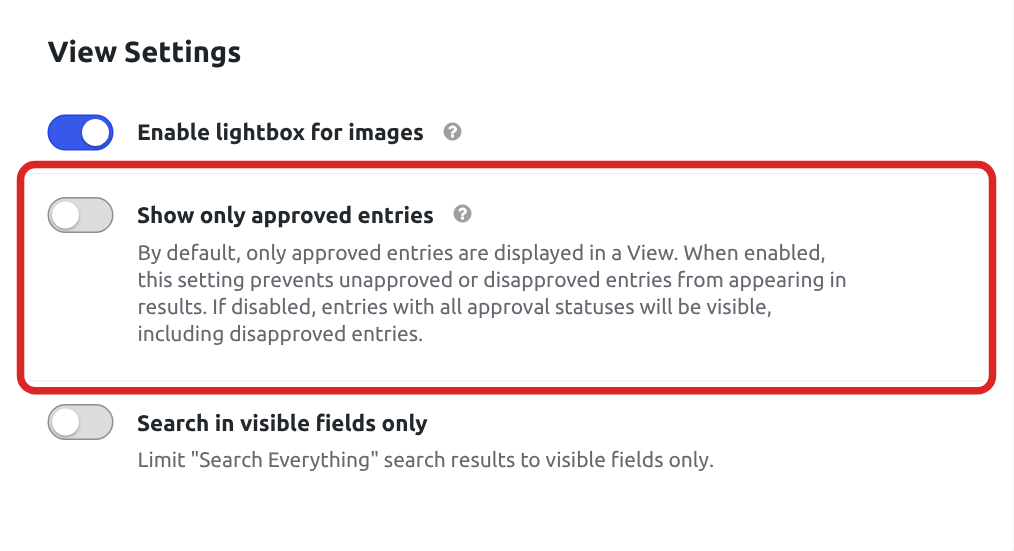
If you’d rather check each spot before it goes live, leave the setting on and approve the entries yourself. The four weeks still count from the order, so approving it later doesn’t add time.
Step 5: Put the featured spots above the directory #
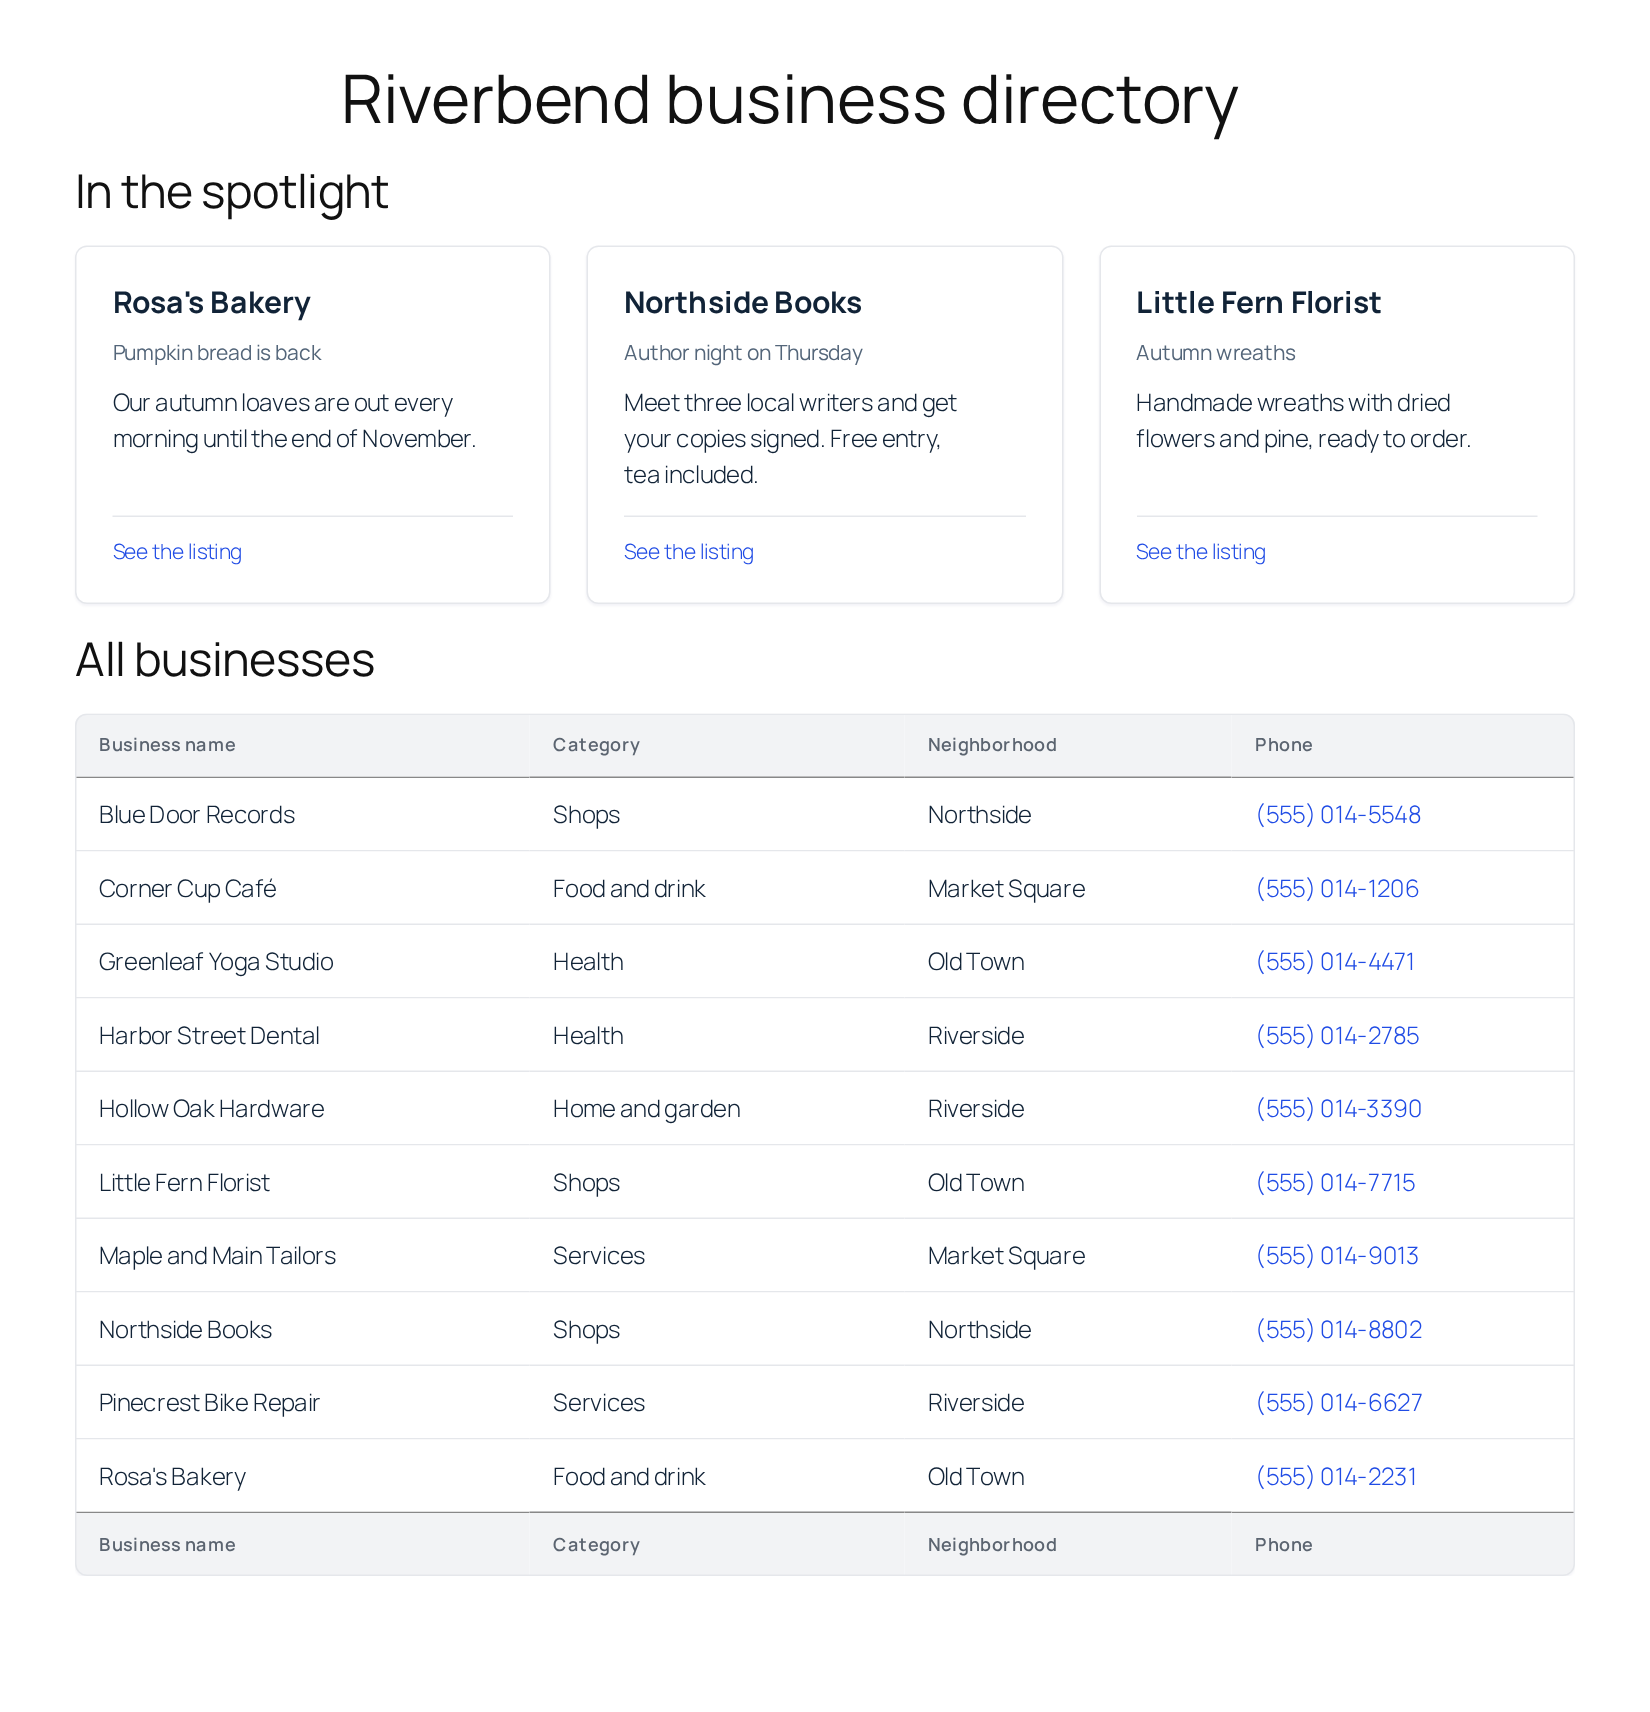
Add the featured spots View to your directory page, above the View that lists every business. Each one goes on the page with a GravityView block or a [gravityview] shortcode, as Embedding Views, entries and fields using blocks shows.
Renewals and refunds #
To renew, the buyer fills in the order form again and pays. That creates a new order with four weeks of its own. If they renew early, both orders show until the first one runs out.
If you refund an order through the payment add-on, its status changes to Refunded and the spot comes off the page right away.
Recurring payments #
To bill a spot every month, use a subscription feed in the payment add-on. Set the condition to Payment Status, is, Active and leave Filter by Start Date empty, so the spot shows for as long as the subscription runs. If the subscription is cancelled or a renewal payment fails, its status changes and the spot comes off the page.
Featured Entries and timed spots #
A star from the Featured Entries extension stays on an entry until someone removes it, so it can’t end by itself. Use the View above for paid spots, and keep the star for your own picks in the directory.

