Embedding Views in Divi, Beaver Builder, and Elementor
GravityView 3.0 adds native support for three popular page builders: Divi, Beaver Builder, and Elementor. You build a View once, then drop it into a builder layout with a dedicated widget, no shortcodes required. A View is GravityView‘s front-end display of your Gravity Forms entries, and these widgets let you place and configure that display visually, right inside the builder you already use.
If you’ve used GravityView’s Gutenberg blocks, this will feel familiar. The page builder integration mirrors the same set of blocks, so the widgets, their names, and their settings line up with what you already know from the WordPress block editor.
Before you start #
Make sure you have the following in place:
- GravityView 3.0 or later. Native page builder support is a 3.0 feature, and it’s included in GravityView core, so you don’t need a separate add-on to use it.
- A supported page builder, installed and active. This integration works with Divi (through the Divi theme or the Divi Builder plugin), Beaver Builder, or Elementor.
- At least one View. The widgets embed an existing View, so create one in GravityView first.
The GravityView widgets #
In each builder, GravityView registers the same five widgets. They match GravityView’s five Gutenberg blocks one-to-one, so you can move between the block editor and your page builder without relearning anything.
| Widget | What it embeds |
|---|---|
| GravityView | A full View. This is the main widget for displaying your entries. |
| GravityView Entry | A single entry from a View. |
| GravityView Entry Field | A single field value from a specific entry. |
| GravityView View Details | View metadata, such as the total number of entries and pagination details. |
| GravityView Entry Link | A link to view, edit, or delete a specific entry. |
All five ship with GravityView core, so every GravityView 3.0 user has access to them in all three builders.
Embedding a View #
The steps below use the main GravityView widget, which is named GravityView in all three builders and carries the same settings everywhere. Once you’ve added it, the rest is the same regardless of which builder you’re in.
- Edit your page in your page builder, and add a new widget or module to your layout.
- Find and add the GravityView widget. (See Finding the GravityView widgets in each builder below for where it lives in each one.)
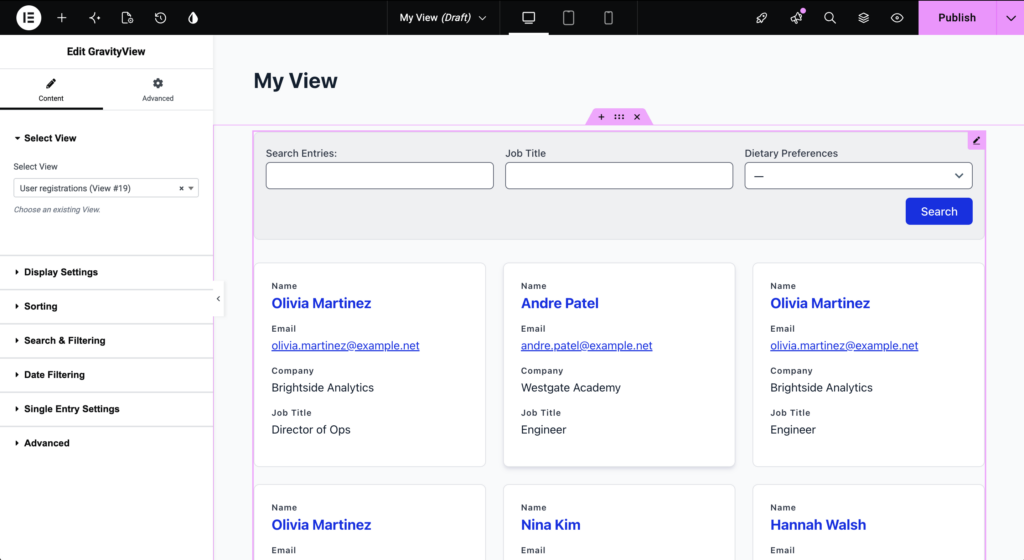
- In the widget settings, choose the View you want to display from the Select View dropdown.
- Adjust any of the optional settings described below to control which entries appear and how the View behaves.
- Save or publish your page, then preview it to see the View in place.
Configuring the View
The GravityView widget groups its settings into panels. These are the same settings available in the GravityView block and the [gravityview] shortcode, so anything you can configure there, you can configure here. The exact labels vary slightly between builders, but the settings themselves are the same:
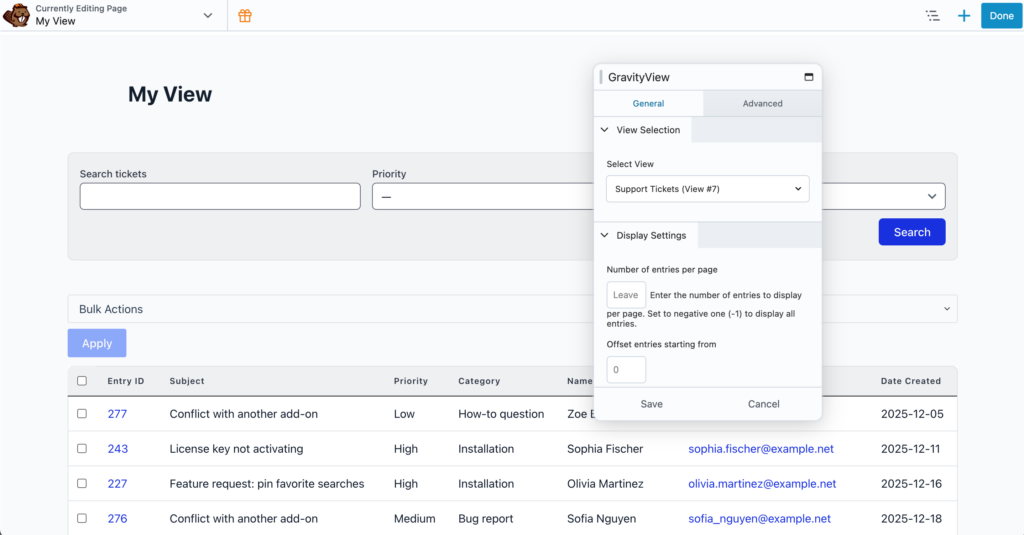
- Select View — Choose which View to embed. This is the only required setting.
- Display Settings — Set the Number of entries per page, an Offset entries starting from value to skip entries at the start, and a CSS Class to add to the View’s wrapper.
- Sorting — Pick a Sort Field and a Sort Direction: Ascending, Descending, or Random.
- Search & Filtering — Pre-filter which entries the View shows using a Search Field, a Search Value, and a Search Operator (for example, Is, Is Not, Contains, Greater, Lesser, Starts With, or Ends With).
- Date Filtering — Limit entries to a range with a Start Date and an End Date.
- Single Entry Settings — Set a custom Single Entry Title for the single-entry page and a custom Back Link Label for its “go back” link.
- Advanced — Set a Post ID to tell GravityView which page a View is embedded on. You only need this in edge cases, such as embedding a View inside another View.
Finding the GravityView widgets in each builder
The widgets do the same thing in every builder, but where they appear (and what the secondary ones are called) varies slightly:
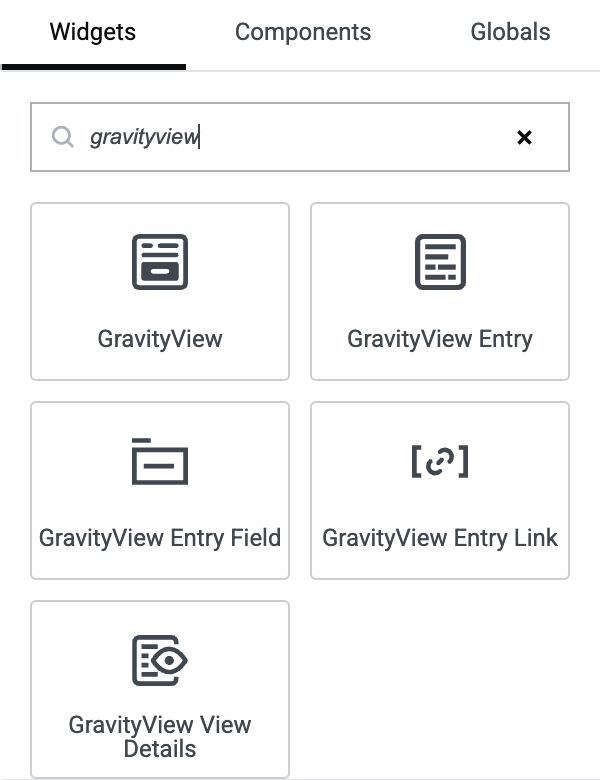
- Elementor — Open the widgets panel and look under the Basic category, or type
GravityViewin the widget search. The widgets use their full names: GravityView, GravityView Entry, GravityView Entry Field, GravityView Entry Link, and GravityView View Details. - Beaver Builder — Open the content panel and find the dedicated GravityKit group. The main widget is GravityView, and the others use shorter labels: GV Entry, GV Entry Field, GV Entry Link, and GV View Details.
- Divi — In the Insert Module window, search for
GravityView. The modules use their full names, the same as in Elementor.
For example, here are the five widgets in Elementor’s Widgets panel, filtered to GravityView:
The other GravityView widgets #
Alongside the main GravityView widget, the four secondary widgets cover more specific placements:
- GravityView Entry — Displays a single entry on its own, which is useful for detail pages or a featured record.
- GravityView Entry Field — Displays one field value from a specific entry, so you can place a single piece of data anywhere in your layout.
- GravityView Entry Link — Outputs a link that opens, edits, or deletes a specific entry.
- GravityView View Details — Displays information about a View, such as the total number of entries or pagination details. It pairs well with a GravityView widget on the same page.
Styling your View #
The page builder widgets embed and configure a View, but they don’t add visual styling controls inside the builder. Your View’s appearance comes from the View itself (the Vantage theme and any custom CSS you’ve added). This keeps a View’s look consistent wherever you embed it.
If you want to style a View visually inside a builder, the GravityView Advanced Elementor Widget is a separate GravityView Pro extension that does exactly that. It works in Elementor only, and it adds live, in-Elementor controls for colors, spacing, typography, columns, and responsive settings. For setup details, see Getting started with the Advanced Elementor Widget. There’s no equivalent styling widget for Divi or Beaver Builder, so in those builders, style your View at the View level or with CSS.
Tips and notes #
- The widget settings match the GravityView block and the
[gravityview]shortcode, so any View you can build with one method works the same way here. - All five widgets are part of GravityView core. You don’t need GravityView Pro to embed Views in a page builder.
- The widgets use your existing View configuration, so you don’t need to rebuild a View to display it in a builder.
- You can combine widgets on a single page, for example a GravityView View Details widget above a GravityView widget, to add context to your entries.
Note: Native page builder support is a GravityView 3.0 feature. If you don’t see the GravityView widgets in your builder, confirm that GravityView 3.0 (or later) and your page builder are both active, then reload the editor.