Published
•
Updated
How to build a rental property management system on WordPress using GravityKit
Managing rental properties means juggling a lot of moving parts. This can include tenant details, lease dates, monthly expenses, vacancy tracking, and more. Spreadsheets get messy fast, and dedicated property management software can be expensive and overly complex for smaller portfolios. In this tutorial, I’ll show you how to build a fully functional rental property…
Managing rental properties means juggling a lot of moving parts. This can include tenant details, lease dates, monthly expenses, vacancy tracking, and more. Spreadsheets get messy fast, and dedicated property management software can be expensive and overly complex for smaller portfolios.
In this tutorial, I’ll show you how to build a fully functional rental property management system right inside WordPress using Gravity Forms and GravityKit. You’ll be able to add properties, track tenants and financials, search and filter your portfolio, edit data inline, and even visualize occupancy and property breakdowns with charts.
Let’s dive in!
Sneak peek
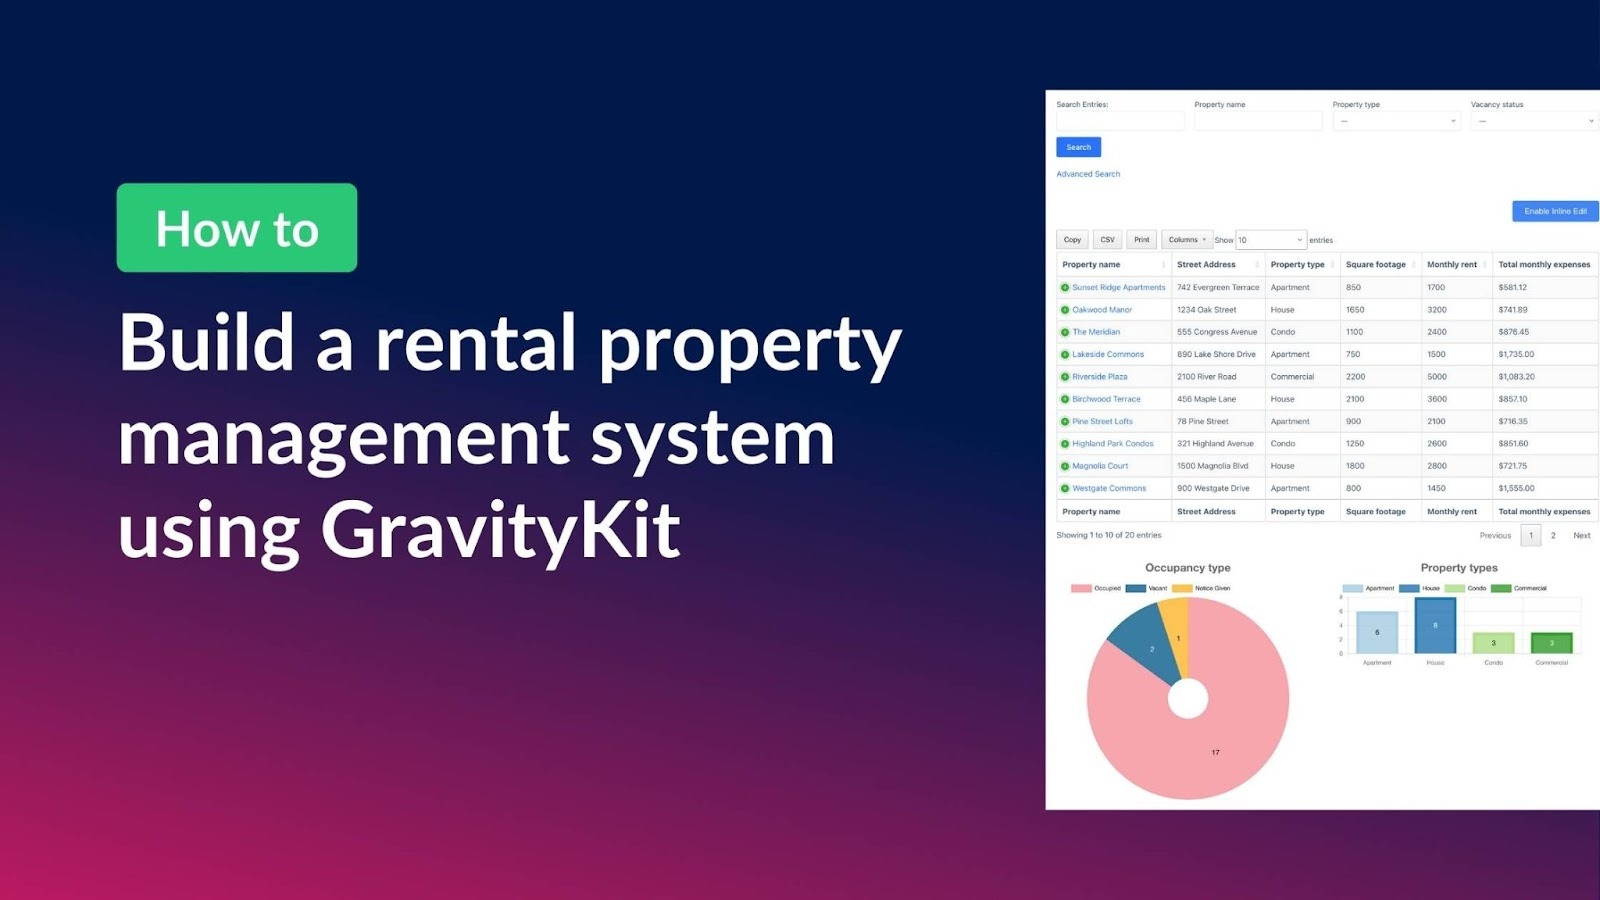
Here’s a sneak peek at the finished rental property management system. As you can see, there is a table showing all properties, a search bar (complete with advanced search) for filtering properties, and charts for visualizing metrics like occupancy status and property type.
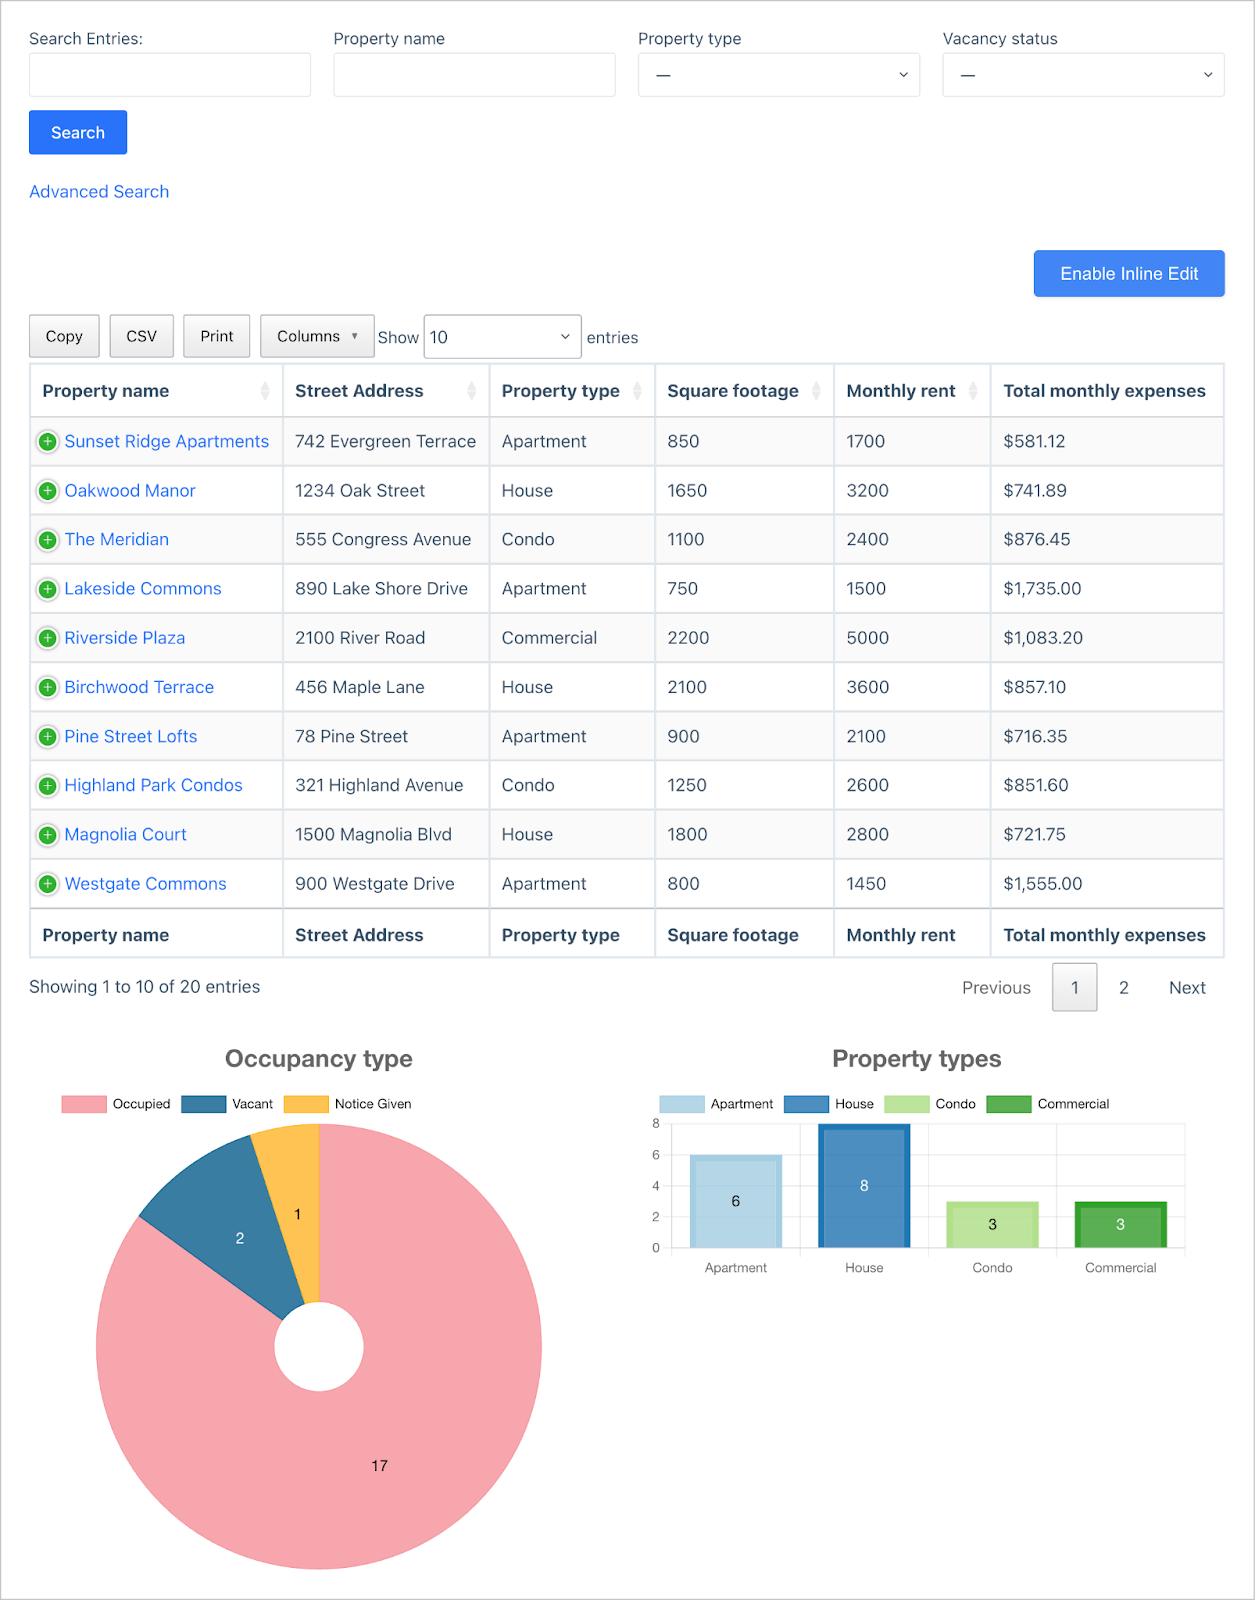
The table also includes several calculated columns that show key financial metrics such as total monthly expenses and net monthly income. These are calculated dynamically based on the property information.
All of the property data is editable directly from the front end by simply clicking on the Enable Inline Edit button. This makes it easy to do things like update tenant info and change occupancy status.
Finally, the Single Entry view (the page that shows detailed information about a specific property) includes a Notes field for adding notes to properties and keeping track of maintenance work.

Wanna try it?
Spin up a demo
See a live property listings demo built with GravityView — explore it yourself.

What you’ll need
Here are the plugins you’ll need to build a rental property management system like the one in this tutorial:
- Gravity Forms – for creating the property submission form.
- GravityView – for displaying property data on the front end in a searchable, sortable table.
- GravityMath – for adding calculated fields like net income and total expenses.
- GravityCharts – for visualizing occupancy and property type data with charts.
- GravityEdit – for editing property data inline directly from the front end.
Get all the GravityKit plugins you need with the All Access Pass.
Step 1: Creating the property submission form
To create a new form, we’ll hover over Forms in the WordPress sidebar and click New Form. Start with a blank form and give it a name. I’ll call mine “Rental properties”. This opens the visual form editor where we can drag and drop fields to build our form.
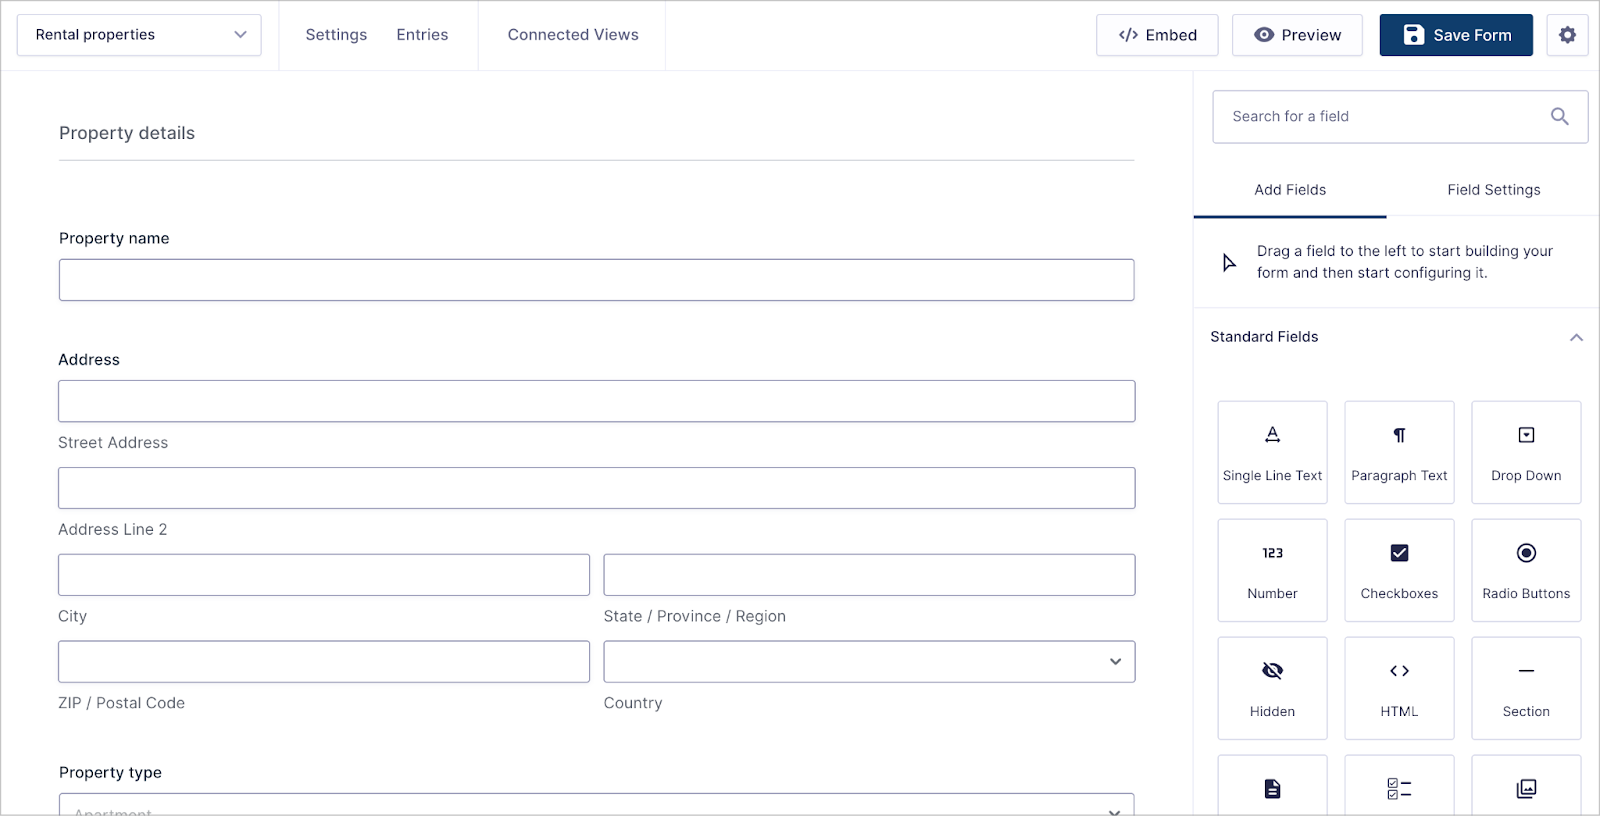
Here are the fields we’ll add, organized into three sections:
Section 1: Property details
- Property name (Single Line Text)
- Address (Address)
- Property type (Drop Down) — with options for Apartment, House, Condo, Commercial, and Other
- Square footage (Number)
- Bedrooms (Number)
- Bathrooms (Number)
Section 2: Tenant info
- Tenant name (Name)
- Tenant email (Email)
- Tenant phone (Phone)
- Lease start date (Date)
- Lease end date (Date)
- Security deposit (Number)
- Vacancy status (Drop Down) — with options for Occupied, Vacant, and Notice Given
Section 3: Monthly financials
- Monthly rent (Number)
- Mortgage / loan payment (Number)
- Property tax – monthly (Number)
- Insurance – monthly (Number)
- HOA / condo fees (Number)
- Maintenance budget (Number)
- Other expenses (Number)
We’ll also create several calculated fields from these later (not in the form itself, but in the View using GravityMath). More on that shortly.
Step 2: Creating the property management View
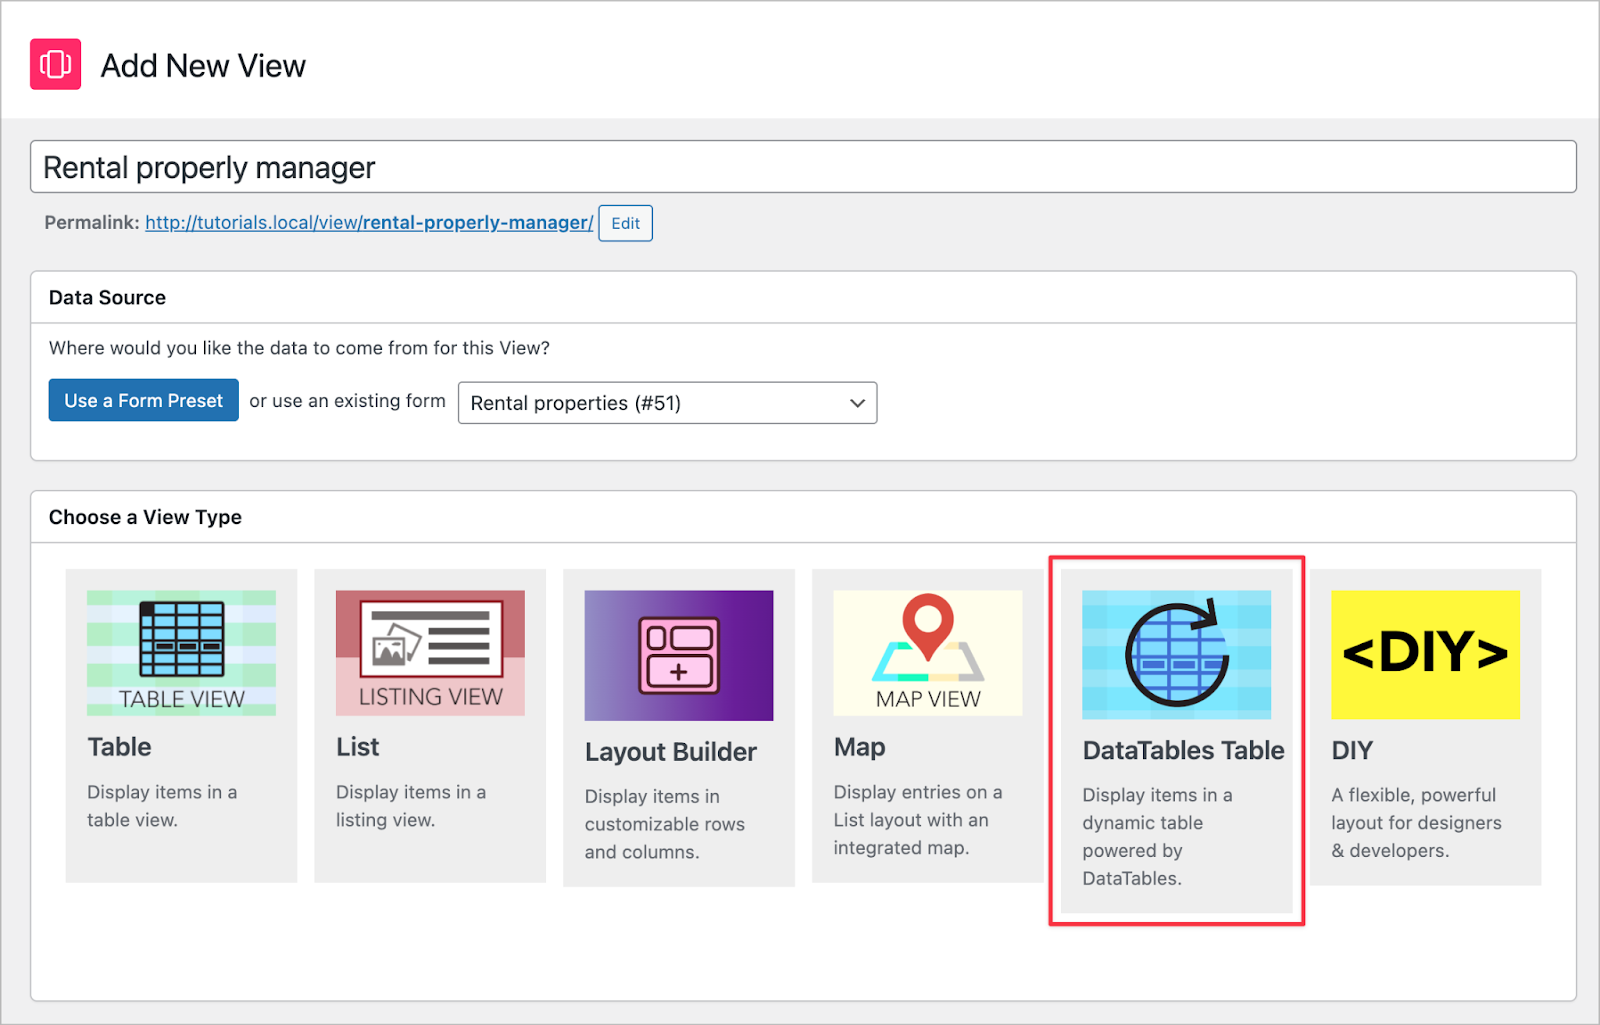
Now for the fun part—displaying all this data on the front end. We’ll hover over GravityKit in the sidebar and click New View. Next, we’ll select our “Rental properties” form as the data source, and choose the DataTables Table layout.
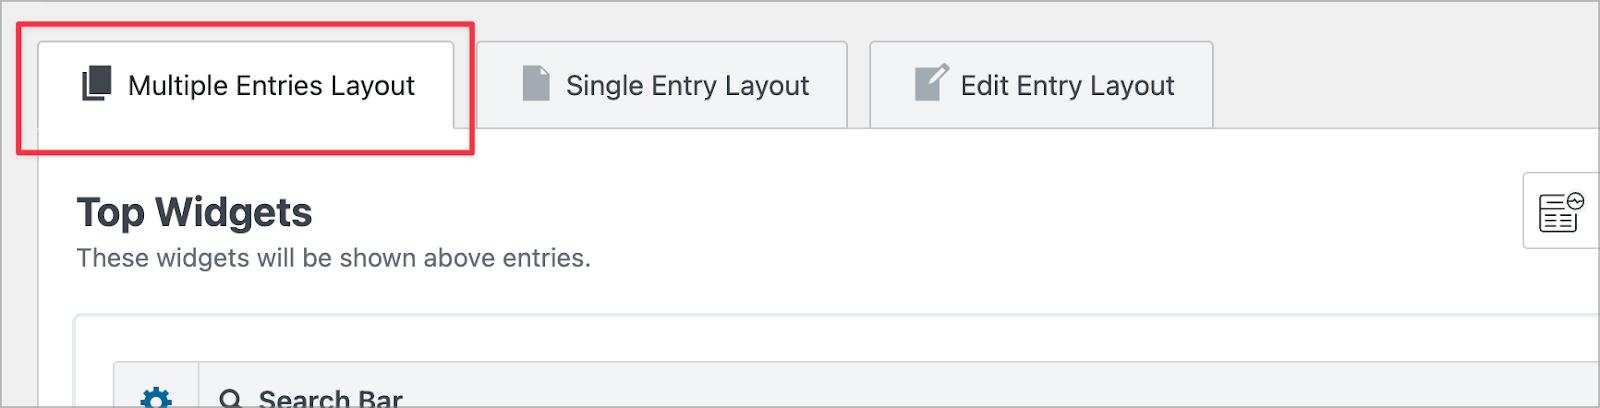
The View editor has three tabs: Multiple Entries Layout, Single Entry Layout, and Edit Entry Layout. We’ll start by configuring the Multiple Entries Layout. This is the main dashboard page that lists all your properties at a glance.
Adding a search bar
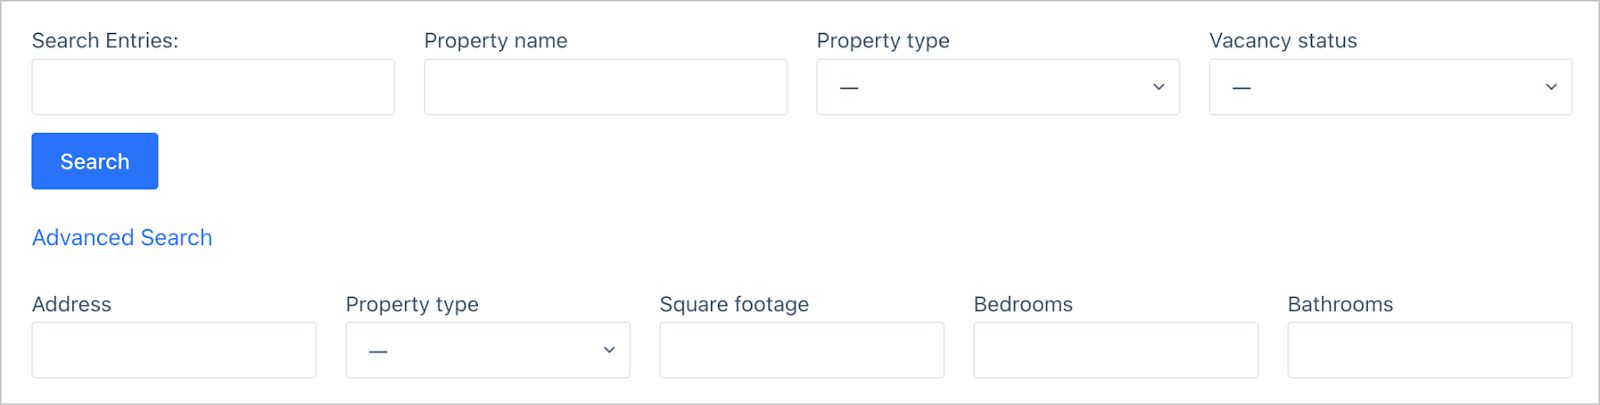
First, we’ll add a search bar so you can quickly find specific properties. In the Top Widgets area, we’ll click Add Search Field to add fields to the search bar. I’ve added Search Everything, Property name, Property type, and Vacancy status as the default visible search fields.
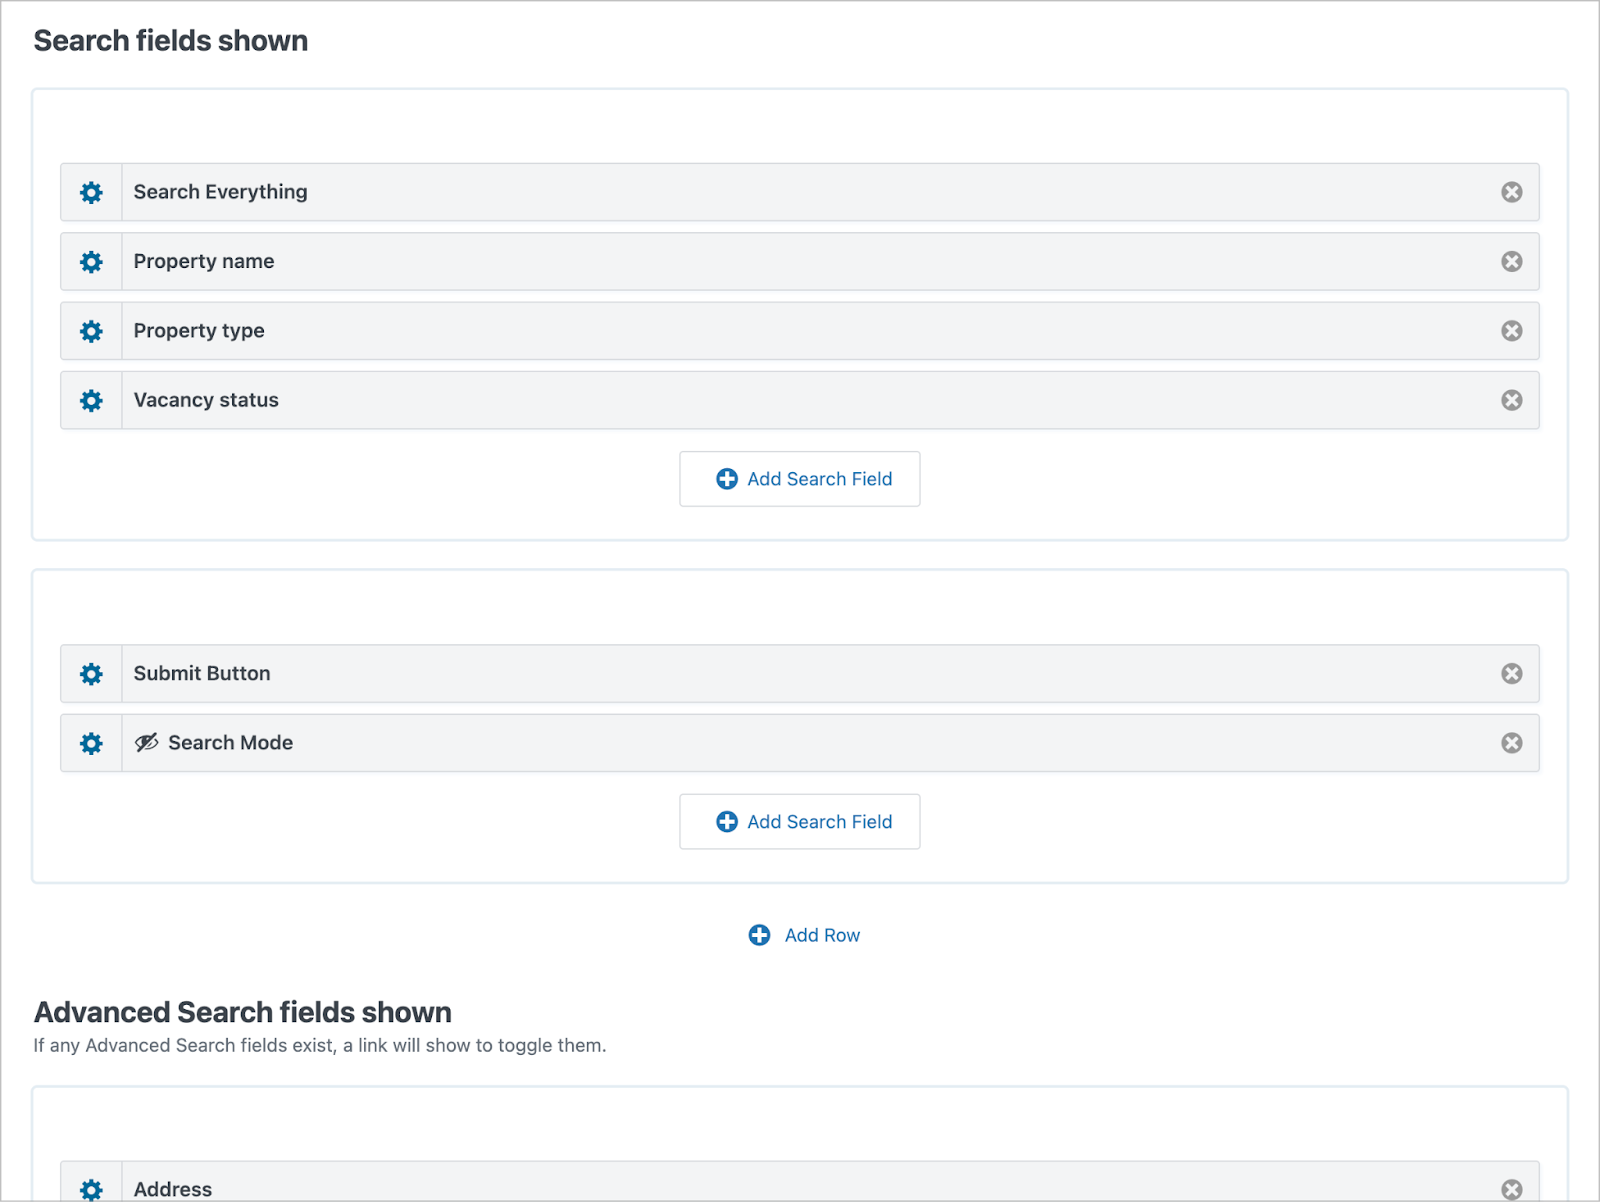
For additional search fields you don’t need all the time, you can add them under the Advanced Search fields shown section. Any fields added here will be hidden by default (users click the Advanced Search link to reveal them). I’ve added Address, Property type, Square footage, Bedrooms, and Bathrooms here.
Adding fields and calculated fields
In the Entries Fields section of the View editor we’ll add columns for the fields we want to display, like Property name, Address, Type, Square footage, Monthly rent, and our calculated fields.
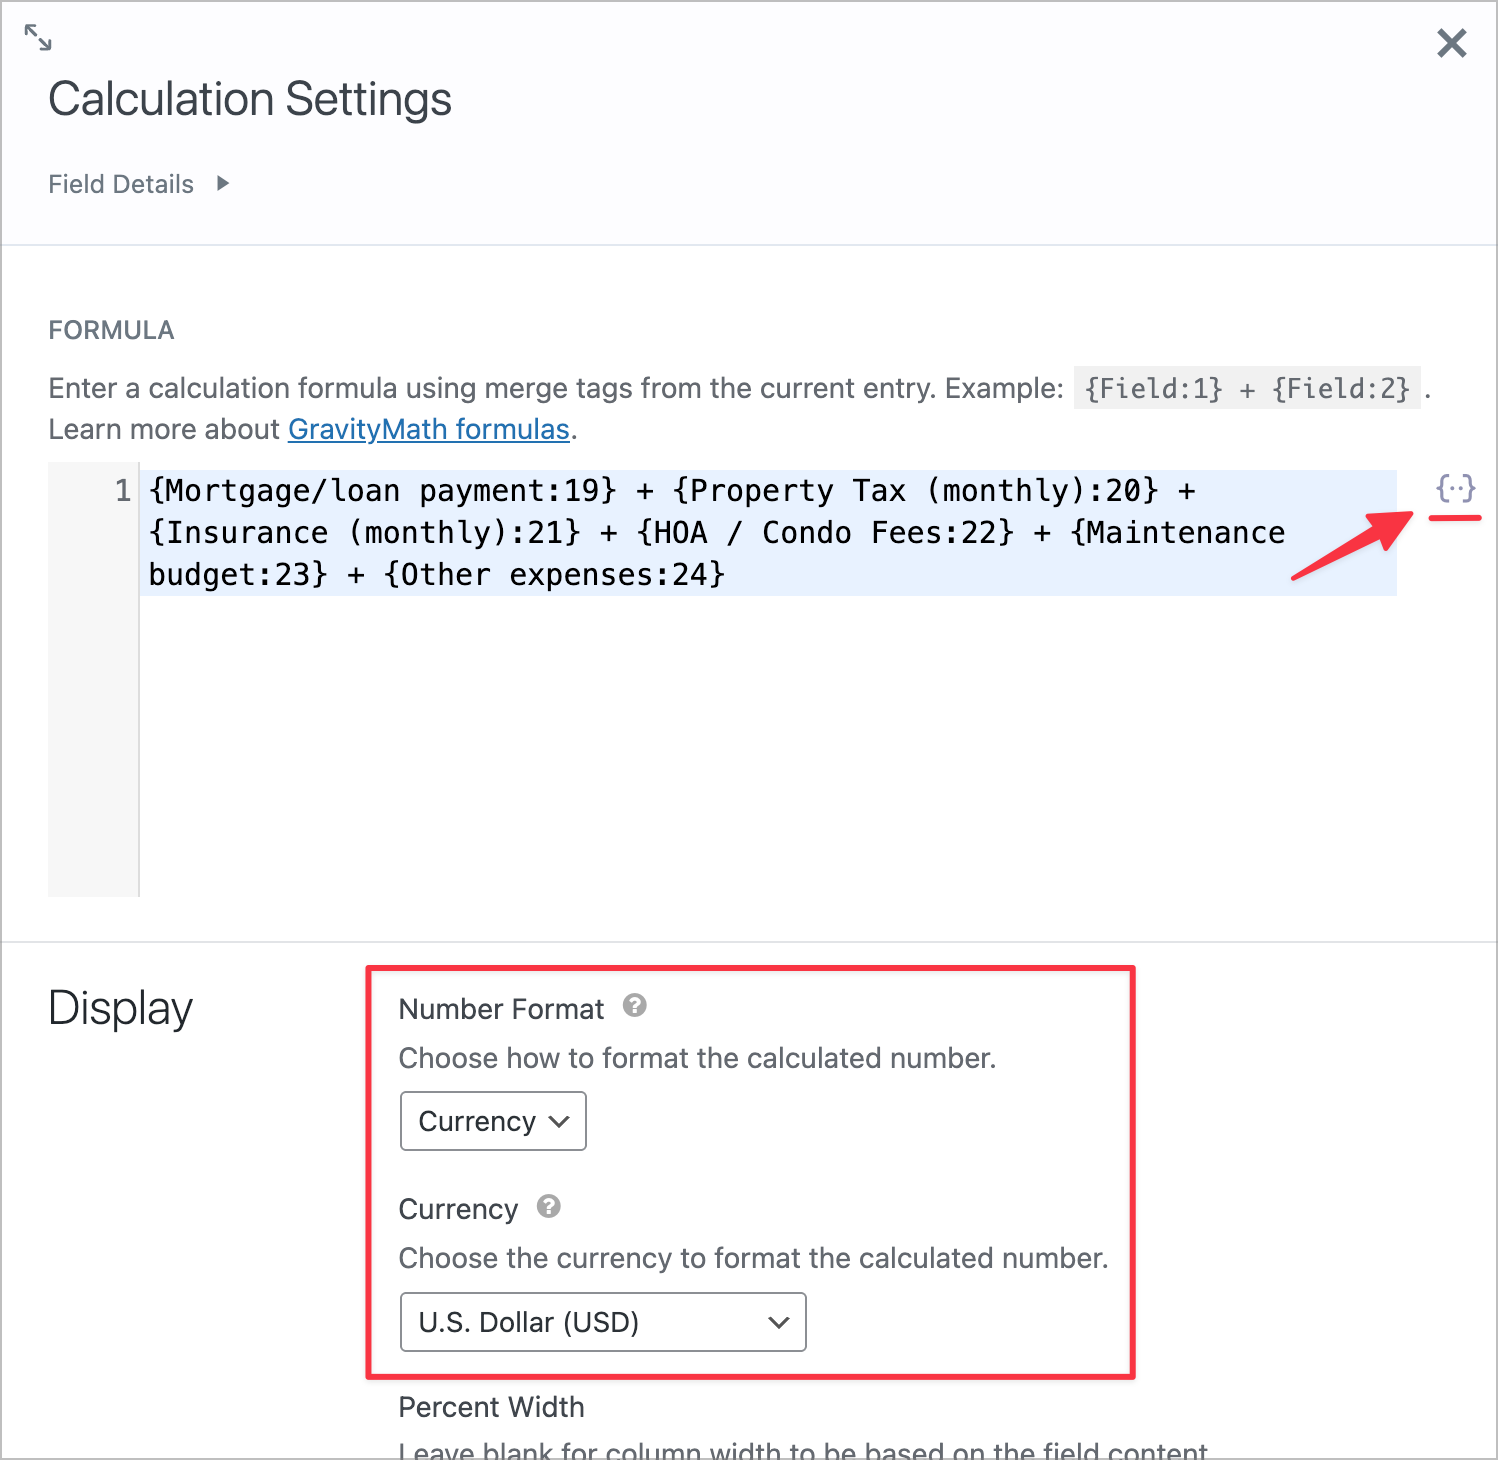
We’ll add calculated fields to the View using the Calculation custom field type that GravityMath adds to GravityView. This allows us to define formulas using Gravity Forms merge tags.

Pro Tip
Merge tags are placeholder values, like {Field Name:ID}, that dynamically pull in data from form entries. For example, {Monthly rent:18} pulls the monthly rent value for each entry. We can use these in formulas to compute new values on the fly.
Here are the calculations we’ll add:
| Calculation | Formula |
|---|---|
| Total monthly expenses | Mortgage + Tax + Insurance + HOA + Maintenance + Other expenses |
| Net monthly income | Rent – Total expenses |
| Annual net income | (Rent – Total expenses) x 12 |
| Deposit as % of rent | (Deposit / Rent) x 100 |
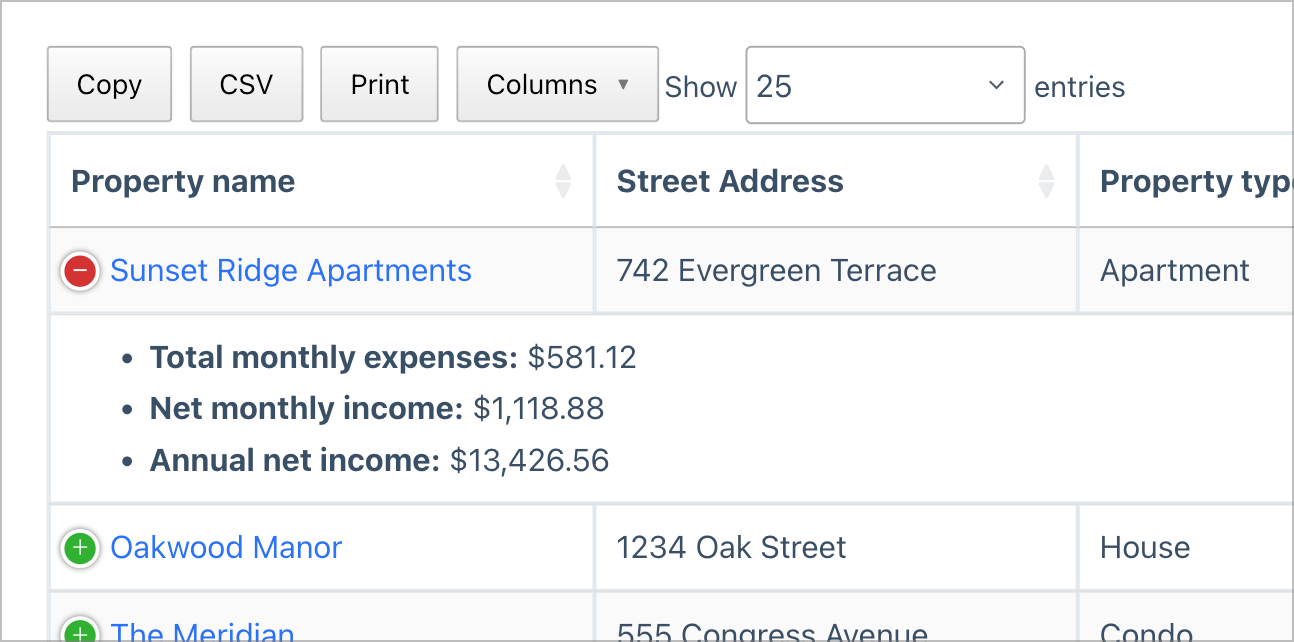
These calculated values appear as regular columns in the table but are computed dynamically.
Configuring the Single Entry Layout
When you click on a property name in the table, it opens the Single Entry view. This is the detailed page for an individual property, showing all of its information in one place.
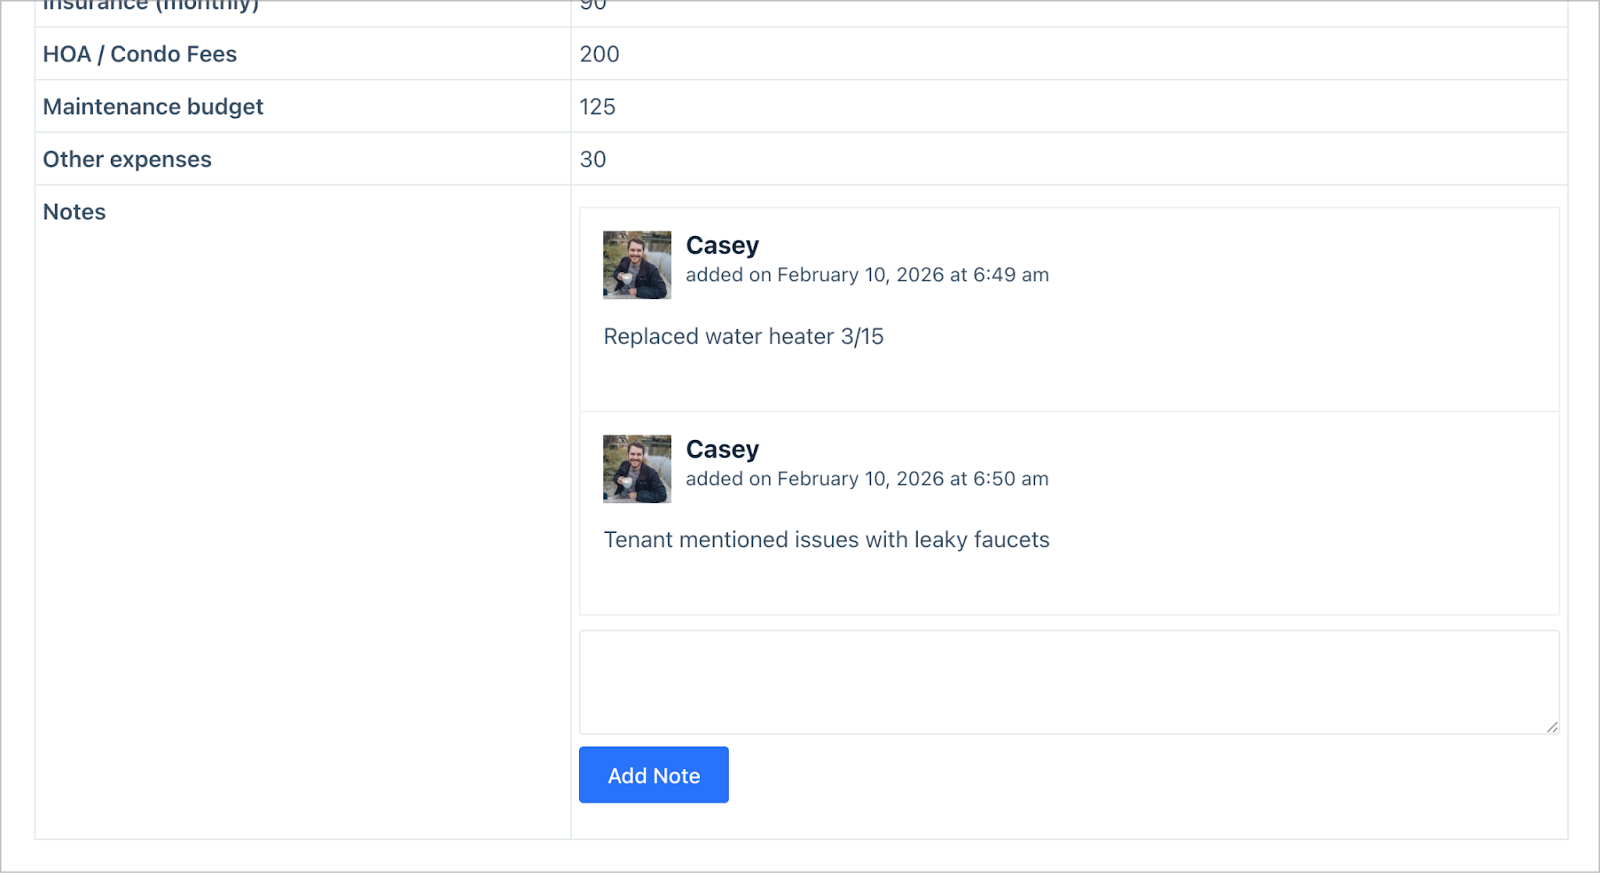
We’ll switch to the Single Entry Layout tab in the View editor and add all the form fields here. I’ve also added the Entry Notes field, which acts as a running log where you can attach notes to individual properties.
This is great for recording maintenance history, tenant communications, or anything else worth tracking. For example, “Replaced water heater 3/15” or “Tenant mentioned issues with leaky faucets”.
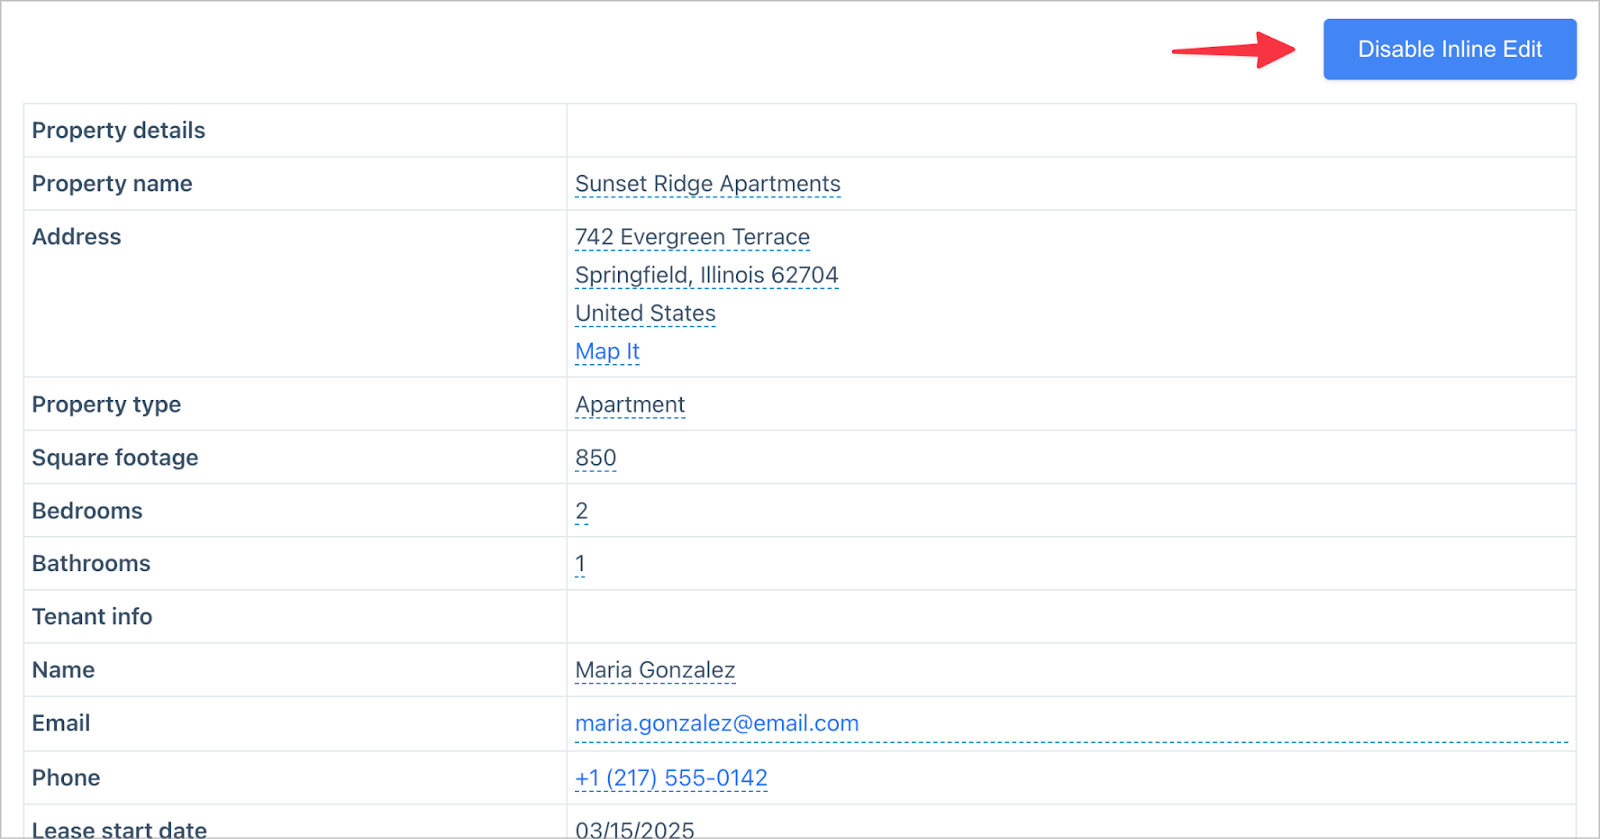
Enabling inline editing
GravityEdit allows you to edit entry data inline, without needing to use the Edit Entry view. To enable it, go to the View Settings and turn on inline editing.
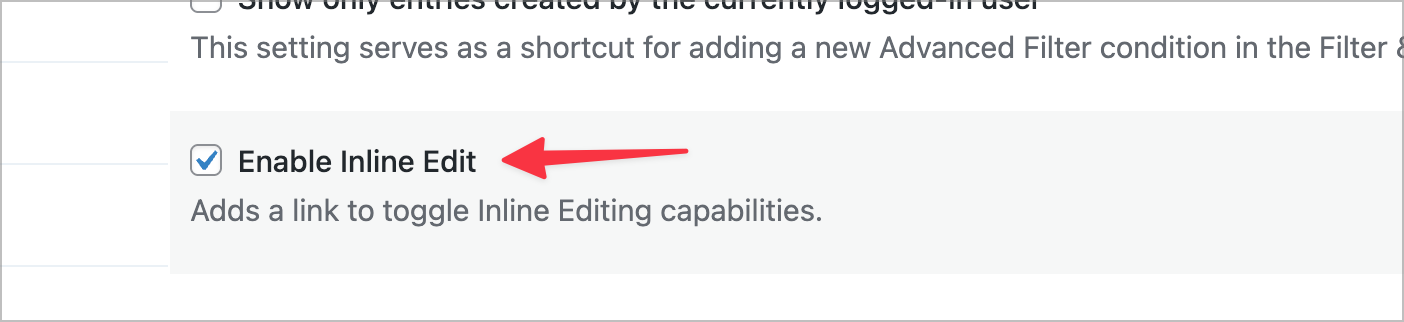
Now, an Enable Inline Edit button appears above the View on the front end. After clicking it, editable fields will have dotted underlines. Simply click on any value to update it in place. This makes it easy to quickly update rent amounts, vacancy statuses, or tenant details without leaving the page.

Step 3: Adding charts
Finally, we’ll add some visual flair using GravityCharts. Navigate to your form settings page, click GravityCharts and then Add New to create a chart feed. We’ll create two charts:
- Occupancy type — a Pie / Doughnut chart based on the Vacancy status field, giving you a quick visual breakdown of how many properties are occupied, vacant, or have notice given.
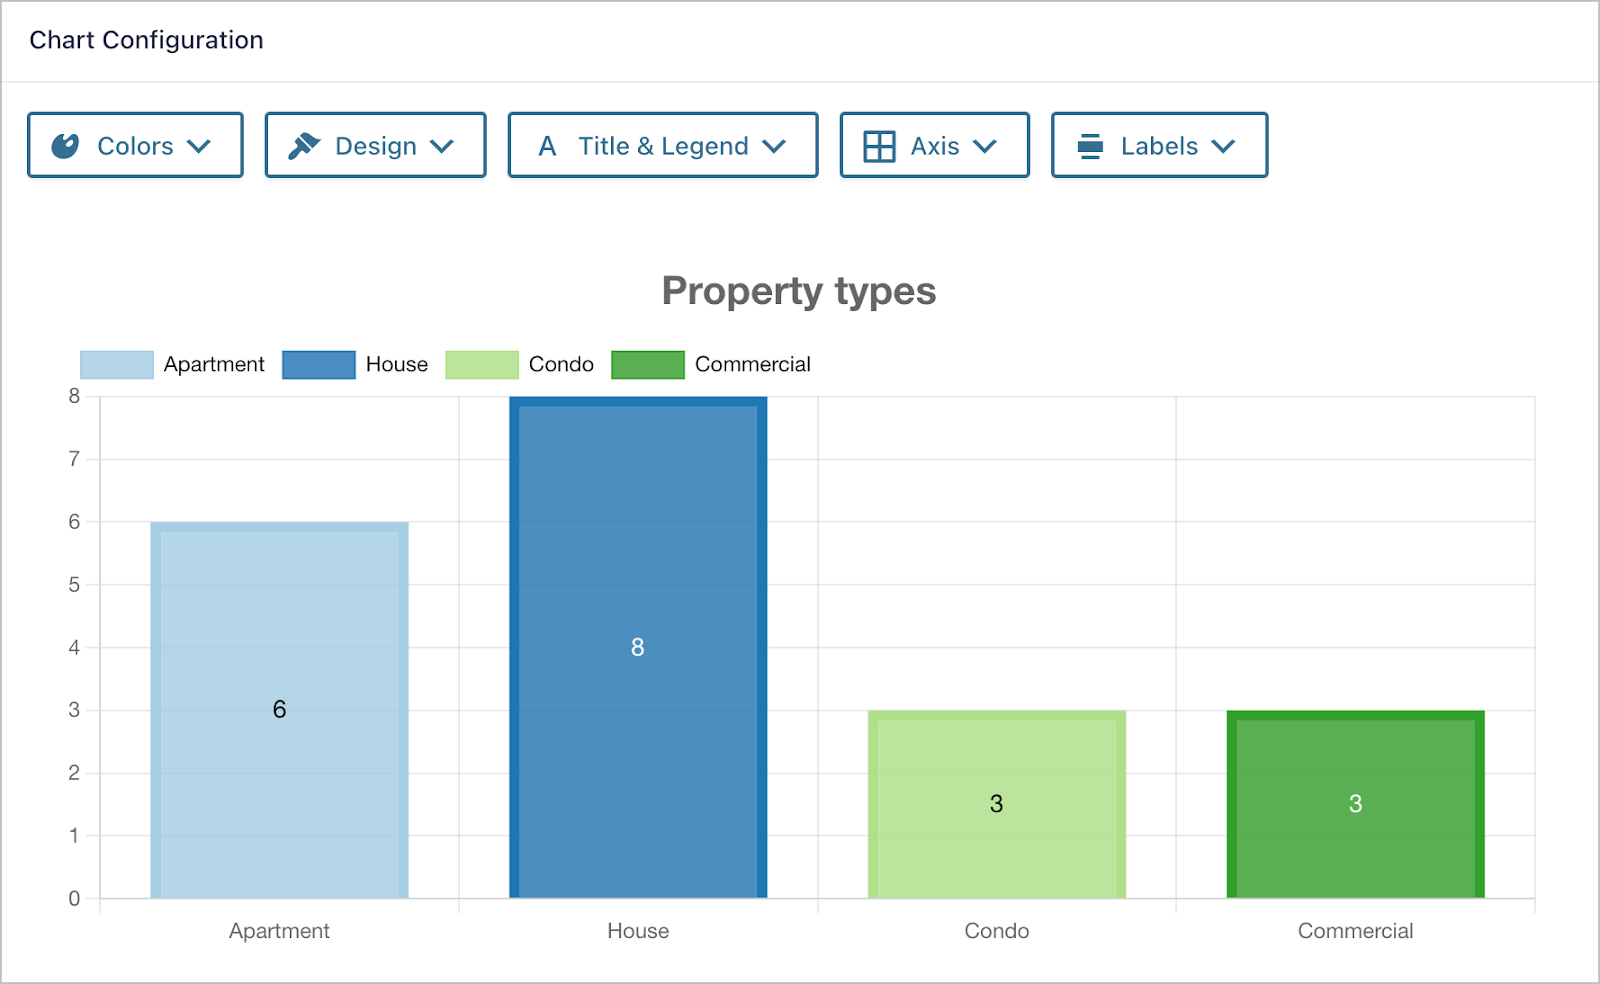
- Property types — a Bar / Column chart based on the Property type field, showing the distribution across apartments, houses, condos, and commercial properties.
To display these charts on the front end, we’ll add them as widgets in the View. Head back to the View editor, and in the Bottom Widgets area below the table, add the GravityCharts widgets.
Build your rental property management system today
That’s it! You now have a complete rental property management system built entirely inside WordPress. We covered creating the property submission form, building a searchable and sortable dashboard with GravityView, adding calculated financial fields with GravityMath, enabling inline editing with GravityEdit, and visualizing your data with GravityCharts.
Get started with this example and keep customizing it to fit your exact needs! Add new fields, create additional Views, or set up email notifications for lease expirations. So what are you waiting for? Try GravityKit today.

Helpful tips right in your inbox.
Subscribe to get the latest articles, information on releases and helpful Gravity Forms tips!
More articles

Launch Log: Row headers for screen readers, smarter conditional logic, and multi-View fixes
GravityView 3.1 adds row headers for screen readers, plus smarter conditional logic in GravityCalendar and fixes for DataTables, Maps, and Dynamic Lookup.

Ecommerce platform market share 2026: WooCommerce leads the web, Shopify leads the top tier
Ecommerce platform market share in 2026, from HTTP Archive data. WooCommerce leads the whole web at 6.64%, but Shopify already leads the top 1M sites.

Launch Log: 3D map enhancements, smarter filtering, and improved performance on large data sets
GravityKit’s July 9 launch log: 3D map starting views and viewport loading, searchable field-to-field filtering, and fixes across DataTables and more.