Published
•
Updated
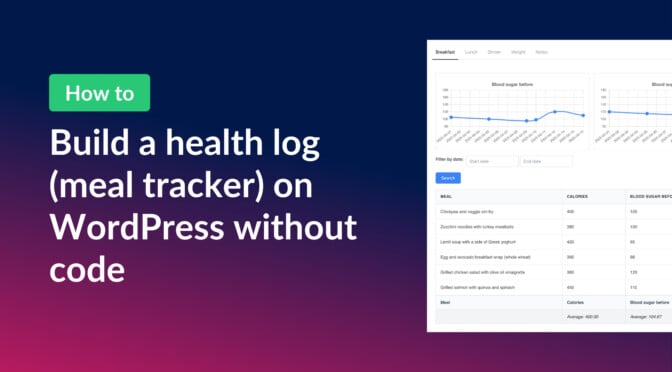
How to build a health log and meal tracker on WordPress without code
Build a no-code health log and meal tracker on WordPress using Gravity Forms and GravityKit. Includes meal tabs, trend charts, and a personal notes dashboard.
In this post, I show you how to build a no-code system for easily tracking meals and monitoring health metrics. Whether you’re a nutrition coach wanting to offer this to your clients, or simply striving for a healthier lifestyle, a custom health log can make a world of difference.
With tabs for different meals, charts to visualize trends, and a dedicated space for personal notes, this tracker can be customized based on your needs. Let’s dive into how you can set this up using Gravity Forms and GravityKit.
Sneak peek
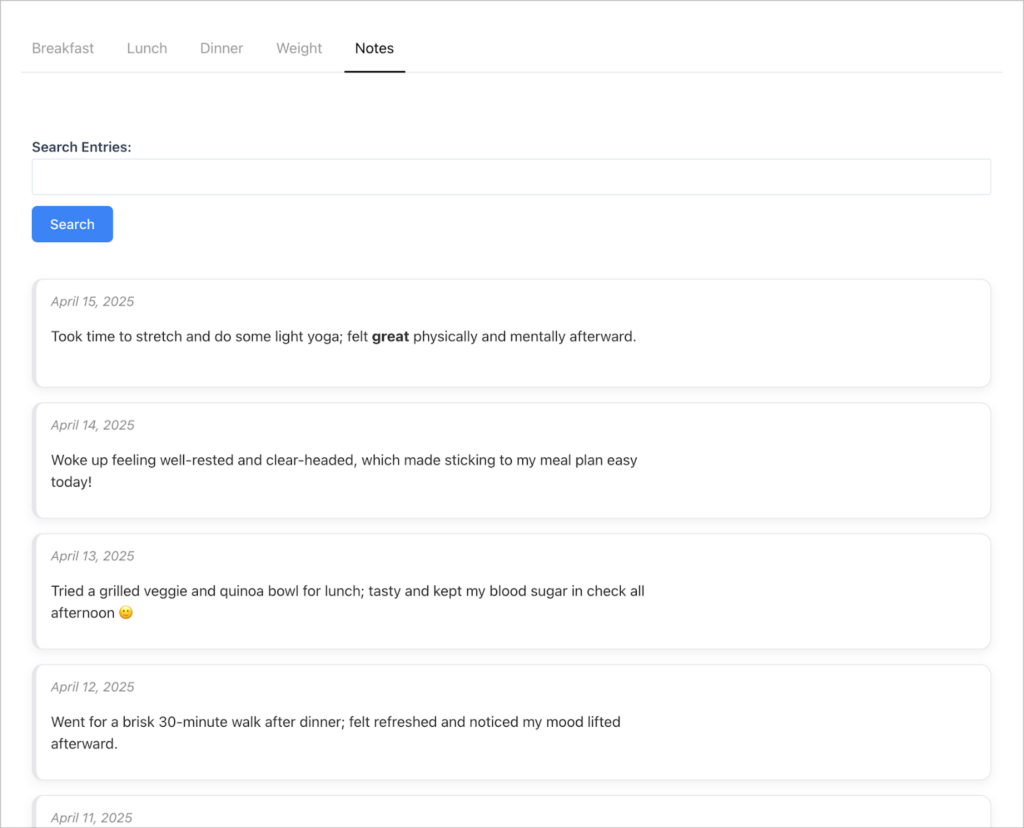
Here’s a preview of the finished health log! As you can see, there are tabs at the top enabling users to switch between different dashboards (breakfast, lunch, dinner, weight and notes). These tabs were added using the “Tabs” block that comes with the free Stackable plugin. Inside each tab is a separate View for logging and visualizing key metrics over time.

The “Notes” tab allows users to reflect on how they’ve been feeling and the impact of their health interventions.

You can see a live demo of the health tracker here, and clone the site for a full 7-day trial of all GravityKit plugins.
What you’ll need
Here are the plugins you will need to create a health log like the one in this example:
If you already have Gravity Forms, you can get everything else you need with the GravityKit All Access Pass.
Creating the health log form
Let’s start by creating the health log form. This form will enable users to track their meals (including calories), weight, and blood sugar levels. Users will also be able to record notes about how they’ve been feeling.
We could use separate forms for each metric being tracked, but for this example we’re going to use a single form with conditional logic that shows/hides fields based on what the user wants to track.
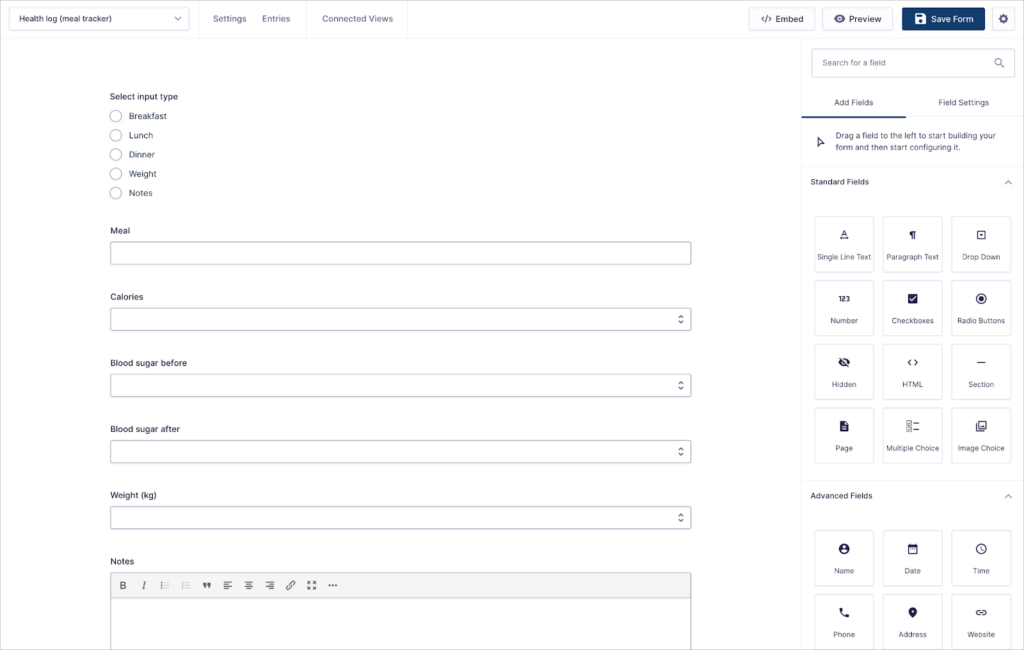
- Select input type (Radio Buttons field)
- Meal (Single Line Text field)
- Calories (Number field)
- Blood sugar before (Number field)
- Blood sugar after (Number field)
- Weight (kg) (Number field)
- Notes (Rich Text Paragraph field)
Next, we’ll add conditional logic to each field type in order to hide it if it isn’t relevant to what the user wants to track. For example, if the user selects “breakfast” as the input type, they should then see the Meal, Calories, Blood sugar before and Blood sugar after fields. Similarly, if they selected Weight, they should only see the Weight (kg) field.
Here’s what that looks like:
Pro tipSee this handy guide to learn more about conditional logic in Gravity Forms.
Creating the charts
Adding charts to the health log will enable users to see how key metrics change over time, such as blood sugar levels or weight. This is important as it allows users to see if they’re making progress and whether their health interventions are working.
To create charts from form data we can use GravityCharts. This add-on enables you to design modern-looking charts using a simple visual interface.
To create a new chart, we’ll go to the form settings, select GravityCharts on the left and click Add New.
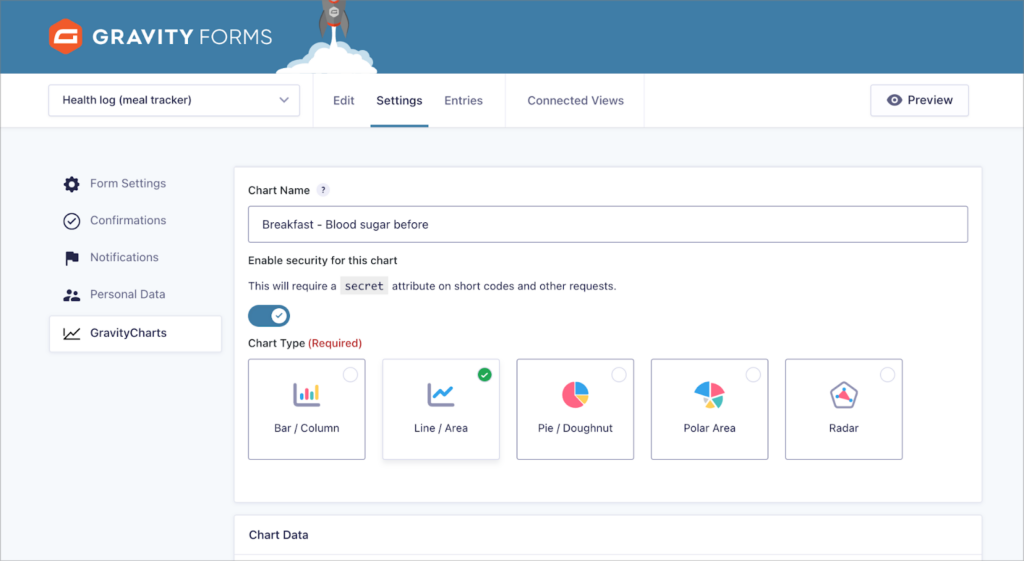
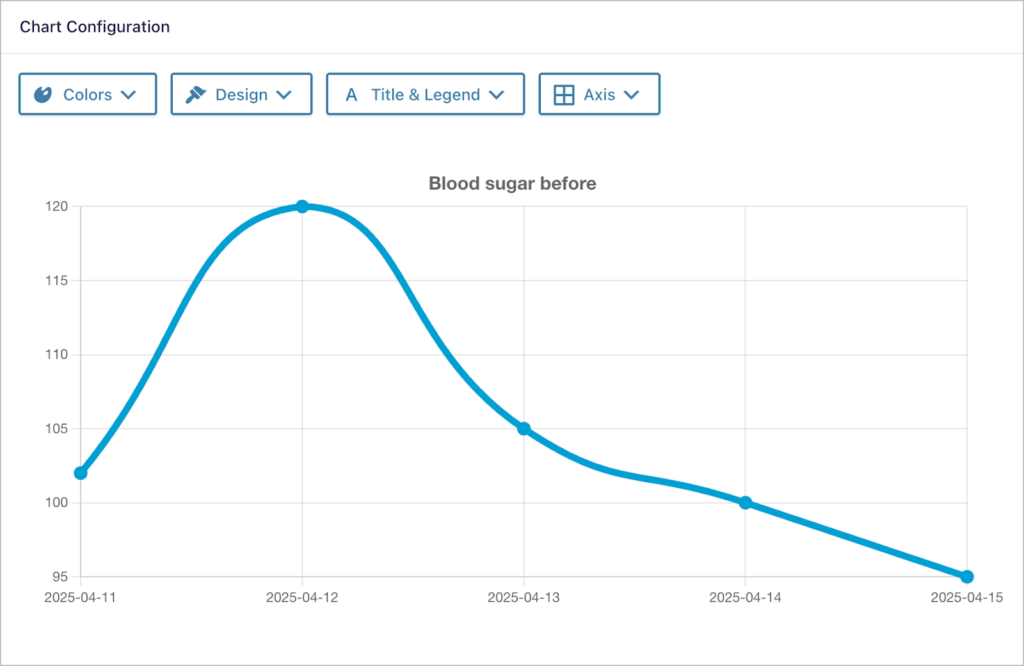
After giving our chart a name, we’ll select Line / Area as our chart type. This is the ideal type of chart for seeing how a metric changes over time.
Next, we’ll configure the chart by selecting what data we want to display.
Let’s go through each options, one by one.
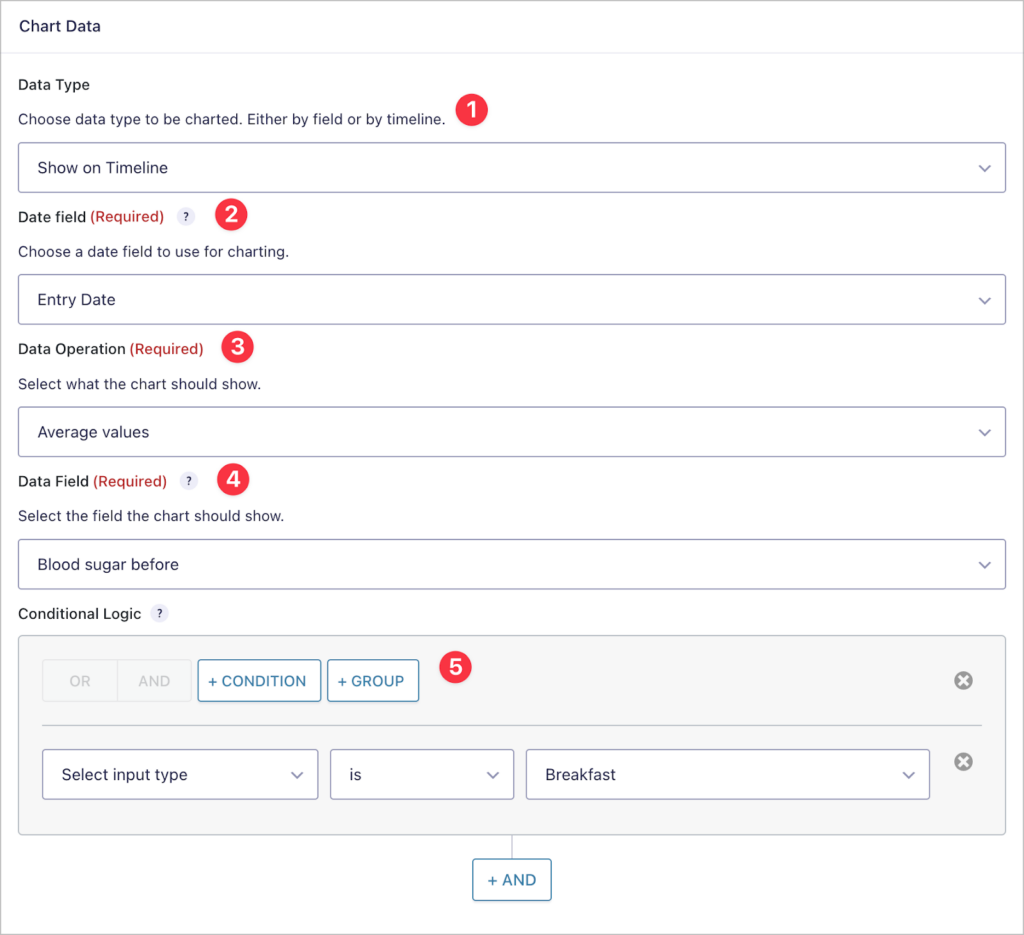
- Data Type – We’ll select Show on Timeline to create a chart that displays data over time.
- Date Field – Here we’ll select Entry Date (the date the entry was submitted by the user).
- Data Operation – Here we can select whether we want to chart the average, min, max, count or sum.
- Data Field – The metric we want to visualize. In this case, the blood sugar reading before a meal.
- Conditional Logic – Conditional logic enables us to filter entries using rules. Let’s add a conditional to only show entries for breakfast, not the other meals.
Next, we’ll scroll down to the chart configuration panel. Here, we can customize the chart colors, add labels, add axes labels and much more.
Following this same process we can create all the other charts that we need!
Creating the meal tracker View
The next step is to create the dashboard View for tracking meals, calories and blood sugar levels.
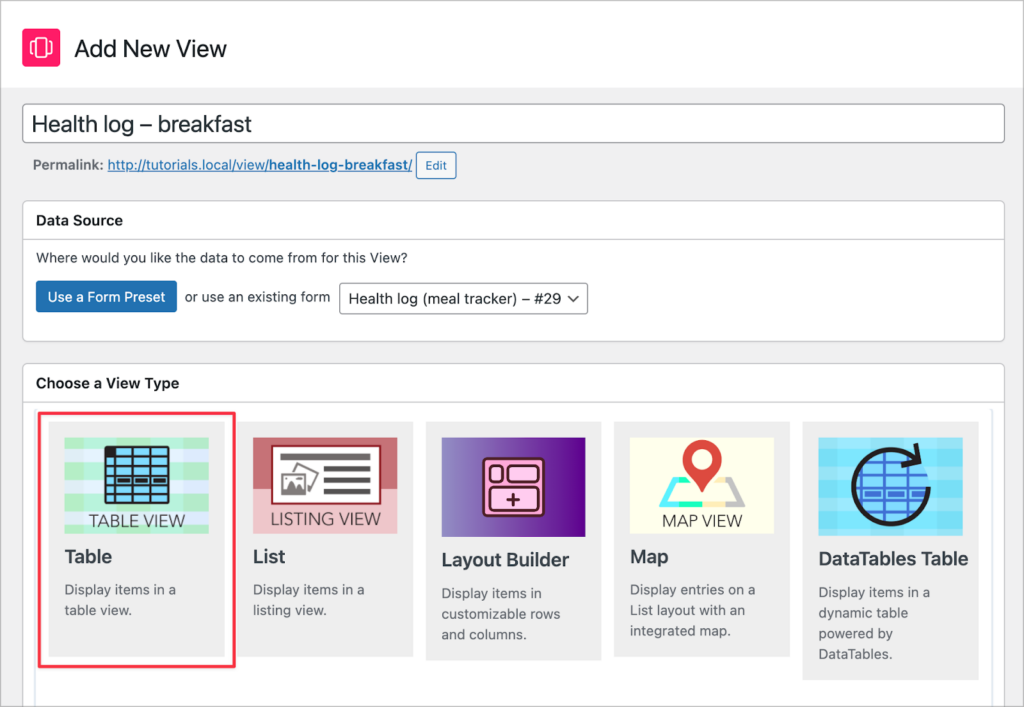
To create a new View, we’ll hover over GravityKit and click New View. After giving our View a name, we’ll select our Health log form as the data source and choose Table as our View type.
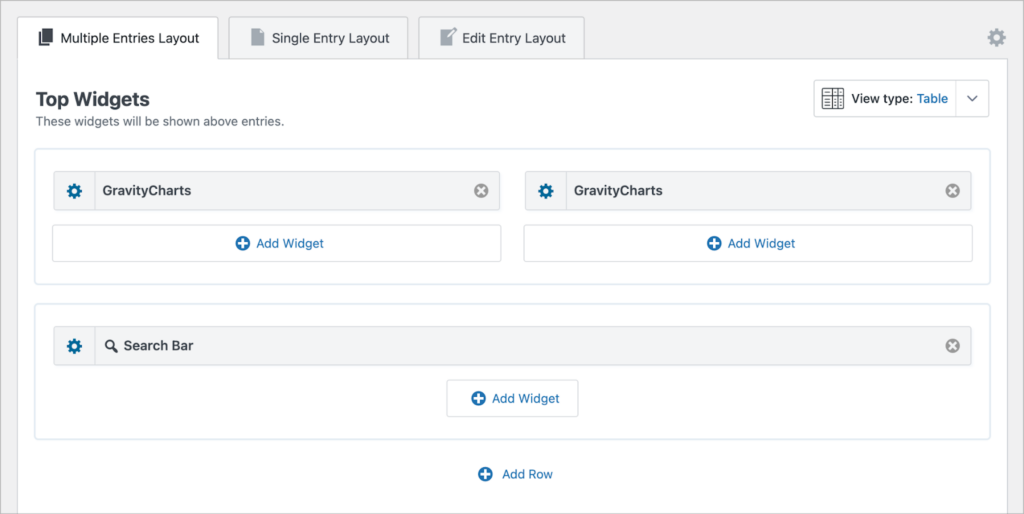
We can now start constructing our dashboard using GravityView’s drag and drop builder. Let’s start by adding our charts to the Top Widgets section of the View editor. We can do this by clicking the Add Widget button and selecting the GravityCharts widget type.
Finally, we’ll add another row below that with a search bar widget, enabling users to filter entries by date.
Next, we’ll scroll down to the Entries Fields section to add the fields we want to display in the table. Here we’ll add the Meal, Calories, Blood sugar before and Blood sugar after fields. Each of these fields will be a column in our table.
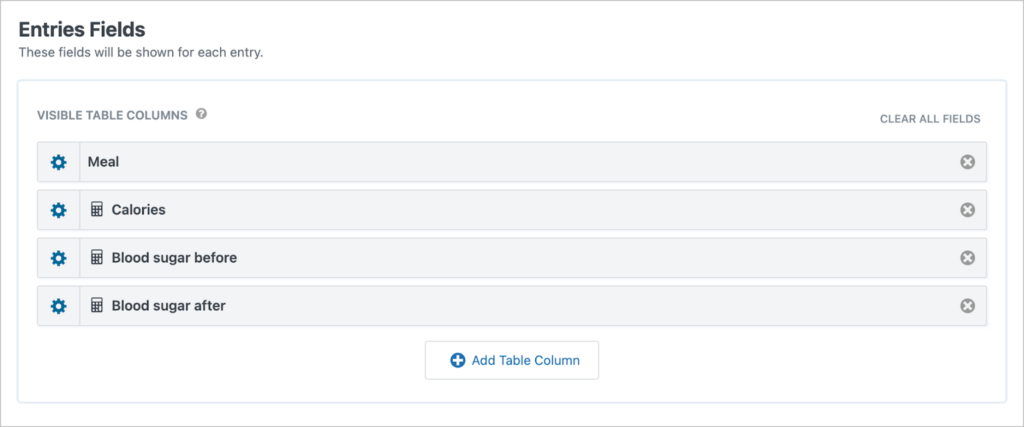
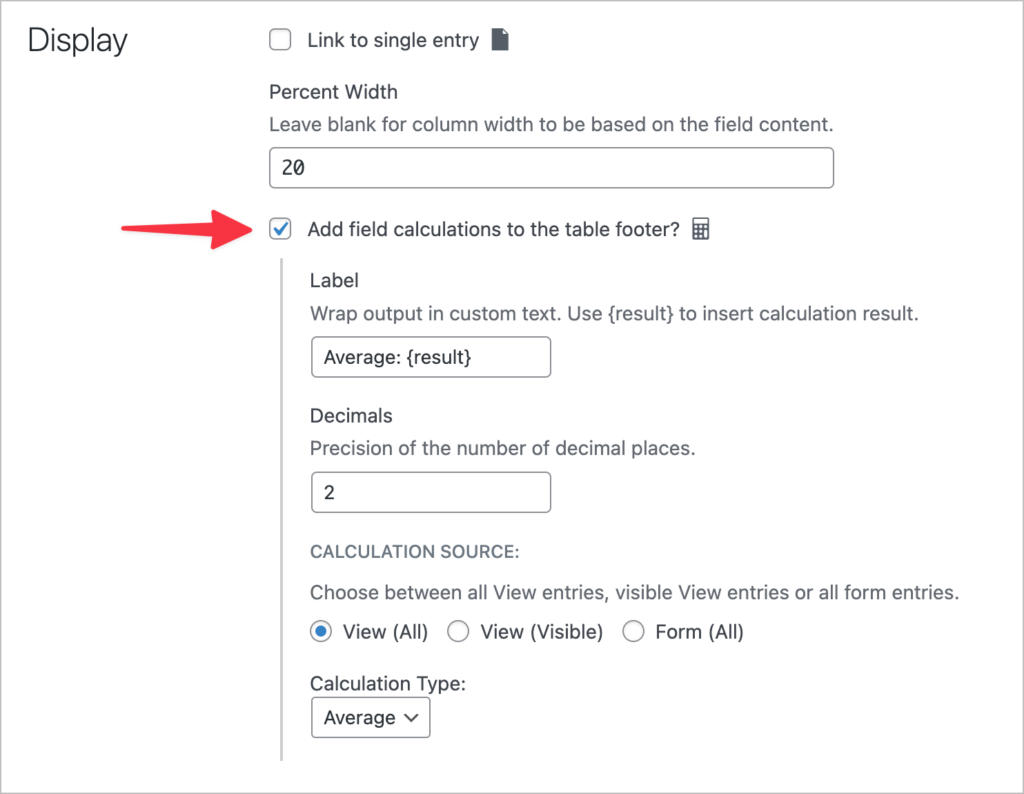
In the field settings we can add footer calculations and set the calculation type to average. This enables us to output the average value for each of the numerical fields in our table.
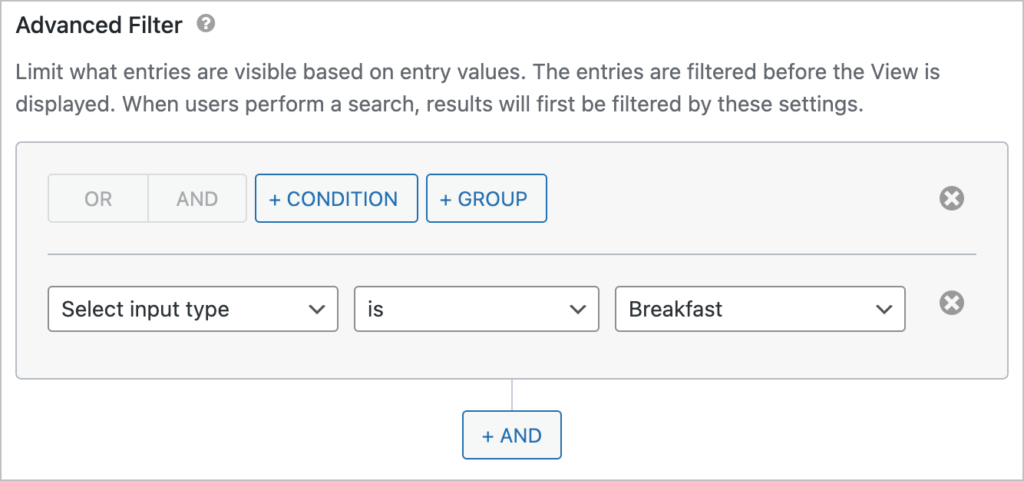
This particular View is for tracking breakfast meals, so we need to add a filtering condition to ensure it only displays data from breakfast entries. We can do this using GravityView’s advanced filter.
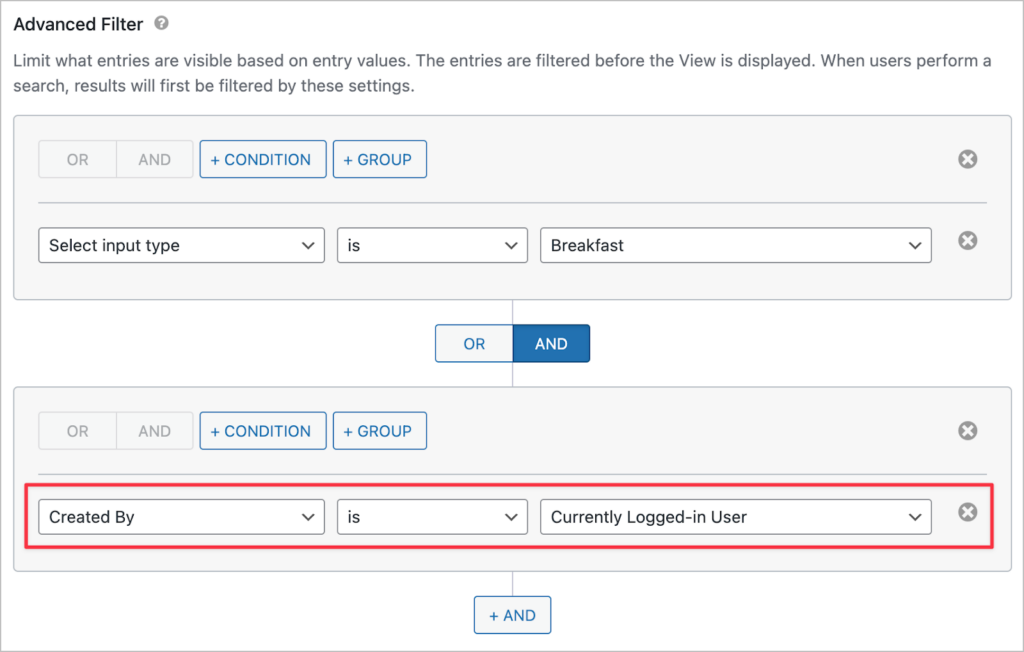
If we were building a tracker for clients to use, we could also add a second condition to ensure that users only see entries that they have added.
That’s it! Here’s what our View looks like on the front end:
The Lunch and Dinner tabs will have similar dashboards. In fact, to create these, we can simply duplicate this View and change the filtering condition to pull in entries from lunch or dinner.
Creating the notes View
The Notes tab is different from the others. Here, users can reflect on how they’re feeling and view notes that they’ve added previously. It’s almost like a personal journal for tracking their progress over time.
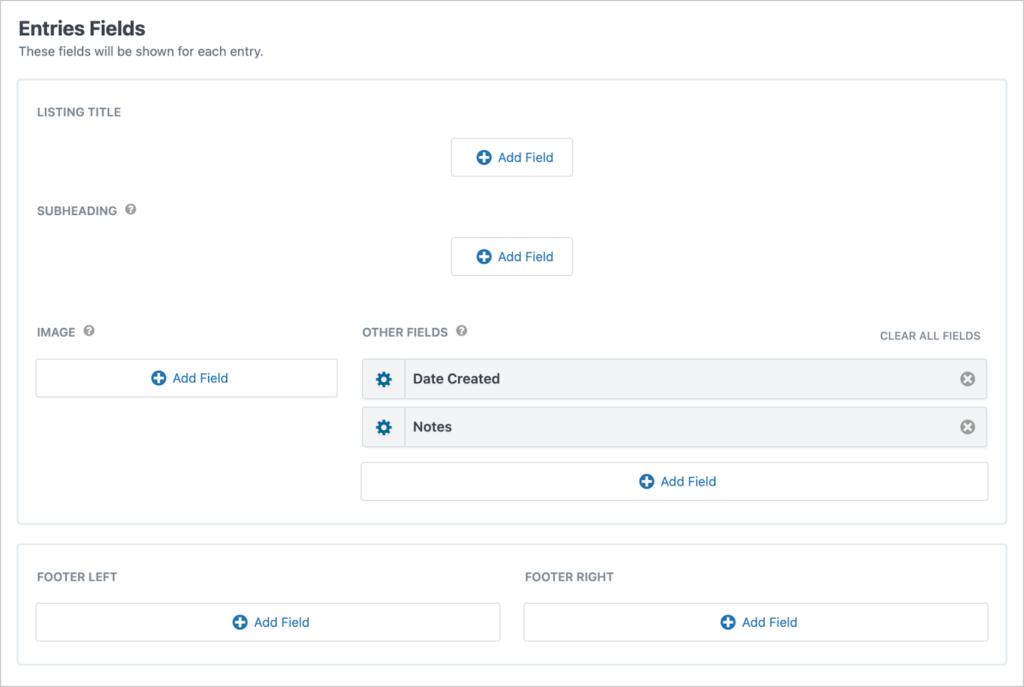
For this, we’re going to create another View, but using the List layout this time. After creating the View, we’ll add the Date Created and Notes fields to the Other Fields section of the View editor.
Next, we’ll scroll down to the View settings, click on the Filter and Sort tab and add an advanced filtering condition to ensure only note entries are being pulled into the View.
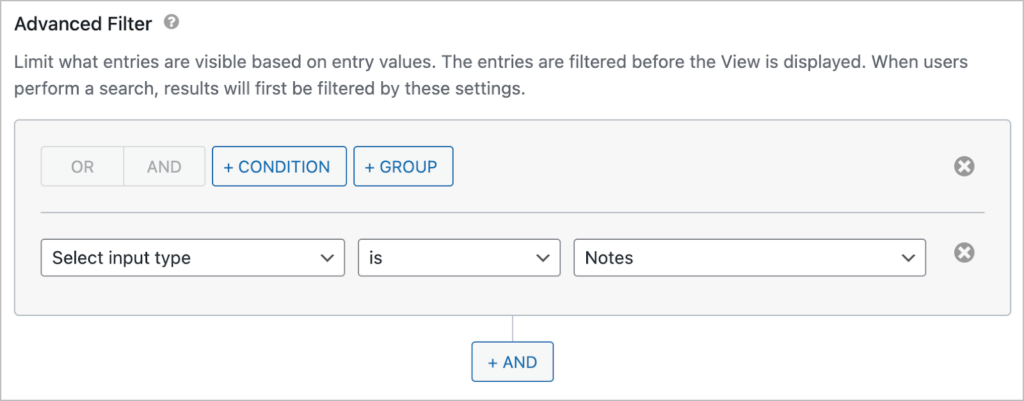
It’s a very simple View configuration. If you want yours to look the same as the example below, you can add this CSS snippet to your View.
That’s it!
Create a health tracker today
And there you have it—a complete, dynamic health tracking dashboard built with GravityKit! From visualizing blood sugar trends to logging meals and jotting down daily reflections, this setup empowers users to take control of their health journey in an intuitive, accessible way.
What’s even better? You can tailor this same approach for other use cases too—like fitness tracking, medication logs, or even mental health journals. With Gravity Forms as the foundation and GravityKit tools doing the heavy lifting, the possibilities are virtually endless.
So, what are you waiting for? Learn more about GravityKit today.

Helpful tips right in your inbox.
Subscribe to get the latest articles, information on releases and helpful Gravity Forms tips!
More articles

How to build a WordPress CRM without code (a contact database you own)
Build a simple WordPress CRM with GravityView. Turn the Gravity Forms entries you already collect into a no-code contact database you own, with no monthly fees.

Launch Log: Distance sorting for radius searches, DataTables search improvements, and import reliability fixes
The latest GravityKit releases add distance sorting to map searches, bring built-in search to DataTables, and fix GravityCharts and GravityImport edge cases.

WordPress page builder market share 2026: Elementor leads at 32.67%
Elementor reaches 32.7% of WordPress sites. WordPress Block Editor 20.6%, wpBakery 8.5%, Divi 5.7%. Latest HTTP Archive crawl, share-of-WordPress basis throughout.