In this post, I guide you through the simple process of creating an academic journal using WordPress, Gravity Forms, and GravityView. No coding skills required!
Learn how to accept article submissions, build a reviewer dashboard, and display approved research papers in an organized, searchable format, making it easy to manage your very own scholarly publication.
Download the free academic article submission form template now!
Import the template into Gravity Forms and customize as necessary.
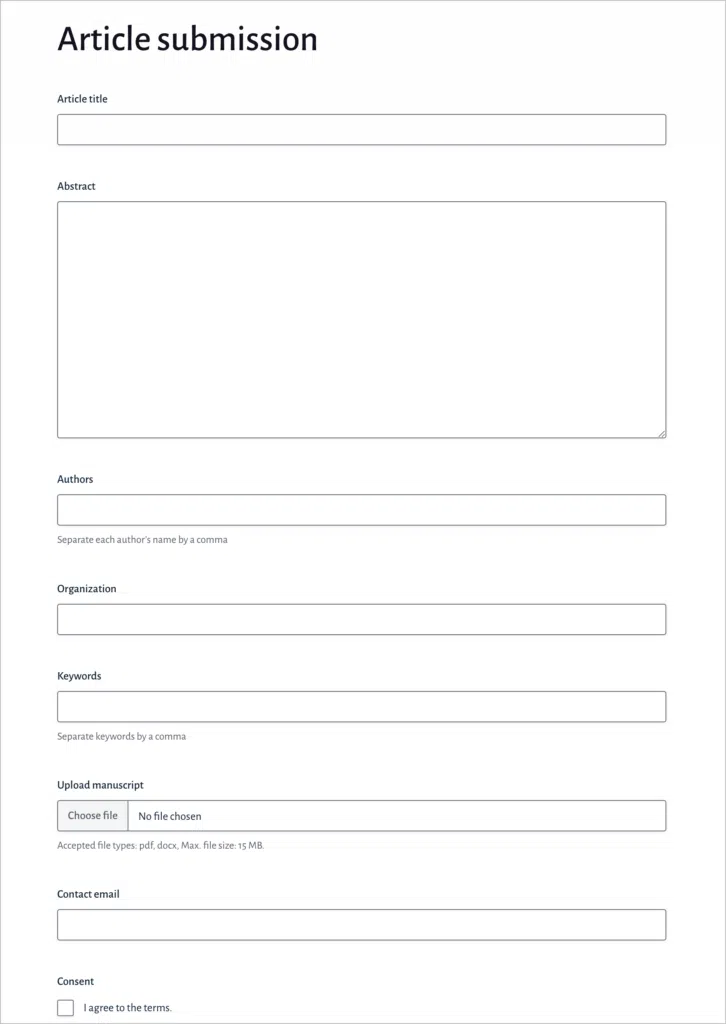
Sneak peek
Here’s a sneak peek at the finished academic journal. As you can see, articles are displayed in a list and there’s a search bar at the top.
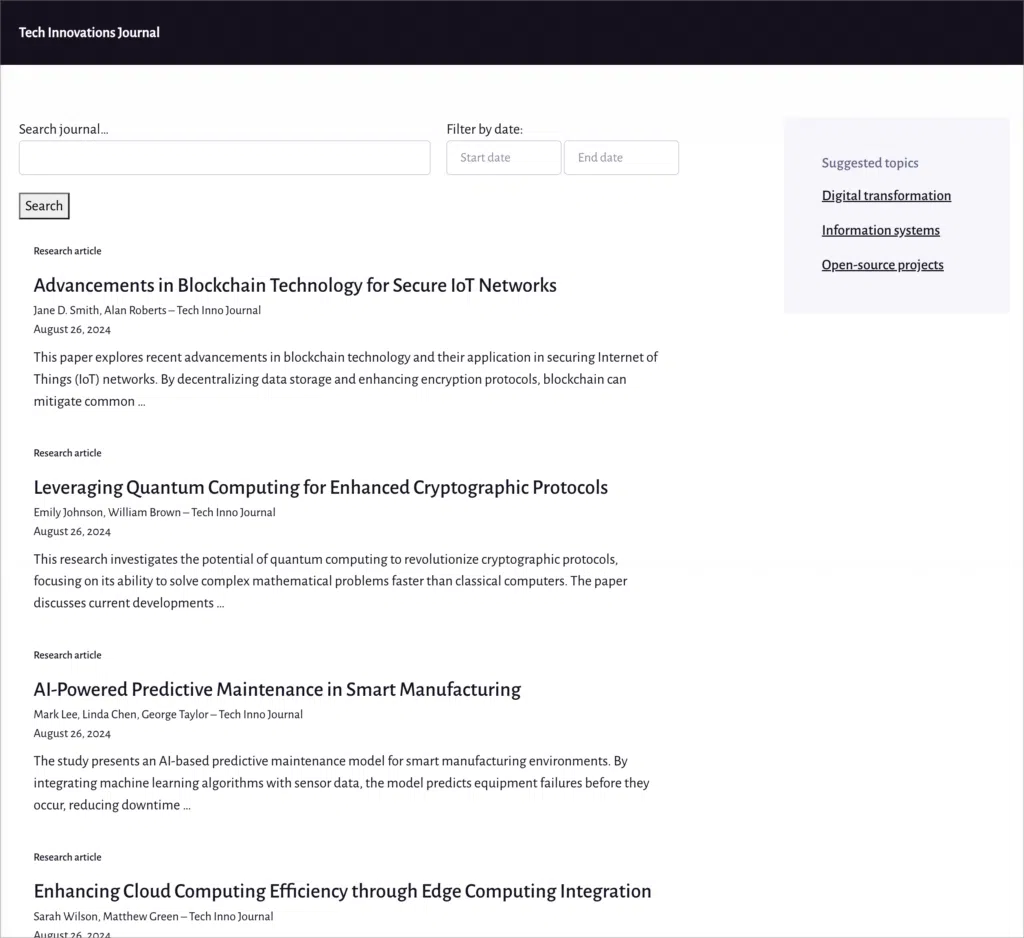
By clicking on an article, you can view more information about that article, including the full abstract. There’s also a button here enabling you to download the full paper as a PDF.

What you’ll need
Here are the plugins you will need to build an academic journal like the one in our example above.
What is an academic journal?
An academic journal is a scholarly publication that contains articles, research papers, and reviews written by experts in a specific field of study. These journals serve as a platform for publishing new research findings and advancing knowledge.
Each article submitted to an academic journal typically undergoes a rigorous peer-review process, ensuring that the content is of high quality, original, and contributes to the field.
Academic journals cover a wide range of disciplines, from the natural sciences and engineering to social sciences and humanities. Academic journals are vital for researchers looking to stay updated on the latest developments in their area of expertise.
The why and how of creating an academic journal
If you’ve found a gap in the existing research literature, launching your own journal can help address that! Moreover, some fields of study may be new or relatively unexplored. Creating a journal can help foster a community of scholars in the field and provide a platform for sharing important knowledge and findings.
Creating your own academic journal requires building a website to host articles, creating a review process, and promoting it to the academic world. I think WordPress is an excellent platform for hosting an academic journal because it’s simple to use and high customizable!
Worried about needing web development expertise, or coding skills? Don’t be. Using WordPress combined with Gravity Forms and GravityView will enable you to build an academic journal in a few simple steps!
Create a form for submitting articles
The first thing we need to do is create a form that will enable researchers to submit their papers for publication.
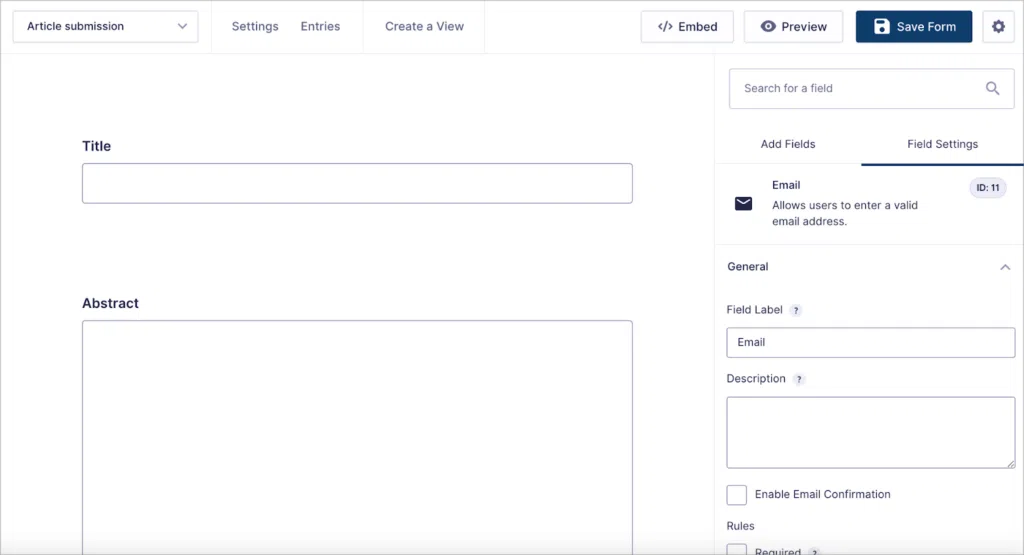
Let’s open the Gravity Forms editor and create a new, blank form. The fields you add to your form will depend on the data you need to collect. For this example, we’ll keep things simple by adding the following fields:
- Title (“Single Line Text” field)
- Abstract (“Paragraph Text” field)
- Authors (“Single Line Text” field)
- Organization (“Single Line Text” field)
- Keywords (“Single Line Text” field)
- Upload manuscript (“File Upload” field)
- Email address (“Email” field)
- Consent (“Consent” field)
If you want to, you can also create administrative fields for your form. These are form fields that are only visible to administrators. Using these fields, you can add information to the submission after it’s been approved, such as a digital object identifier (DOI) or a citation.

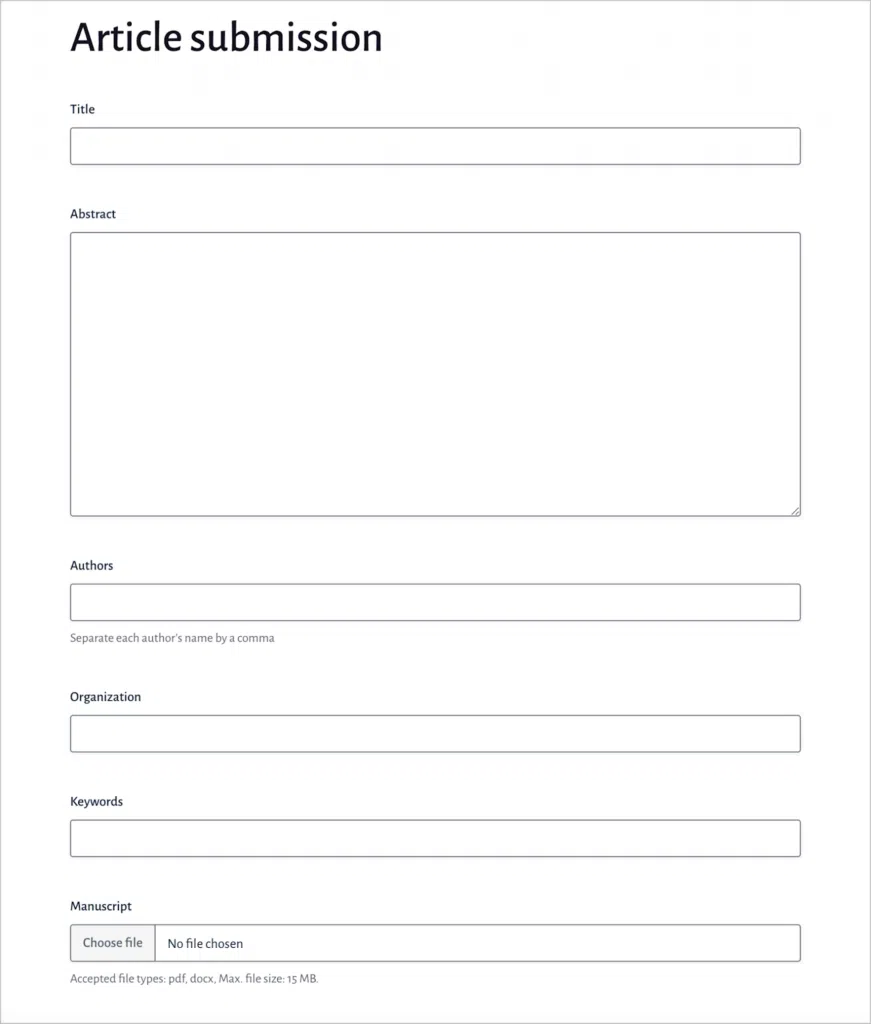
Here’s what our finished submission form looks like:
After creating our submission form, the next step is to configure notification emails so we can notify researchers when their papers are approved.
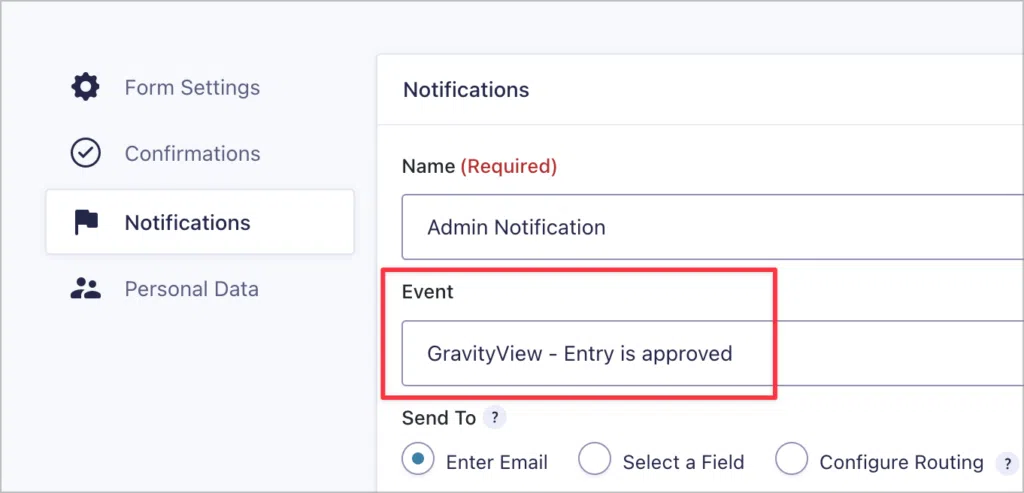
To do this, we’ll go to the form settings and click on “Notifications”. Here we can create a new notification and set the “Event” to “GravityView – Entry is approved”. This will ensure that the notification email is only sent when a submission has been approved.
Now we can scroll down and add the notification message text. Here we can use merge tags to populate the message dynamically based on the details provided in the authors’ submission!
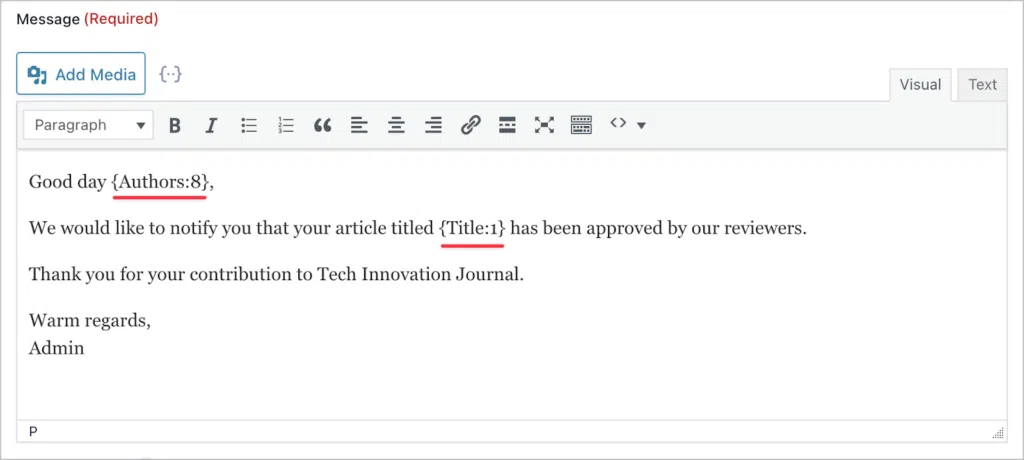
Now let’s move on to the next step.
Create a dashboard for reviewing submissions
Before we can build the article feed, we need to create a dashboard that will allow reviewers to approve or reject new article submissions. We can do this using the built-in approval feature in GravityView!
Let’s start by creating a new View using the DataTables layout and linking it to our article submission form.
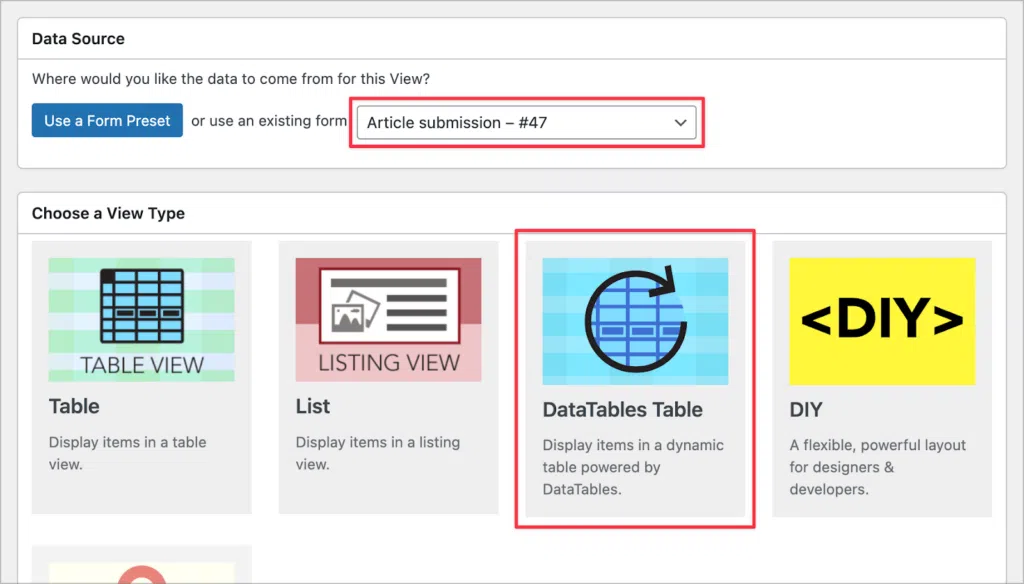
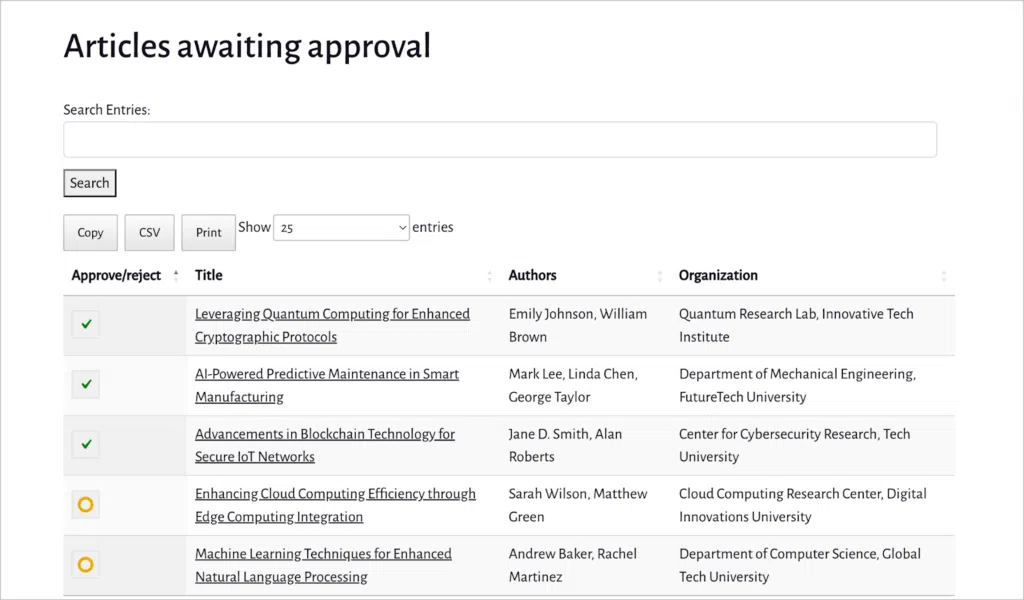
Here we can add the “Approve/reject” field. This will enable reviewers to read through submissions and decide whether to approve them for publication.
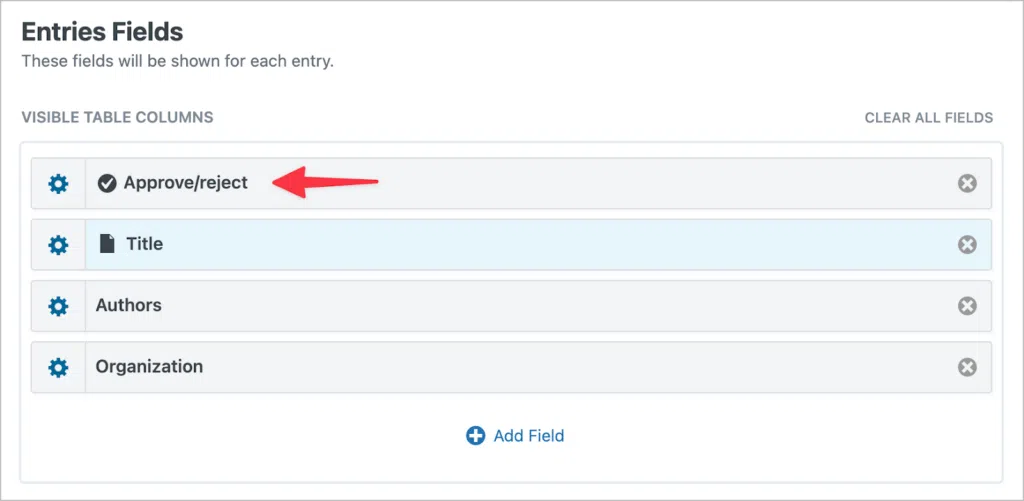
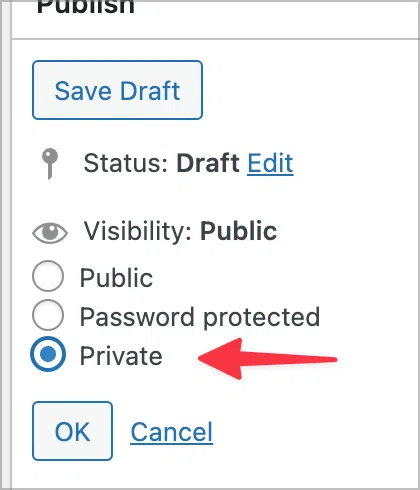
Finally, we’ll set the visibility to “Private” to ensure that only administrators will be able to access this View.
Here’s what the article approval View looks like on the front-end:
Now that we have a way for reviewers to approve or reject articles, we can turn our attention to the main View that will display published research papers on the front-end.
Create a View to display approved articles
Now we can create a secondary View to display approved articles in a list on the front-end. For this example, we’re going to create a similar layout to Google Scholar. We’ll create a list of articles; for each article we’ll show the title at the top, followed by the authors and date, and then an excerpt from the abstract below.
💡 Pro tip: Bear in mind that GravityView’s flexible builder enables you to create different kinds of layouts for your data—you’re not limited by the example here!
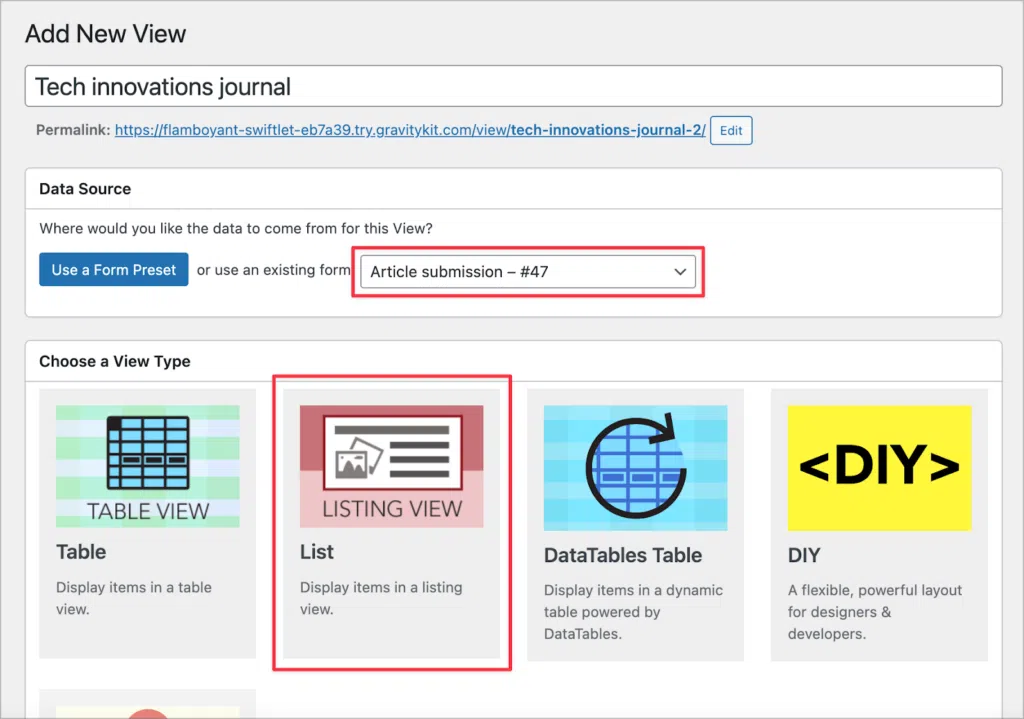
To create a new View, we’ll hover over “GravityKit” and click “New View”. After giving our View a name, we’ll select the “Article submission” form as our data source and “List” as our View type.
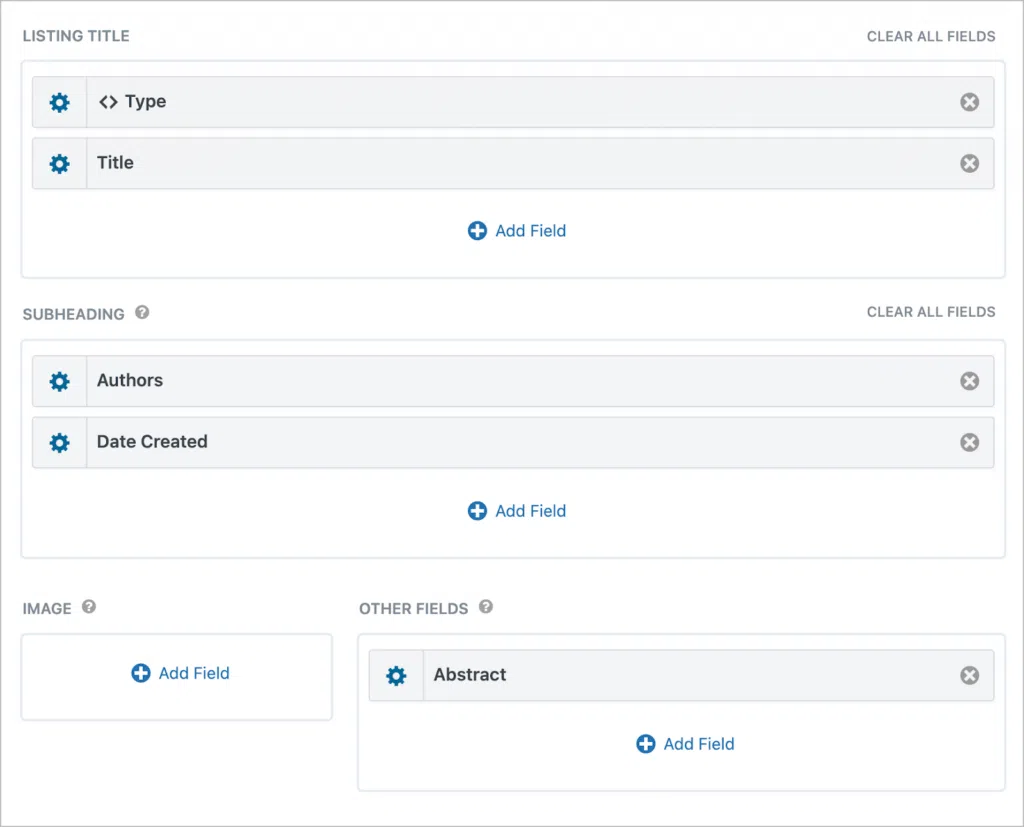
Now we can add fields to our View using the GravityView drag-and-drop builder. Let’s start by configuring the Multiple Entries layout—this is the page where all research papers will be displayed one after the other.

To create a layout similar to most academic journals, we’ll add the “Title” field to the “Listing Title” section and the “Authors” and “Date Created” fields to the “Subheading” section. Next, we’ll add the “Abstract” field to the “Other Fields” section.
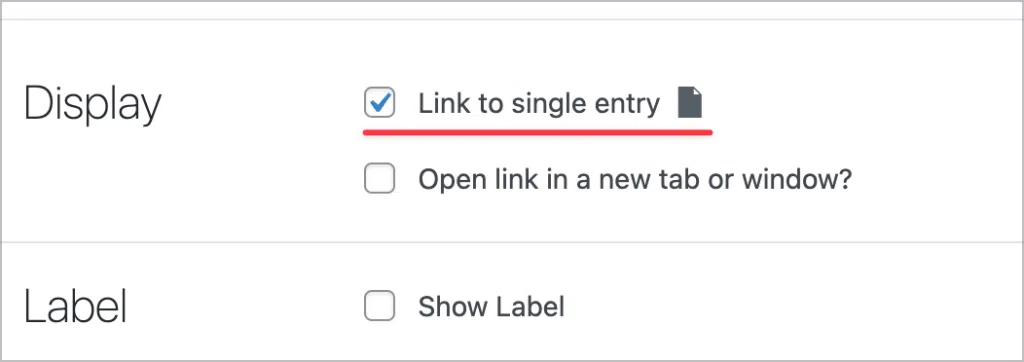
After adding the title field, we’ll open the field settings and check the box labeled “Link to single entry”.
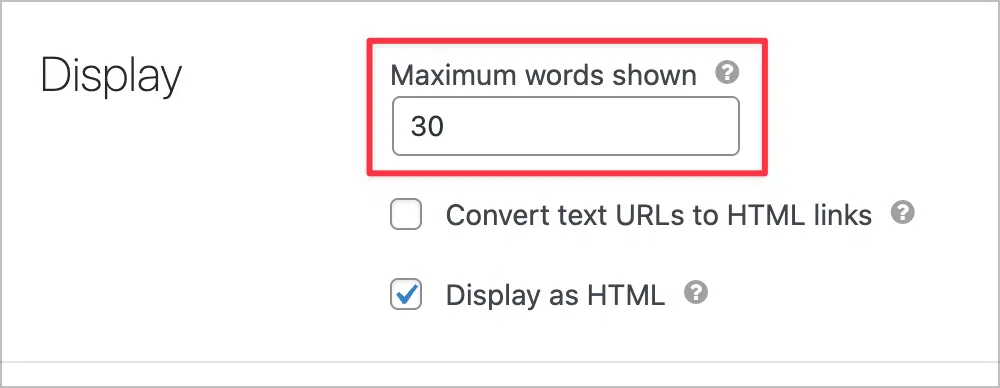
To limit the number of words shown in the abstract, we’ll open the field settings and set the “Maximum words shown” to 30.
Adding a search bar
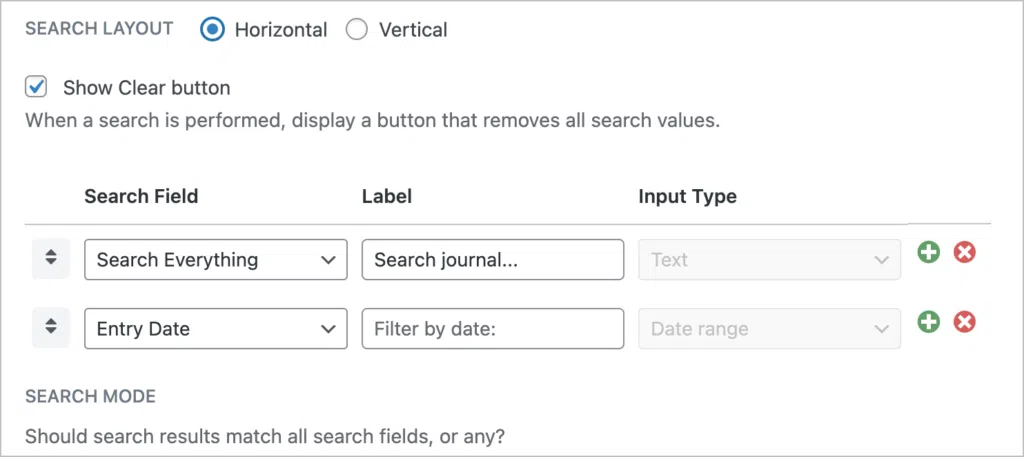
Now, let’s add a search bar that will enable visitors to search for journal articles. To do this, we’ll add a “Search Bar” widget to the View.

Next, we’ll open the widget settings to configure the search inputs. Here, we’ll add two search inputs, allowing visitors to search for articles by keyword or date.
Here’s what the Multiple Entries page looks like on the front end:

Okay, now let’s turn our attention to the Single Entry layout.
Configuring the Single Entry Layout
The Single Entry page shows details about a specific journal article. Here, we’ll add all the information associated with the article, including a link to download the full paper.
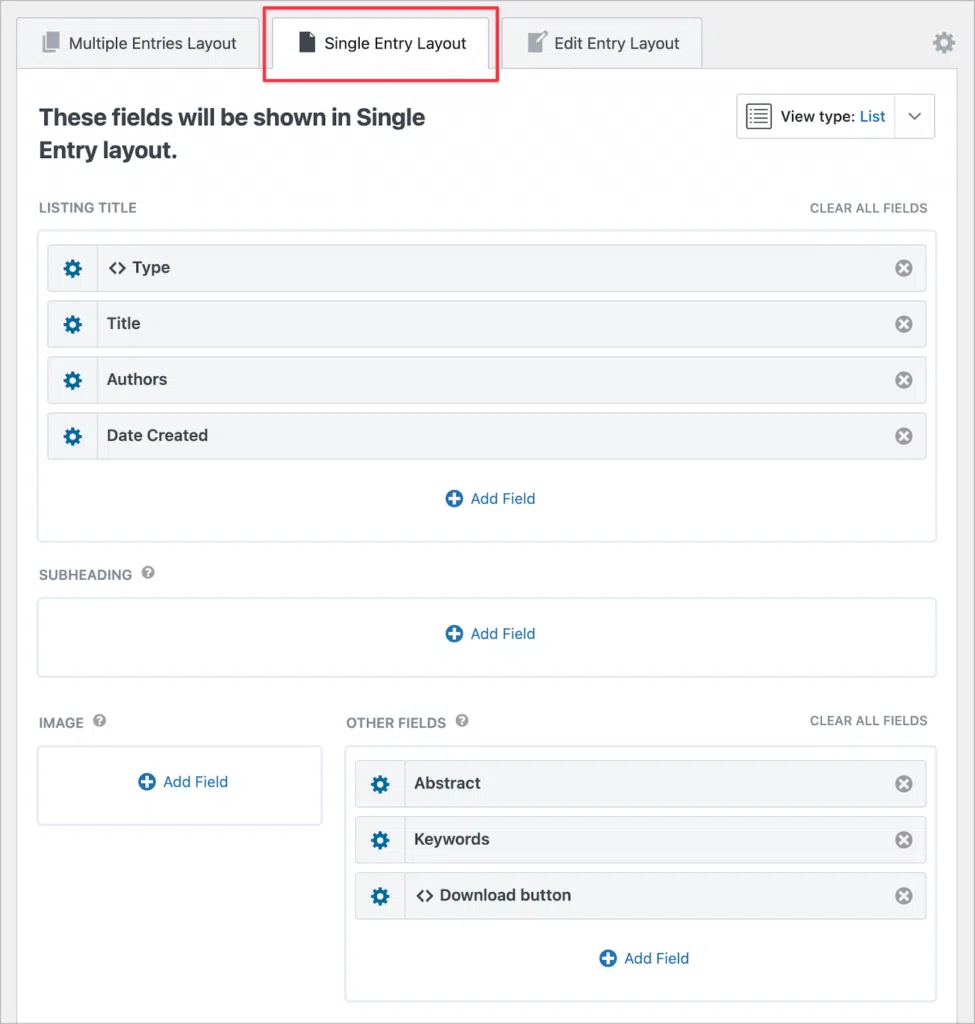
To create the download button, we’ll create an HTML button using the Custom Content field. By using an HTML anchor tag and adding the file upload URL as the href value, we can create a dynamic download button for downloading research papers.

Here’s what the Single Entry page looks like on the front end:

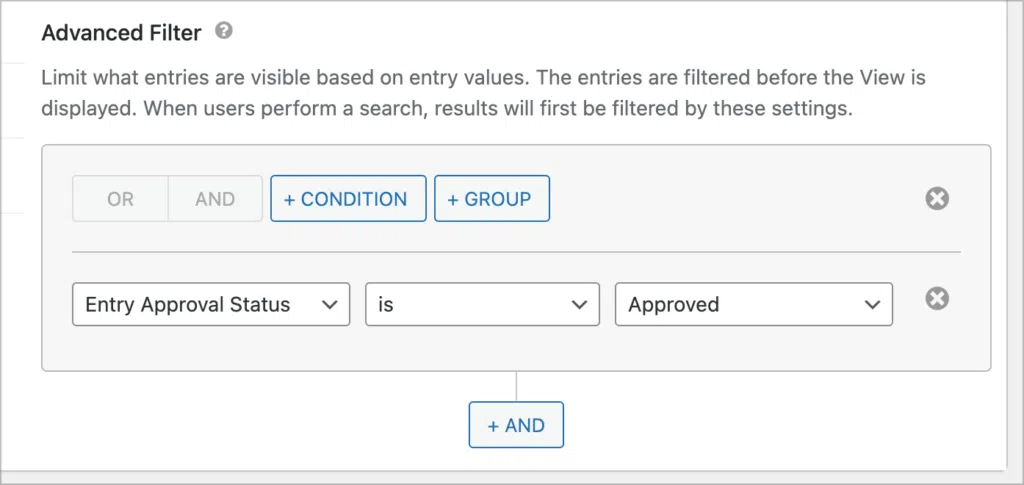
Finally, we’ll add an advanced filtering condition to our View to ensure that only approved articles are displayed in the journal.
That’s it!
Build your academic journal on WordPress today
Creating an academic journal on WordPress is not only feasible but also straightforward with the right tools. By using Gravity Forms and GravityView, you can manage submissions, streamline the review process, and provide a user-friendly interface for accessing scholarly articles!
Whether you’re filling a gap in the literature or fostering a new academic community, this approach offers a customizable, no-code solution to help you get your journal up and running efficiently. If you found this post helpful, check out more of our tutorials and how-to guides.

Helpful tips right in your inbox.
Subscribe to our weekly newsletter for tips, special offers, and more!
Helpful tips right in your inbox.
Subscribe to our weekly newsletter for tips, special offers, and more!
