
Making Table Views accessible to screen readers with row headers
GravityView 3.1 adds a new field setting to the Table layout: Use this field as a row header. Enabling it marks one column of your table as the label for each row, so screen readers announce that value as context for every other cell. This article explains what row headers do, when to use them, and how to turn them on.
Note: This feature requires GravityView 3.1 or newer and applies to Views using the Table layout.
What row headers are #
Think about how you read a table. If you’re looking at a member directory and want someone’s phone number, your eye finds the row for “Jane Smith” and slides across. The name anchors everything else in that row, so you always know whose data you’re looking at.
A screen reader user doesn’t get that anchor by default. Behind the scenes, a table is made of header cells and data cells. GravityView’s Table layout has always marked the top row (Name, Email, Phone) as column headers, but every cell below that was a plain data cell. Someone moving down the Phone column with a screen reader hears bare values (“555-0142… 555-0198… 555-0177”) with no indication of whose numbers those are. To find out, they have to navigate back across each row to the name, for every single row.
A row header fixes that. When one column is marked as the row header, screen readers treat its cells as the label for their whole row. Moving through the table, the user hears the identifying value announced together with each cell, for example: “Jane Smith, Phone, 555-0142”. Whatever cell they land on, they know which record it belongs to.
The exact announcement varies between screen readers (NVDA, JAWS, and VoiceOver each phrase it slightly differently), but all of them use row headers to provide this context.
When to use row headers #
Enable the setting on the one field that identifies each record in your View:
- A member or staff directory – the Name field
- A job board – the Job title field
- An equipment inventory – the Asset ID field
- A support log – the Ticket number field
A few things to keep in mind:
- Enable it for one field per row. A row has one label. Marking multiple columns as row headers gives screen readers conflicting context.
- Nothing changes visually. Row headers are a semantic improvement for assistive technology; sighted visitors see the same table as before.
- It helps with accessibility audits. Properly labeled data tables are part of WCAG success criterion 1.3.1 (Info and Relationships), and automated checkers and manual auditors both look for them. If you build for government, education, or other organizations with accessibility requirements, this setting helps your Views pass review.
How to enable a row header #
- Edit your View (it must use the Table layout).
- In the Multiple Entries tab, click the gear icon on the field that identifies each row (for example, Name).
- In the field settings panel, check Use this field as a row header.
- Click Update to save the View.
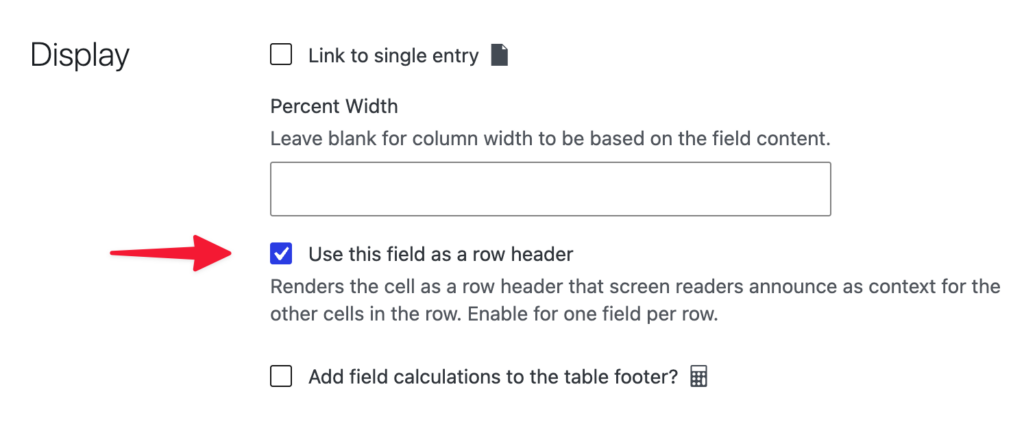
That’s it. The setting takes effect the next time the View renders.
What changes in your table’s markup #
For the technically curious: HTML distinguishes header cells (<th>) from data cells (<td>), and the scope attribute tells assistive technology what a header cell labels. With the setting enabled, GravityView renders that column’s cells as <th scope="row"> instead of <td>:
<tr>
  <th scope="row">Jane Smith</th>
  <td>jane@example.com</td>
  <td>555-0142</td>
</tr>
The scope="row" attribute is what tells screen readers to announce “Jane Smith” as context for the email and phone cells in that row. No custom code, template overrides, or CSS changes are involved.

