IN this post, I show you, step by step, how to build a custom dashboard for tracking donations and fundraising campaigns on WordPress.
Running a charity or nonprofit requires resourcefulness. Using Gravity Forms and GravityKit, you can create an affordable donation platform and dashboard without writing any code!
Let’s get started.
Download the free donation form template now!
Import the template into Gravity Forms and customize as necessary.
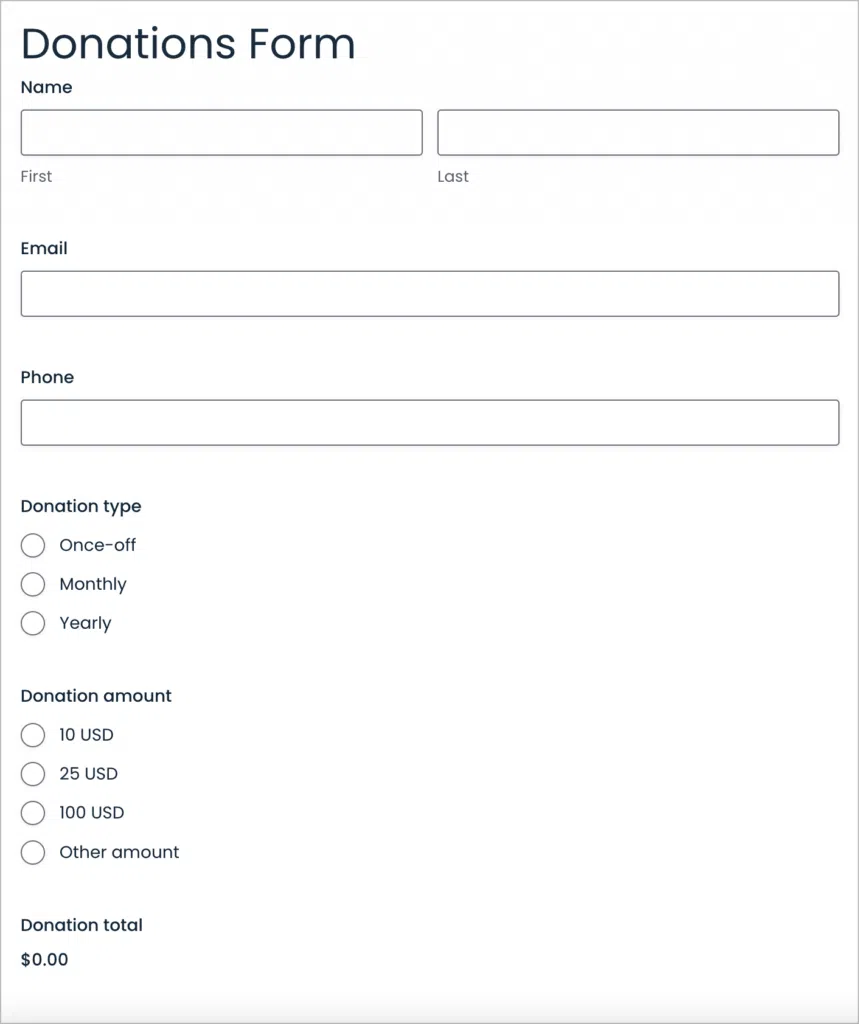
Table of contents
Sneak peek
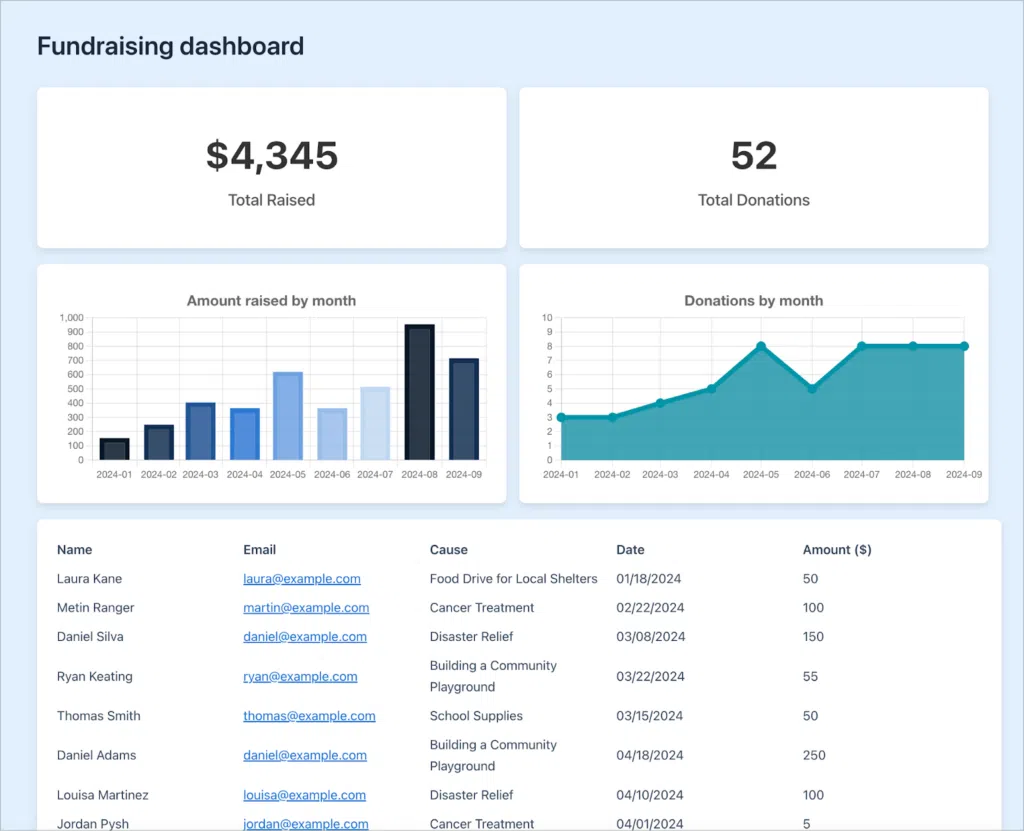
Here’s a look at the finished fundraising dashboard. As you can see, we have the total amount raised and the total donations at the top. Below that are two charts showing the amount raised by month and the number of donations by month.
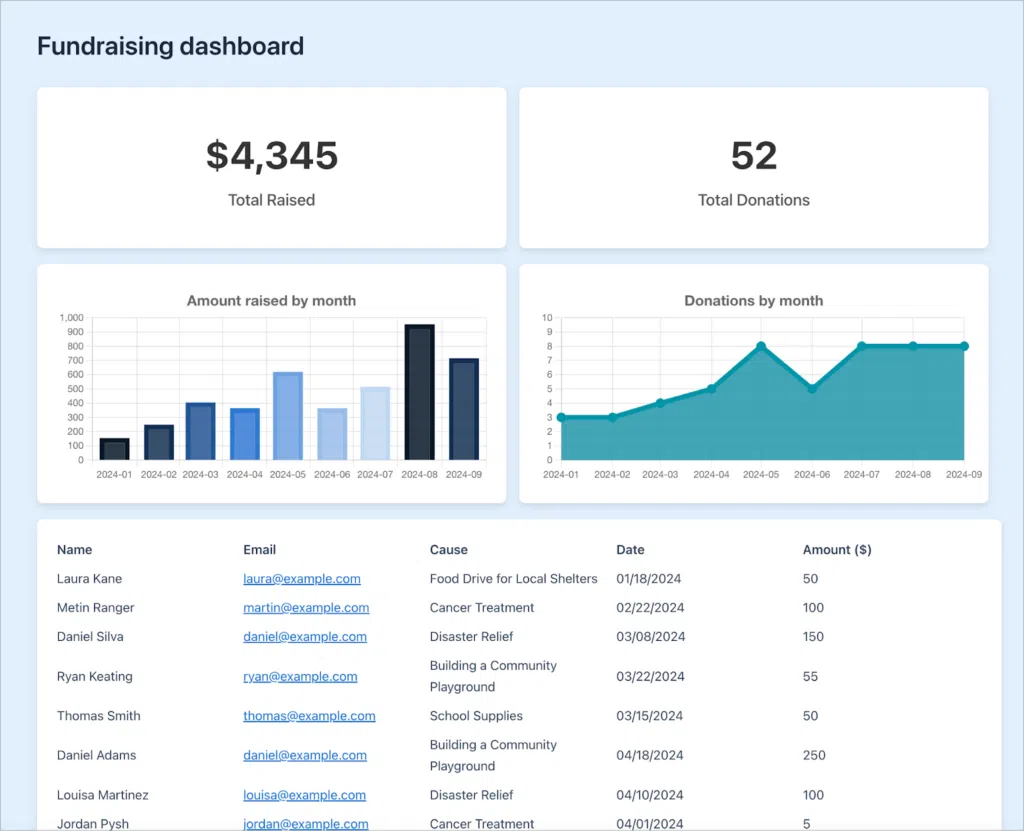
Below the charts is a table View showing all the most recent donations! Keep reading to see how I built this dashboard using Gravity Forms and GravityKit!
💡 Pro tip: Check out the live demo of the fundraising dashboard here and get your own free trial site!
What you’ll need
Here are the plugins you will need to build a fundraising dashboard like the one in this tutorial:
💡 GravityKit is proud to support the work of not-for-profit organizations and charities by offering special discounts across our suite of products.
Creating the donation form
The first step is to create a form that enables us to accept donations through our website.
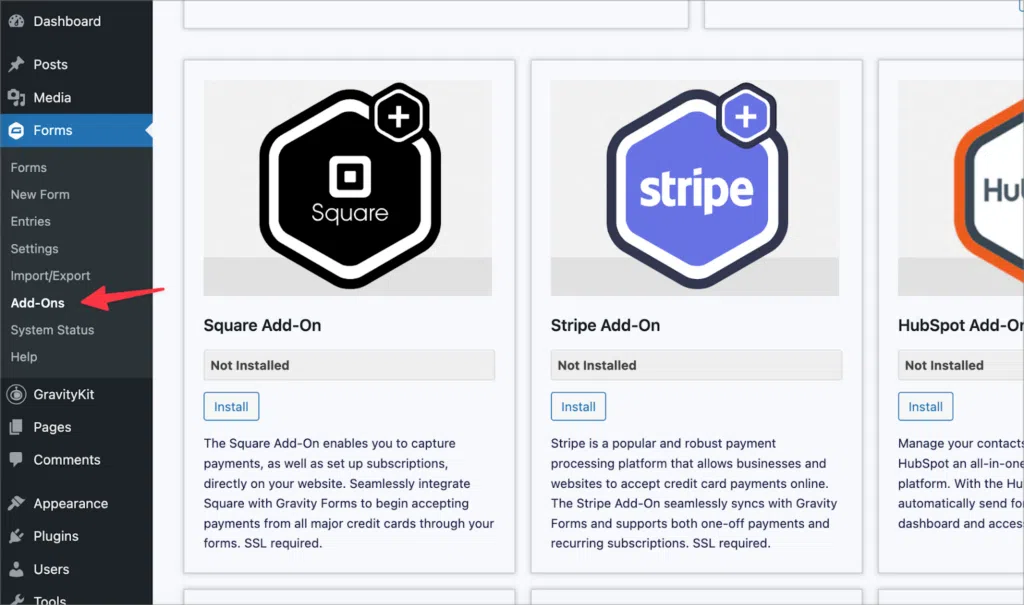
First, we’ll need to install one of the payment add-ons from the “Add-Ons” screen in Gravity Forms. Gravity Forms currently supports Stripe, PayPal, Square, Mollie, 2Checkout, and Authorize.net.
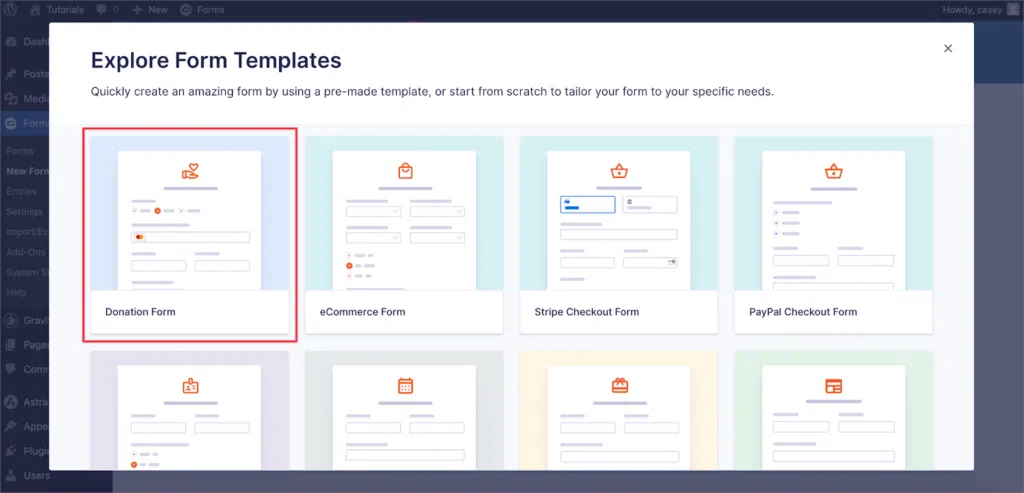
Now, we can create the donation form. The easiest way to do this is to start with the Donation Form template. This template already includes most of the fields we need for accepting donations.
The only thing left to do is add a payment field to our form. In this example, we’ll add the “Square” payment field. To add a new field to your form, simply drag and drop it from the right sidebar.
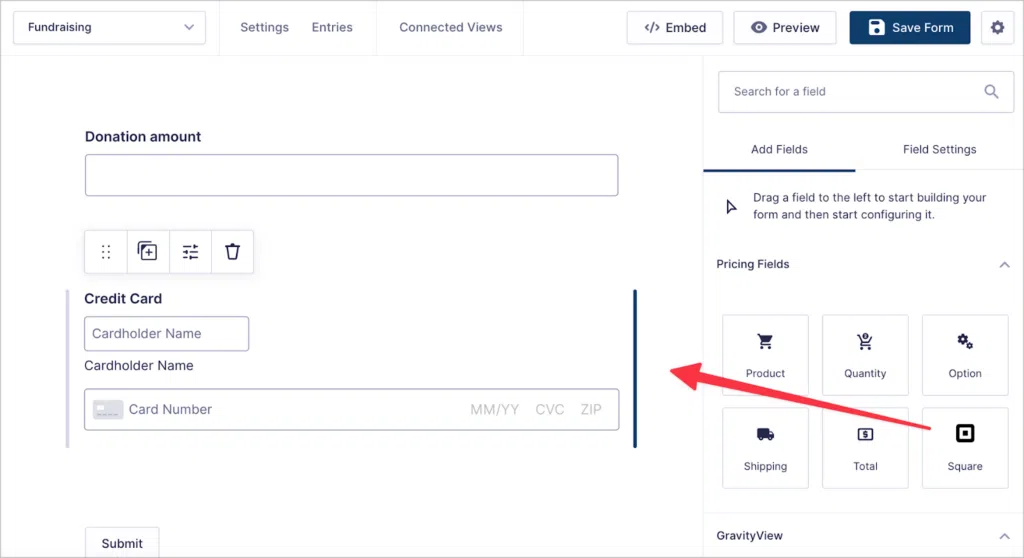
Feel free to customize the form as you see fit and add additional fields if necessary! When you’re done, remember to embed your form somewhere on your website.
Creating the charts
Now that we have a way for visitors to donate to our fundraising efforts, we’re going to build a dashboard for tracking donations in real-time!
The dashboard we’re going to build is made up of various components, including charts, calculations, and tabular data. Let’s begin by creating the charts.
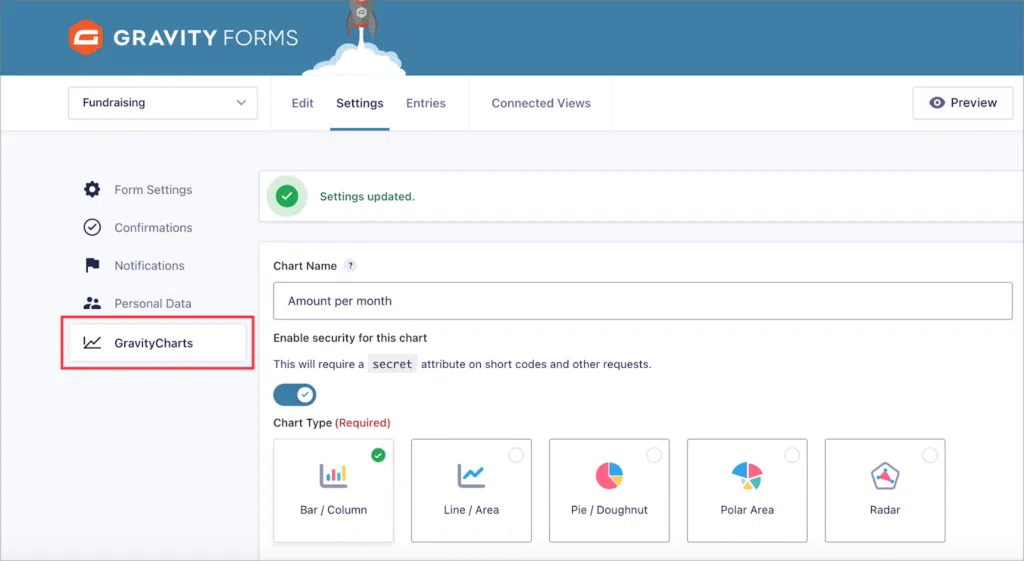
To create a new chart, we’ll go to the form settings, select “GravityCharts” on the left and click “Add New”. Let’s create a chart that shows the total amount donated by month. First we’ll give it a name (“Amount per month”) and then we’ll select “Bar/Column” as the chart type.
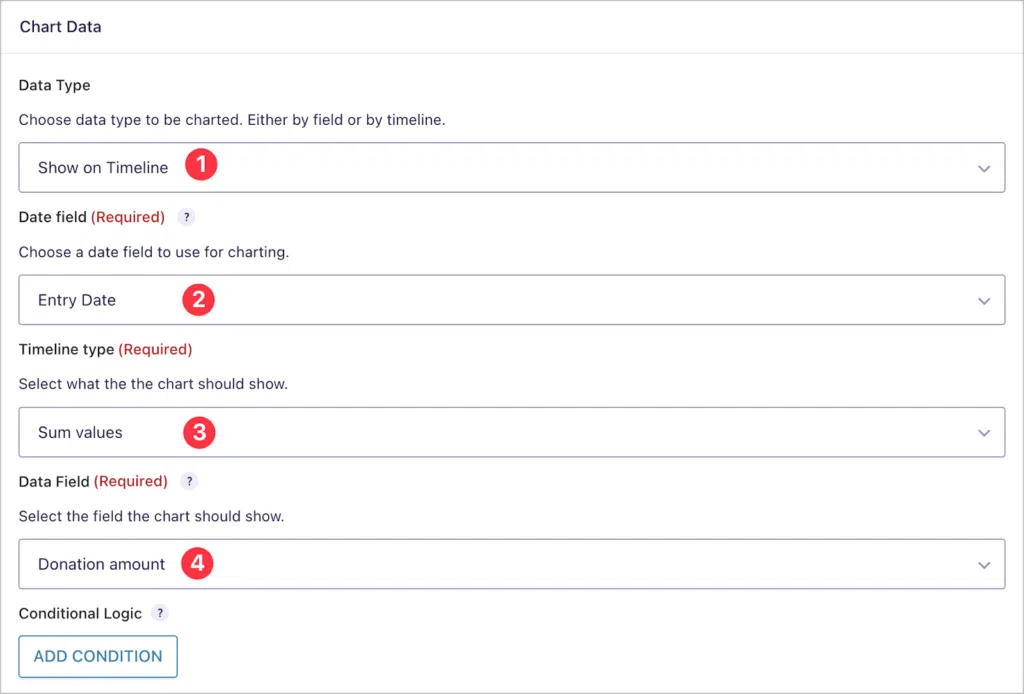
Next, we need to choose what to show on the chart. We’ll start by setting the data type to “Show on timeline” and choosing the entry date as our date field. We’ll also change the timeline type to “Sum values” and select the “Donation amount” field as our data field.
Now we can scroll down to the live preview to see what our chart looks like. Here there are a range of tabs to style and customize the chart itself.
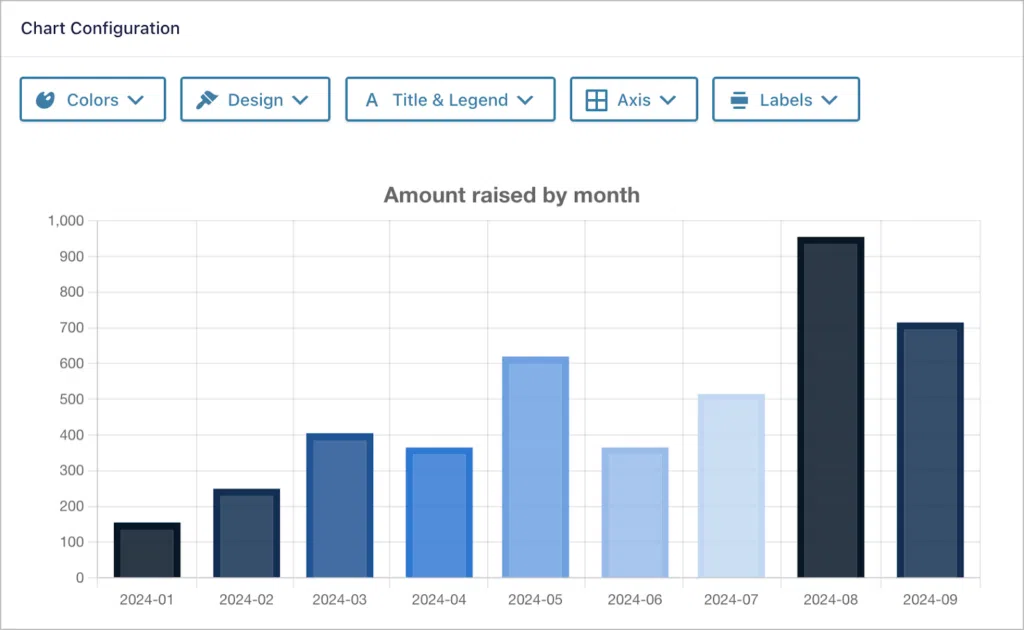
Once you’re happy with your chart, remember to save the feed! After saving our chart, we’ll create another one to show the number of donations per month.
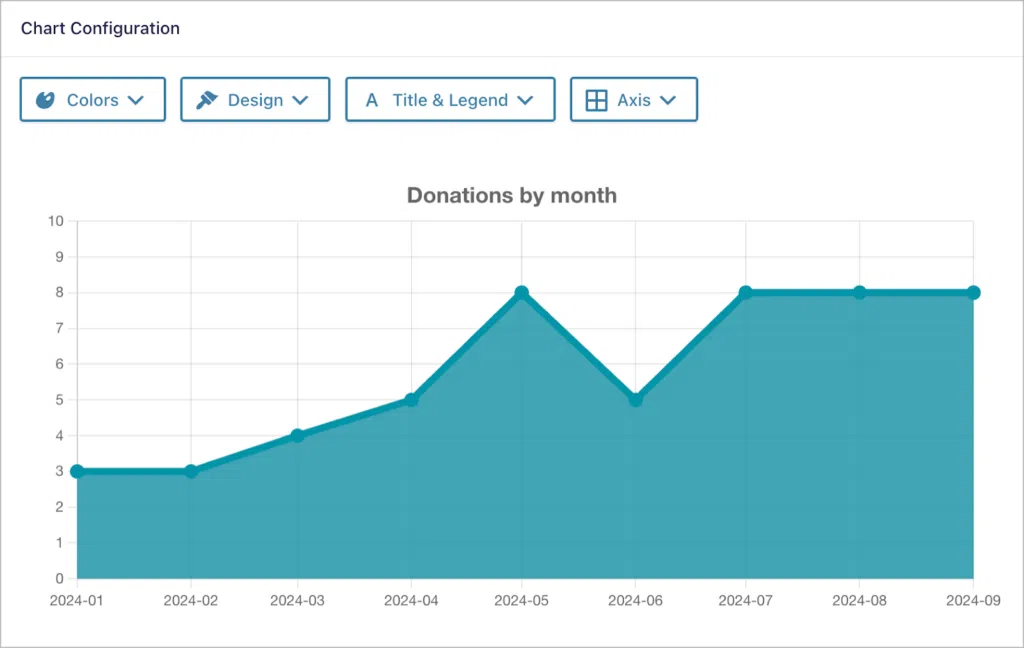
After creating our charts, we can turn our attention to building the dashboard itself!
Creating the dashboard View
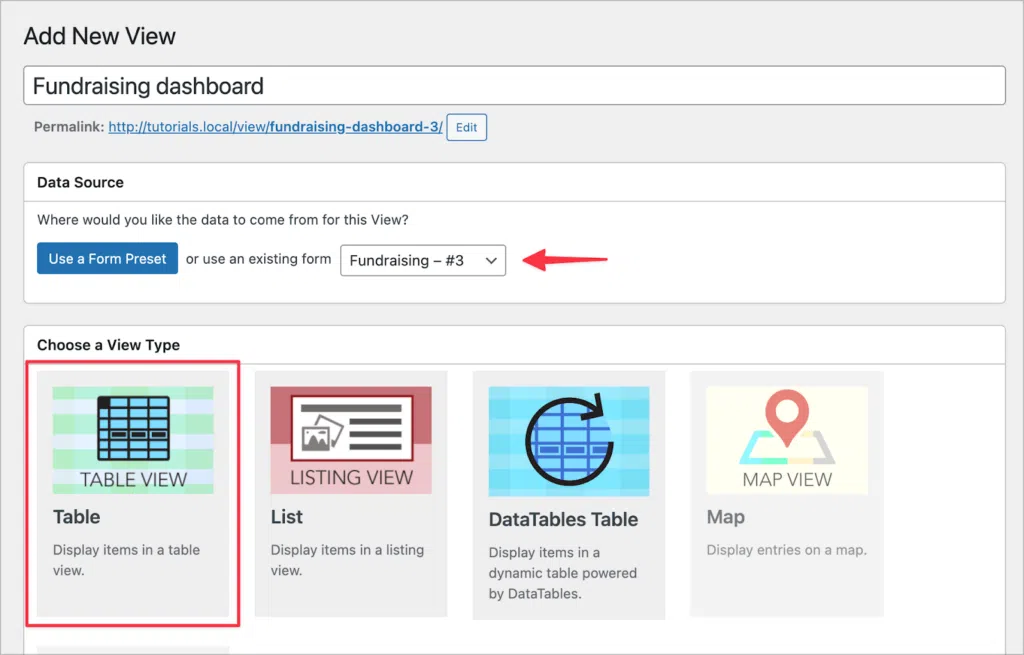
To create a new View, we’ll hover over “GravityKit” and click “New View”. After giving our View a name, we’ll select our fundraising form as the data source. After that, we’ll choose “Table” as our View type.
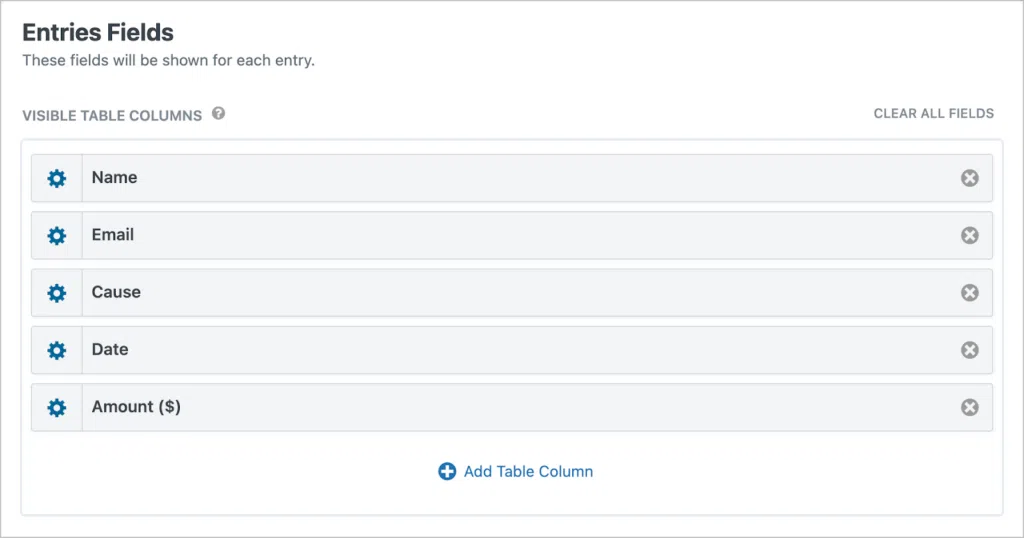
Now, let’s scroll down to the “Entries Fields” section and add the fields we want to show in our table.
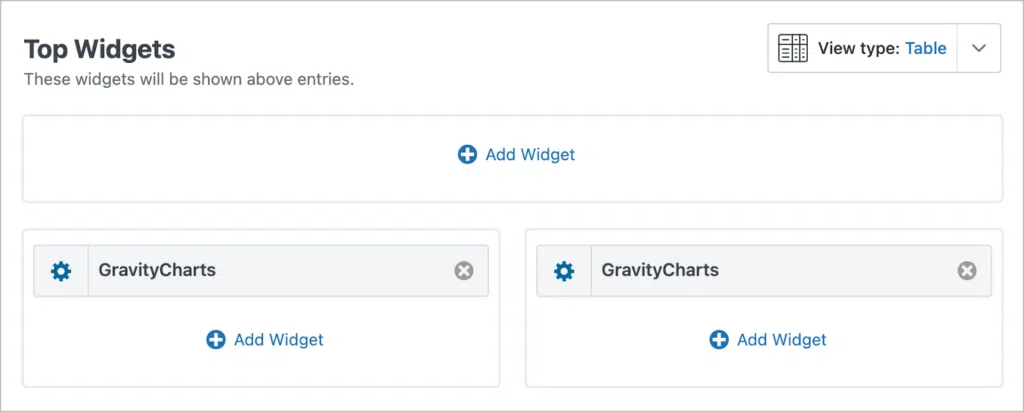
Now let’s add our charts to the top widget areas. To add a chart, we’ll click on the “Add Widget” button and select the “GravityCharts” widget. Let’s add one chart on each side.
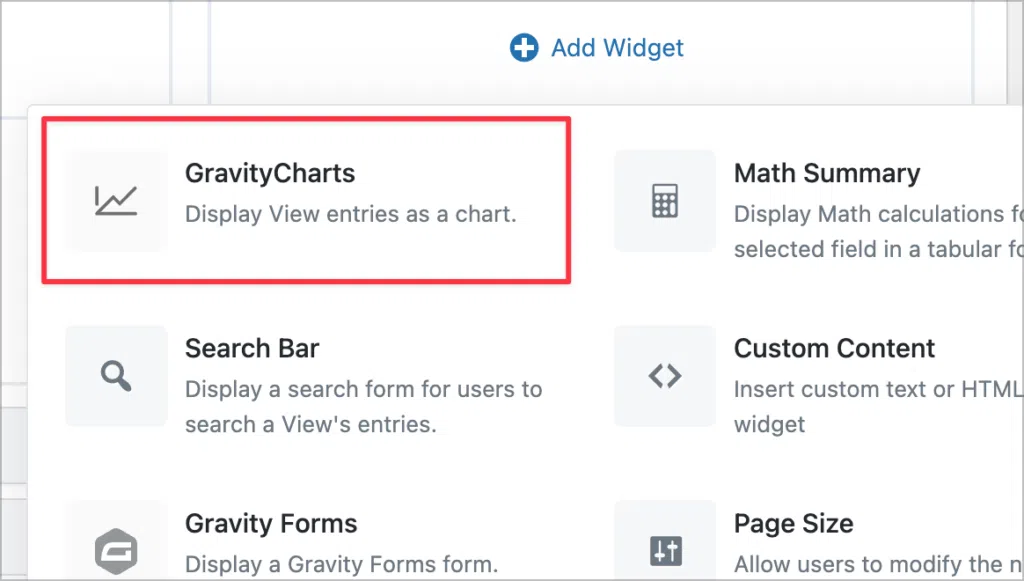
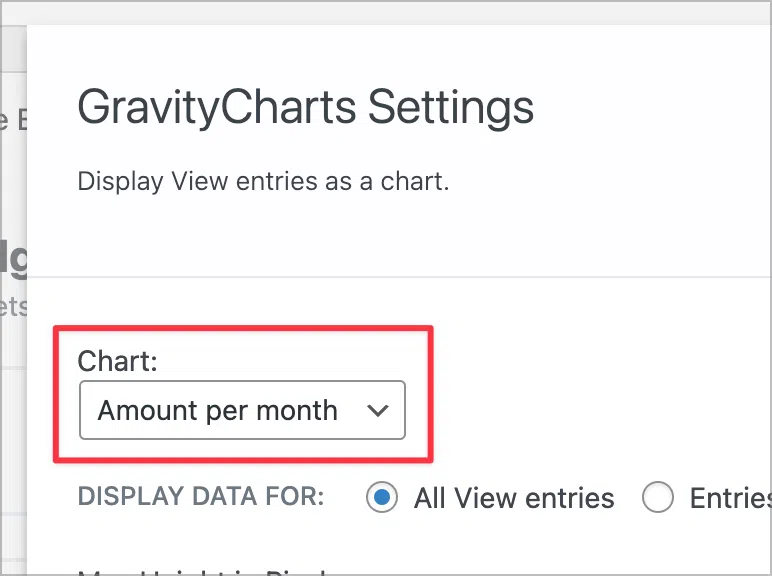
After adding the widgets, we’ll click on the gear icon to open the widget settings. Here we’ll need to select the chart we want to display from the drop down list.
Here’s what the Top Widgets area looks like after adding our chart widgets:
Now that we’ve added our chart, we need to add the calculations for the total amount raised and total donations!
Calculating the total donations and amount raised
Below are the calculations we need to create. To do this, we’re going to use GravityMath! GravityMath provides a powerful shortcode that we can use to perform advanced calculations on our donation data using shortcodes.
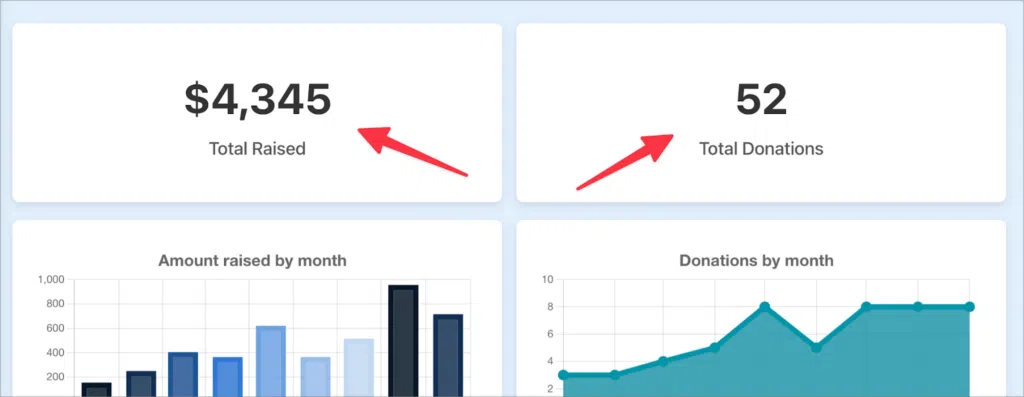
Here’s the shortcode we need to calculate the total amount donated:
[gravitymath scope="form" id="3"]
    {Donation amount:5:sum}
[/gravitymath]
And here’s the shortcode for calculating the total donations:
[gravitymath scope="form" id="3"]
    {Donation amount:5:count}
[/gravitymath]
To add these to our dashboard, we’re going to use a Custom Content widget:
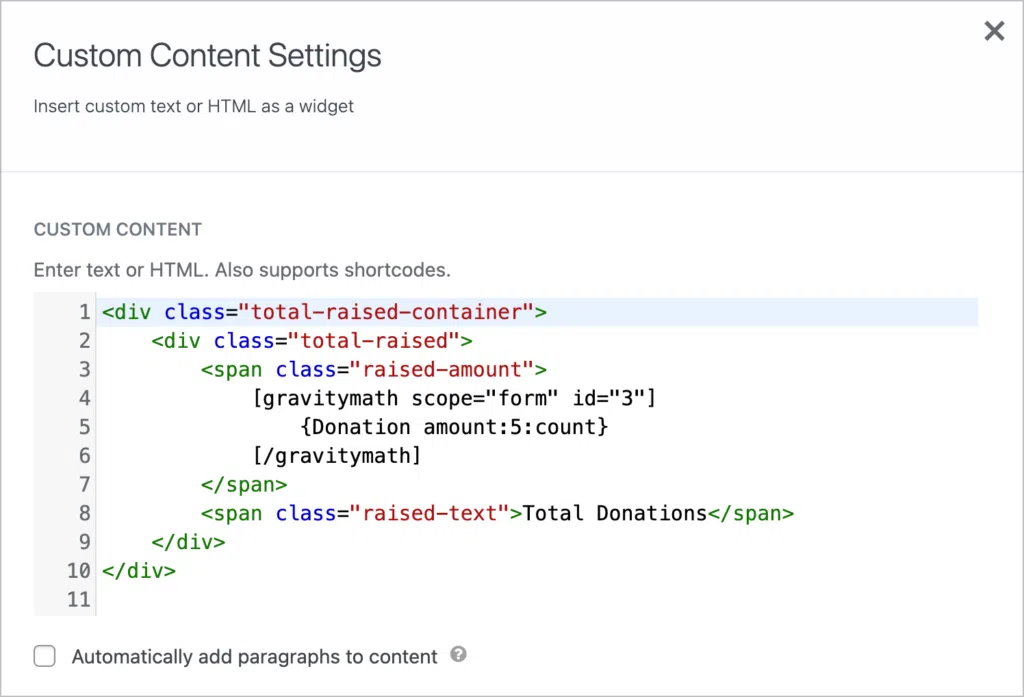
As you can see, we’ve added some simple HTML which will enable us to style the shortcode output and ensure it’s consistent with the rest of our dashboard. If you want to use the same styles, free free to copy/paste the code below.
That’s it!
Here’s our finished dashboard:
Build a fundraising dashboard today!
Using Gravity Forms and GravityKit, you can build powerful dashboards for your nonprofit or charity. See the latest donations, track your fundraising campaigns, and visualize the data using charts. Both Gravity Forms and GravityKit offer discounted licenses for registered nonprofits, making them an affordable choice!
So what are you waiting for? Get GravityKit today!

Helpful tips right in your inbox.
Subscribe to our weekly newsletter for tips, special offers, and more!
Helpful tips right in your inbox.
Subscribe to our weekly newsletter for tips, special offers, and more!
