Published
•
Updated
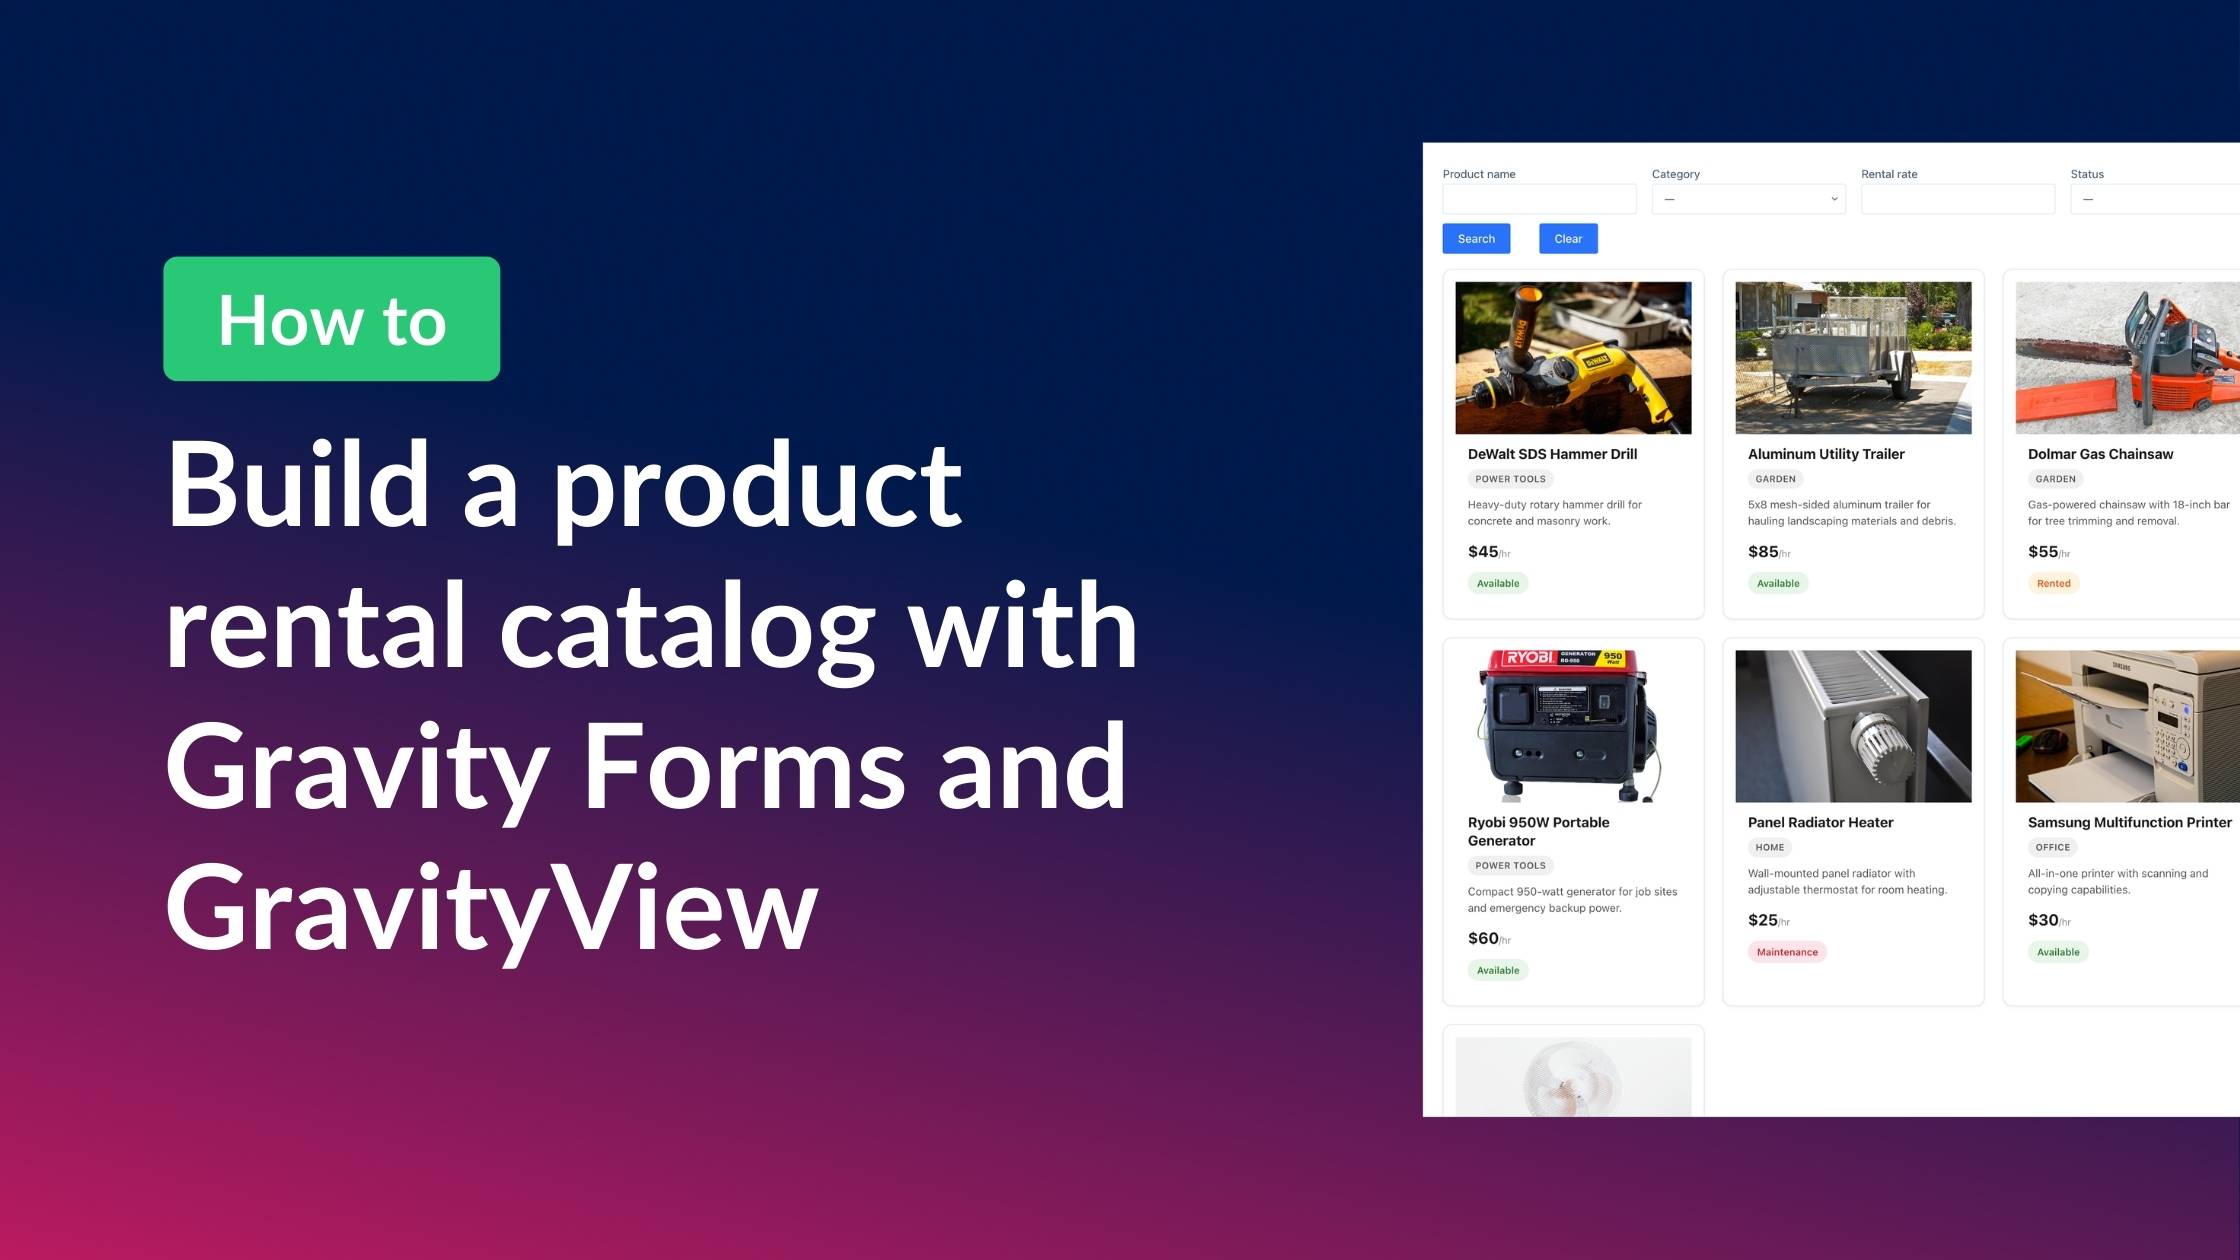
How to build a product catalog on WordPress with GravityView
Build a searchable product catalog or equipment directory on WordPress without WooCommerce. Use Gravity Forms for data entry and GravityView for a filterable front-end display.
Need to display a browsable product catalog or equipment directory on your WordPress site? Maybe you’re running an equipment rental company, managing an internal asset library, or showcasing products without needing a full shopping cart. Whatever the case, WooCommerce is overkill when all you need is a clean, searchable display!
The good news? You can build a fully functional product catalog using just two plugins: Gravity Forms for data entry and GravityView for the front-end display. In this post, I’ll walk you through the entire setup—from creating your product form to building a searchable catalog with detail pages and even an enquiry form.
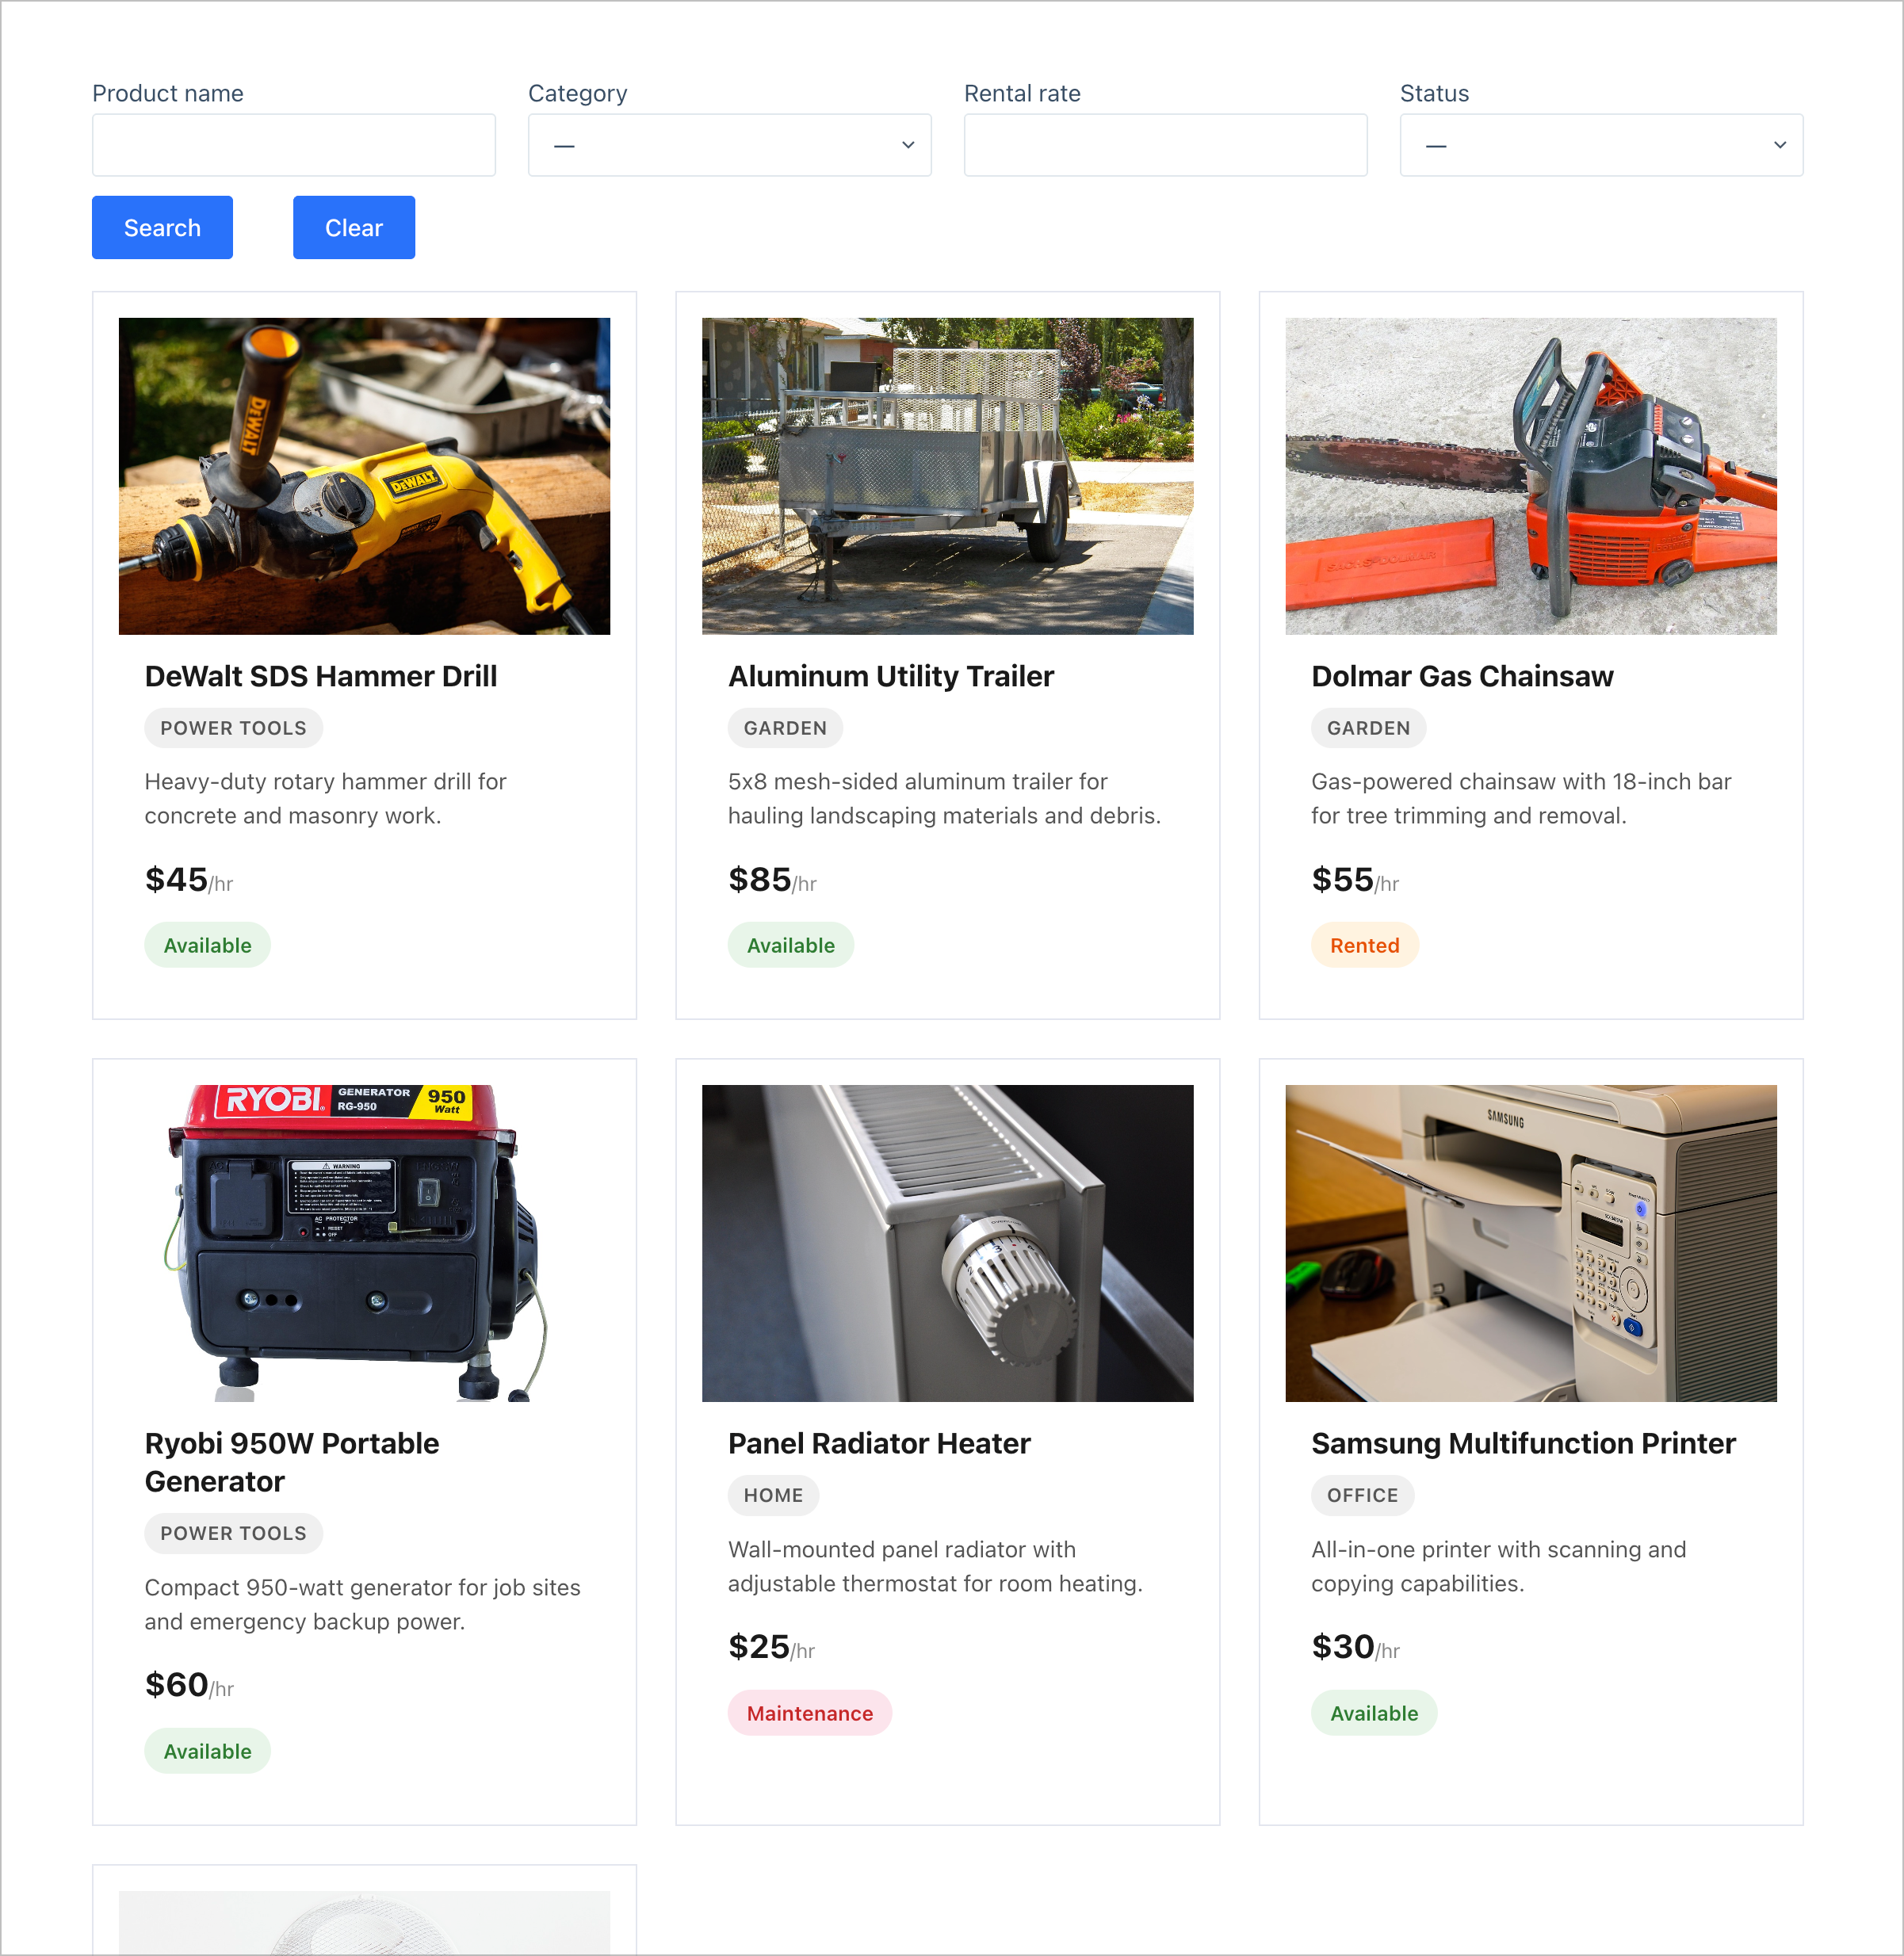
Sneak peek
Here’s a sneak peek at what we’ll be building:
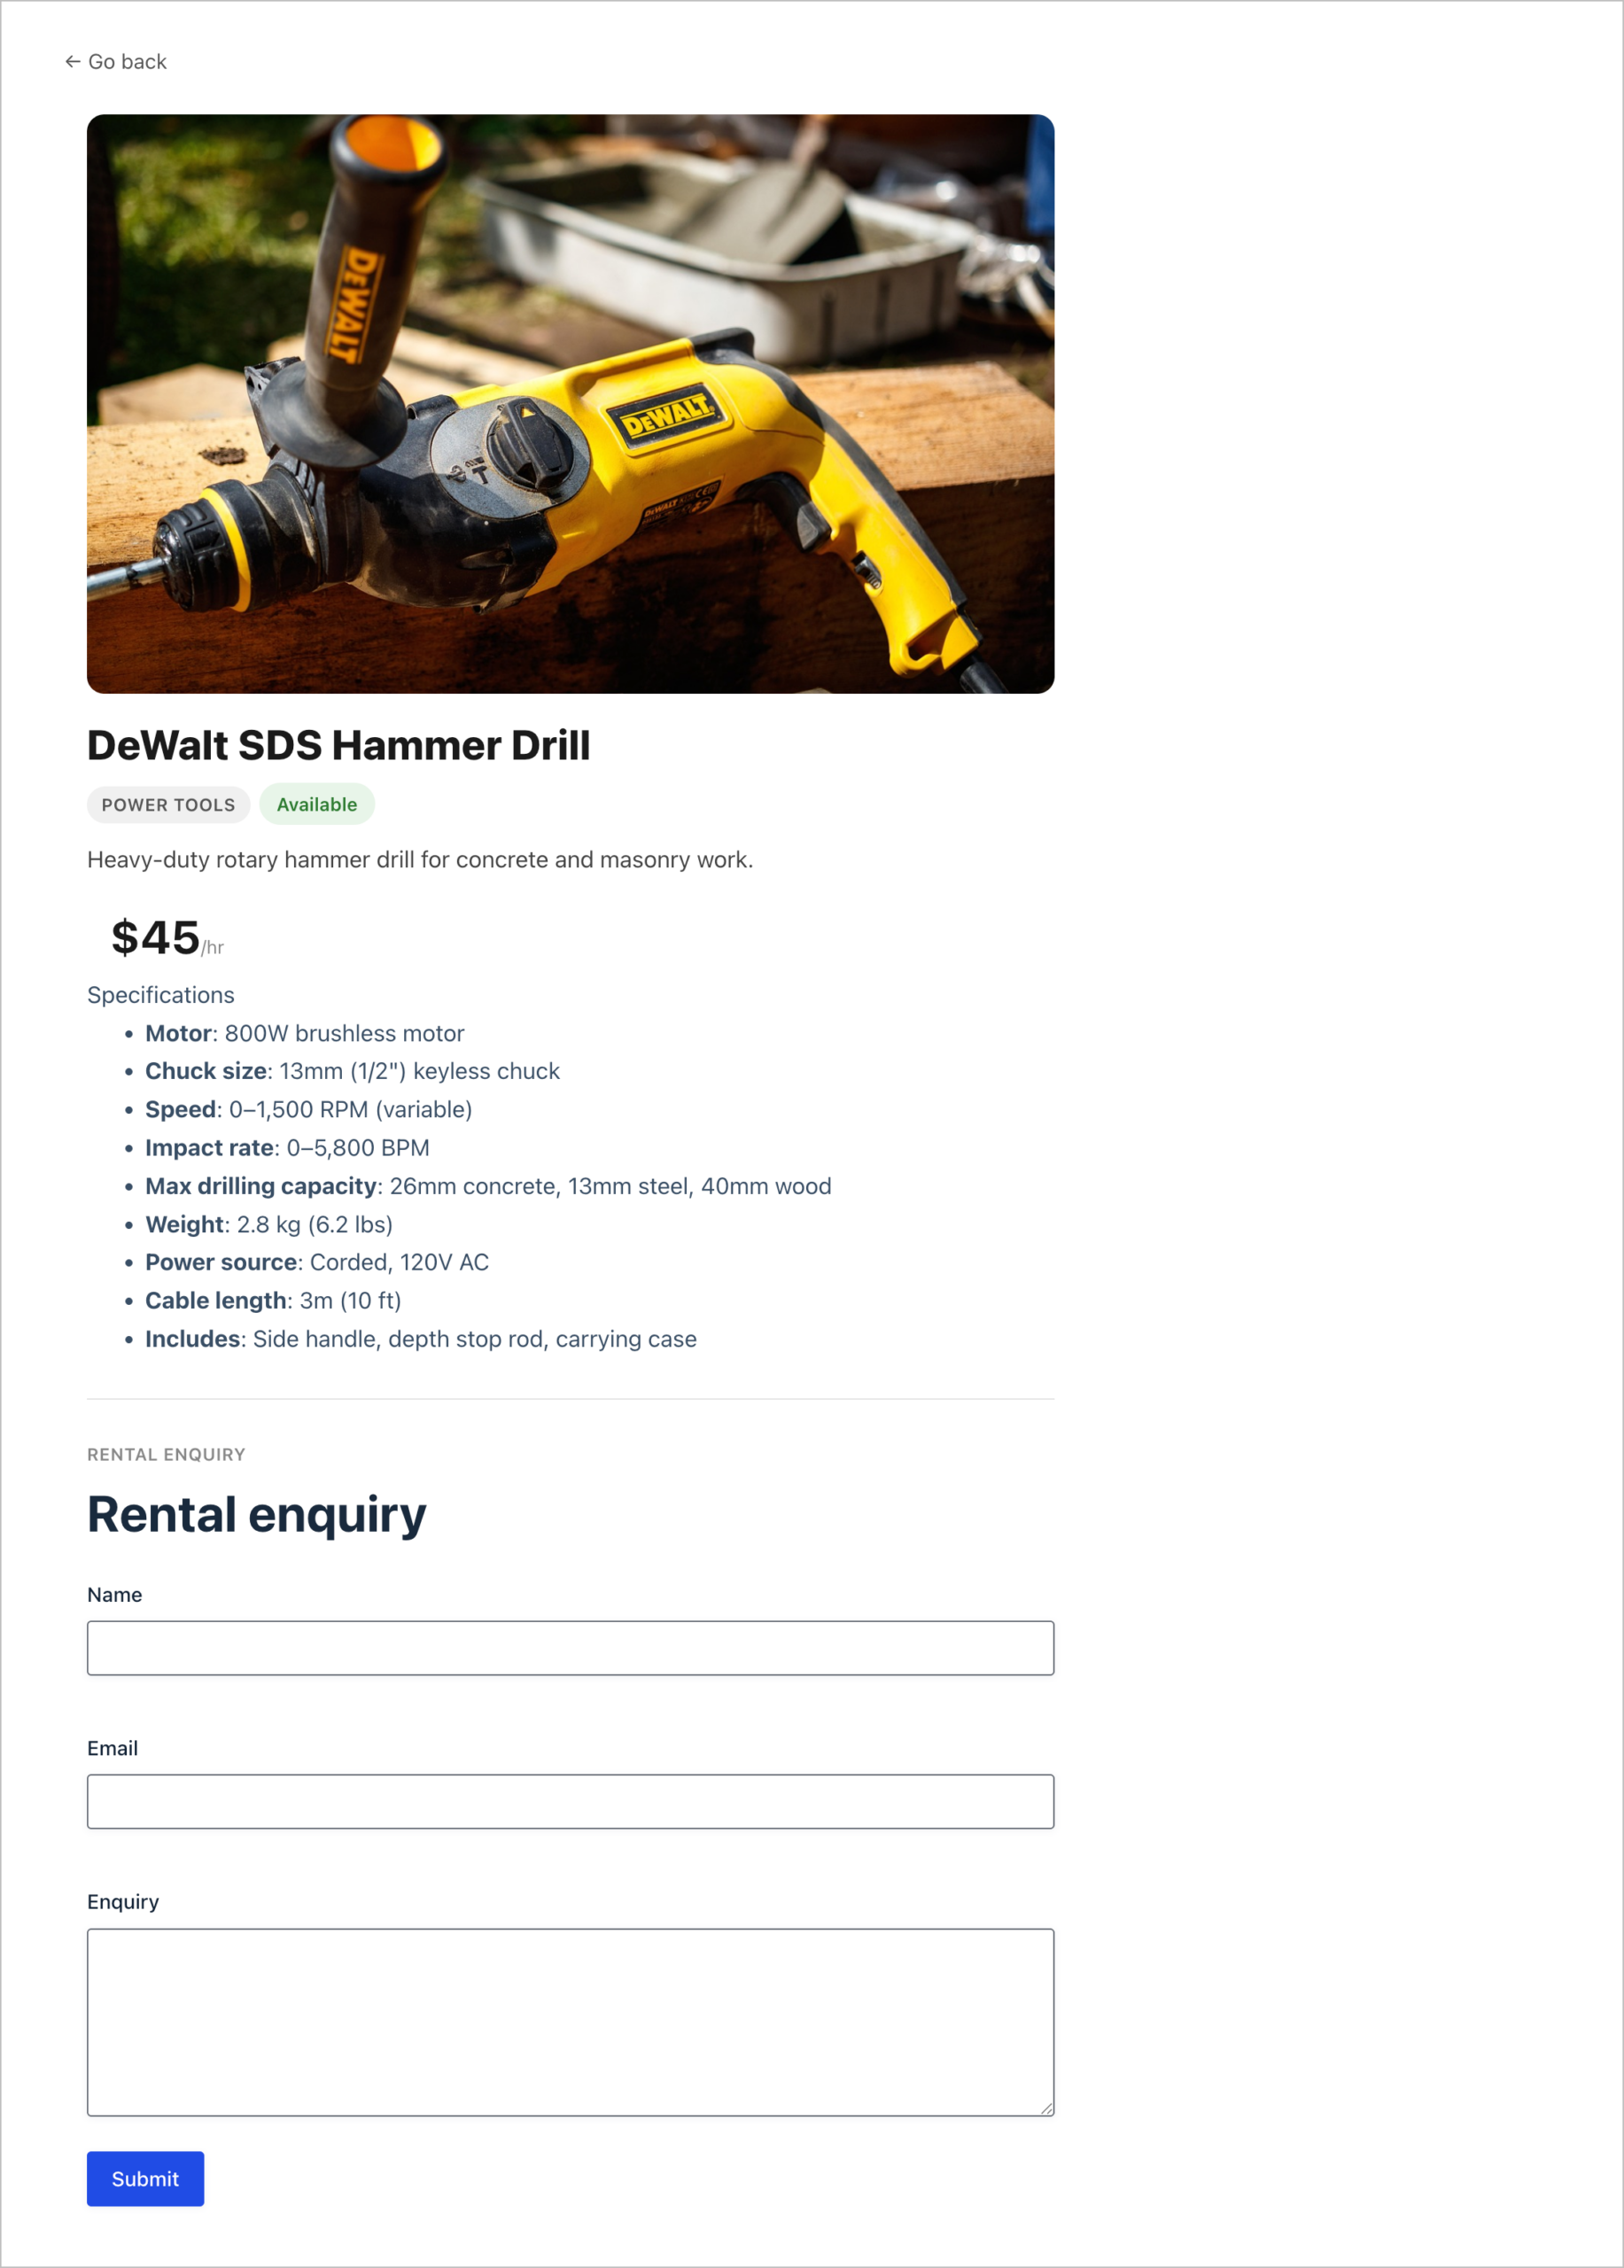
And when a visitor clicks on a product, they’ll see a detail page with full specifications and an enquiry form:
Let’s get started!
Wanna try it?
Spin up a demo
See what you can build with GravityView — explore the live demo.

What you’ll need
Before we dive in, here are the plugins you’ll need:
- Gravity Forms – for powering your product database. Each form submission becomes a product entry in your catalog.
- GravityView – for displaying your Gravity Forms entries on the front end as a searchable, filterable catalog.
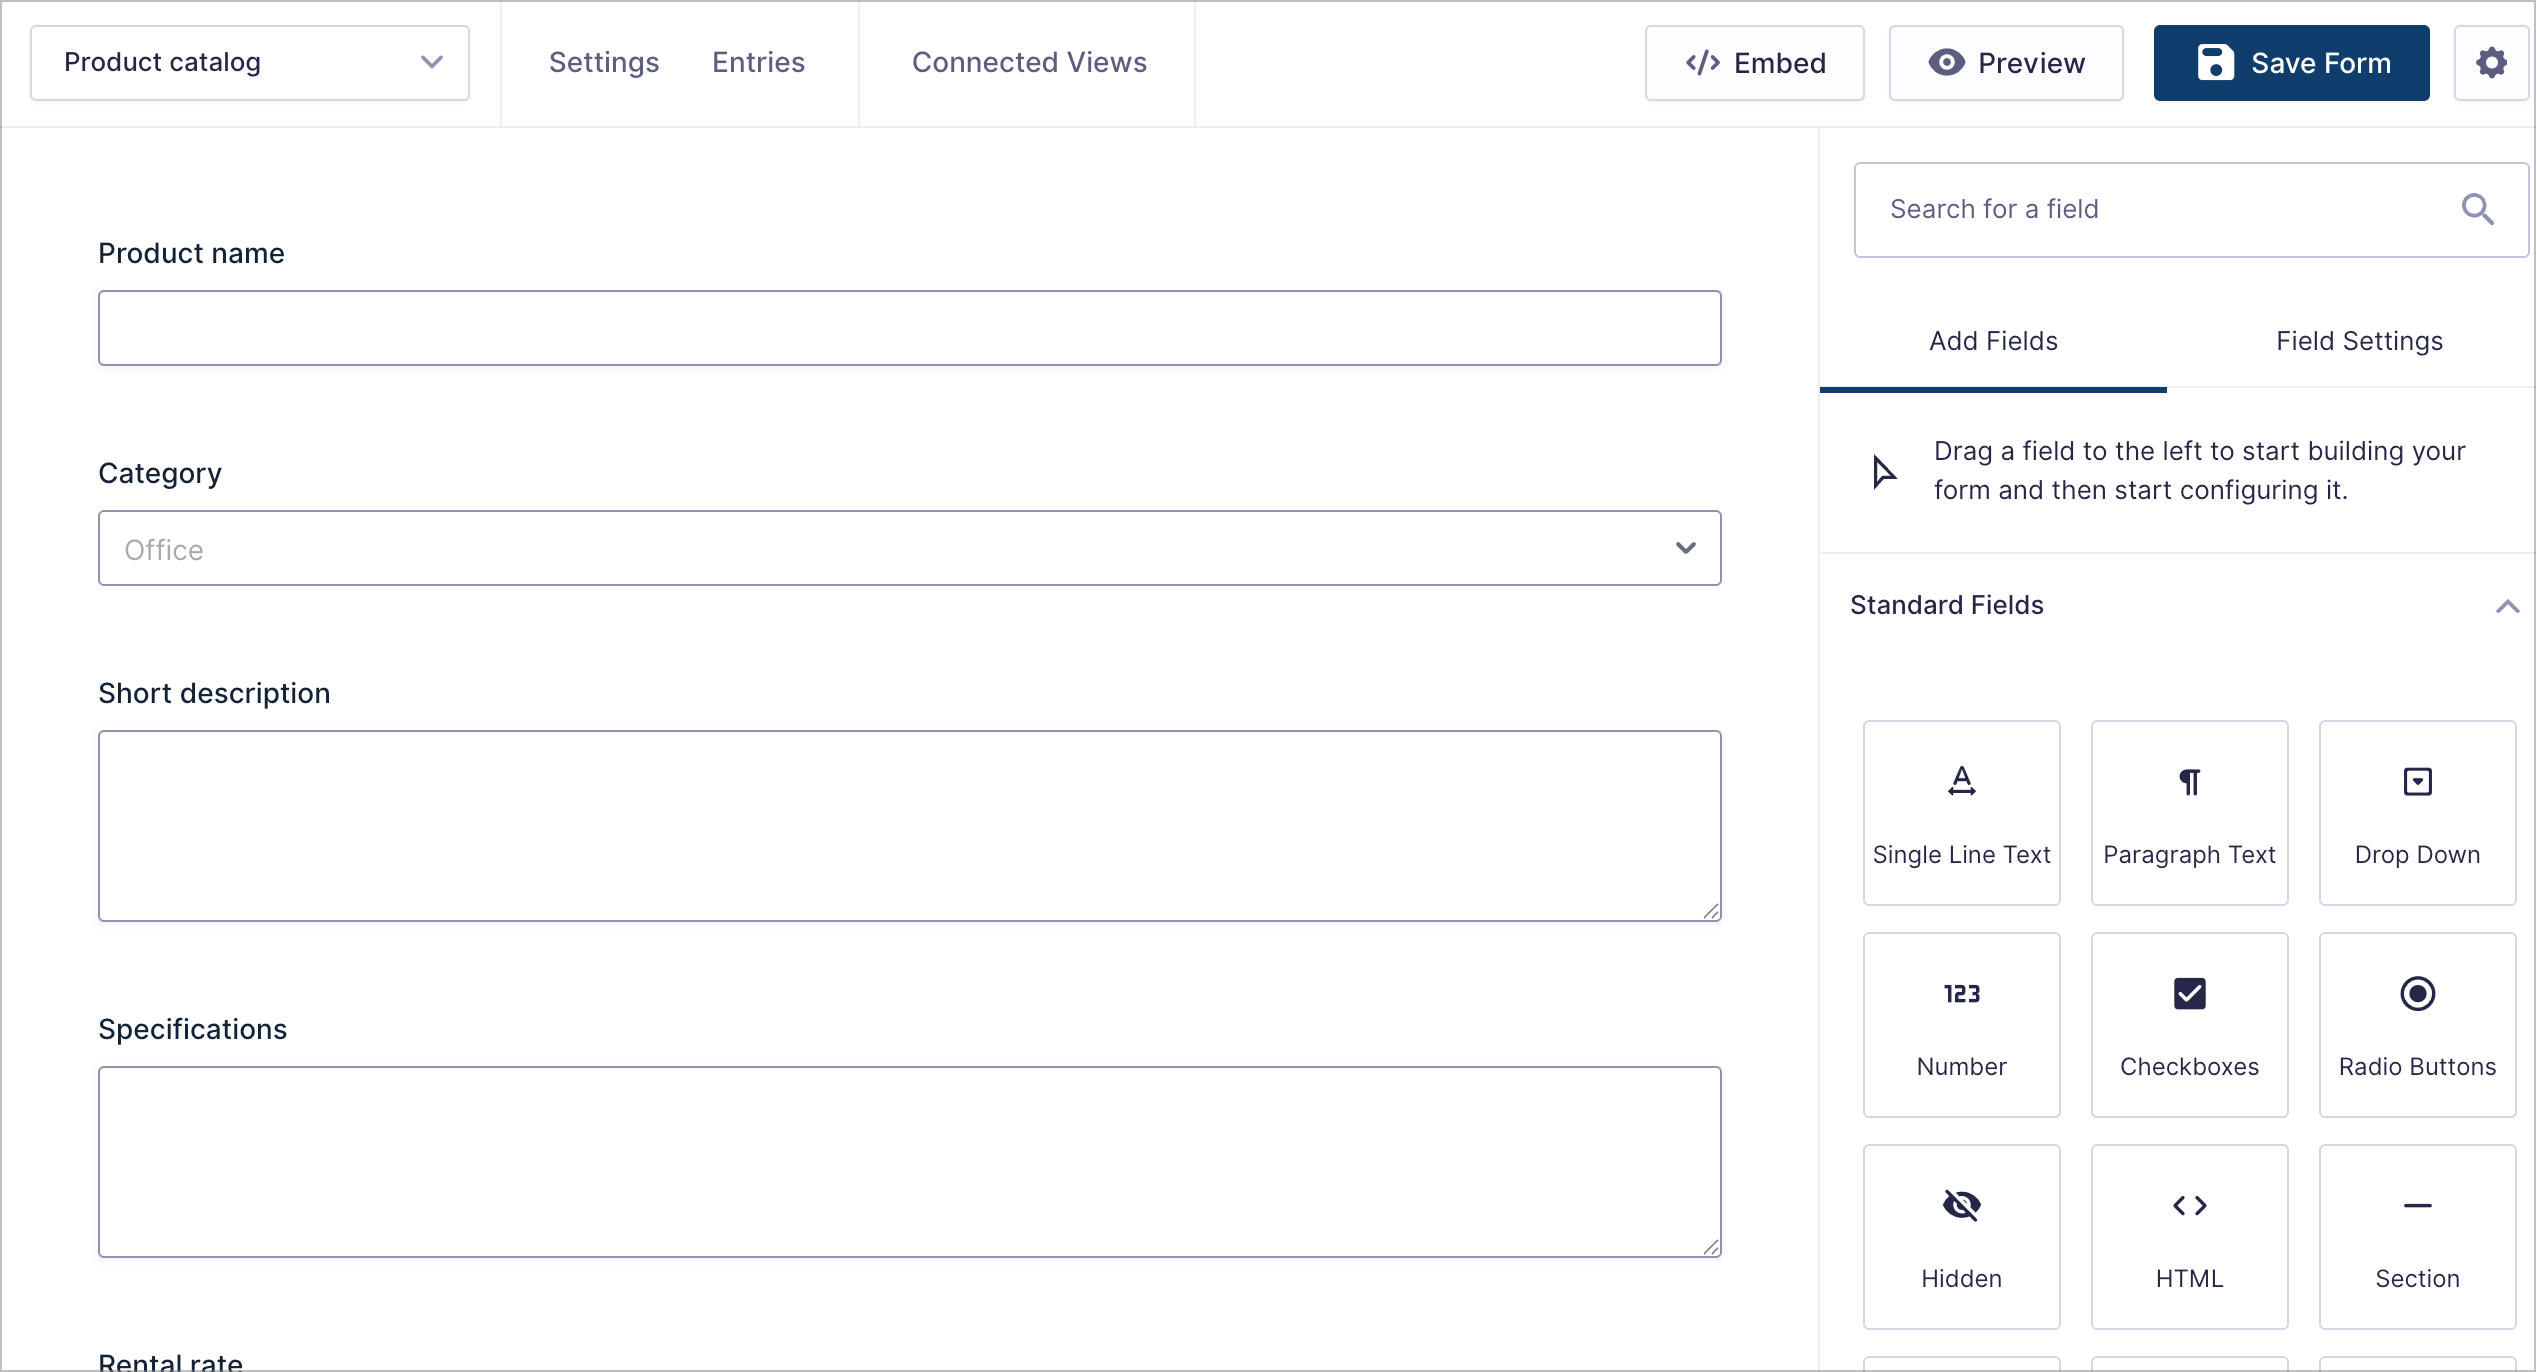
Step 1: Create the product form
First, we’ll create a Gravity Forms form to capture all the product information. Think of this form as your product database, as each submission will become one item in your catalog.
To create a new form, hover over Forms in the WordPress sidebar and click New Form. Name it something like “Product catalog”.
Now we’ll add the following fields:
- Product name (Single Line Text) – the title of each product
- Category (Drop Down) – for grouping products (e.g., Power Tools, Garden, Office, Home)
- Short description (Paragraph Text) – a brief summary shown in the catalog grid
- Specifications (Paragraph Text) – detailed specs shown on the product detail page
- Rental rate (Number) – the price per day/week
- Image (File Upload) – a product photo
- Status (Drop Down) – availability status (e.g., Available, Rented, Maintenance)

Pro Tip
If your team needs to enter a lot of products at once, enable Gravity Forms’ Save and Continue feature so they can save progress and come back later.
Once you’ve added all the fields, click Save Form and add a few test entries so we have something to display in the next step.
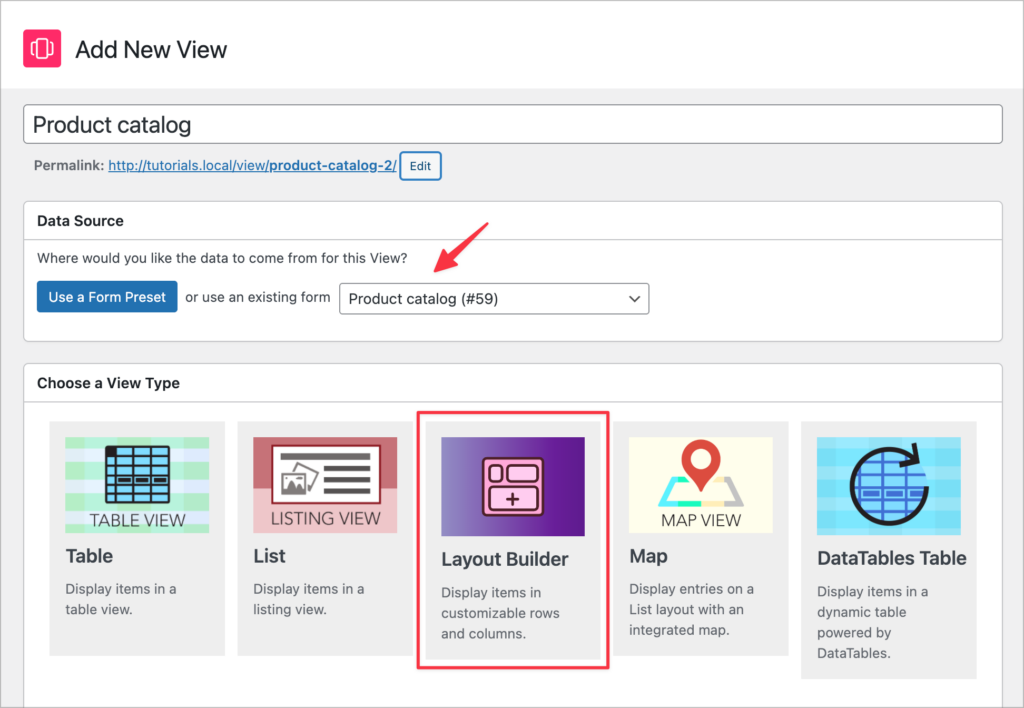
Step 2: Create the catalog View
Next, we’ll create a GravityView View that pulls in our form entries and displays them as a browsable catalog.
To create a new View, hover over GravityKit in the WordPress sidebar and click New View. Select the Layout Builder view type and choose your “Product catalog” form as the data source.
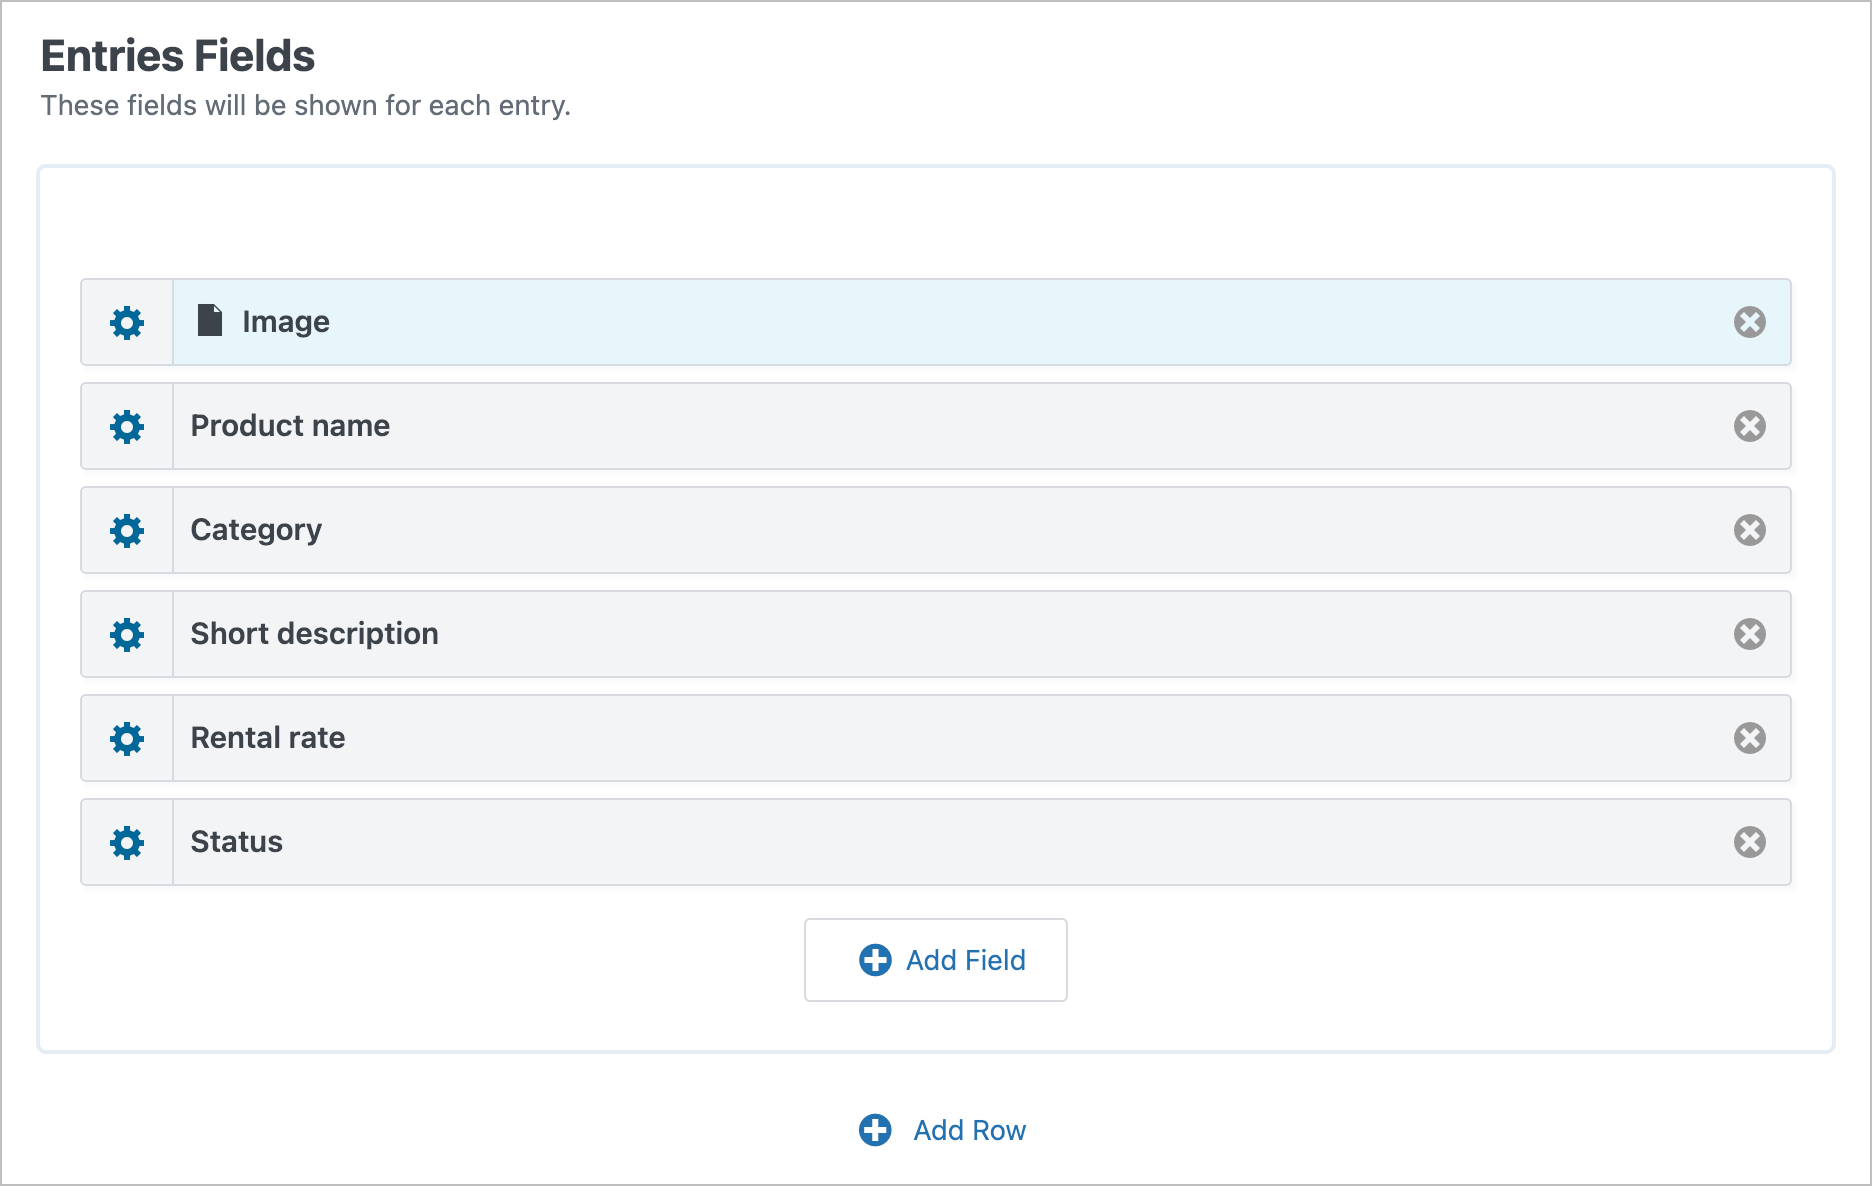
Next, we’ll configure the layout. In the Entries Fields section, add the fields you want to display for each product card:
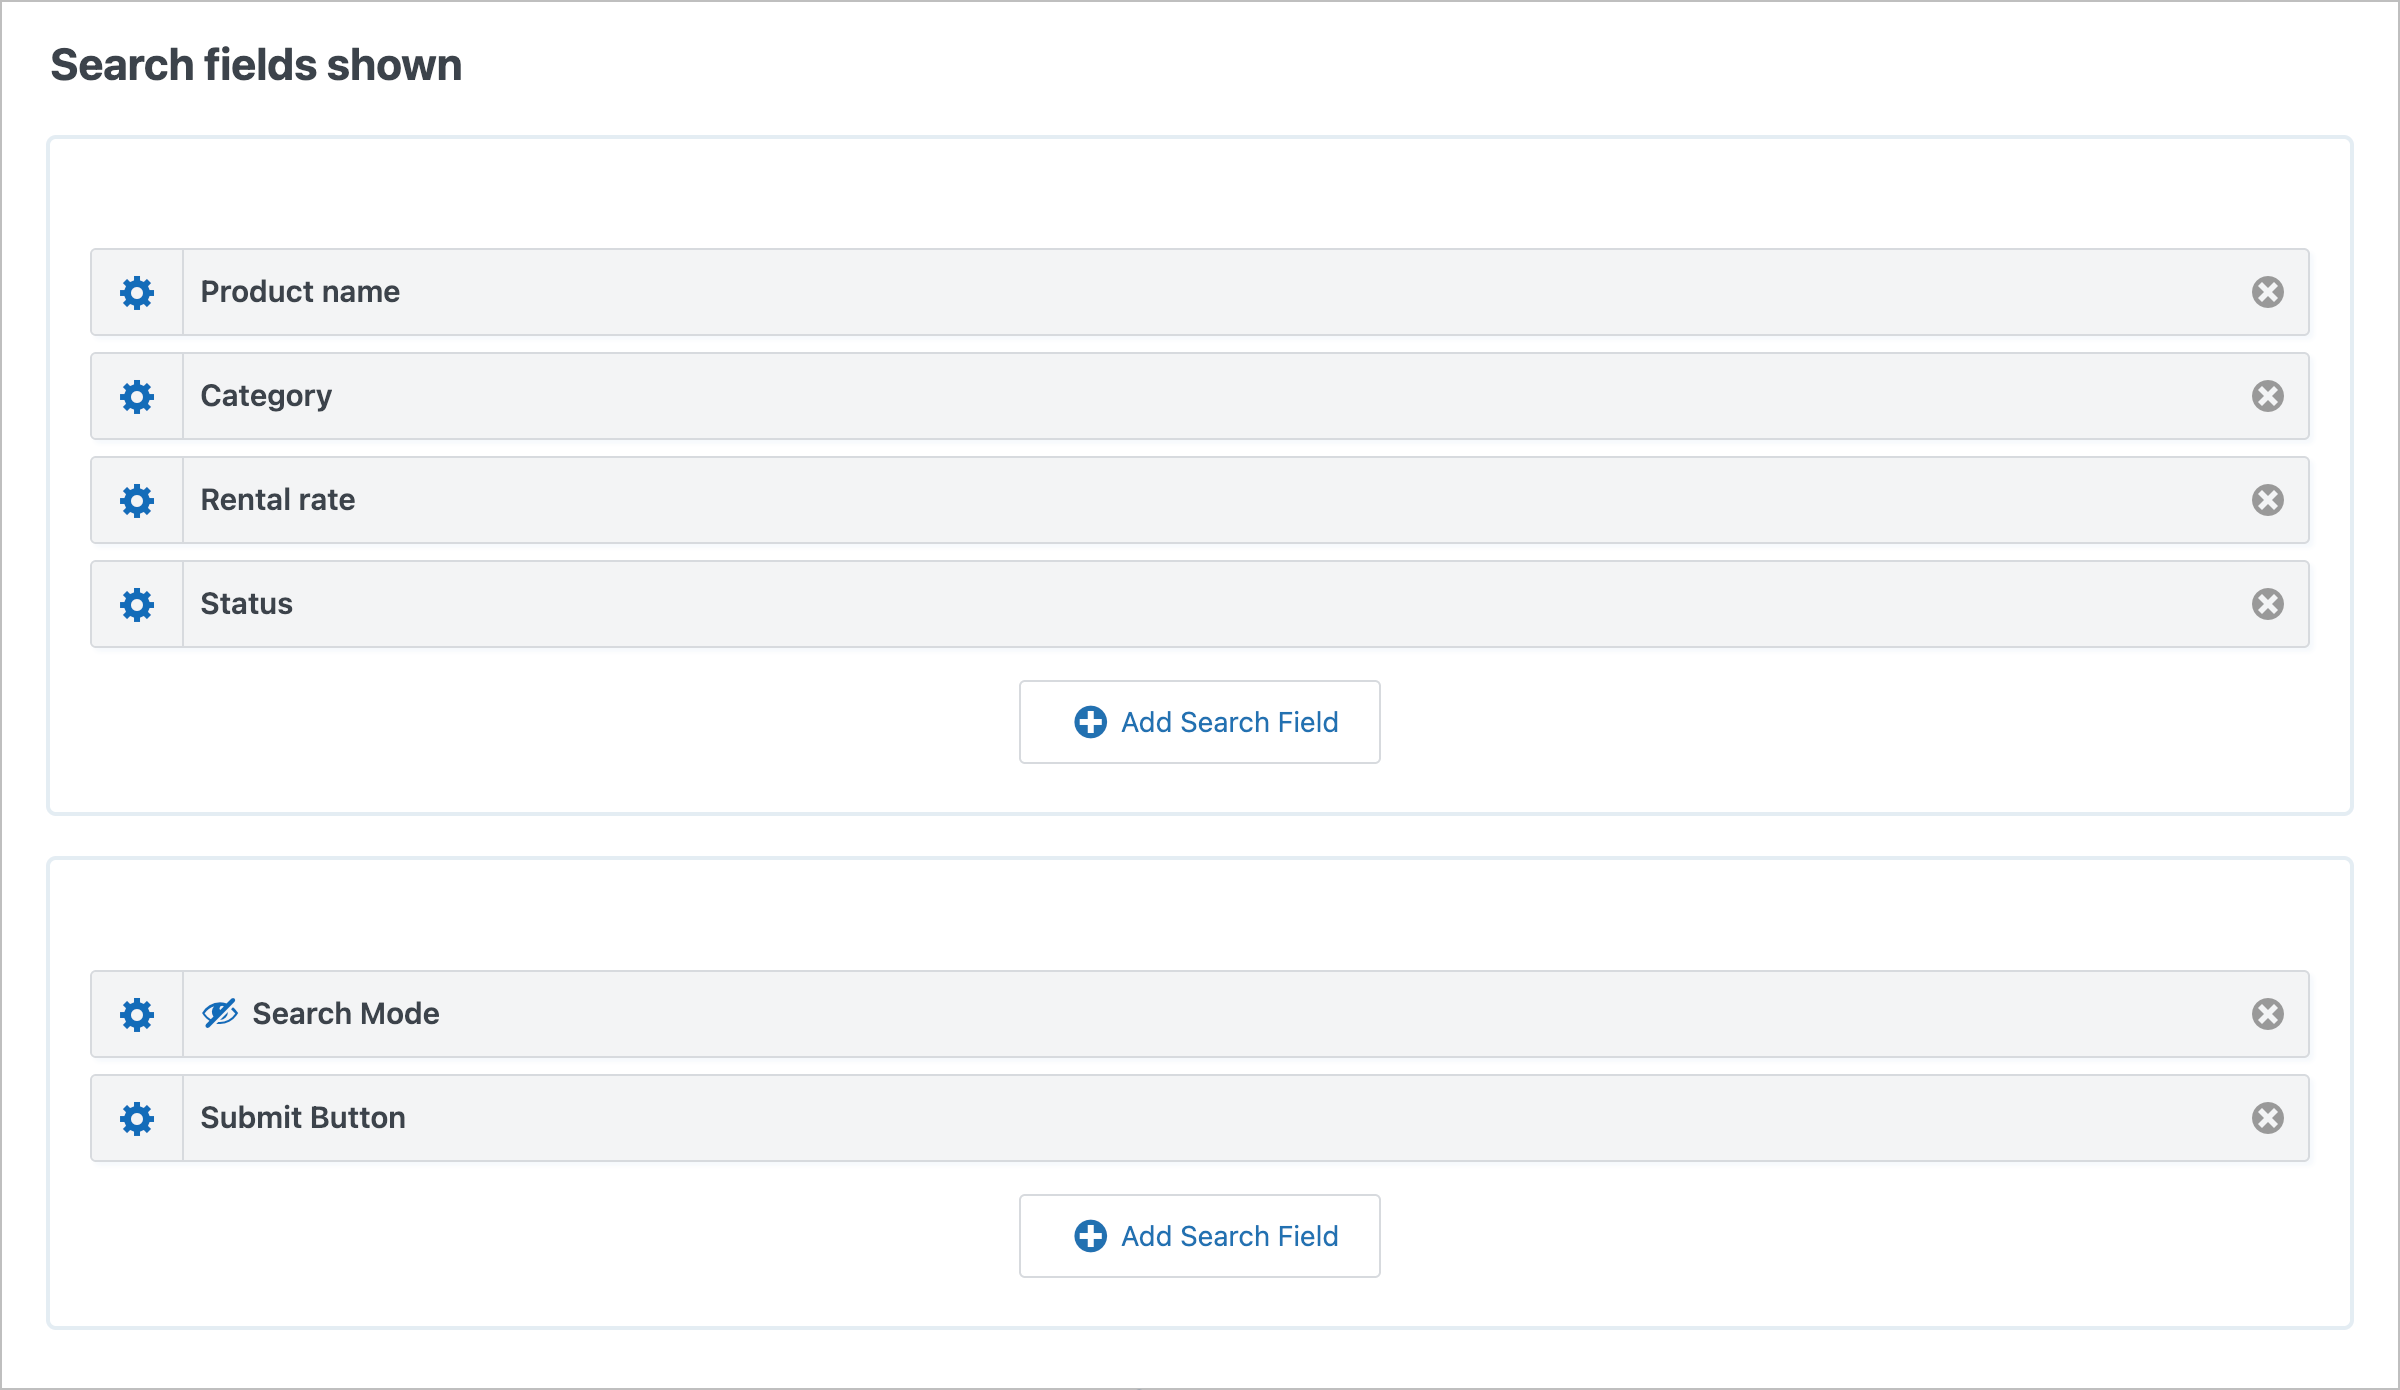
Add a search bar
One of the best parts of using GravityView for a catalog is the built-in search functionality. We’ll add a Search Bar widget so visitors can quickly find what they’re looking for.
Scroll down to the Search Bar section and add the following search fields. You can customize these to suit your catalog.
- Product name – a text search so visitors can type in a product name
- Category – a dropdown filter so they can browse by category
- Rental rate – a filter for price range
- Status – a dropdown filter for availability
Save your View and embed it on a page using the GravityView block or shortcode. Here’s what the catalog looks like on the front end:

Step 3: Build the product detail page
When a visitor clicks on a product in the catalog, they’ll be taken to a Single Entry page that shows all the product details. Let’s configure that now.
Back in the View editor, click on the Single Entry Layout tab. Here, we’ll add all the fields we want to show on the detail page:
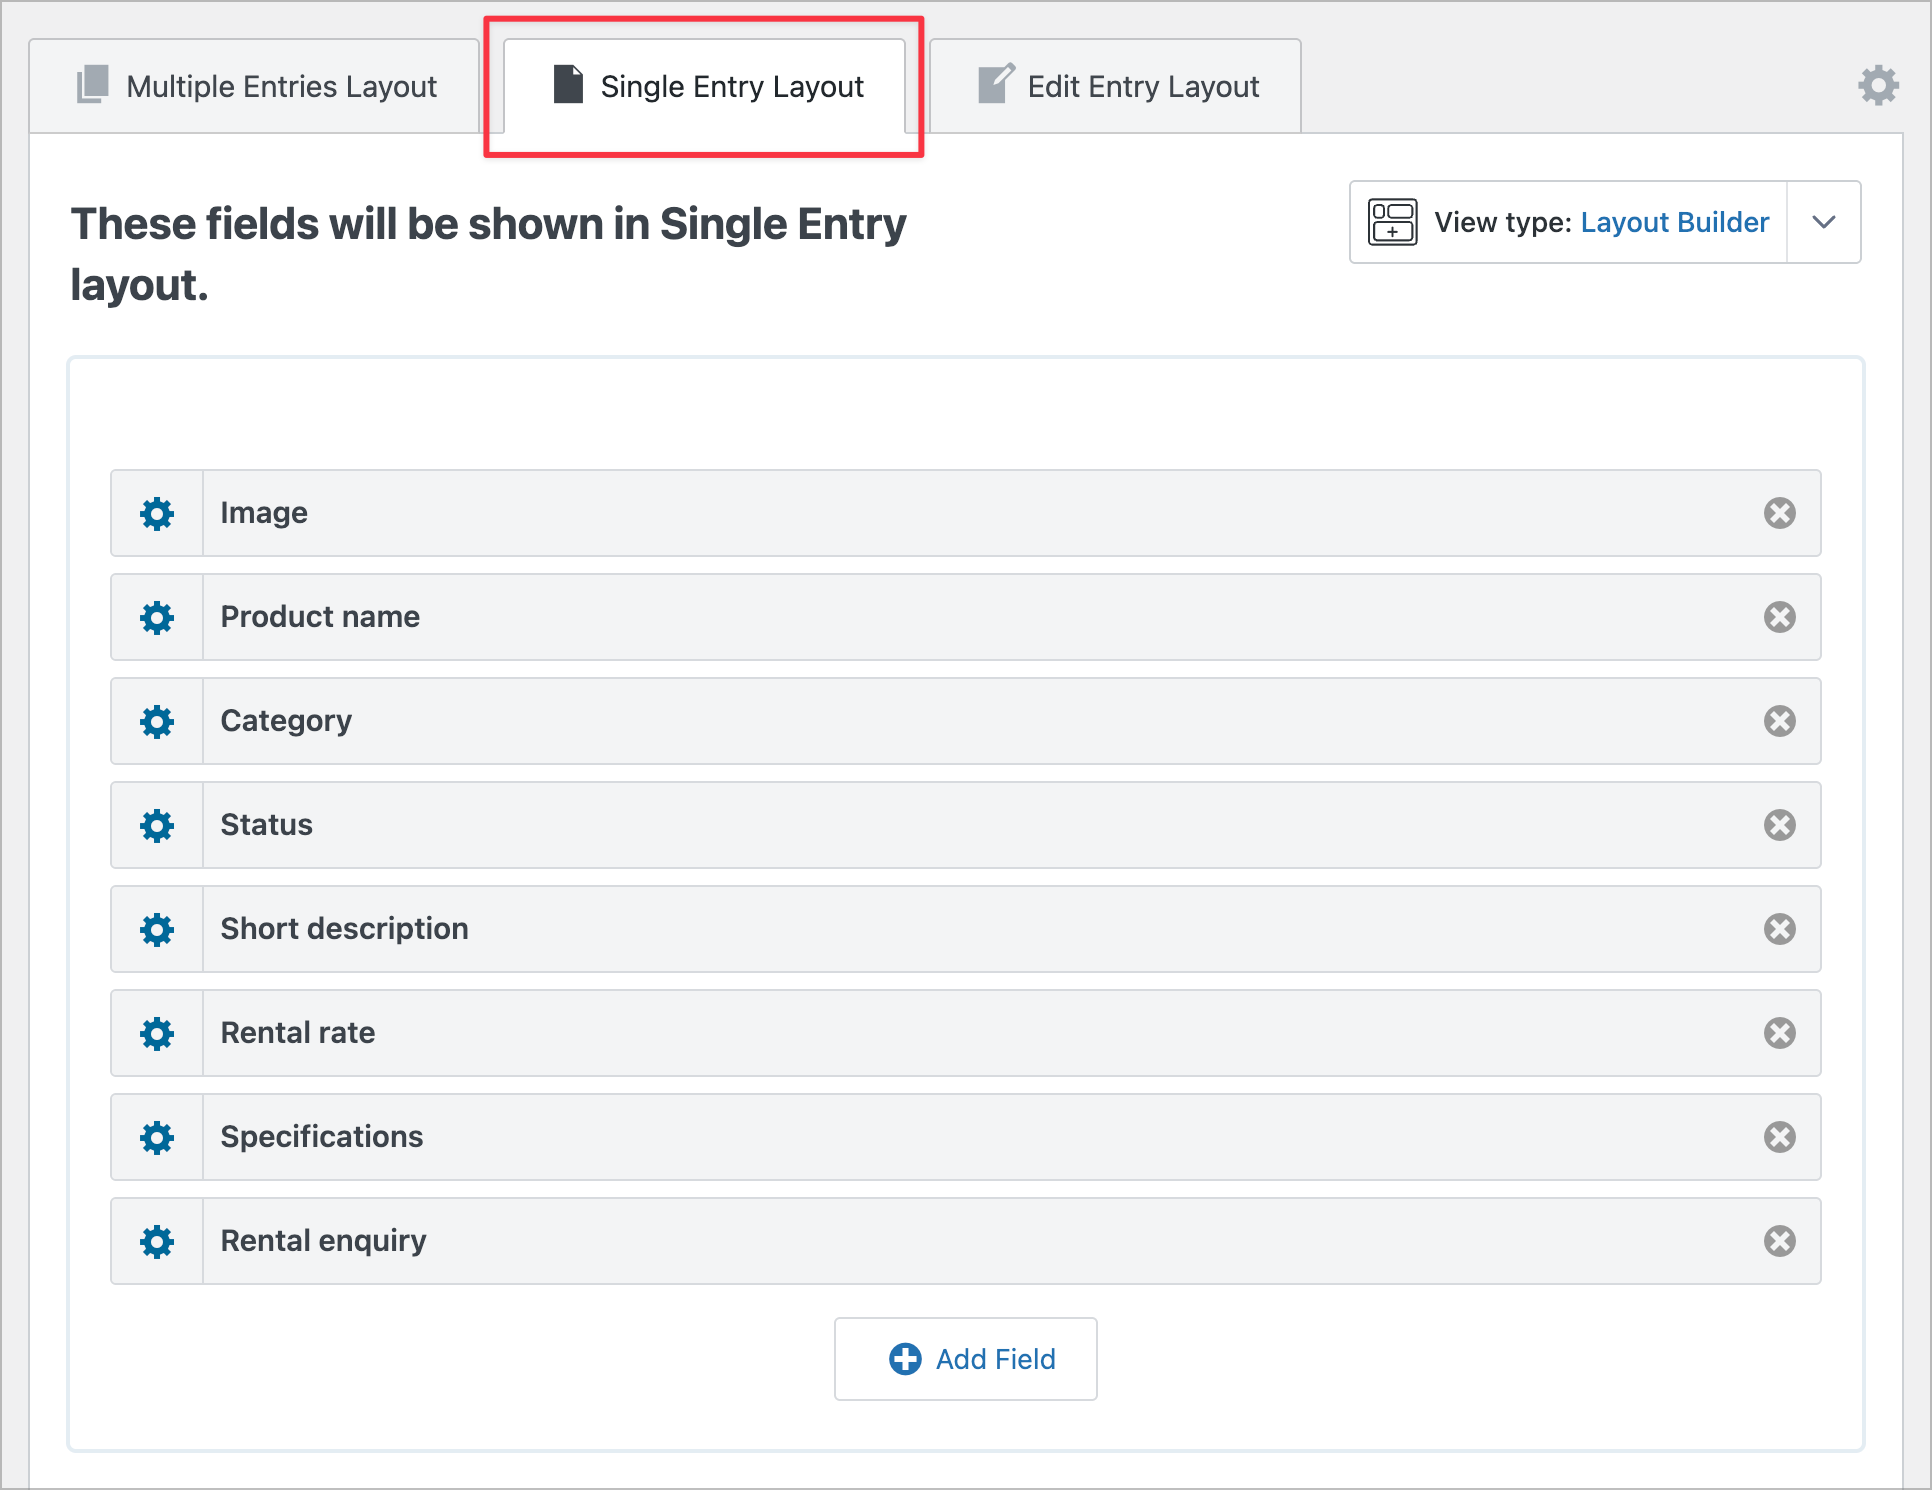
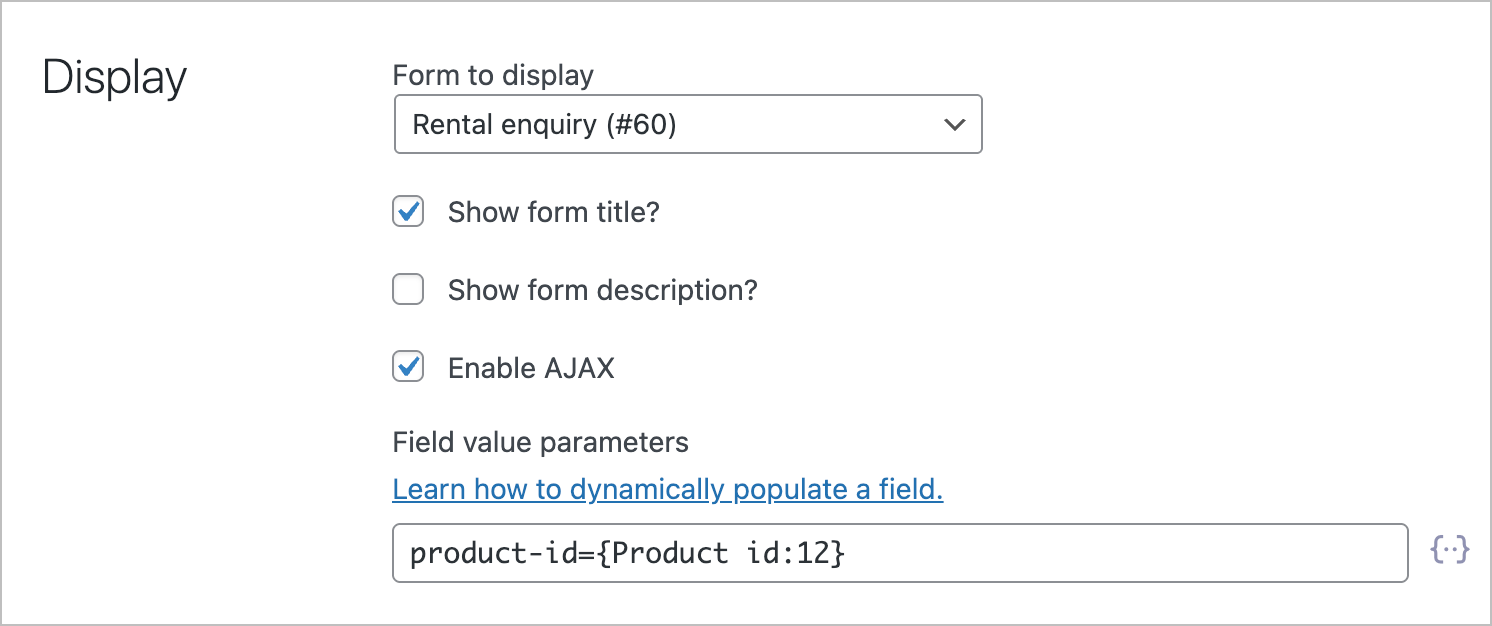
Notice the Rental enquiry field at the bottom? That’s a Gravity Forms field type in GravityView that embeds a separate form directly on the Single Entry page. This lets visitors submit an enquiry about a specific product without leaving the page.
To set this up, first create a simple enquiry form in Gravity Forms with fields like Name, Email, and Enquiry, and add a Hidden field to capture the product name or entry ID.
Then, back in the GravityView Single Entry layout, add a Gravity Forms field, select your enquiry form, and configure the Field value parameters to dynamically populate the hidden field with the product ID:
Here’s what the finished product detail page looks like on the front end, complete with the rental enquiry form:

Step 4: Filter by availability (optional)
If your catalog is public-facing, you may only want to show products that are currently available. To do this, add an Advanced Filter to your View that only displays entries where the Status field equals “Available”.
Alternatively, leave all statuses visible and use GravityView’s gvlogic shortcode to style the status badges differently. For example, you could show a green badge for “Available” and a gray badge for “Rented Out” to make it easy for visitors to see what’s in stock at a glance.
Step 5: Create category landing pages with URL parameters
Want to create dedicated landing pages for specific product categories? You can link directly to your catalog View with a pre-filtered URL.
For example, if your catalog page is at yoursite.com/catalog/, you can link to a filtered view like this:
yoursite.com/catalog/?filter_category=Power+ToolsThis is a great way to build targeted landing pages or add category links to your site’s navigation menu.
Step 6: Optional enhancements
Once you have the basics in place, there are a few more GravityKit plugins that can take your catalog to the next level:
- GravityView Maps Layout – if your products or equipment have a location field, you can display them on an interactive map
- GravityEdit – let staff update availability status directly from the front-end catalog without having to open the Edit Entry screen
- GravityExport – export inventory reports filtered by category, status, or any other field
A note on inventory management
It’s worth being upfront about what this setup can and can’t do. GravityView is excellent at displaying and filtering your product data, but it doesn’t handle complex business logic like availability conflict detection, booking calendars, or automated inventory tracking. If you need those features, you’ll want to look into dedicated booking or inventory management plugins.
That said, for the vast majority of product catalogs and equipment directories where you just need a clean, searchable way to display your items, this setup works extremely well.
Create your product catalog today
That’s it! You’ve now got a fully functional product catalog powered by Gravity Forms and GravityView. To recap what we built:
- A Gravity Forms form that serves as your product database
- A GravityView View that displays your products in a searchable card grid
- A Single Entry page that shows full product details with an embedded enquiry form
- Search and filter functionality so visitors can find exactly what they need
Ready to build your own catalog? Give GravityView a try!

Helpful tips right in your inbox.
Subscribe to get the latest articles, information on releases and helpful Gravity Forms tips!
More articles

Launch Log: Row headers for screen readers, smarter conditional logic, and multi-View fixes
GravityView 3.1 adds row headers for screen readers, plus smarter conditional logic in GravityCalendar and fixes for DataTables, Maps, and Dynamic Lookup.

Ecommerce platform market share 2026: WooCommerce leads the web, Shopify leads the top tier
Ecommerce platform market share in 2026, from HTTP Archive data. WooCommerce leads the whole web at 6.64%, but Shopify already leads the top 1M sites.

Launch Log: 3D map enhancements, smarter filtering, and improved performance on large data sets
GravityKit’s July 9 launch log: 3D map starting views and viewport loading, searchable field-to-field filtering, and fixes across DataTables and more.