
Using Visual Merge Tags
Visual Merge Tags shows merge tags as chips instead of raw text in every field where you type them: notifications, confirmations, calculation formulas, feed settings, and the View editor in GravityView, where you build Views (the pages that display your form entries). You can insert a tag by typing {, click a chip to change what it outputs, and preview the real value from an entry before you save. This article explains how each part works, how to turn it off, and what it doesn’t do yet.
A merge tag is a placeholder, such as {Name (First):1.3}, that Gravity Forms replaces with a value from the entry when it sends an email or displays content.

Before you start #
- Visual Merge Tags is free and needs no license. It is part of Foundation 1.35.0 and newer.
- It works with the merge tag fields Gravity Forms already provides, so there is nothing to set up. It is on by default, and you can limit it to GravityKit screens or turn it off (see Choose where Visual Merge Tags appear).
Note: Your existing merge tags don’t change. Visual Merge Tags only changes how merge tags look while you edit them. Each chip is saved as the same plain merge tag text Gravity Forms has always used, so your notifications, confirmations, and other settings keep working as before, and you can still type merge tags by hand.
Insert a merge tag #
You can insert a merge tag in two ways.
- Type a brace. Click in any merge tag field and type
{. A list opens with the tags that work in that field, grouped by type (for example Fields, Entry properties, and Date & time). Keep typing to filter the list, use the arrow keys to move through it, and press Enter to insert the highlighted tag. - Use the merge tag picker icon. Click the merge tag picker icon above the field (its tooltip reads Insert merge tag) to open the same list. It is the Gravity Forms merge tag icon turned on its side, so a rotated icon tells you the field uses Visual Merge Tags.
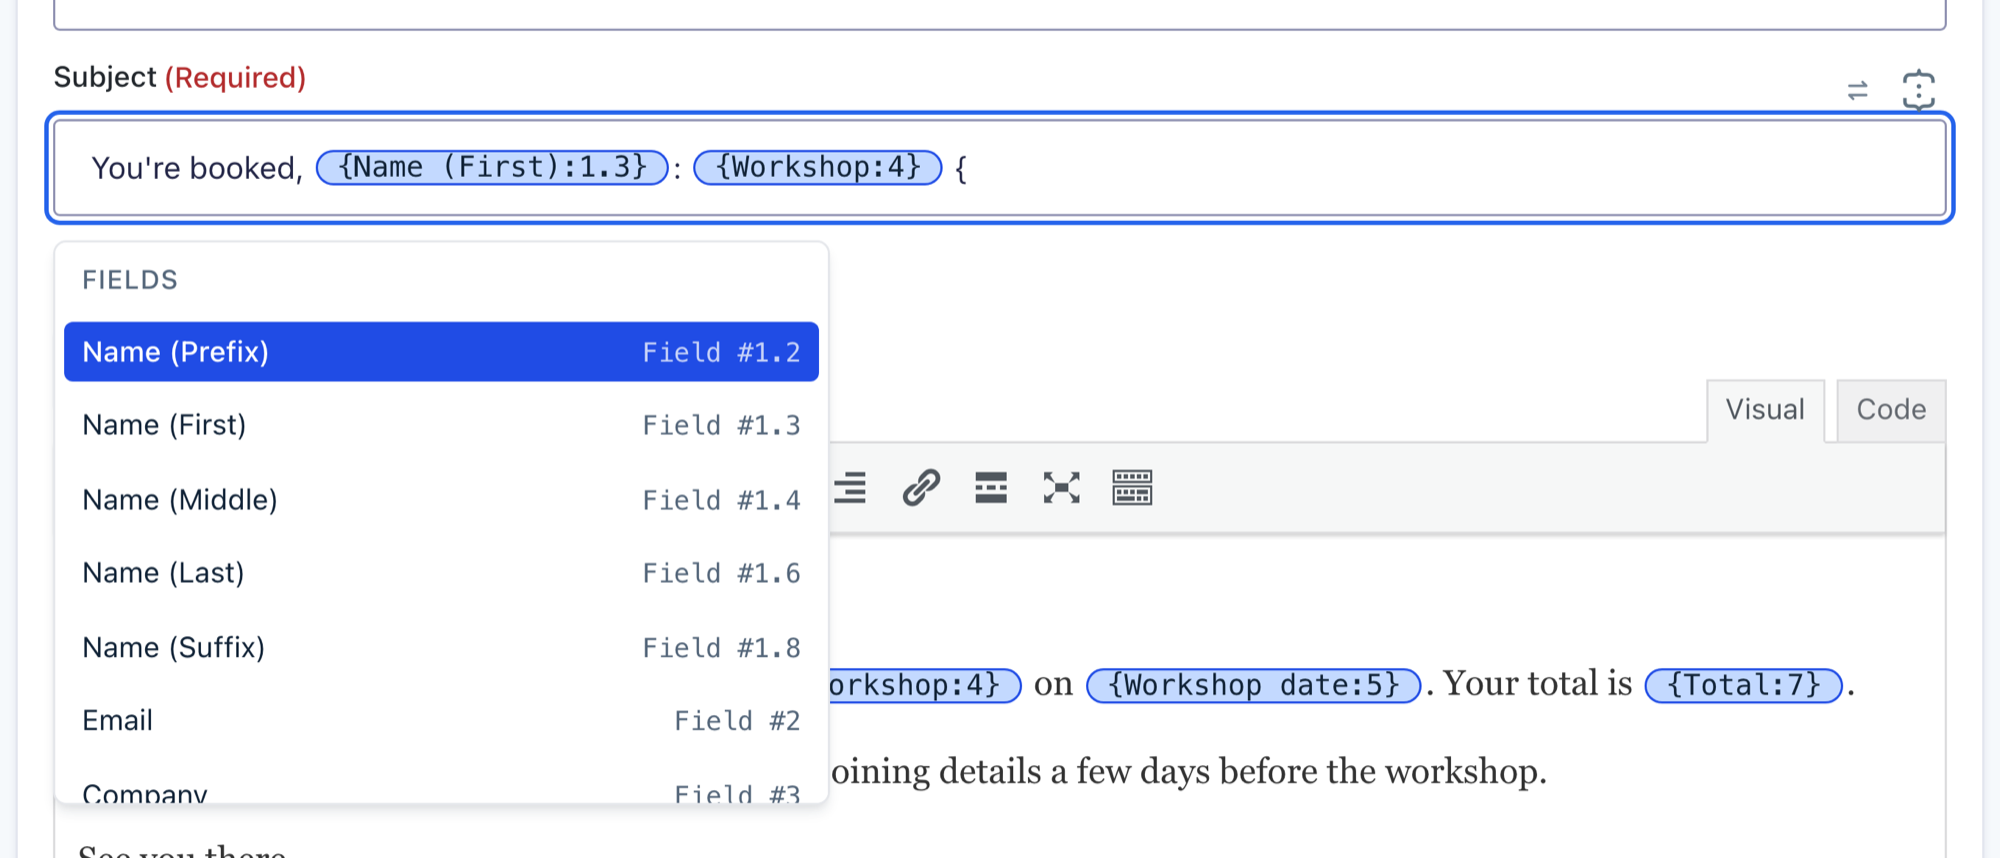
The list only offers tags that work where you’re typing. A form field’s Default Value doesn’t offer GravityView tags, for example, and a calculation Formula leaves out tags like {all_fields} that a calculation can’t use.
Change what a merge tag shows #
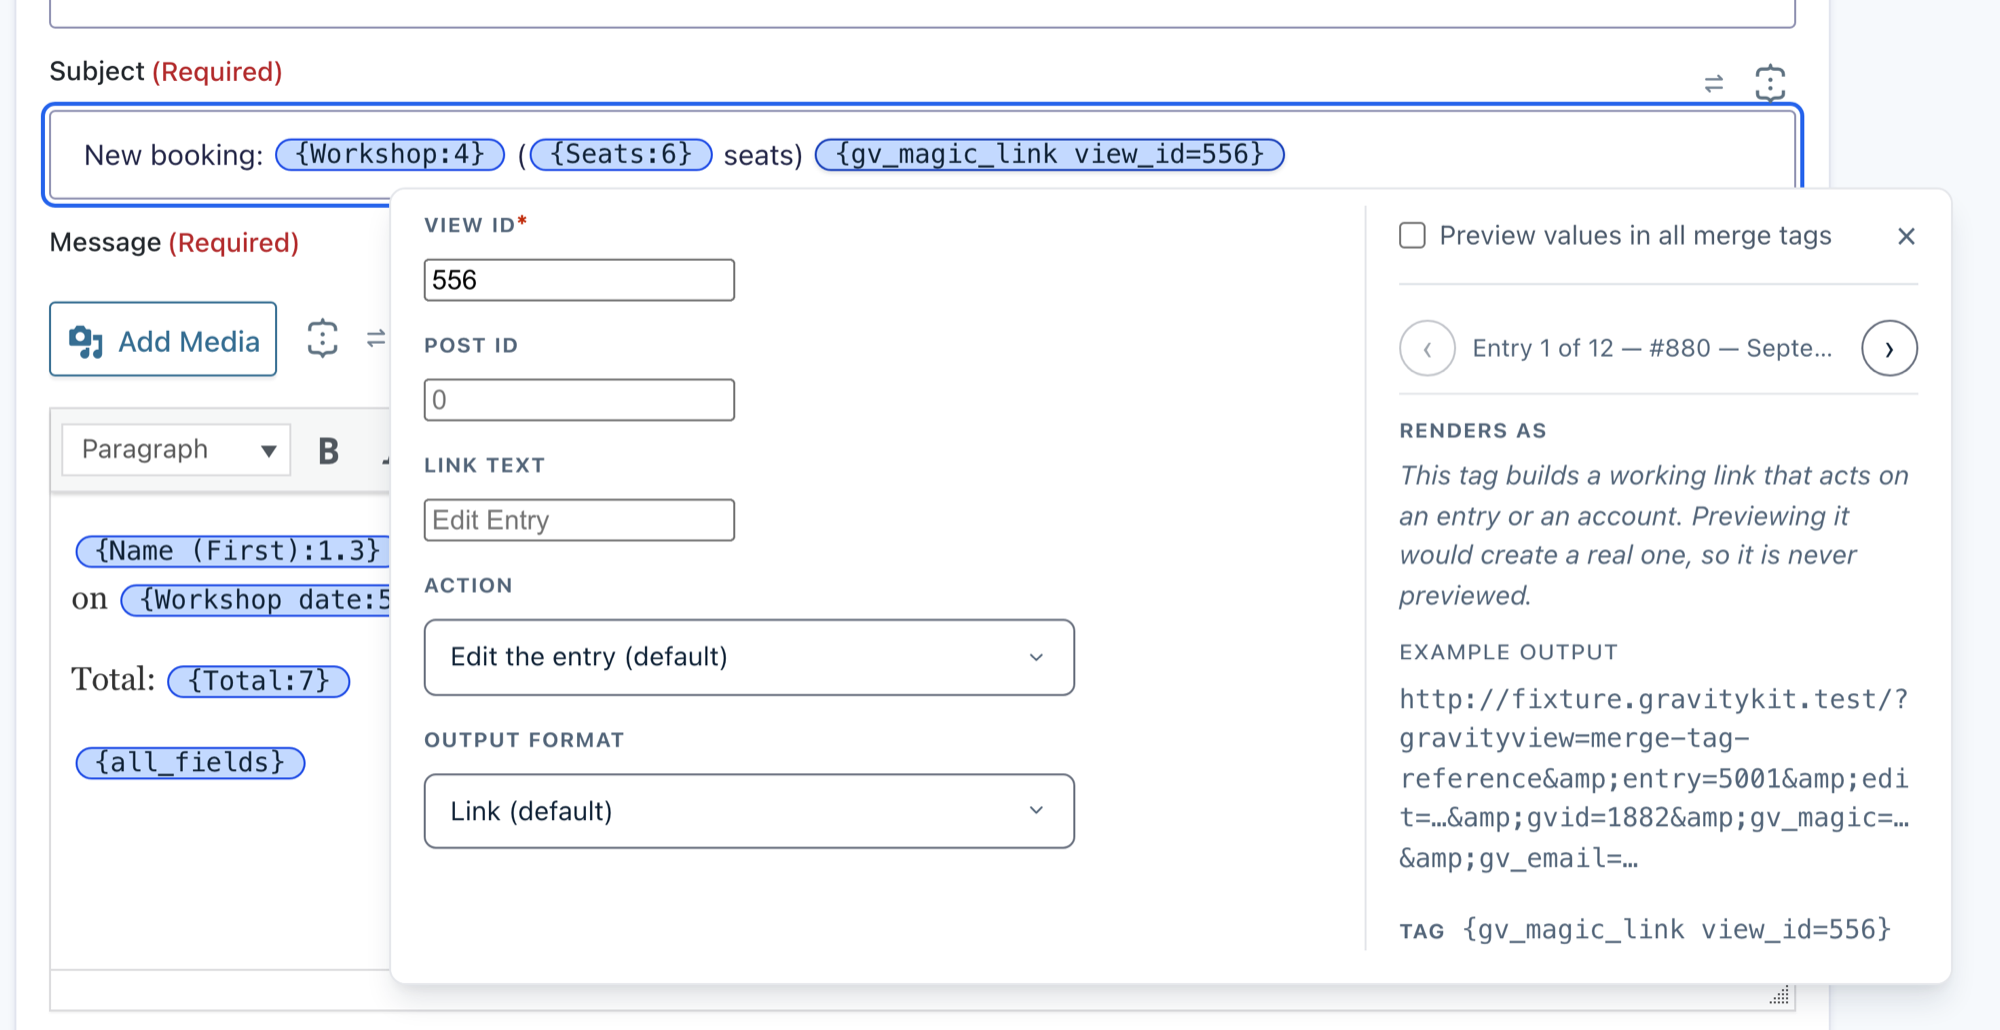
Click a chip to open its settings panel. The panel shows only the options that apply to that tag in that field.
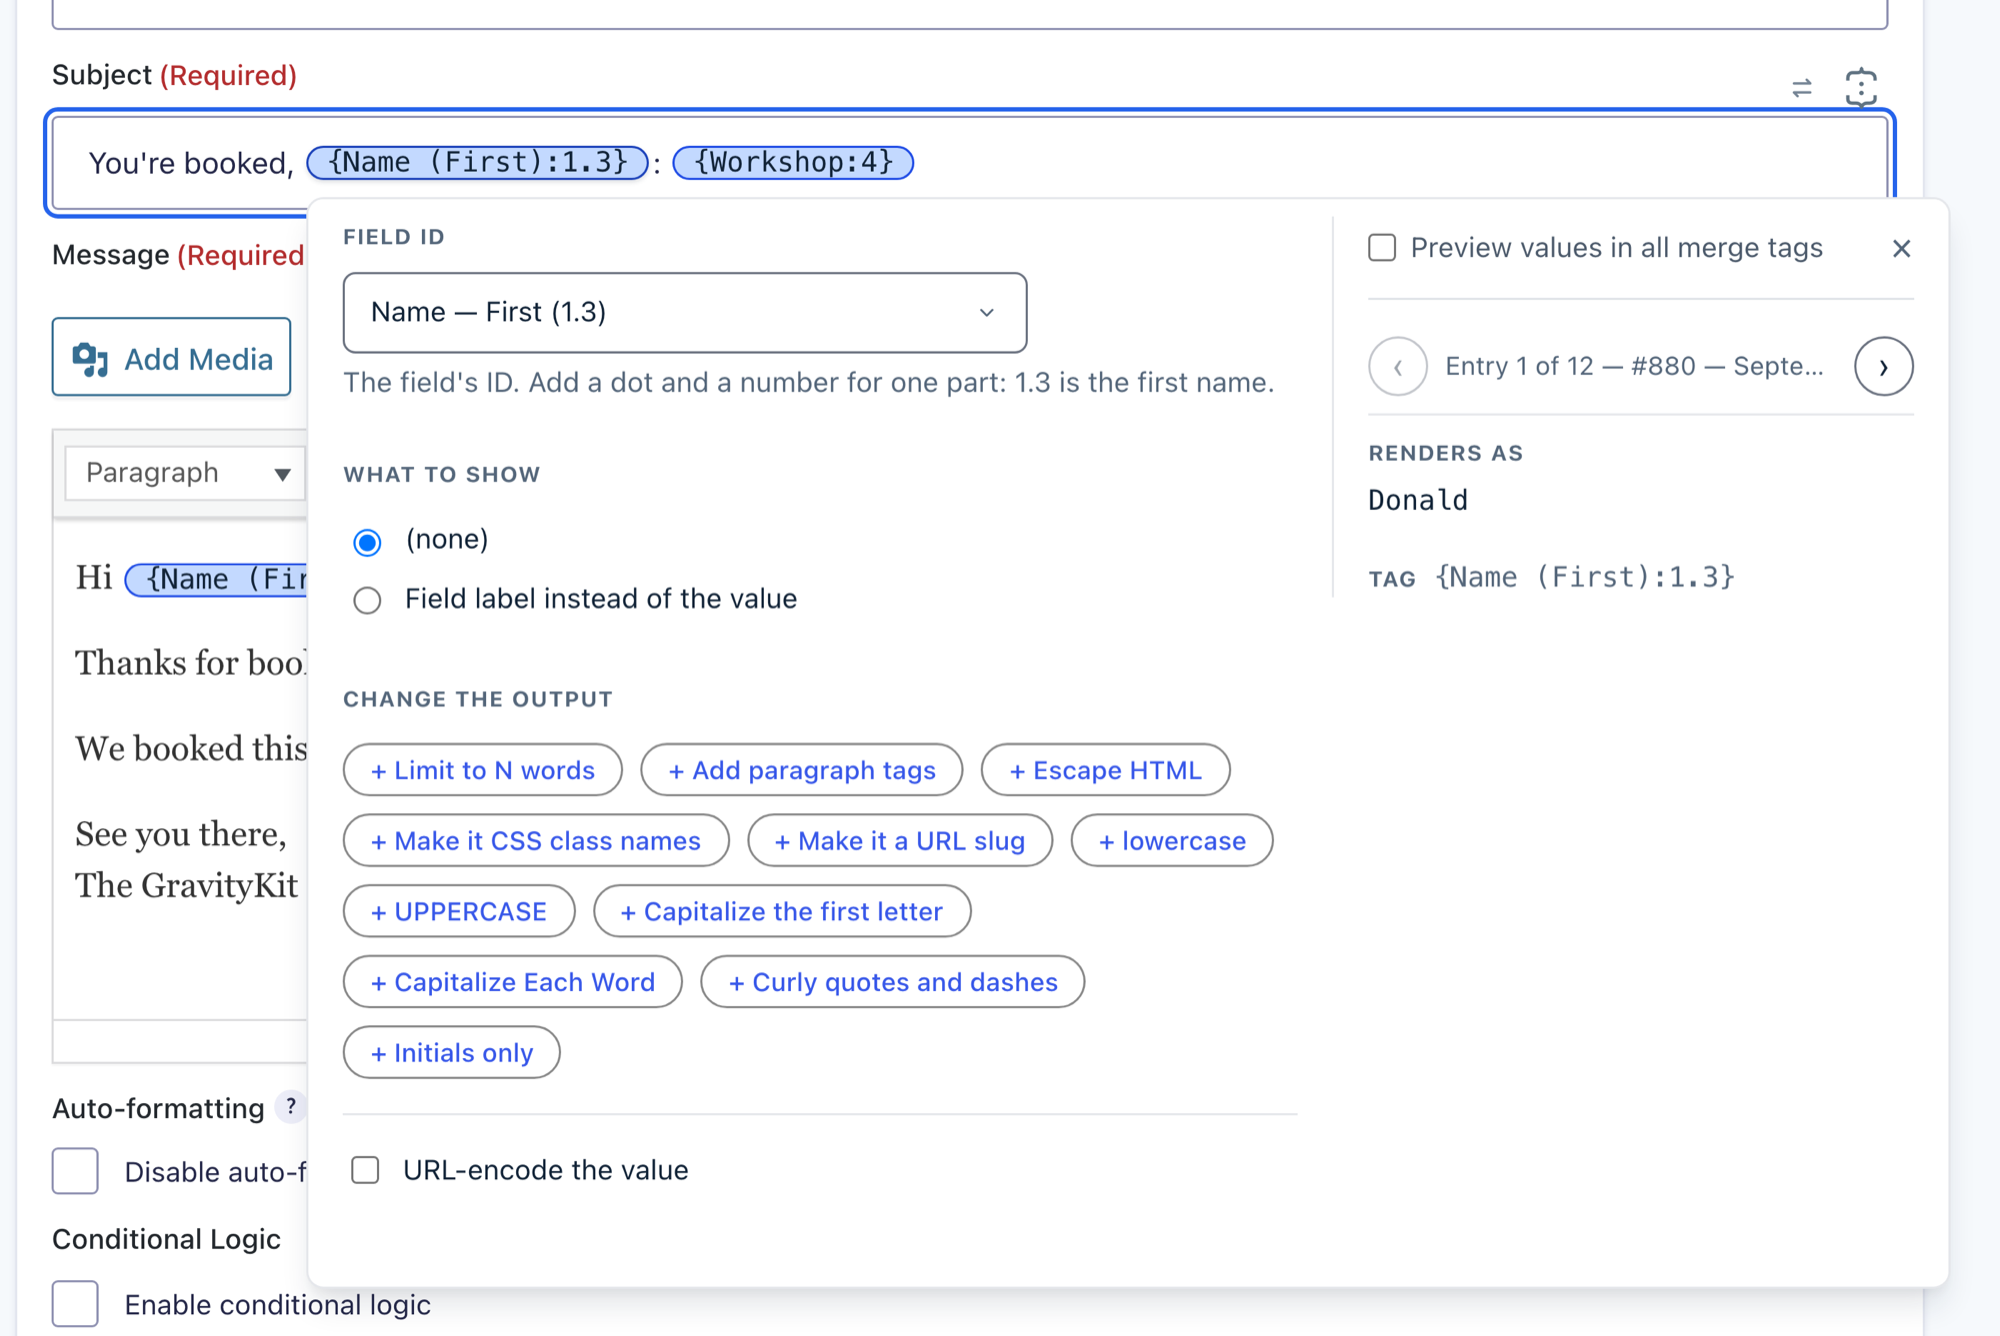
- Field ID – For a field tag, choose which field (or which part of a field, such as the first name) the tag reads.
- What to show – Choose a different form of the value, such as the field label instead of the entry value, or a raw stored date instead of a formatted one.
- Change the output – Add changes such as UPPERCASE, Limit to N words, or Make it a URL slug (which turns
TeX Worksintotex-works). - URL-encode the value – Makes the value safe to use in a web address, such as a redirect URL, by encoding spaces and special characters. It always applies last, after every change above it.
Changes in Change the output apply from top to bottom, so their order can change the result. Use the arrows beside each change to reorder it, and the × to remove it. The chip and the Tag line at the bottom of the panel update as you go, and the settings are saved into the merge tag itself (for example {Company:3:strtoupper}).
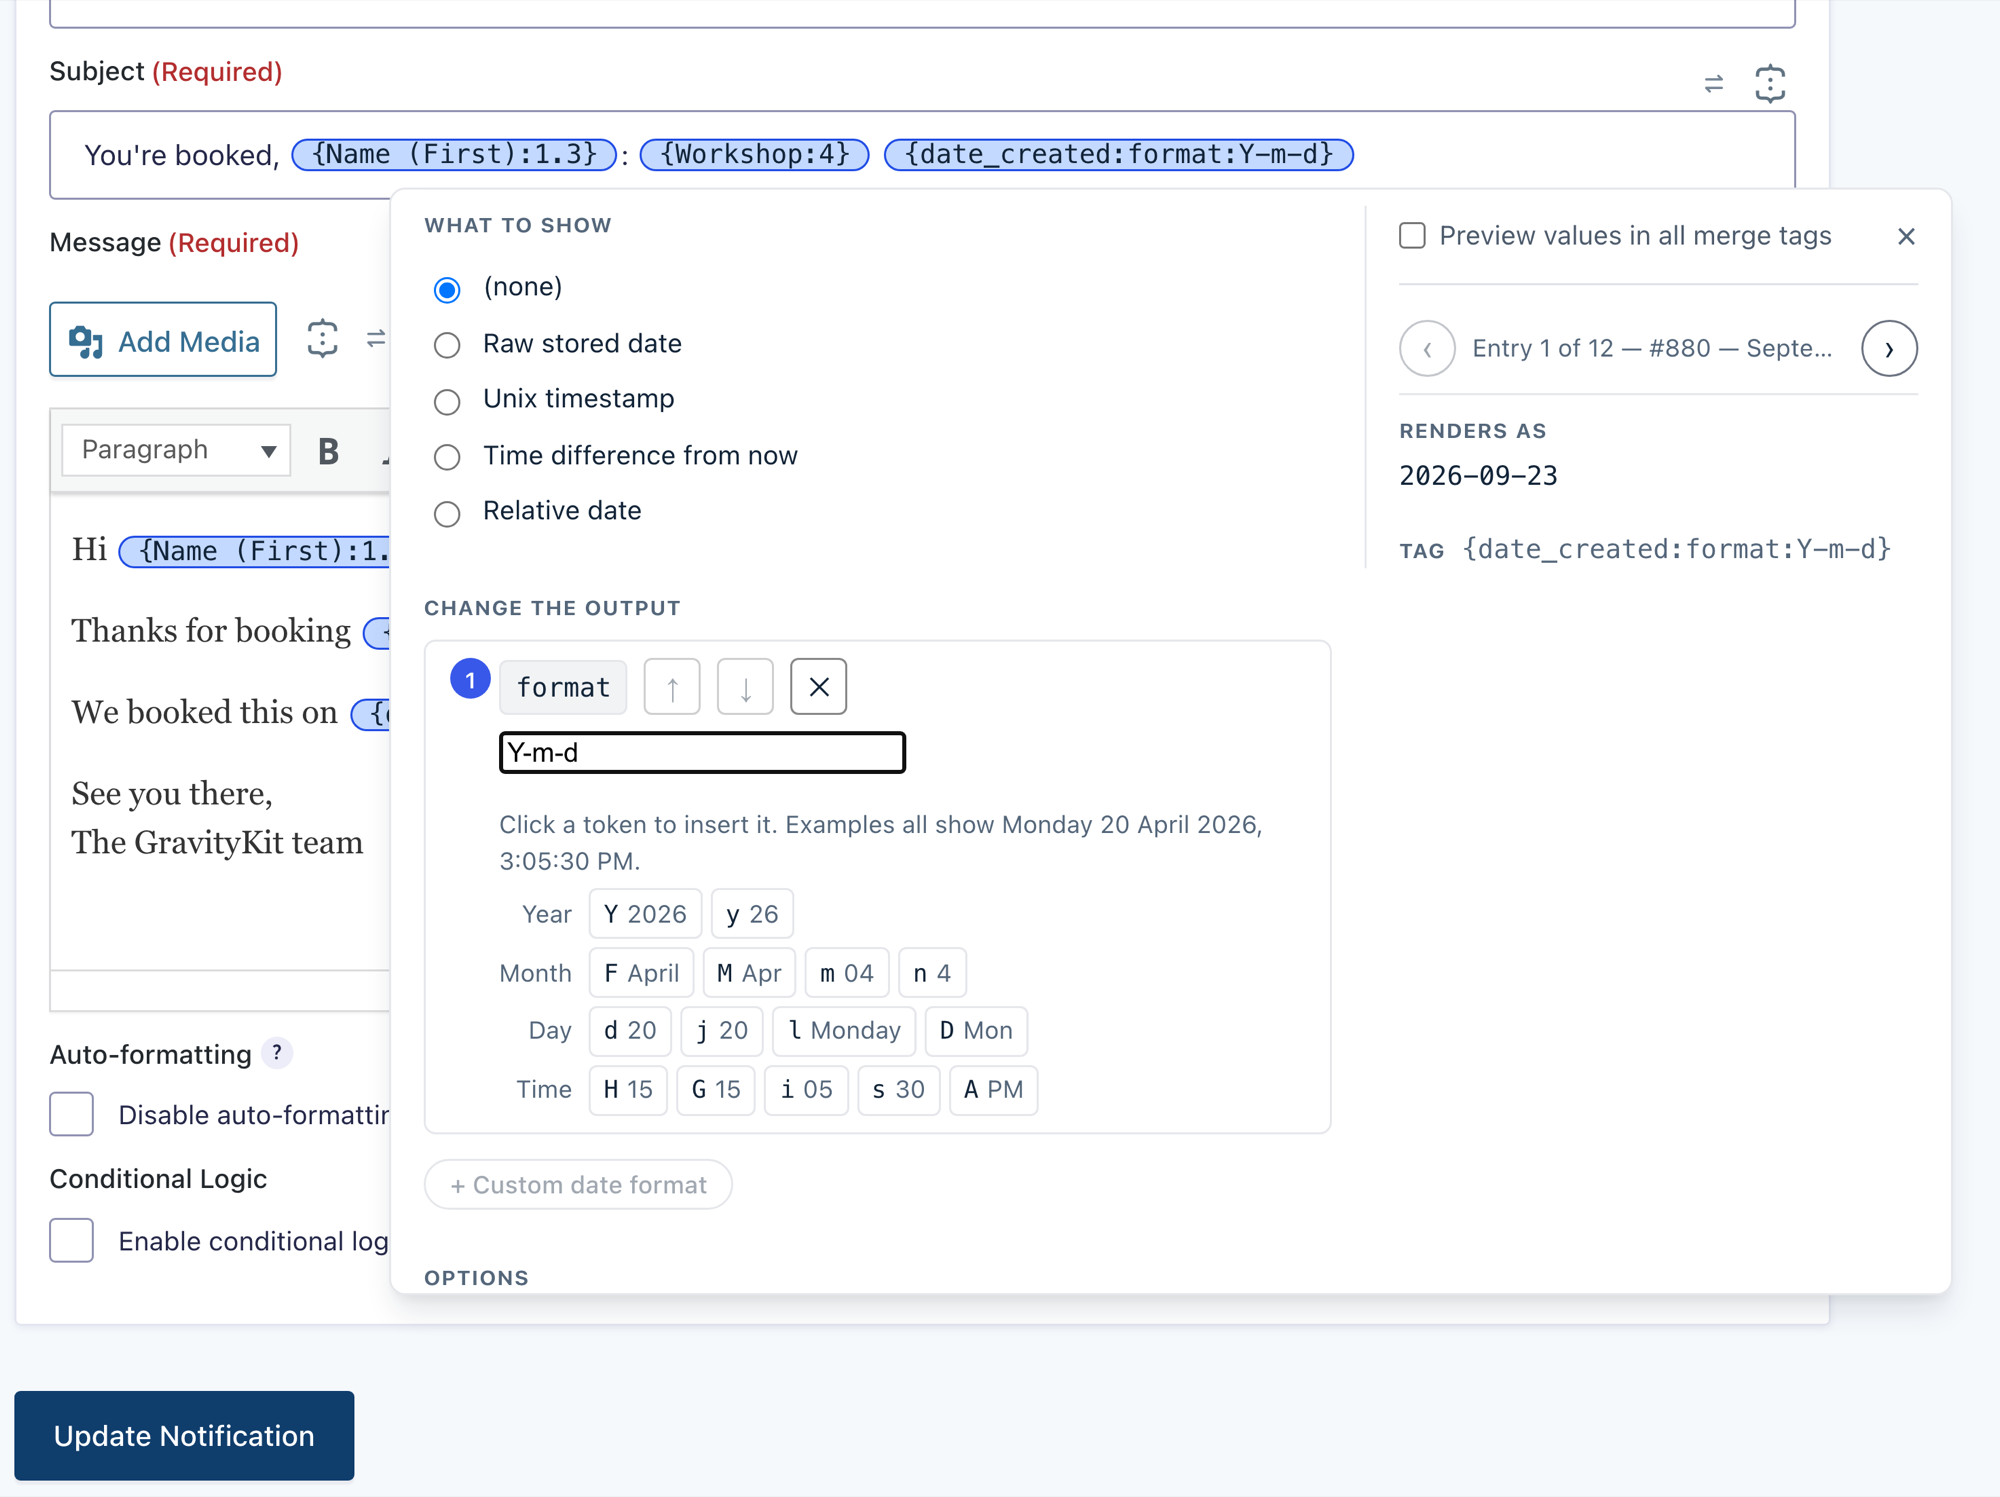
Format a date
For a tag from a Date field, the What to show list includes ready-made formats such as yyyy-mm-dd and dd/mm/yyyy. For any other format, set What to show to (none), then click + Custom date format to open the date format builder. Click a token, such as F April or Y 2026, to add it to the format. Every example uses the same date, so you can see what each token outputs before you use it.
Preview a merge tag with real entries #
The right side of the settings panel previews the tag with real entries.
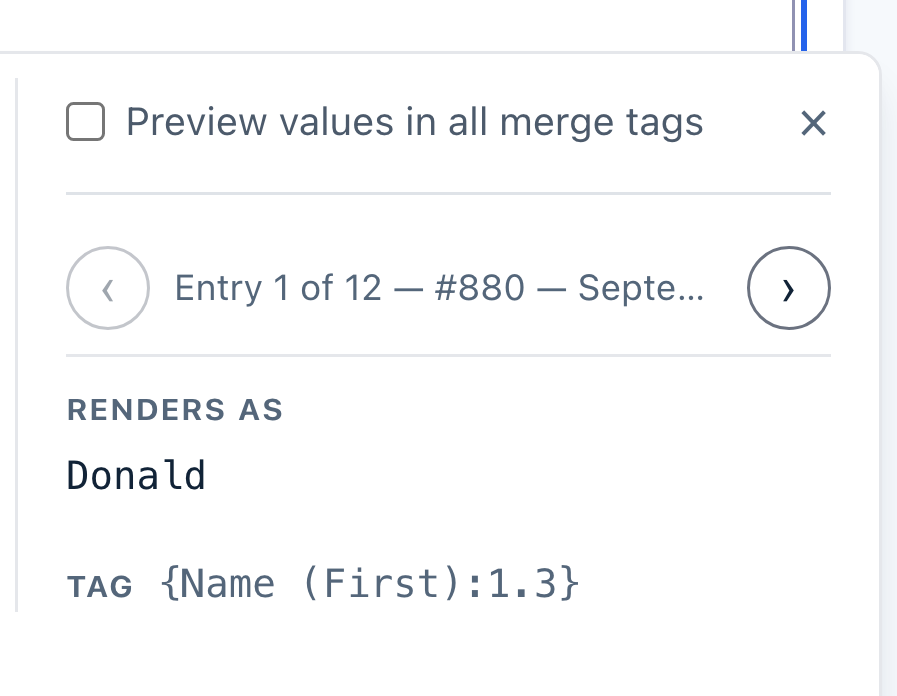
- Preview values in all merge tags – Shows every tag in the field as its value at once, instead of just this one.
- The entry arrows – Step through entries (Entry 1 of 12, and so on) to check the tag against different submissions.
- Renders as – The tag’s output for the current entry. The site renders it the same way it does when the content is used (for example, when a notification is sent, a confirmation is shown, or a View is displayed), so the preview matches the final output rather than an estimate.
- Tag – The exact merge tag text that gets saved, including any options you chose.
The entries you can step through depend on where you are:
- On a Gravity Forms screen, the preview uses the form’s active entries (not spam or trash).
- In a GravityView View, the preview uses the entries that View shows to you.
When Preview values in all merge tags is on, each chip shows its value for the current entry, and the arrows update all of them together.
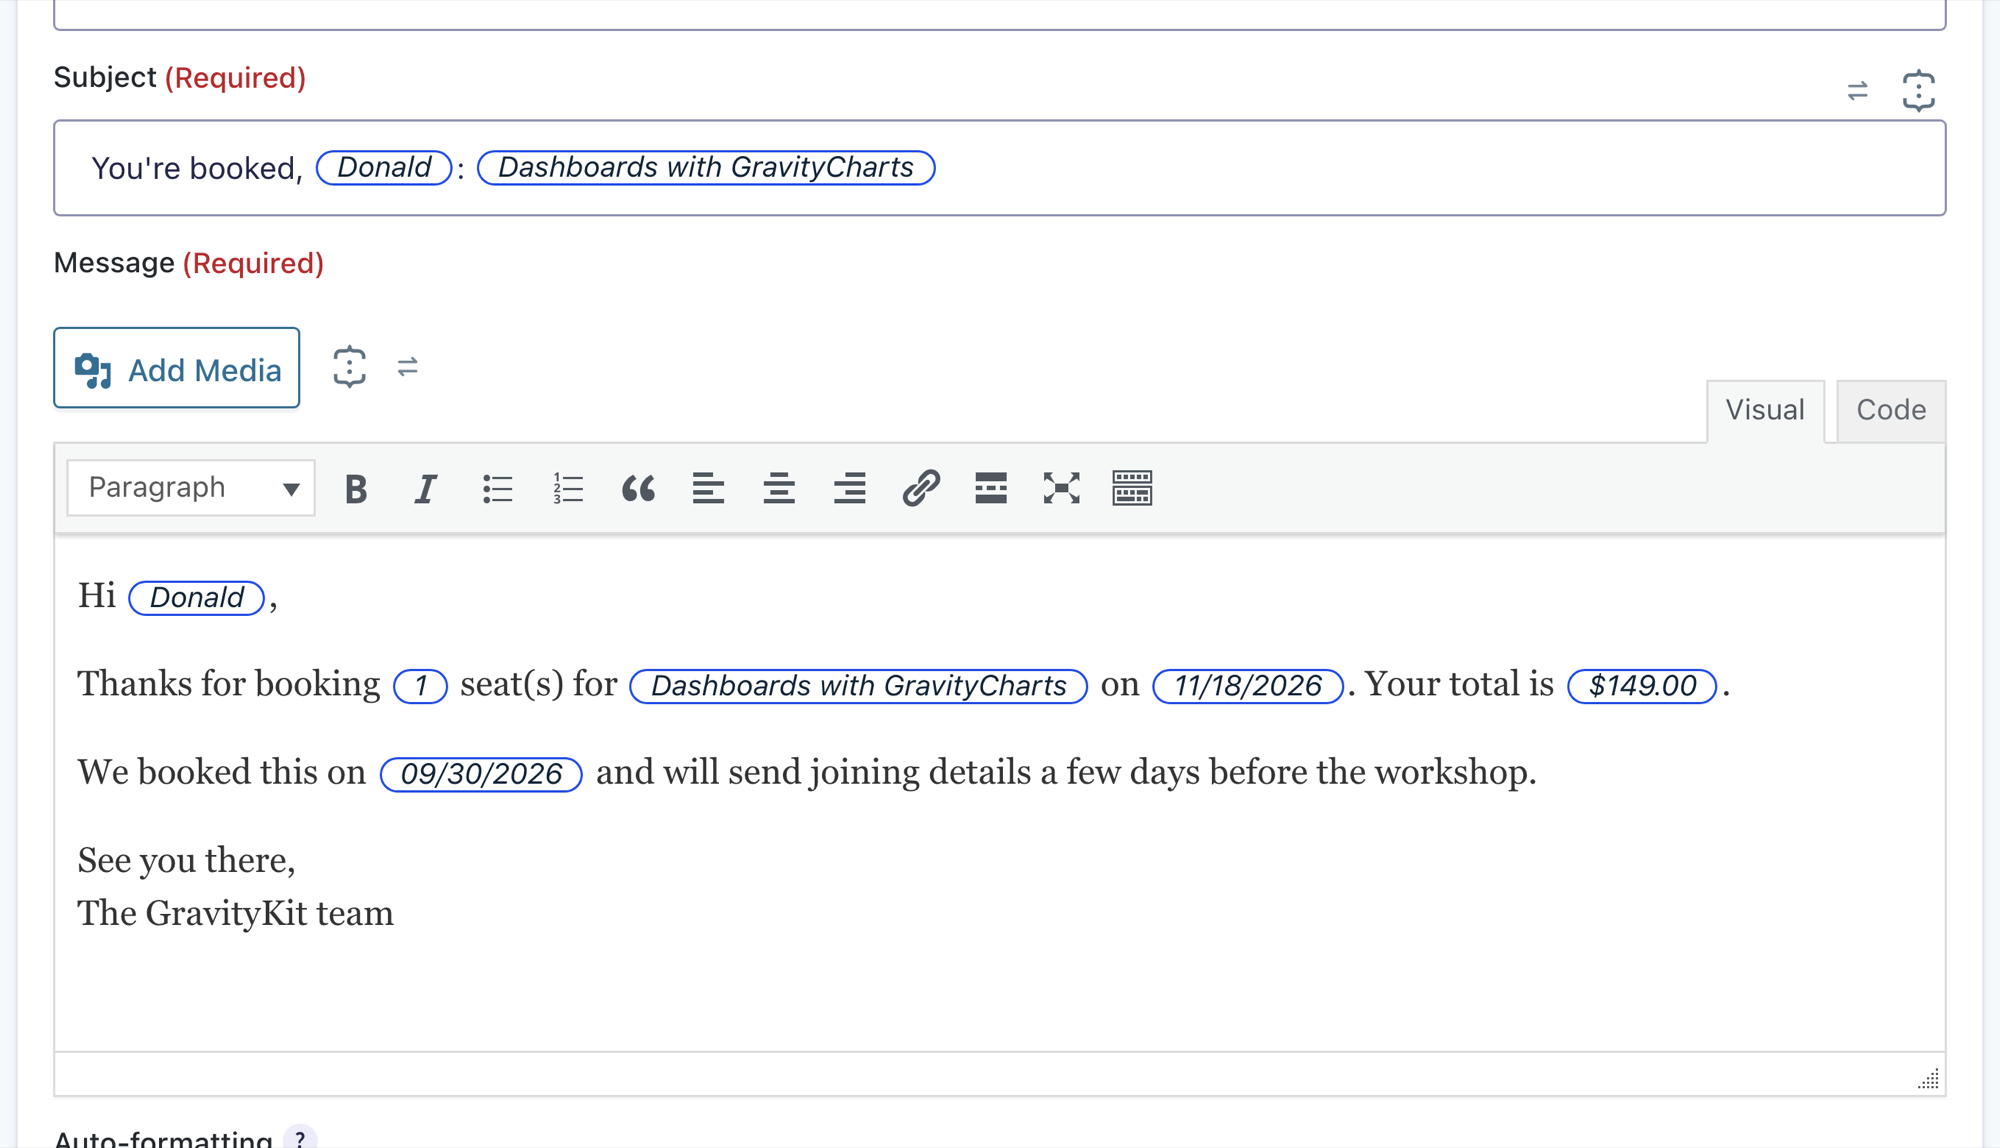
A tag that reads something outside the entry, such as {admin_email}, shows the same value for every entry. Its panel says it renders the same way every time.
When a preview isn’t shown
Some tags are never previewed, and the panel explains why instead of showing a guess:
- Magic Links and entry approval tags build a working link. Previewing one would create a real link that acts on an entry.
- Tags that reveal account security data, such as a user’s activation key, never show a value.
- Tags that read the page address or URL parameters, such as
{get}tags, have no value until someone opens the page.
The preview also needs a few things to work:
- The form must have at least one entry. A new form shows no preview until the first entry arrives.
- You need permission to view entries in Gravity Forms. For a View, you also need permission to edit that View.
Edit a merge tag as text #
To change a tag by typing, double-click the chip, or select it and press Shift+Enter. The chip turns back into plain text so you can edit it directly. Click outside the field when you’re done, and the text becomes a chip again. Press Esc to cancel the edit instead.

| Key | What it does |
|---|---|
| { | Opens the merge tag list |
| Enter | Opens the settings panel for the selected chip |
| Shift+Enter | Edits the selected chip as text |
| Delete or Backspace | Removes the selected chip |
| Esc | Closes the settings panel, or cancels editing a tag as text |
Copying text that contains chips copies the merge tag text, so you can paste it into any field, including one without Visual Merge Tags.
Switch back to the Gravity Forms merge tag picker #
Each field has a swap icon next to the merge tag picker icon (its tooltip reads Switch to Gravity Forms’ native merge tag picker). Click it to switch to Gravity Forms’ own merge tag picker, where tags show as plain text. Every merge tag field on the screen switches at once, including the ones you didn’t click. Click it again to switch back to Visual Merge Tags.
The choice is saved in your browser, so every screen keeps the picker you chose until you click the swap icon again. Other people who work on the site, and other browsers you use, keep their own setting.

Choose where Visual Merge Tags appear #
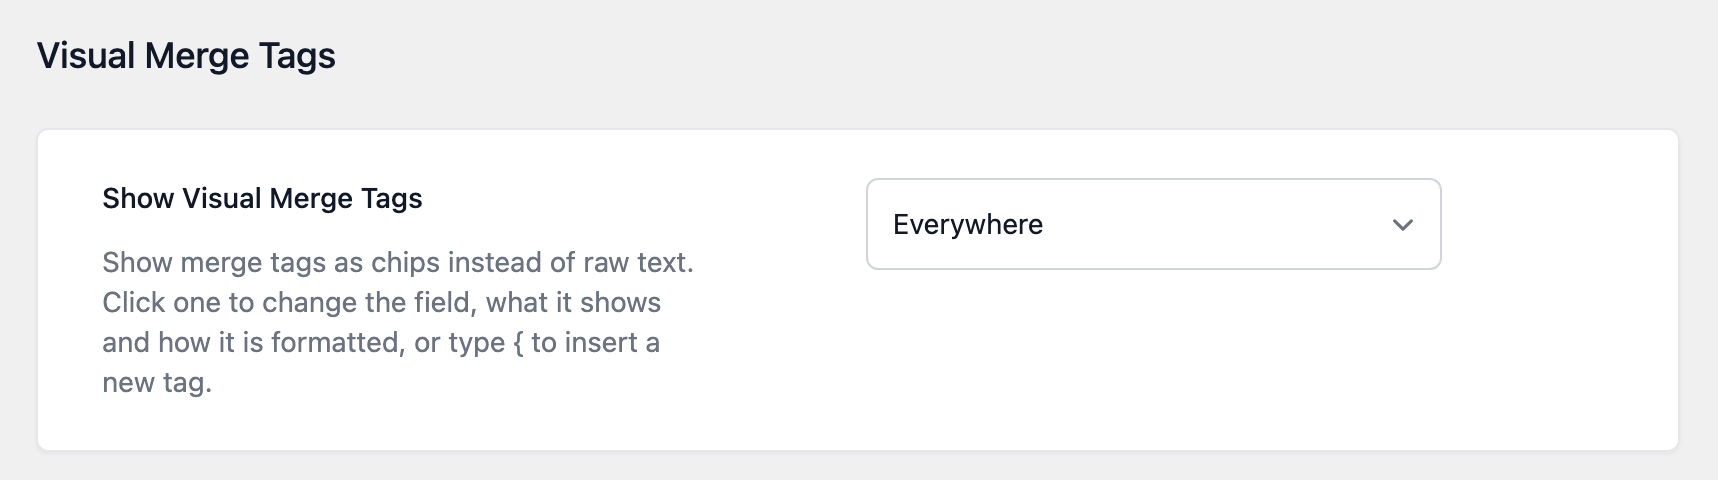
A site setting controls where Visual Merge Tags is used.
- In your WordPress dashboard, go to GravityKit, then click Settings.
- Find the Visual Merge Tags section.
- Choose an option for Show Visual Merge Tags, then save.
| Option | What happens |
|---|---|
| Everywhere (default) | Every merge tag field Gravity Forms gives a picker to, on any screen, including Gravity Forms’ own screens and other plugins’ settings |
| GravityKit screens only | Only GravityKit screens, such as the GravityView View editor and GravityCalendar feeds. Gravity Forms screens keep the Gravity Forms picker |
| Off | Visual Merge Tags doesn’t load anywhere, and every field uses the Gravity Forms picker |
Merge tags from other plugins #
Tags that other plugins add to the Gravity Forms merge tag list also appear in the Visual Merge Tags list and show as chips. For example, Gravity PDF (Blue Liquid Designs) adds a merge tag for each PDF you set up on a form. Visual Merge Tags doesn’t know the options for tags like these, so their panel shows none. If a field contains merge tag syntax Visual Merge Tags doesn’t recognize, it keeps the text exactly as written and marks the chip as read-only.
Known limitations #
- A View that uses Multiple Forms to join a second form doesn’t offer field tags from the joined form yet. You can still type those tags by hand.
- In Safari, selecting text across a chip can highlight from the start of the line. The selection itself is correct; only the highlight is drawn wrong.

