
Mapping CSV columns to form fields
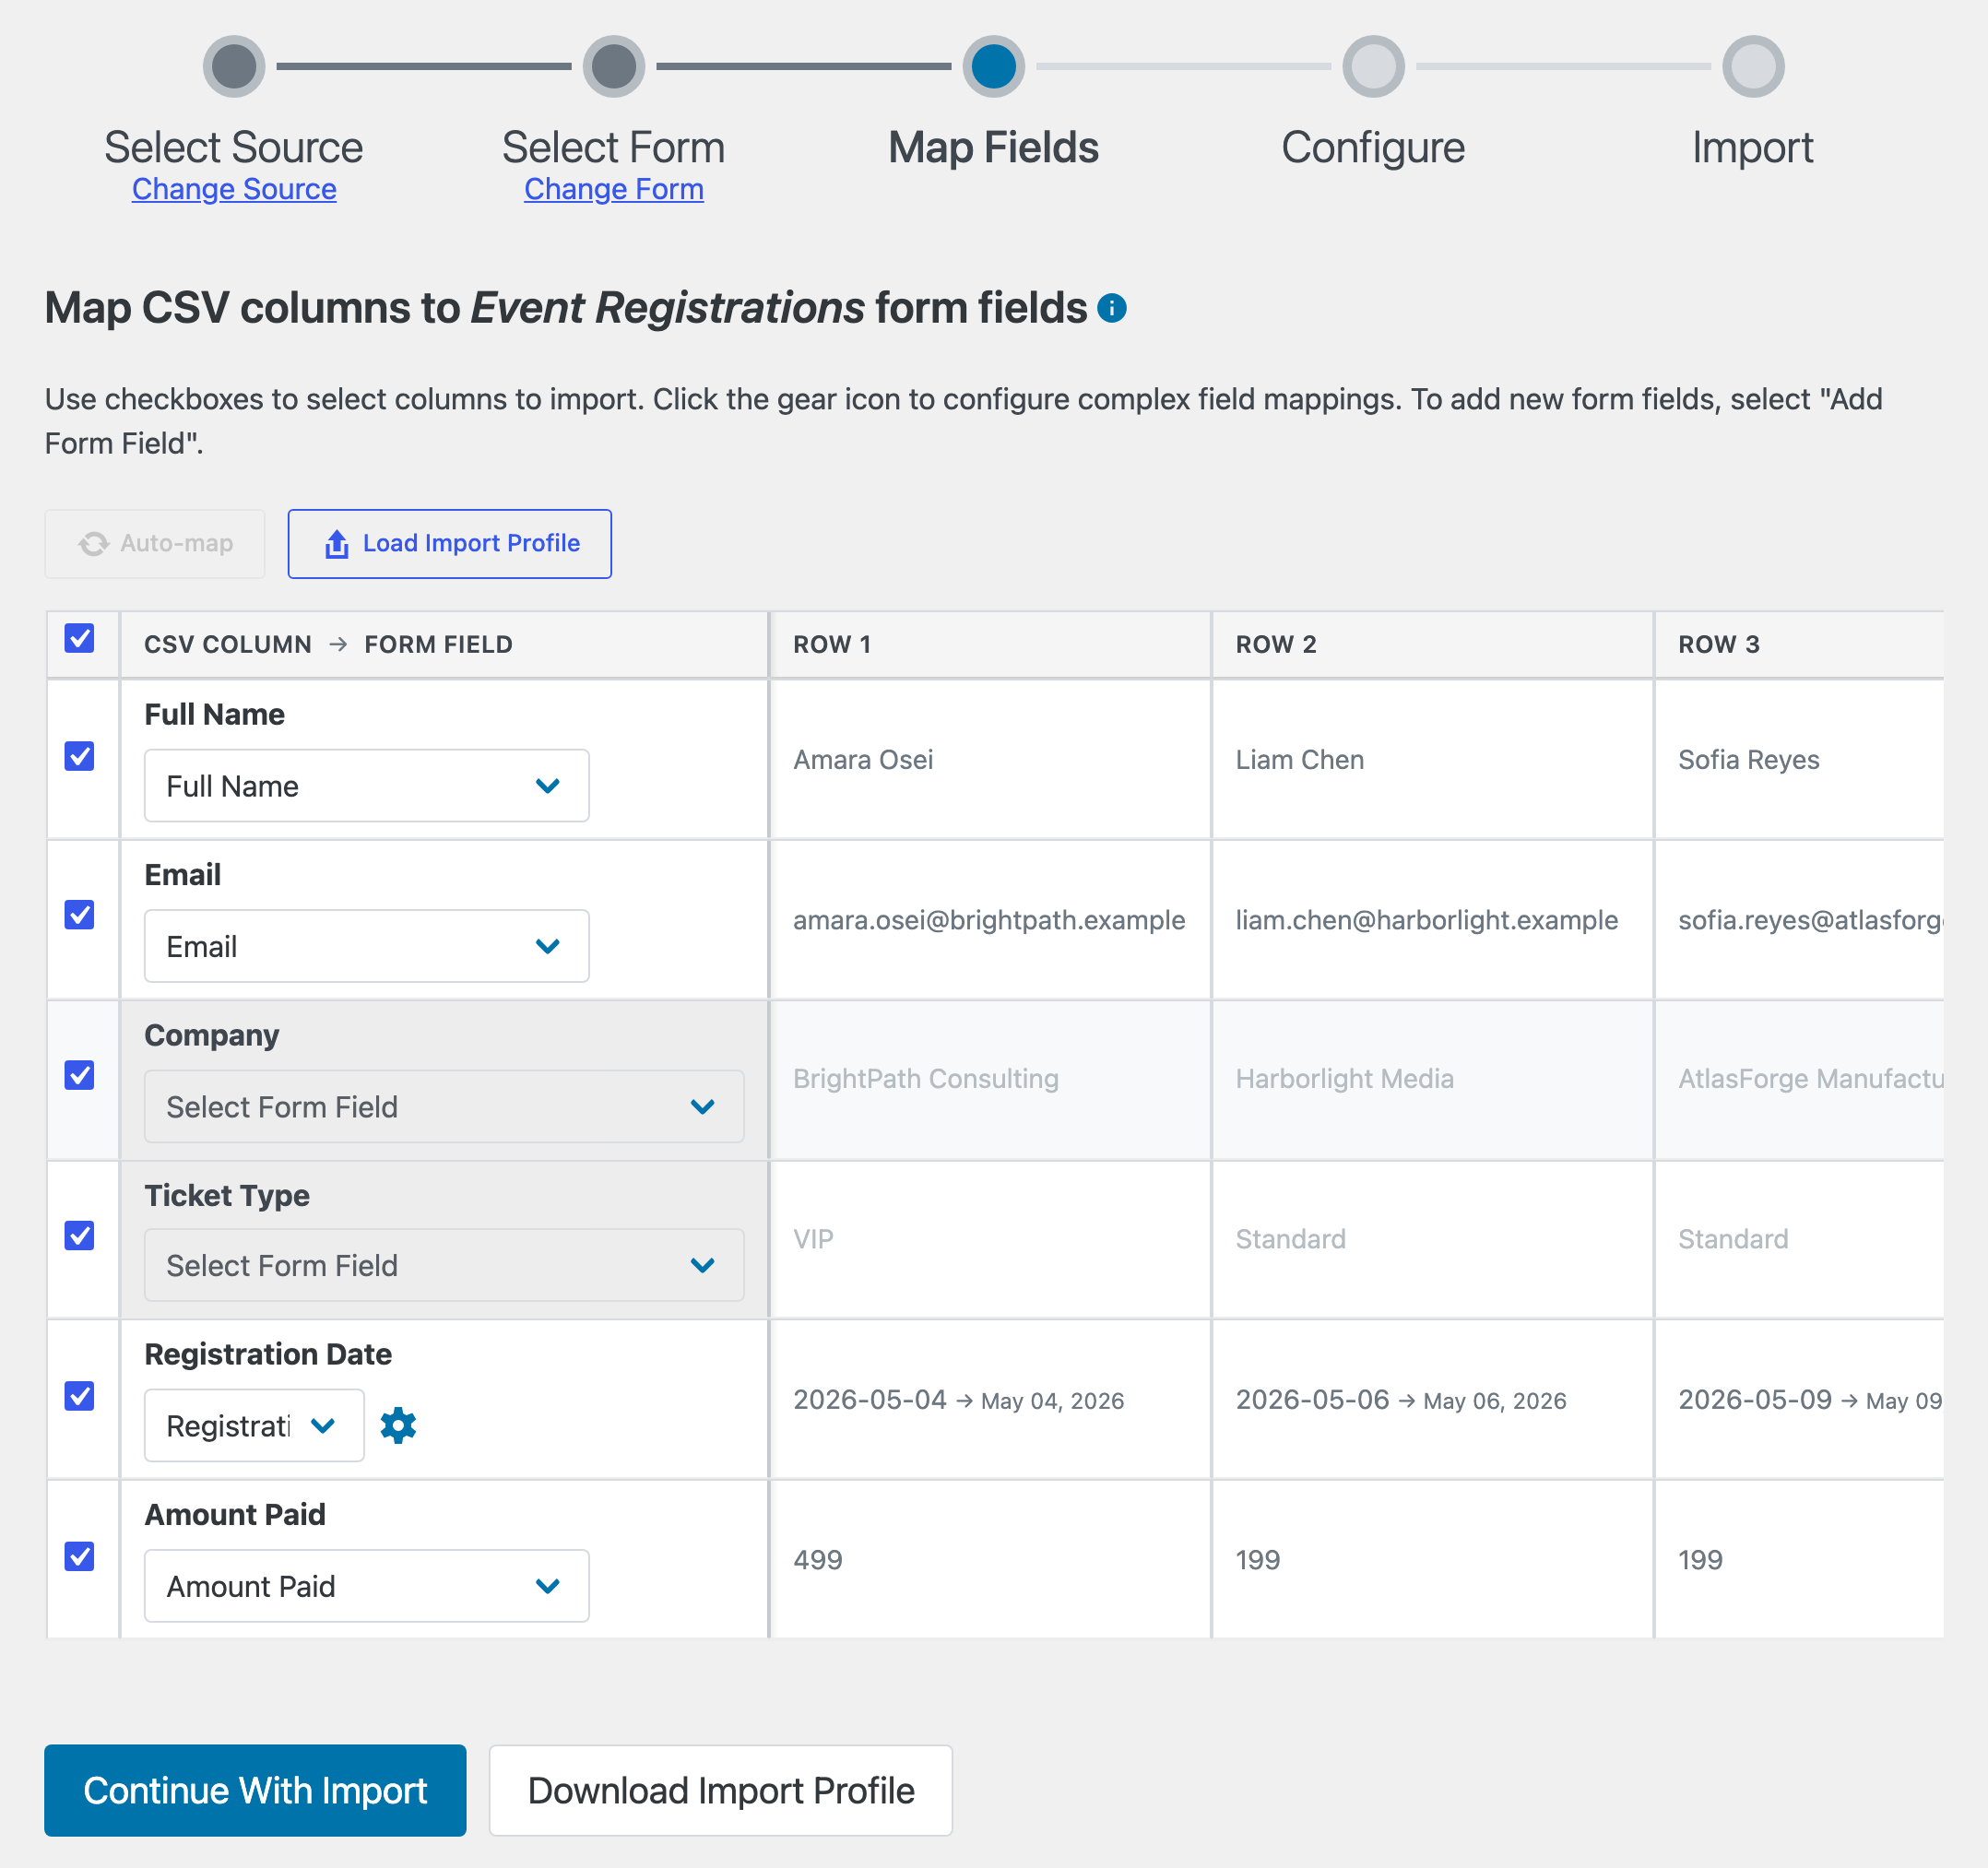
The Map Fields stage is where you tell GravityImport where each CSV column belongs. Each row in the mapping table is one column from your file, with a preview of its first values so you can see what’s in it before anything is imported.
Automatic mapping #
GravityImport maps columns for you wherever the column name matches the form. The match is case-insensitive and checks:
- The field’s label, admin label, and field ID
- Individual input labels for multi-input fields, such as the First and Last inputs of a Name field
- The combined “Field Label (Input Label)” format, so a column named
Name (First)maps straight to the Name field’s First input - Entry properties, such as Entry ID or Source URL
Columns without a match show Select Form Field so you can map them yourself. Clicking Auto-map runs the automatic matching again at any time, which is useful after you change the form or clear a mapping.
Naming your CSV columns after your field labels lets most of a file map itself. See Naming your field columns.
Mapping a column manually #
Pick the destination from the column’s dropdown. The list shows:
- The form’s fields
- Entry properties: Entry Notes, Entry ID, Entry Status, Entry Date, Source URL, User ID, User IP, payment details such as Payment Amount and Transaction ID, and more
- Add Form Field, which creates a new field without leaving the importer
Mapping a column to Entry ID has a special meaning: GravityImport updates the existing entries with those IDs instead of creating new ones. See Updating existing entries with the GravityImport plugin.
Imported entries appear in GravityView like submitted entries, but GravityImport doesn’t give them an approval status. Views show only approved entries by default, so to show imported entries straight away, map a column to Approval Status and put Approved in each row.
Adding a form field during import #
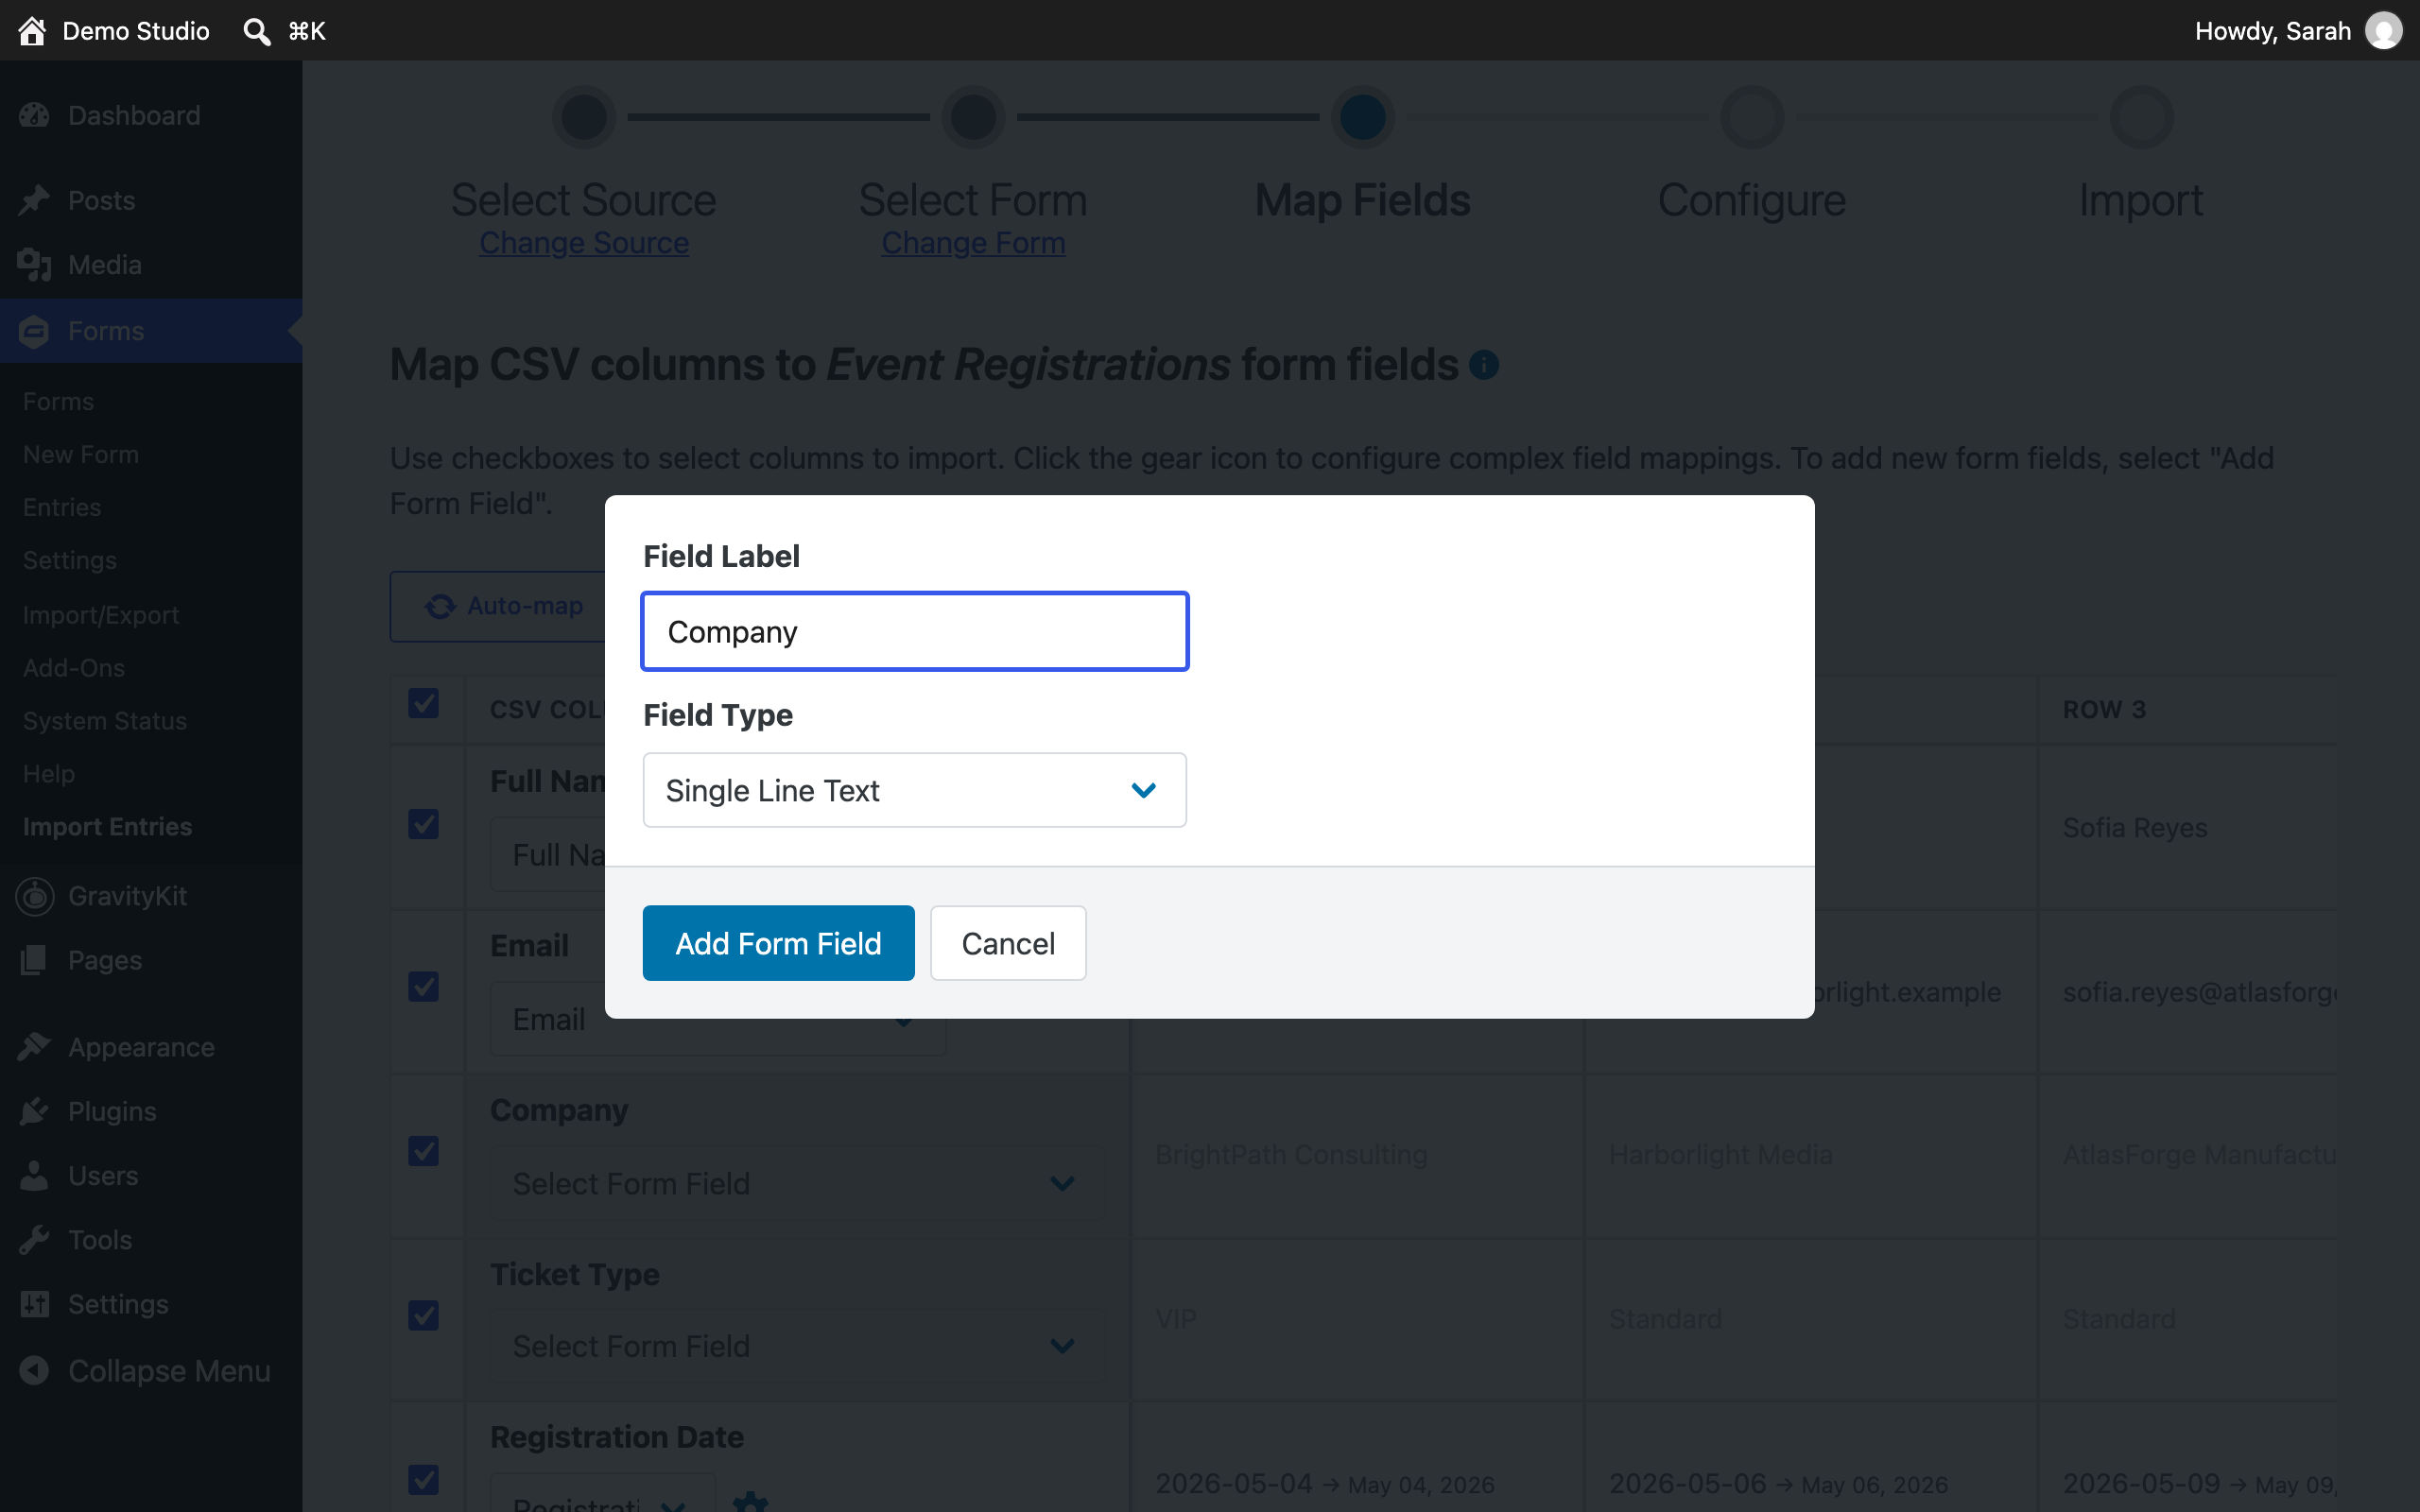
When the form has no field for a column yet, choose Add Form Field from the dropdown. A dialog opens with the Field Label pre-filled from the column name and a Field Type dropdown, set to Single Line Text by default. Pick the type that suits the data, then click Add Form Field. The new field is added to the form and the column is mapped to it.
Skipping a column #
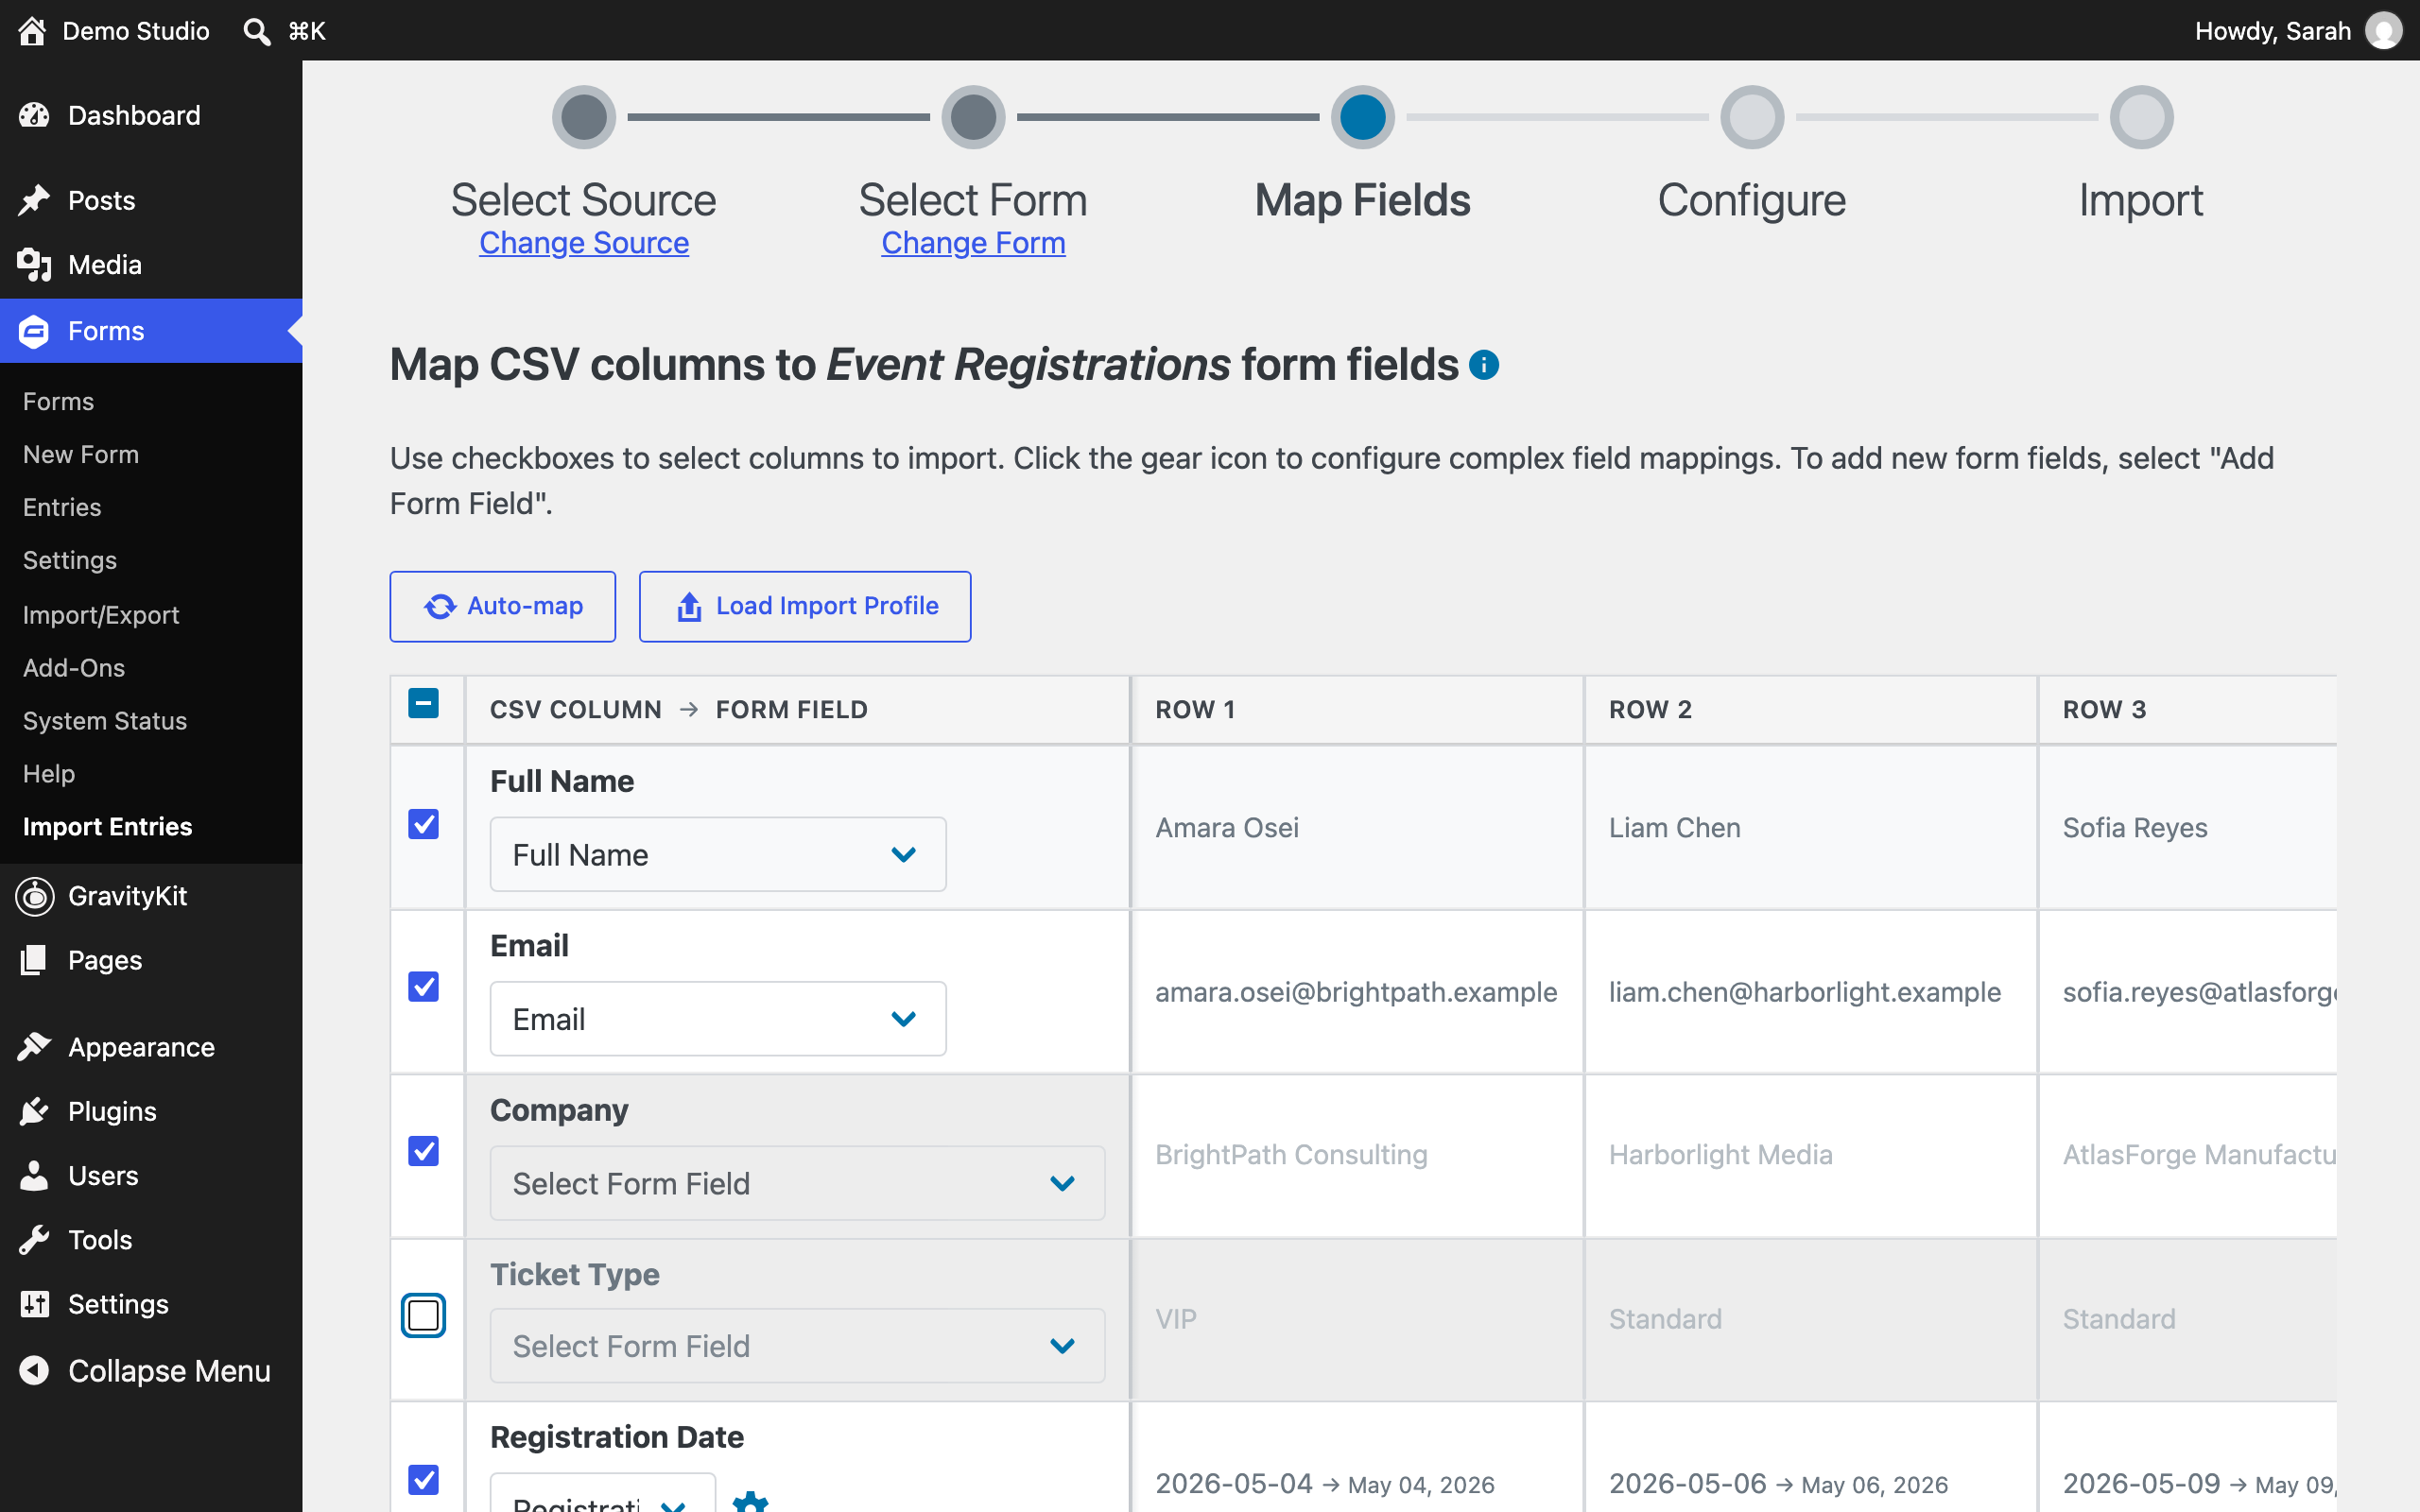
Untick a column’s checkbox to leave it out of the import. The row dims to show it will be ignored. The header checkbox ticks or unticks every column at once.
Fine-tuning a mapping #
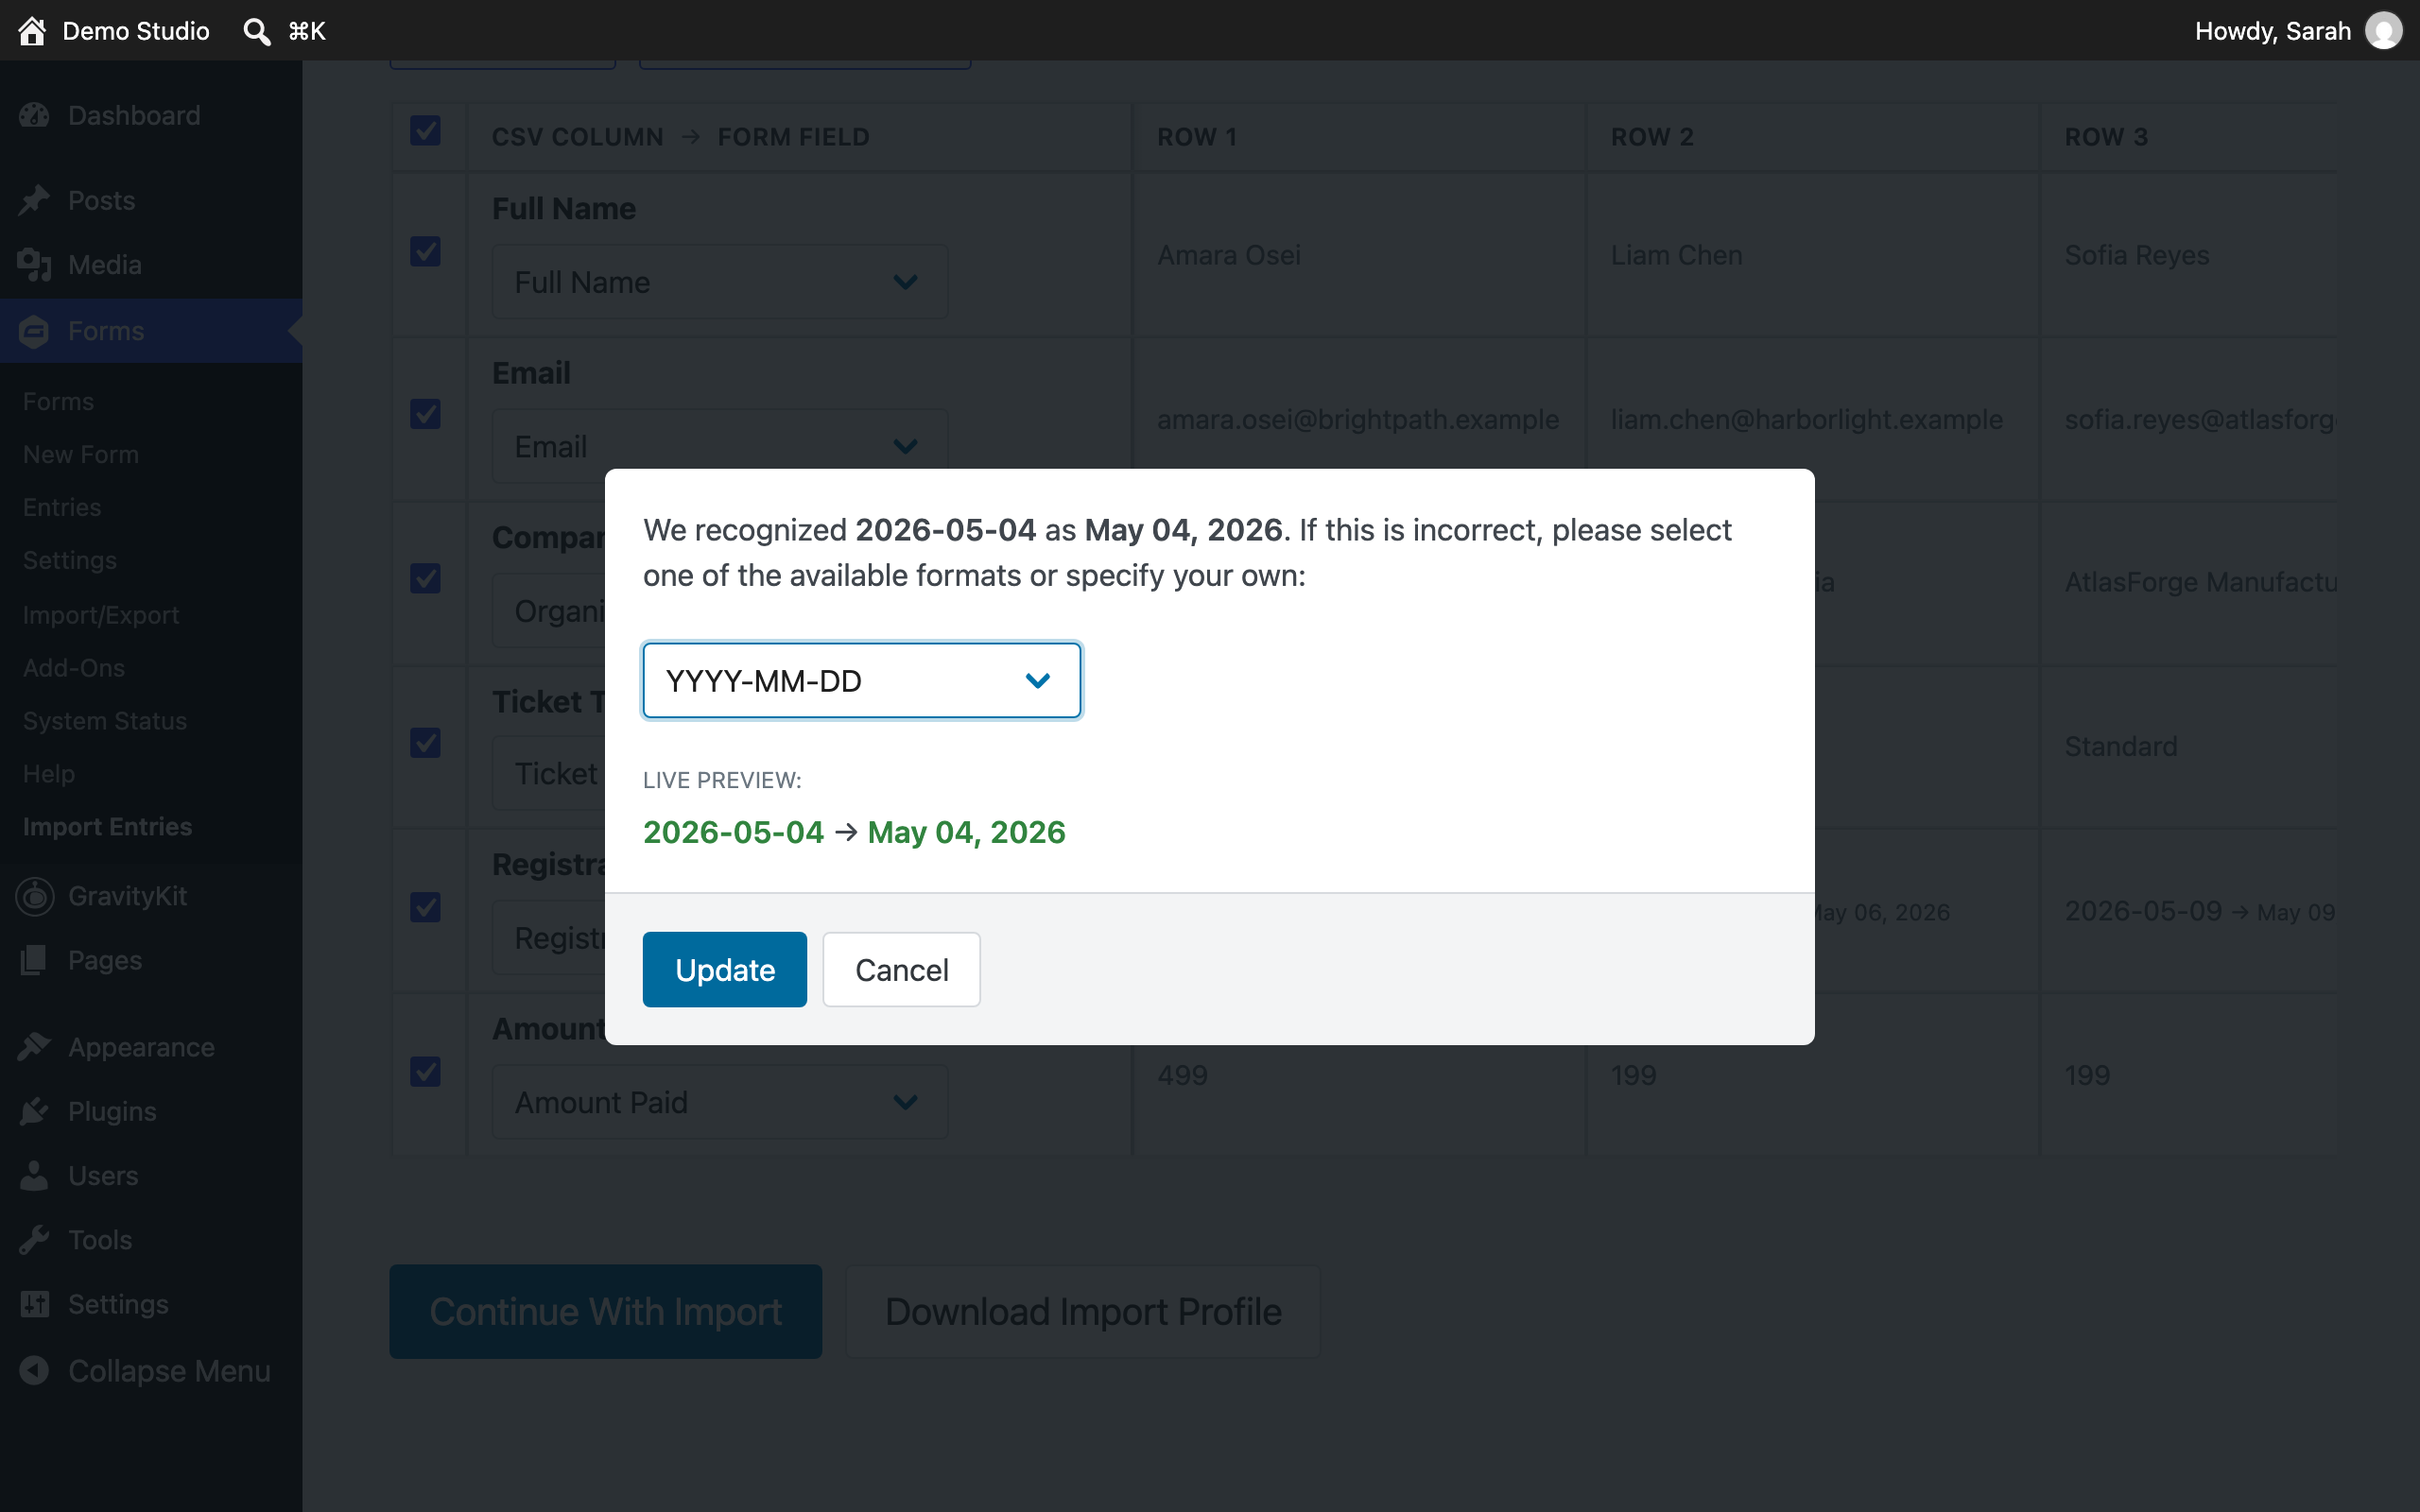
A gear icon appears next to columns with extra settings. For a date column, it opens a dialog where you confirm or change the date format, with a live preview of how the first value will be interpreted. Click Update to apply.
Date and phone fields #
A new Date field or Phone field starts with a setting that GravityImport can’t fill. Change it in the form editor before you import.
Date fields
GravityImport imports a date column into a Date field whose Date Input Type is Date Picker, and stores the value as a date. A new Date field starts as Date Field, which has separate month, day, and year inputs, as does Date Drop Down. For those, the mapping dropdown offers only the Month, Day, and Year inputs, and a column mapped to them stores nothing, even when the import reports success.
To import dates, edit the form, open the Date field’s settings, and set Date Input Type to Date Picker. Auto-map then maps a column with the field’s name to it.
Phone fields
A new Phone field starts with Phone Format set to International (formatted). That format rejects the plain phone numbers a CSV file holds, so every row with a phone number fails validation with “Please enter a valid phone number in the correct format.” The mapping screen shows no warning before the import runs.
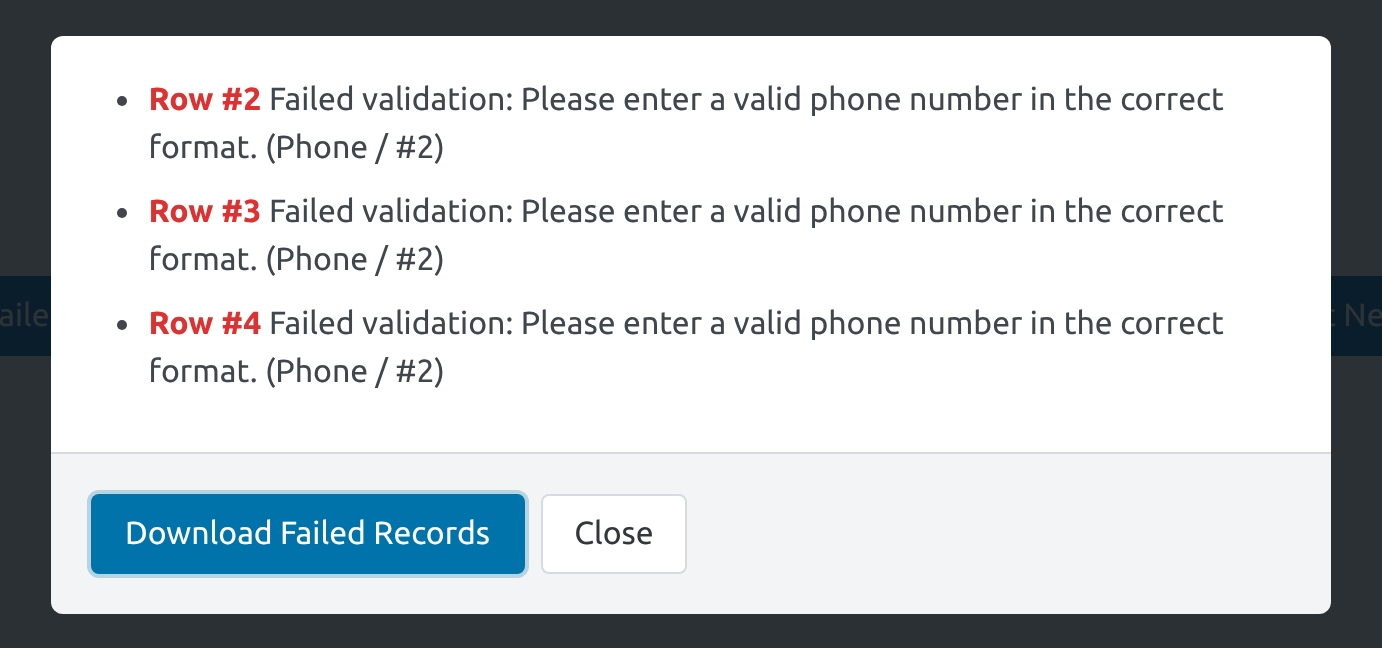
Before importing, set the field’s Phone Format to one of these:
- International (unformatted): accepts phone numbers as they are in the file.
- US Standard: accepts US numbers such as
970-555-0142and stores them as(970) 555-0142. A number with a country code, such as+1 970 555 0188, fails validation.
With Skip Field Validation on, rows with an International (formatted) phone are imported with the phone left empty.
Validation before the import runs #
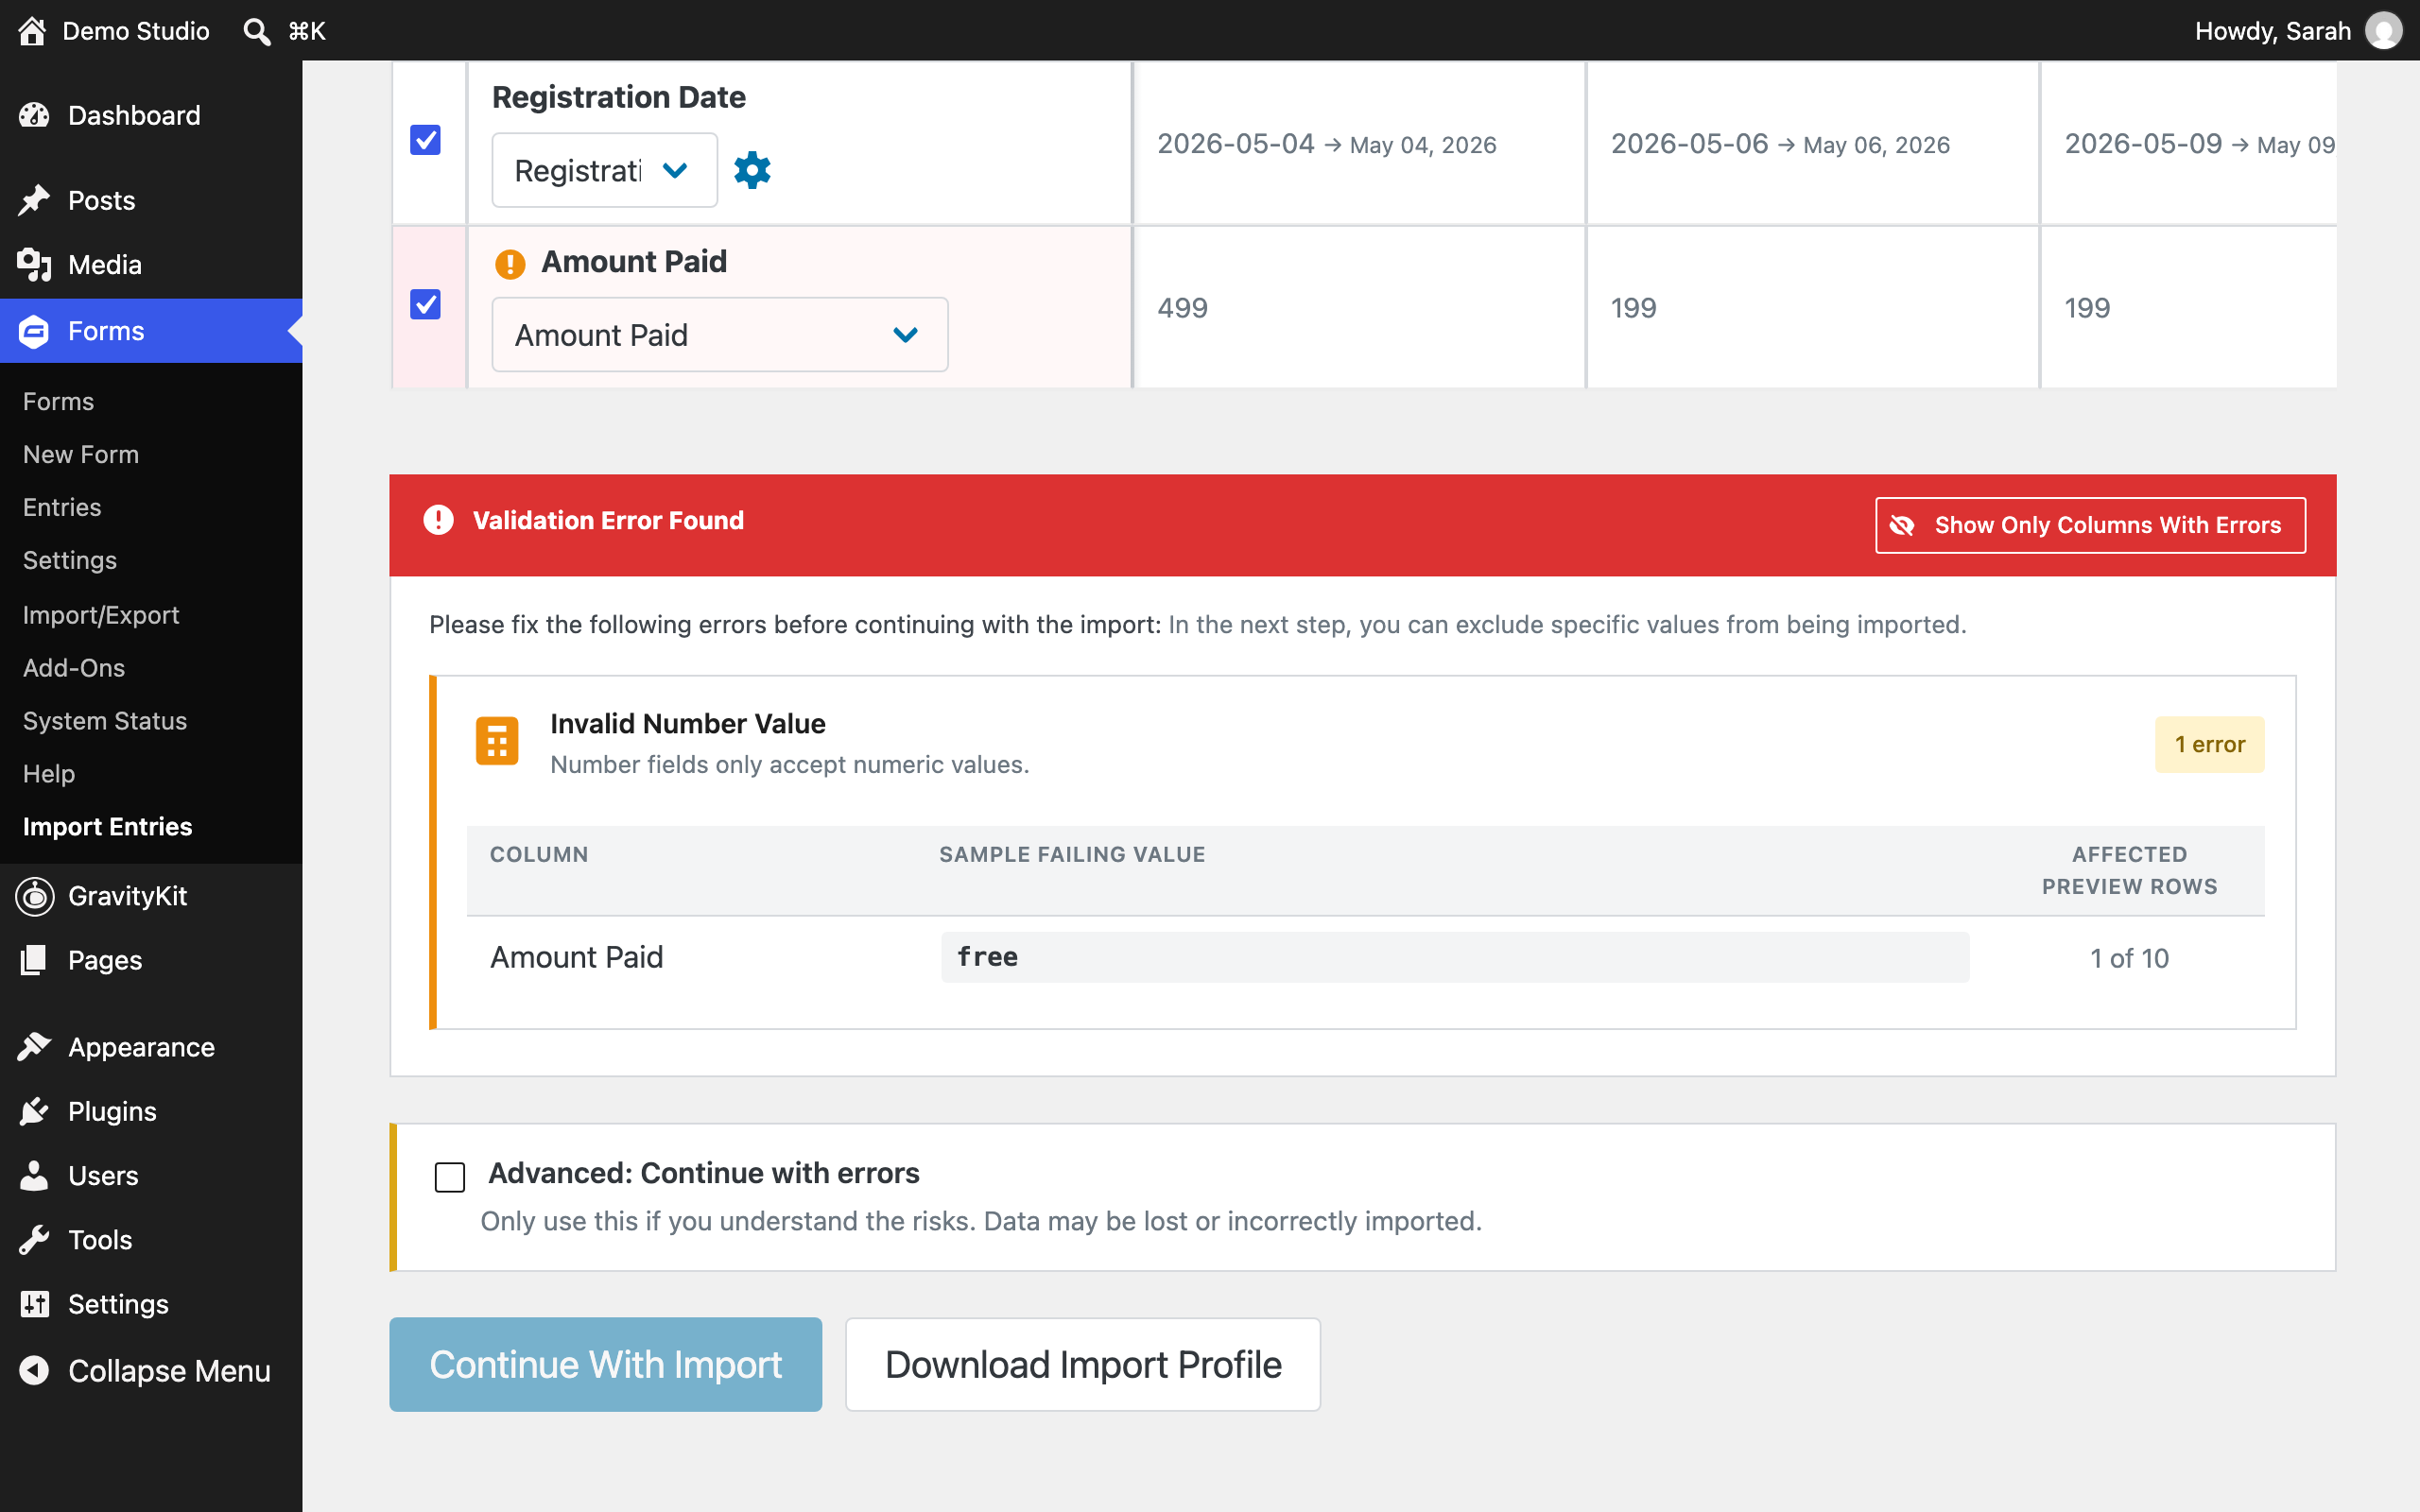
GravityImport checks the preview values as you map. Columns with invalid values are flagged in the table, and a Validation Error Found panel below the mapping lists each problem with a sample failing value and the number of affected rows. Fix the file and upload it again, untick the problem column, or tick Advanced: Continue with errors to proceed anyway. Rows that fail validation are rejected during the import.
Saving your mapping for reuse #
Download Import Profile, on the Import Complete screen at the end of an import, saves the import’s mapping as a file. On a later import, Load Import Profile applies the whole mapping in one step. The same file also runs imports from the command line: see Importing entries from the command line with WP-CLI.
Continue with the import #
When the mapping looks right, click Continue With Import to move on to the Configure stage. You can return here later: the Configure and results screens both offer a Change Field Mapping link.

