
Getting started with GravityImport: how to import entries into Gravity Forms

GravityImport is the best way to import data into Gravity Forms from a CSV. #
We’re the only Gravity Forms Certified Add-On for importing entries from CSV. The easy-to-use interface makes it easy to map & import thousands of entries with data validation, input mapping, and more.
Buy now! – We guarantee it will save you time!
Watch the video tutorial #
This guide walks through a complete import: uploading a CSV, choosing the form the entries belong to, mapping your columns to form fields, configuring how the import runs, and checking the results.
Before you begin, you’ll need:
- Gravity Forms and GravityImport installed and activated
- A CSV (comma-separated values) file whose first row contains your column names. GravityImport imports CSV files only, up to your site’s maximum upload size (shown on the upload screen). If your data lives in a spreadsheet, export it as CSV first (Excel’s “CSV UTF-8” format works well).
The importer is a five-stage wizard: Select Source, Select Form, Map Fields, Configure, and Import. The progress bar at the top shows where you are, and each completed stage gets a Change link so you can step back at any point.
1. Open the importer #
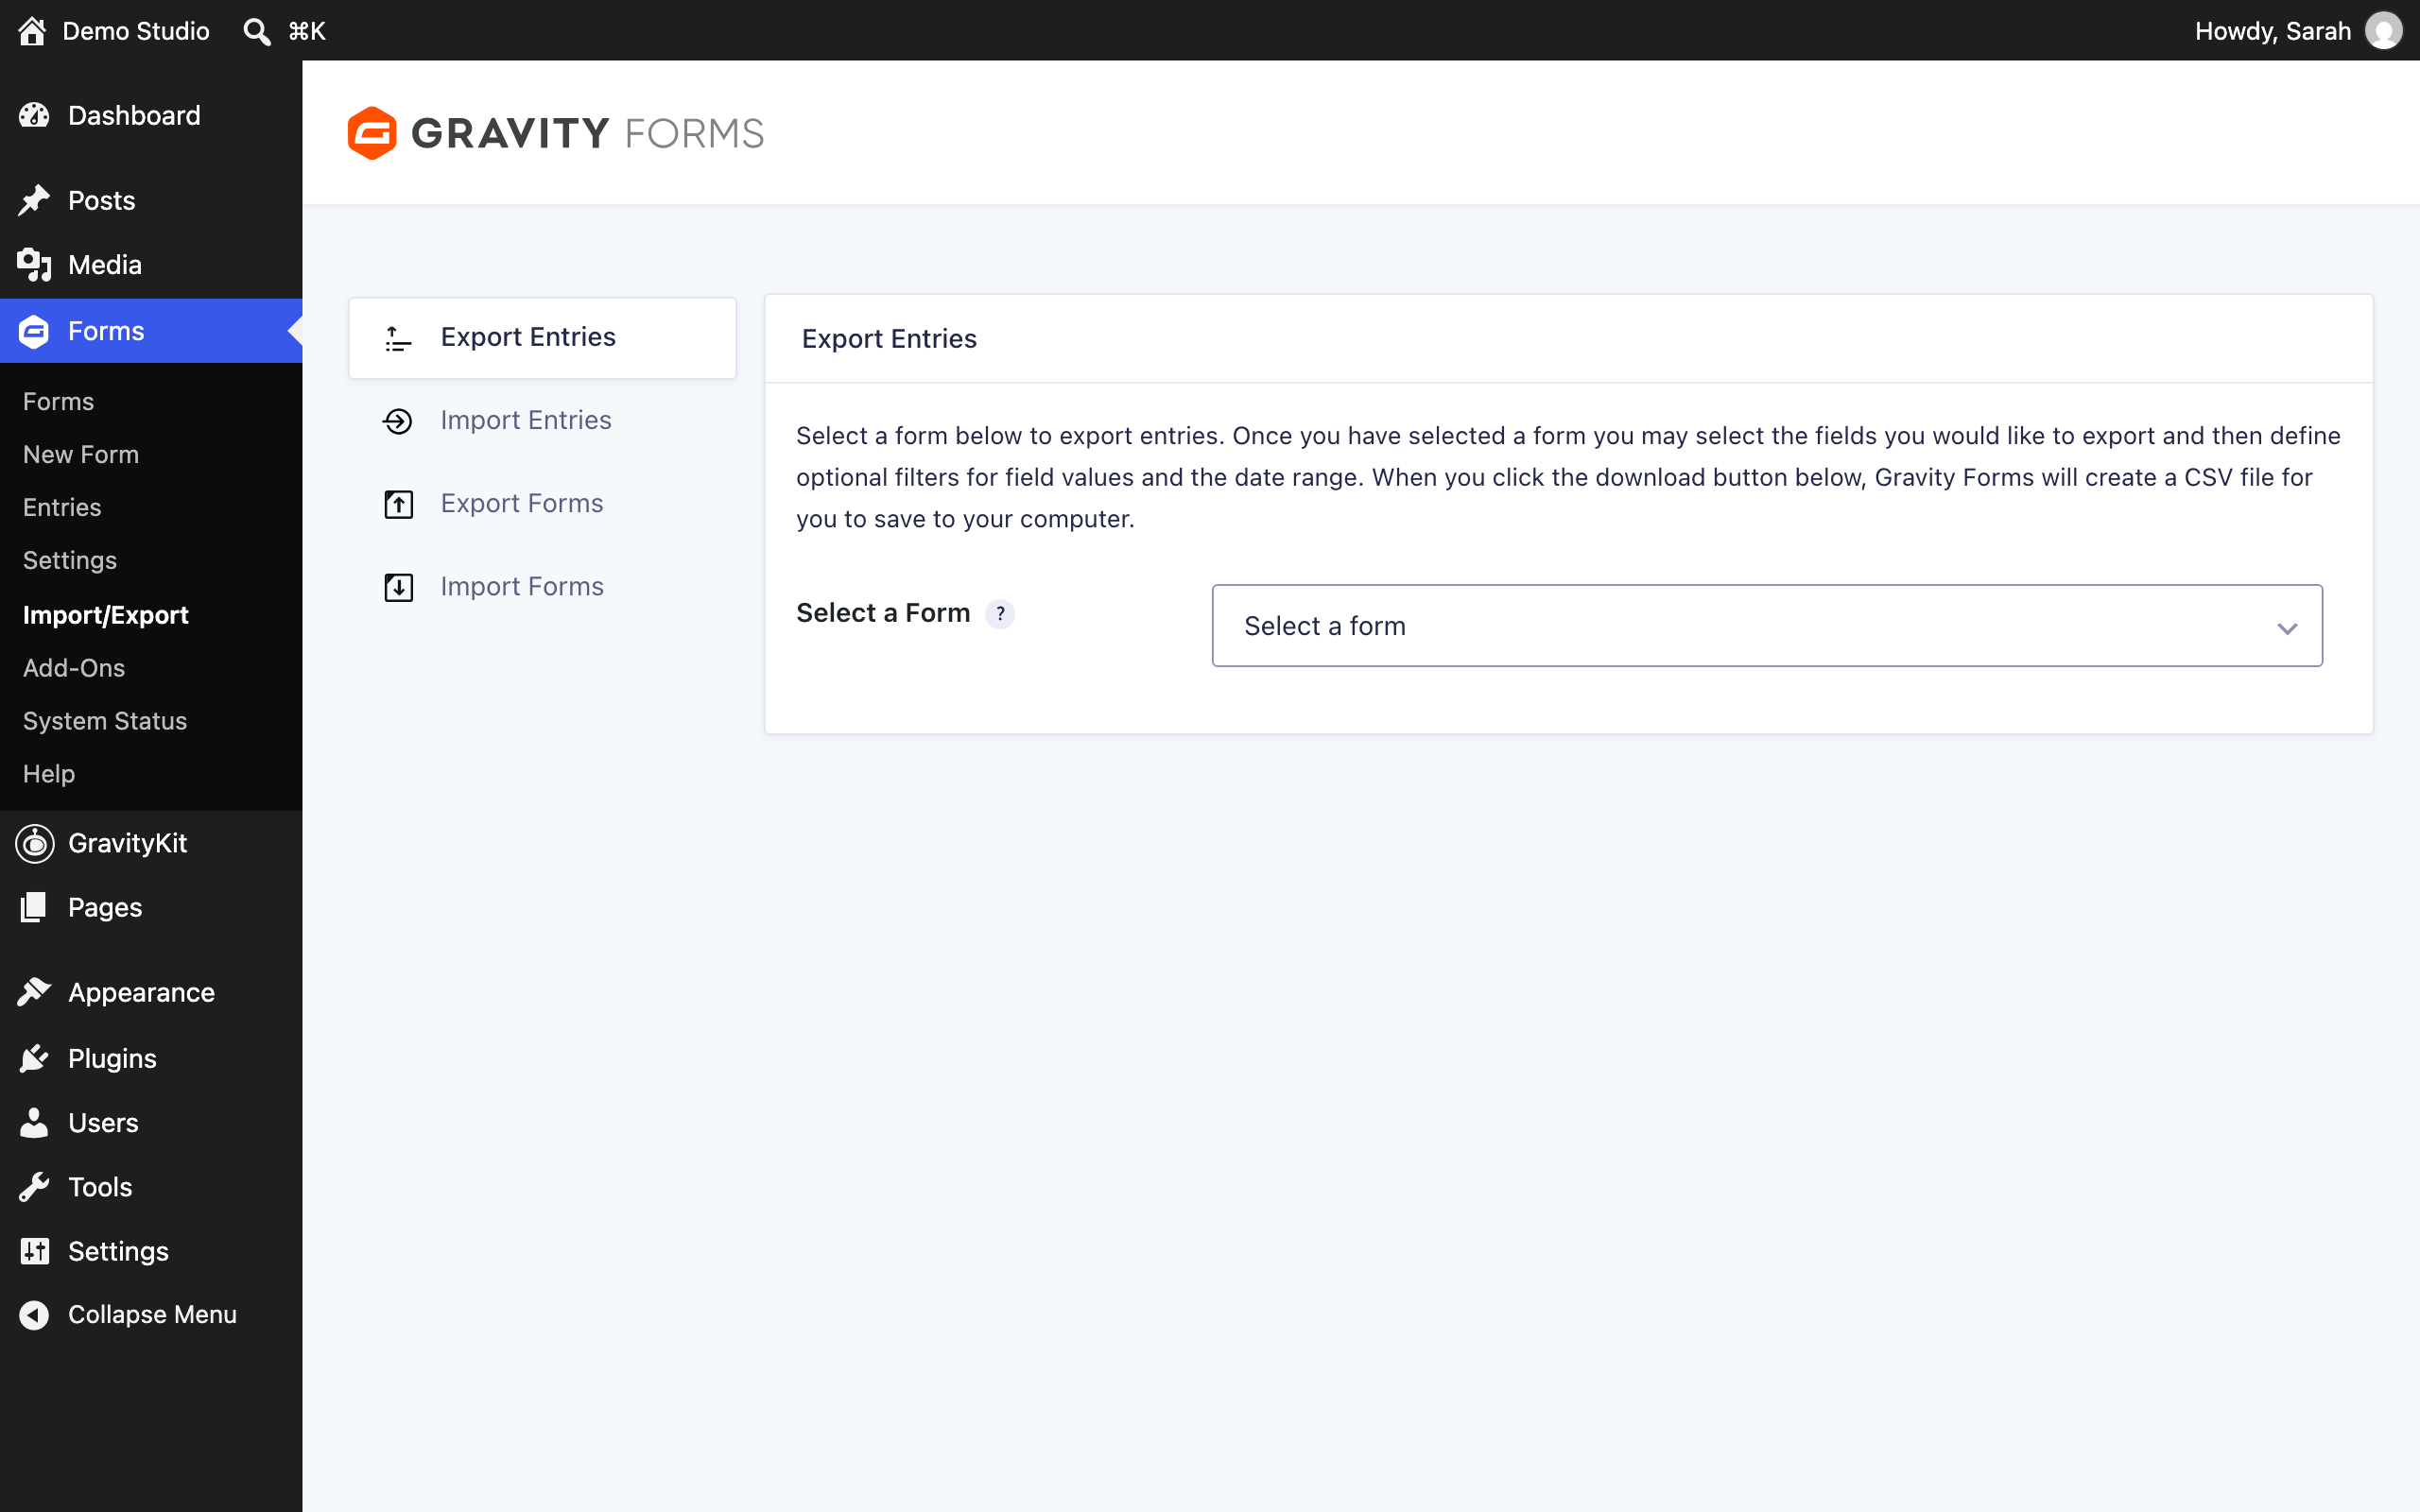
In the WordPress admin, go to Forms, then Import/Export, and click the Import Entries tab.
2. Upload your CSV #
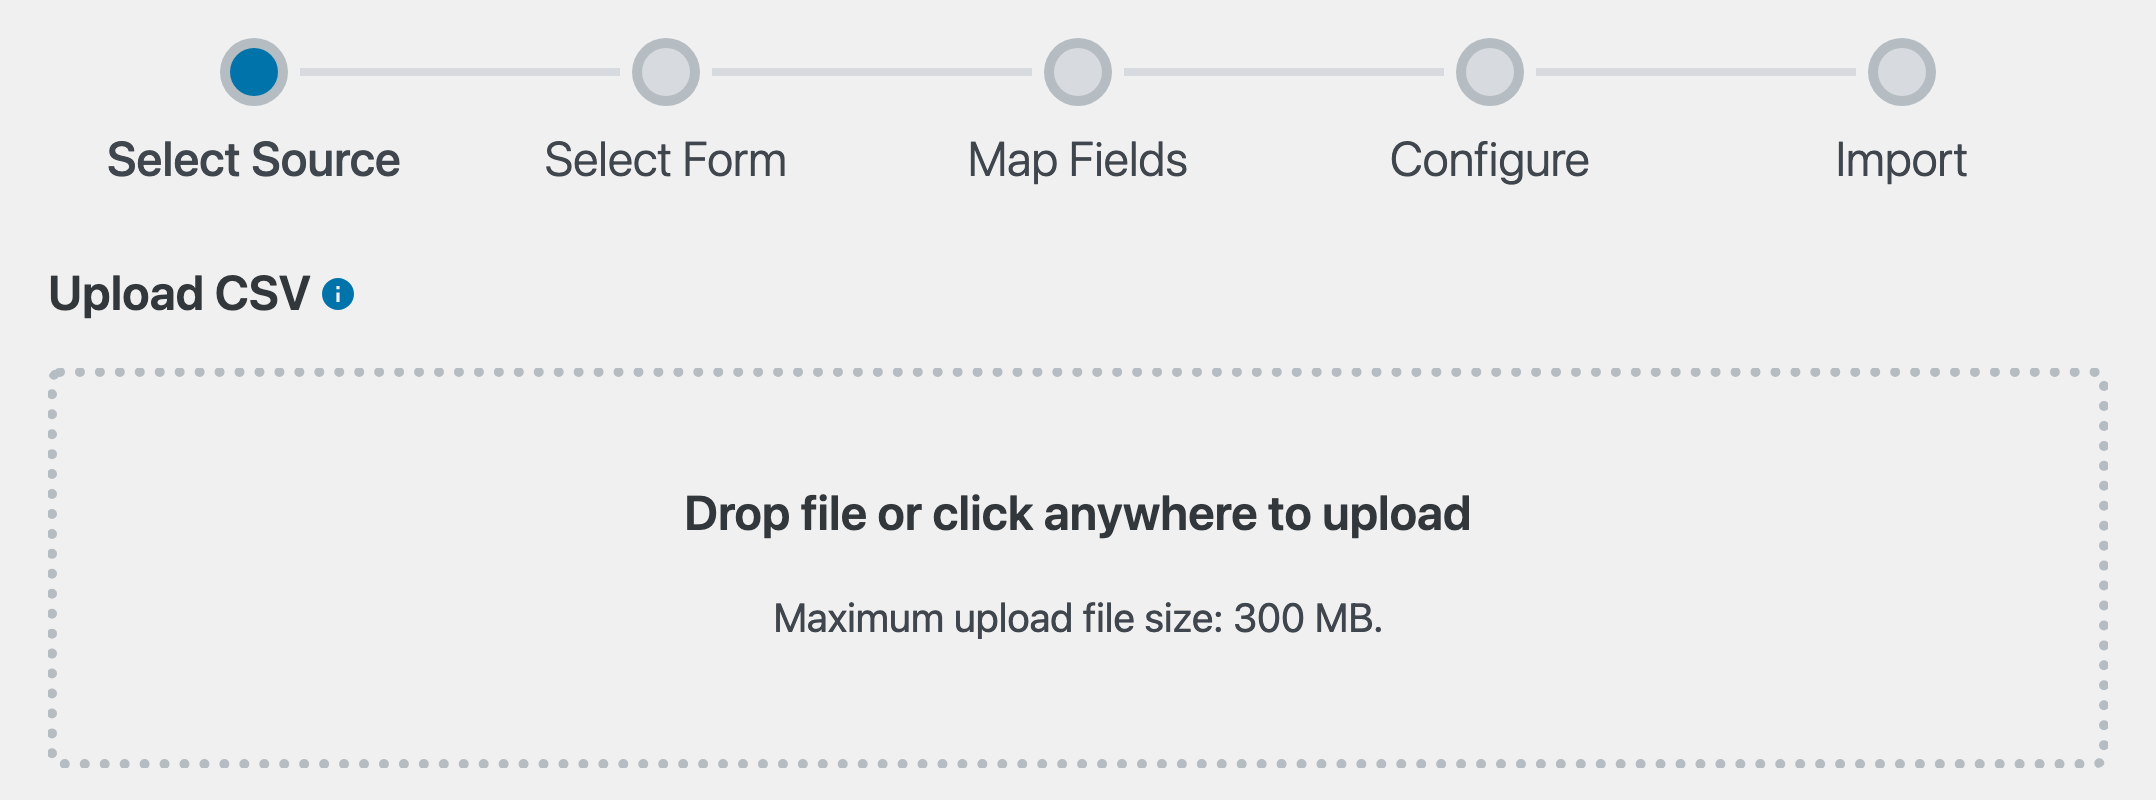
Drag your CSV onto the drop zone, or click anywhere inside it to choose a file from your computer. Files up to your site’s maximum upload size are accepted; the limit is shown below the drop zone.
When the upload finishes, the wizard moves to the next stage automatically.
3. Choose where the entries go #
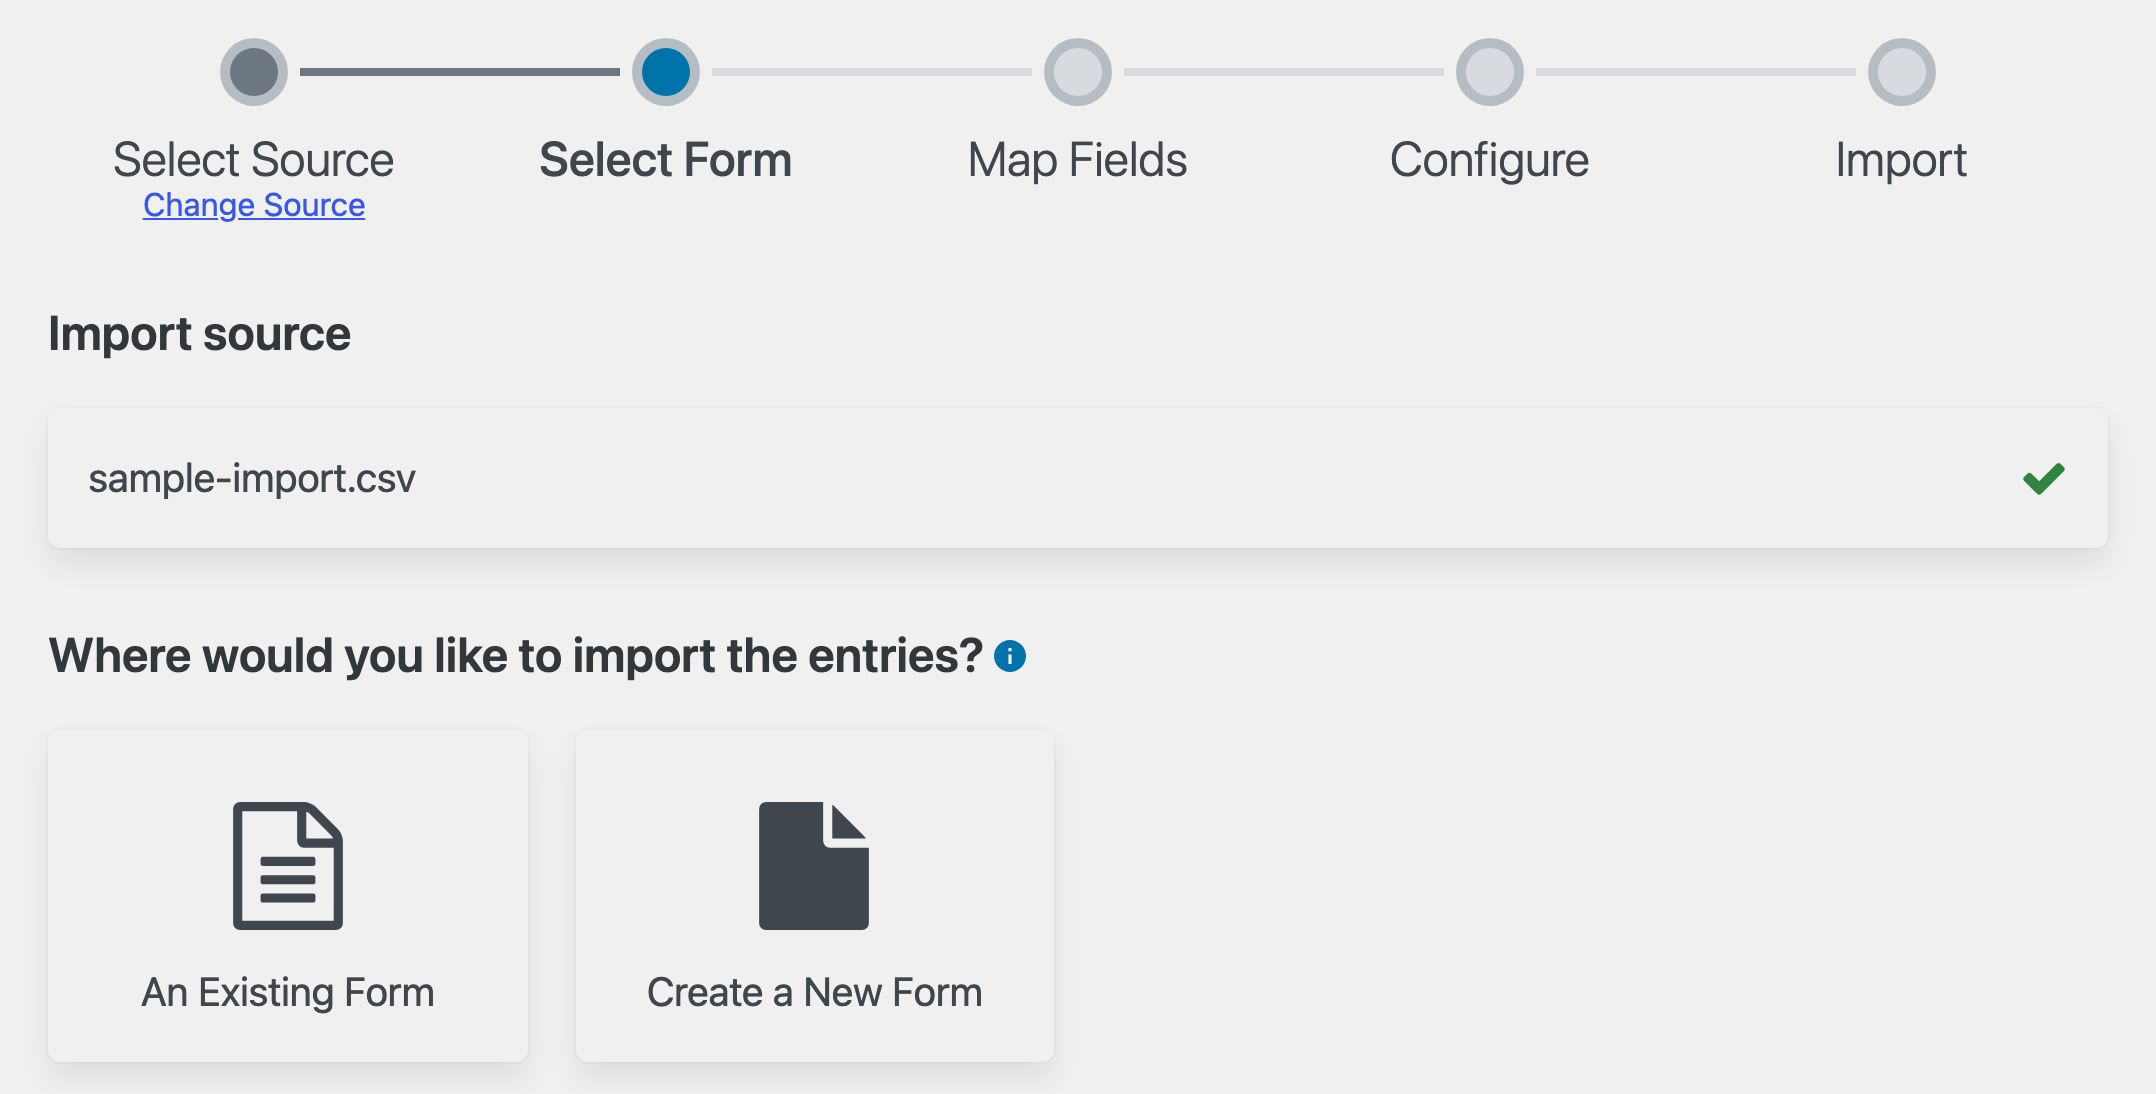
Pick a destination for your rows:
- An Existing Form adds them as new entries to a form you already have.
- Create a New Form builds a form for you, with one field per CSV column, and imports into that.
Importing into an existing form
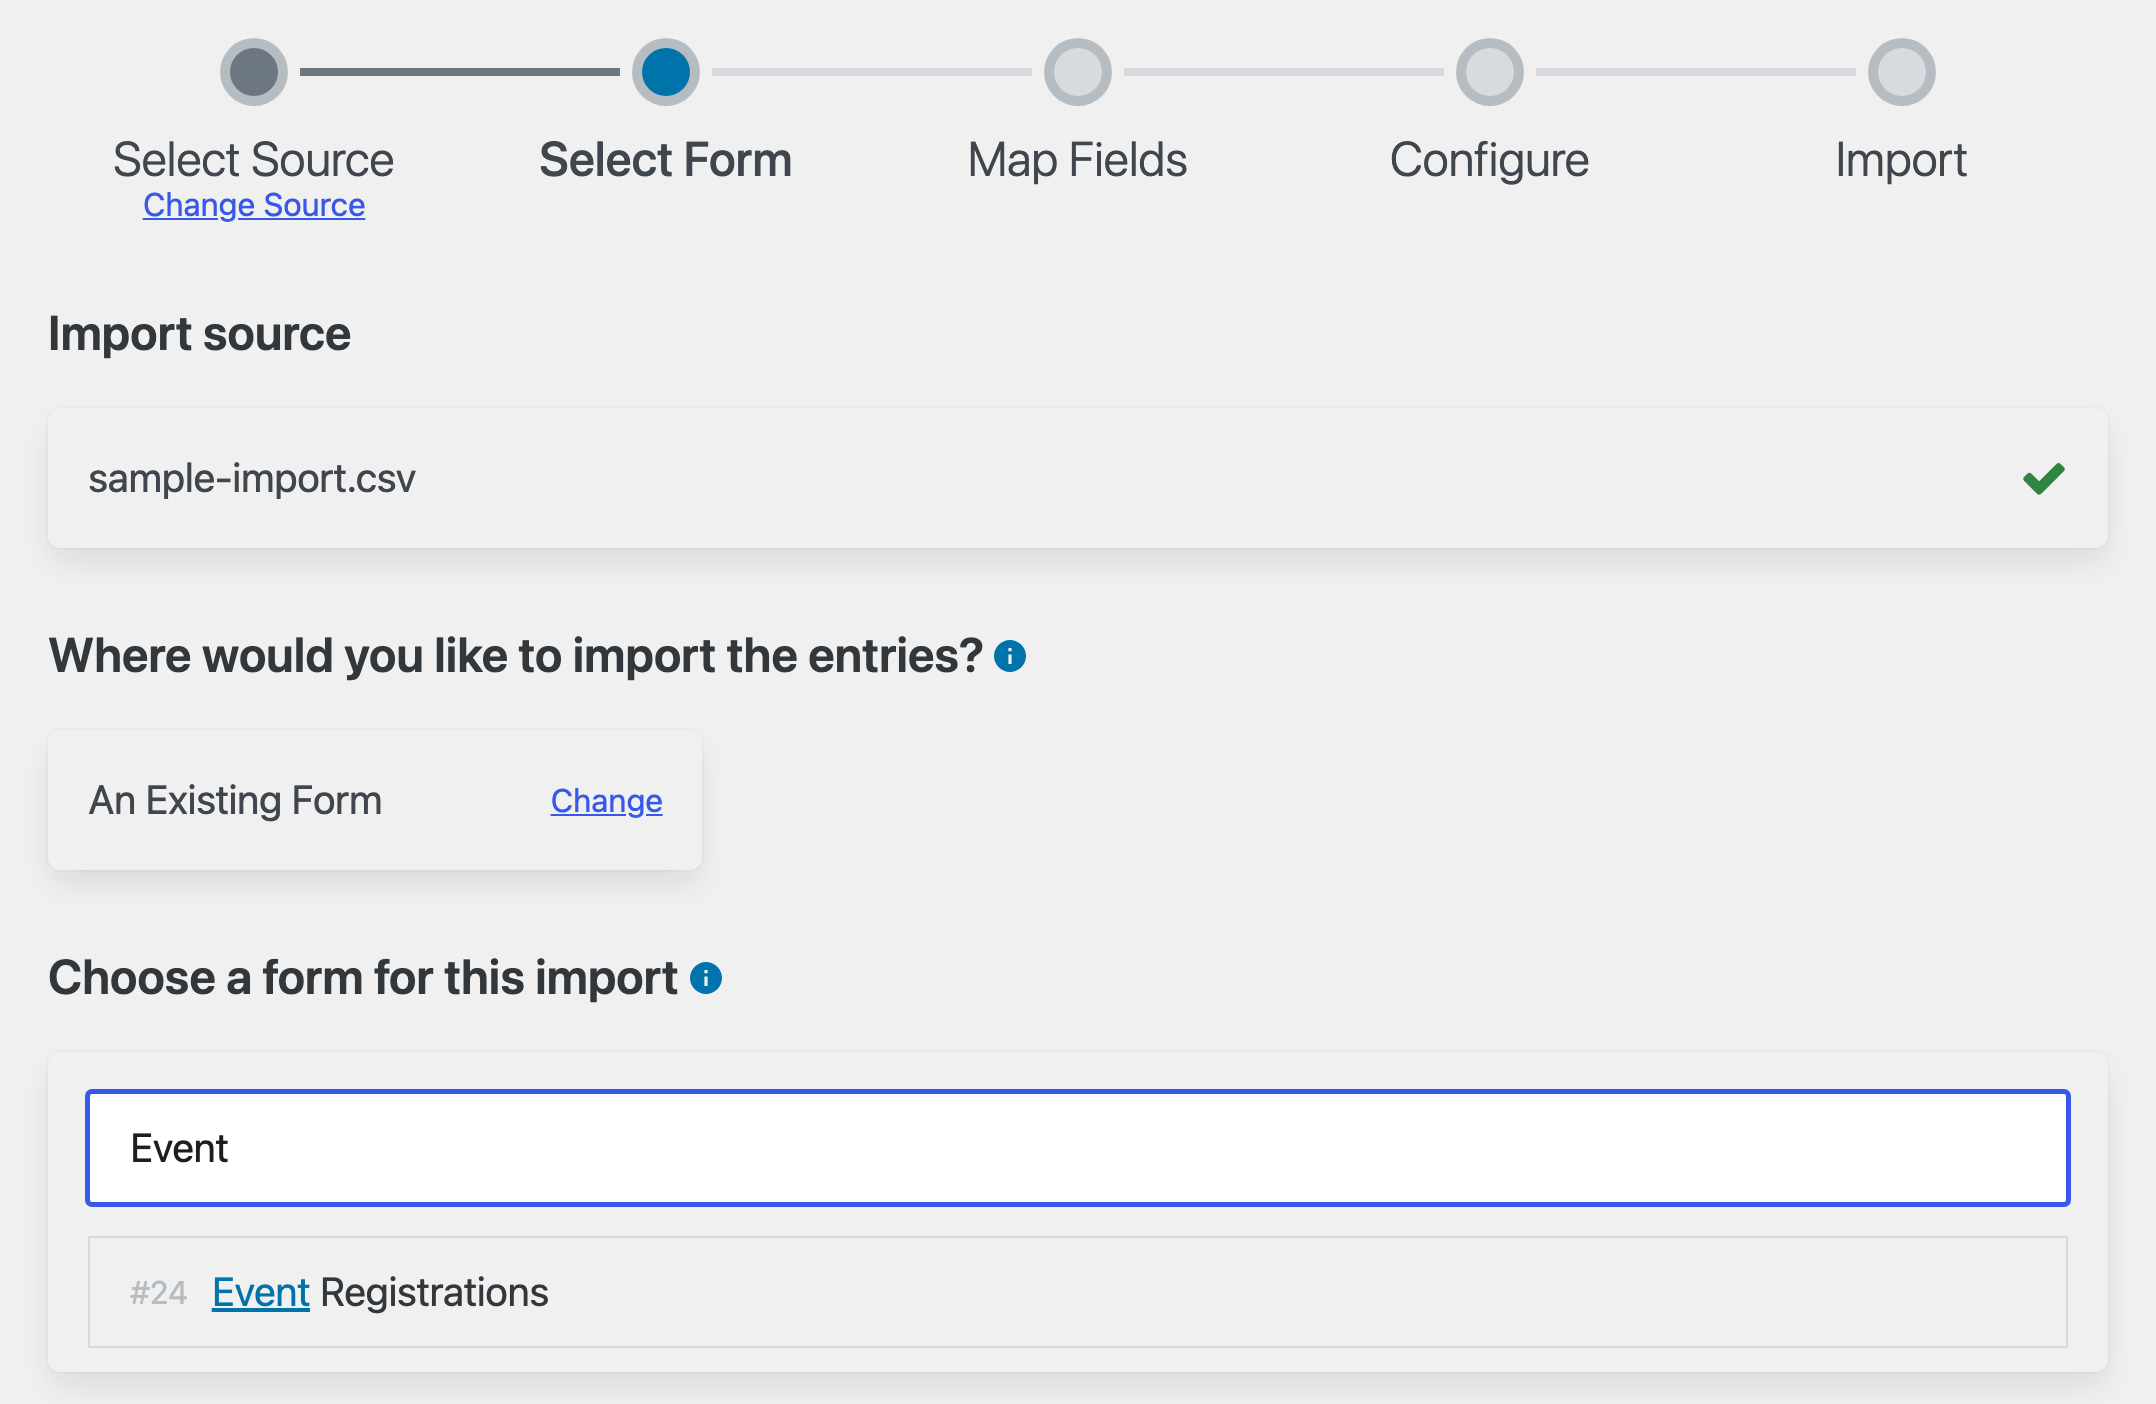
Click the form’s name in the list, or type part of its name in the search box to filter. Only active forms are listed, so if you don’t see yours, check that it isn’t inactive or trashed.
Creating a new form
Name the new form, then click Continue With Import. GravityImport takes you straight to field mapping, and the form itself is created at the end of the wizard, when you click Create Form and Continue With Import on the Configure stage.
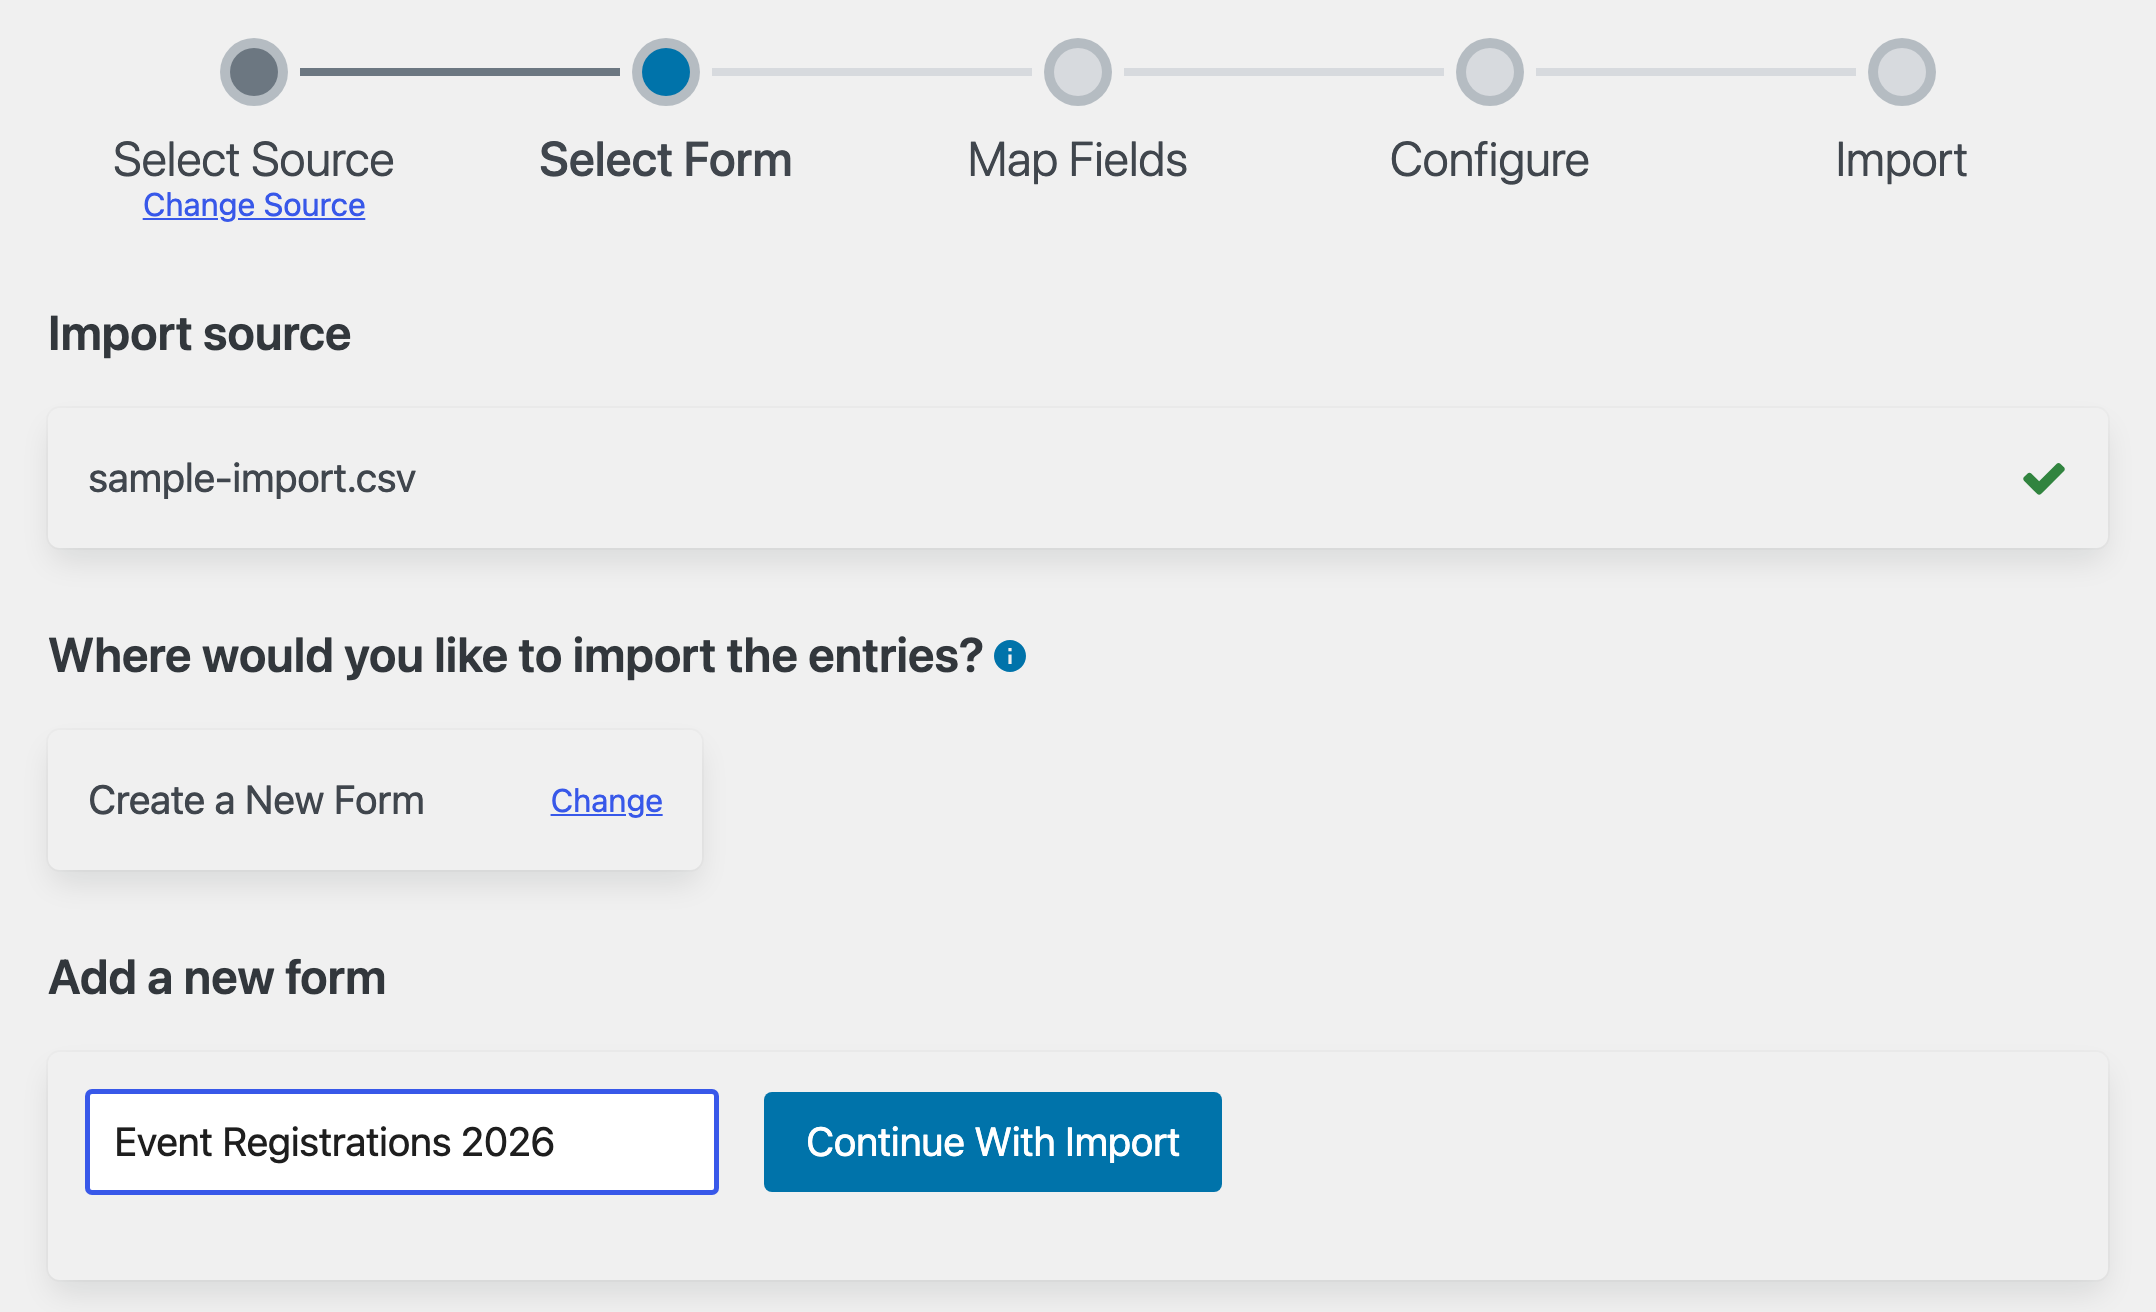
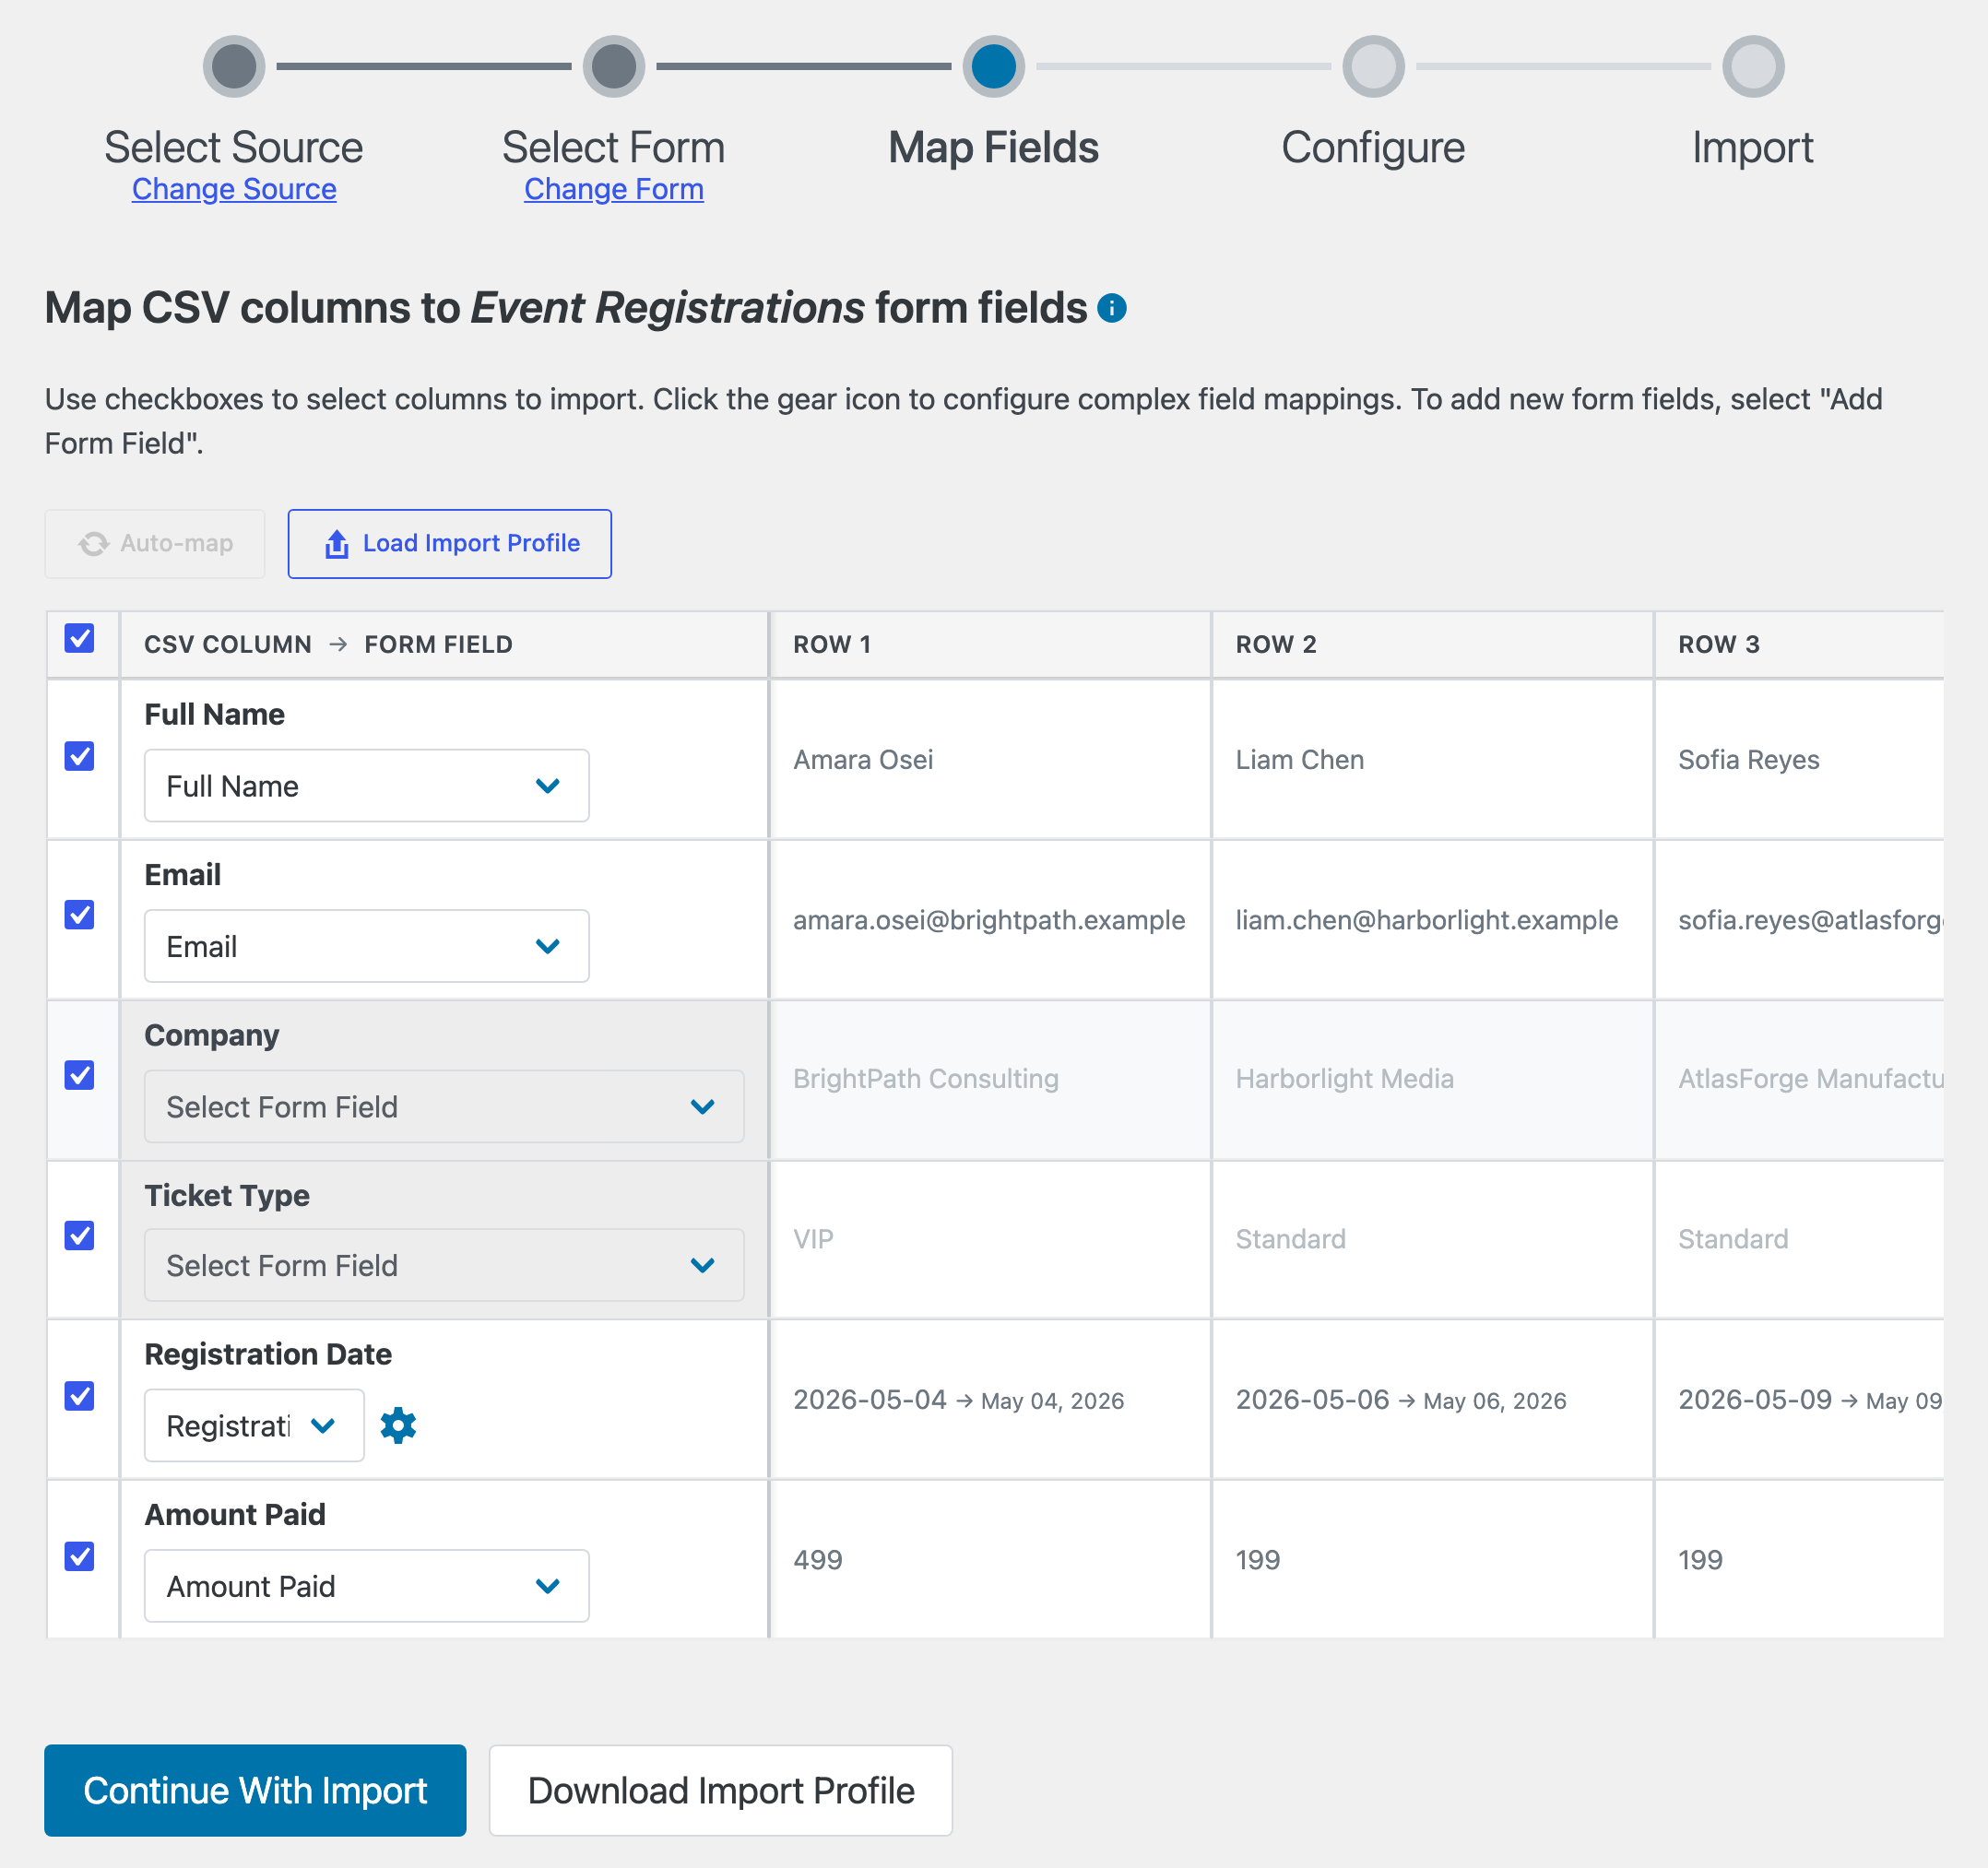
4. Map CSV columns to form fields #
Each row in the mapping table is one CSV column, with a preview of its first values so you can see what’s in it.
Columns are mapped for you wherever the column name matches a form field. The match is case-insensitive and checks the field’s label, admin label, and field ID, individual input labels for multi-input fields, and entry properties such as Entry ID or Created By. Clicking Auto-map re-runs this matching at any time.
For everything else:
- Pick the field from the column’s dropdown.
- Choose Add Form Field from the dropdown to create a new field on the form without leaving the importer.
- Untick a column’s checkbox to leave it out of the import.
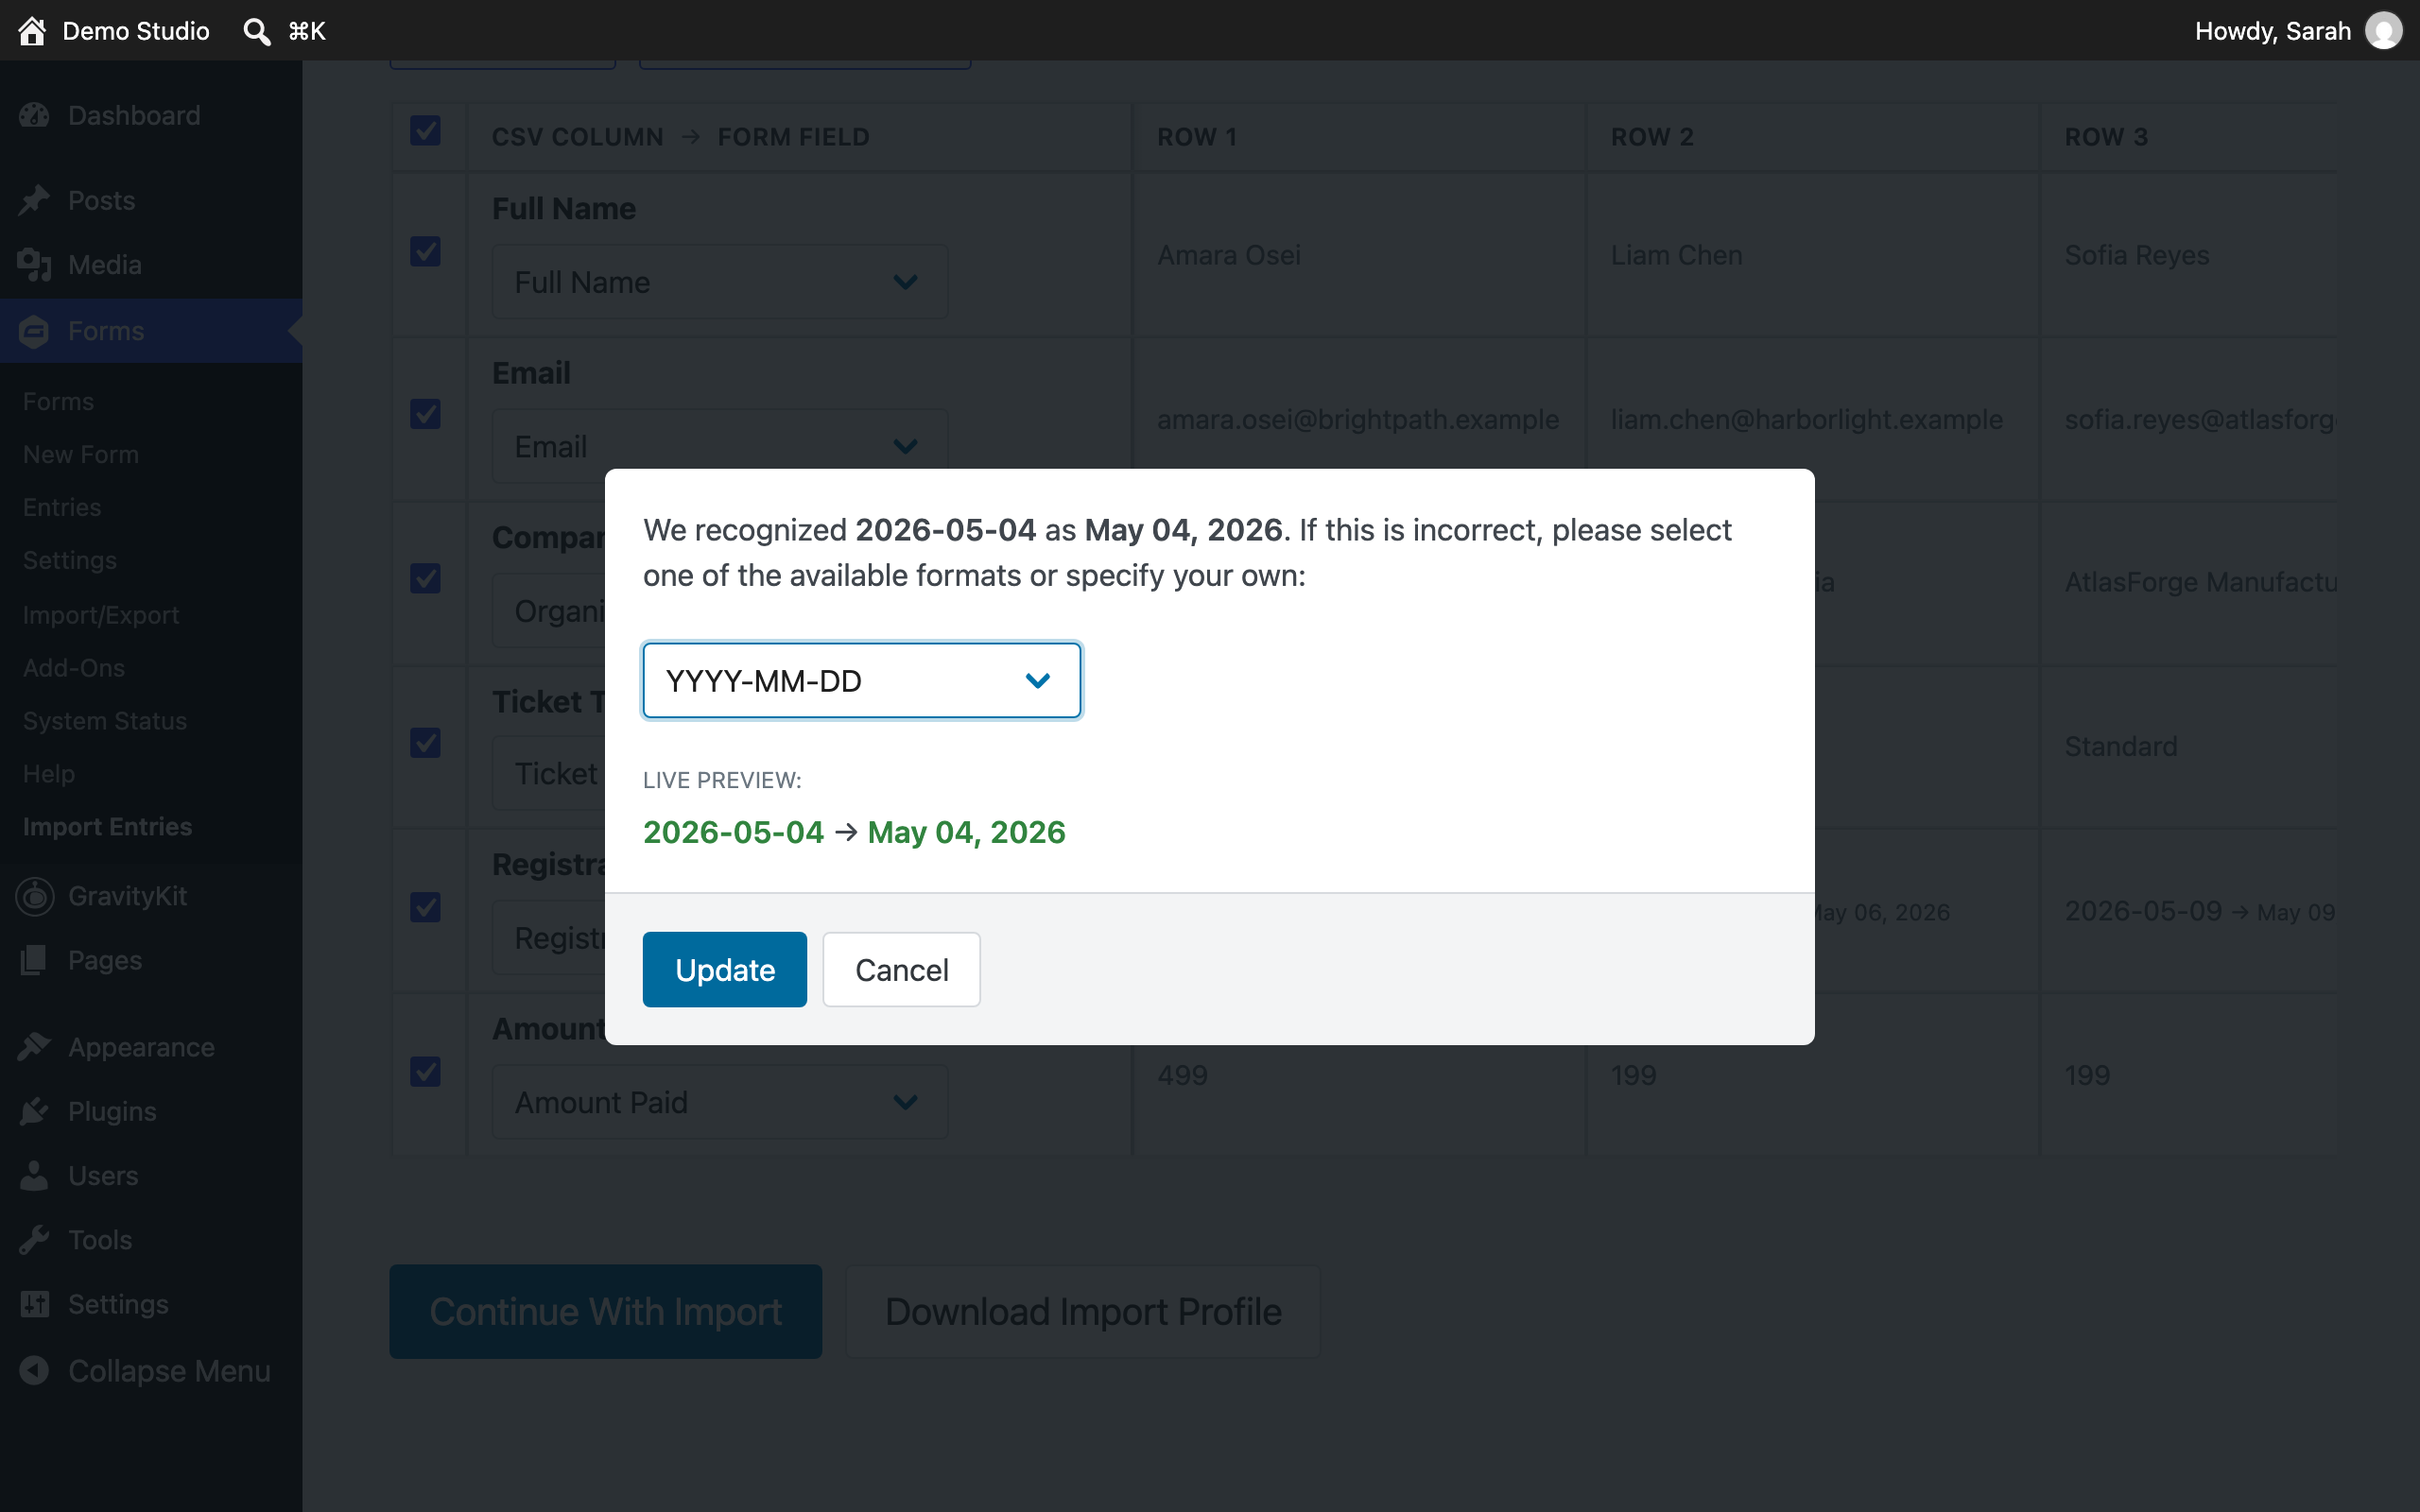
A gear icon appears next to columns you can fine-tune. For a date column, for example, it opens a dialog where you confirm or change the date format, with a live preview of how the first value will be interpreted.
Running the same import regularly? You can save an import’s field mapping and apply it again instead of re-mapping by hand. Download Import Profile on the Import Complete screen at the end of an import saves one, and Load Import Profile applies it to a later import.
When the mapping looks right, click Continue With Import.
5. Configure the import options #
The Configure stage controls how the import behaves:
- Ignore Required Form Fields imports rows even when they’re missing values the form normally requires. This toggle only appears when the form has required fields.
- Continue Processing If Errors Occur (on by default) keeps the import running past problem rows and reports them at the end, instead of stopping at the first error.
- Conditional Import imports only the rows that match rules you define, such as “Ticket is VIP”.
- Email Notifications sends the form’s active Gravity Forms notifications for every imported row. Leave this off unless you want an email per entry.
- Skip Field Validation accepts values the form would normally reject. Gravity Forms still sanitizes certain fields.
- Process Feeds appears when the form has feeds configured (for example, a User Registration or payment add-on feed) and lets you choose which feeds run for each imported entry.
If you’re unsure about an option, hover over the Help icon in the lower right of the screen.
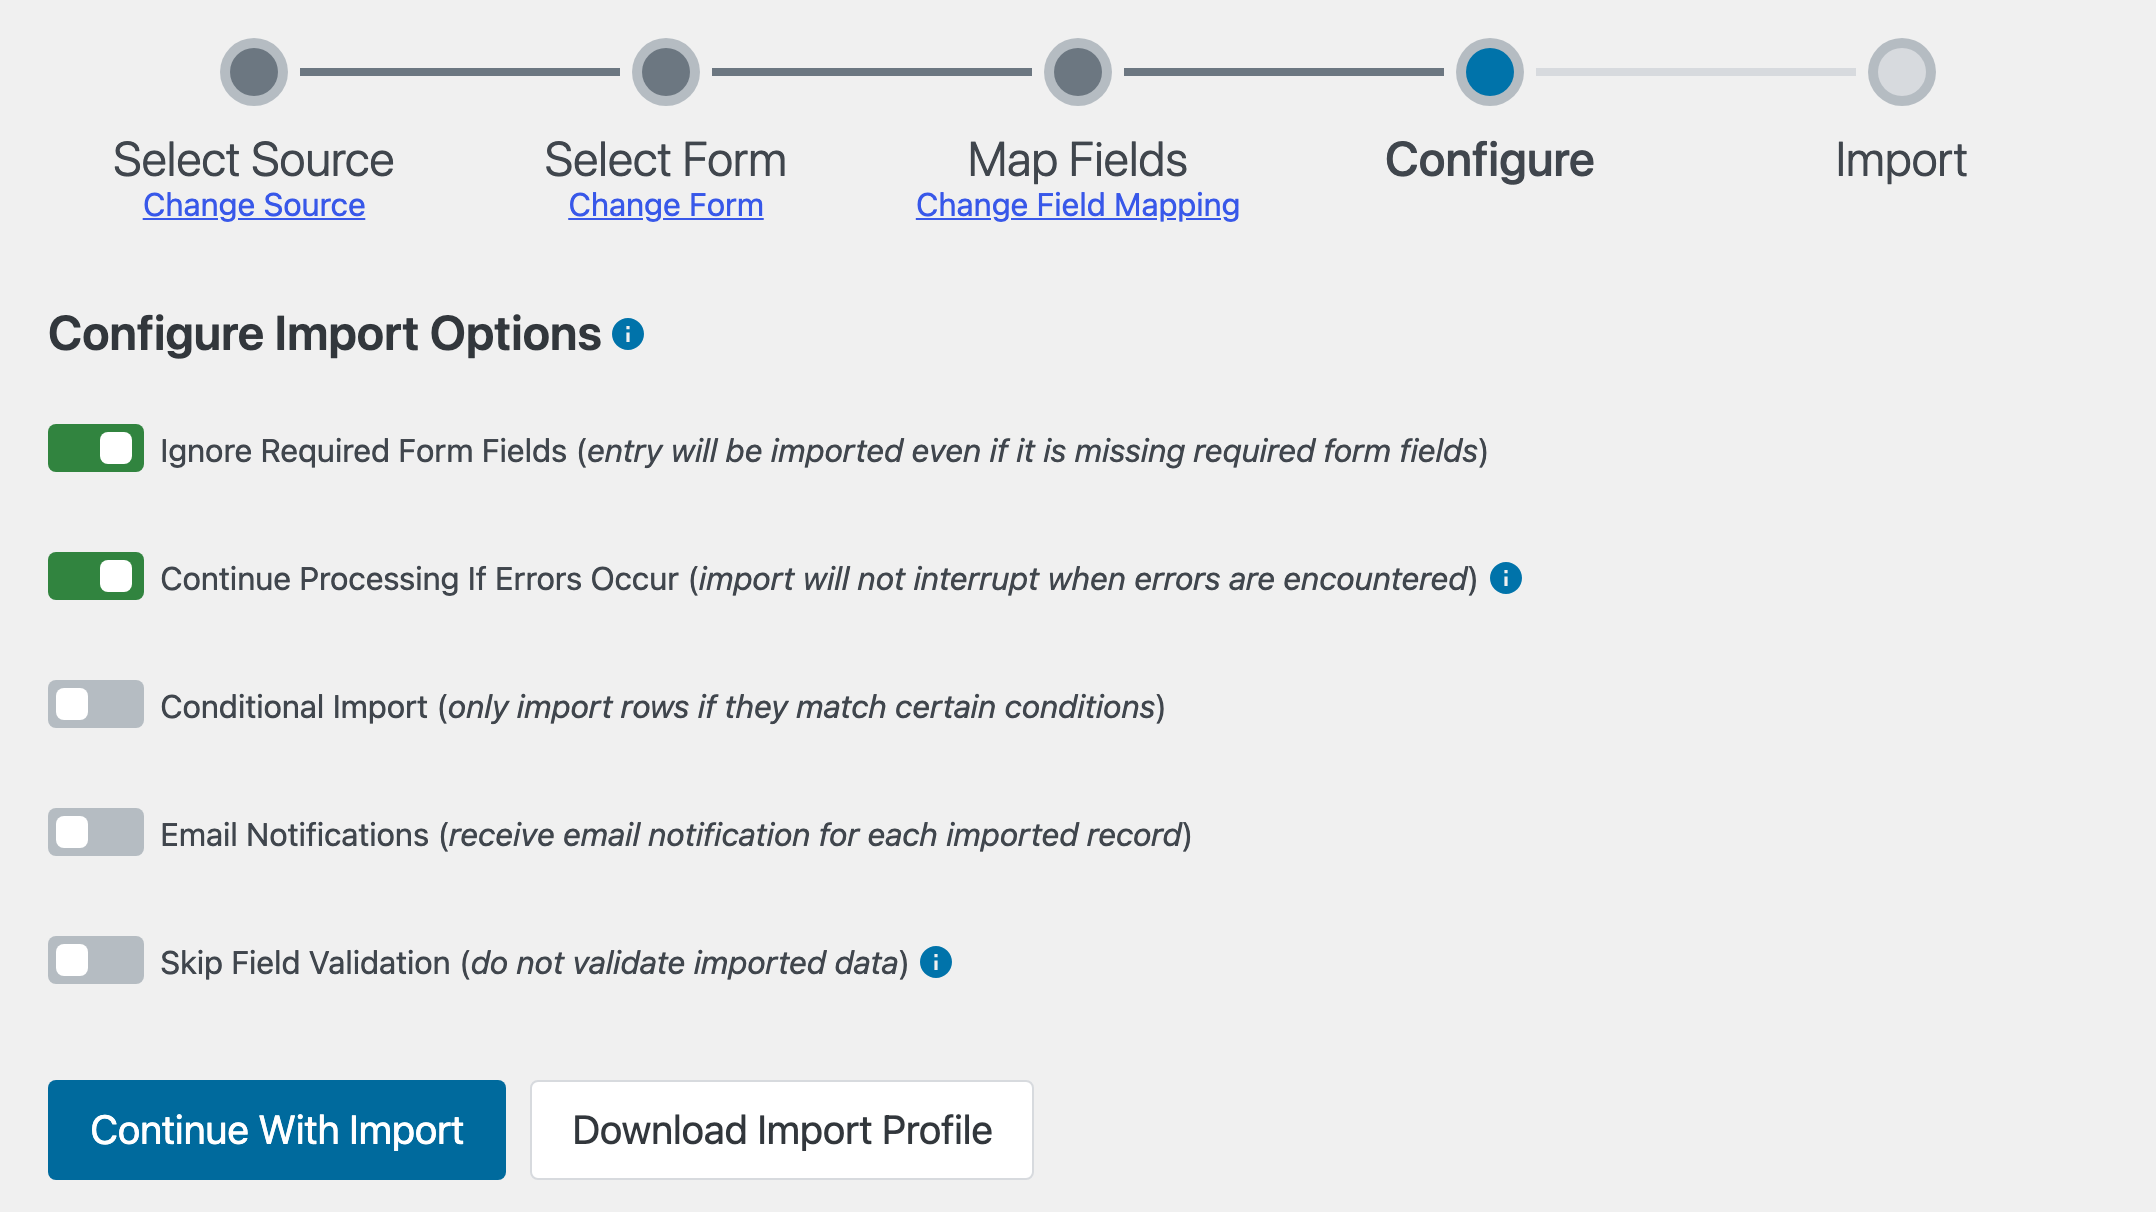
The defaults are fine for a typical first import. Click Continue With Import to start.
6. Watch the import run #
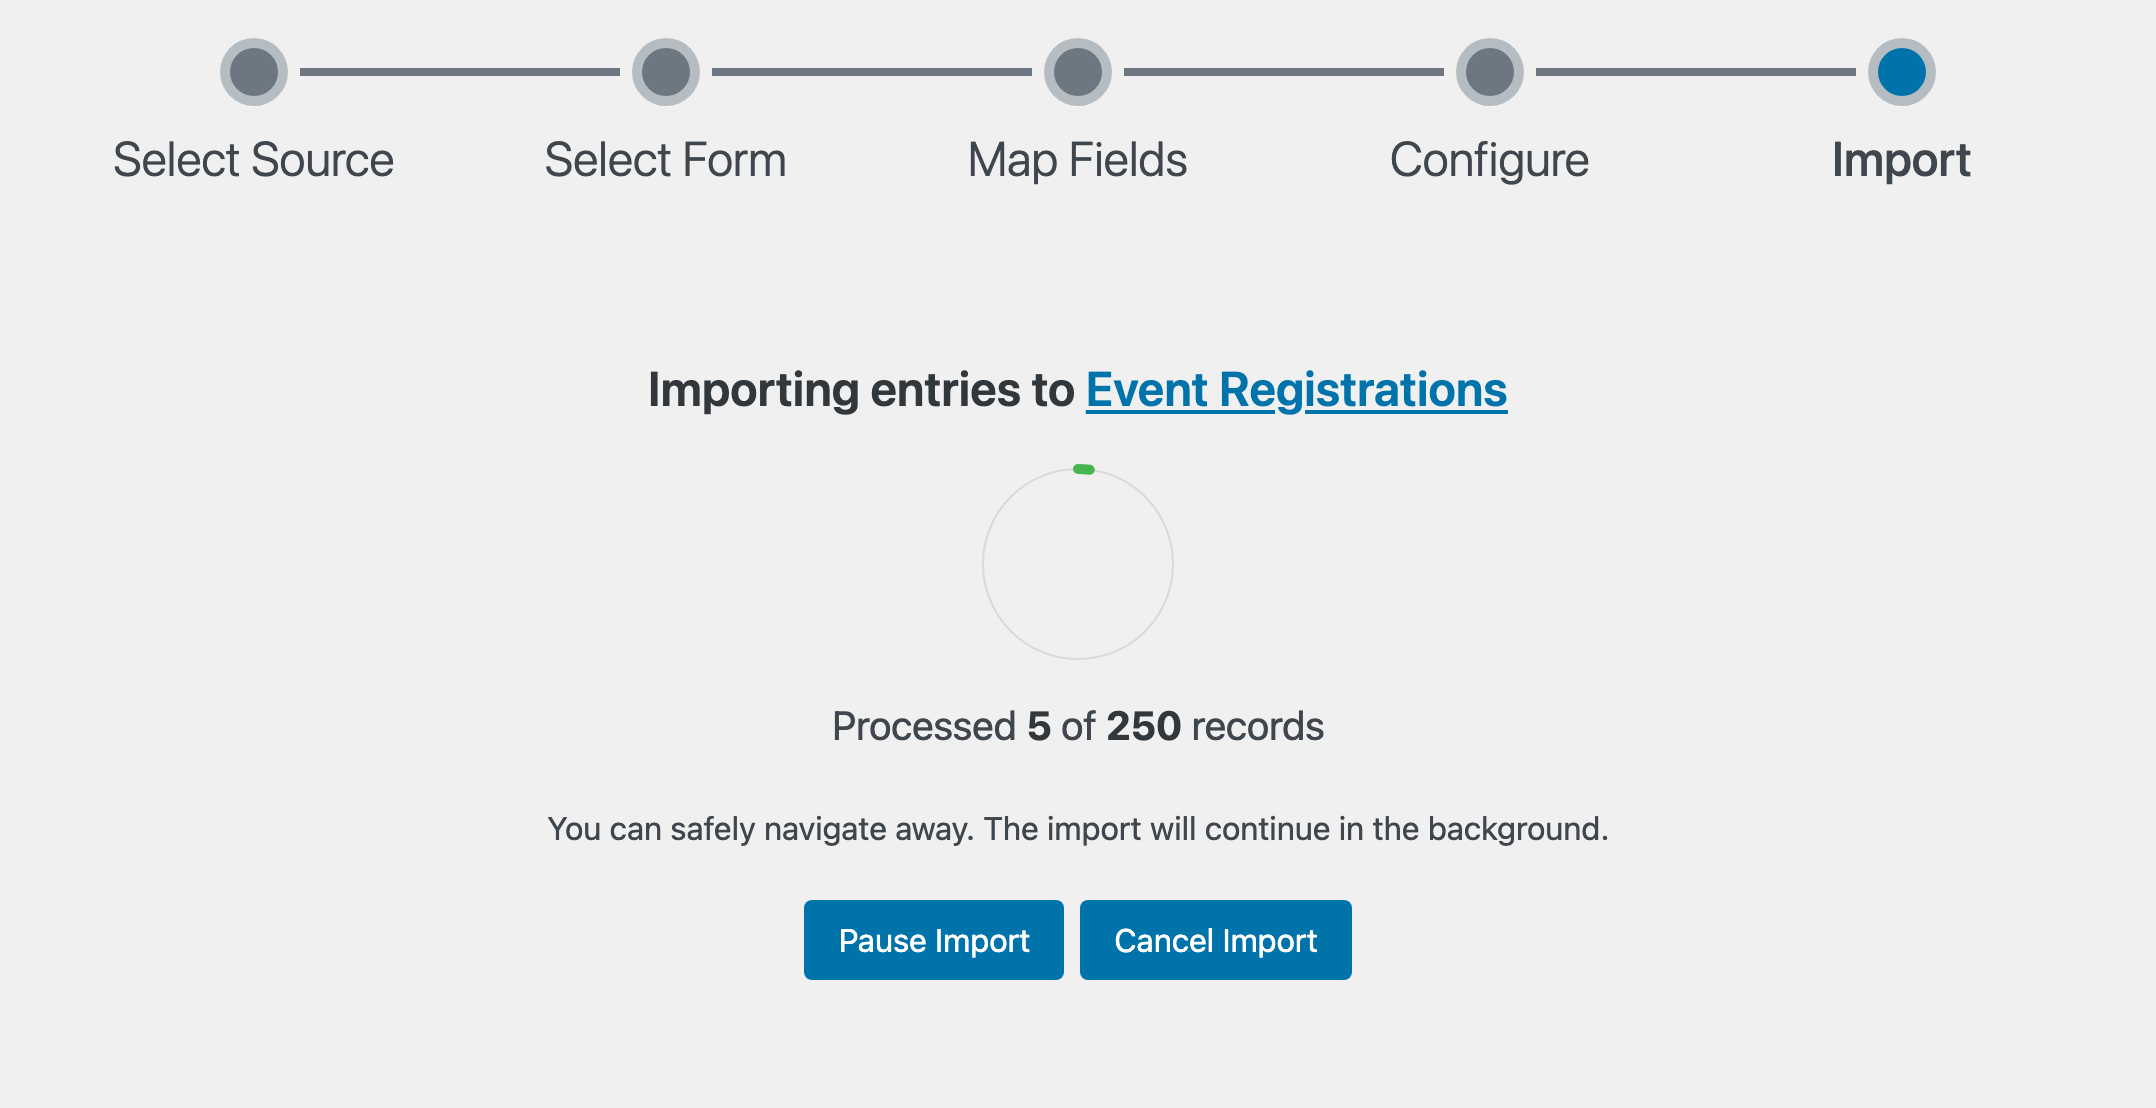
Rows become entries as the progress updates. You can pause or cancel a running import, and for large files you don’t need to wait around: when the import runs in the background, it’s safe to navigate away and the import continues.
When background processing is off, or the site can’t run background jobs, the import runs in your browser and the screen says “Do not navigate away from this page.” Keep the page open until the import finishes. Background processing explains the settings that control this.
7. Review the results #
When the import finishes, a summary shows how many rows were imported, skipped, or rejected.
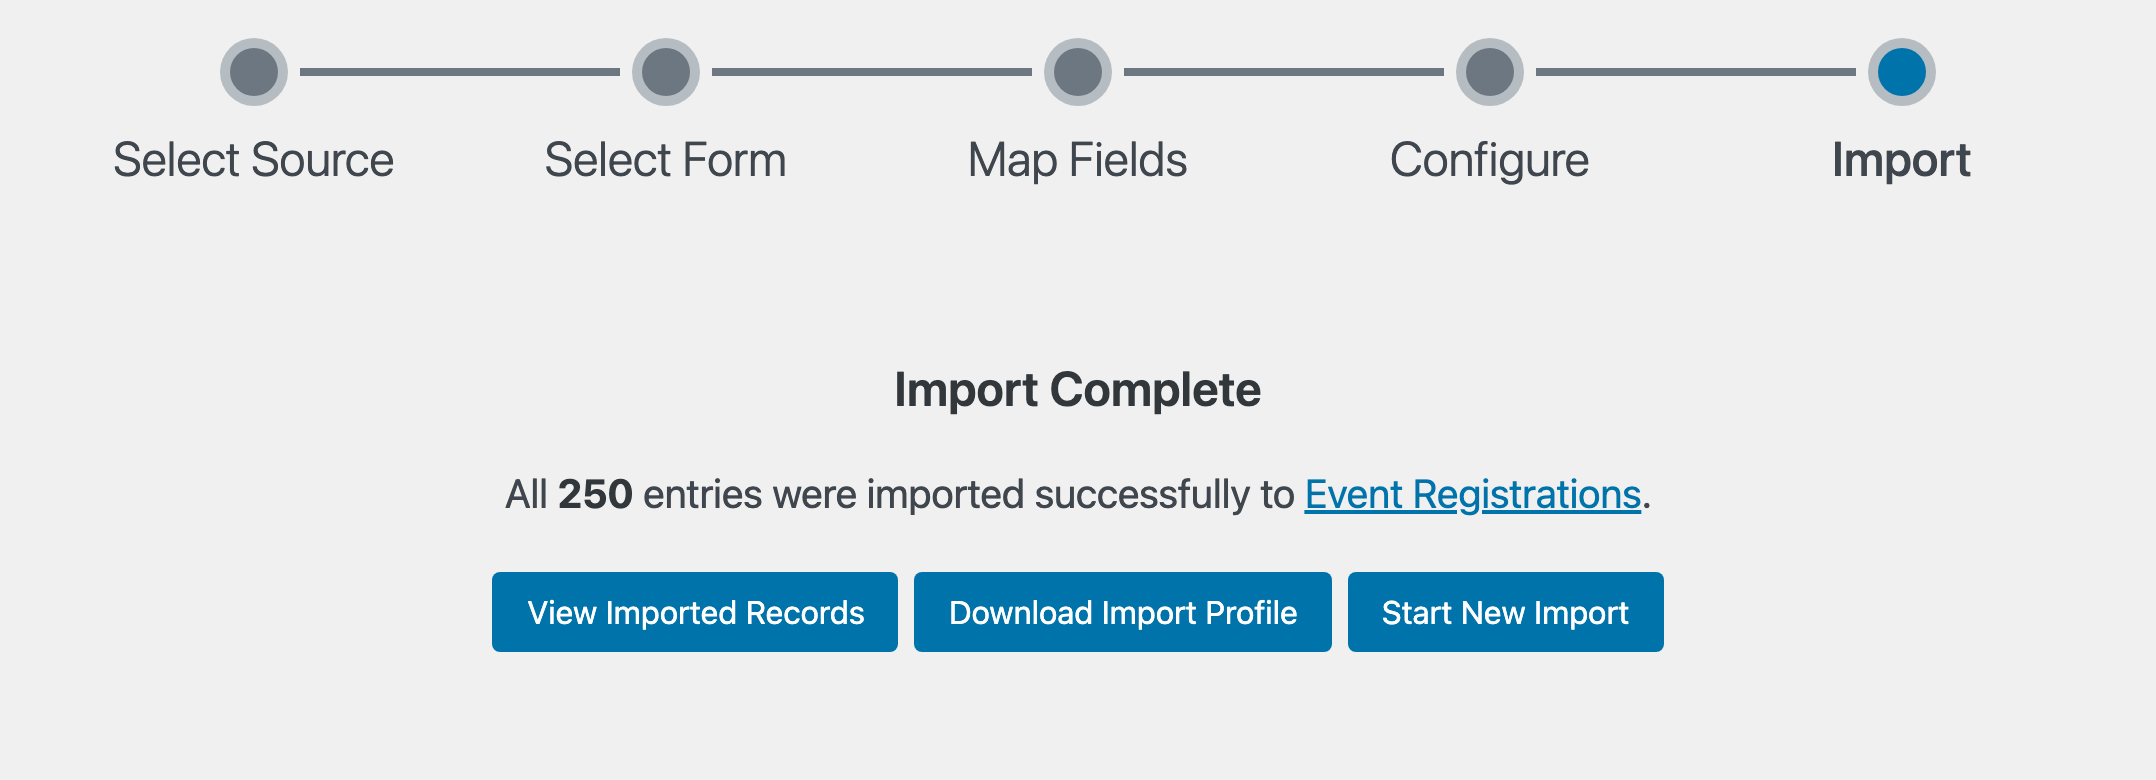
- View Imported Records opens the new entries in Gravity Forms.
- Download Import Profile saves this import’s field mapping for reuse.
- Start New Import begins the next file.
If any rows were rejected, the summary also includes:
- A view log link explaining why each row failed
- A download link that saves a file of just the failed rows so you can fix and re-import them
- Retry Failed Records, which runs the failed rows again, and Remap & Retry Failed Records, which takes you back to field mapping first
8. View your entries #
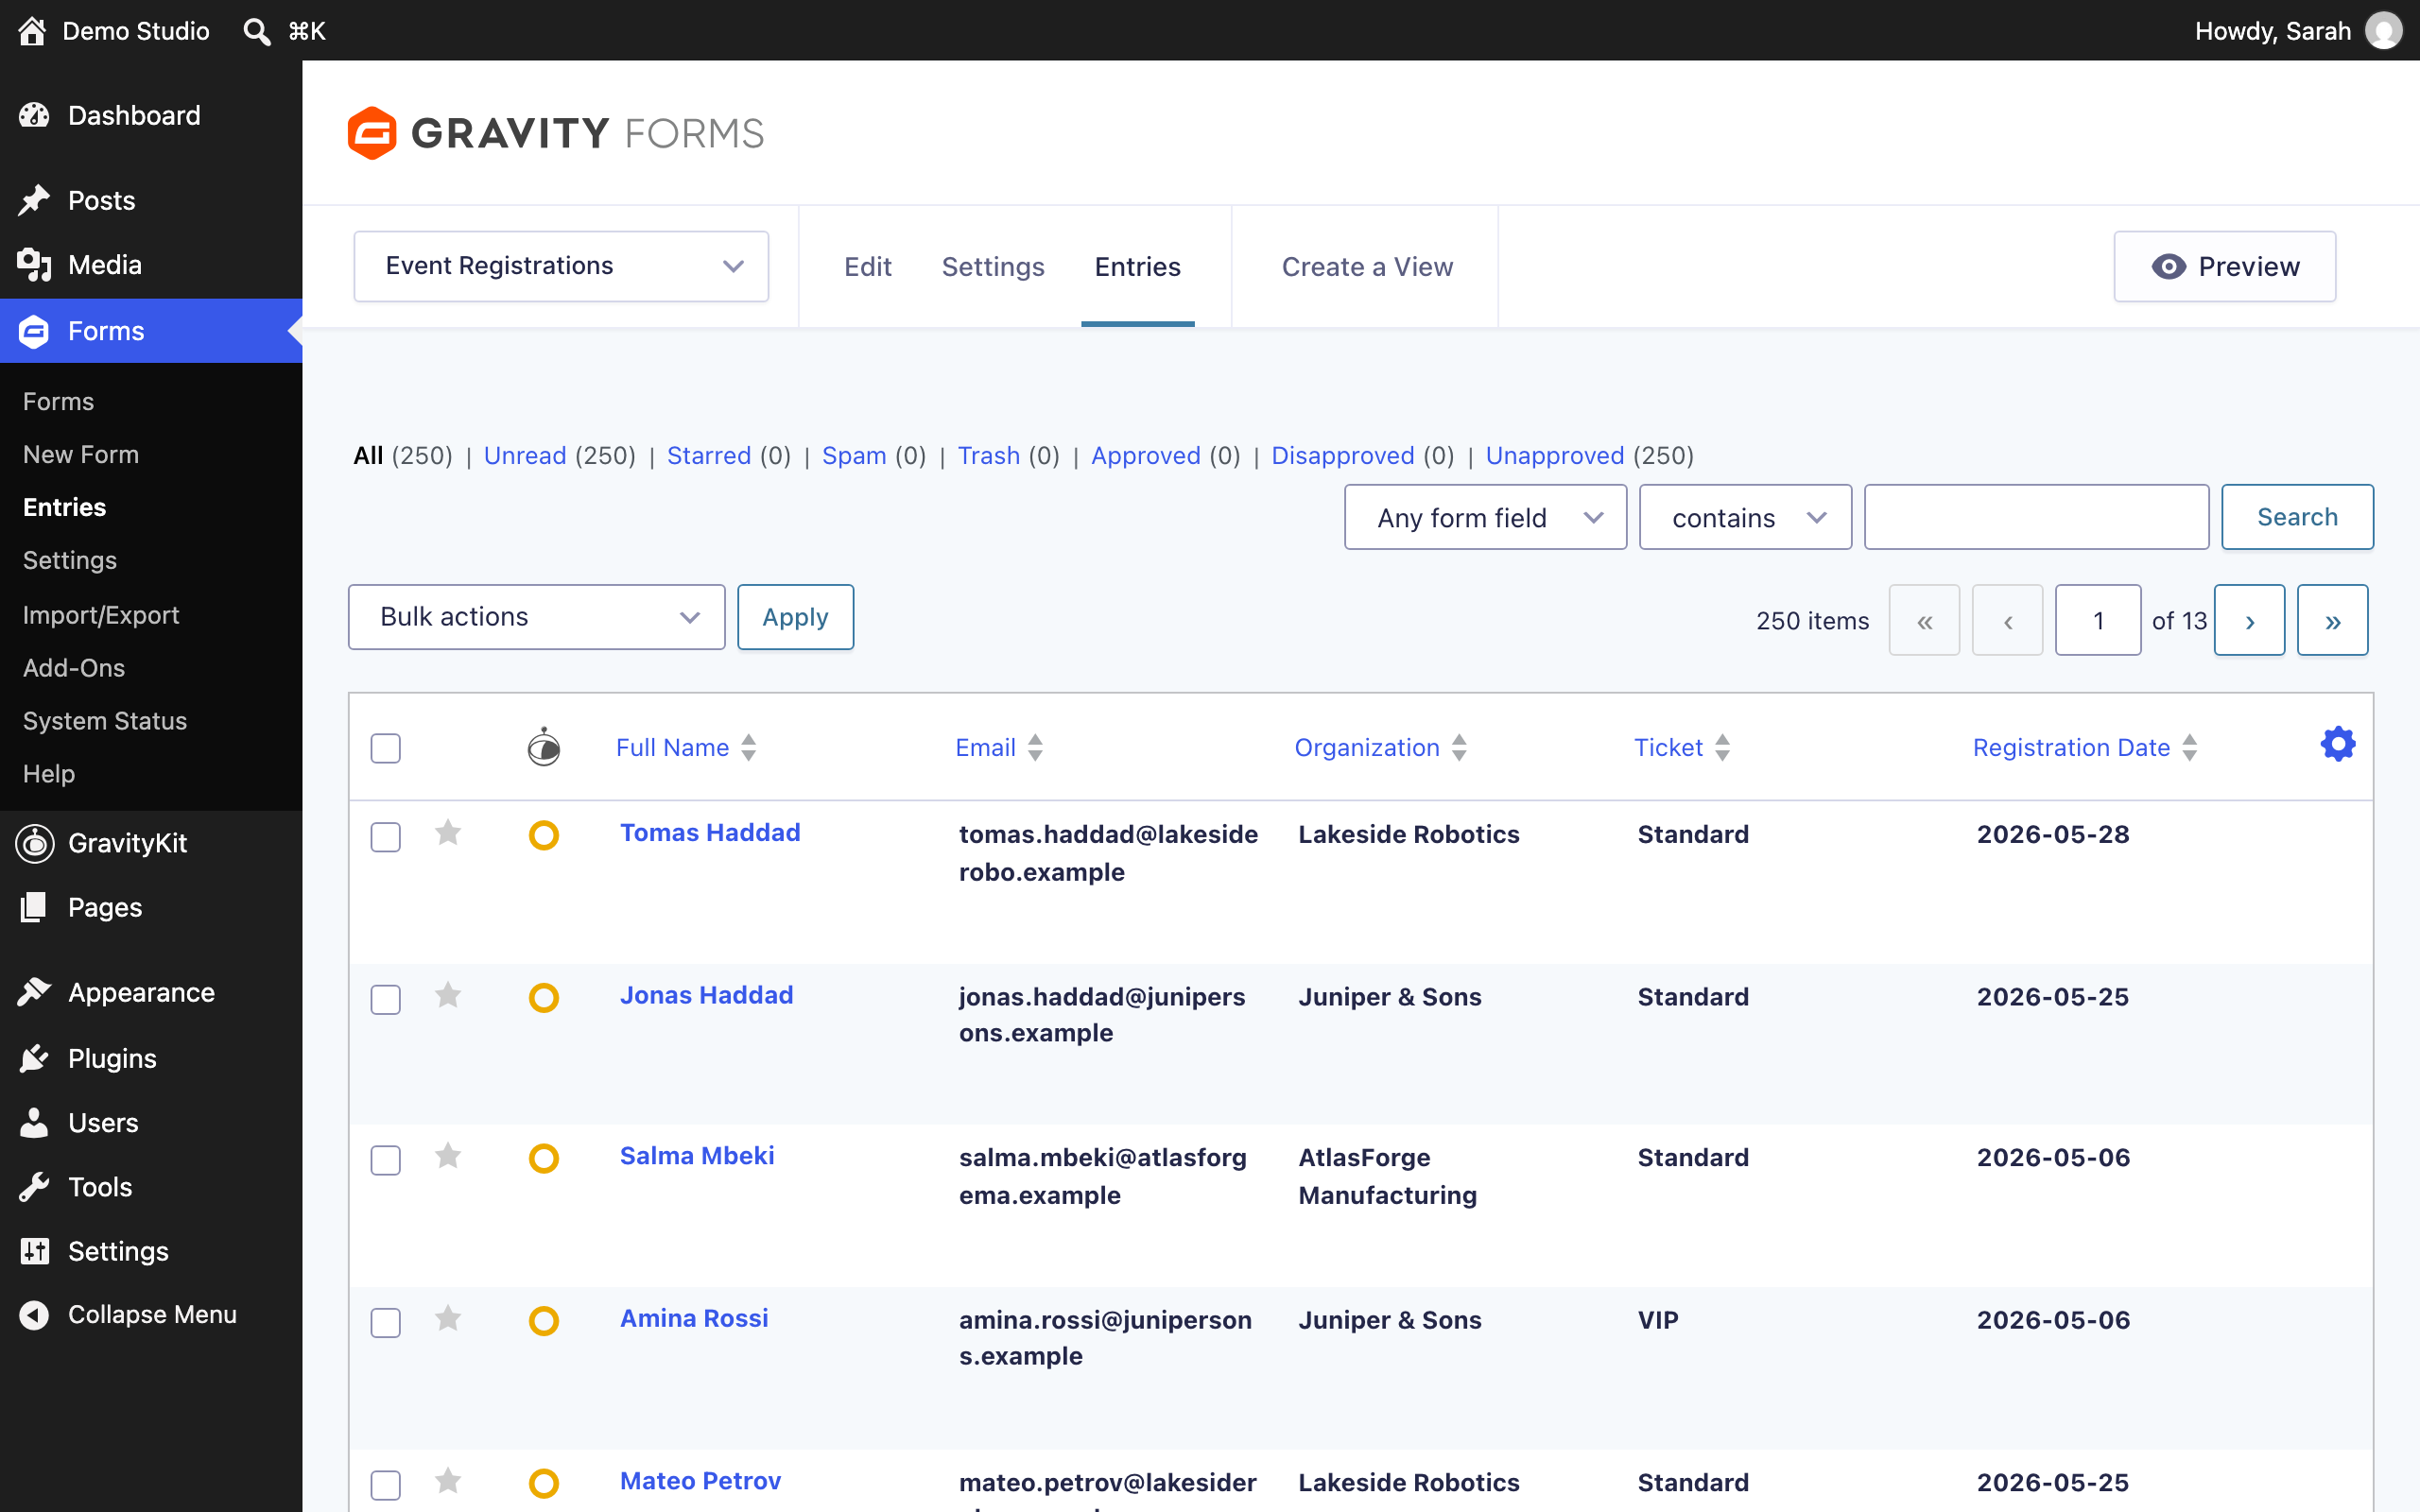
Click View Imported Records to see the imported entries on the Gravity Forms Entries screen, ready to use like any other entries.
What happens if your CSV has errors #
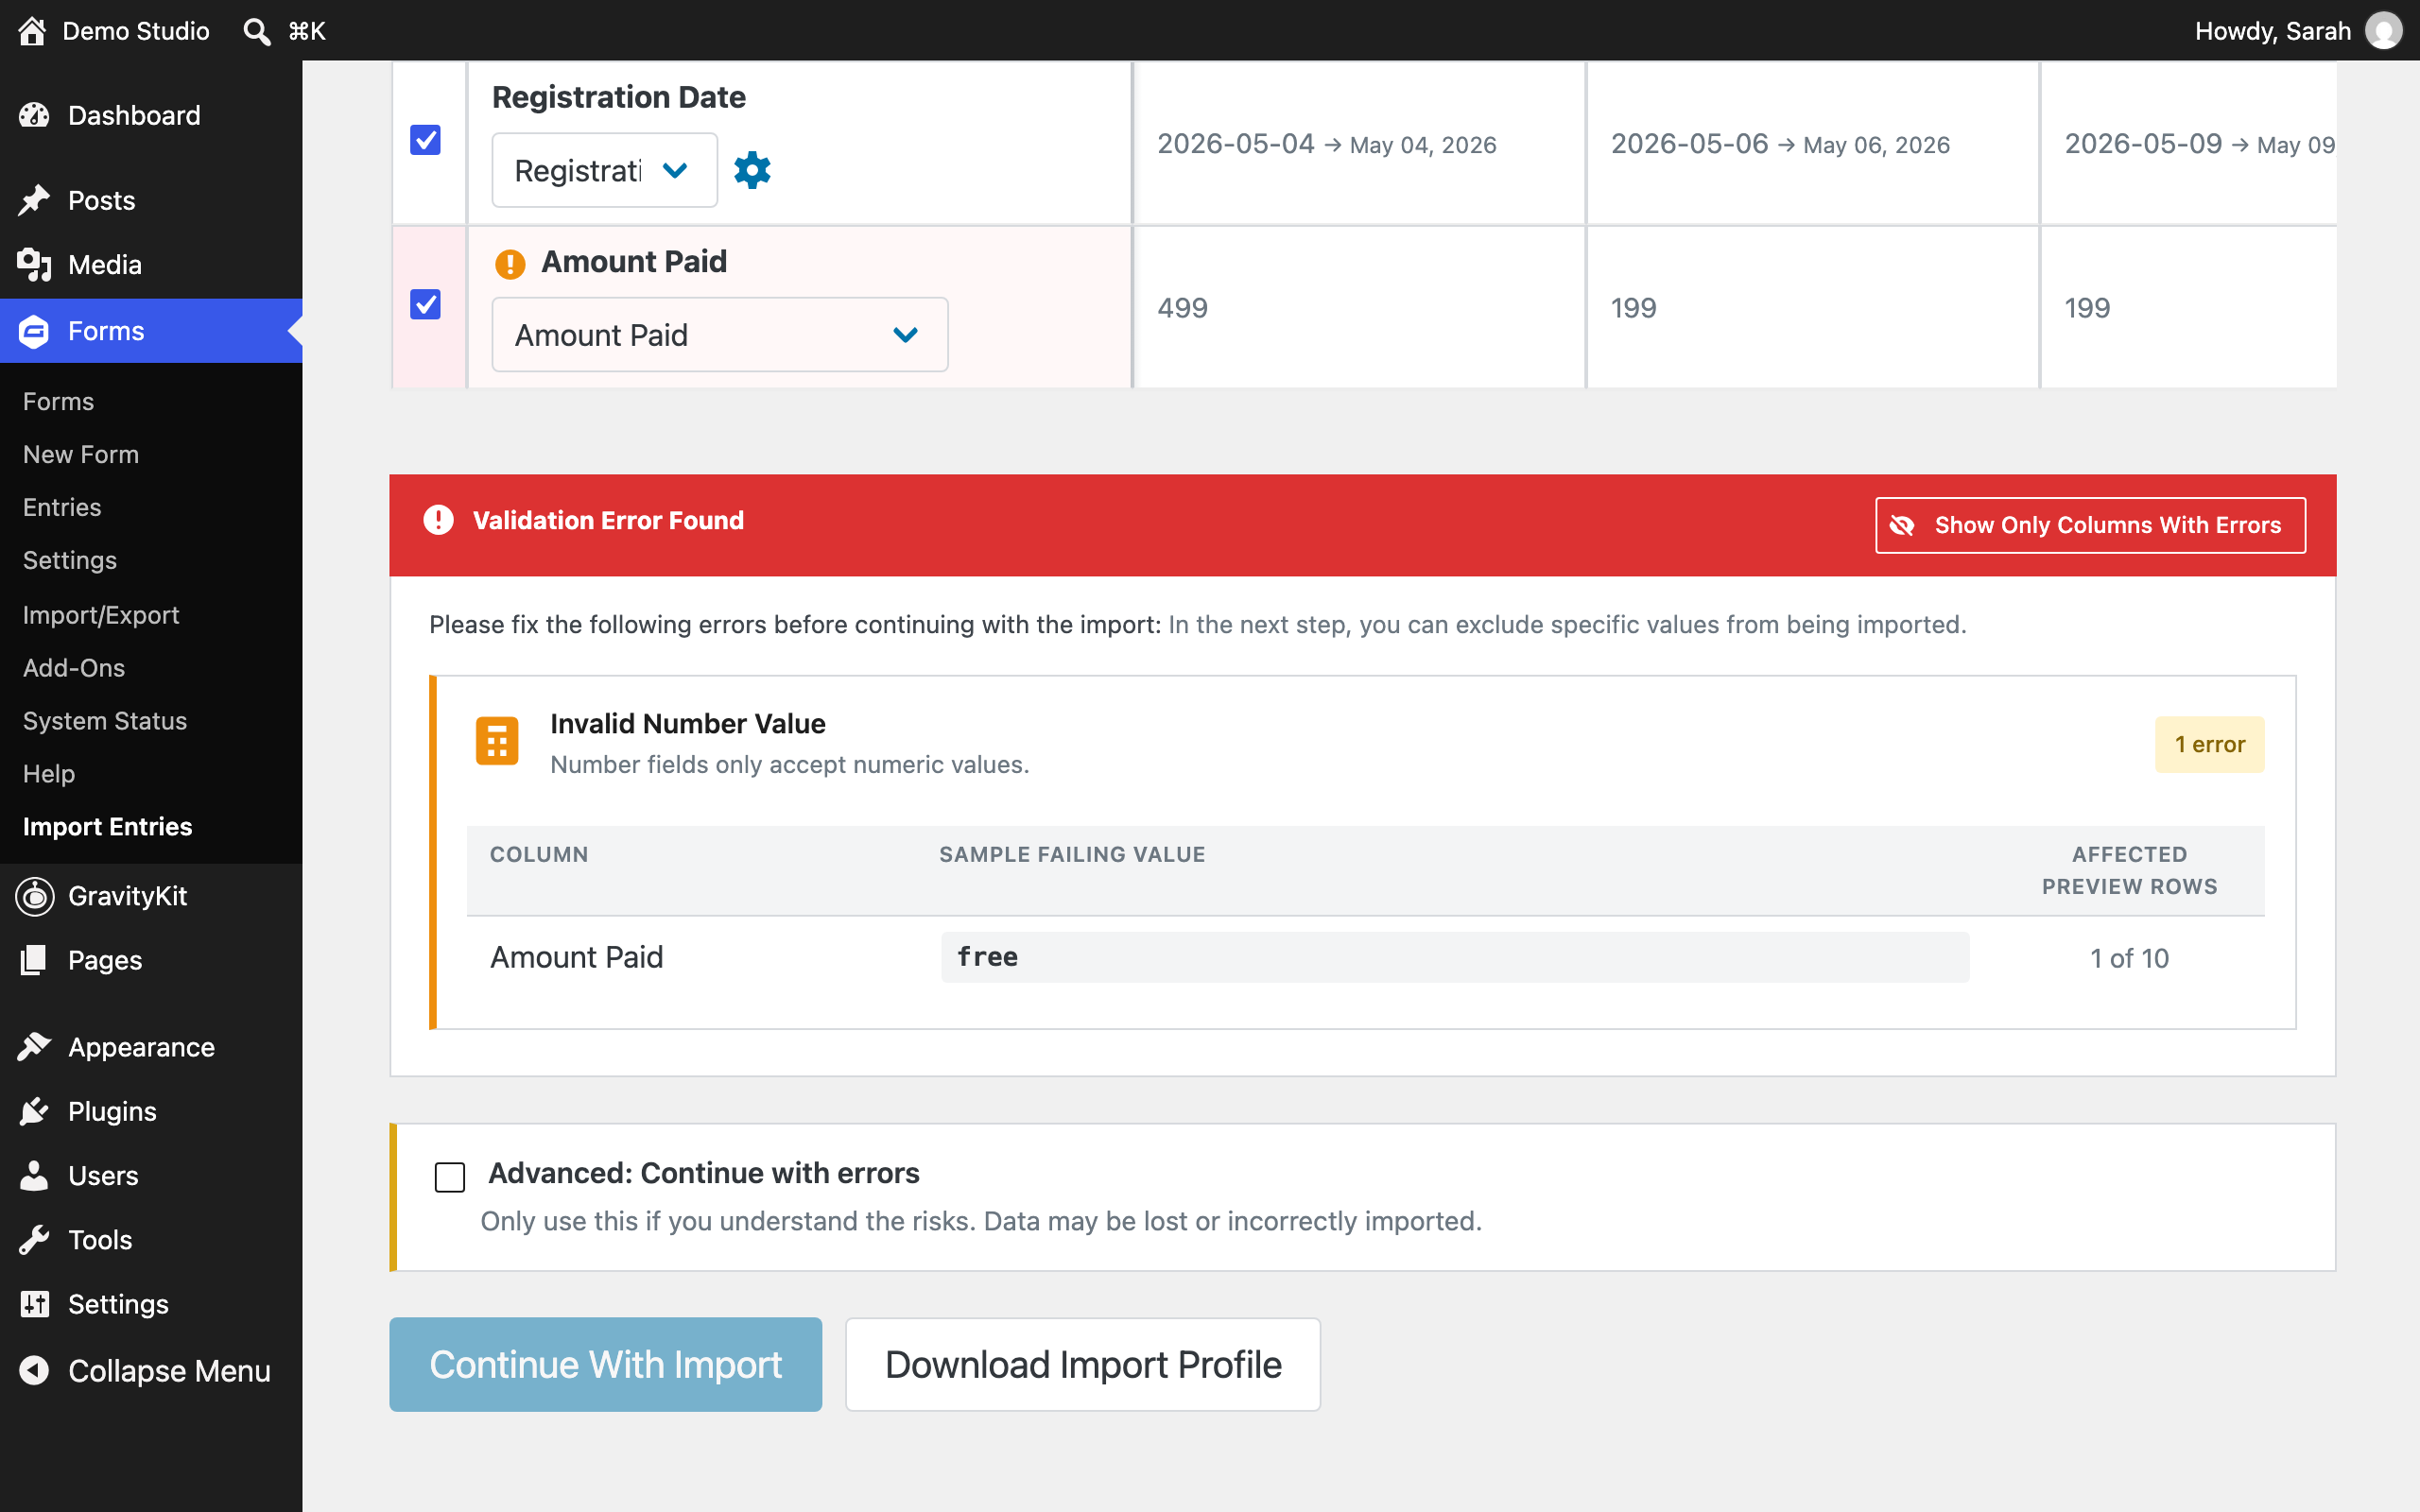
GravityImport checks your data before the import runs. On the Map Fields stage, columns with invalid values are flagged in the mapping table, and a Validation Error Found panel below it lists each problem with a sample failing value and the number of affected rows. Fix the file and upload it again, untick the problem column, or tick Advanced: Continue with errors to proceed anyway. Rows that fail validation are rejected during the import.
Errors during the run don’t spoil the rest of the import. With Continue Processing If Errors Occur on (the default), GravityImport rejects the problem rows, imports everything else, and reports the results at the end. Turn that option off and the import stops at the first error instead.
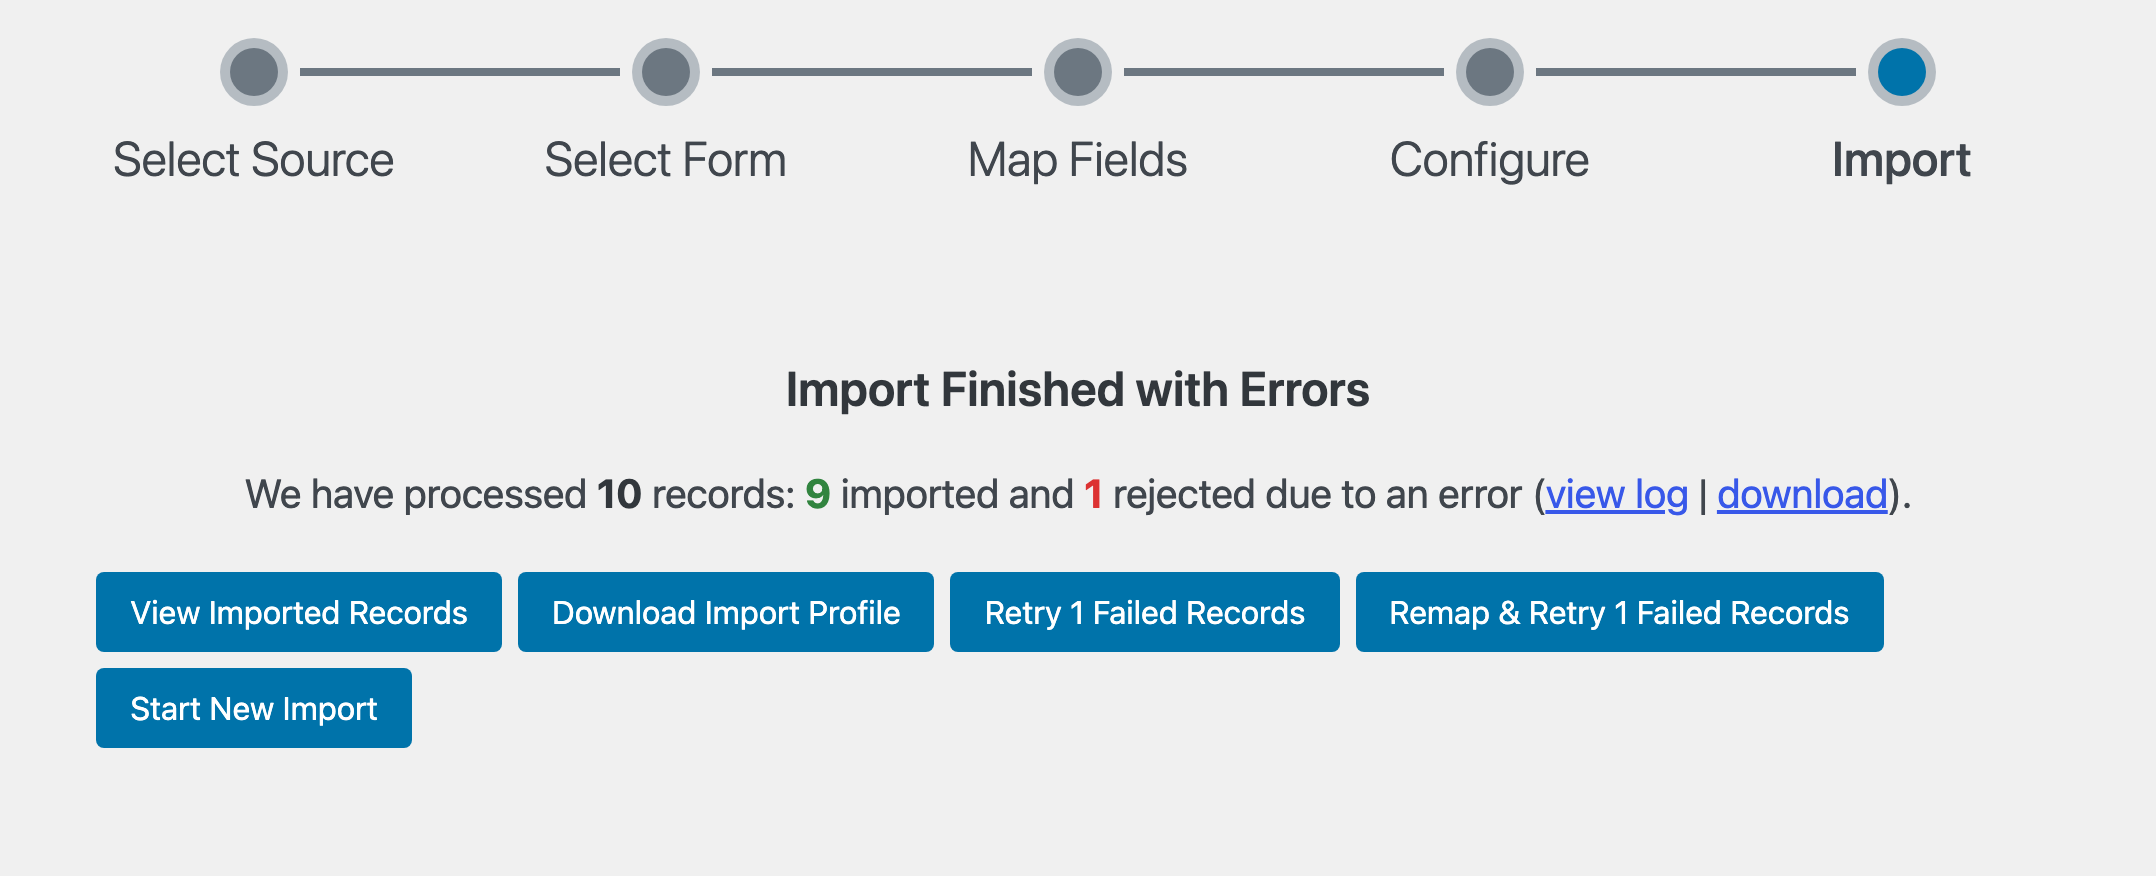
From the summary you can:
- Click view log to see why each row failed.
- Click download to save a file containing only the failed rows.
- Click Retry Failed Records to run the failed rows again, or Remap & Retry Failed Records to adjust the field mapping first.
If the flagged values are intentional, the Skip Field Validation and Ignore Required Form Fields options on the Configure stage let them through. Gravity Forms still sanitizes certain fields.
Updating existing entries #
Need to bulk-update entries you already have? Re-import a CSV that includes an Entry ID column and GravityImport updates those entries instead of creating duplicates. See Updating existing entries with the GravityImport plugin.
Related articles #
Was this page helpful?


- GravityImport is the best way to import data into Gravity Forms from a CSV.
- Watch the video tutorial
- 1. Open the importer
- 2. Upload your CSV
- 3. Choose where the entries go
- 4. Map CSV columns to form fields
- 5. Configure the import options
- 6. Watch the import run
- 7. Review the results
- 8. View your entries
- What happens if your CSV has errors
- Updating existing entries
- Related articles