How to schedule automated exports
GravityExport lets you export Gravity Forms entries to Excel, CSV, or PDF files and save them to various storage locations. With the built-in scheduling feature, you can automate these exports to run at regular intervals—hourly, daily, weekly, or on a custom schedule. In this article, you’ll learn how to configure a scheduled export from start to finish, including setting up an export filter, creating a Save feed, choosing a schedule interval, and selecting a storage location.
Prefer to watch the video? #
How scheduled exports work #
A scheduled export in GravityExport has two main components:
- Export filter – Defines what data is included in the export (which fields, which entries, and what format)
- GravityExport Save feed – Defines when and where the export runs (schedule interval and storage location)
You configure the export filter first, then create a Save feed that references it. Once saved, GravityExport runs the export automatically on your chosen schedule using WordPress background processing—meaning it works even if WP-Cron is disabled on your site.
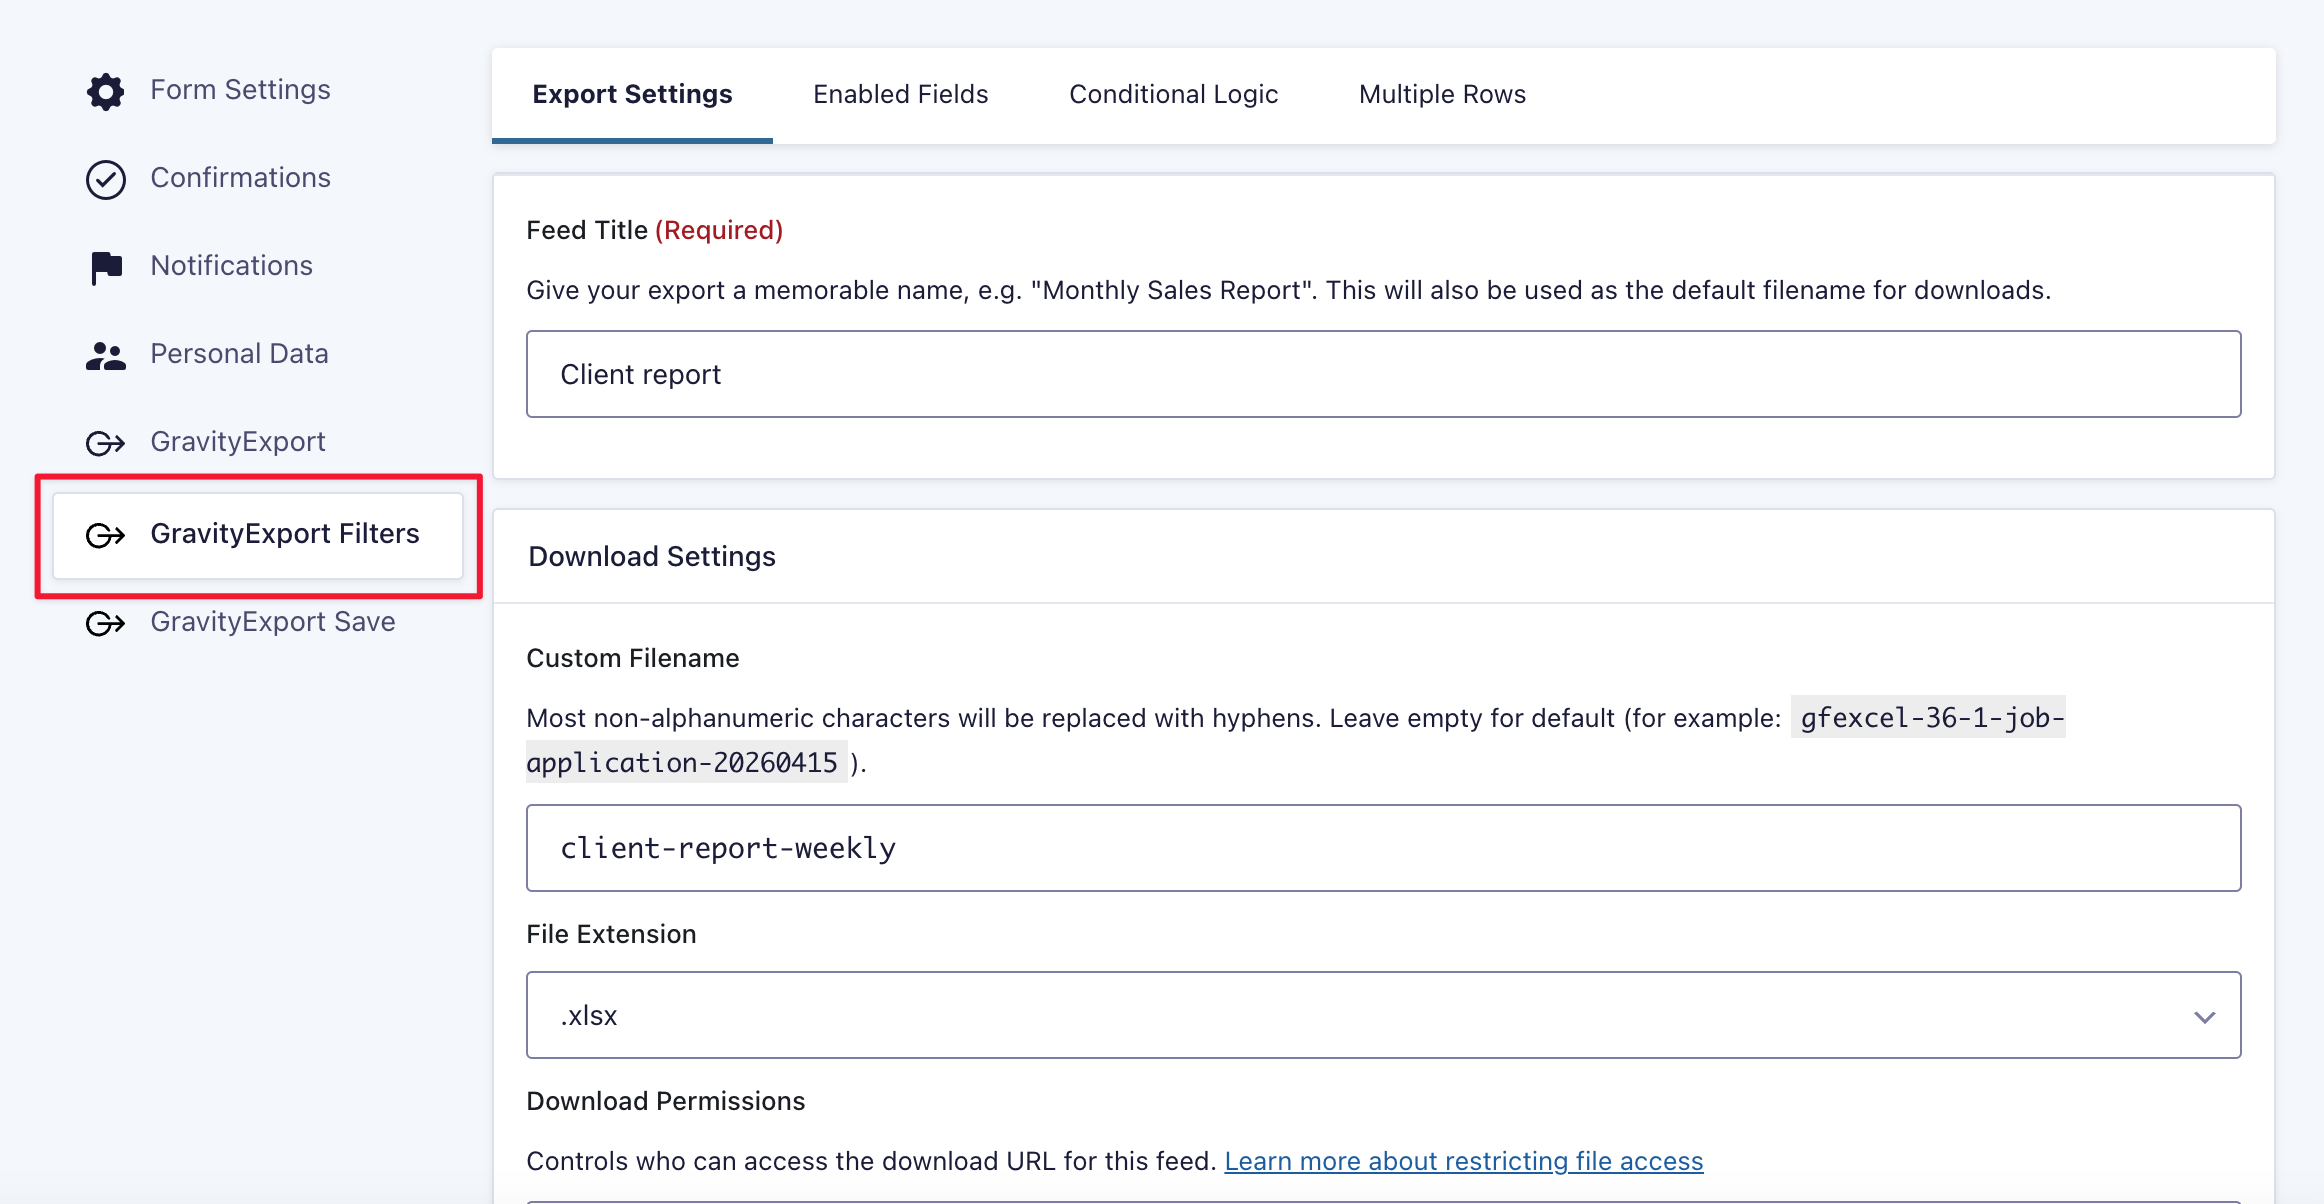
1. Configure an export filter #
Export filters let you control which fields and entries are included in your report. You can create multiple filters for the same form to generate different reports for different audiences.
- In your WordPress admin, navigate to Forms and select the form you want to export
- Click Settings > GravityExport
- Make sure you have enabled the download on the GravityExport feed
- Click on GravityExport Filters to view your export filters
- Click Add New to create a new filter, or select an existing one to edit it
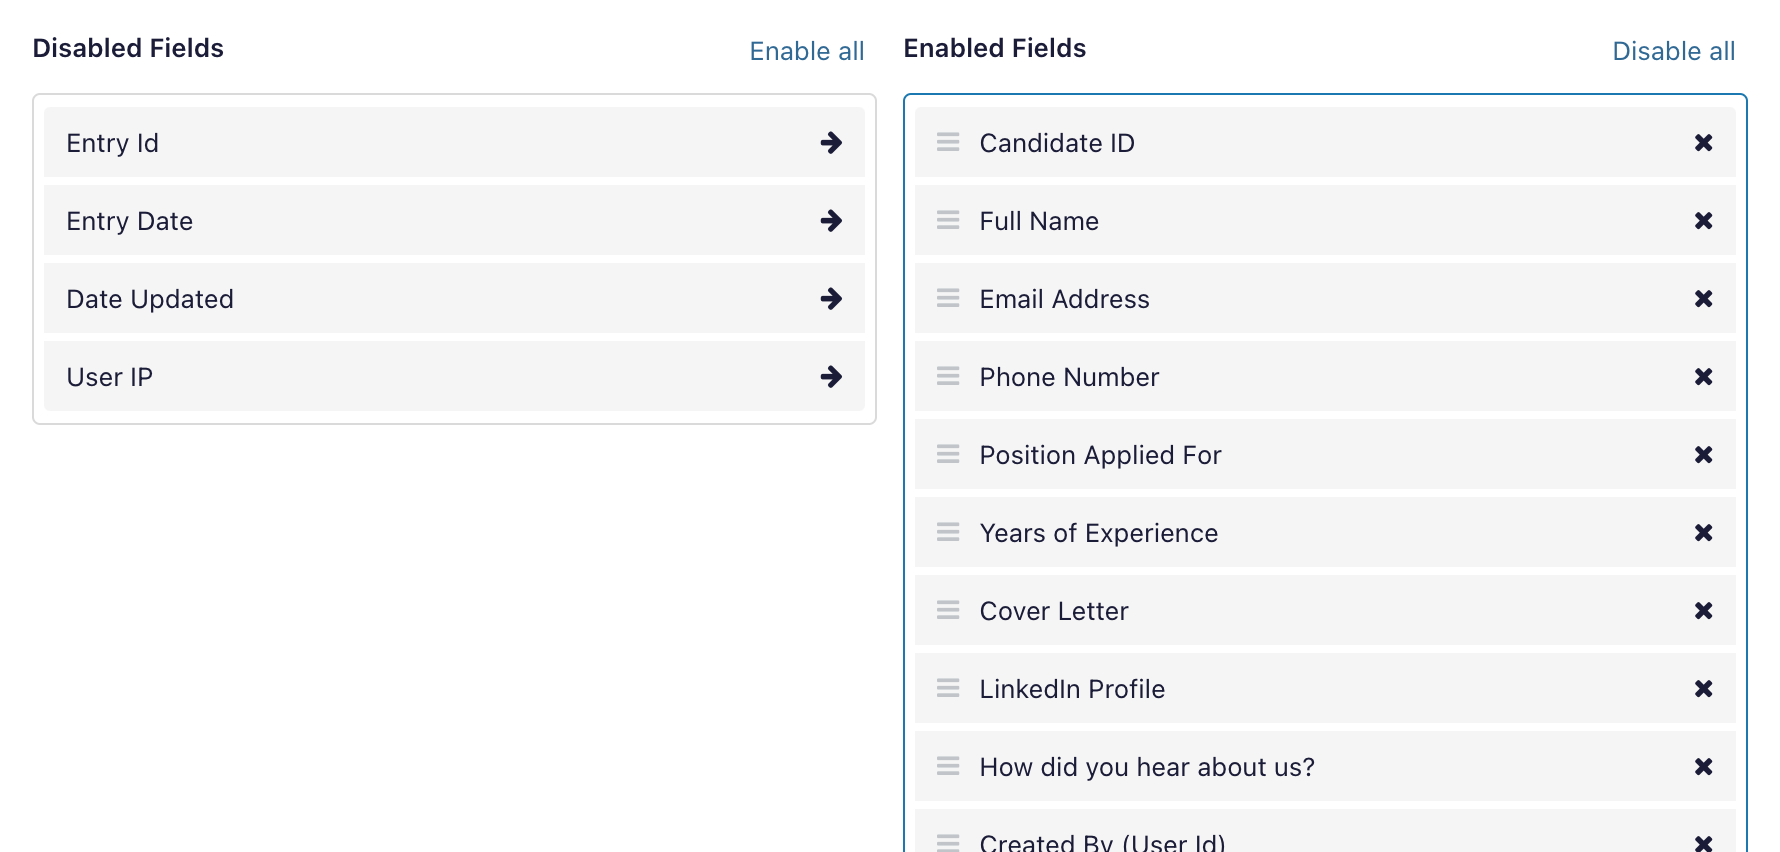
Select the fields to include
Inside the filter, you’ll see a list of all form fields. Toggle fields on or off to control what appears in the export.
- Fields that are enabled will be included in the exported file
- Fields that are disabled will be excluded
Set up conditional logic for date filtering
If you want your scheduled export to include only recent entries (for example, the past week’s submissions), add a condition using the Conditional Logic section of the filter.
- Enable Conditional Logic on the filter
- Set the condition to Entry Date > is after > the past week
This works well with weekly scheduling—each export will contain only the entries submitted since the last report.
You can also filter by other criteria, such as specific field values, payment status, or entry approval status.
Additional filter options
The export filter includes several other configuration options:
- Header position – Control where column headers appear in the exported file
- Multiple rows – For List fields and GP Nested Forms, add a distinct row for each item.
Configure the Save feed #
The Save feed is where you configure the schedule, file format, and storage location for your export.
- Navigate to Forms > select your form > Settings > GravityExport Save
- Click Add New to create a new Save feed
- Enter a descriptive Feed Name (e.g.,
Client report weekly)
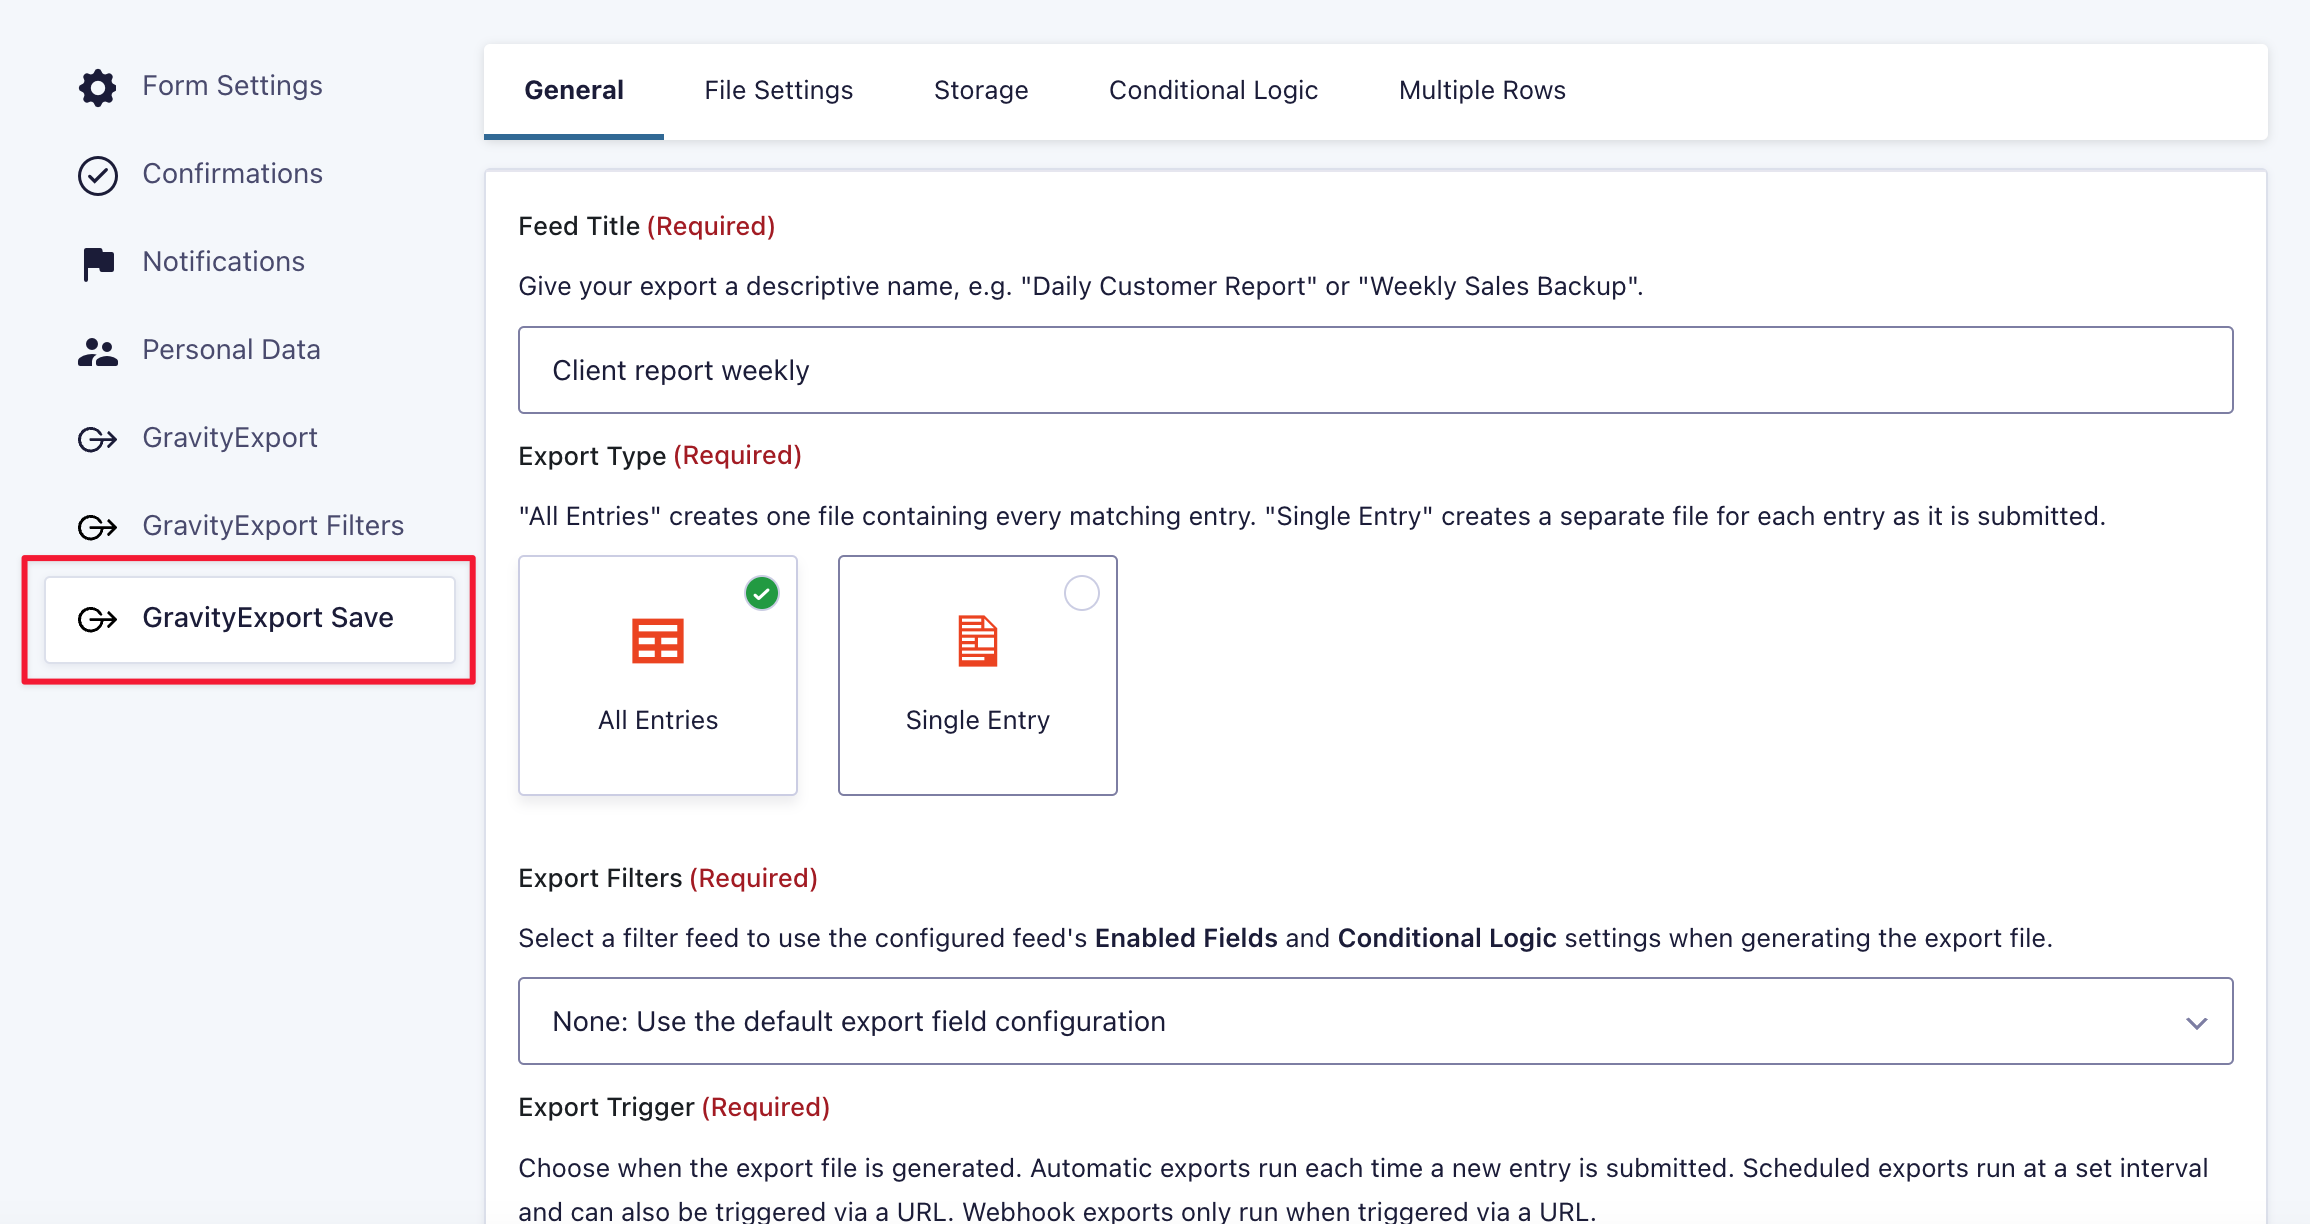
Choose the entry scope
Under Entry Scope, select which entries to include:
- All Entries — Exports all entries that match your filter criteria (most common for scheduled reports)
- Single Entry — Exports one entry at a time (useful for per-submission exports)
For scheduled reports, you’ll typically select All Entries.
Select an export filter
Under Export Filter, choose the filter you created in the previous step. This determines which fields and entries are included in the export.

3. Set the schedule interval #
Under Export Trigger, select Scheduled. This reveals the scheduling options.
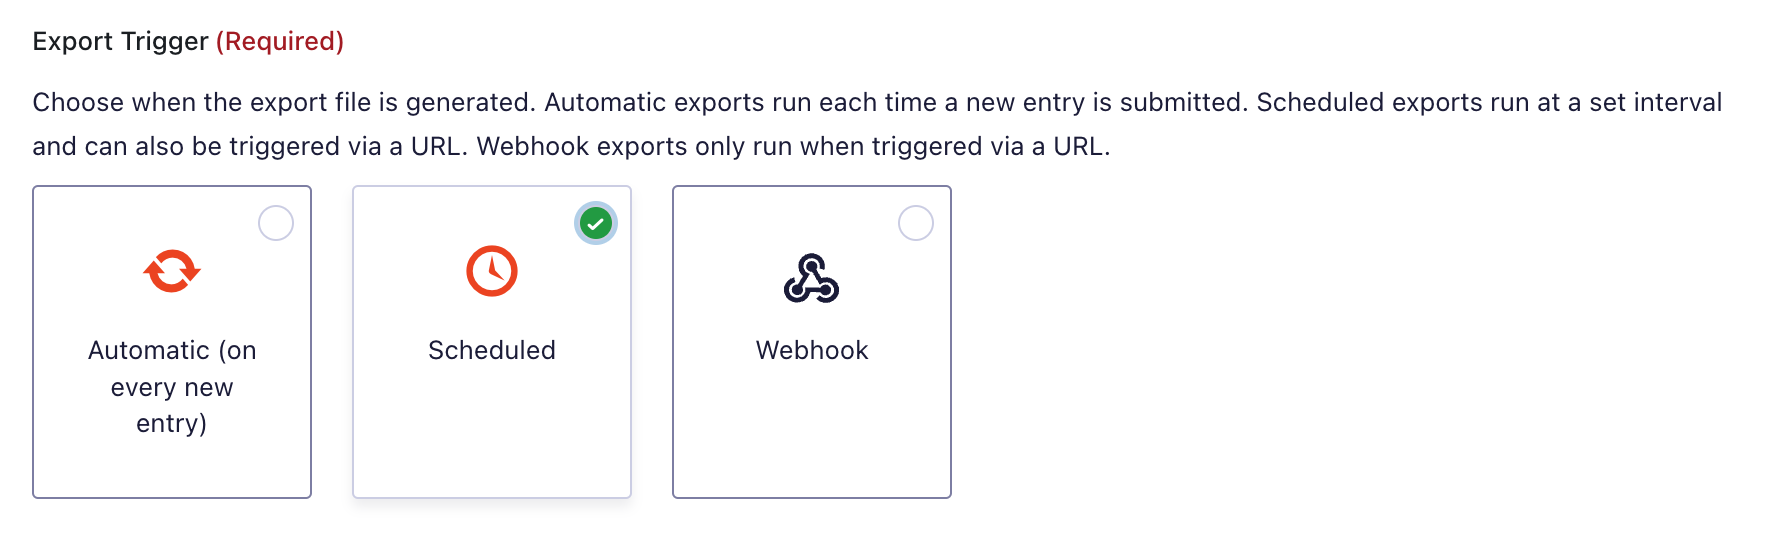
Note: The default trigger is Automatic, which runs the export every time a new entry is submitted. Select Scheduled to run on a recurring interval instead.
Choose a Schedule Interval from the available options:
| Interval | How often it runs |
|---|---|
| Every hour | Once per hour |
| Twice daily | Every 12 hours |
| Daily | Once per day |
| Weekly | Once per week |
| Custom | Every n hours (you define the number) |
If you select Custom, an additional field appears where you can enter the number of hours between each export. For example, entering 48 would run the export every two days.
Enable failure alerts
Check the Failure Alerts box to receive a WordPress dashboard notification if an export fails to run. This helps you catch issues early, especially for reports your team or clients depend on.
4. Configure the file settings #
Choose a file format
Under File Format, select the output format for your export:
- Excel (.xlsx) — Best for stakeholders who work in spreadsheets
- CSV (.csv) — A lightweight, universal format compatible with most tools
- PDF (.pdf) — Best for formatted, read-only reports
Choose a storage location
Under Storage Location, select where GravityExport should save the exported file:
- Local folder – Saves the file to a directory on your site’s server. Enter the file path in the Path field.
- Dropbox – Sends the file to a connected Dropbox account
- Box – Sends the file to a connected Box account
- SFTP – Sends the file to another server via SFTP (Secure File Transfer Protocol, a method for securely transferring files between servers)

Handle multi-row fields
If your form includes list fields or nested form fields, enable the Split multi-row fields option to expand each item into its own row in the export. This is useful when a single entry contains multiple values that need to appear as separate lines.
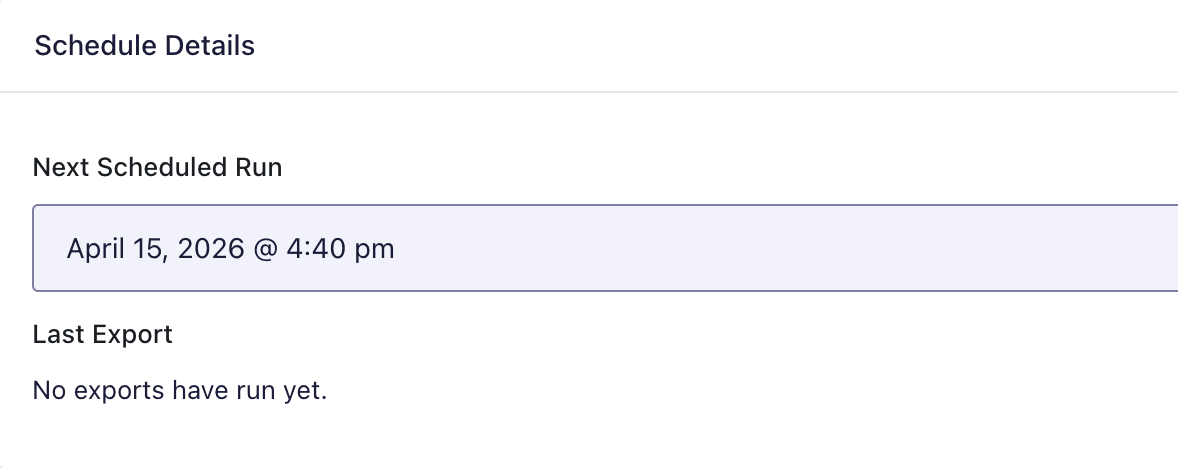
5. Save and verify #
- Click Save Settings to activate the scheduled export
- After saving, the feed settings display the Next scheduled run time and the Last export status
Your scheduled export is now active. GravityExport will automatically run the export at each interval and save the file to your chosen storage location.
Scheduling tips #
- Pair date filters with your schedule interval. If you schedule a weekly export, set your export filter to include only entries from the past week. This prevents duplicate entries across reports.
- Use descriptive feed names. If you have multiple Save feeds for the same form (e.g., one for your client and one for internal use), clear names make it easier to manage them.
- Check the last export status. After the first scheduled run, verify that the export completed successfully by checking the status on the Save feed settings page.
- Enable failure alerts. Dashboard notifications help you catch failed exports before your team or clients notice missing reports.
- Consider a custom interval for non-standard schedules. The custom option accepts any number of hours, so you can set intervals like every 6 hours, every 2 days (
48), or every 3 days (72).
Other trigger options #
In addition to scheduled exports, GravityExport offers two other trigger methods:
| Trigger | How it works | Best for |
|---|---|---|
| Automatic | Runs the export every time a new entry is submitted | Real-time file updates |
| Scheduled | Runs the export on a recurring interval | Regular reports (daily, weekly, etc.) |
| Webhook | Runs the export when a URL is accessed | Custom schedules or automation workflows |
The Webhook option generates a public trigger URL that you can call from external services like FastCron, Zapier, or Make. This is useful if you need a schedule that doesn’t fit the built-in intervals, such as “every second Thursday” or “the first Monday of each month.” Learn more.
