
Connecting FTP to GravityExport
Note: FTP export needs the full version of GravityExport. GravityExport Lite does not include it.
GravityExport allows you to save entries to a remote FTP server. Follow these steps to connect GravityExport to FTP.
1. Find Your FTP Details #
You should be able to find your FTP login details from inside your hosting account. Copy these details for later.

2. Create a New “GravityExport Save” Feed #
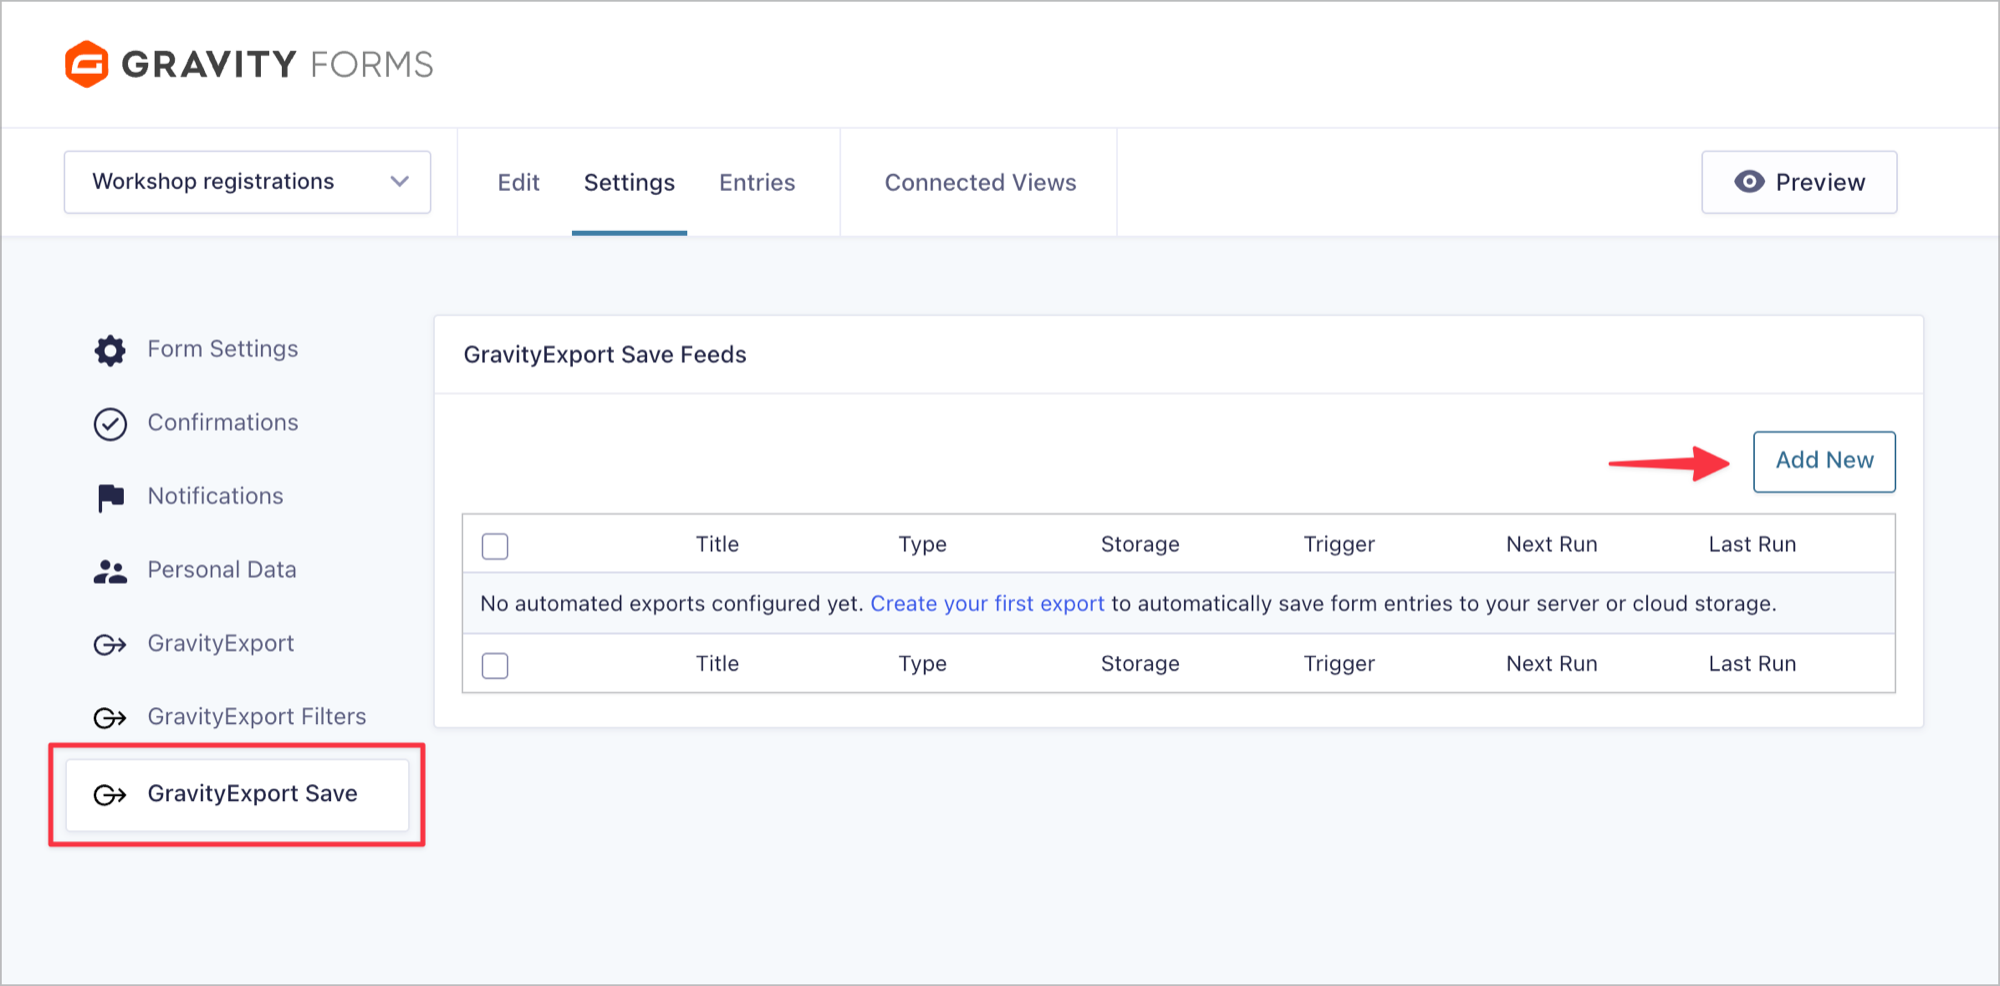
In your WordPress admin, go to Forms, hover over your form and click Settings. Open the GravityExport Save tab and click Add New. On GravityExport 1.15 and 1.16, the tab appears only once the form’s download URL is enabled or the form already has an active Save feed. If it isn’t there, open the GravityExport tab and click Enable download URL first, or update GravityExport.
3. Configure the FTP Storage Settings #
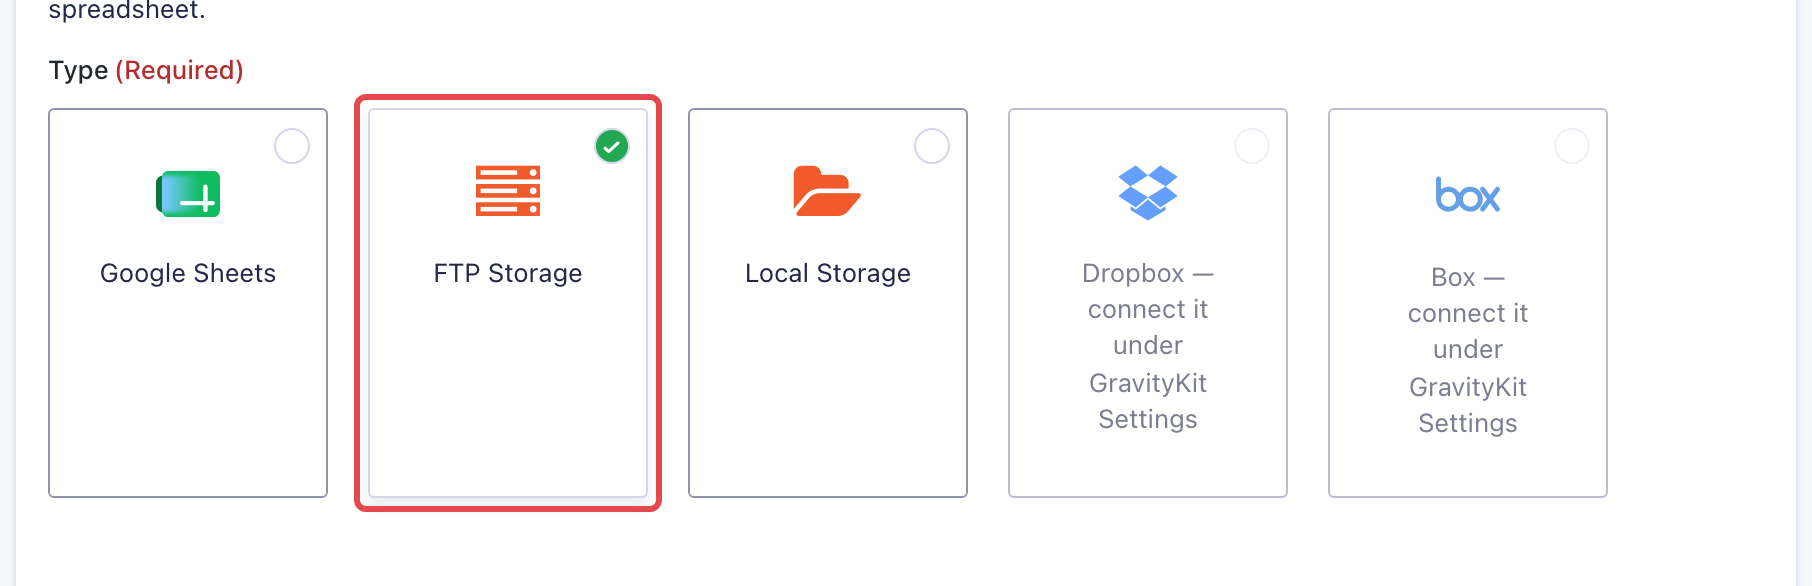
Configure the settings for your report, then open the Storage tab. Under Storage Destination, select the FTP Storage tile (alongside Google Sheets, Local Storage, Dropbox, and Box).
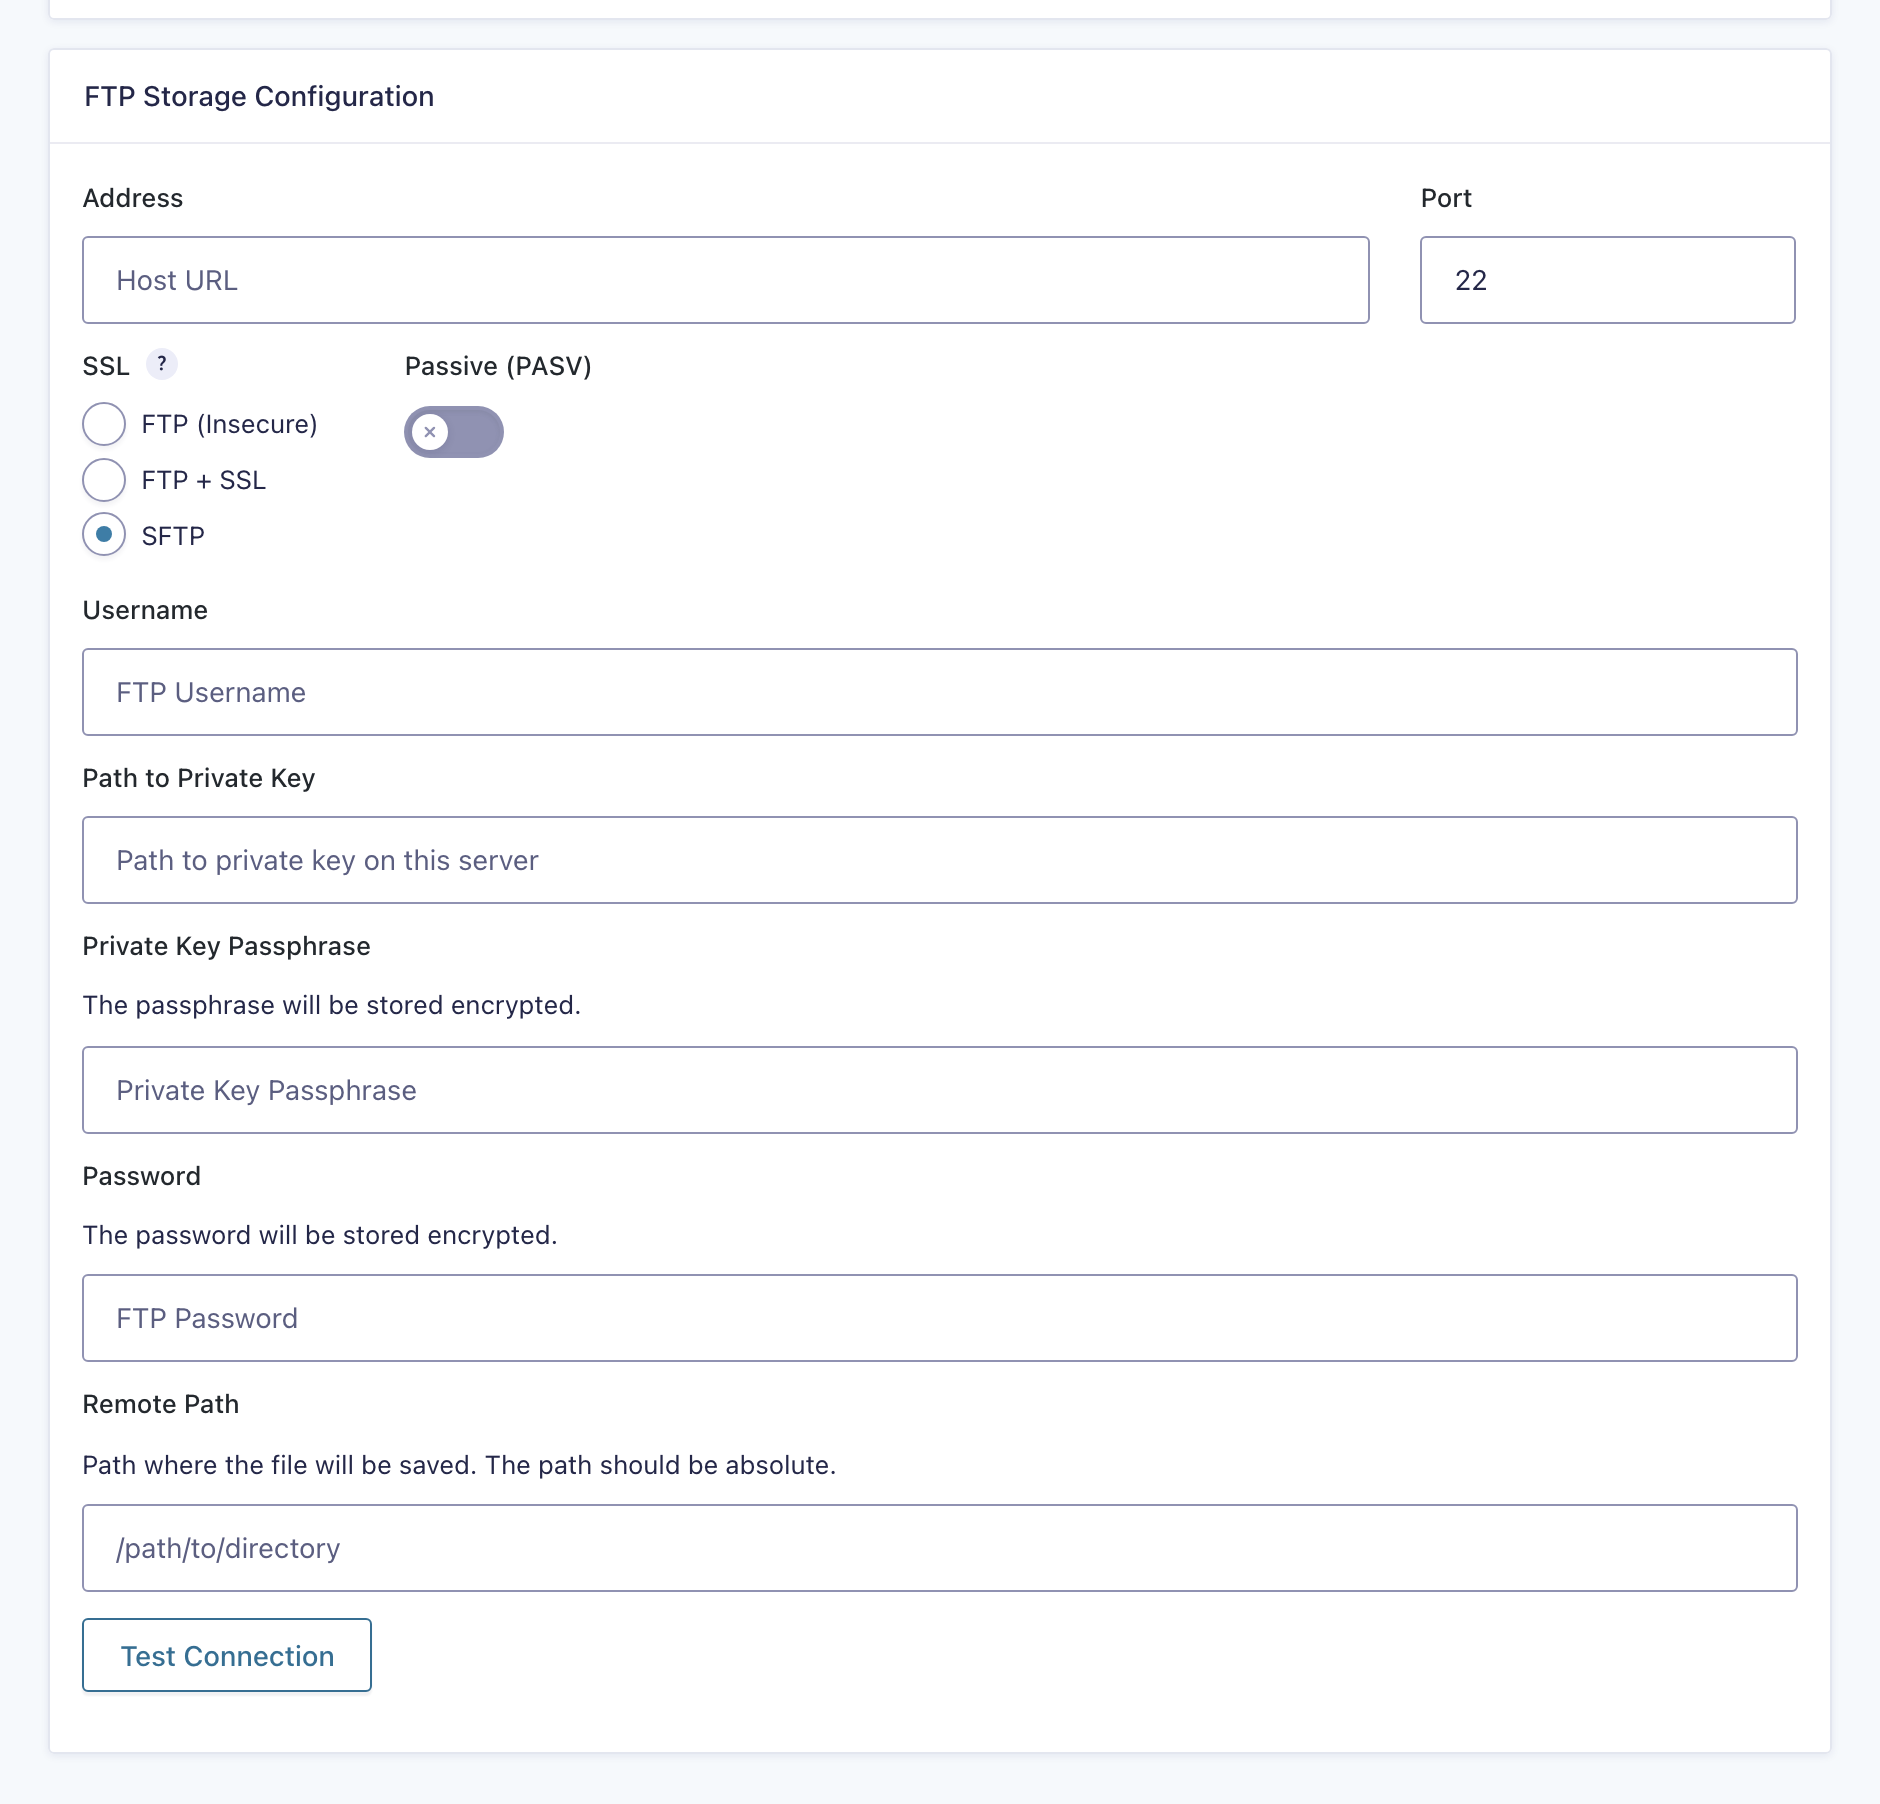
The FTP Storage Configuration settings now appear. Enter the Address, Port, Username, Password and Remote Path, and under SSL choose FTP (Insecure), FTP + SSL or SFTP. SFTP and port 22 are selected by default, so a plain FTP server usually needs FTP (Insecure) and port 21. With SFTP selected, the Path to Private Key and Private Key Passphrase fields are there for key-based logins. Click Test Connection to check the details before you save.
When you’re finished, click Save Settings. With the default Automatic trigger, a file is sent to your FTP server each time a new entry comes in. You can also switch the feed to a schedule or a webhook, or send a file straight away with Export Now.

