Published
•
Updated
Feature Highlight: Maps info boxes
In this edition of Feature Highlights, we’re exploring the Info Boxes feature for the GravityView Maps layout. Info boxes allow you to display information about an entry when a user clicks on that entry’s map marker. Info Boxes are useful for displaying summary data, links, or custom content related to entries displayed on a map.…
In this edition of Feature Highlights, we’re exploring the Info Boxes feature for the GravityView Maps layout. Info boxes allow you to display information about an entry when a user clicks on that entry’s map marker.
Info Boxes are useful for displaying summary data, links, or custom content related to entries displayed on a map. Keep reading as we show you how to configure Info Boxes for your map-based applications! 👇
About the GravityView Maps Layout
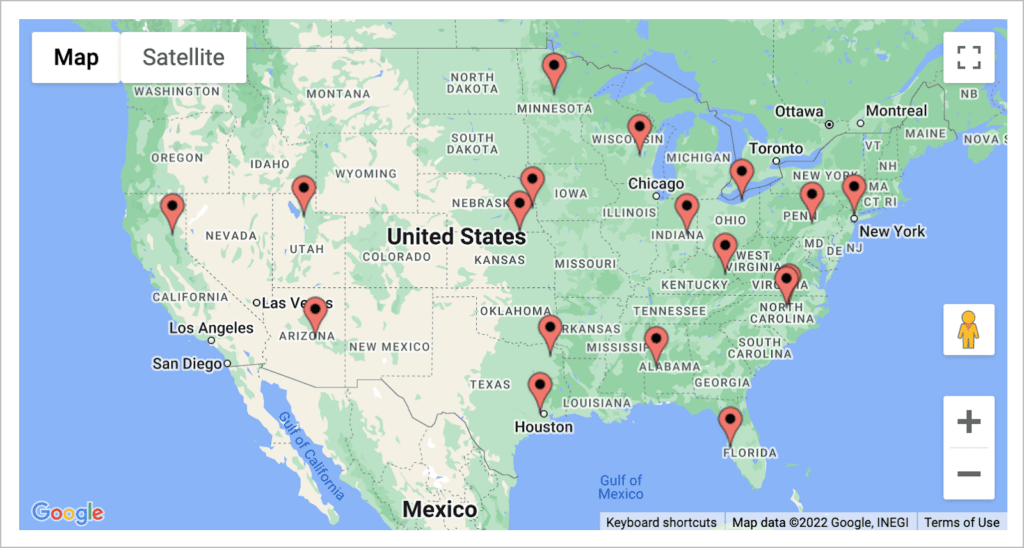
GravityView’s Maps layout allows you to display Gravity Forms entries as markers on a Google Map (the most popular mapping app in the world!). This enables you to build geolocation directories, store locators, local business directories, and much more!
Pro tipIf you want to see exactly how the Maps layout works, check out our live demo.
For more information about setting up the Google Maps integration and building directories with the Maps layout, check out these helpful blog posts:
What are info boxes?
Info boxes allow you to display additional information about an entry on a map by clicking the entry’s marker. When you click the marker, a box appears with content about that entry.
It’s your choice what content you want to add inside the info box. You can populate it dynamically using information from the entry, or add custom text, links or other HTML content.
In the example above, we’re displaying the business name, address and a link to view the business’s website. Now let’s take a look at how to add info boxes to Views using the Maps layout.
Adding info boxes to your maps applications
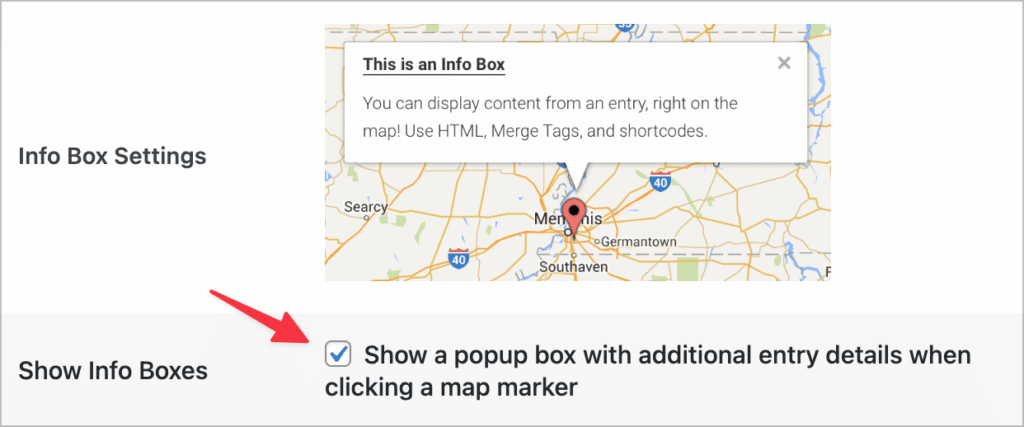
Open your View editor and scroll down to the View Settings box at the bottom of the page. Now click on the “Maps” tab and check the box that says “Show a popup box with additional entry details when clicking a map marker”.
After enabling the Info Boxes feature, you’ll see three new input boxes appear below, labeled ‘Title’, ‘Content’ and ‘Image URL’. Next to each box is a button that brings up a list of Gravity Forms merge tags.
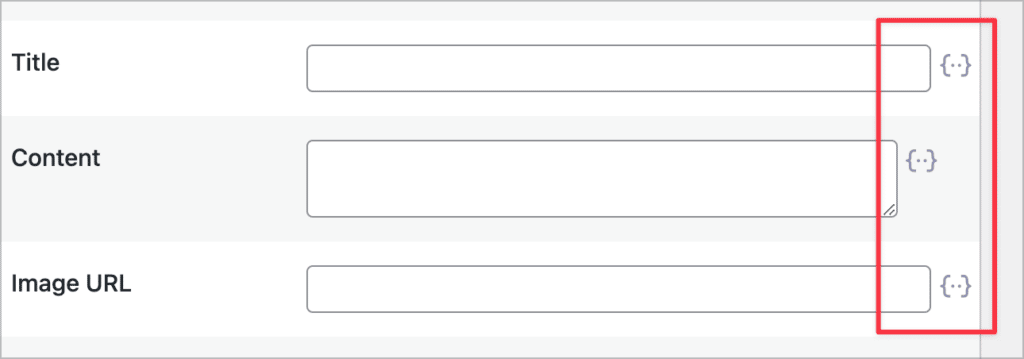
Merge tags allow you to dynamically display the value submitted for a specified field. In the example below, we’re displaying the business name, the business summary and the business’s featured image.
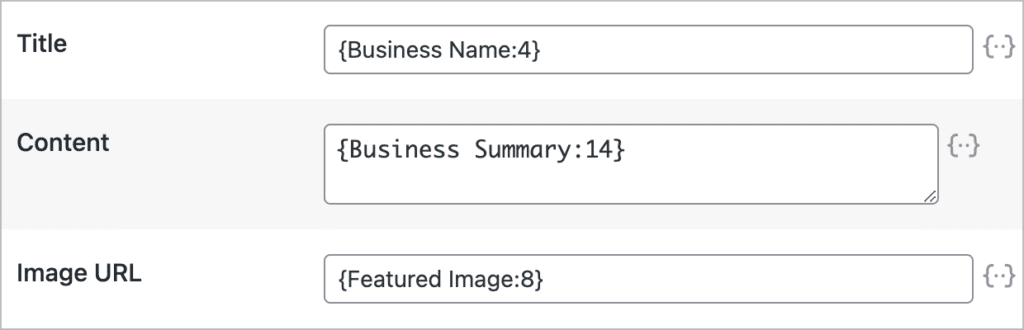
If you add an image URL to your info box, you can also specify the image alignment (top, left or right).

Here’s an example of what the info box looks like on the front end. As you can see, when clicking on the map marker, we can see the featured image for that business, the name of the business and a short summary description.
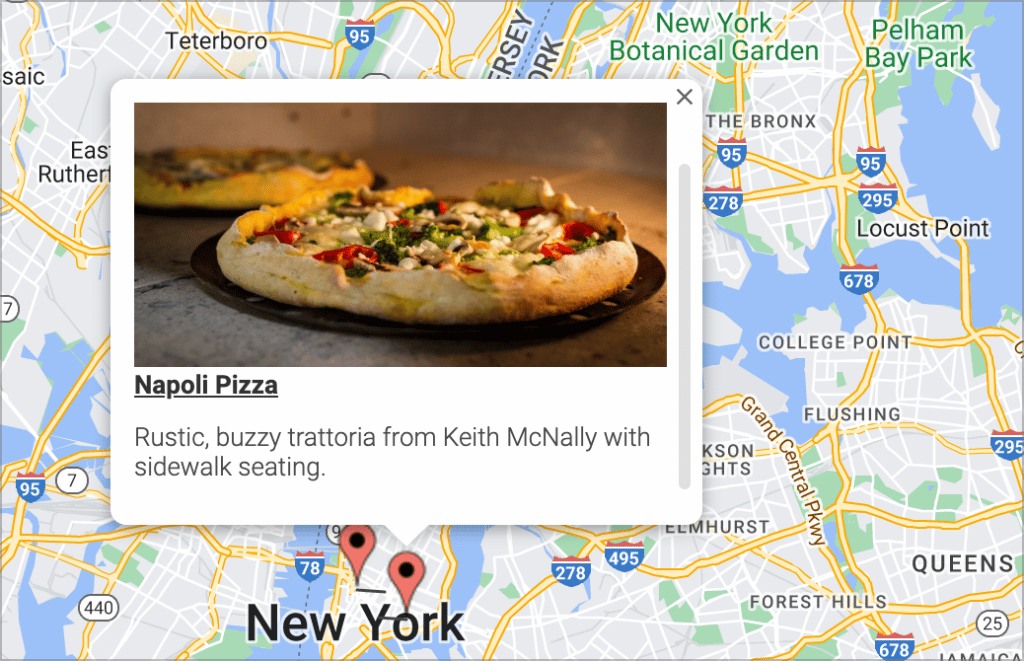
Map info boxes also support HTML content, so feel free to experiment with adding your own custom designs and anchor links!
Add info boxes to your Gravity Forms maps applications
In this edition of Feature Highlights, we took an in-depth look at the Info Boxes feature for the GravityView Maps layout. Info boxes allow you to display additional details about an entry when a user clicks on that entry’s map marker.
If you’re new to GravityView and you want to learn more about the Maps layout, check out this helpful blog post where we show you how to build a Gravity Forms geolocation directory!

Helpful tips right in your inbox.
Subscribe to get the latest articles, information on releases and helpful Gravity Forms tips!
More articles

10 things you can ask AI to do with Gravity Forms (using the free GravityKit MCP)
See 10 practical things you can ask AI to do with Gravity Forms using the free GravityKit MCP: create forms, manage entries, build Views, and more.

Launch Log: theme template editing in Block MCP, Shield silentCAPTCHA for Zero Spam, and GravityView fixes
Block MCP adds safe theme template editing, Gravity Forms Zero Spam gains Shield silentCAPTCHA support, and GravityView fixes lightbox and notice bugs.

GravityKit turns 12: a year in review, and 30% off Lifetime All Access
GravityKit turns 12. A look back at a year of GravityView 3.0, GravitySearch, and AI-assisted building, plus a birthday sale on the Lifetime All Access Pass.