Published
•
Updated
How to build a business directory with Gravity Forms
Build a custom business directory with Gravity Forms and GravityView without writing any code. Drag-and-drop builder, preset templates, and powerful filtering included.

Are you planning to build a Gravity Forms business directory? You’ll need a robust, flexible plugin that allows you to display listings on the front end.
There are plenty of dedicated WordPress directory plugins available on WordPress.org, but none of them allow you to build a directory using Gravity Forms.
That’s where GravityView comes in. GravityView is a powerful add-on for Gravity Forms that allows you to display your form entries on the front end for use in powerful applications. Using GravityView and Gravity Forms, you can build a custom business directory without writing any code.
With preset layout templates, a drag and drop builder, and a range of powerful extensions, GravityView is the ultimate Gravity Forms directory add-on!
Wanna try it?
Spin up a demo
Check out a live demo of the finished business directory and get your own free trial site preloaded with all GravityKit add-ons!

Download the free business listing form template now!
Import the template into Gravity Forms and customize as necessary.
Sneak peek
Here is a quick look at the directory we’re going to build in this tutorial:
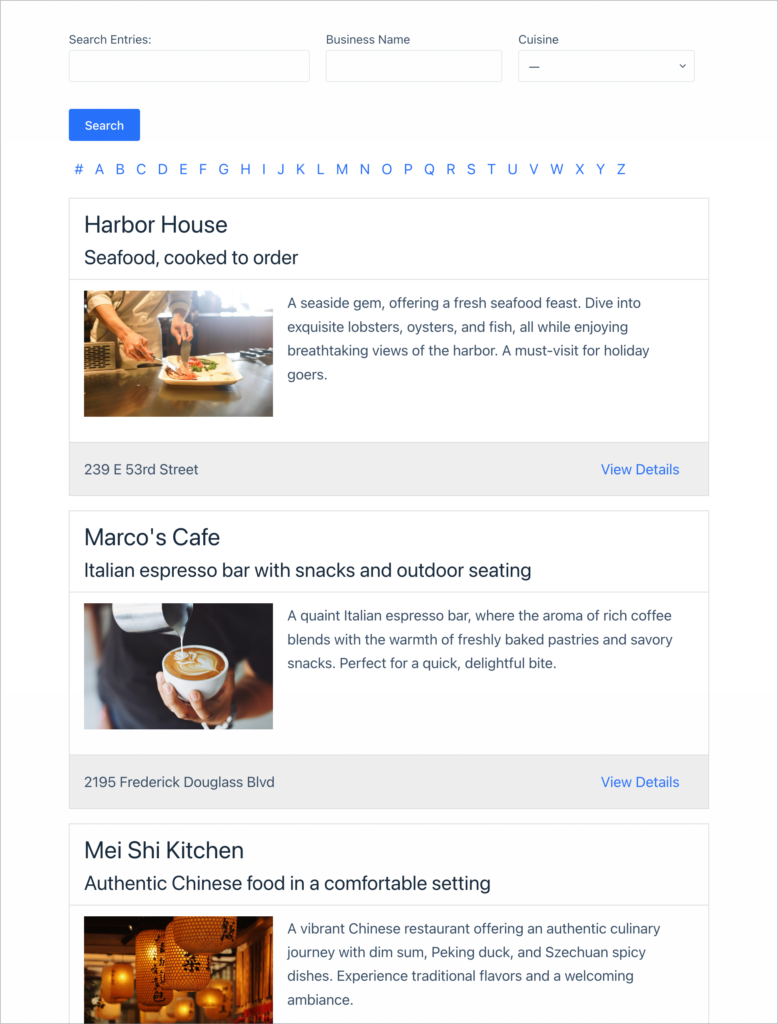
When clicking “View Details”, users are taken to the Single Entry page where they can view more information about the listing, including the restaurant’s full address and contact details:
Full video course
Prefer to watch a video rather than read a long article? Check out the full step by step course here:
What is a business directory?
A business directory is a website that helps users find businesses in different industries. Business directories display relevant information such as the services offered by the business, the location of the business, and the business’s contact details.
Building a business directory is a great way to promote local businesses and make an extra income by charging companies to post listings.
Getting started with GravityView
GravityView is an add-on for Gravity Forms that allows you to display form entries on the front end of your website. GravityView is a multi-purpose plugin that allows you to build all kinds of Gravity Forms-powered applications.
Due to its functionality, GravityView is also the ultimate Gravity Forms directory plugin.
Creating the directory listing form using Gravity Forms
To create a new form in Gravity Forms, we’ll hover over “Forms” and click “New Form”. After giving our form a name, we can start adding fields to it using the drag and drop form builder.
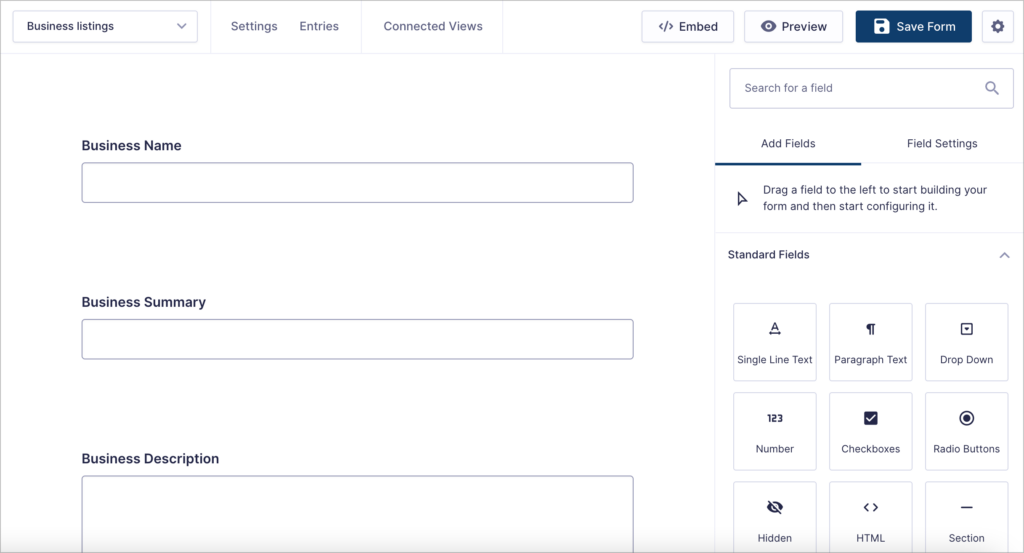
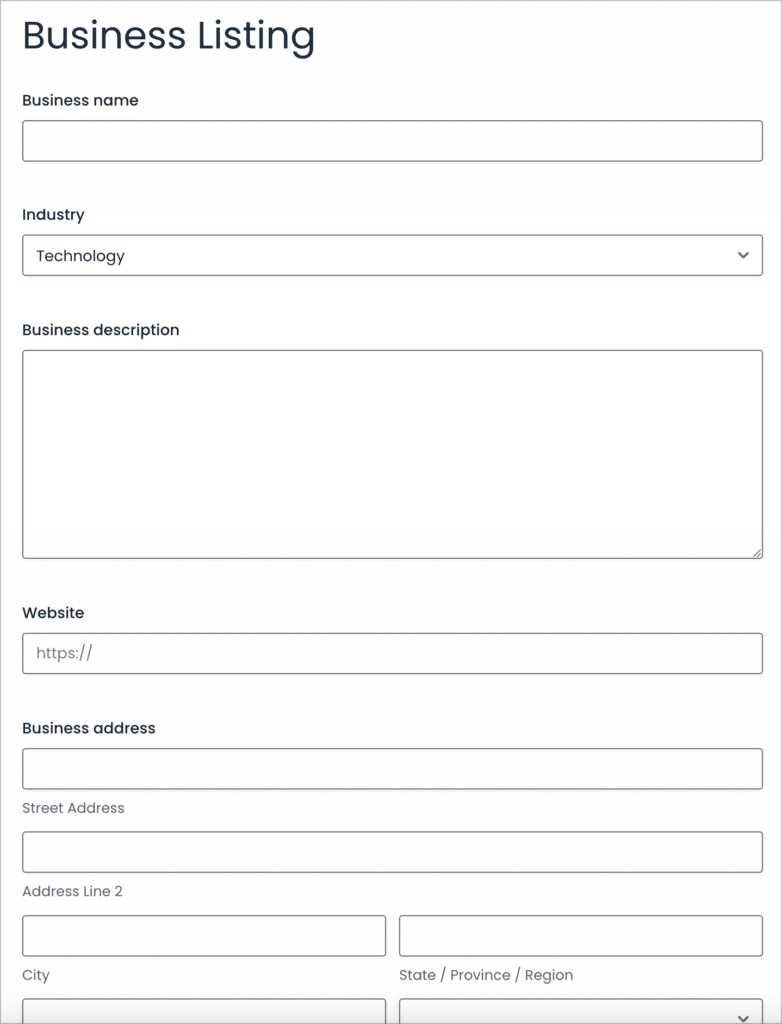
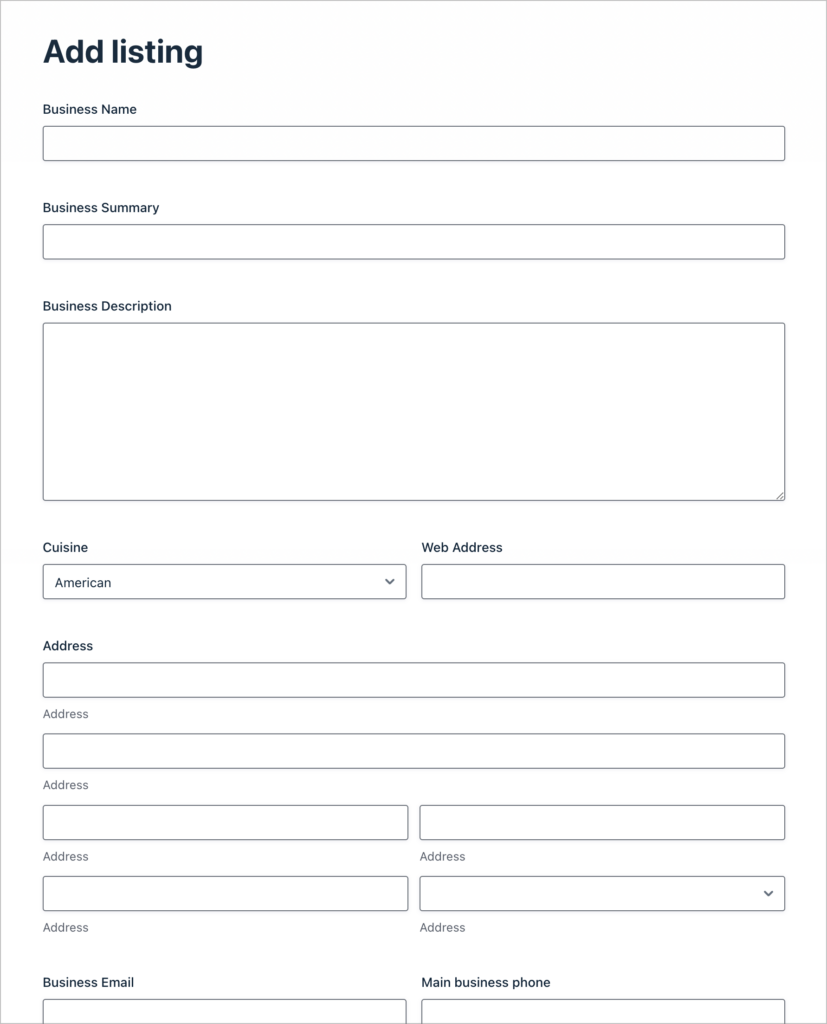
Make sure you add fields for all the relevant information that you want to display in your directory. For this example, we’ll add the following fields:
- Business Name (Single Line Text field)
- Business Summary (Single Line Text field)
- Business Description (Paragraph field)
- Cuisine (Drop Down field)
- Address (Address field)
- Business Phone (Phone field)
- Business Email (Email field)
- Web Address (Website field)
- Featured Image (File Upload field)
Here’s what our directory listing form looks like on the front end:
Save time by downloading the free business listing form template now!
After creating oour form and embedding it on a page or post, the next step is to set up a View to display business listings on the front end.
Creating a View to display Gravity Forms entries
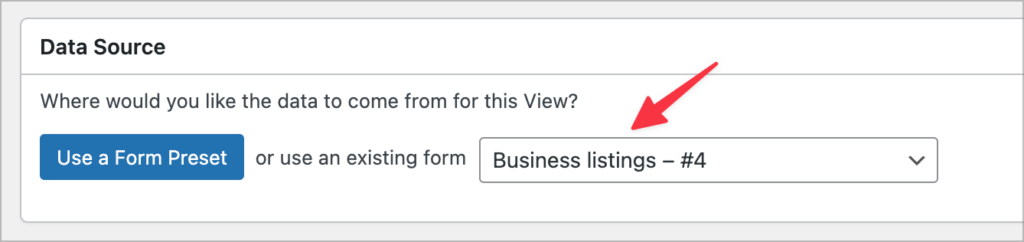
To create a new View, we’ll hover over “GravityKit” in the WordPress sidebar and click “New View”. After giving our View a name, we’ll select our new form as the “Data Source”. This tells GravityView where to pull data from for displaying on the front end.
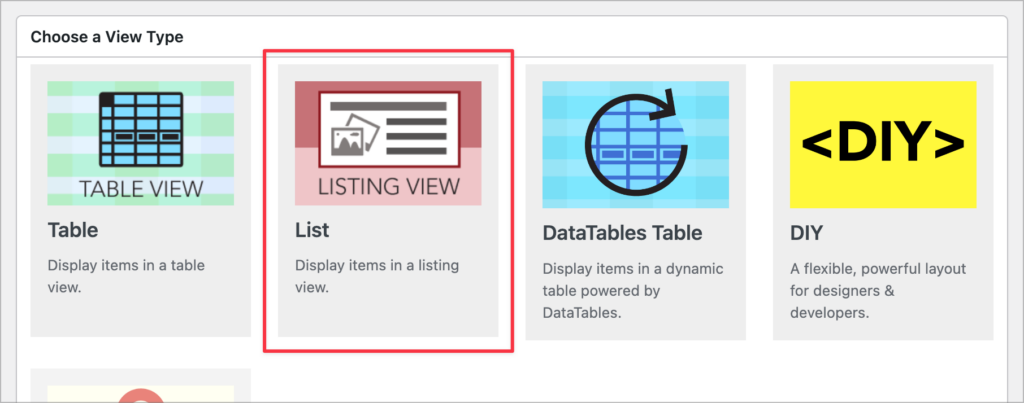
Next, we need to choose a View type. We’ll select the “List” type.
After selecting a View type, we can start constructing our directory using GravityView’s drag and drop builder.
Configuring the Multiple Entries Layout
The Multiple Entries layout is the main directory page where all of our listings will show up one after the other.
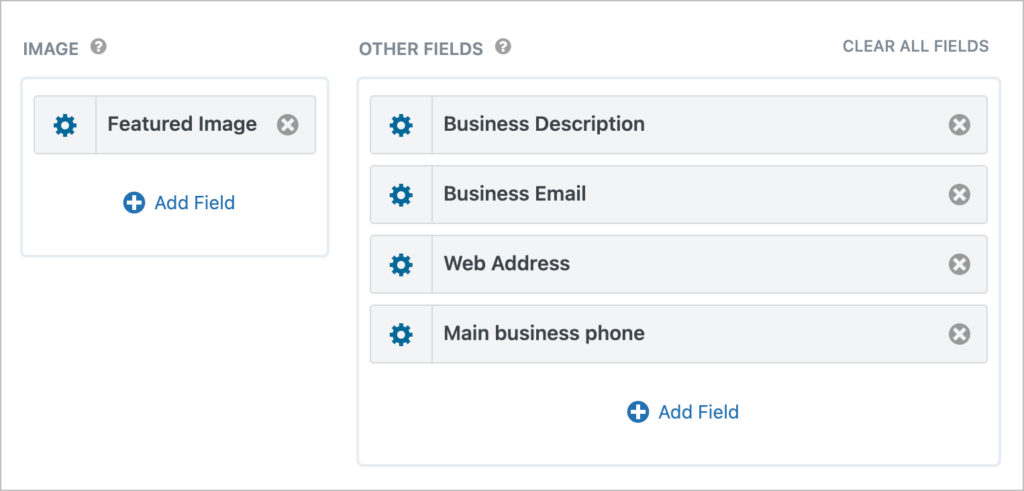
To get started, we’ll scroll down to the “Entries Fields” section of the editor . Here, we’ll add the “Business Name” to the “Listing Title” section, the “Business Summary” to the “Subheading” section, the “Featured Image” to the Image section, and the “Business Description” to the “Other Fields” section.
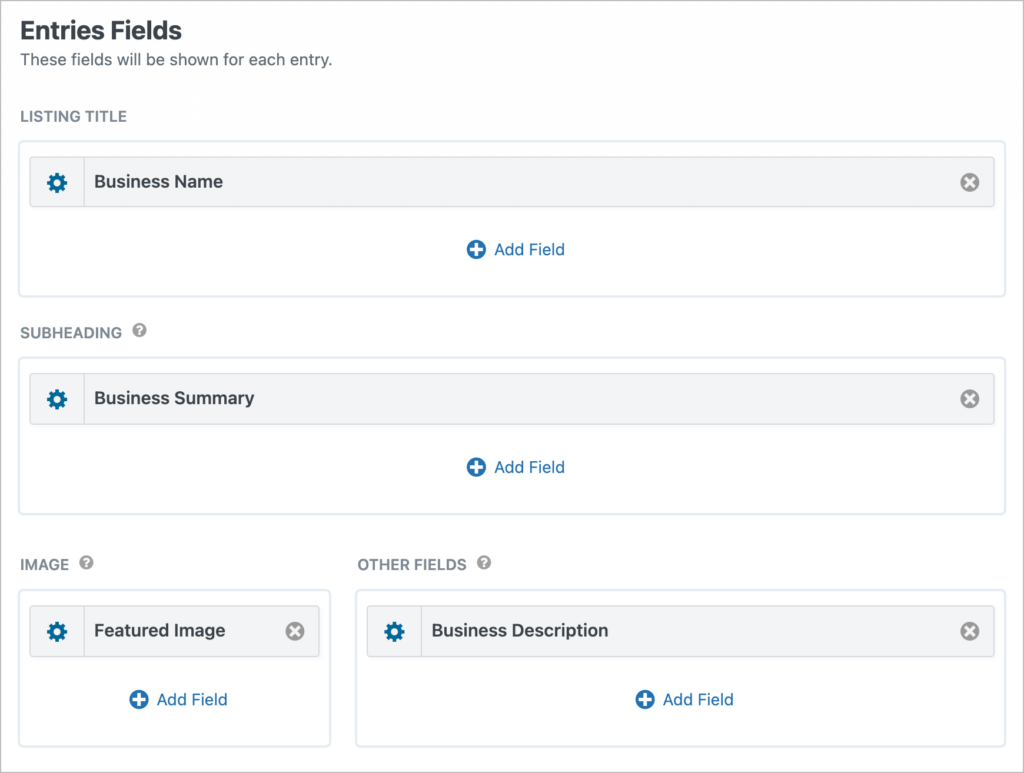
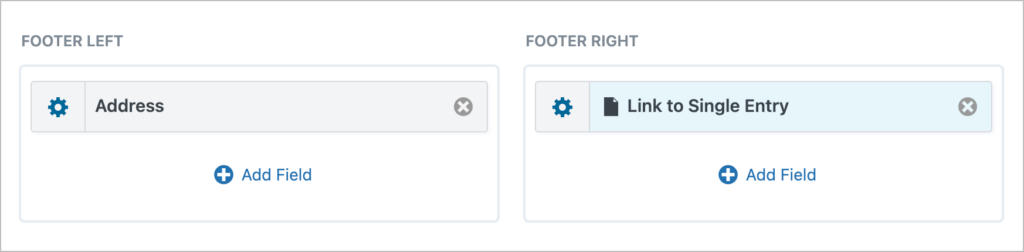
Finally, we’ll add the “Street Address” to the left footer area and in the right footer area, we’ll add the “Link to Single Entry” field. This field outputs a link to the Single Entry where users can view more information about a specific business (more on this soon).
Configuring the search bar
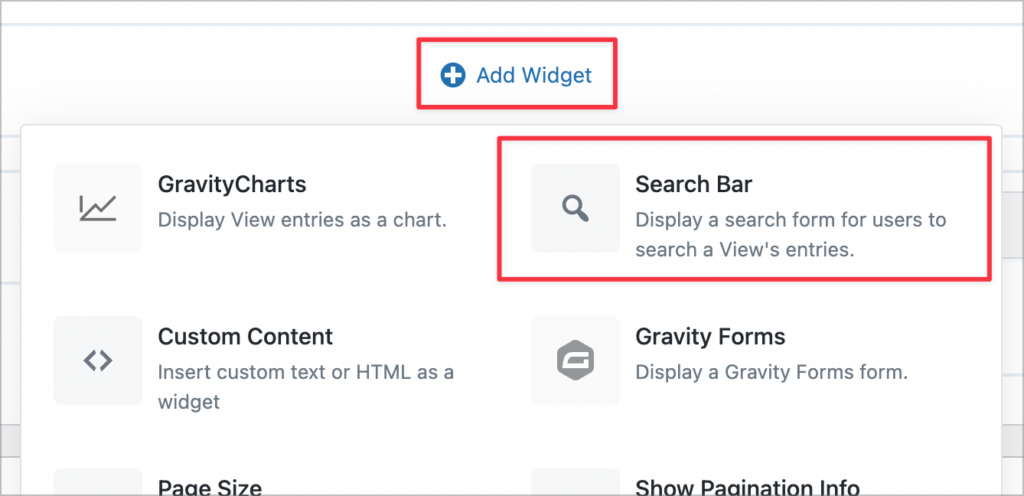
Now that we’ve added all the fields we need, let’s turn our attention to the search bar. To add a search bar to our View, we’ll click on the “Add Widget” button and select the Search Bar widget.
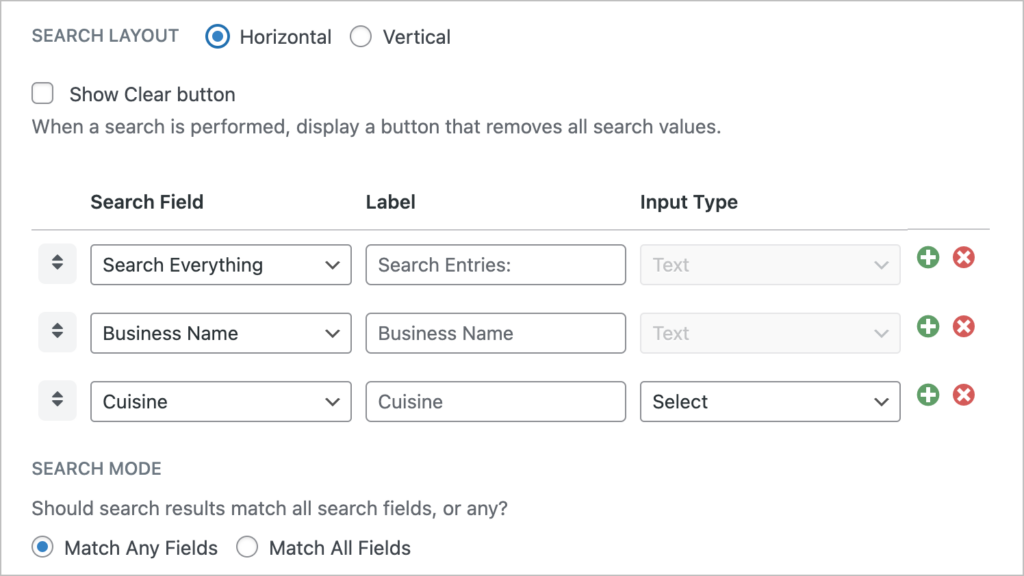
To configure the search settings, we’ll click on the gear icon next to the widget name. We’ll add three search input fields, allowing users to search fo restaurants by keyword, business name, or cuisine.
GravityView 3.0 gives the search bar more ways to narrow a directory. Date fields now support range presets and a combined date picker, and number fields can take minimum and maximum limits, so visitors can filter listings by exactly the criteria that matter.
Pro tipConsider adding an A-Z Filter widget for additional sorting/filtering options.
Here’s what the Multiple Entries Layout looks like on the front end:
Although it’s looking pretty slick already, we’re not done yet. We still need to configure the Single Entry layout, the Edit Entry layout and configure some View Settings!
Configuring the Single Entry Layout
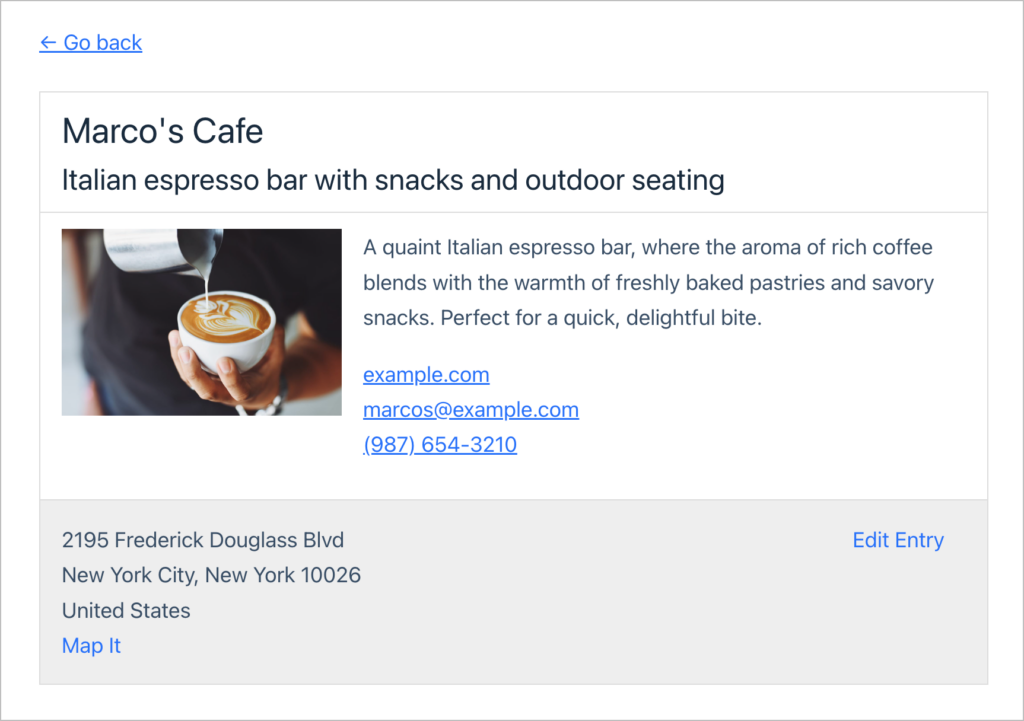
The GravityView Single Entry Layout allows you to view more information about a particular listing. This is the page that users will go to when they click on the “View Details” link at the bottom right of a listing.
To start building out the Single Entry layout, we’ll click on the Single Entry Layout tab at the top.

Here we’re going to add some additional fields that don’t appear on the Multiple Entries layout, including the business’s contact information such as their email, web address, and phone number.
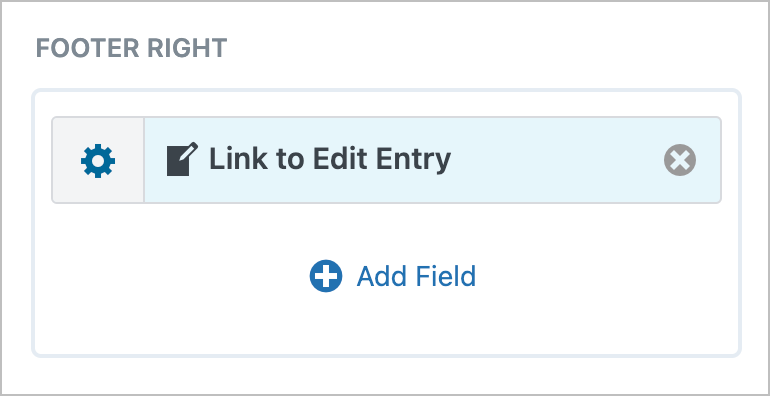
Next, we’re going to add a “Link to Edit Entry” field to the right footer section. This will allow entry creators to update their own listings from the front end.
Here’s what the Single Entry page looks like on the front end:
We’re almost done! All we need to do now is configure the View settings.
Configuring the View settings
GravityView includes a range of options and settings that allow you to customize your View layouts. To edit the View settings, scroll down to the “Settings” meta box.
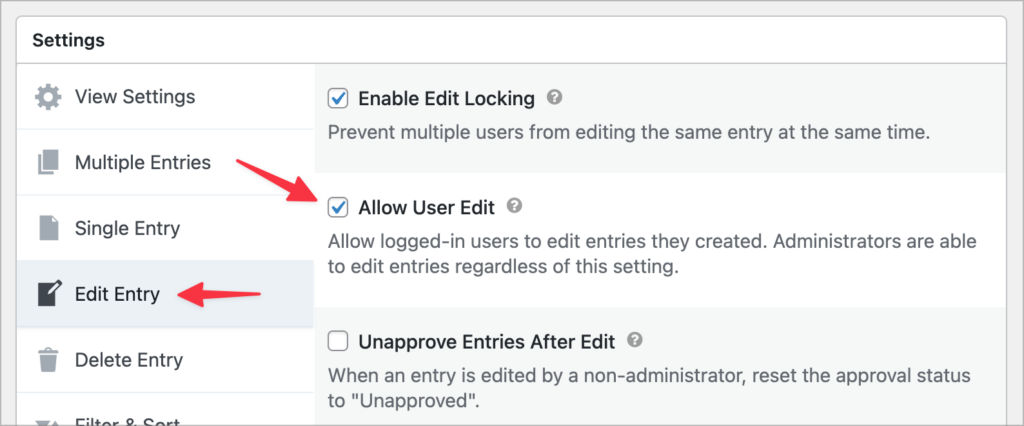
To allow users to edit their own listings, click on the “Edit Entry” tab and check the box that says “Allow User Edit”.
Pro tipYou can use GravityView’s entry approval system to approve new listings before they show up in the directory.
That’s it! You’ve now got a fully functioning Gravity Forms business directory! Now let’s have a look at how you can extend your directory to create more sophisticated layouts.
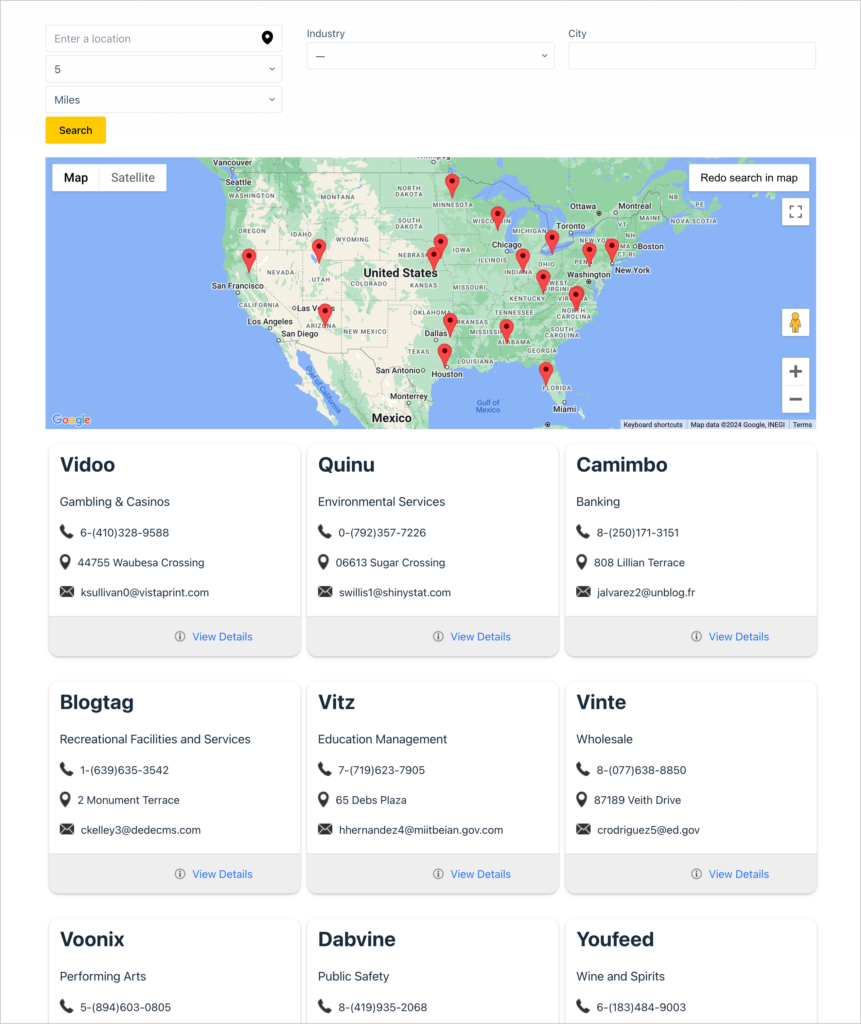
Bonus: Google Maps integration
The GravityView Maps layout allows you to display Gravity Forms entries on a Google Map. The Maps layout is perfect for building geolocation directories or local business directories!
Extending your Gravity Forms directory
GravityView also offers a range of extensions that allow you to customize your directory further by adding additional functionality.
Add social sharing buttons
With the Social Sharing & SEO extension, you can add social share buttons to individual directory listings. This allows users to easily share listings on their social networks.
Rank higher in search engines
The Social Sharing & SEO extension also helps you improve your SEO and rank higher in the search results. The plugin integrates with the most powerful WordPress SEO plugin, Yoast SEO.
This allows you to add custom metadata to your Views and single listings as well as social images and more!
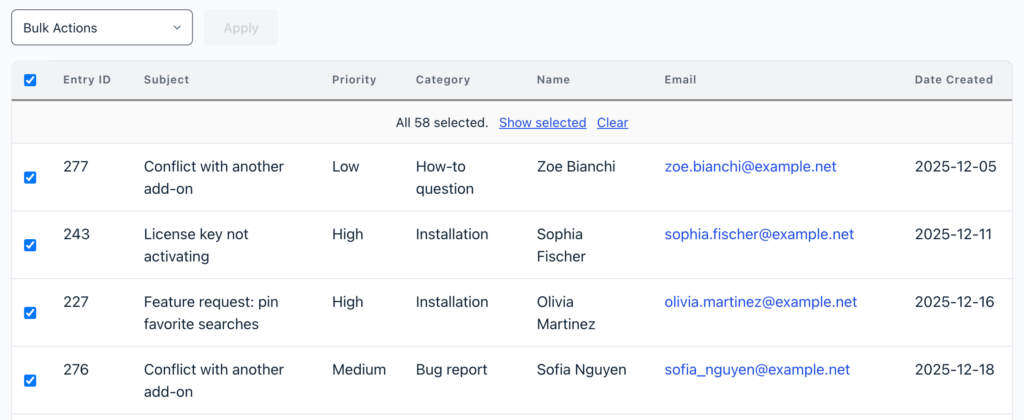
Manage listings in bulk from the front end
If you display your listings in a Table View, GravityView 3.0’s Bulk Actions widget lets approved users approve, edit, delete, or export many of them at once from the front end, with no dashboard access required. It’s a fast way to moderate a busy directory. See the frontend bulk actions documentation to set it up.
Build a custom Gravity Forms directory layout
The GravityView DIY layout allows you to build your own custom directory layout using HTML and CSS. This is perfect for anyone who feels too constrained by GravityView’s preset layout templates.
Prefer not to write code? GravityView 3.0’s Vantage theme gives your directory a clean, modern, responsive look out of the box, so for most directories you can skip the DIY route entirely and reserve HTML and CSS for the finishing touches.
Charge companies for “featured” listings
Are you planning to build a paid business directory? Using GravityView’s Featured Entries extension, you can charge companies to post “featured” listings that show up at the top of the search results.
Filter entries using conditional logic
The GravityView Advanced Filtering extension allows you to filter entries using conditional logic. This gives you full control over what entries are displayed in your directory. Advanced filtering allows you to:
- Show only the entries created by the logged-in user
- Display different entries based on a user’s role
- Restrict entries by date range
- Filter entries based on the URL query parameters passed to the current page
Start building your Gravity Forms directory today
GravityView is a powerful add-on for Gravity Forms that allows you to build powerful directories and other applications.
A business directory is a website that indexes businesses in specific industries and helps users to find the goods and services that they need. In this post, we showed you how to build a Gravity Forms business directory by using GravityView to display form entries on the front end of your website.
So if you’re looking to build a business directory on WordPress, get GravityView today, the best Gravity Forms directory plugin!

Helpful tips right in your inbox.
Subscribe to get the latest articles, information on releases and helpful Gravity Forms tips!
More articles

10 things you can ask AI to do with Gravity Forms (using the free GravityKit MCP)
See 10 practical things you can ask AI to do with Gravity Forms using the free GravityKit MCP: create forms, manage entries, build Views, and more.

Launch Log: theme template editing in Block MCP, Shield silentCAPTCHA for Zero Spam, and GravityView fixes
Block MCP adds safe theme template editing, Gravity Forms Zero Spam gains Shield silentCAPTCHA support, and GravityView fixes lightbox and notice bugs.

GravityKit turns 12: a year in review, and 30% off Lifetime All Access
GravityKit turns 12. A look back at a year of GravityView 3.0, GravitySearch, and AI-assisted building, plus a birthday sale on the Lifetime All Access Pass.
