Market research is an integral part of the product development cycle. The information gained from market research helps brands understand their customers’ problems, pain points, and desired solutions.
When conducting market research, researchers often use spreadsheets or simple word processors. However, these tools have limitations, and don’t always provide the functionality needed for detailed data capture.
In this tutorial, we’re going to show you how to build a custom market research platform on WordPress using Gravity Forms and GravityView—no code required!
Building a custom tool will allow you to customize it to your needs, whether for competitor analysis, pricing research or simply identifying gaps in the market. You can build a tool to be used internally, or create a business out of it by licensing it out to customers and agencies!
💡 Check out our live demo applications and get your own free trial site preloaded with all GravityKit add-ons!
Download the free market research form template now!
Import the template into Gravity Forms and customize as necessary.
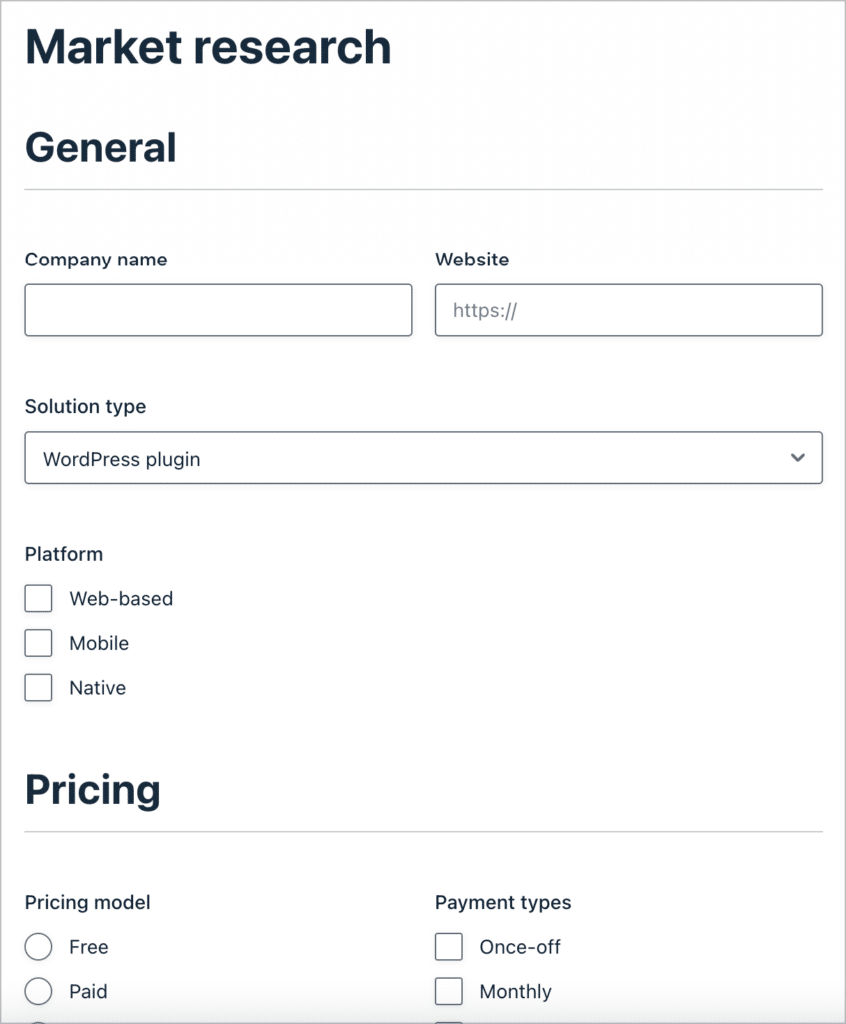
Sneak peek
In this example, we’re going to be building a tool that helps us conduct market research for a fictional list-building service. We’ll be doing competitor research by gathering pricing and sign-up information.
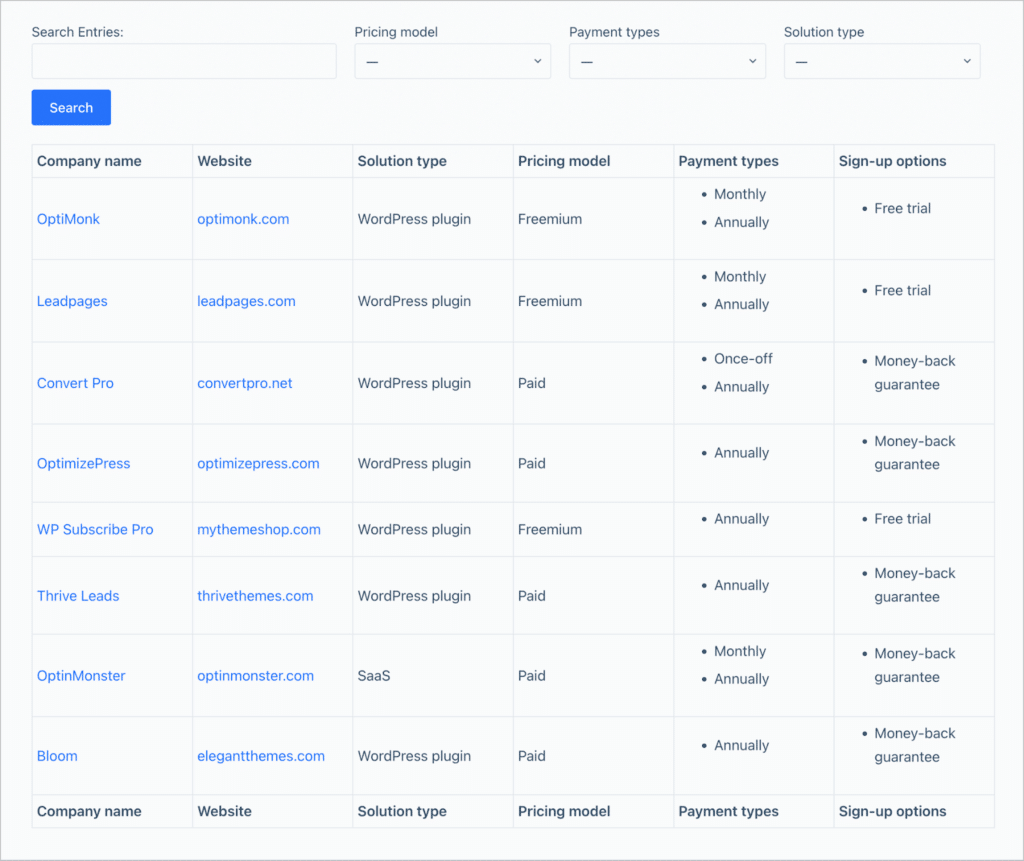
We’ll use Gravity Forms to input the data and GravityView to display that data in a searchable database, making it easy to extract helpful insights.
What you’ll need
Here’s what you’ll need to follow along with this tutorial:
- Gravity Forms
- GravityView
- GravityExport (optional)
Before we start building our own market research tool, let’s take a look at a real-world example of Gravity Forms and GravityView being used for market research.
Real-world example: Dive Ops
WordPress developer Jamie Madden used Gravity Forms and GravityView to create a market research tool called “Dive Ops”. The tool enabled him and his team to conduct competitor analyses on different dive software solutions.
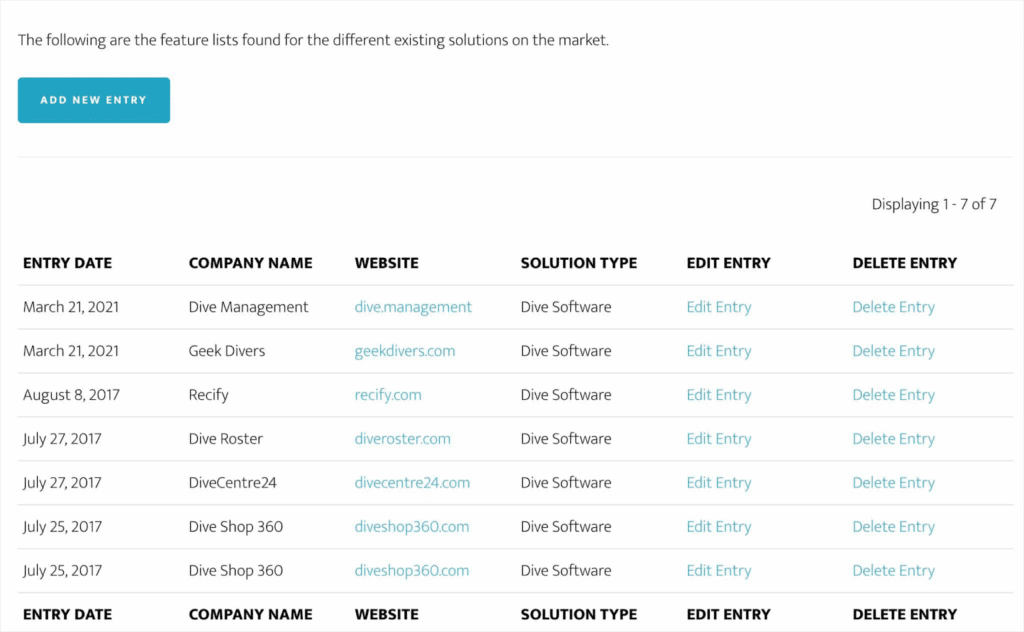
This is a real-world example of the power of GravityView for market research and analysis! You can read more about it in this case study.
What is market research?
Market research refers to the process of gathering information about your target market to help shape brand messaging, verify the success of a new product, or optimize product pricing. Market researchers typically investigate several areas of the market, gathering insights to help businesses succeed and grow.
Why is market research important?
Conducting market research helps brands understand their customers’ problems, pain points, and desired solutions. This information is invaluable when it comes to product creation. Market research also sheds light on other aspects of the market that impact growth. This includes:
- Which competitors are outperforming you in the market
- Your customers’ considerations when choosing a product in your niche
- What factors influence purchase decisions among your target audience
- Attitudes towards pricing in your niche
Market research helps brands understand the attitudes and emotions of their target audience, leading to more informed decisions regarding their products and offerings!
Types of market research
“Market research” is a broad term that encompasses different types of research aimed at improving a brand’s reputation, positioning, and conversion rates. Here are some types of market research that you may choose to conduct:
- Competitor analysis
- Pricing research
- Buyer persona research
- Customer satisfaction research
In this example, we’re going to build a tool for competitor analysis. However, with GravityView’s versatility, you can create a tool for any kind of data capture or market research.

💡 Pro tip: You can conduct surveys with the Gravity Forms Survey add-on and display survey responses on the front end using GravityView.
Creating the form
For this example, we’re going to build a market research platform for a fictitious company that offers a lead generation tool. The type of research we’ll conduct will be a competitor analysis, looking at similar software solutions in our niche.
To start off, we’ll need to create a form that allows us to capture data on the various competitors. To create a new form, we’ll hover over “Forms” and click “New Form”. After giving our form a name, we can start adding fields using the Gravity Forms visual editor.
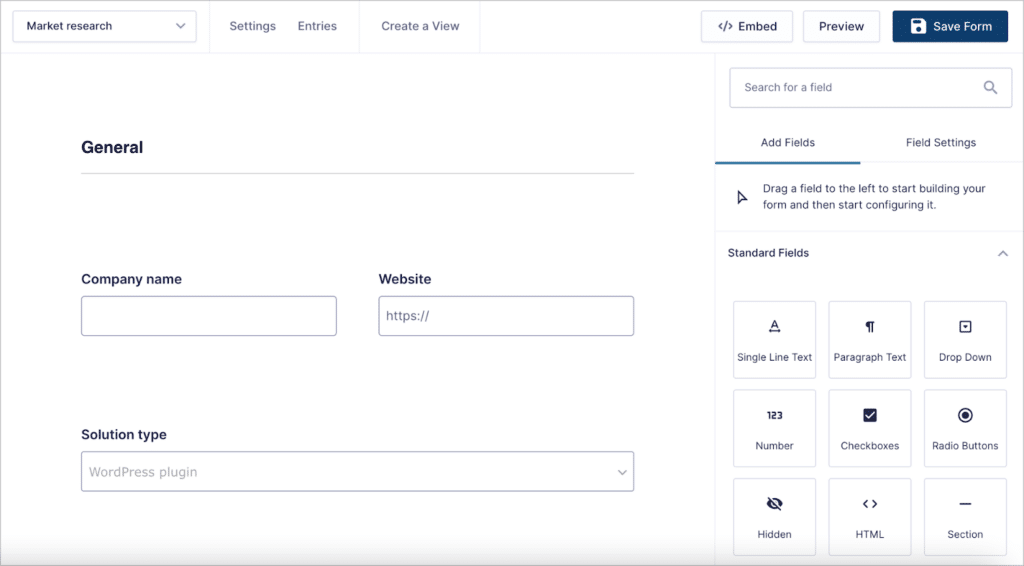
Depending on the kind of research you’re doing, and the type of information you want to capture, you can customize your form accordingly.
Our main focus with our research will be assessing what kind of solutions competitors offer and analyzing their pricing models and strategies. Here’s what our form looks like on the front end:
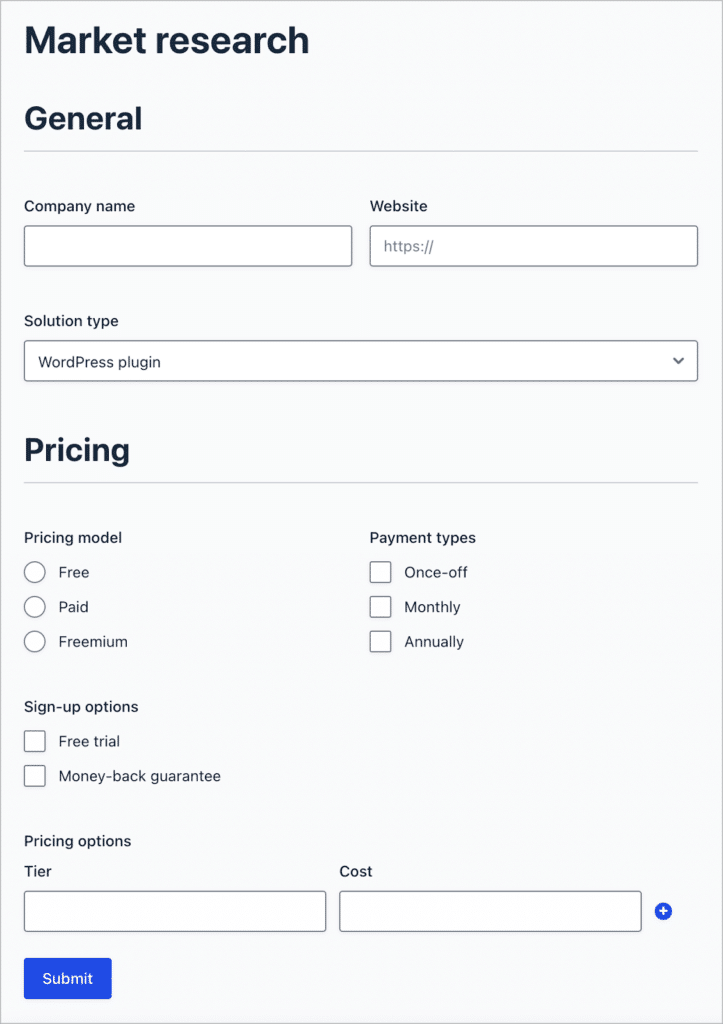
As you can see, we’re using a “List” field for the “Pricing options”, as this will allow us to input multiple pricing tiers.
The next step is to construct a database that will allow us to store the information we capture, filter using search terms, analyze the data we collect, and extract helpful insights.
Building the searchable database
Now that we have our form, we can create a searchable database using GravityView, allowing us to store and filter the data we collect.
To create a new View, we’ll hover over “GravityKit” and click “New View”. After giving our View a name, we’ll need to select a data source. The data source is a Gravity Form containing the entries we want to display. For this, we’ll select our market research form that we created in the previous step.
After selecting a data source, the next step is to choose a View Type. For our competitor analysis tool, we’ll select the “Table” layout, but the “DataTables” layout would work equally well.
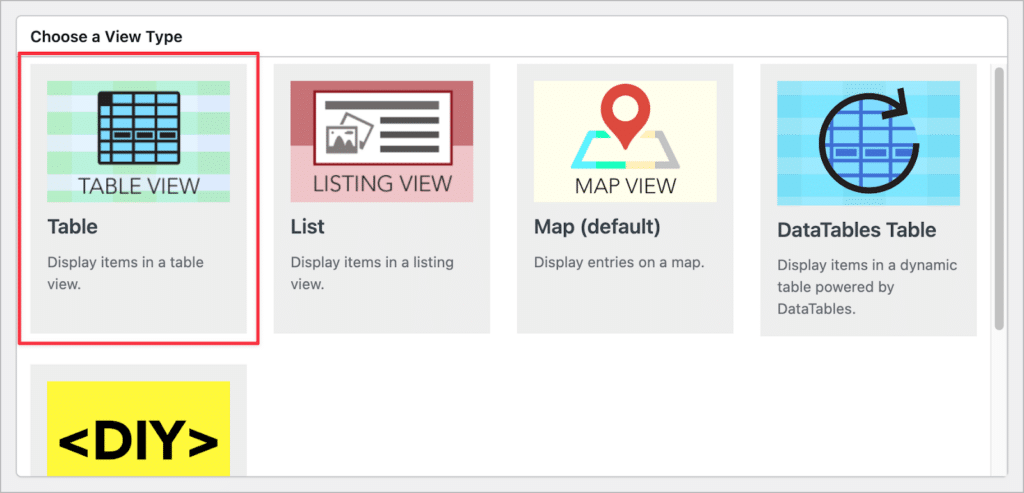
After selecting a data source and choosing a View Type, we can start constructing our View using GravityView’s drag-and-drop builder. There are three aspects to a View—the Multiple Entries Layout, Single Entry Layout, and the Edit Entry layout.
Configuring the Multiple Entries Layout
The Multiple Entries Layout is our main database view, where we can see all of our market information in one table. The View has 3 sections—two widgets sections at the top and bottom, and the “Entries Fields” section in the middle.
GravityView will automatically configure this layout for us, but we can easily edit things if we wish to do so. Each field we add here will show up as a new column in our table. To add a new field, we can click on the “Add Field” button and select a field from the list.
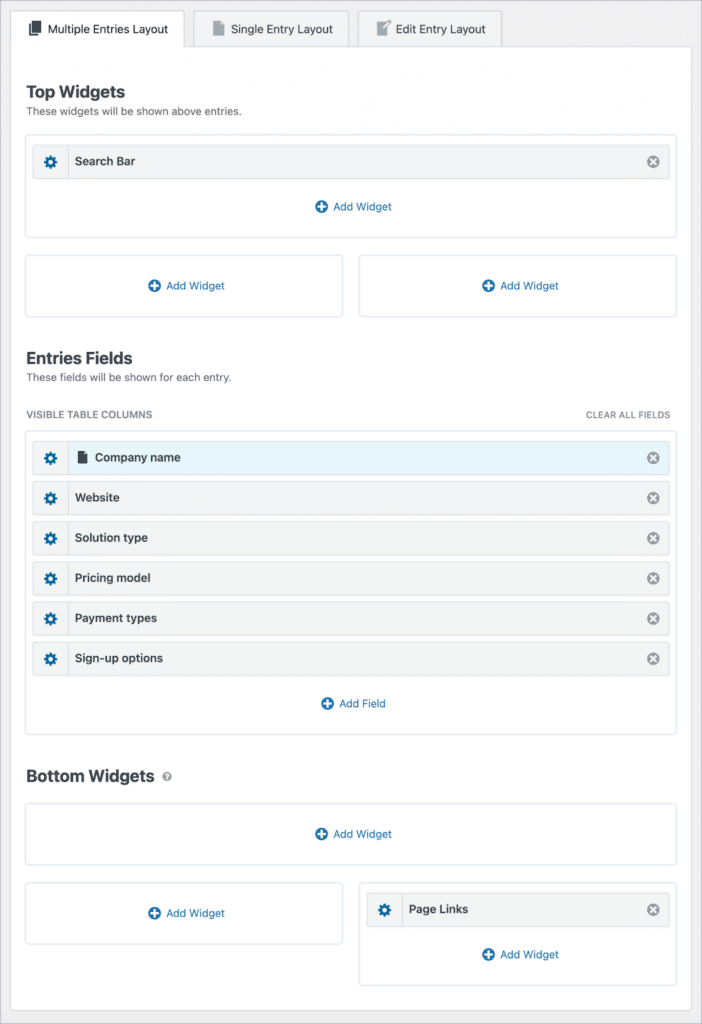
After adding fields to our View, we can turn our attention to the search bar widget and start configuring the search functionality.
Implementing search functionality
When you create a new View, it will come preloaded with a search bar widget. Having a search bar is helpful for:
- Running comparisons
- Filtering entries
- Analyzing and digging into the data
We can configure the search settings by clicking on the gear icon next to the widget label. Here, we can add additional search fields and configure the search functionality. For this example, we’ll add search inputs for the “Pricing model”, “Payment types” and “Solution type” fields.
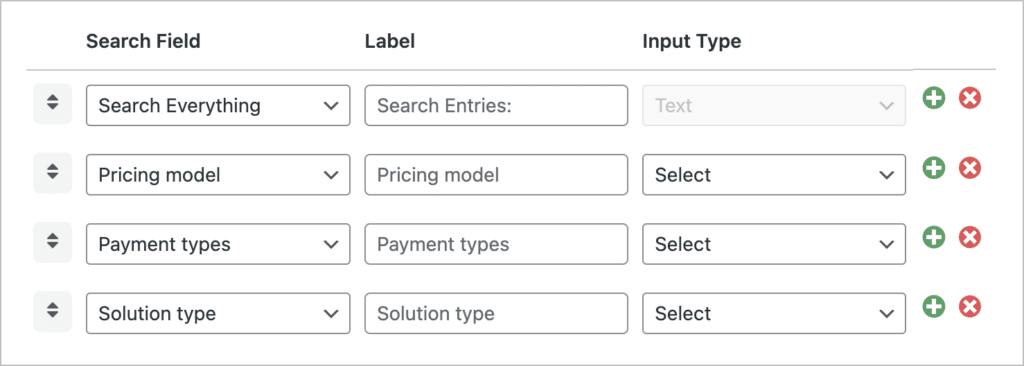
Here’s what our market research database looks like on the front end:
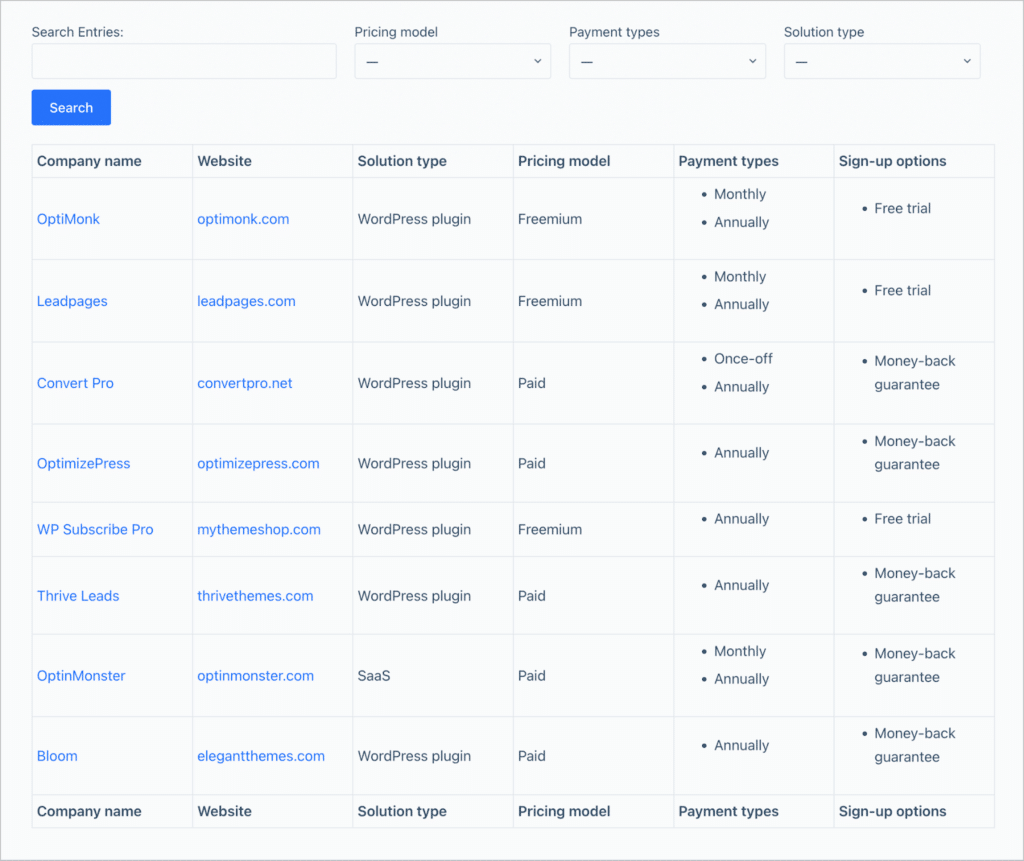
GravityView automatically makes the first field (the company name) a link to the Single Entry layout, so we’ll configure that next.
The GravityView Single Entry Layout
The Single Entry Layout displays fields related to a single entry in a View. Here, we can add additional fields that we can’t fit in the main database view. GravityView configures this layout for us automatically, so all the form fields are already added.
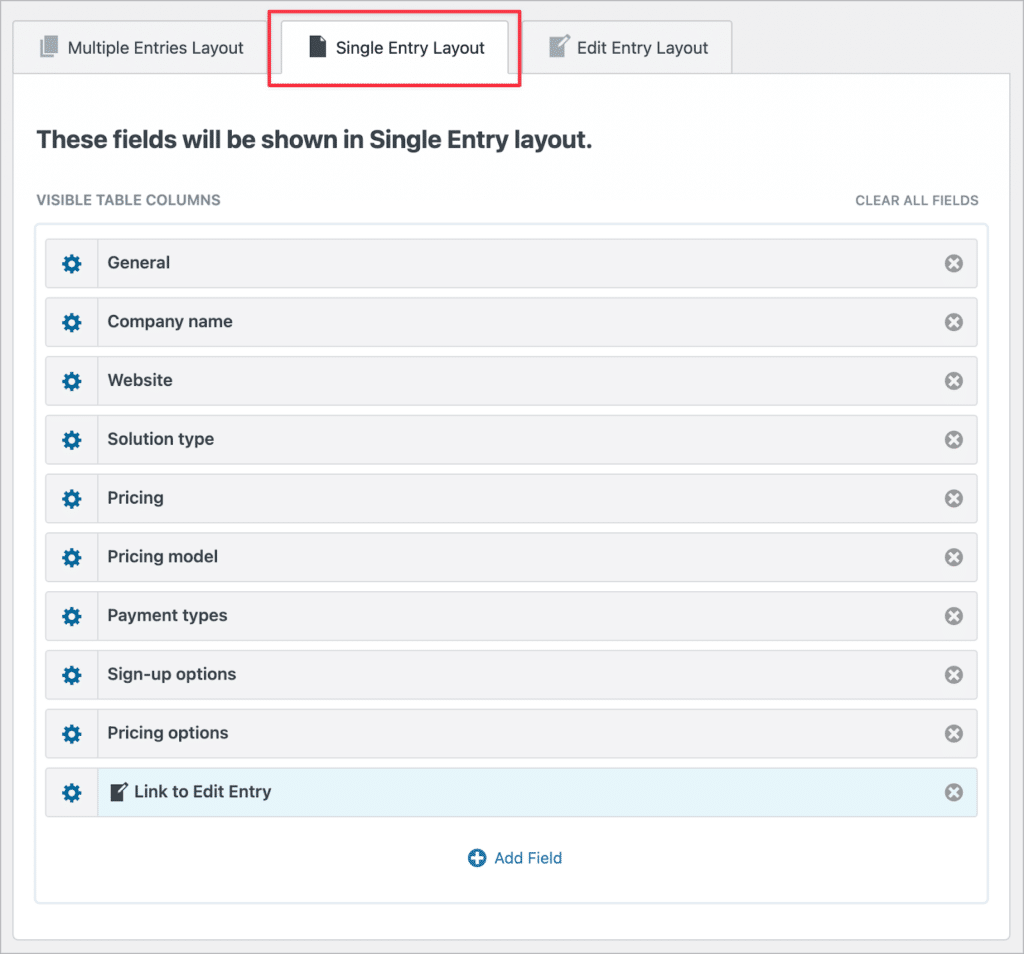
Here’s what the Single Entry Layout looks like on the front end:
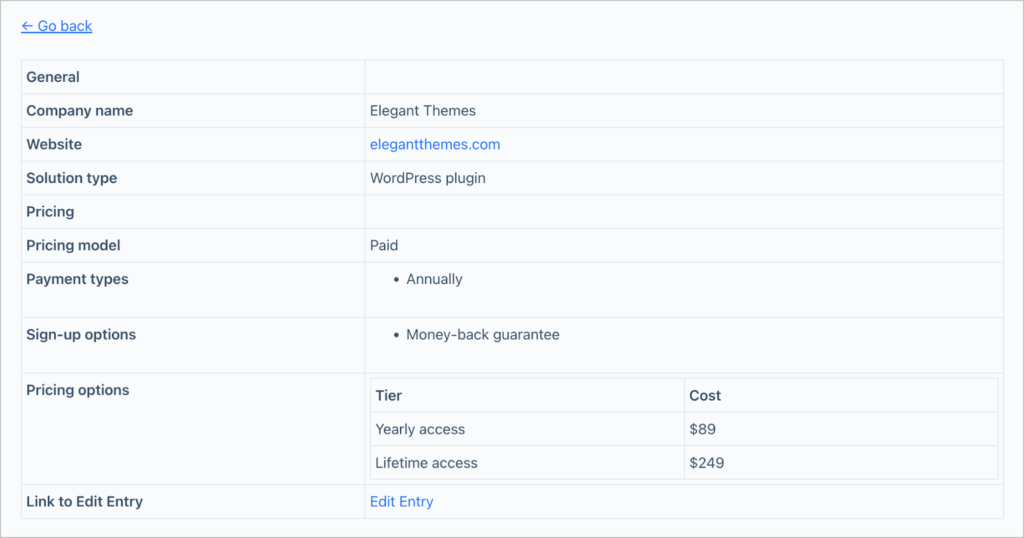
As you can see, the Single Entry page contains additional information, not visible from the Multiple Entries database view.
Editing entries from the front end
One of the strengths of GravityView is that it allows you to edit form entries from the front end. All you need to do is add a link to the Edit Entry layout. To do that, we’ll click on the “Add Field” button and select “Link to Edit Entry”.

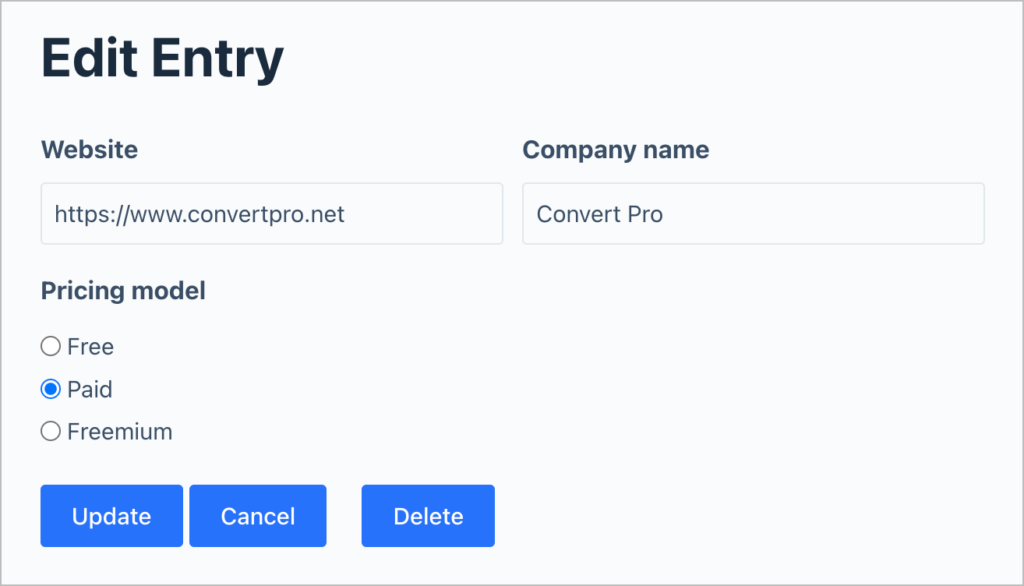
By default, all form fields will be editable from the front end. If you want to limit which fields are editable, simply add them to the Edit Entry Layout. For this example, we only want the “Website”, “Company name” and “Pricing model” fields to be editable, so we’ll add them to the Edit Entry Layout.
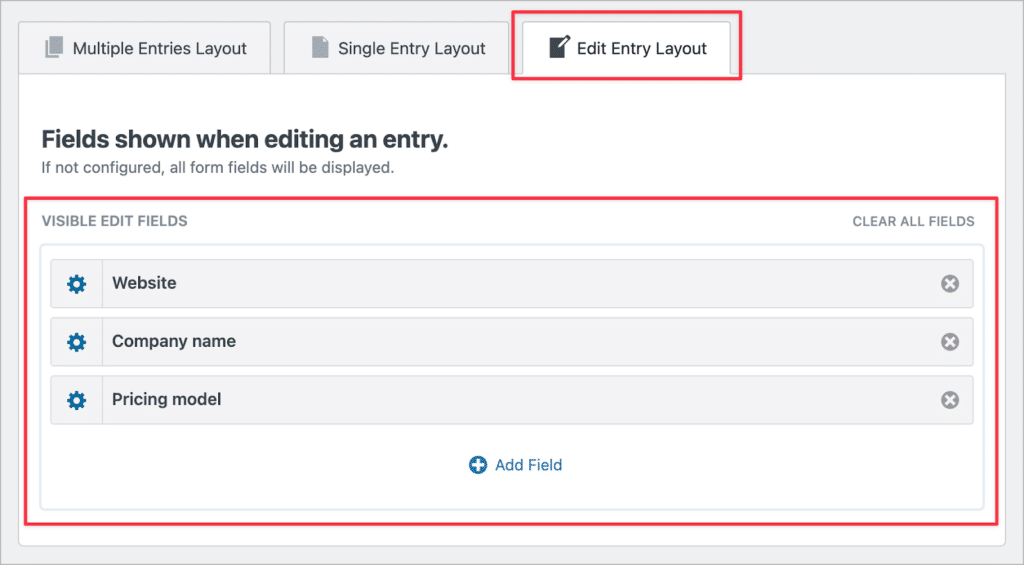
Here’s what the Edit Entry layout looks like on the front end:
That’s it! Now that our View is complete, we can look at options for exporting the data.
Exporting entries for further analysis
After gathering your market research data, you may need a way to export that data for sharing or further analysis. GravityView includes a built-in export feature, making it easy to export data in a View to CSV or TSV format.
All you need to do is add /csv/ or /tsv/ to the end of the View URL, like this:
https://www.yourdomain.com/view/market-research/csv/Another way to export data from a View is by using GravityExport. GravityExport is an add-on for Gravity Forms that allows you to export Gravity Forms data to CSV, Excel, or PDF using a secure download link. You can also send reports to Dropbox!
Create your market research tool using GravityView
Market research refers to the process of gathering information about your target market to help shape brand messaging, verify the success of a new product, or optimize product pricing.
In this post, we showed you how to build a market research platform on WordPress using Gravity Forms and GravityView. If you found this tutorial interesting, and you’re looking to build web apps on WordPress without writing any code, get GravityView today!

Helpful tips right in your inbox.
Subscribe to our biweekly newsletter for tips, special offers, and more!
Helpful tips right in your inbox.
Subscribe to our biweekly newsletter for tips, special offers, and more!
