Sending out surveys is a powerful way to learn about your customers, do market research and get feedback on your products. The Gravity Forms Survey add-on allows you to craft surveys for any use case.
In this post, we’re going to show you how to export your survey responses using GravityExport. Using GravityExport, you can attach survey responses to email notifications, export Excel reports, send survey submissions to Dropbox, and more!
How do you create surveys with Gravity Forms?
You may be wondering how to create surveys in Gravity Forms. The best way to create effective surveys is by using the official Gravity Forms Survey Add-On.
The Surveys add-on adds extra field types to Gravity Forms, allowing you to create surveys for different industries and use-cases. Here are a few examples:
- Feedback survey – Gain valuable insight into how your customers use your products or services.
- Onboarding survey – Assess your customers’ knowledge and expertise so you can provide them with the support they need.
- Product research – Find out what products your customers want and how best to solve their problems.
- Employee satisfaction survey – Measure employee satisfaction levels to ensure a happy, productive work environment.
After installing the Survey add-on, you will see a new “Survey” field in the Gravity Forms editor. This single survey field supports the following eight field types:
- Likert – the user must select an option from a scale.
- Rank – users must drag and drop options to rank them in their preferred order.
- Rating – users can select a star rating from 1 to 5.
- Checkboxes – users can select from multiple options.
- Dropdown – users can select from a number of dropdown options.
- Paragraph Text – users can write a comment or review using multiple lines of text
Why export your Gravity Forms survey responses?
Here are some of the reasons why you may find it helpful to export your Gravity Forms survey responses and results:
- Compile reports for your customers or team members
- Undertake further analysis of the survey responses using tools like Excel
- Send a copy of the completed survey to the user who made the submission
Now let’s look at how to export Gravity Forms survey results using GravityExport.
Exporting Gravity Forms survey results using GravityExport
GravityExport is one of the plugins we offer as part of our toolkit of essential Gravity Forms add-ons. GravityExport allows you to export Gravity Forms entries to CSV, Excel or PDF using a secure download link!
Using GravityExport, you can easily export your Gravity Forms survey results, allowing you to view survey responses whenever you need and send reports to other users. Using GravityExport’s “Save” functionality, you can also save your survey responses to a remote storage location such as Dropbox.

GravityExport Lite is the free version of GravityExport. It allows you to create one export per form and save files to either CSV or Excel (.xlsx).
💡 Pro tip: You can download GravityExport Lite for free from the WordPress plugin directory!
Exporting Gravity Forms survey results using a secure download link
Edit your survey form and hover over “Settings” at the top. You’ll see that GravityExport adds 3 new feed types to Gravity Forms – “GravityExport Lite”, “GravityExport Filters”, and “GravityExport Save”.
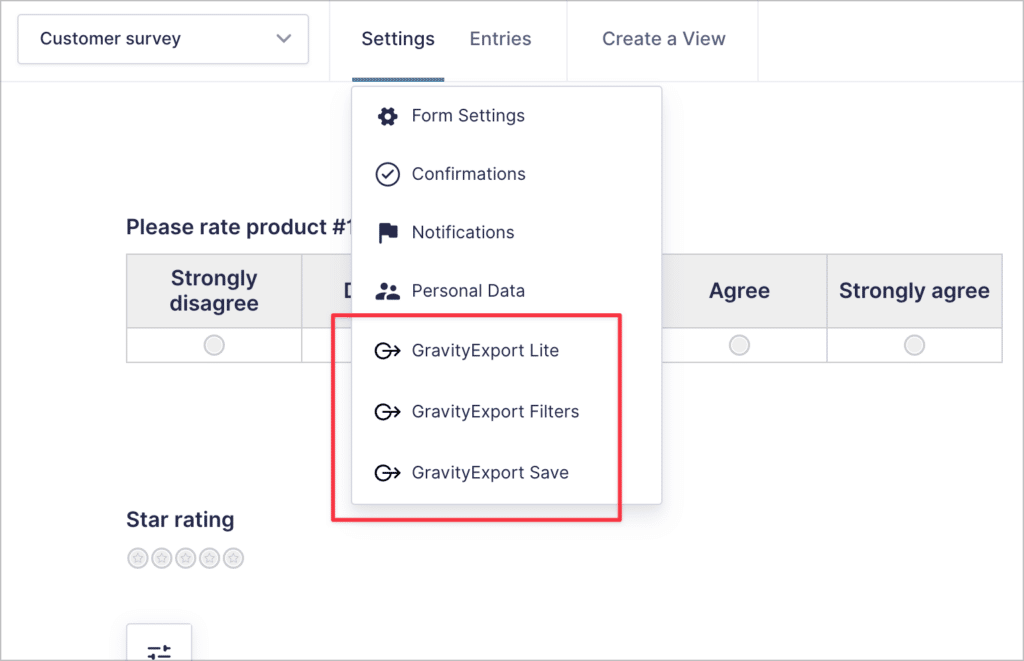
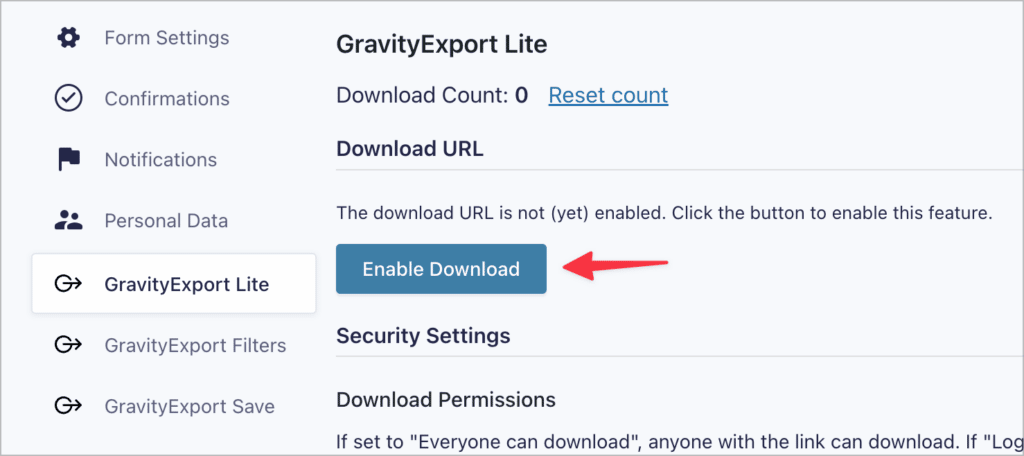
Select “GravityExport Lite” and then click on the button that says “Enable Download”.
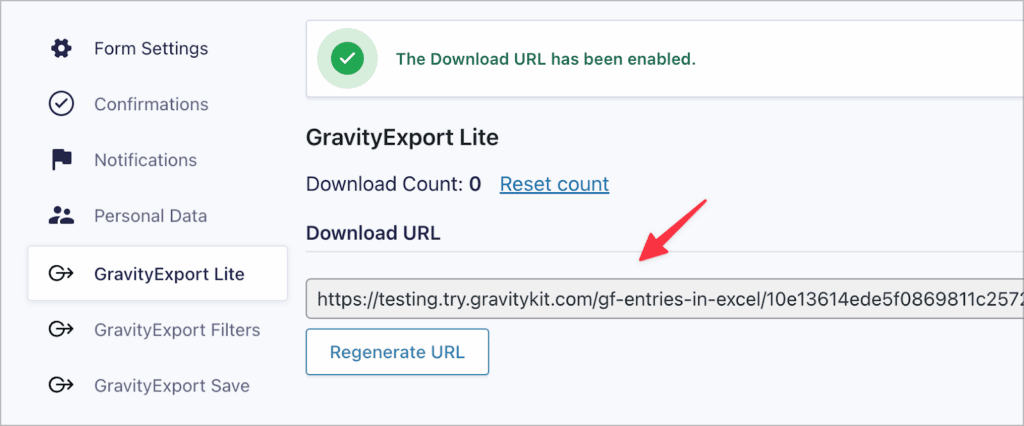
GravityExport will now generate a unique download URL that you can use to download survey submissions.
After the URL has been generated, scroll down to configure the remaining options. You can change the download permissions, add a custom filename, change the file extension, and more!
You can also choose which fields to include in the report.
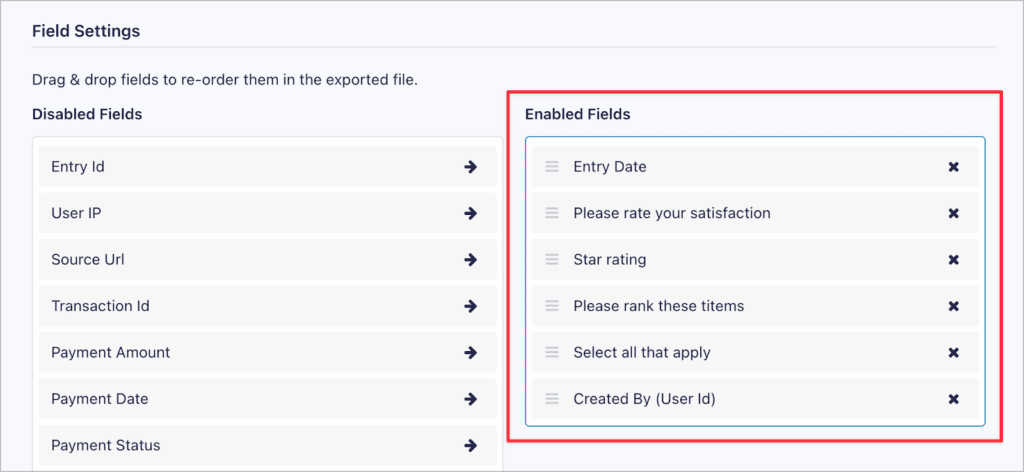
When you’re finished, save the feed. Now all you need to do is paste the download URL into your browser’s address bar and hit “Enter”. Your report will download to your computer containing all of the survey responses you’ve received to date. You can also send this link to anyone who needs the data.
How to attach survey responses to email notifications
Would you prefer to receive an email every time someone submits your survey with a PDF attachment of their responses? You can do this by selecting an existing Gravity Forms Notification under the “Attach Single Entry to Notification” option.

If you don’t have a notification email configured yet, you’ll need to create one by selecting “Notifications” on the left and then clicking “Add New”.
Creating multiple export files for a single survey form
You may want to create multiple export files for a single survey form. You can do this by adding multiple GravityExport Filter feeds. To create a new filter feed, click on “GravityExport Filters” and then click “Add New”.
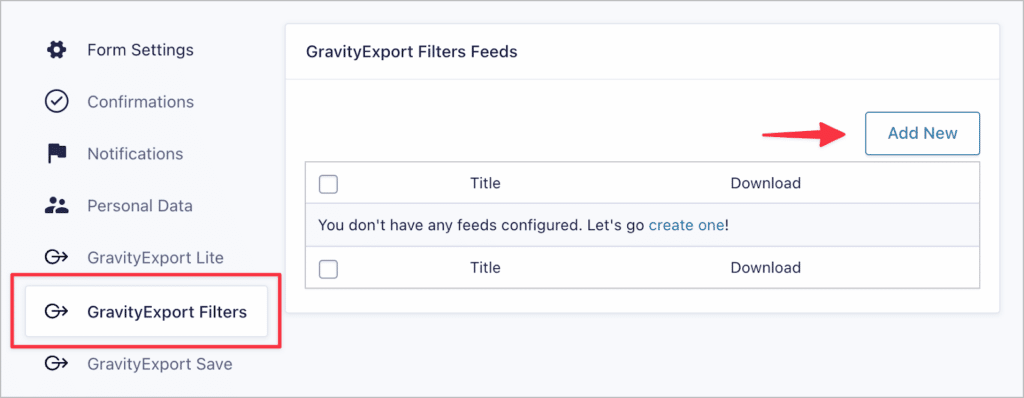
Now you can configure an export just like you did in the previous step. After saving the feed, GravityExport will generate a new download URL.

GravityExport filters allow you to create multiple reports with different settings and file formats!
Exporting Gravity Forms survey results to a remote storage location
With GravityExport, you can also export Gravity Forms survey results to a remote storage location, such as Dropbox or a server running SFTP.
To set this up, click on “GravityExport Save” and add a new feed. Now give your feed a name and choose whether you want to export all entries or a single entry.

Next, you’ll need to select a storage type. GravityExport allows you to send entries to Dropbox, a server running SFTP, or local storage.
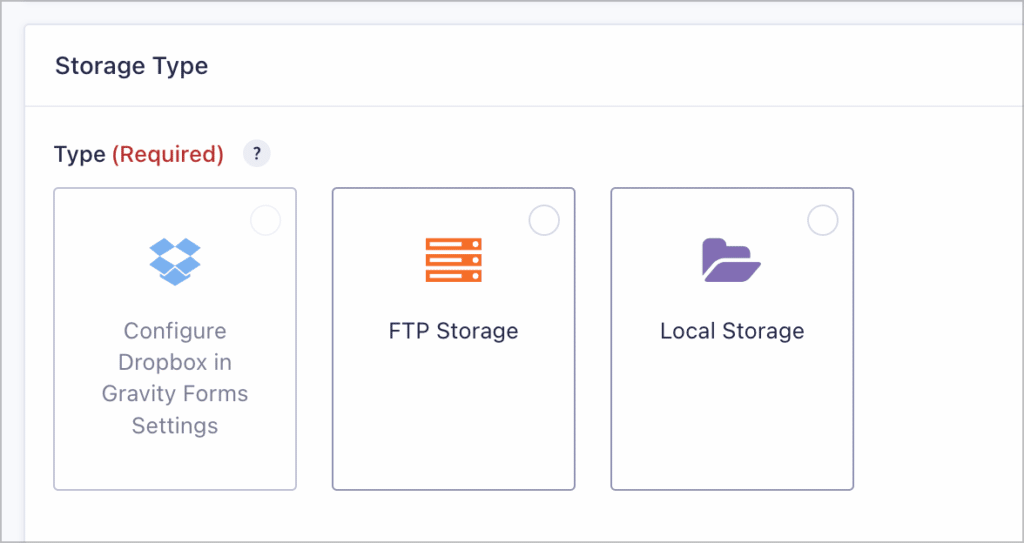
As you can see, if you select Dropbox, you’ll need to configure the connection to your Dropbox account in the Gravity Forms settings. (All you need to do is generate an access token from your Dropbox App Console and paste it into the box).
Finally, you can control which entries are included in the report by adding one or more conditional logic filters.
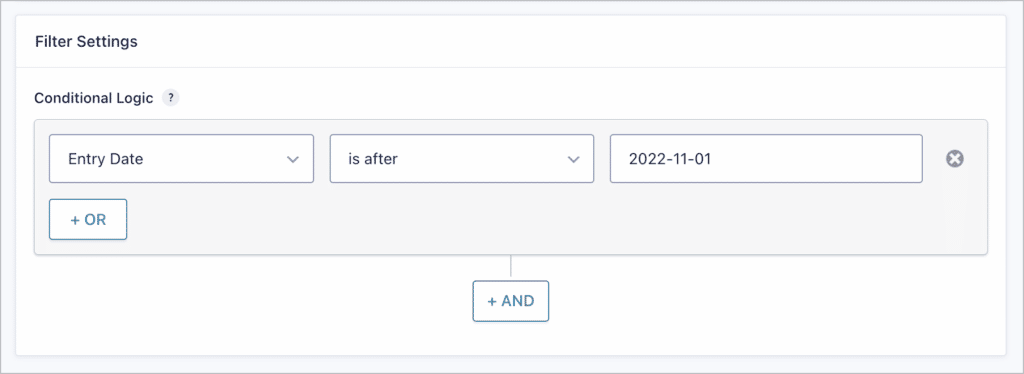
Conditional logic allows you to filter entries based on conditions that you set. For example, you can:
- Restrict entries by date created
- Filter out entries that contain certain field values
- Only include entries created by a specific user
💡 Pro tip: Check out our ultimate guide to learn more about conditional logic in Gravity Forms.
Bonus: Displaying Gravity Forms survey responses on the front end
Now that we’ve covered how to export Gravity Forms survey results, you may be wondering how to display survey responses on the front end.
If you want to display single survey responses on your website, you can use GravityView. However, if you want to chart the results of your surveys and display those charts on the front end, you’ll need to use GravityCharts.
GravityView is an add-on for Gravity Forms that allows you to display form data on your website using different layouts. Here’s an example:
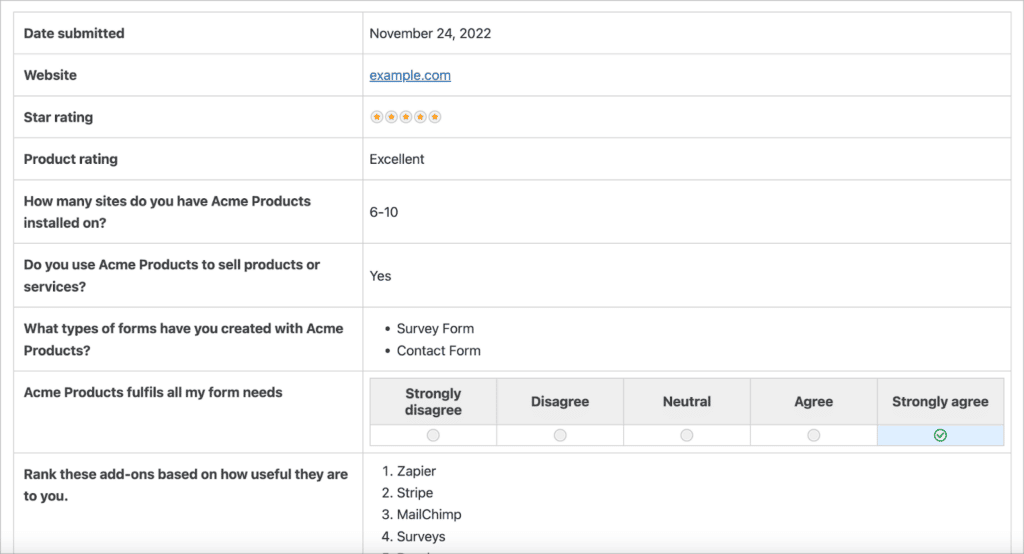
For more information on using GravityView to display Gravity Forms survey responses, read our detailed guide here.
💡 Pro tip: View a live demo of how GravityView displays survey responses on the front end.
Export your Gravity Forms survey results
The Gravity forms Survey add-on allows you to create surveys using eight different field types. Using GravityExport, you can export survey responses to CSV, Excel or PDF and send reports to remote storage locations (like Dropbox)!
If you’re looking to export your survey responses, attach them to email notifications or send them to remote storage, get GravityExport today!

Helpful tips right in your inbox.
Subscribe to our weekly newsletter for tips, special offers, and more!
Helpful tips right in your inbox.
Subscribe to our weekly newsletter for tips, special offers, and more!
