Published
•
Updated
The ultimate guide to the Gravity Forms visual editor (drag and drop form builder)
One of the features that makes Gravity Forms so popular is its easy-to-use, visual form builder. However, if you’re new to WordPress, or you’re not familiar with drag and drop functionality, you may need some help understanding how it works. In this tutorial, we’ll...
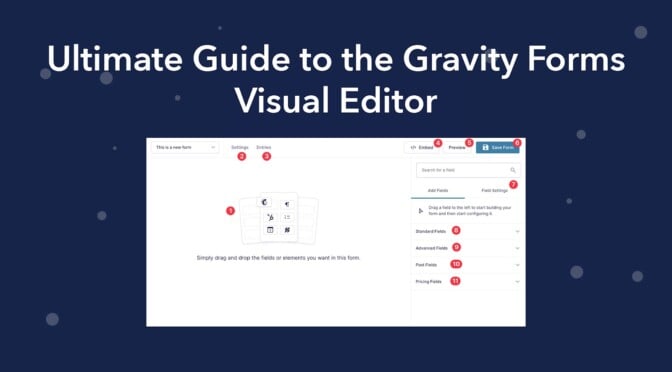
One of the features that makes Gravity Forms so popular is its easy-to-use, visual form builder. However, if you’re new to WordPress, or you’re not familiar with drag and drop functionality, you may need some help understanding how it works.
In this tutorial, we’ll introduce you to the Gravity Forms visual editor and show you how to build new forms for any use case. We’ll cover adding new fields, modifying the field settings, duplicating and deleting existing fields, placing fields side-by-side, saving changes to your form and much more.
Keep reading to learn everything you need to know about the Gravity Forms visual editor!
What is Gravity Forms?
Gravity Forms is a WordPress form builder that allows you to build complex, accessible forms using an intuitive drag-and-drop interface.
Most websites rely on forms to gather important information, take payments, receive contact requests and much more. Creating forms from scratch isn’t easy, and they can get complicated fast. That’s why using a visual form builder like Gravity Forms can make your life a lot easier.
Gravity Forms also has integrations with some of the leading web applications and online service providers. This includes Hubspot, Mailchimp, Aweber, Slack, Zapier, PayPal, and more!
Pro tipTo learn more about Gravity Forms, read How to Use Gravity Forms: The Ultimate Guide.
What is drag and drop?
Depending on your online experience, you may be unfamiliar with the term “drag and drop”. If so, don’t fear because it’s rather self-explanatory.
According to Techopedia, drag and drop “is a functionality by which users can select an object or a section of text and can move it to a desired location and “drop” it there”.
Gravity Forms’ visual form editor allows you to build forms by dragging and dropping fields. This allows you to create complex forms in only a few clicks. In fact, the rise of drag and drop tools has changed the web as we know it, creating better and more intuitive user experiences!
Introducing Gravity Forms, the ultimate visual form editor for WordPress
After installing Gravity Forms, you can create a new form by hovering over Forms and clicking New Form. This will take you to the visual editor where you can begin adding new fields to your form using drag and drop.
Let’s take a more in depth look at the Gravity Forms form builder:
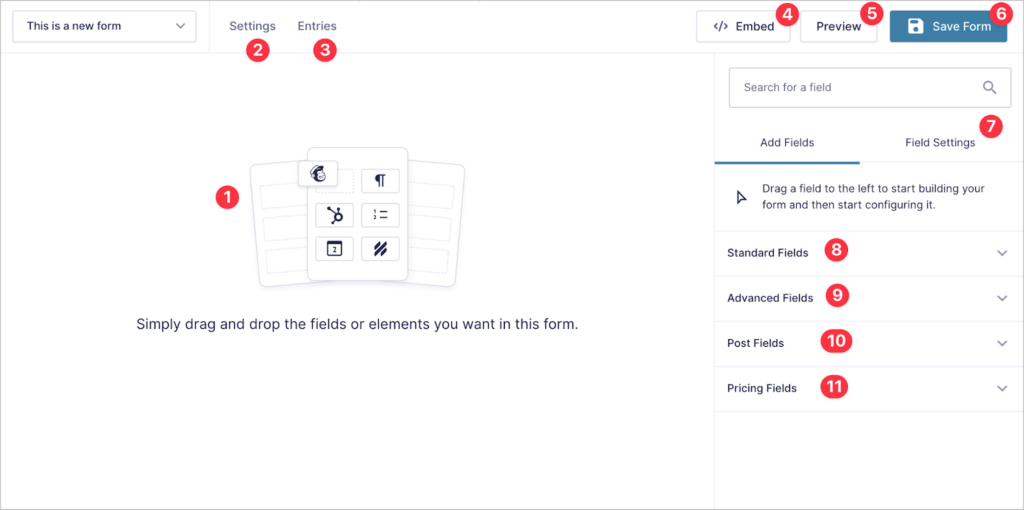
- This is the “canvas” area where you can drag and drop fields to start building your new form
- The “Settings” link will take you through to the form settings page
- The “Entries” link will take you through to the form entries page where you can view each form submission
- Clicking here will allow you to add your form to a new or existing page or post on your site
- Clicking “Preview” allows you to see a preview of your form before you embed it on your site
- Clicking “Save Form” will save your changes
- The “Field Settings” tab on the right-hand side will open the field settings for a form field that you’ve already clicked on
- Opening this tab will display all of the Gravity Forms Standard fields
- Opening this tab will display all of the Gravity Forms Advanced fields
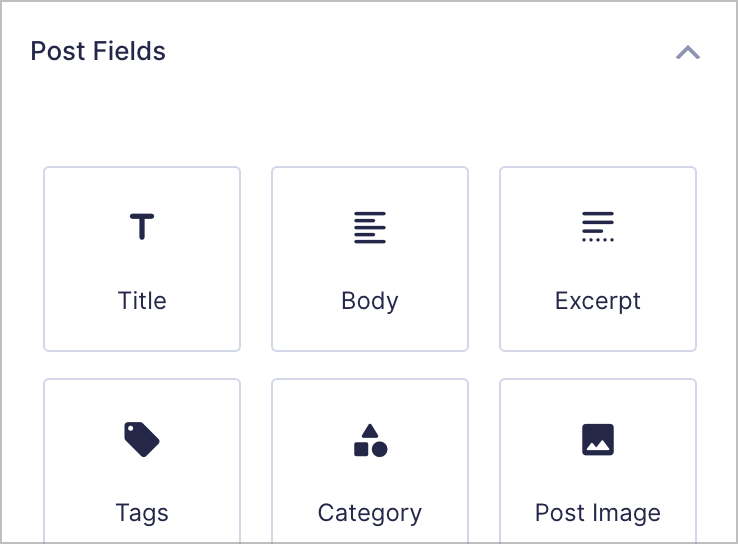
- Opening this tab will display all of the Gravity Forms Post fields
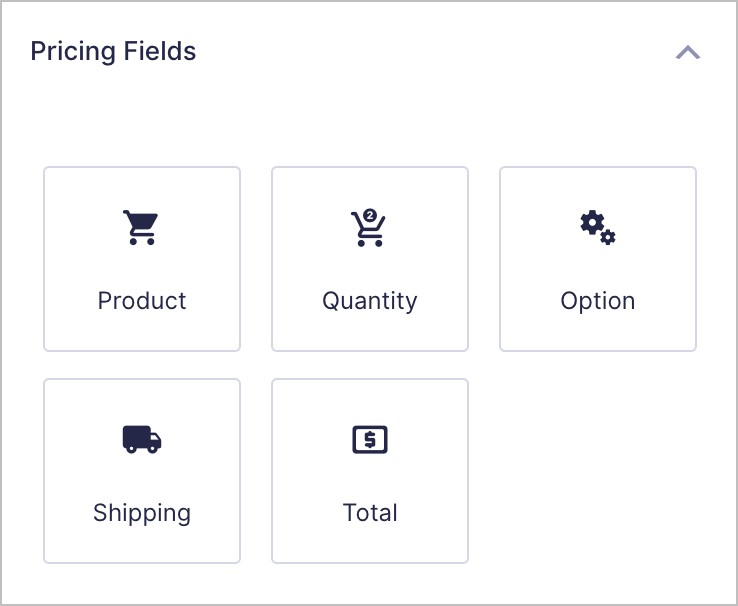
- Opening this tab will display all of the Gravity Forms Pricing fields
Now that you’re familiar with the layout of the Gravity Forms vidual builder, let’s take a look at each of the field types in more details.
Field types
Gravity Forms supports a wide range of field types, allowing you to build forms for any use case. Here are the different fields that you can drag and drop from the sidebar to build new forms.
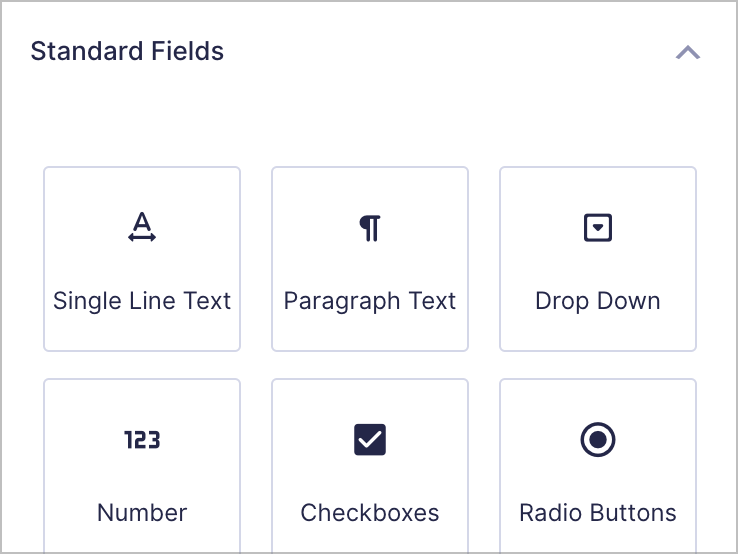
Standard fields
“Standard fields” are the most common field types for web forms. There are ten standard fields in total including Single Line Text, Paragraph, Drop Down, Number, Checkboxes and others.
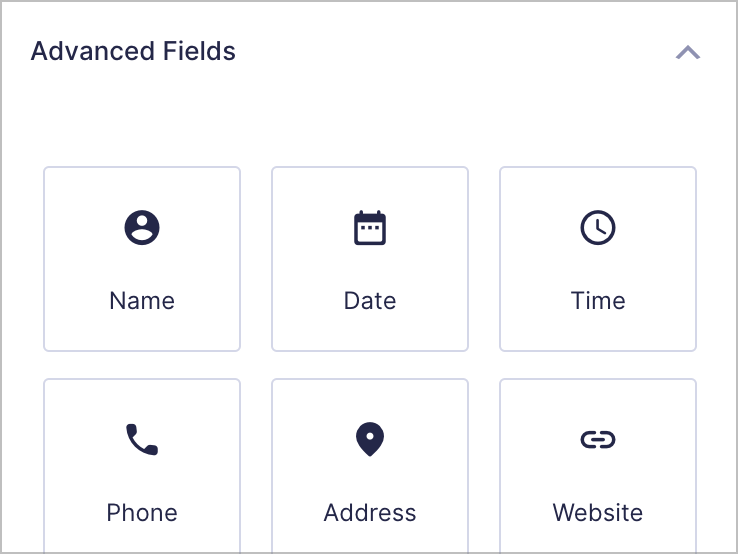
Advanced fields
Gravity Forms supports an additional 14 “Advanced” field types. Advanced fields are more specialized and are useful for more specific use cases. Advanced fields often include multiple input fields within one container.
Advanced fields include Address, Name, Date, Time and more.
Post fields
“Post” fields allow you to capture data which you can then turn into a WordPress post. Using post fields, you can create forms that allow users to submit content to your website. The resulting post will be saved as a draft, so you’ll need to publish it before it’s visible to the public.
Pricing fields
Gravity Forms Pricing fields enable you to create product focused forms and take payments through your site. Here you’ll also find payment collection fields for Stripe, PayPal and other Gravity Forms payment add-ons.
Creating a new form
Now that you’re familiar with the different field types available in Gravity Forms, let’s look at how to create a new form, step by step.
Adding fields to your form using drag and drop
After opening the form editor, the first step is to begin constructing your form by adding fields using the drag and drop editor. Gravity Forms makes this really simple. All you need to do is use your mouse to click and hold on a field and then drag it and drop it onto the canvas.
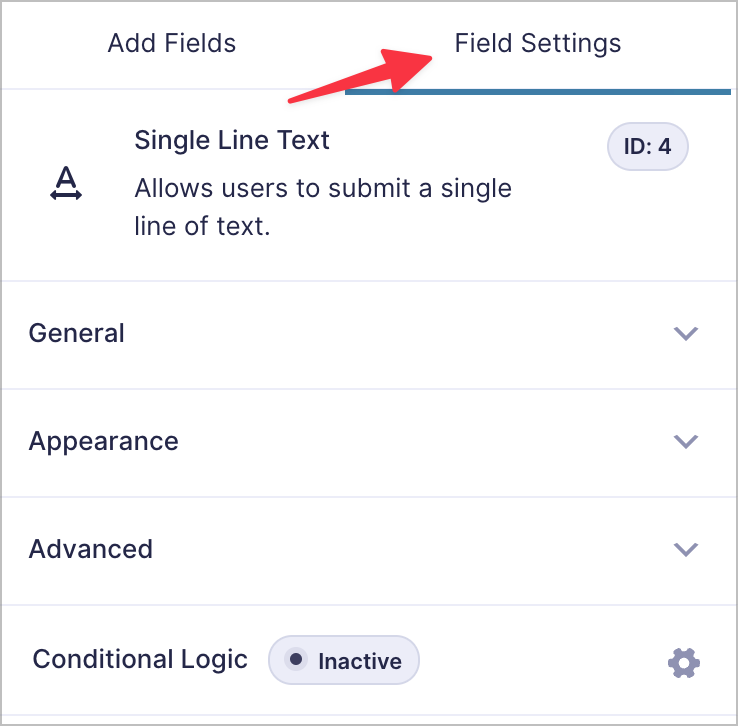
After adding a new field to your form, you’ll probably want to edit the field label and make other modifications. You can do this by clicking on the Field Settings tab.
Field settings
There is a range of options for customizing each field type – you can find these options under Field Settings. The field settings are split into four sections – “General”, “Appearance”, “Advanced” and “Conditional Logic”.
Under “General” you can change the field label and description, make the field required and add choices for checkboxes, radio buttons and other fields where users have to select one or more values.
Under “Appearance” you can adjust the placement of the field label and description, change the field size, add custom CSS classes and more.
Under “Advanced” you’ll find options allowing you to set a default value for the field, change the Admin label, adjust the field visibility, allow the field to be populated dynamically and more.
Finally, clicking on the “Conditional Logic” tab will open a fly out menu allowing you to enable conditional logic and show/hide the field based on one or more conditions.
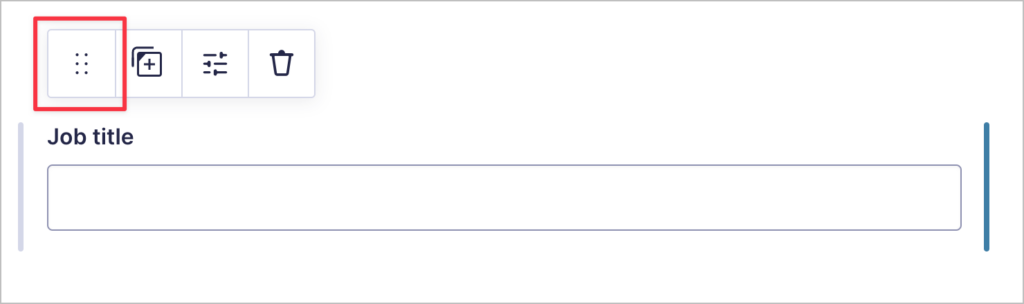
Repositioning fields
After adding fields to your form, you may want to change the order or reposition them. This is easy to do using the drag and drop functionality. Simply hover over the field you want to reposition, click on the icon with 6 dots and drag and the field to where you want it.
Now that you know how to reposition fields, what about duplicating or deleting fields?
Duplicating and deleting existing fields
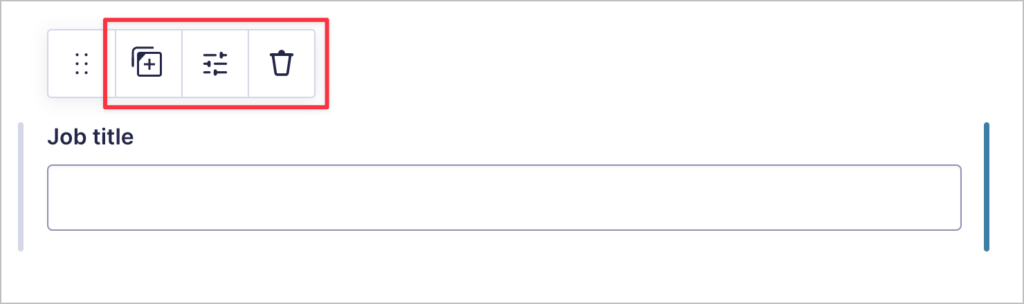
When you hover over an existing field, you’ll see three additional icons next to the “move” icon. The first one allows you to duplicate the field. Duplicating fields can save you time if you’re building long forms and you need many of the same field type.
The next icon opens the field settings and the final one (the trash can) enables you to delete the field.
Now let’s look at how to add multiple columns to a form by placing fields side-by-side.
Adding multiple columns to your form
Sometimes you may want to place fields side-by-side instead of one after the other. This is easy using the Gravity Forms visual editor. All you need to do is hover over the field, click and hold the Move icon and drag the field next to another field.
Saving changes to your form
As you’re building your form, you should save it periodically to ensure you don’t lose any of your changes in case of an internet outage or another issue of some kind. To save changes to your form, click on the “Save Form” button at the top right of the screen.
Gravity Forms will then save your form using AJAX, meaning the page will not need to be reloaded.
Embedding your form on a page or post
When you’re finished building your form, you’ll need to embed it on a page or post. There are several ways to do this. You can either use the Gravity Forms embed shortcode or the Gutenberg block from inside the WordPress editor to add a form to your page, or you can embed a form directly from the form editor!
To see the different options, click on the button that says “</> Embed”. Here you can add your form to an existing page/post, create a new page/post or copy the embed shortcode (which you can paste anywhere on your site).

You should now be familiar with the Gravity Forms visual editor and ready to start building your first form!
Gravity Forms examples
If you haven’t built a web form before, you may be more comfortable looking at different examples first and emulating an existing form that you like the look of. Luckily, there are plenty of good examples out there as nearly every website makes use of forms!
If you’re looking for examples of forms built with Gravity Forms, the best place to look is the Gravity Forms template library. Here you’ll find a variety of prebuilt forms including newsletter sign-up forms, gift certificate forms and event registration forms.
When you find a form you like, you can download it and import it into your own website. From there you can customize it to your liking.
Taking Gravity Forms to the next level with certified add-ons
After playing around with Gravity Forms, you’ll soon discover that it’s more than just a form builder. Gravity Forms is at the core of a powerful ecosystem of extensions and add-ons that allow you to create no-code web applications on WordPress.
If you’re ready to take Gravity Forms to the next level, check out our powerful kit of essential add-ons:
- GravityView – Display your form data on the front end (build directories and other front end apps).
- GravityImport – Import entries to Gravity Forms from a CSV file.
- GravityEdit – Save time by editing existing form entries inline.
- GravityCharts – Create graphs and charts using your form data.
- GravityActions – Bulk edit multiple entries at the same time.
- GravityCalendar – Display your form entries on a calendar.
- GravityExport – Export your form data to Excel, CSV and PDF and send reports to remote storage.
- GravityMath – Perform advance calculations using your form data.
- GravityRevisions – Track changes made to entries and restore prior versions.
Pro tipIf you’re interested in what our kit of add-ons can do for you, take a look at our customer case studies to find out what’s possible!
Start building forms using the Gravity Forms visual builder
Gravity Forms is the most powerful form plugin for WordPress. One of the reasons it’s so popular is due to its visual form editor that allows you to build new forms using a drag and drop interface.
Drag and drop is a powerful functionality that’s gaining popularity on the web. Using the Gravity Forms visual builder you can create complicated forms in only a few clicks, reposition fields with ease, add multiple columns to your forms and embed forms on the front end.
In this post, we introduced you to the Gravity Forms visual editor and showed you how to create and customize new forms. If you enjoyed this post, subscribe to our blog below for more helpful content!

Helpful tips right in your inbox.
Subscribe to get the latest articles, information on releases and helpful Gravity Forms tips!
More articles

Announcing GravityView 3.0: a fresh new look, AI View creation, and native page builder support
GravityView 3.0 is here: restyle Views with the new Vantage theme, build them with AI, embed them in any page builder, and run bulk actions on the front end.

Launch Log: GravitySearch arrives, plus AI spam review and GravityView fixes
This week, releases are anchored by a brand-new product! GravitySearch joins the GravityKit suite with cross-form entry search for Gravity Forms. Alongside it, Gravity Forms Zero Spam picks up an AI-powered review step, and GravityView sees fixes for Enhanced Security, Edit Entry, and Entry…

Meet GravitySearch: advanced global search for Gravity Forms
GravitySearch adds cross-form search to Gravity Forms: find any entry from one screen, build advanced filters, and preview results without leaving the page.