Published
•
Updated
How to upload Gravity Forms entries to FTP
Store and share Gravity Forms entry data securely over FTP without granting admin access to your site. Step-by-step guide using GravityExport to automate FTP file transfers.
Are you wondering how to backup your Gravity Forms entries to your own server using FTP?
When someone submits your form in Gravity Forms, that information is saved in your WordPress database. On the one hand, this is a good thing because it gives you full control over your data. But on the other hand, it’s an inconvenient way to store and share data as users need administrator access to view and download it.
Needless to say, granting users admin privileges to your website so that they can view form entries isn’t a good practice from a security point of view.
Sharing files with users over FTP is fast, convenient and it doesn’t require access to your WordPress website! Keep reading to find out how to store and transfer your Gravity Forms data using FTP.
Wanna try it?
Spin up a demo
See GravityExport in action on its live demo site.

What is FTP?
FTP (which stands for “File Transfer Protocol”) is a method for transferring files over the internet. Amazingly, FTP was invented in the 1970s, more than 40 years ago!
To use FTP, you need to run an FTP client and initiate a connection to a remote server running FTP. After establishing the connection, the client can send and receive files from the remote server (also called the FTP “host” or “site”).
Web developers often use FTP to make changes to a website as it allows you to manage and update large amounts of files.
Advantages of FTP storage
There are several advantages to sharing and storing your files using FTP. Here are some of the main ones.
Store and transfer large files
Many businesses use FTP because it’s an effective way to transfer large files. With FTP you can also move multiple files at one time, reducing interruptions and speeding up the file transfer process. Trying to share large files over email or Slack simply doesn’t work as these services are not built for file transfer.
Having a central, FTP server is a great way to share files with team members.
Access your reports anytime, anywhere
To access files over FTP, all you need is an internet connection. Furthermore, with FTP, you don’t have to worry about interruptions or losing your transfer progress when you get disconnected from the internet. When the network is available, FTP will automatically reconnect and pick up where you left off.
Step 1: Installing GravityExport
To get started uploading your reports to FTP, you’ll need GravityExport—a powerful plugin that makes it easy to export Gravity Forms entries to different formats and locations.
Alternatively, if you have a GravityView All Access license, you can install GravityExport from inside your WordPress admin menu at no extra cost. To do this, log in to your website, hover over Views, and click on Manage Add-Ons. Next, scroll down until you see GravityExport and click Install.
Step 2: Creating a new report
After installing GravityExport, you’ll be able to create a new remote storage feed to send files directly to your own FTP server. Start by hovering over Forms and clicking on Forms. Next, hover over your form and click Settings.
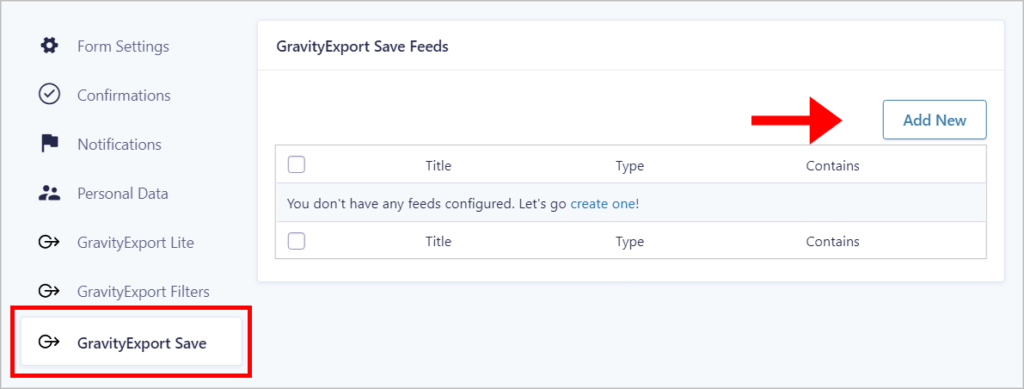
On the form settings page, click on the GravityExport Save tab. To add a new feed click Add New and give it a name. Configure your report by choosing a file type (GravityExport allows you to export your form data as a PDF, CSV, or Excel file!).
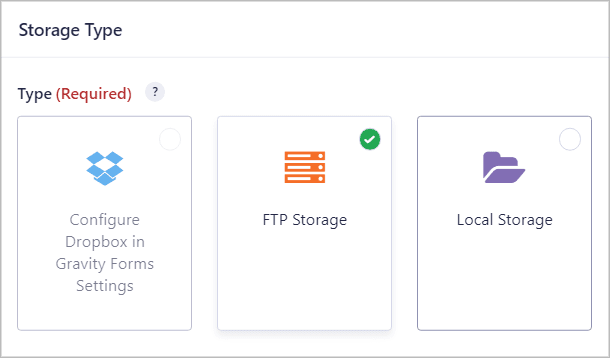
Now, under Storage Type select FTP Storage.
Next, specify what data the report should contain and give it a custom file name. When you’re done, you’ll need to scroll down to the FTP settings and enter your FTP server details.
Step 3: Finding your FTP details
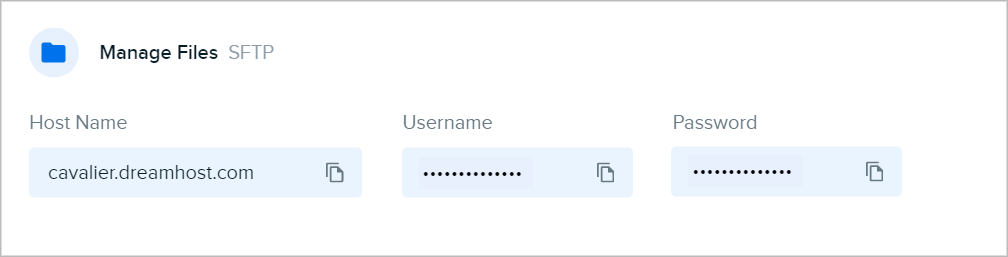
To integrate GravityExport with your FTP server, you’ll need to input your FTP hostname, username, and password. If you’re struggling to find your FTP credentials, here are some tips.
Check inside your hosting account
If you have a web hosting account, you should be able to find your FTP details inside the admin panel.
Try your cPanel login details
If you can’t find any FTP details in your hosting account, then your FTP login details may be the same as your cPanel login details. For the hostname, use “yourdomain.com” or “ftp.yourdomain.com”.
Contact your web host’s support
If you still can’t connect to FTP, contact your web host’s support and ask them to send you your login details. If you have never accessed FTP before, you may need to set a password first.
Step 4: Configuring the FTP settings
Now that you have your FTP server details, scroll down to where it says “FTP Storage Configuration” and type in the Hostname (Address), Username, and Password.
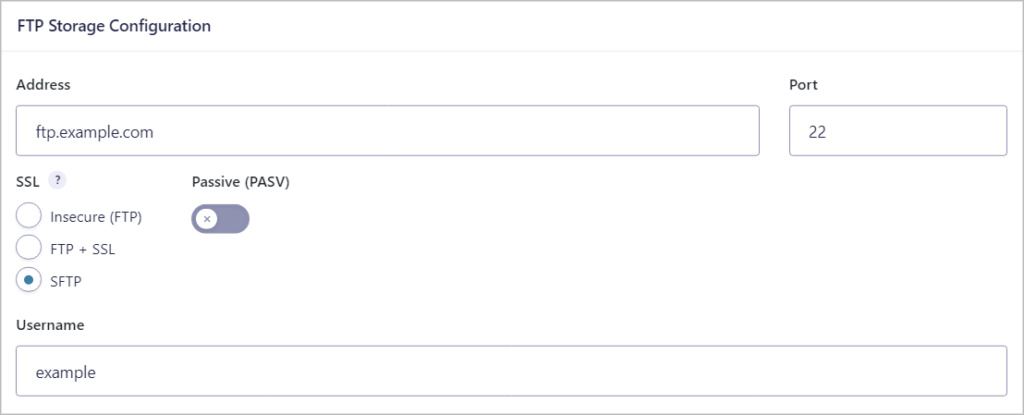
You’ll notice there are different connection types for FTP.
- Insecure (FTP)
- FTP + SSL
- SFTP
We recommended connecting over SFTP (which is the default) as it’s the most secure. SFTP uses SSH (secure shell) encryption to protect your data while it’s being transferred. Due to security concerns, many hosts only offer SFTP as opposed to standard FTP.
You’ll also see the following settings:
- Passive (PASV)
- Port
- Path
Here’s a brief breakdown of each one and what they refer to.
- Passive (PSV) – Passive mode is an alternative way to establish an FTP connection. This is the preferred way to access FTP servers that are behind a firewall.
- Port – Specify the port number to use when connecting to your FTP server. The default connection port for SFTP is 22.
- Path – Here you can specify the path for where you want your report to be saved. For example:
/home/user/gravityforms/reports/.
After configuring the integration, it’s time to test it to ensure everything is set up correctly.
Step 5: Testing the integration
To test the integration with your FTP server, open your form in Gravity Forms and submit an entry. After that, you’ll need to access your server to see if the file was uploaded successfully.
The best way to access your FTP storage is to connect to your server using the file manager or an FTP client like FileZilla or WinSCP.
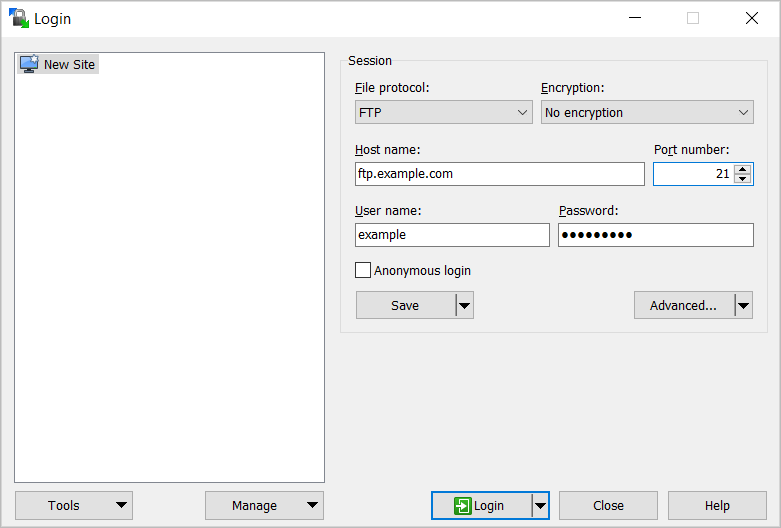
To do this, open your chosen client and ensure you’re connected to the internet. Then, type in your FTP details, and click “Connect”.
Bonus: What about file uploads?
If your form includes a File Upload field, you might be wondering whether GravityExport can transfer the actual files, not just the entry data, to your FTP server. The answer is yes.
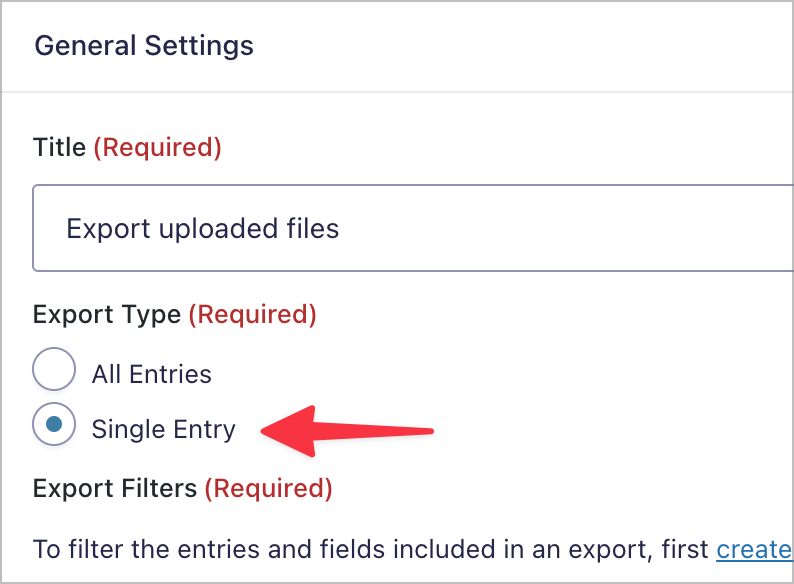
To make this work, you’ll need to set up a Single Entry feed rather than a bulk export. This processes each form submission individually, enabling you to copy the uploaded files to your FTP server as they come in.
When configuring your GravityExport feed, you’ll see a checkbox labeled “Copy all file upload fields with the exported entry”. Enabling this option ensures that any files uploaded through your form (images, PDFs, documents, etc.) are physically transferred to your FTP server alongside the entry data report.
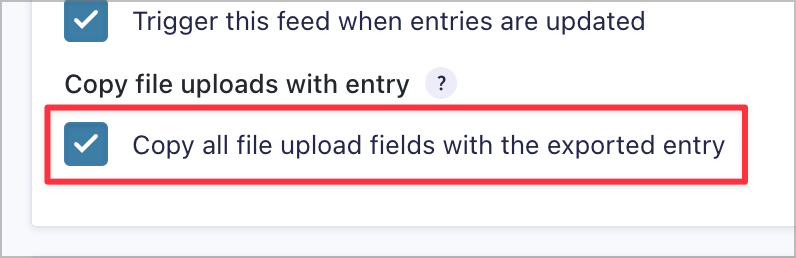
Without this option enabled, GravityExport will only export the entry data (field values, metadata, etc.). The file paths will appear in your CSV or Excel report, but the actual files will remain on your WordPress server.

Pro Tip
For a detailed walkthrough of exporting files, check out our guide on how to export images and files uploaded to Gravity Forms.
Gravity Forms FTP upload: Final thoughts
FTP (File Transfer Protocol) is a way of transferring files between servers on the internet. FTP has been around for over 40 years and is an integral tool for sharing, storing, and organizing files.
GravityExport allows you to send Gravity Forms entries to an external server using FTP. This makes it easy to share files with other users who can access reports anytime, anywhere, without needing admin access to your site.
To get started uploading your Gravity Forms entries to FTP, get GravityExport today!

Helpful tips right in your inbox.
Subscribe to get the latest articles, information on releases and helpful Gravity Forms tips!
More articles

10 things you can ask AI to do with Gravity Forms (using the free GravityKit MCP)
See 10 practical things you can ask AI to do with Gravity Forms using the free GravityKit MCP: create forms, manage entries, build Views, and more.

Launch Log: theme template editing in Block MCP, Shield silentCAPTCHA for Zero Spam, and GravityView fixes
Block MCP adds safe theme template editing, Gravity Forms Zero Spam gains Shield silentCAPTCHA support, and GravityView fixes lightbox and notice bugs.

GravityKit turns 12: a year in review, and 30% off Lifetime All Access
GravityKit turns 12. A look back at a year of GravityView 3.0, GravitySearch, and AI-assisted building, plus a birthday sale on the Lifetime All Access Pass.
