Published
•
Updated
How to export images and files uploaded to Gravity Forms: A simple guide
Gravity Forms omits uploaded files from default exports. GravityExport solves this by bundling submitted images and documents alongside entry data in a single download.

If your website uses Gravity Forms, you may be wondering how to export files uploaded to your forms.
The Gravity Forms “File Upload” field allows users to attach images, documents, and other files to their form submissions. However, when exporting the entry data, the files themselves are not included!
So, what should you do? That’s what we’re going to cover in this post! Keep reading to learn how you can easily export files and images associated with your Gravity Forms entries.
Wanna try it?
Spin up a demo
See GravityExport in action on its live demo site.

Export images and files from Gravity Forms using GravityExport
GravityExport is a powerful, all-in-one export solution for Gravity Forms! With GravityExport, you can compile reports, export entry data to different file formats, and export files associated with submissions.
Here’s how to export uploaded images and files from Gravity Forms using GravityExport:
1. Install the GravityExport add-on
You can get GravityExport from our website. While there is a free version of the add-on, called GravityExport Lite, you’ll need the premium version to export uploaded files.
After downloading the add-on from your GravityKit Account page, follow the steps below to install and activate it on your site:
- Log in to your WordPress dashboard, hover over “Plugins”, click “Add New” and then “Upload Plugin”.
- Upload the plugin file you downloaded previously and click “Install Now”, and then “Activate”.
- Finally, hover over “GravityKit” in your WordPress Admin sidebar menu, click “Manage Your Kit”, and paste your license key into the box.
That’s it! Now that the plugin is installed and active on your website, you can begin configuring custom exports for uploaded files.
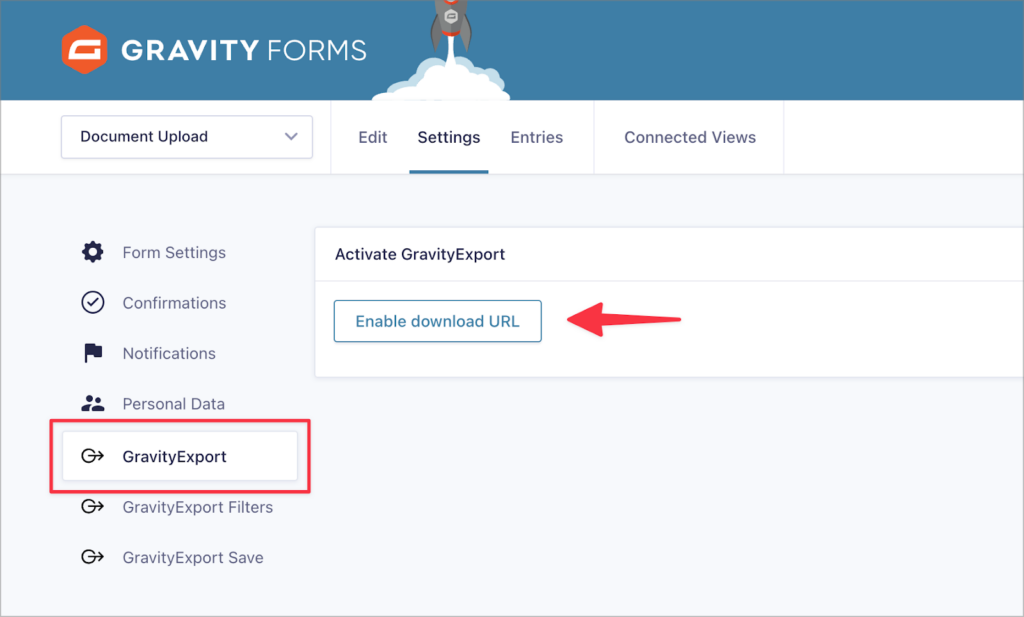
2. Activate the download URL
After installing GravityExport, you’ll be able to configure new feeds for exporting entries and files. The first thing you’ll need to do is activate the download URL. You can do this by going to your form settings, selecting “GravityExport” on the left and clicking “Enable Download URL”.
This will generate a unique download URL, allowing you to download your form entry data. However, this is only the first step of the process, because we have yet to configure the file export option!
Before moving to on step 3, make sure to save the feed.
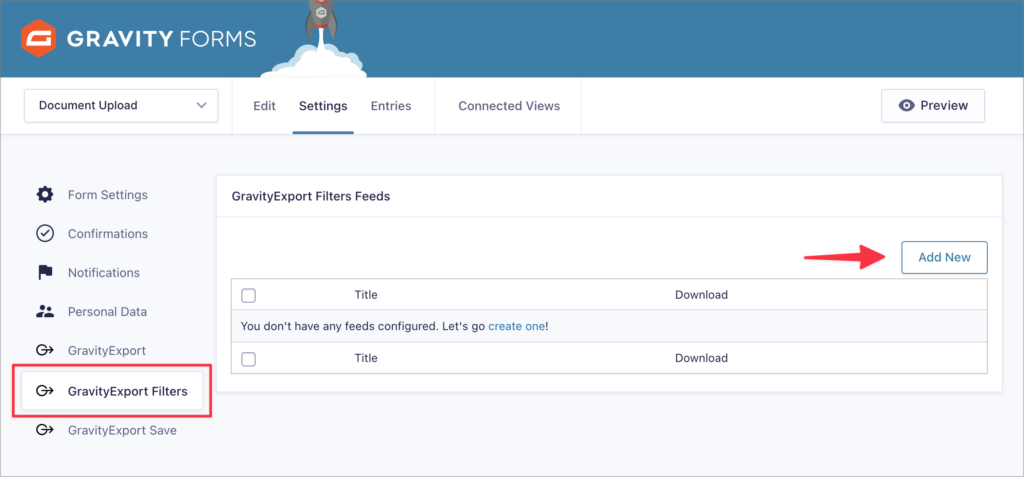
3. Create a report filter
Before we set up an automatic export to export uploaded files, we’re going to create a new filter feed. This will allow us to specify the form fields we want to export, rather than exporting all the data.
To create a new filter, we’ll click on “GravityExport Filters” and add a new feed.
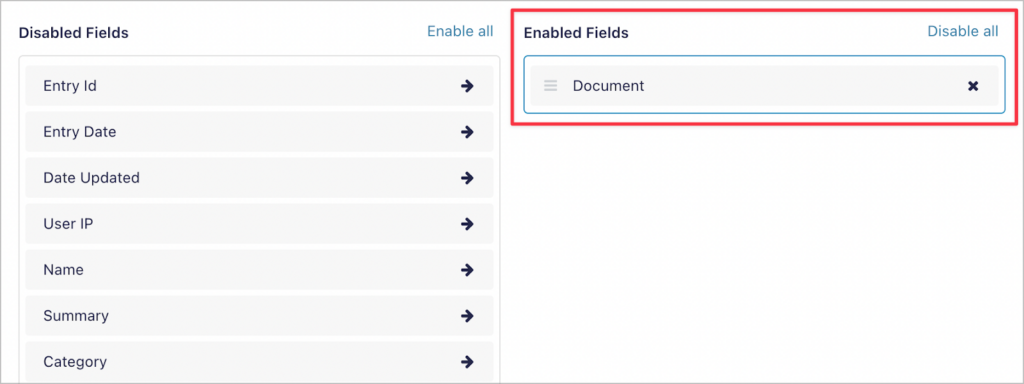
After giving our filter a name, we can scroll down to the “Field Settings” box and choose which form fields to include in the report.
Because we only want to export the files uploaded with each submission, we’ll disable all fields except the “Document” field. If you want to export entry data along with the fiels, you can leave the other fields enabled.
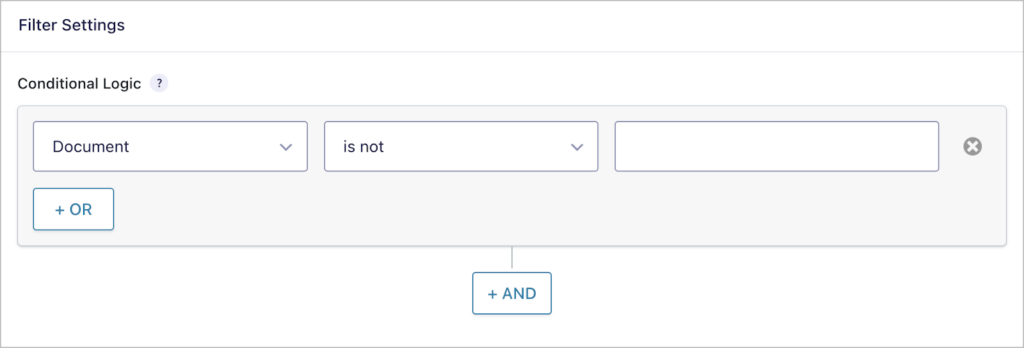
We can also add an optional conditional logic filter here to exclude entire entries from the export! For example, the filter below is exclude all entries that don’t include a document.
After configuring the filter, we’ll save the feed.
4. Configure a new “Save” Feed
Now that we have a report filter set up, we’re going to configure our file export feed. This feed will run every time we receive a new entry, exporting all uploaded files to a location of our choice.
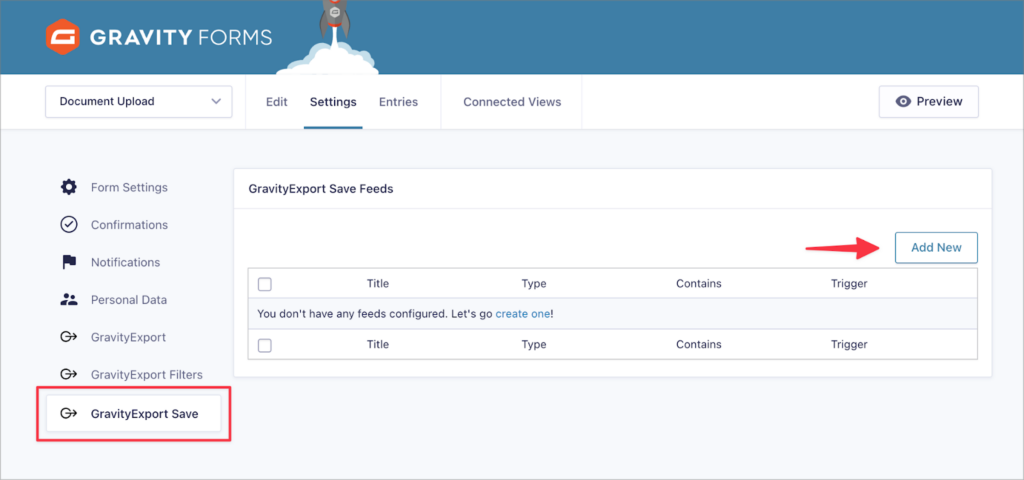
We’ll start by selecting the “GravityExport Save” tab and clicking “Add New” to create a new feed.
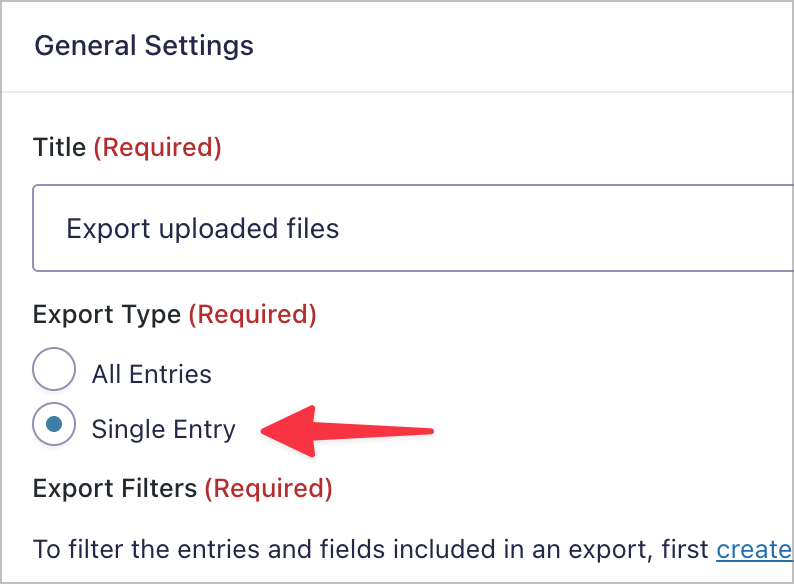
First, we’ll give our export a name, and then select an export type. Here, we have the option to export all entries or single entries. We’ll select “Single Entry”.
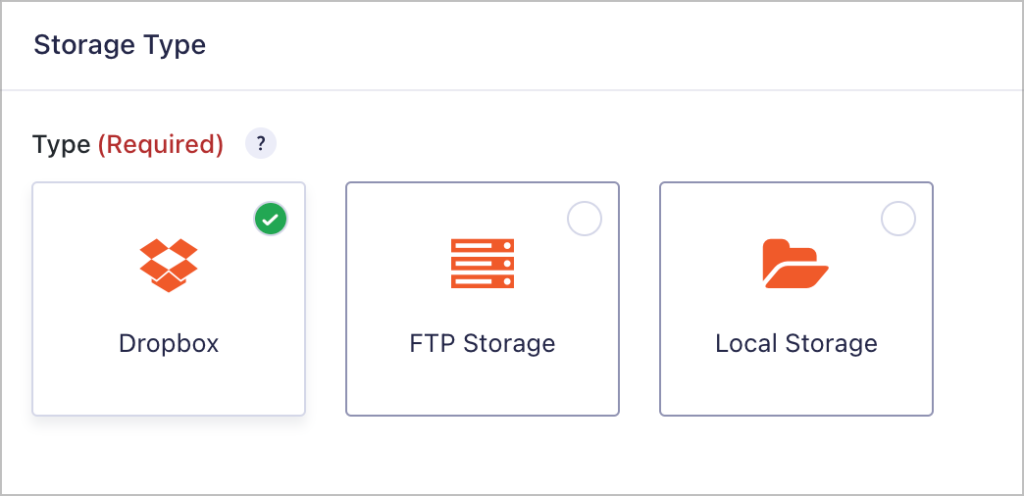
Next, we need to choose where to save our exported files and entry data. GravityExport enables us to export data to Dropbox, FTP storage or local storage!
Pro tipLearn more about exporting your Gravity Forms data to Dropbox, or a server running FTP.
After selecting a storage location, we’ll scroll back up and check the box that says “Copy all file upload fields with the exported entry”.
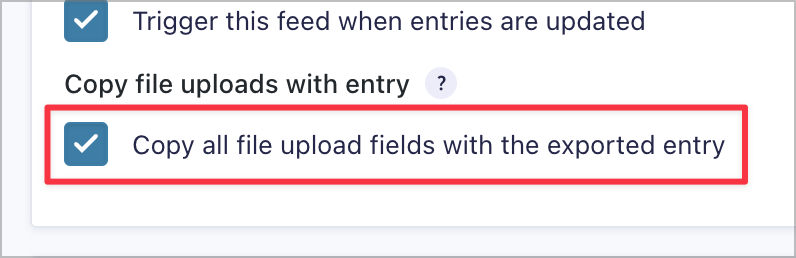
Finally, save the feed.
That’s it! Now every time we receive a new form entry, the associated files will be exported and saved to our Dropbox!
5. Build more helpful reports
Why stop at just one report? GravityExport enables you to configure multiple reports and exports for each of your forms! Not only is GravityExport the best plugin for exporting uploaded images and files from Gravity Forms, it’s got a load of other powerful features, too!
- Share entry reports using a secure download URL
- Attach entries to Gravity Forms notification emails
- Export Gravity Forms entries to PDF
- Export Gravity Forms entries to Excel
- Filter data in your reports and save export configurations for future exports!
- Loads more powerful features…
Other ways to export uploaded files from Gravity Forms
You may be wondering what other ways there are to export uploaded images and files from Gravity Forms. While GravityExport provides the best overall solution, with the most flexibility, there are other methods:
- Export to Dropbox using the official Dropbox add-on
Using the official Gravity Forms Dropbox add-on, you can send all files uploaded through your form directly to your Dropbox. The Add-On also includes a “Dropbox” form field, which you can add to a form. This allows users to upload files from their own Dropbox as part of their submission. - Export files using Zapier automations
Using Zapier is always an option if you need a way to send files and images to a location that GravityExport does not support. For example, you could set up an automation that uploads all files to your Google Drive. Gravity Forms has an official Zapier add-on, making it easy to configure different automations.
Bonus: Making it easier to download files from Gravity Forms
Often you may not need a way to export your Gravity Forms files. Instead, you may just need a way to access those files more easily, or download them from your site.
If that’s the case, then consider using GravityView to build a document library or Gravity Forms file repository! GravityView is an add-on that enables you to display Gravity Forms data on the front end.
You can use GravityView to List uploaded files in a table with a download button, making it easy to search for files and download them directly from your website.
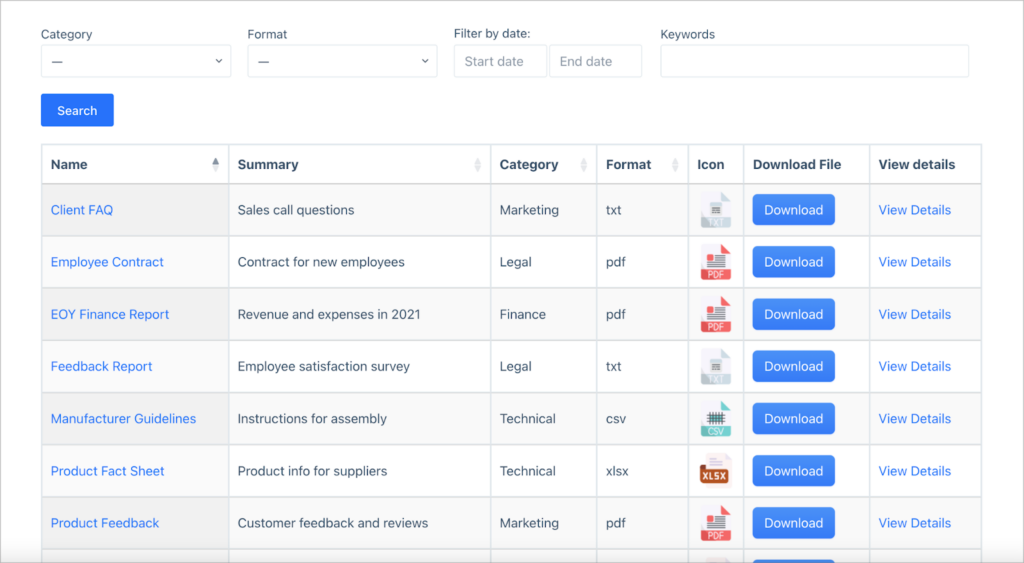
Pro tipWant to build a document library/repository like the one above? Check out our step-by-step tutorial.
Easily export files associated with Gravity Forms submissions
While you can export entry data from Gravity Forms, there is no way to export the files associated with those submissions using default functionality.
If you need a way to export images and files uploaded to Gravity Forms, then GravityExport is the ideal solution for you. With GravityExport, you can send data to different locations and configure multiple reports for each of your forms.
To learn more about managing files in Gravity Forms, read our comprehensive guide to Gravity Forms file uploads!

Helpful tips right in your inbox.
Subscribe to get the latest articles, information on releases and helpful Gravity Forms tips!
More articles

10 things you can ask AI to do with Gravity Forms (using the free GravityKit MCP)
See 10 practical things you can ask AI to do with Gravity Forms using the free GravityKit MCP: create forms, manage entries, build Views, and more.

Launch Log: theme template editing in Block MCP, Shield silentCAPTCHA for Zero Spam, and GravityView fixes
Block MCP adds safe theme template editing, Gravity Forms Zero Spam gains Shield silentCAPTCHA support, and GravityView fixes lightbox and notice bugs.

GravityKit turns 12: a year in review, and 30% off Lifetime All Access
GravityKit turns 12. A look back at a year of GravityView 3.0, GravitySearch, and AI-assisted building, plus a birthday sale on the Lifetime All Access Pass.
