Using Entry Tags in GravityBoard
GravityBoard integrates with the Entry Tags plugin to display tags on cards. Tags provide a clear, visual way to categorize and organize entries directly on your board.
What you can do with entry tags #
When Entry Tags is active, you can:
- See tags on cards: Tags appear at the top of each card with colored backgrounds
- Edit tags from the card detail view: Open a card to add or remove tags
- Control visibility: Show or hide tags using your board feed settings
Requirements #
To display entry tags on a GravityBoard, you need:
- The Entry Tags plugin installed and activated
- A form with at least one Entry Tags field
- A GravityBoard feed configured for that form
Setting up tags on your board #
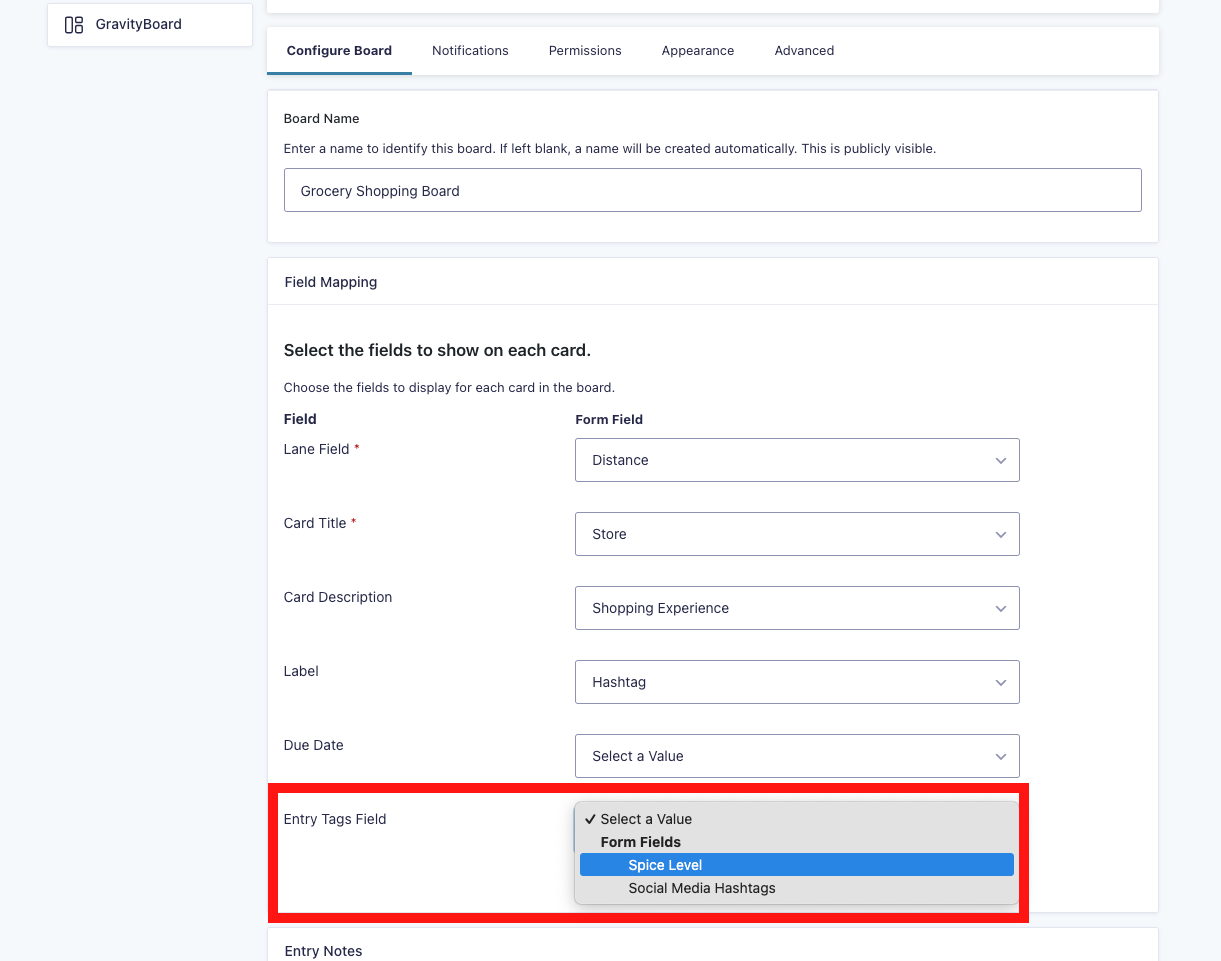
Step 1: Map the entry tags field
- Go to Forms > Boards and edit your board feed
- Open the Configure Board tab
- In the Field Mapping section, locate Entry Tags Field
- Select the Entry Tags field from your form
- Click Save Settings
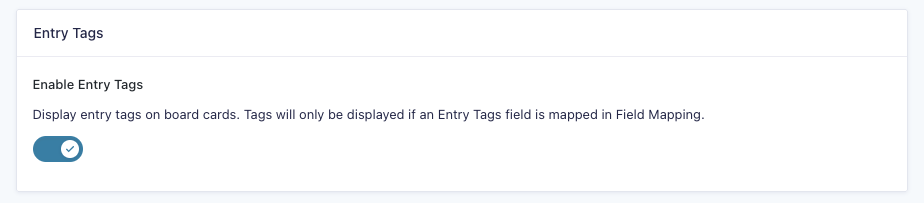
Step 2: Enable tag display
- In the same feed settings, scroll to the Entry Tags section
- Toggle Enable Entry Tags on (enabled by default)
- Click Save Settings
Note: Tags only appear on cards when:
- The Entry Tags plugin is active
- An Entry Tags field is mapped
- Enable Entry Tags is turned on
Viewing tags on cards #
After setup, tags appear at the top of each card, above the card title.
Each tag includes:
- A colored background defined in the Entry Tags field settings
- Readable text: Text color automatically adjusts for contrast
If an entry has multiple tags, they display side by side and wrap to additional lines as needed.

Editing tags #
You can add or remove tags directly from GravityBoard without opening Gravity Forms.
To edit tags on a card
- Click a card to open the card detail view
- Locate the Tags field
- Click the field to open the tag dropdown
- Select a tag to add it, or click the × icon to remove a tag
- Click Save
Changes sync immediately, no page refresh required.
Note: GravityBoard does not support creating new tags. You can only select from existing tags or remove tags that are already assigned.
Troubleshooting #
Tags are not appearing on cards
- Confirm Entry Tags is active: The integration requires the plugin to be installed and activated
- Check field mapping: Ensure an Entry Tags field is selected in Field Mapping
- Verify the toggle: Make sure Enable Entry Tags is turned on
- Confirm tags exist: Entries must have tags assigned
Tags are not saving
- Check your permissions: You need edit access to the card
- Verify the form field: Confirm the Entry Tags field still exists on the form
Tag colors look incorrect
- Update tag colors: Colors are controlled in the Entry Tags field settings
- Clear your cache: Your browser may be displaying cached styles
Related articles #
If you need help or have questions, contact our support team.