Published
•
Updated
How to build a bug tracker for project management on WordPress (without code)
Build a custom WordPress bug tracker using Gravity Forms and GravityView. Manage issues, assign priorities, and track status without costly off-the-shelf project tools.
Running a software company? Keeping your customers happy is a top priority, and that means nailing issue tracking and bug fixes with an organized workflow!
Now, while issue tracking software is vital, you might find existing solutions don’t meet the needs of your organization. Plus, many of those platforms are too costly for smaller companies.
Keep reading as we show you how to build a custom WordPress bug tracker using Gravity Forms and GravityView.
Check out a live demo of the finished bug reporting system and get your own free trial site preloaded with all GravityKit add-ons!
Download the free bug report form template now!
Import the template into Gravity Forms and customize as necessary.
Sneak peek
Here’s a sneak peek at our finished issue reporting system.
When developers click on an issue, they will be able to view more details about it, including its status.
Developers can then update the issue status from the front end.
What you’ll need
Here are the plugins you’ll need to build an issue tracking system like the one in this tutorial:
- Gravity Forms (any license level)
- GravityView (any license level)
- Gravity Forms Entry Tags (free!)
What is a bug tracking system?
Software companies need ways to log, track and monitor bugs. An issue reporting and tracking system helps you manage the process so you can notify developers to start working on fixes. Without an efficient issue tracking system, it’s hard to pinpoint important issues and prioritize development work.
Many companies around the world pay “hackers” thousands of dollars for finding issues and vulnerabilities in their software which they can then take action on.
Why build a bug tracker on WordPress?
If you already run a WordPress website, it makes sense to build an issue tracker using the same platform. After all, why spend time switching between different apps, when you can use one for everything?
To build an effective issue tracking system, you need two things:
- A way for users to report issues in detail
- A way to categorize, update, filter, and sort those issues
Gravity Forms takes care of the reporting side of things by allowing you to build powerful forms and configure custom notifications. GravityView allows you to display, update, sort, and filter those entries on the front end. Using Gravity Forms and GravitityView, you can build a customized issue tracker that suits the needs of your business.
Furthermore, Gravity Forms and GravtyView are both flexible solutions that can scale as your business grows!
Creating the issue submission form
The first thing we need to do is create a form that allows users to submit new issues that they encounter. issues will then be sent to developers to review and fix. The system we’re going to build will function a lot like Jira or Github!
Before you create a new form, ensure you have installed and activated our free Gravity Forms Entry Tags plugin. This plugin adds a new “Entry Tags” field type to Gravity Forms, making it easy to tag submissions with different labels.
To create a new form, we’ll hover over “Forms” and click “New Form”. Now we can start adding fields using the Gravity Forms drag-and-drop builder.
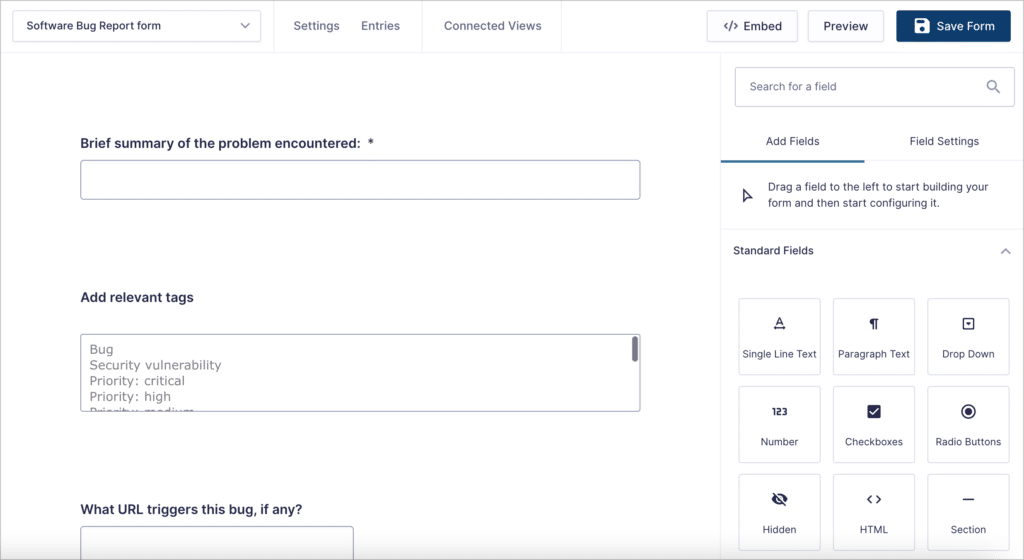
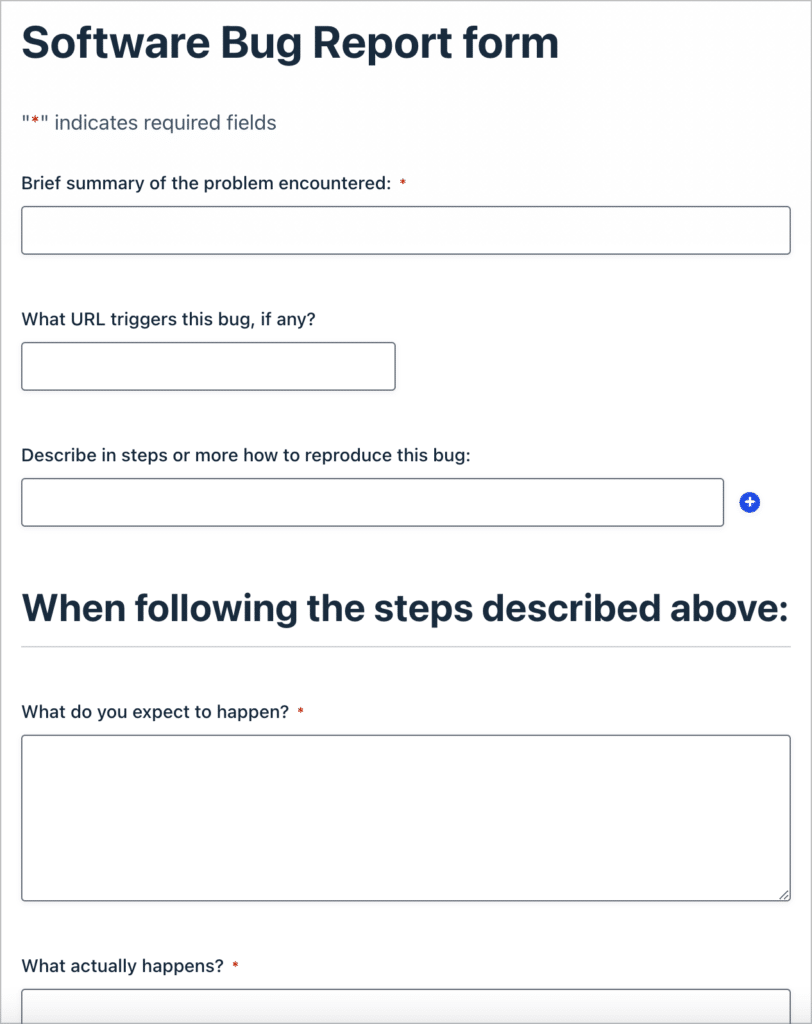
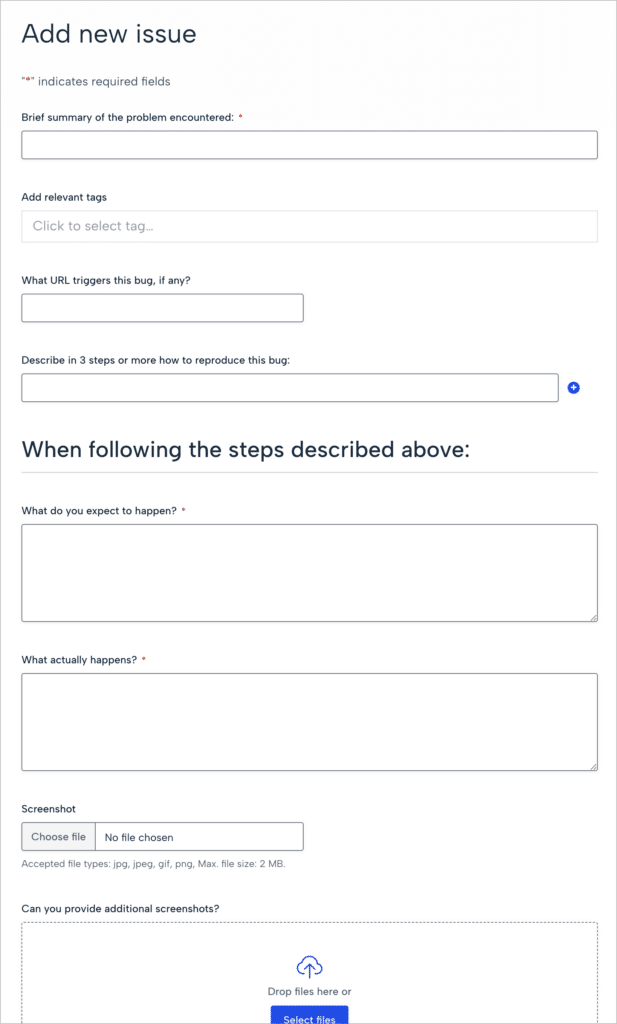
Let’s add the following fields to our form:
- Brief summary of the problem encountered (Single Line Text field)
- Add relevant tags (Entry Tags field)
- What URL triggers this bug, if any? (Website field)
- Describe in steps or more how to reproduce this bug (List field)
- What do you expect to happen? (Paragraph field)
- What actually happens (Paragraph field)
- Screenshot (File Upload field)
- Can you provide additional screenshots (Multi-File Upload field)
- Name
- Website
- Status (Drop Down field)
- Approved? (Checkbox field)
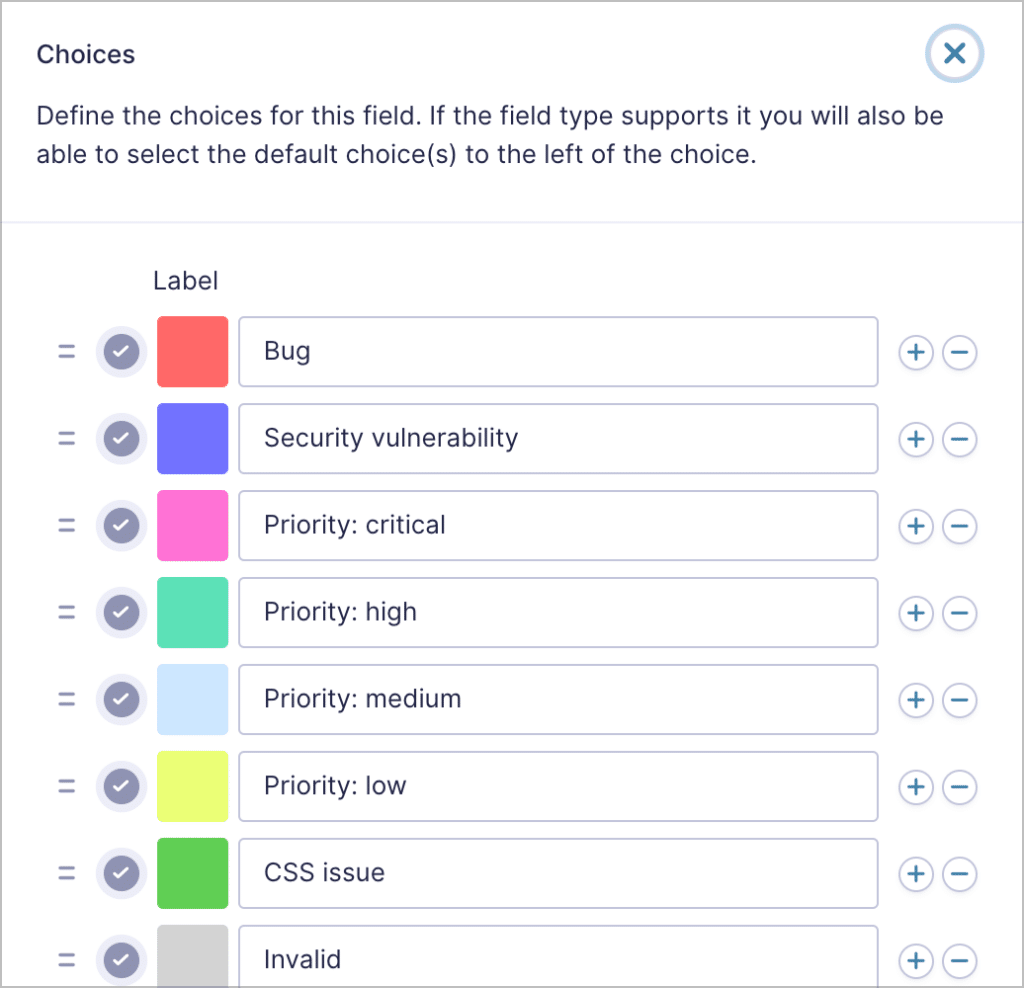
After adding the “Tag” field to your form, open the field setting to set the field choices. These will be the possible tags that users can add to an issue. Here we’ll add tags like “Bug”, “Priority: critical” and “CSS issue”.
The final two form fields are especially important! We’re going to make both of fields fields “Administrative” to ensure that they are not accessible to regular users.
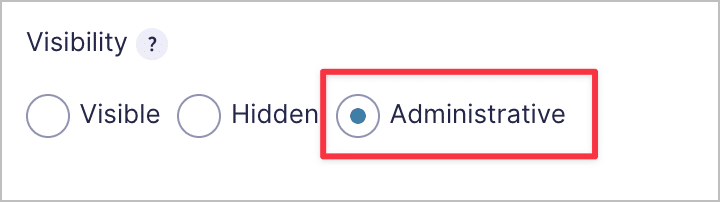
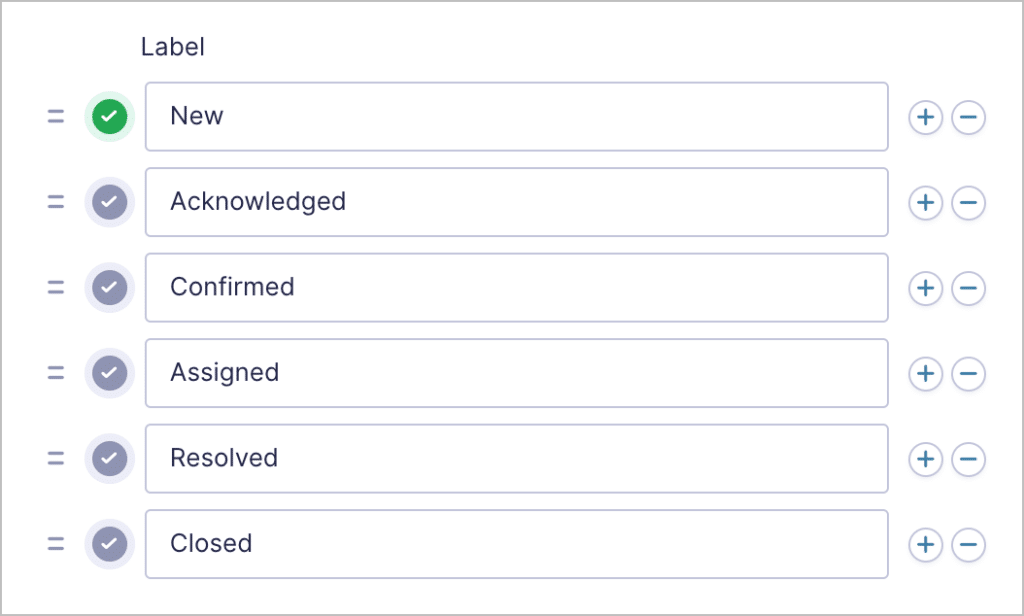
Developers will be able to use these fields to approve new issues that get submitted and update the status of existing issues. The “Status” field will have multiple options that developers can select.
Feel free to customize your form according to the unique needs of your organization!
Here’s what our finished issur submission form looks like on the front end:
You can save time by downloading this form template now!
Creating the bug tracker View
After creating the issue submission form, the next step is to build a View to display issues on the front end. This will allow developers to search and sort through issues, view new issues in detail and update an issue’s status.
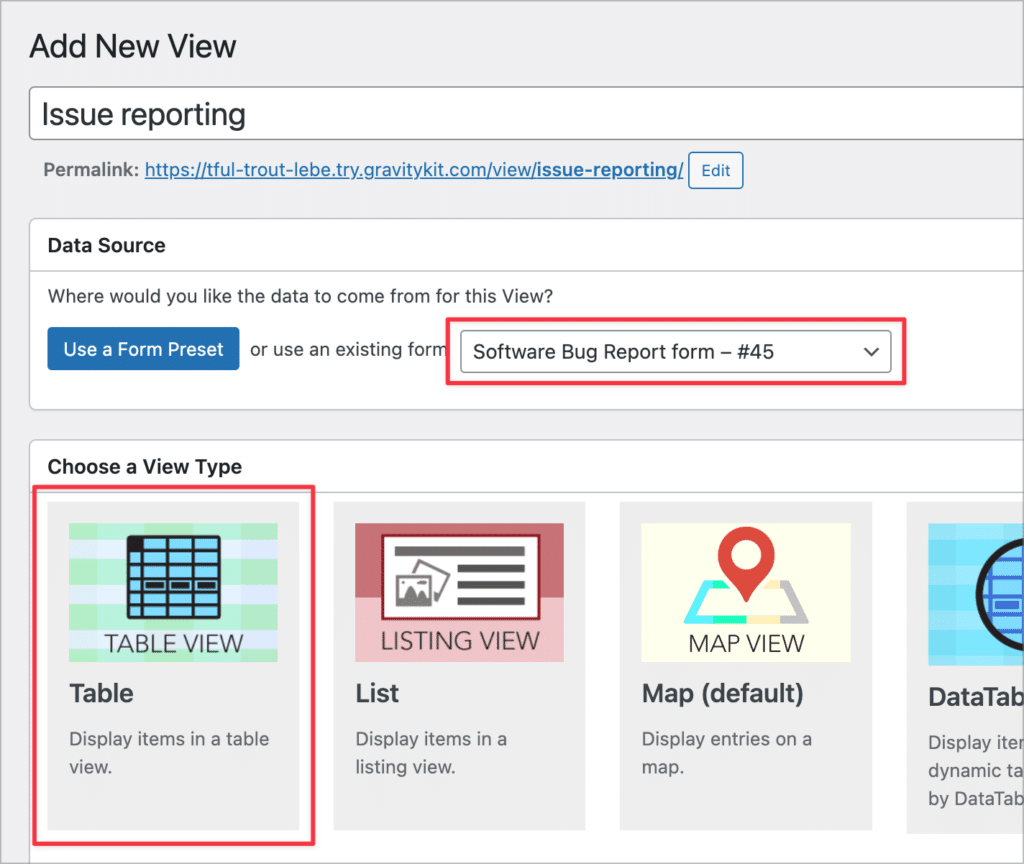
To create a new View, we’ll hover over “GravityKit” and click “New View”. After giving our View a name, we’ll need to select a data source and choose a View Type. We’ll select our bug report form as the data source and choose the Table layout as our View Type.
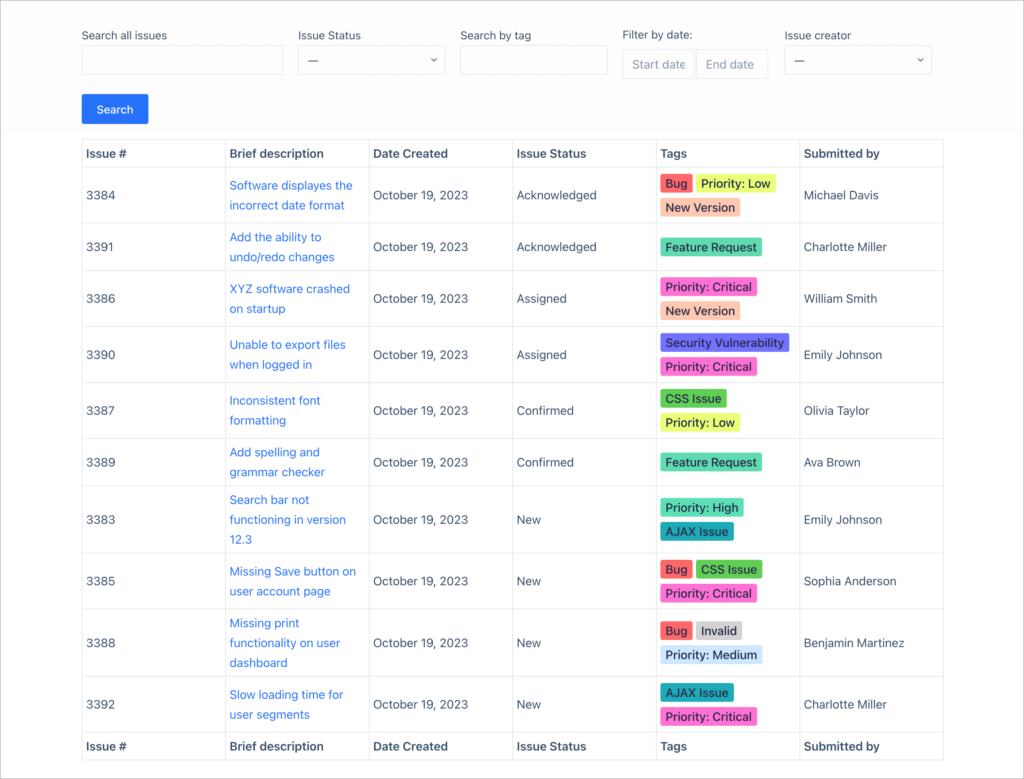
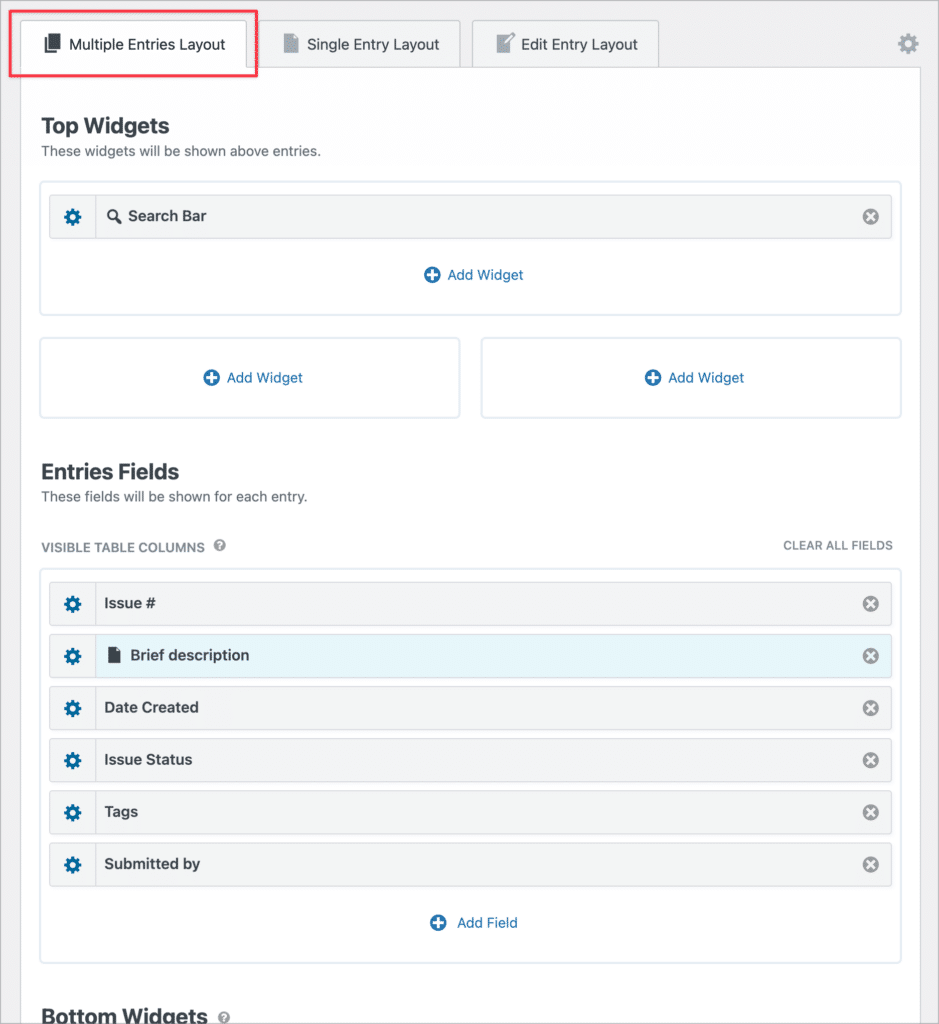
Now we can start configuring our View using GravityView’s intuitive drag-and-drop builder! Let’s start with the Multiple Entries Layout. First, we’ll add a Search Bar widget to the “Top Widgets” area. After adding the widget, we can click on the gear icon to configure the search settings and add different input fields.
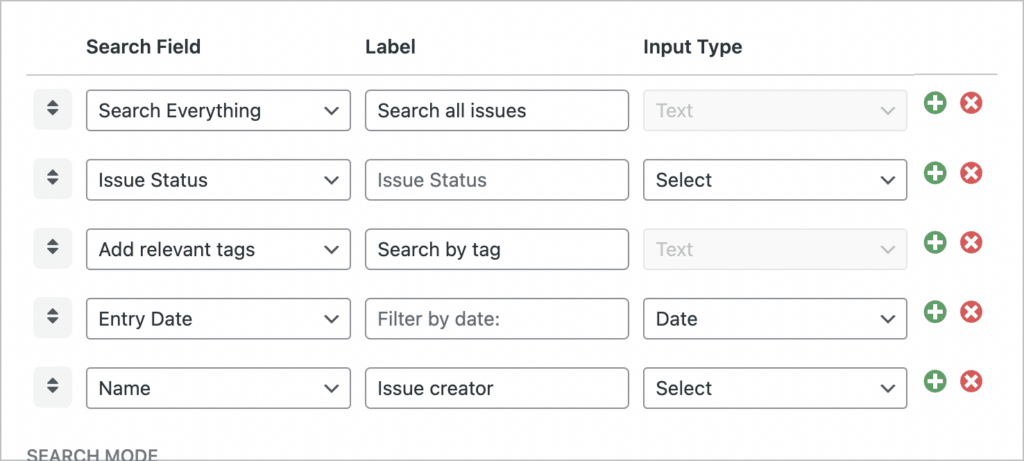
As you can see, we’ve added five search inputs allowing users to search by keyword, issue status, tags, date and name.
Next, we’ll add fields to the “Entries Fields” section of the View editor. Here we’ll add the following fields:
- Issue # (for this we can use the entry ID)
- Brief description (make this field a link to the Single Entry)
- Date Created
- Issue status
- Tags
- Submitted By (the name of the user who submitted it)
Here’s what the Multiple Entries Layout looks like after adding widgets and fields:
After configuring the Multiple Entries Layout, we can turn our attention to the Single Entry Layout.
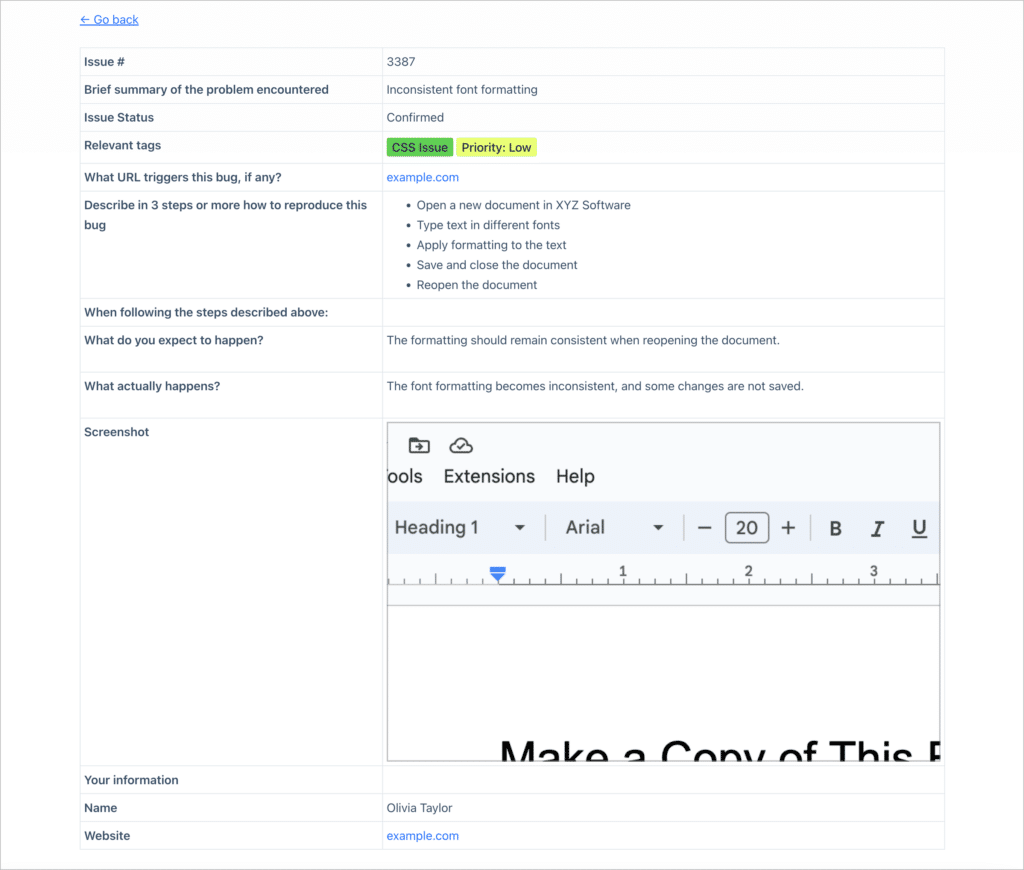
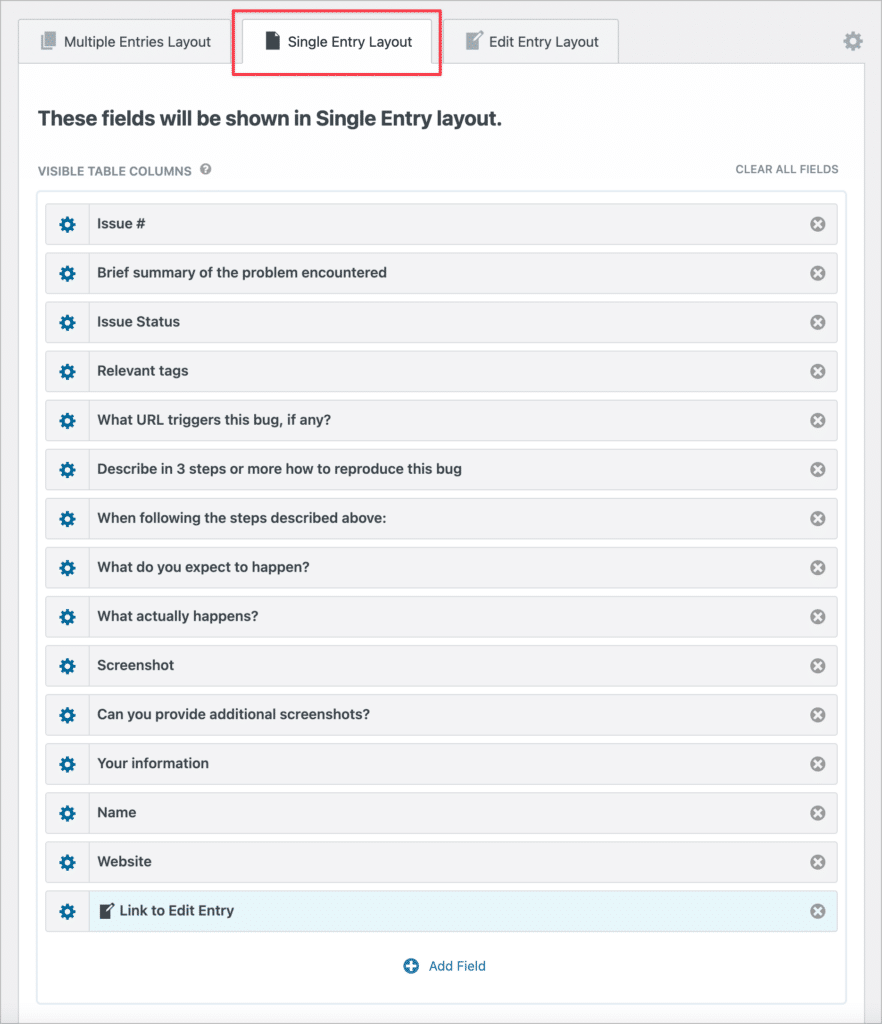
Configuring the Single Entry Layout
The Single Entry Layout displays more information about a specific issue. Here we’re going to add all form fields, including a link to edit the issue!
We’re almost there! Finally, we’ll need to configure the Edit Entry Layout.
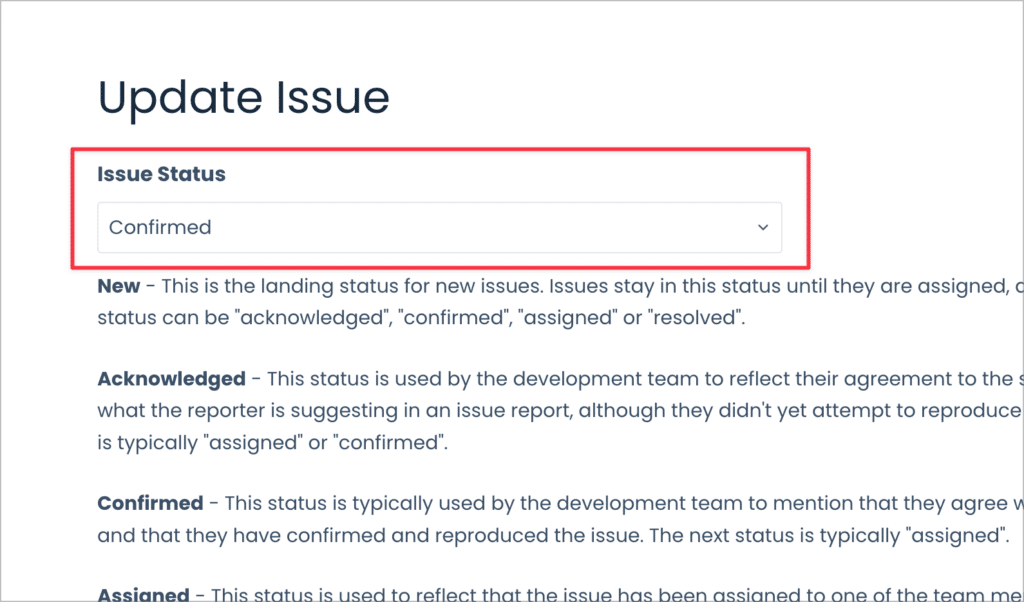
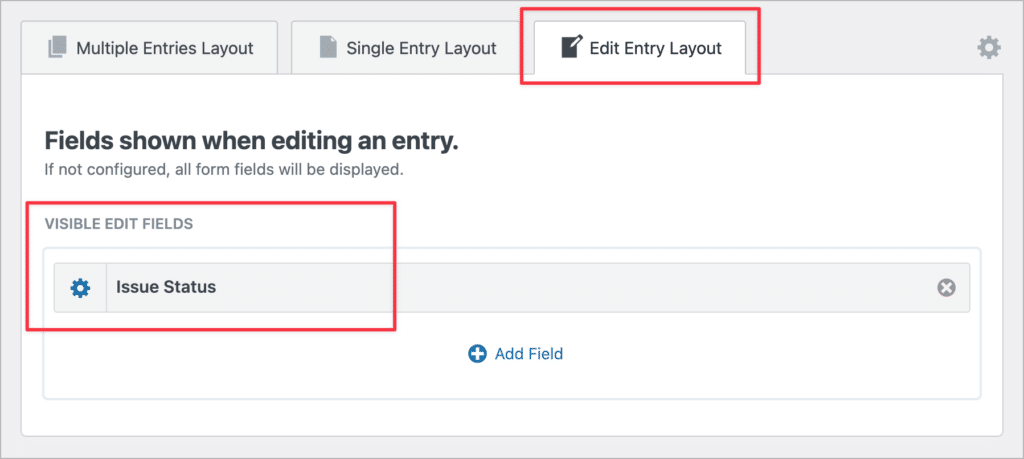
Configuring the Edit Entry Layout
The final thing we need to do is configure the Edit Entry Layout. This will allow developers to update issues from the front end. In our case, we only want developers to be able to update the status of an issue, so we’ll only add this single field to the layout.
That’s it!
Checking it out on the front end
Now that we’ve configured our bug tracker View, let’s check it out on the front end.
When we open the View, we’ll be able to see. asnapshot of all the new issues. We can see the issue number, title, date created, and who submitted it. There is also a search bar where we can sort and filter issues by various parameters.
When a user clicks on an issue to view more details they are taken to the Single Entry page where they can see the entire issue, including screenshots.
Users can then click on the Edit link to update an issue’s status!
In this tutorial, we built a simple yet powerful WordPress bug tracker. There are several ways you could extend and enhance this application using Extensions for Gravity Forms and GravityView..
Extending your issue tracker application
There are several powerful Extensions available for both Gravity Forms and GravityView. Using these, you can enhance your issue tracker application by adding advanced features. Here are some examples:
- Add advanced filtering conditions: Use GravityView Advanced Filtering Extension to filter issues using conditional logic. This would allow you to exclude issues with a status of “Closed”.
- Set up email notifications: Using Gravity Forms’ built-in “Notifications” feed, you can set up email notifications every time a new issue is reported.
- Set up Slack notifications: Gravity Forms offers a Slack add-on that allows you to send Slack notifications when your form is submitted
Pro tipLearn more about extending GravityView by checking out all of our powerful Extensions.
Build a bug tracking tool for project management today!
Having an efficient bug tracking workflow is a critical part of improving and growing your app or software platform. Many third-party apps allow you to report and track issues but they are often complex and inflexible.
You can build your own bug tracker for WordPress using Gravity Forms and GravityView. Gravity Forms allows you to collect bug reports and notify developers via email, while GravityView allows you to display, edit, filter, and sort issues on the front end.
If you enjoyed this tutorial, subscribe to our newsletter below and we’ll notify you when we publish new content! Next, check out how to build a custom task management system.

Helpful tips right in your inbox.
Subscribe to get the latest articles, information on releases and helpful Gravity Forms tips!
More articles

Launch Log: GravitySearch arrives, plus AI spam review and GravityView fixes
This week, releases are anchored by a brand-new product! GravitySearch joins the GravityKit suite with cross-form entry search for Gravity Forms. Alongside it, Gravity Forms Zero Spam picks up an AI-powered review step, and GravityView sees fixes for Enhanced Security, Edit Entry, and Entry…

Meet GravitySearch: advanced global search for Gravity Forms
GravitySearch adds cross-form search to Gravity Forms: find any entry from one screen, build advanced filters, and preview results without leaving the page.

Block MCP is now a free WordPress plugin (and it sets itself up)
Block MCP is now a free WordPress plugin. Connect Claude or any MCP client to your site in minutes and let AI edit your content without breaking blocks.