Published
•
Updated
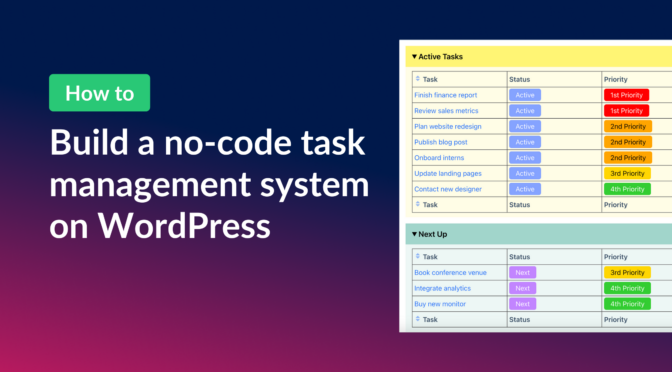
How to build a task management system on WordPress without code
Build a custom task management app on WordPress with Gravity Forms and GravityView. Let users add, filter, sort, and update tasks from the front end without writing code.
Does your team suffer from a lack of collaboration, inefficient task execution, and missed deadlines? If so, it’s time to think about implementing a WordPress task management system!
After all, what better platform to use for task management than the world’s most popular CMS? In this post, I’m going to show you how to build a custom task management app using Gravity Forms and GravityView.
We’ll start by setting up a “task submission” form in Gravity Forms where we can add new tasks as they arise. Next, we’ll use GravityView to create an interface that allows users to organize, filter, sort, edit, and update tasks from the front end.
Let’s get started!
Check out a live demo of the finished task management system and get your own free trial site preloaded with all GravityKit add-ons!
Download the free task tracking form template now!
Import the template into Gravity Forms and customize as necessary.
Sneak peek
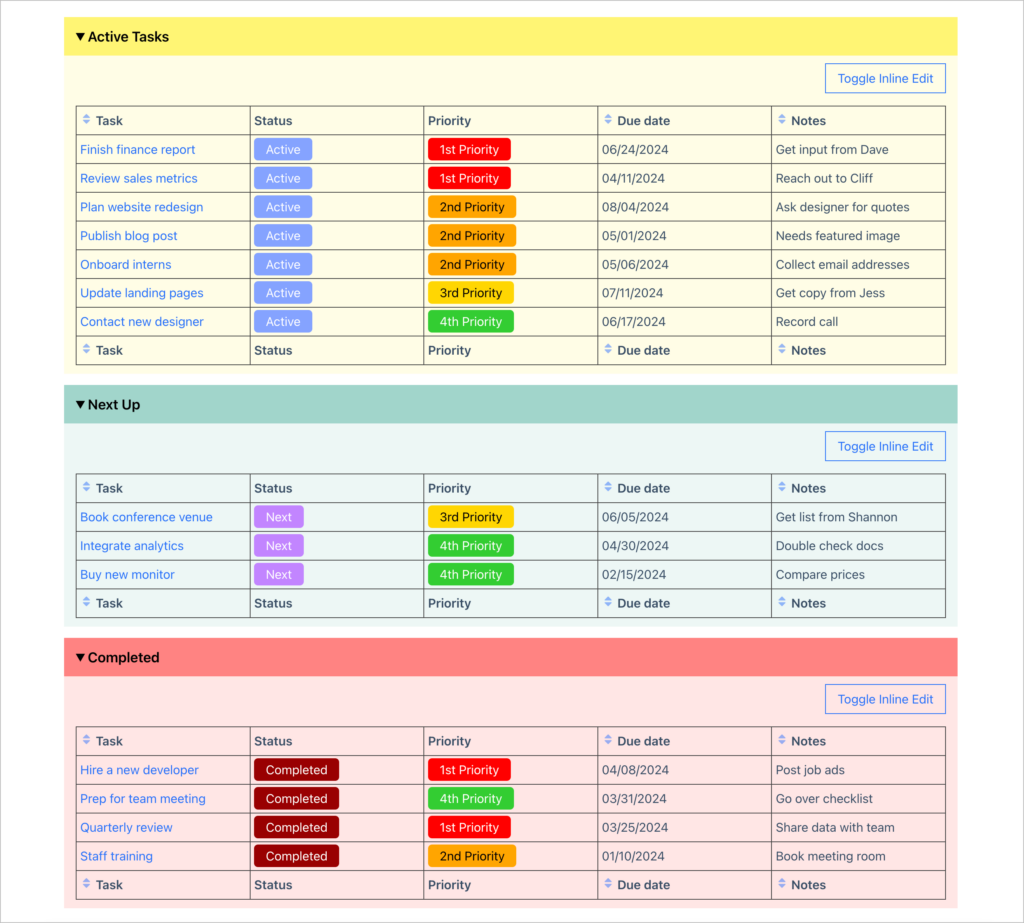
Here’s a preview of the finished task management system. As you can see, tasks are grouped together based on status. Each task also has a priority level and a due date associated with it.
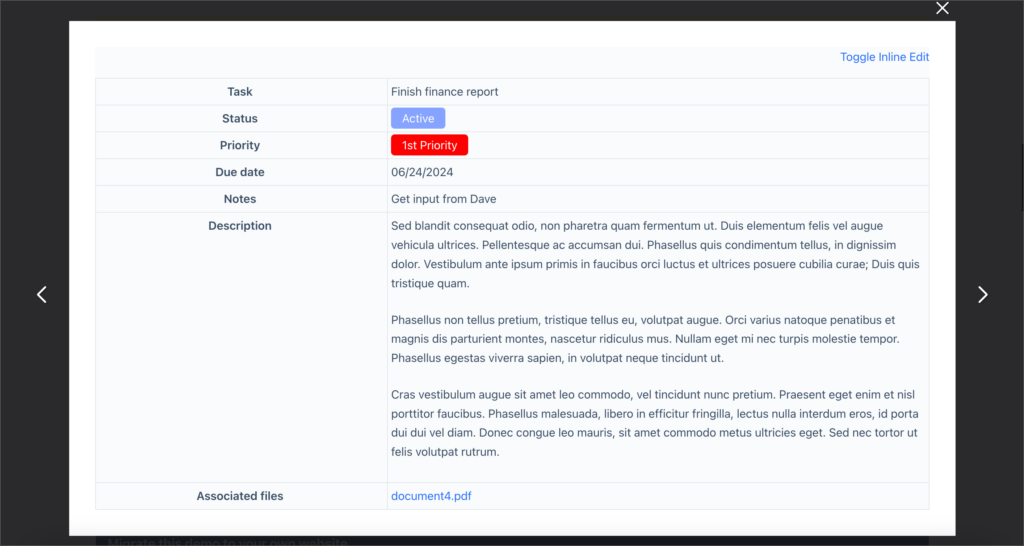
Clicking on the name of a task brings up a lightbox containing more information about that specific task, including its full description and any associated files or documents.
Why use a task management app?
When it comes to getting things done and completing projects on time, having a task management system is crucial!
Back in the day, people often used paper to-do lists and whiteboards for recording and keeping track of tasks. But today things have evolved and we’re lucky enough to have plugins like GravityView that let us build our own, personlized task management tools! Here are some of the benefits of using these tools.
Keep everything organized in one, central hub
Having a specific tool for managing your tasks and projects enables you to manage everything from one central hub instead of having notes and reminders in different places. This helps you to stay organized so that you don’t forget about important tasks.
Task prioritization
A task management system enables you to prioritize tasks and manage important deadlines. Many people spend time on low-priority tasks which end up delaying deadlines for bigger projects. Task management helps you to prioritize your to-dos so that you finish important projects on time.
Improve team collaboration
Task management tools allow anyone to create tasks and assign them to other members of the team. Moreover, having a central hub allows your entire team to see who’s working on what. This makes for more efficient work and better collaboration.
Why use Gravity Forms and GravityView for task and project management?
Gravity Forms is a powerful data management platform that enables you to capture any kind of data on your website. GravityView compliments Gravity Forms by giving you the ability to display that data on the front end and build dynamic interfaces! This makes Gravity Forms with GravityView a versatile solution for building custom task management systems on WordPress.
1. Creating the task form in Gravity Forms
The first thing we’re going to do is create a form in Gravity Forms that enables us to submit tasks. This is going to form the backbone of our Gravity Forms task management system.
To create a new form, we’ll hover over “Forms” and click “New Form”. Then we’ll give the form a name (“Tasks”) and click “Create Form”. Now we can start constructing our form using the Gravity Forms visual editor.
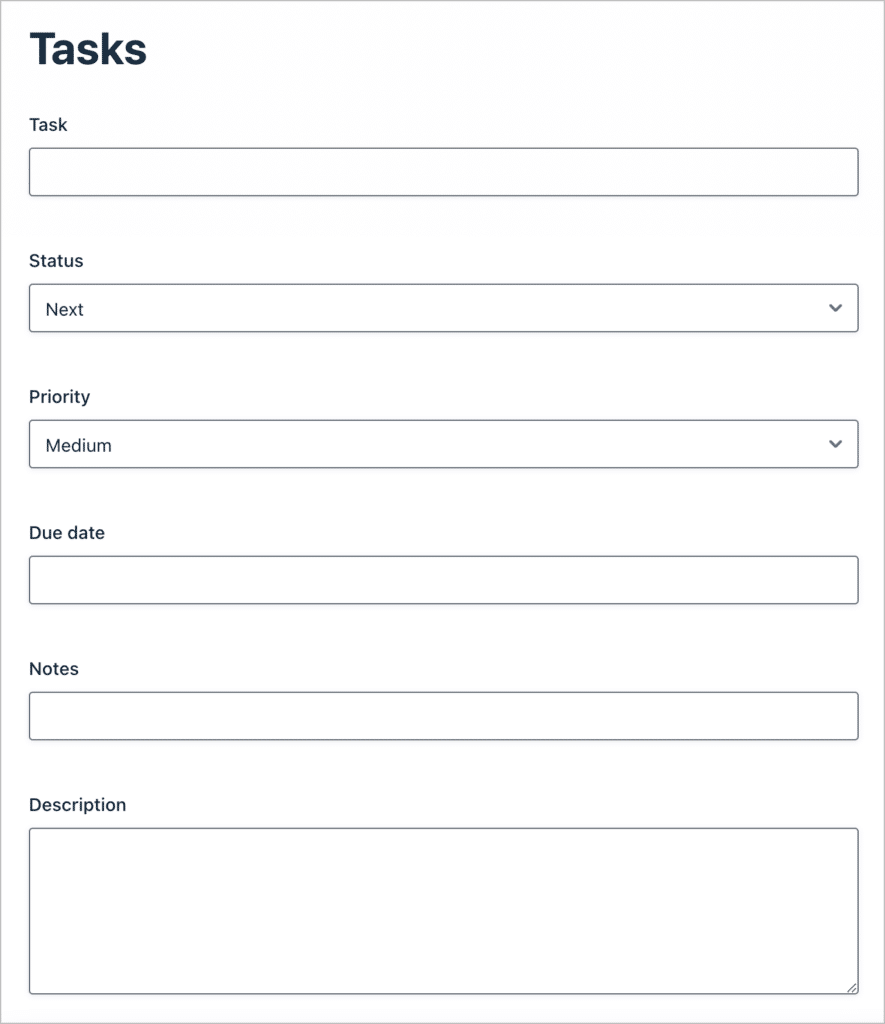
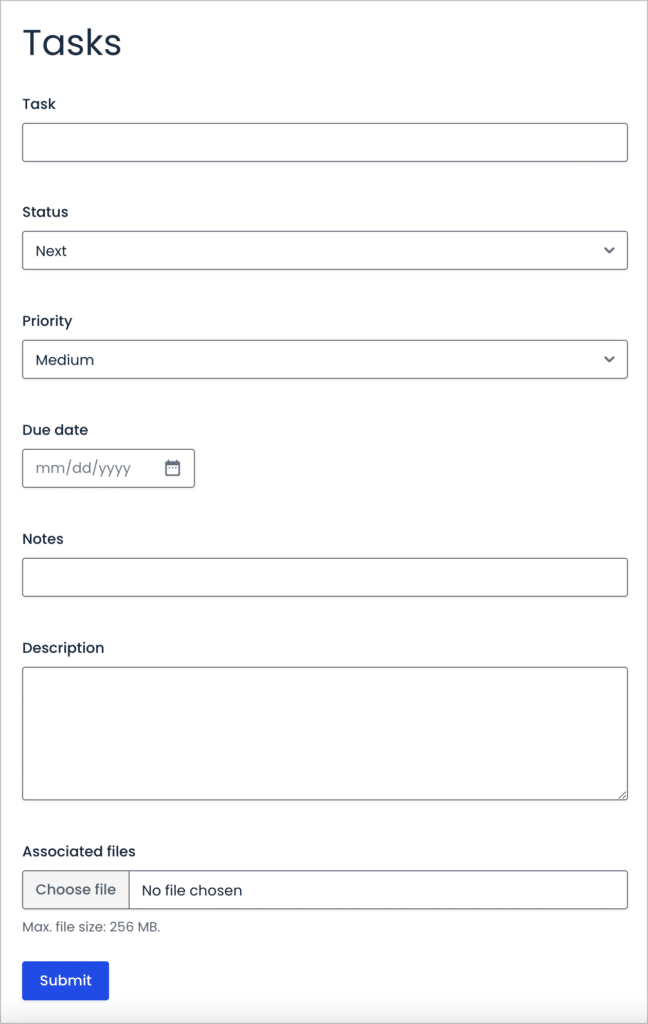
We’re creating a relatively basic task management app, so we’ll just add the following fields:
- Title (“Single Line Text” field)
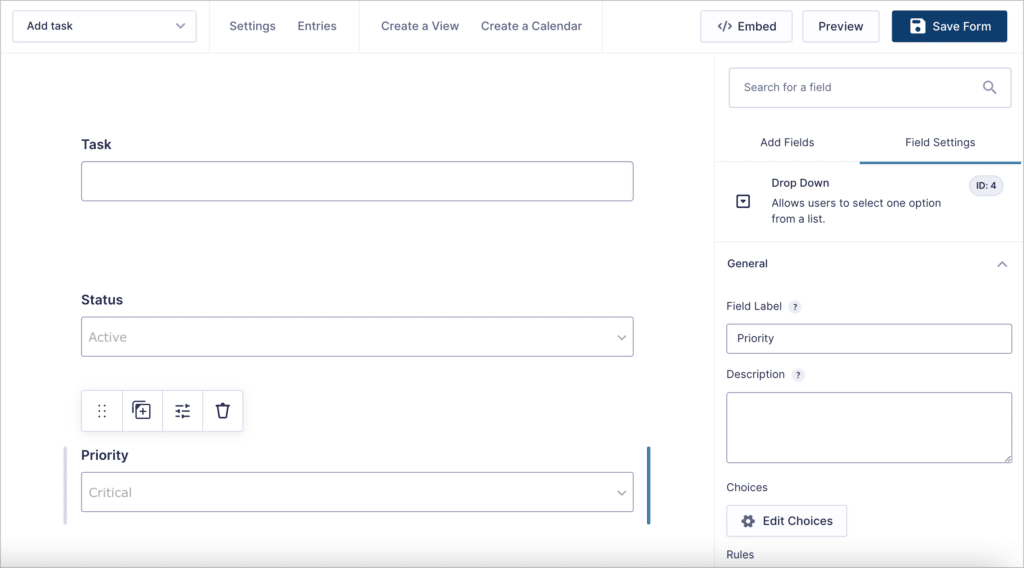
- Status (“Drop Down” field)
- Priority (“Drop Down” field)
- Due date (“Date” field)
- Description (“Paragraph Text” field)
- Notes (“Single Line Text” field)
- Associated file (“File Upload” field)
For the “Priority” dropdown field, we’ll add four options:
- “1st Priority”
- “2nd Priority”
- “3rd Priority”
- “4th Priority”
For the “Status” dropdown we’ll add the following three options:
- “Active” (for tasks that need attending to)
- “Next Up” (for tasks that aren’t urgent)
- “Completed” (for tasks that have been finished)
The “Description” and “Notes” fields are for us to describe the task in more detail or add extra, relevant information about the task. Finally, the “Associated file” field will allow us to upload files related to the task, such as a report or spreadsheet for example.
Okay, that’s it!
Now, all that’s left to do is update our form and embed it on a page or post. To do this, we’ll create a new page, add a “Gravity Forms” block and select our form from the dropdown menu.
Here’s what our completed form looks like on the front end:
Save time by downloading the task tracking form template now!
Now that our “Add Task” form is set up and ready, the next step is to create a View that enables us to display and edit tasks on the front end.
2. Creating the View in GravityView
Now that we have a task submission form set up, we’re going to create a View in GravityView that allows us to display and edit those tasks on the front end.
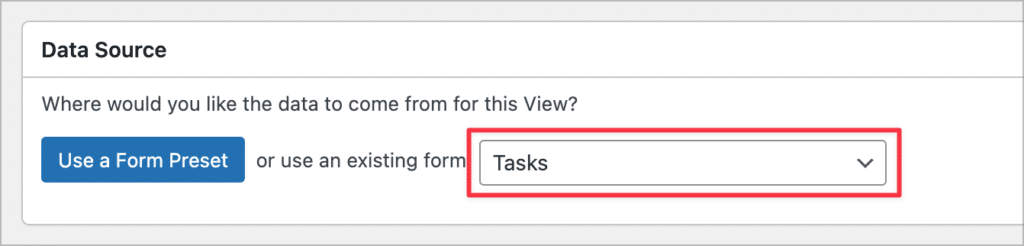
To create a new View, we’ll hover over “GravityKit” in the sidebar menu and click on “New View”. Next, we’ll select our Tasks form as the data source (this is a form containing the entries we want to display).
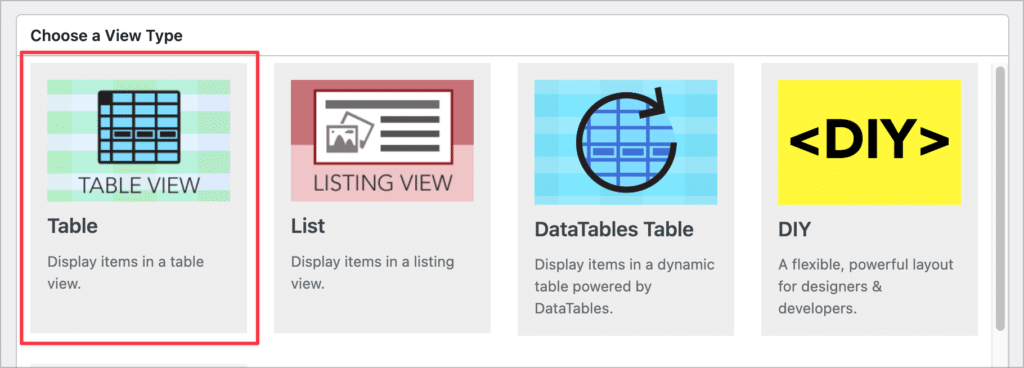
Finally, under “Choose a View Type”, we’ll select the “Table” View Type. This layout option allows us to display Gravity Forms entries in a table format. This View type is ideal for a task management interface!
After selecting a View type, we can start configuring our View by adding widgets and fields to the Multiple Entries page. The Multiple Entries page is where all the tasks will be displayed.
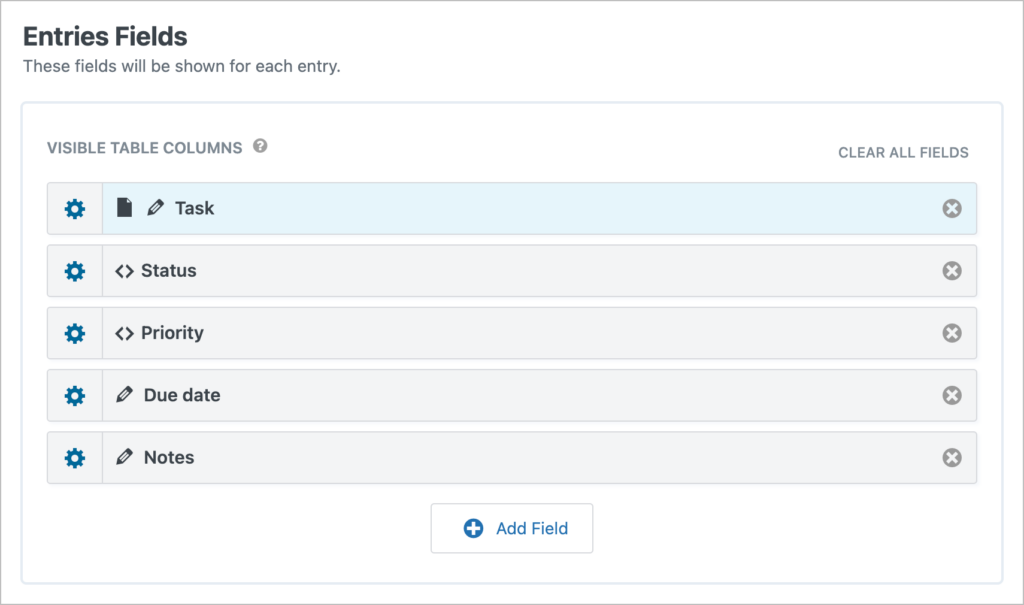
We can add fields to the “Entries Fields” section by clicking on the “Add Field” button and selecting the fields we want to display. For this example, we’ll add the “Task”, “Status”, “Priority”, “Due Date”, and “Notes” fields. Each of these fields will be a column in our table.
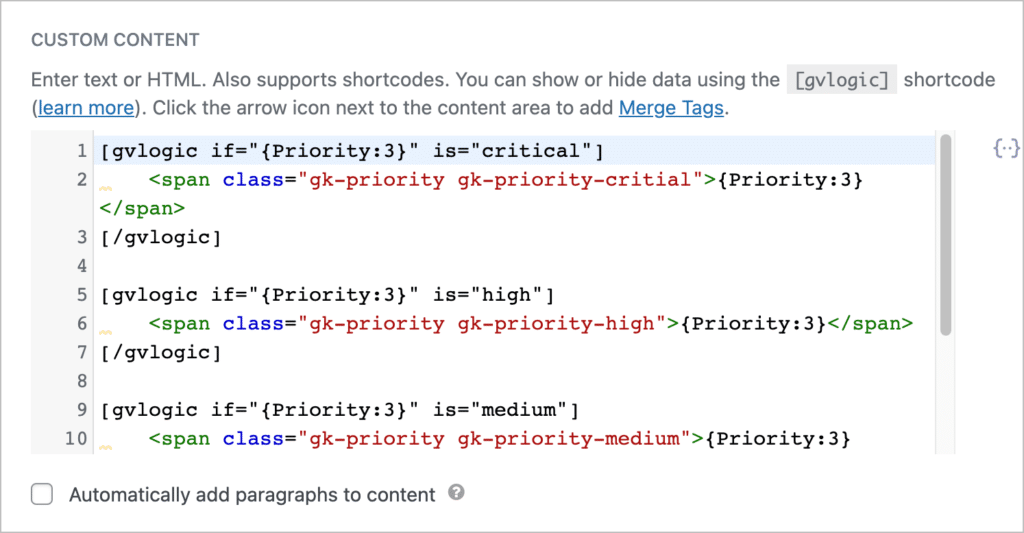
Now we want to color-code the priority, based on its level of urgency. We can do this by using a Custom Content field together with the gvlogic shortcode. This shortcode is added to WordPress by GravityView and allows us to display information based on conditions that we set.
Using the code below, we are adding a different CSS class to the “Priority” field based on whether it’s 1st, 2nd, 3rd or 4th priority. These different classes will allow us to add different background colors using CSS!
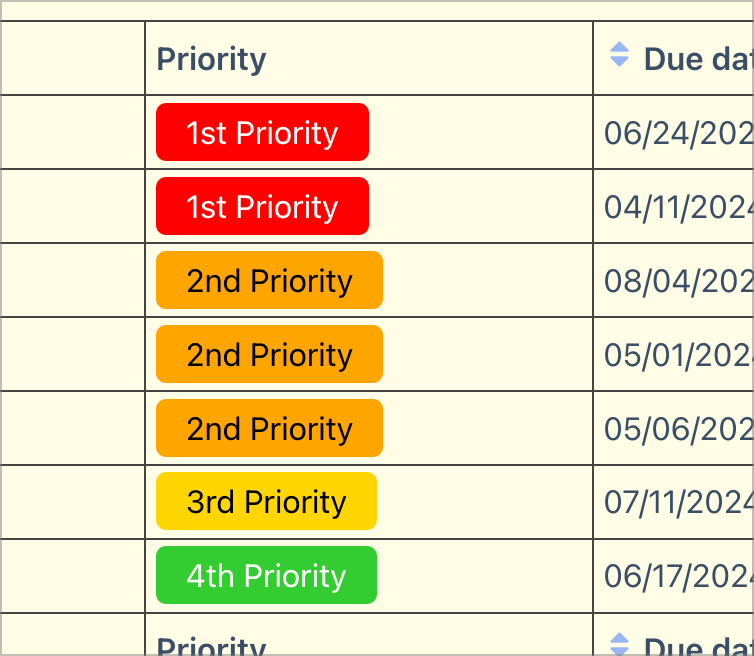
Here’s an example of what that looks like:
Here’s the code I used to achieve the above look:
3. Adding a search bar (optional)
The View loads with a Search Bar widget at the top automatically. You can configure this to include different search inputs if you want to, or you can simply remove it.
4. Configuring the Single Entry Layout
The Single Entry Layout page enables us to display more details about a specific task. Before we configure this layout, we’ll need to add a link to the Single Entry page from the Multiple Entries Layout.
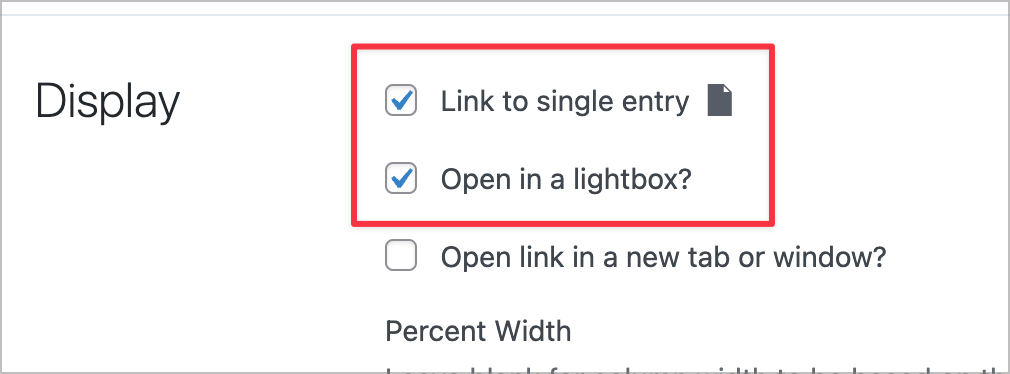
Let’s make the Task title a clickable link that takes the user to the Single Entry page to see additional information about that task. To do this, we’ll click on the gear icon to open the field settings, and check the box that says “Link to single entry”. We’ll also check the box that says “Open in a lightbox?”.
To edit the Single Entry layout, we’ll click on the “Single Entry Layout” tab at the top of the View editor. Here, we’ll ensure that all the fields are visible, including the task description.

Here’s what it looks like on the front end:
Now let’s move on to sorting an filtering.
5. Sorting and filtering tasks
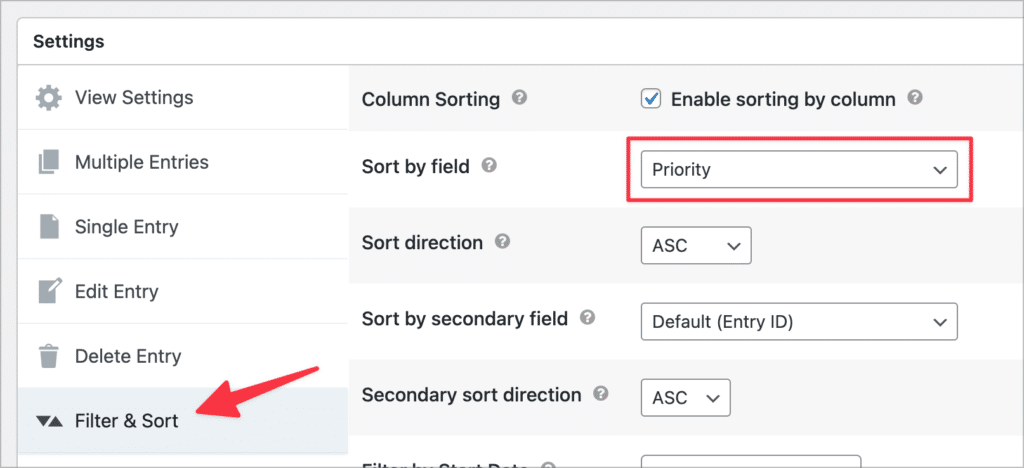
To sort tasks by a particular field, we’ll scroll down to the “View Settings” box and click on the “Filter & Sort” tab. Here we’ll sort tasks by Priority Ascending (ASC) so that the highest priority tasks show up at the top.
Okay, we’re almost done! The final step is to enable front-end editing so that team members can edit and update tasks from the front end.
6. Editing tasks from the front end
Our WordPress task management app would not be complete without the ability to update tasks from the front end. GravityView includes this functionality by default. To enable this feature, all you need to do is configure the Edit Entry layout!
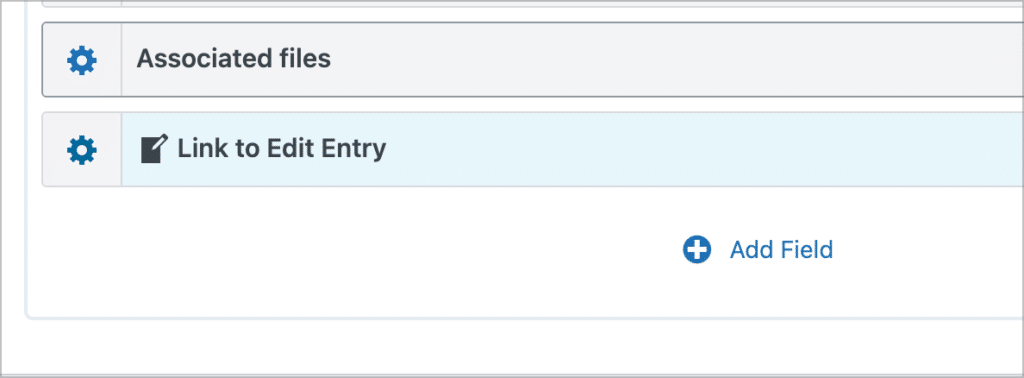
We’ll start by adding a link to the Edit Entry Layout from the Single Entry Layout page. We can do this by clicking on the “Add Field” button and searching for the “Link to Edit Entry” field.
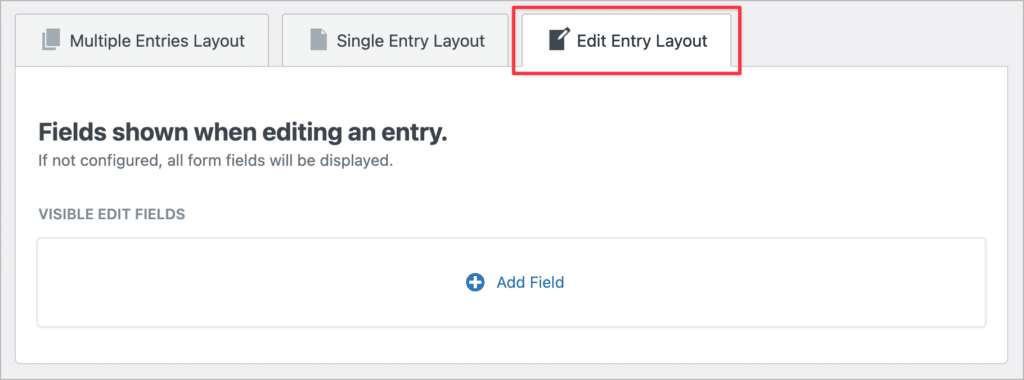
We can then configure the Edit Entry Layout by adding the fields that we want to be editable. If you leave this configuration blank (i.e., you don’t add any fields), then by default all the fields will be editable from the front end.
7. Front end editing using GravityEdit (optional)
Another way to edit tasks from the front end is by using the GravityEdit add-on. GravityEdit enables you to edit entries faster and more efficiently, without having to click through to the Edit Entry page!
8. Filtering tasks by status
You may want to filter tasks in your View by status, so you only show the active tasks, and not those that were already completed. We can do this using Gravityview’s Advanced Filtering Extension.
To add an Advanced Filter condition, go to the View settings, click on the “Filter & Sort” tab and add a new filtering condition for the “Status” field.
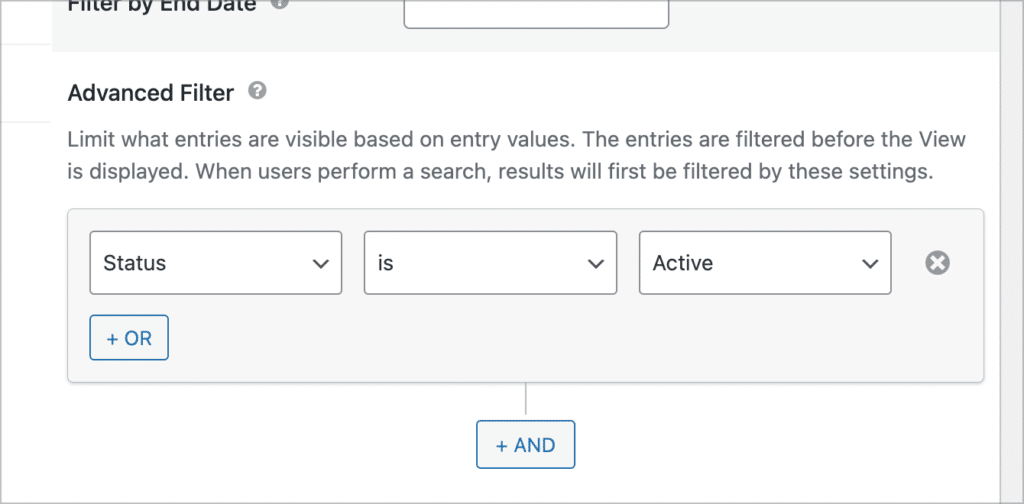
In this example, we created three separate Views that group tasks based on their status. You can easily do this by duplicating the View and adjusting the filtering condition.
9. Putting together our task management system
To embed your View on the front end, all you need to do is add the “GravityView View” block to your page and select your View from the dropdown field. You can also embed Views using shortcodes.
For this example, we’ve created three separate Views so we can group tasks by status. All the Views are the same except for a single filtering condition that filters tasks based on status.
To finish off our task management interface, we’re going to embed each View inside an accordion, using the “Accordion” module from the free “Genesis Blocks” plugin.
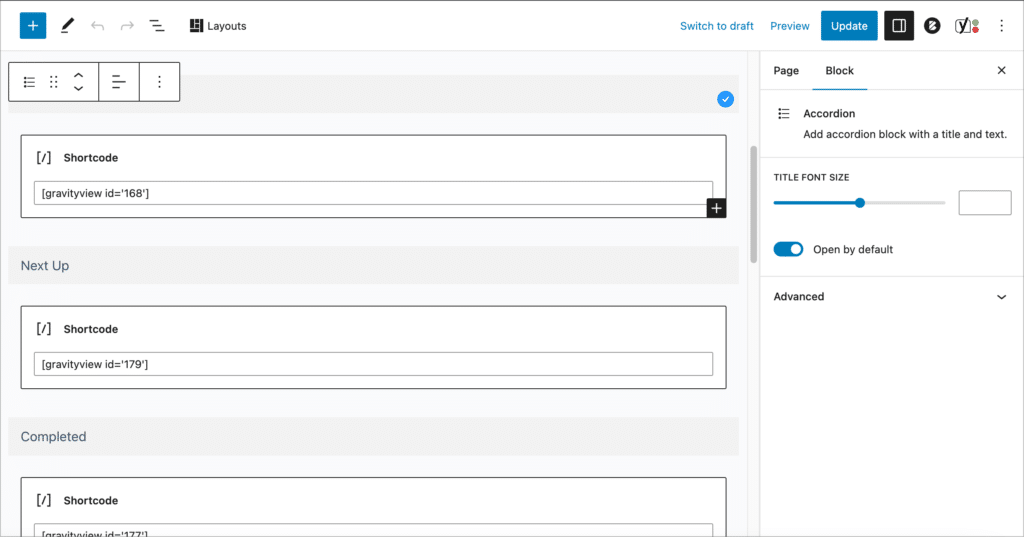
We’ll also add some styles to each accordion so that each one is a different color. First, we’ll give each accordion a unique CSS class (e.g., ‘active’, ‘next’, and ‘completed’).
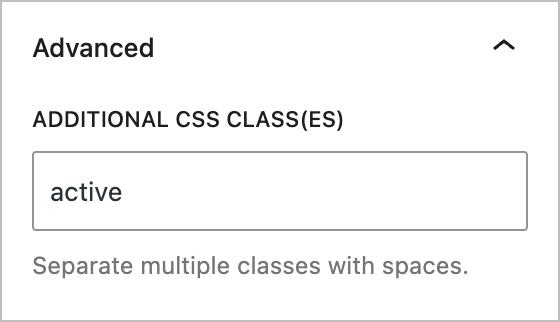
Next, we’ll add the following CSS snippet.
.active .gb-accordion-title {
    background: #FFF574;
    color: #000;
    font-size: 18px;
    font-weight: 600;
}

.next .gb-accordion-title {
    background: #A1D6CB;
    color: #000;
    font-size: 18px;
    font-weight: 600;
}

.completed .gb-accordion-title {
    background: #FF8383;
    color: #000;
    font-size: 18px;
    font-weight: 600;
}

.active .gb-accordion-text {
    background: #fffde6;
}

.next .gb-accordion-text {
    background: #edf7f5;
}

.completed .gb-accordion-text {
    background: #ffe6e6;
}
Here’s what our finished task management system looks like on the front end:
Start building your task management app with GravityView
Using a task management system helps you prioritize your work, stay on track and ensure that important deadlines are always met. Moreover, task management apps are crucial for team collaboration and organization.
But why spend time (and money) on third-party tools when you can build your own task management app using WordPress? In this post, we showed you how to build a Gravity Forms task management tool using GravityView.
Did you find this post helpful? Check out some of our other tutorials showing you how to build a project management system or create a custom issue tracker.

Helpful tips right in your inbox.
Subscribe to get the latest articles, information on releases and helpful Gravity Forms tips!
More articles

Launch Log: GravitySearch arrives, plus AI spam review and GravityView fixes
This week, releases are anchored by a brand-new product! GravitySearch joins the GravityKit suite with cross-form entry search for Gravity Forms. Alongside it, Gravity Forms Zero Spam picks up an AI-powered review step, and GravityView sees fixes for Enhanced Security, Edit Entry, and Entry…
Meet GravitySearch: advanced global search for Gravity Forms
GravitySearch adds cross-form search to Gravity Forms: find any entry from one screen, build advanced filters, and preview results without leaving the page.
Block MCP is now a free WordPress plugin (and it sets itself up)
Block MCP is now a free WordPress plugin. Connect Claude or any MCP client to your site in minutes and let AI edit your content without breaking blocks.