Are you looking for a way to display your Gravity Forms entries on a calendar?
Calendars are a great way to visualize event information. Using the Gravity Forms Calendar plugin by GravityView, you can embed a customized calendar on your website in minutes that displays data from Gravity Forms.
Install the plugin, configure your calendar feed and customize the layout. Then, display your calendar anywhere on your WordPress website! You can also allow users to edit event information, right from the front end.
Keep reading to find out more about the best calendar plugin for Gravity Forms.
Table of contents
Why Display Your Gravity Forms Entries on a Calendar?
While a Google Map is a great way to visualize data with a location aspect, a calendar is the best way to visualize data with a time component. There are several reasons why you may want to display your Gravity Forms entries on a calendar.
Displaying upcoming events gives your audience an easy way to keep up to date with the latest events and happenings concerning your organization.
For example, let’s say you’re running an events website. You’re using Gravity Forms to capture event information, but you want to give your users a nice way of visualizing that data.
A calendar layout gives users a great way to keep up to date with the latest events, check what’s coming up in the future, and find out more information about an event right from the front end of your website.
Gravity Forms Calendar by GravityView
Using the Gravity Forms Calendar plugin by GravityView, you can create a new calendar and add it to your website in minutes.
The plugin allows you to choose from four different layout options, prefilter events based on conditional logic and edit event information from the front end.
Note: This plugin allows you to display Gravity Forms entries on a calendar. It’s not an appointment booking calendar. If you’re looking for that functionality, check out gAppointments.
If you have a GravityView All Access license, you’ll already have access to Gravity Forms Calendar. Otherwise, you can purchase it as a standalone plugin from our website.
To get started with Gravity Forms Calendar, log into your account, download the plugin, and install it on your WordPress website.
Once you’ve activated the plugin, you can start configuring new calendar feeds for your Gravity Forms forms.
How to Create the Calendar Feed
In your WordPress admin menu, hover over Forms and click Forms. Find your events form, hover over it, and click Create a Calendar.
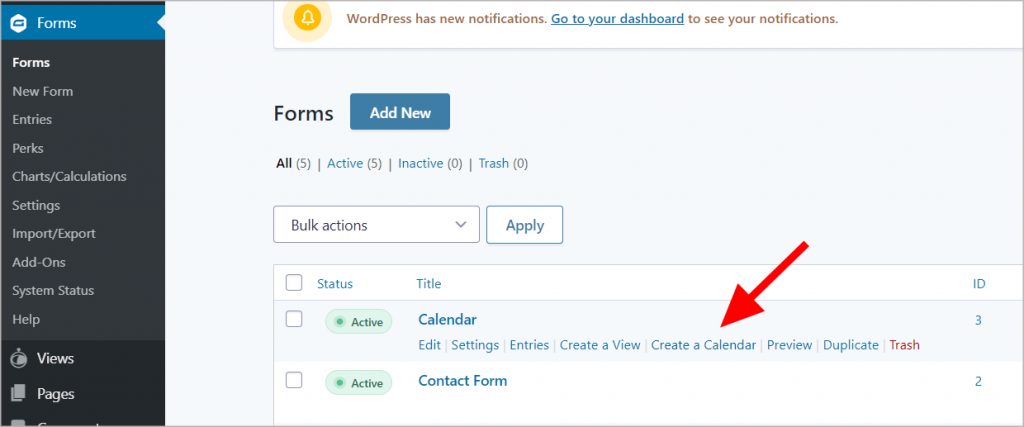
Note: You need to choose a form that contains a date field, otherwise the calendar won’t know where to display your entries.
You can now start configuring your calendar feed. Give the feed a name and select a field for the Start Date. You also have the option to select fields for the End Date, Start Time and End Time.
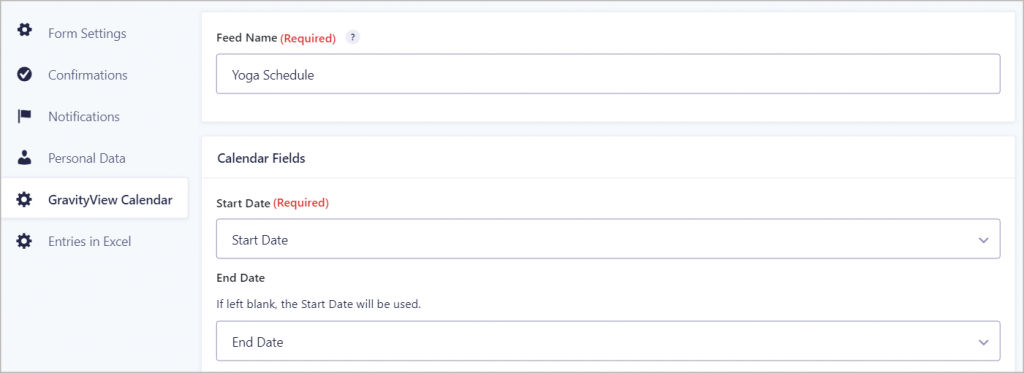
Next, scroll down to edit the Event Title and Description. Here you have the ability to use Gravity Forms merge tags, which allow you to pull through field values from your form.

You can also add an event URL and change the background color of all events on the calendar.
Customize and Style Your Calendar
If you scroll down further, you’ll see the Calendar Settings box. Here you’ll find a variety of options for customizing the look and layout of your calendar.
You can choose from three different preset layouts:
- Grid
- Agenda
- List
Under each one of these options, there are further subcategories that allow you to set up your calendar just the way you want it.
To see what each of these layouts will look like on the front end, scroll down to the bottom of the page where you’ll see a preview of your calendar that updates in real-time.
Next, you can configure the Calendar Controls. Here you can add navigation widgets to your calendar like arrows to go to the next month.
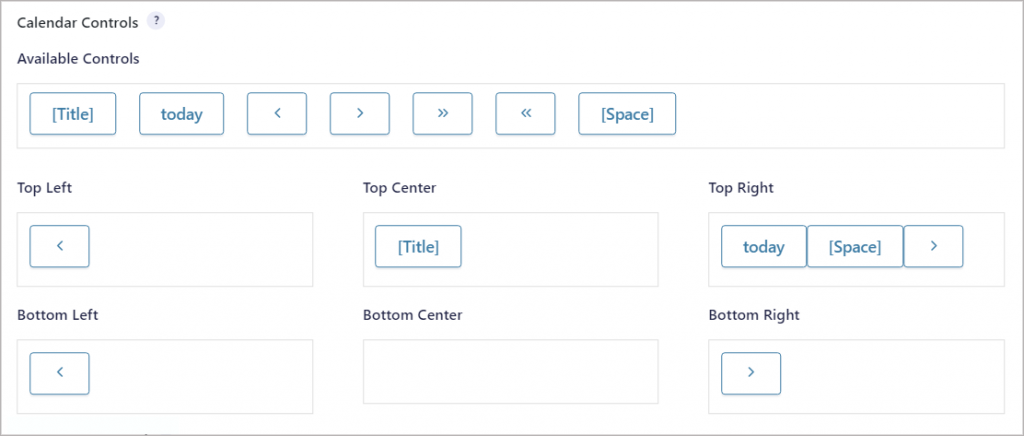
You can change the calendar controls by dragging and dropping them into one of the six available areas.
Choosing Who Can Edit Your Calendar
Finally, if you want events to be editable from the front end, you can enable event editing by checking the Allow Event Editing box.
You also have the option to restrict event editing to certain user roles. This can be helpful if you want members of your team to be able to edit events without needing admin access to your website.

Let’s take a sneak peak at our calendar on the front end.

As you can see, hovering over an event brings up the event description. If you added an event URL field, users would be able to click through to that URL to find out more information.
So how do you display your calendar on the front end? That’s what we’re going to cover next.
Displaying Your Calendar
There are four different ways to display an events calendar on your WordPress website. We go through each one of them below.
Shortcode
You can embed your calendar on a WordPress post or page using the [gv_calendar] shortcode. On the Gravity Forms Forms page, hover over your form, then over settings, and then click on GravityView Calendar.
You’ll see the embed shortcode in the Shortcode column. Copy and paste this into a page or post to display your calendar on the front end.

WordPress Widget
You can also display your calendar using the GravityView Calendar WordPress widget. Hover over Appearance and click Widgets. Drag the GravityView Calendar widget into a widget area and then configure the widget by selecting the Calendar Feed and Form.

Gutenberg Block
The Gravity Forms Calendar plugin comes with its own Gutenberg block. This makes it really easy to add calendars to posts or pages on your WordPress website.

Create a new page or post, add a new block and search for “GravityView Calendar”, then select the GravityView Calendar block.
Then, choose where Calendar Feed and Form from the Block Settings.
GravityView Widget
If you already have GravityView installed, you can embed a calendar into an existing View by clicking on the Add Widget button and selecting the Calendar widget.
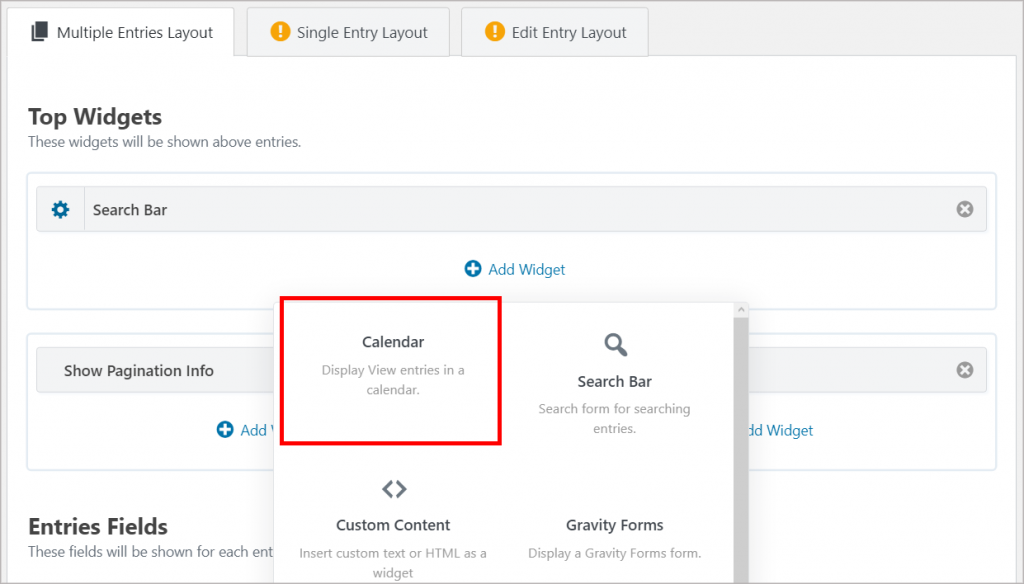
That’s it! Those are all the ways to display your calendar on the front end.
Adding Extra Functionality With Calendar Blocks
In the WordPress editor, click on the ‘+’ icon and search for “GravityView Calendar”. Along with the standard block used for embedding calendars, you’ll see two other blocks – “GravityView Calendar Link” and “GravityView Calendar Buttons”.
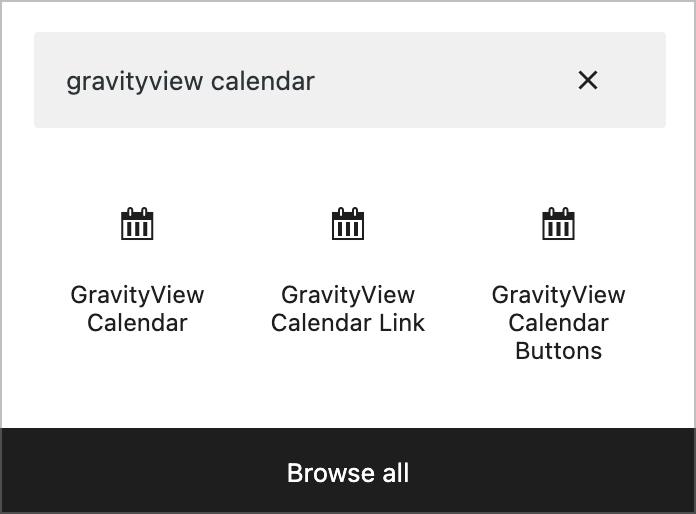
The “GravityView Calendar Link” block displays a link to your calendar feed URL, allowing users to subscribe to your Gravity Forms calendar using their Google or Apple calendar. Check out this Feature Highlight to learn more about Calendar subscription links.
The “GravityView Calendar Buttons” block displays two buttons: one allowing users to export an iCalendar file containing event information, and another for copying the calendar feed URL. Check out our documentation to learn more about Calendar blocks.
Why Is Gravity Forms Calendar the Best Calendar Plugin for Gravity Forms?
Gravity Forms Calendar is a powerful plugin that allows you to display Gravity Forms entries on your website. The plugin comes with a variety of options for customizing the layout of the calendar, and you can also enable event editing, allowing users to edit events from the front end.
Configuring a calendar feed is simple and requires no coding skills. Furthermore, your calendar can be embedded in a post, page, widget, or anywhere on your WordPress website.
GravityView’s Gravity Forms Calendar integration is the most customizable and robust calendar solution for Gravity Forms. So what are you waiting for? Get Gravity Forms Calendar today!
