Published
•
Updated
How to connect GravityView with BuddyPress: Step-by-step guide
BuddyPress is a popular plugin for building social networks and online communities with WordPress. If you’re using GravityView to display form entries on your site, connecting it to BuddyPress lets you turn those entries into user posts, profile updates, or group content. In this post, I’ll show you how to connect your GravityView apps to…
BuddyPress is a popular plugin for building social networks and online communities with WordPress. If you’re using GravityView to display form entries on your site, connecting it to BuddyPress lets you turn those entries into user posts, profile updates, or group content.
In this post, I’ll show you how to connect your GravityView apps to BuddyPress using Uncanny Automator—no code needed. Let’s dive in!
Wanna try it?
Spin up a demo
See what you can build with GravityView — explore the live demo.

What you’ll need
Here are the plugins you’ll need to connect GravityView with BuddyPress:
- Gravity Forms
- GravityView
- BuddyPress
- Uncanny Automator Pro (While Uncanny Automator has a free version, you’ll need the Pro version for most of the BuddyPress actions)
What is Uncanny Automator?
Uncanny Automator is a popular automation plugin for WordPress that enables you to connect different plugins and apps without having to write code!
Each automation—called a “recipe”—starts with one or more triggers (such as a form submission or user action) and ends with one or more actions (like sending an email, enrolling a user, or updating a record in another service). This simple “when this happens, do that” structure makes it easy to automate tasks across your site without writing a single line of code.
Uncanny Automator supports the following triggers for GravityView:
- Entry is approved
- Entry is rejected
For BuddyPress, it supports a range of triggers and actions. You can see the full list on the BuddyPress integrations page.
For this example, we’re going to create two different recipes: the first one will post an entry to the Activity Stream when it’s approved in GravityView, and the second will add an entry creator to a group when their entry is approved.
1. Posting an approved entry to the activity stream
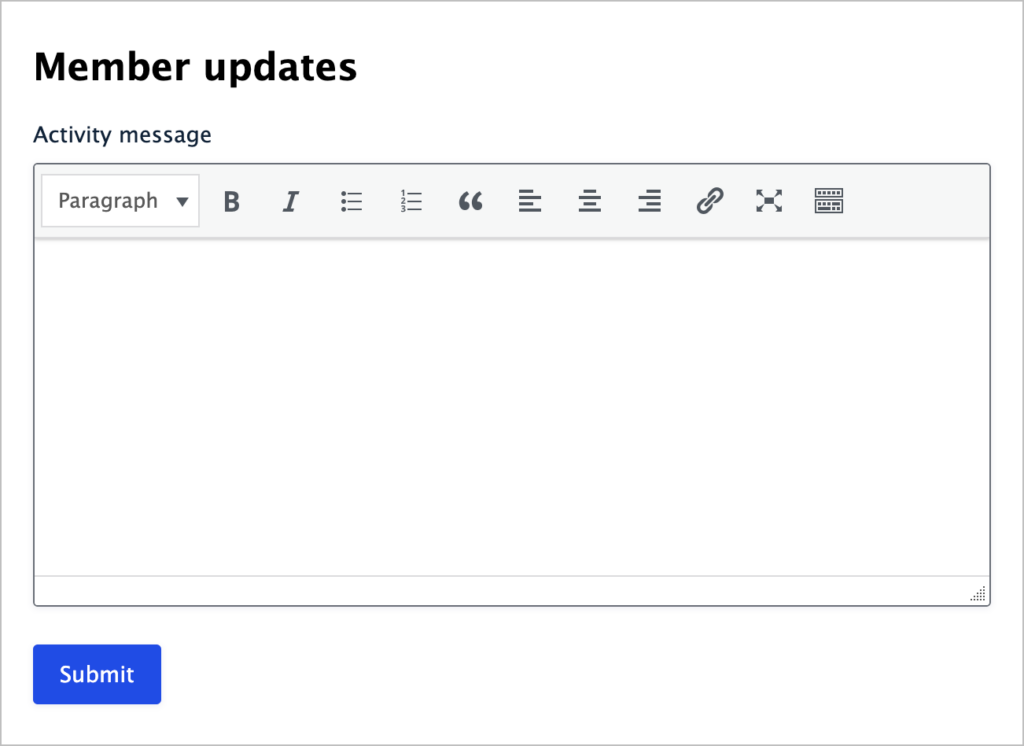
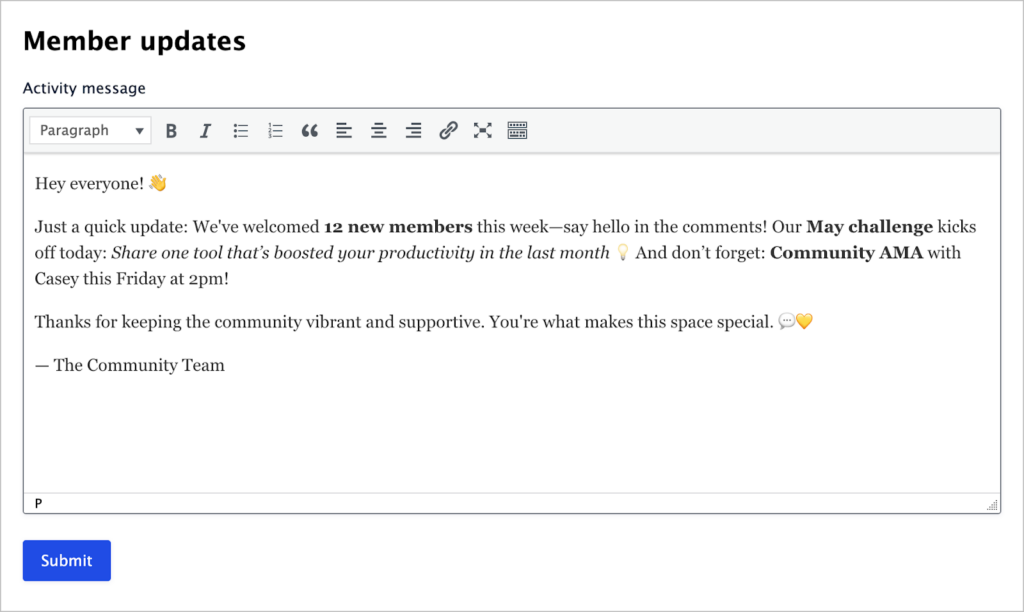
We have a very simple form set up in Gravity Forms with a single rich text paragraph field. We’re going to set up a new recipe that sends approved entries from this form directly to the BuddyPress activity stream.
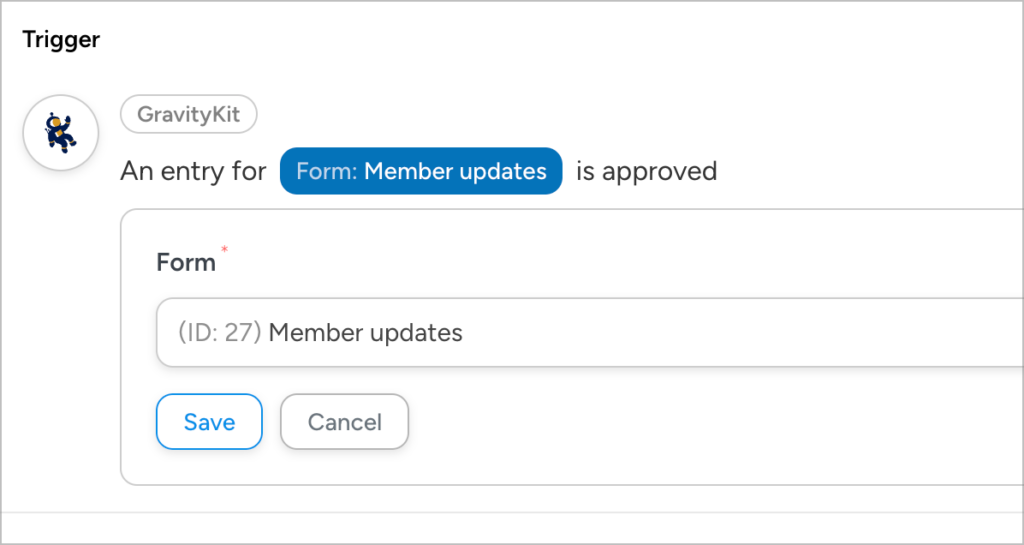
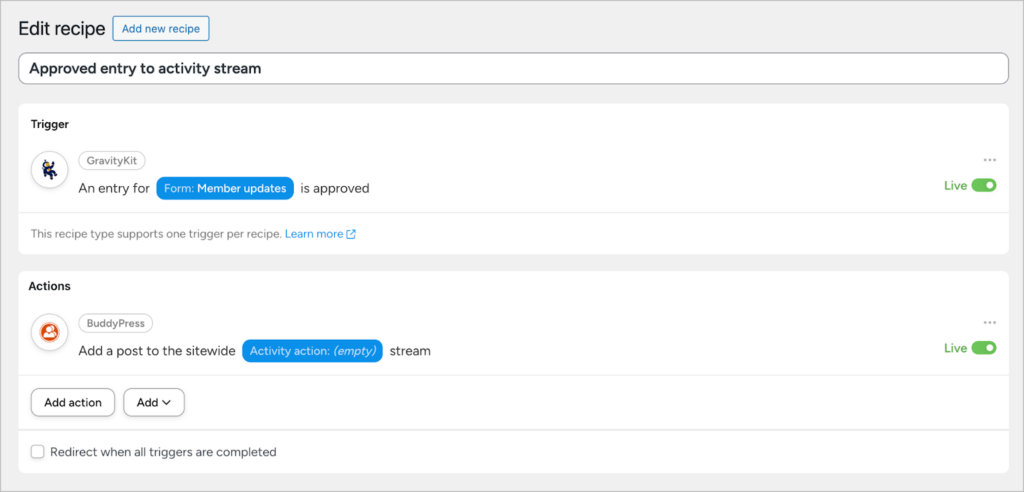
To create a new recipe, we’ll hover over “Automator” and click “Add new recipe”. After giving the recipe a name, we’ll select “GravityKit” as the trigger integration.
After that, we need to choose a specific trigger and form to apply it to. We’ll select the “Entry is approved” trigger and the “Member updates” form. This ensures that our automation fires whenever a new Member updates form submission is approved in GravityView.
Now that our trigger is set up, we can add a new action in BuddyPress. The action is the event that happens after the trigger.
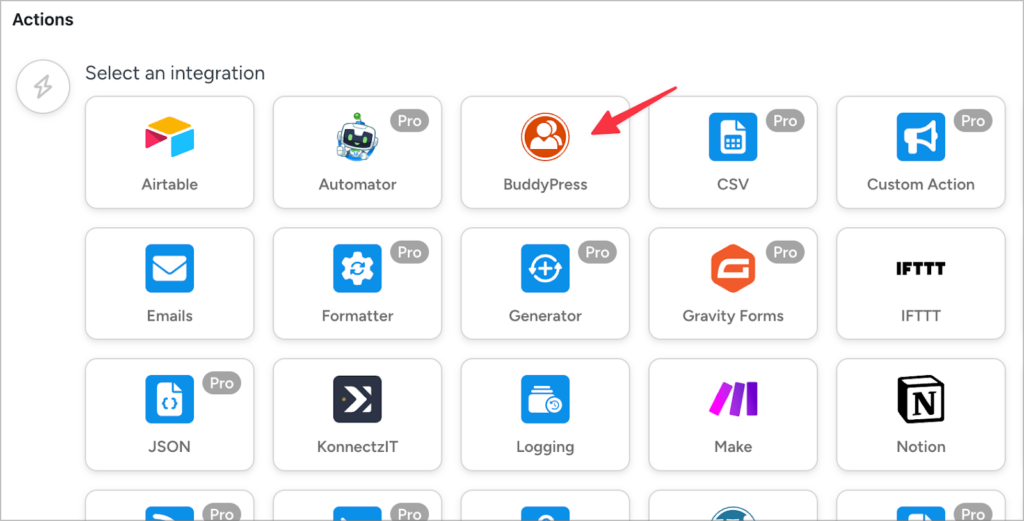
For the action, we’ll select “Add a post to the sitewide activity stream”. The next step is to configure the action by setting a value for the author and activity message. We’ll set the author to “User that completes the trigger” and the activity message to the activity message field in our form.
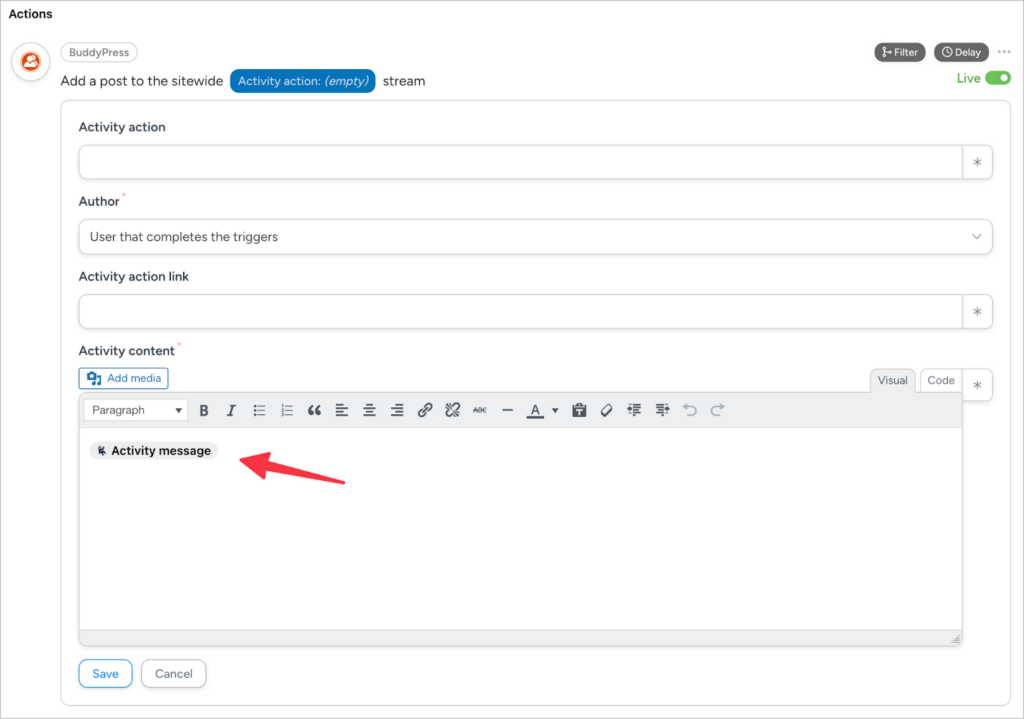
After that we can save the recipe and toggle it live!
The only thing left to do is test the connection to ensure it’s working as expected.
Testing the connection
We’ll start by submitting a new entry in our Member updates form.
After submitting the entry, we’ll head over to our View and approve it using GravityView’s built-in entry approval feature.
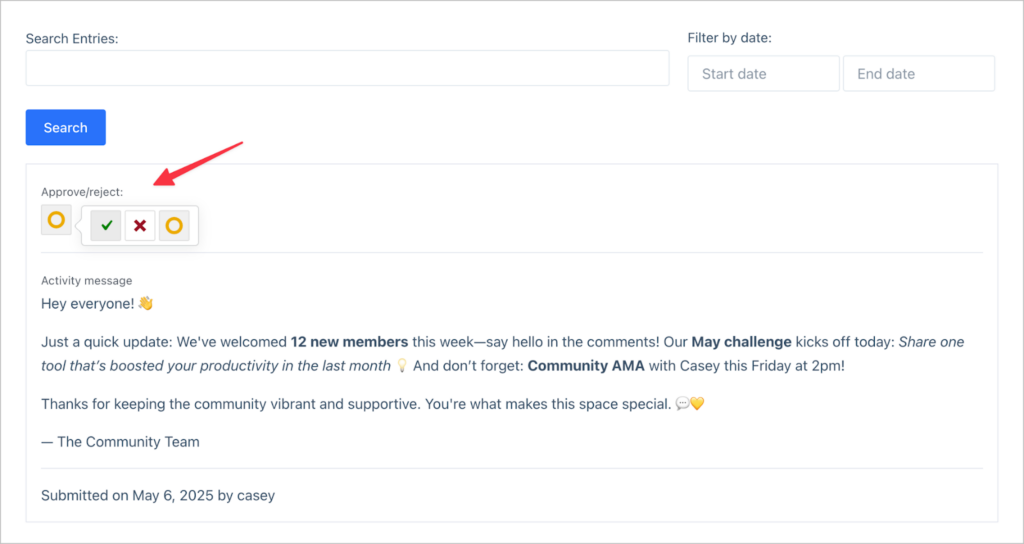
GravityView’s entry approval feature also works in the backend, allowing you to approve/reject entries from the “Entries” screen in Gravity Forms.
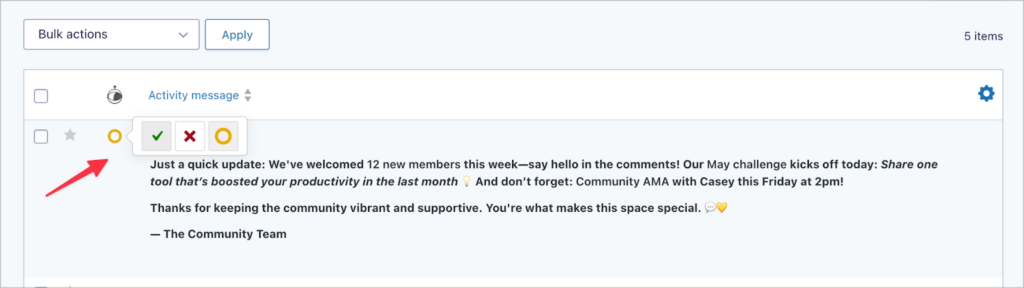
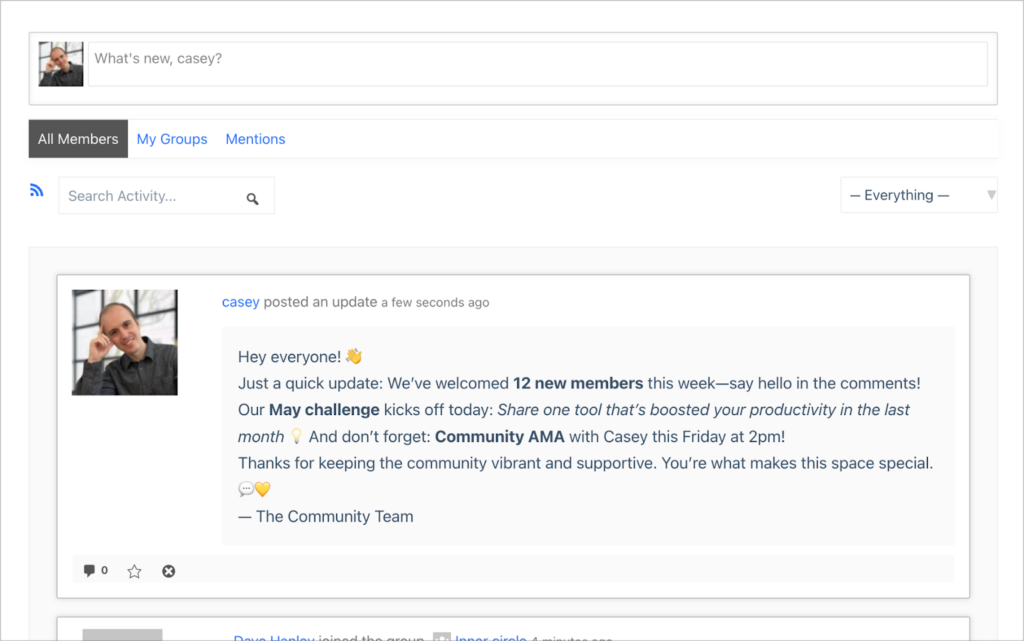
After approving the entry, it’s immediately posted to the BuddyPress activity stream for other members to see!
Now let’s go through a second example.
2. Adding a user to a group when an entry is approved
Now let’s create a second recipe that adds a user to a group in BuddyPress (called the Inner circle) when their form entry is approved in GravityView.
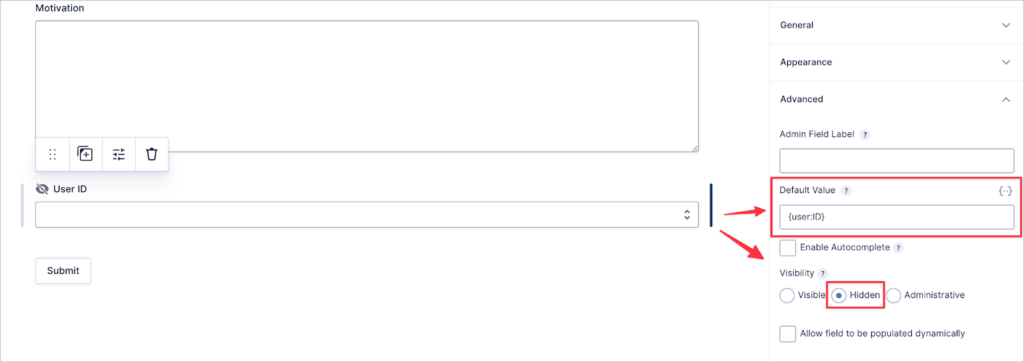
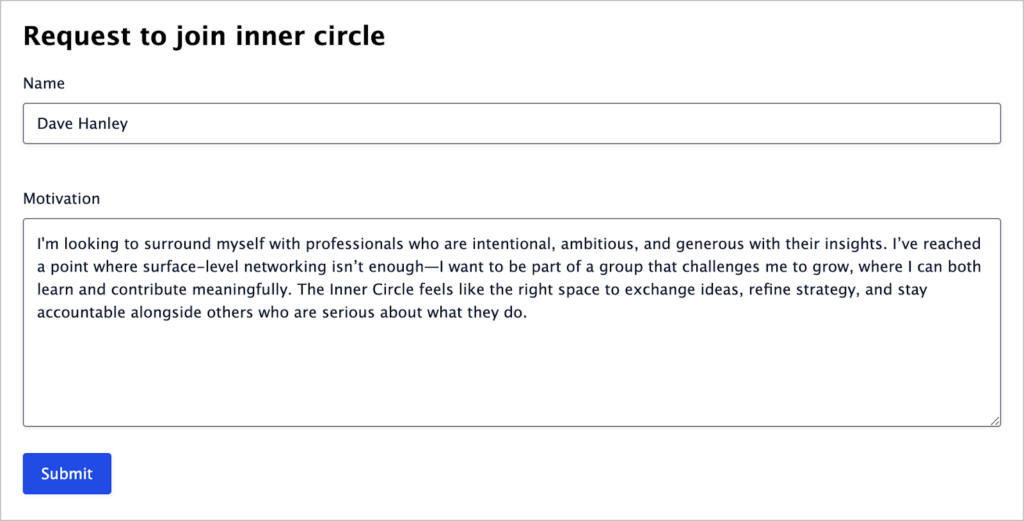
First, we’ll create a new Gravity Forms form for users to apply to join a group. We’ll add a hidden field to the form and prepopulate it with the {user:ID} merge tag to capture the user’s ID. This is important to ensure we add the correct user to the group when the entry is approved.
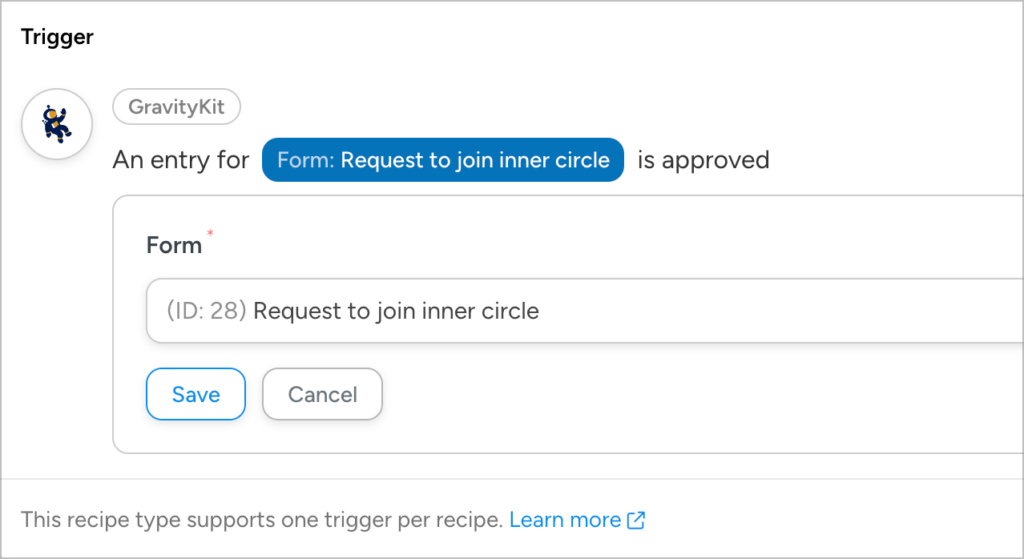
Next, we’ll create a new recipe and once again select “Entry is approved” as the trigger. But this time, we’ll select a different form (Request to join inner circle).
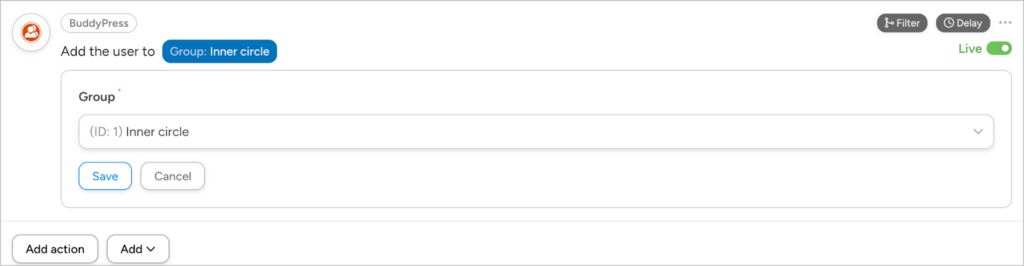
Now we’ll add an action, select BuddyPress as the integration, and choose “Add the user to a group” as the specific action we want to perform.
To configure the action, we first need to set the user data:
- Unique field: We’ll set this to “ID”.
- Value: We’ll set this equal to the hidden “User ID” field in our form.
- What to do if the user doesn’t exist? There are two options here: create a new user or do nothing. Unless you want logged-out users to have access to the form, select “Do nothing”.
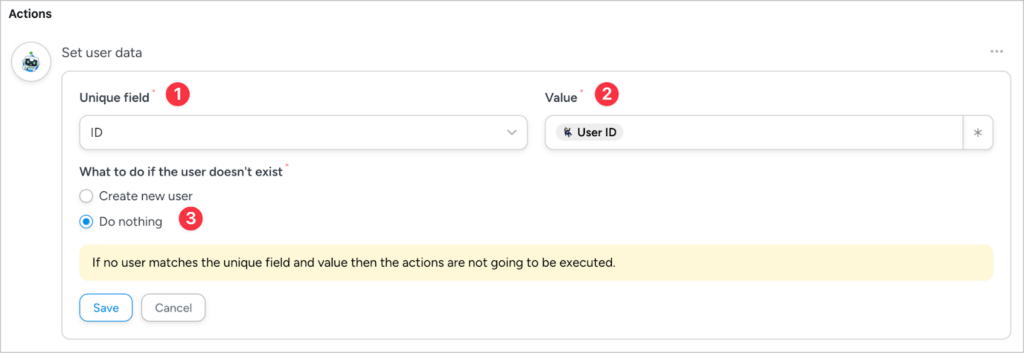
The final step is to choose which group the user should be added to. In this case, we’ll select the “Inner circle” group.
Now that everything is set up, let’s test the connection!
Testing the connection
Let’s go ahead and submit a new request to join the inner circle.
After submitting the request, we’ll go to our View and approve it.
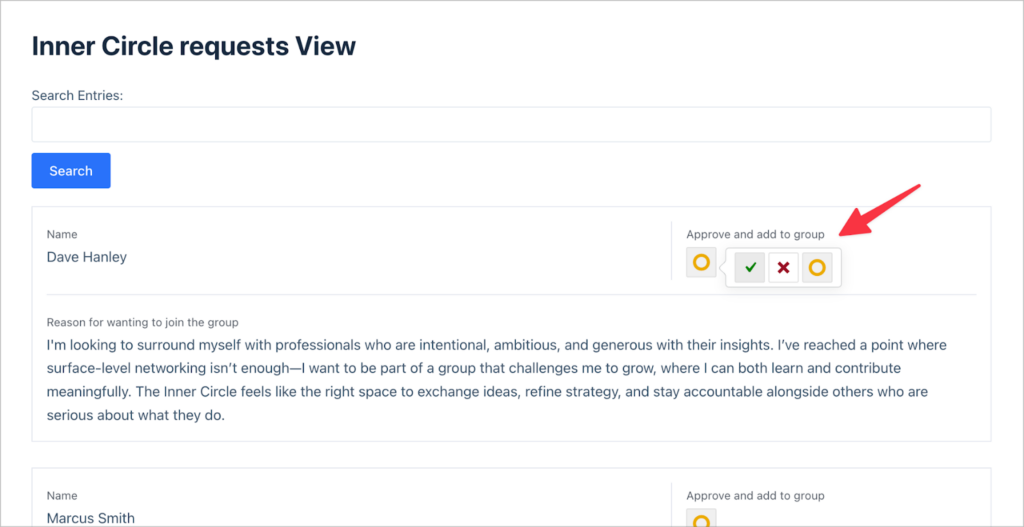
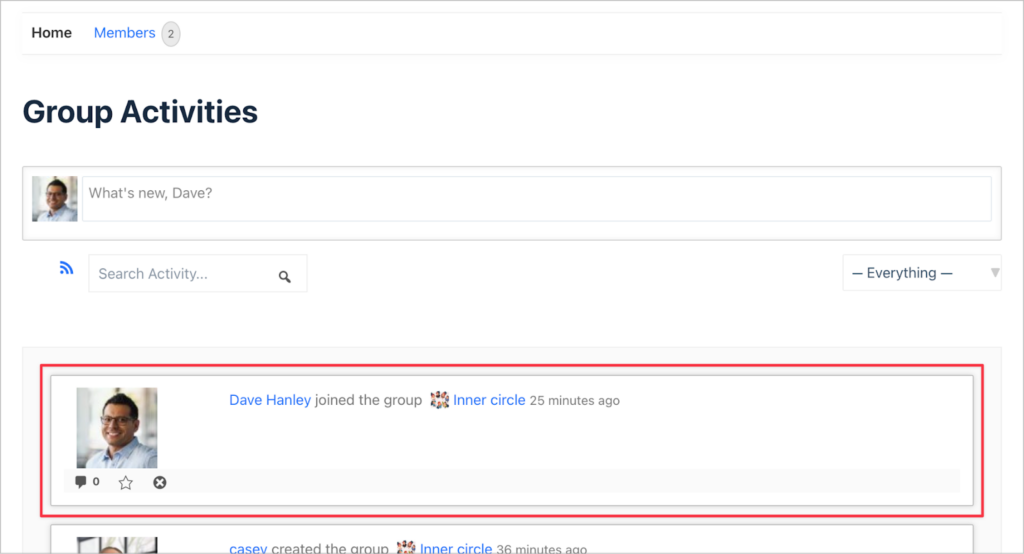
After the request is approved, the user who submitted it (Dave Hanley) is automatically added to the “Inner circle” group in BuddyPress!
Connect your GravityView apps to BuddyPress
Connecting GravityView to BuddyPress enables you to create powerful automations for your community and membership sites. Whether you’re creating member posts, updating profile fields, or triggering group actions, this integration allows data to flow between GravityView and BuddyPress—without manual input.
In this post, we only covered two simple examples. However, Uncanny Automator supports a wide range of BuddyPress actions! If you found this post helpful, you can learn more about how GravityView connects with other tools (like Notion and Paid Memberships Pro) on our blog.

Helpful tips right in your inbox.
Subscribe to get the latest articles, information on releases and helpful Gravity Forms tips!
More articles

10 things you can ask AI to do with Gravity Forms (using the free GravityKit MCP)
See 10 practical things you can ask AI to do with Gravity Forms using the free GravityKit MCP: create forms, manage entries, build Views, and more.

Launch Log: theme template editing in Block MCP, Shield silentCAPTCHA for Zero Spam, and GravityView fixes
Block MCP adds safe theme template editing, Gravity Forms Zero Spam gains Shield silentCAPTCHA support, and GravityView fixes lightbox and notice bugs.

GravityKit turns 12: a year in review, and 30% off Lifetime All Access
GravityKit turns 12. A look back at a year of GravityView 3.0, GravitySearch, and AI-assisted building, plus a birthday sale on the Lifetime All Access Pass.