Published
•
Updated
How to connect GravityView with Notion: Step-by-step guide
Notion is a popular SaaS app for organising tasks, projects, and workflows. If you’re using GravityView to power web applications on WordPress, connecting it to Notion lets you store and manage that data in a Notion page or database. In this post, I’ll show you how to send data from a GravityView View to a…
Notion is a popular SaaS app for organising tasks, projects, and workflows. If you’re using GravityView to power web applications on WordPress, connecting it to Notion lets you store and manage that data in a Notion page or database.
In this post, I’ll show you how to send data from a GravityView View to a Notion database using Uncanny Automator—no code needed. Let’s dive in!
Wanna try it?
Spin up a demo
See what you can build with GravityView — explore the live demo.

What you’ll need
Here are the plugins you’ll need to connect GravityView with Notion:
- Gravity Forms
- GravityView
- An account with Notion.so
- Uncanny Automator Pro (while Uncanny Automator has a free version, you’ll need the Pro version for the Notion integration)
What is Uncanny Automator?
Uncanny Automator is a popular automation plugin for WordPress that enables you to connect different plugins and apps without having to write code!
Each automation—called a “recipe”—starts with one or more triggers (such as a form submission or user action) and ends with one or more actions (like sending an email, enrolling a user, or updating a record in another platform). This simple “when this happens, do that” structure makes it easy to automate tasks across your site without writing a single line of code.
Uncanny Automator supports the following triggers for GravityView:
- Entry for a specific form is approved
- Entry for a specific form is rejected
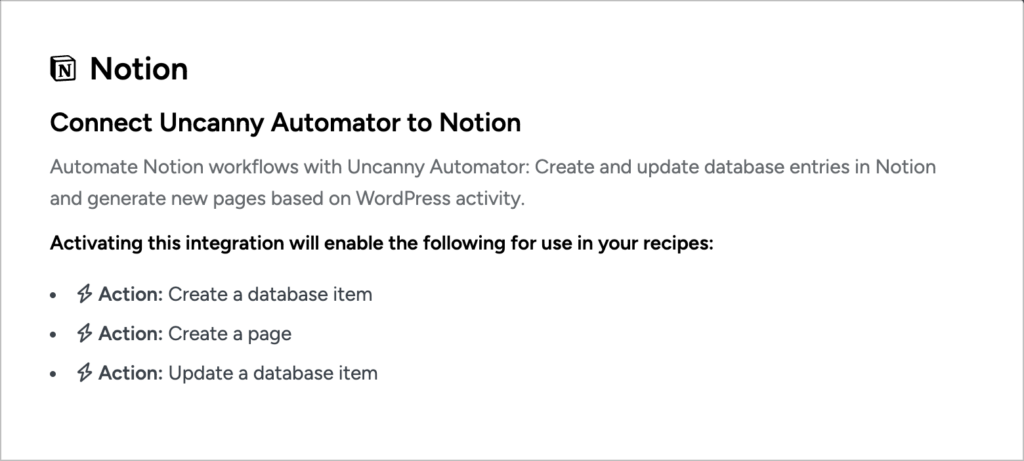
For Notion, it supports the following actions:
- Create a database item
- Update a database item
- Create a page
For this example, we’re going to create an automation that sends data from a Gravity Forms entry to a Notion database when that particular entry is approved in GravityView.
1. Setting up our Notion database
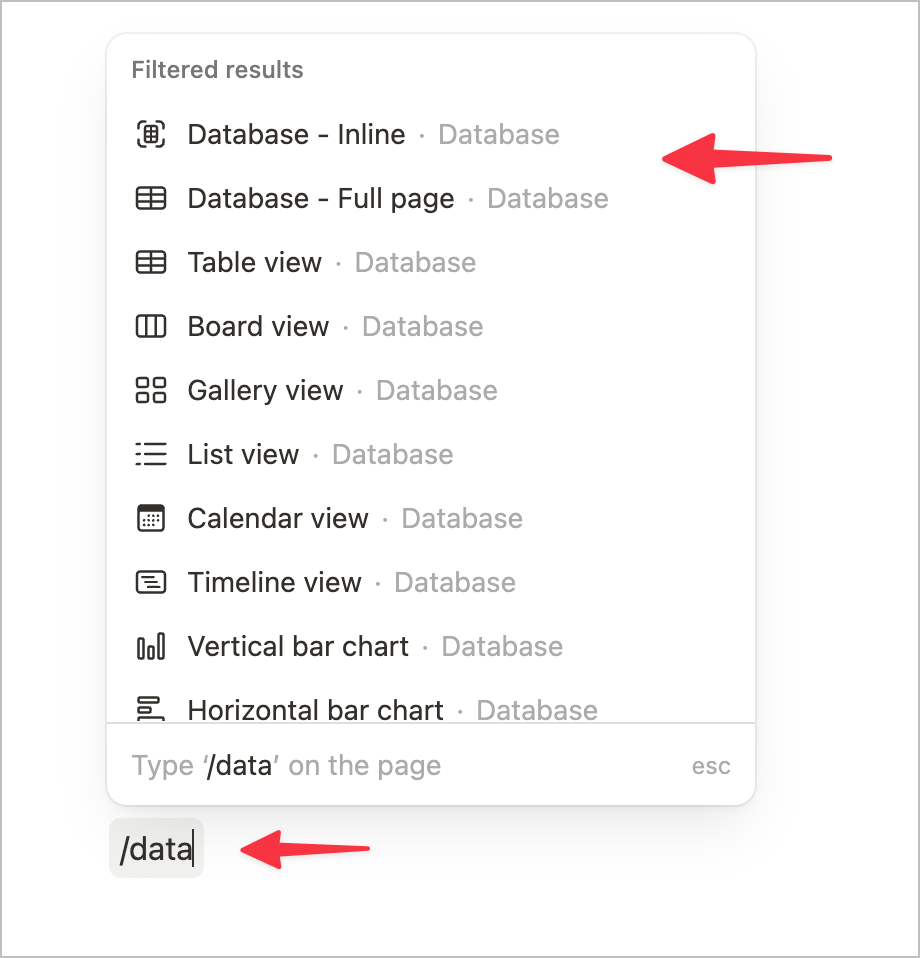
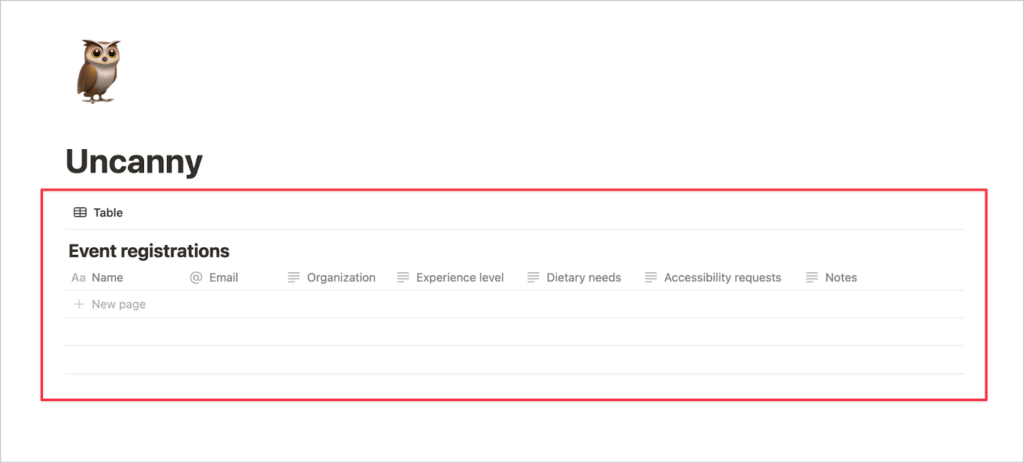
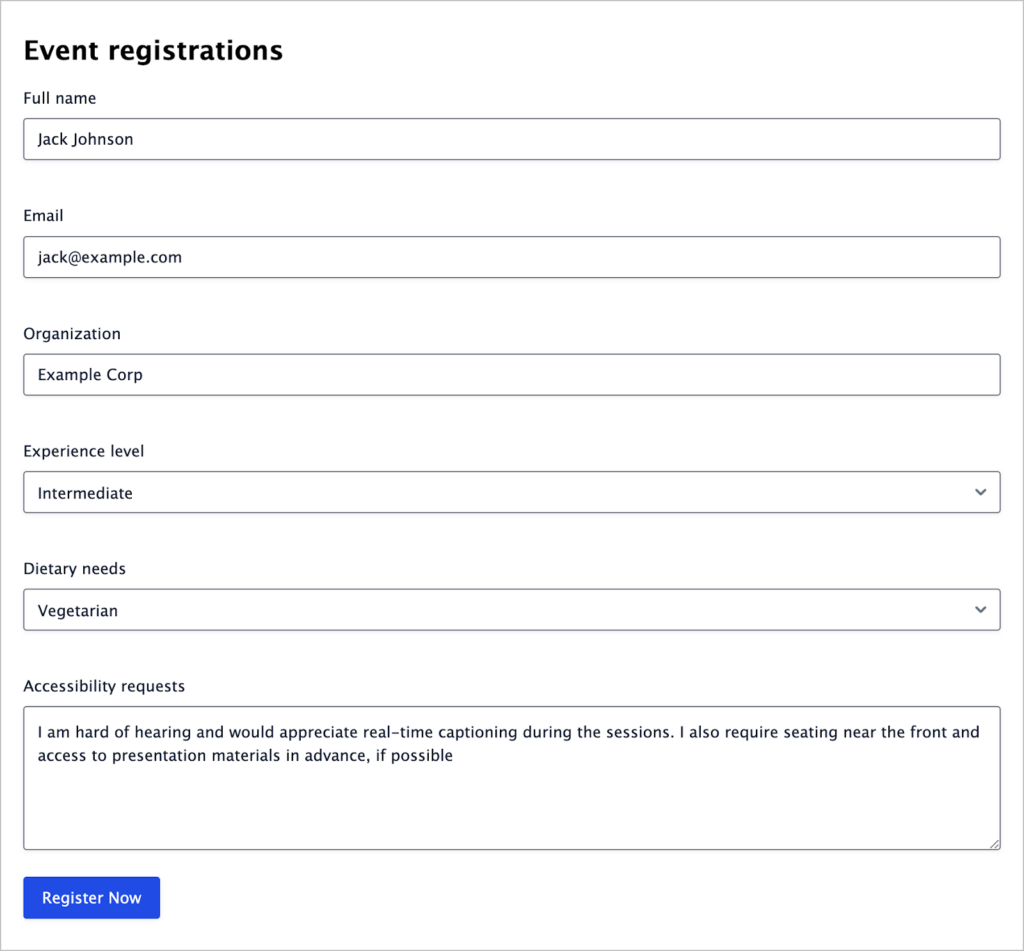
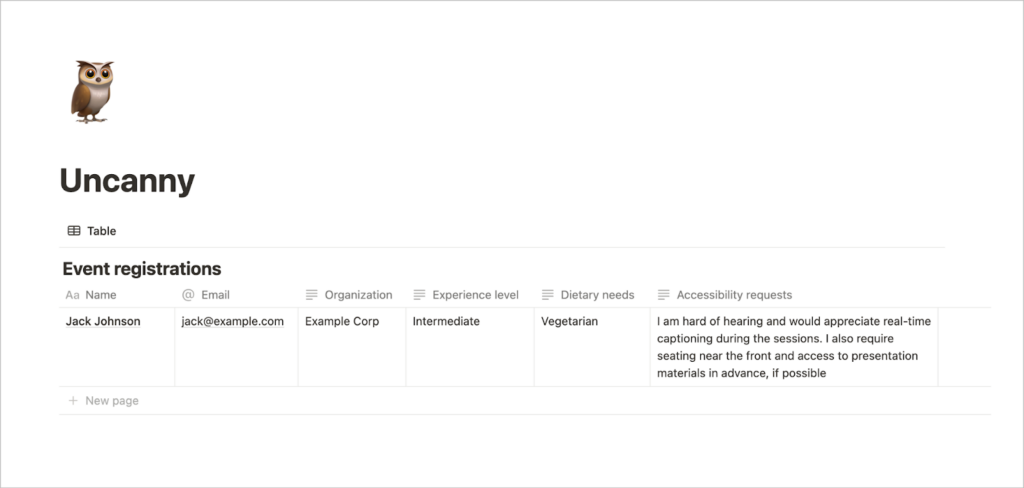
The first thing we need to do is set up a new database in Notion. For this example, I’ll open up my Notion app, create a new page called “Uncanny” and insert a database inside called “Event registrations”.
To create a new database, simply type / followed by the type of element you want to add (e.g., Database - Inline).
Next, we’ll add various columns to the database—these should match the fields in our Gravity Forms form.
Now that everything is set up in Notion, the next step is to connect our Notion account to Uncanny Automator in WordPress.
2. Connecting our Notion account to Uncanny Automator
To do this, we’ll hover over “Automator”, click “App integrations” and select “Notion” from the left-hand sidebar. We’ll simply follow the on-screen instructions to connect our Notion account to Uncanny Automator.
After establishing the connection, we’ll need to select a specific Notion page to share data with. Let’s select the example “Uncanny” page we created in the previous step.

Now we’re ready to configure a new automation, or “recipe”. A recipe is an automated workflow that enables us to perform an action when a specific trigger is fired.
3. Creating a new recipe in Uncanny Automator
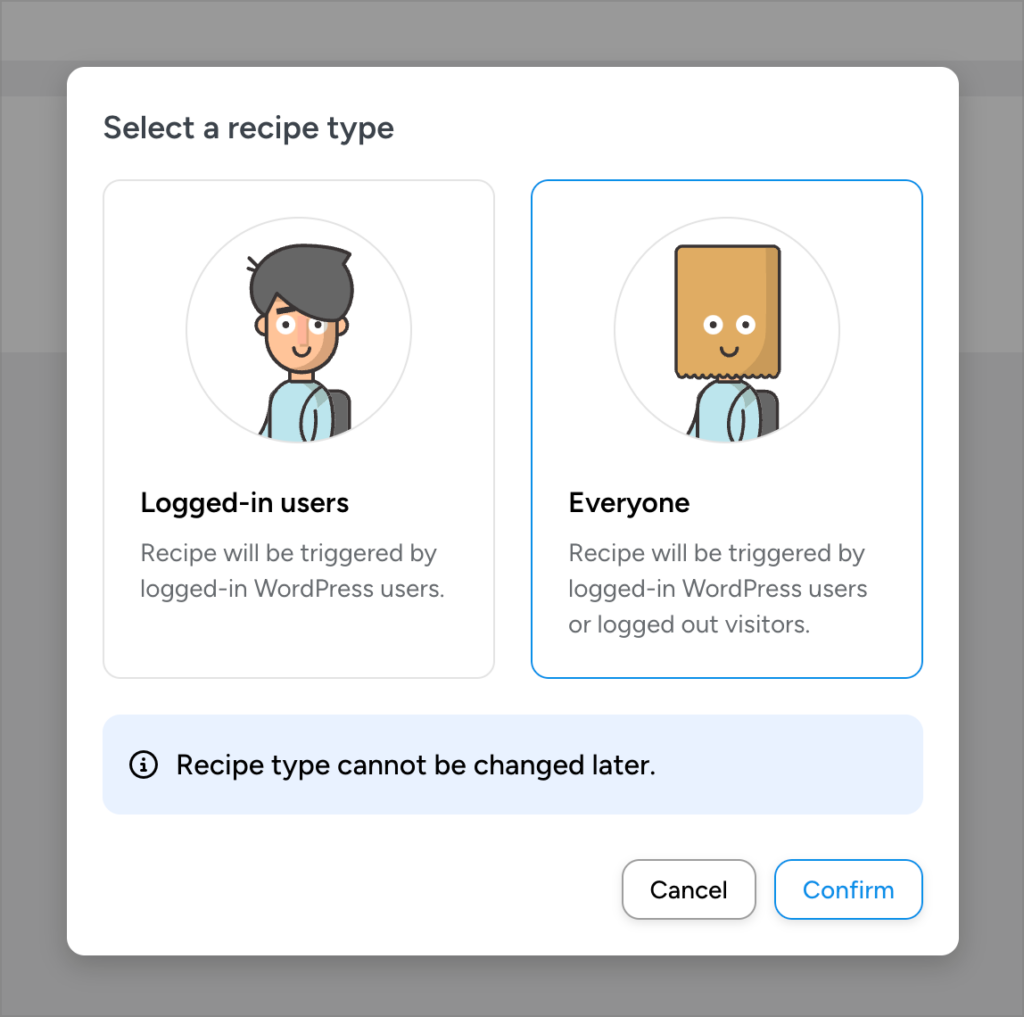
To create a new recipe, we’ll hover over “Automator” in the WordPress sidebar and click “Add new recipe”. Next, we need to choose a recipe type. This determines whether the automation can be triggered by logged-in or logged-out users.
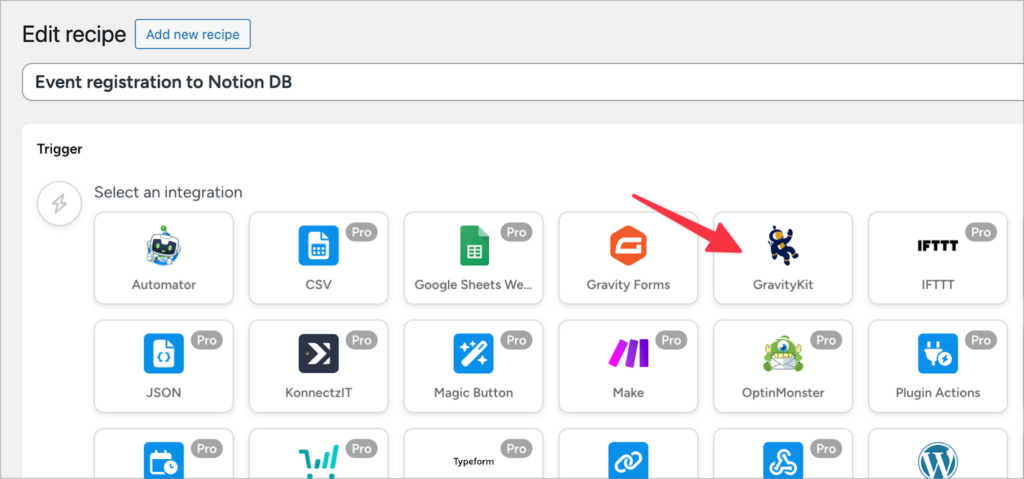
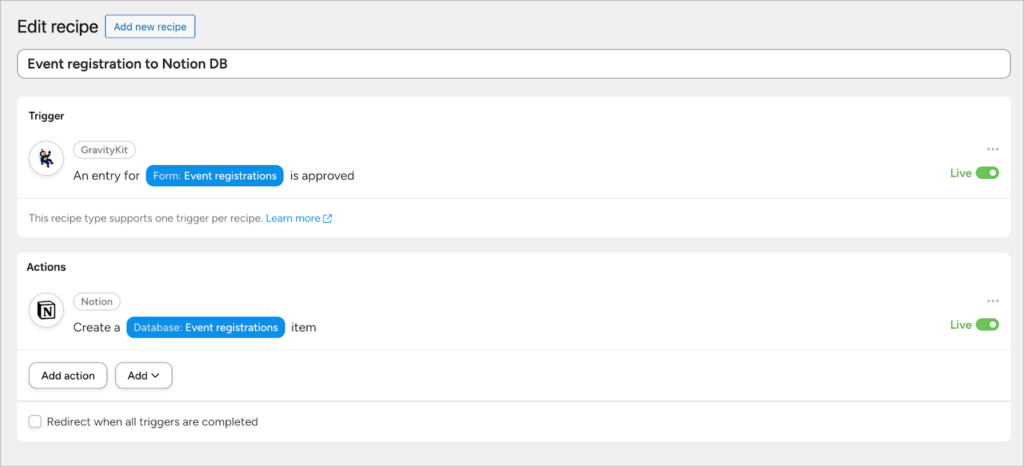
Now we can start configuring our recipe! We’ll start by choosing “GravityKit” as the trigger integration.
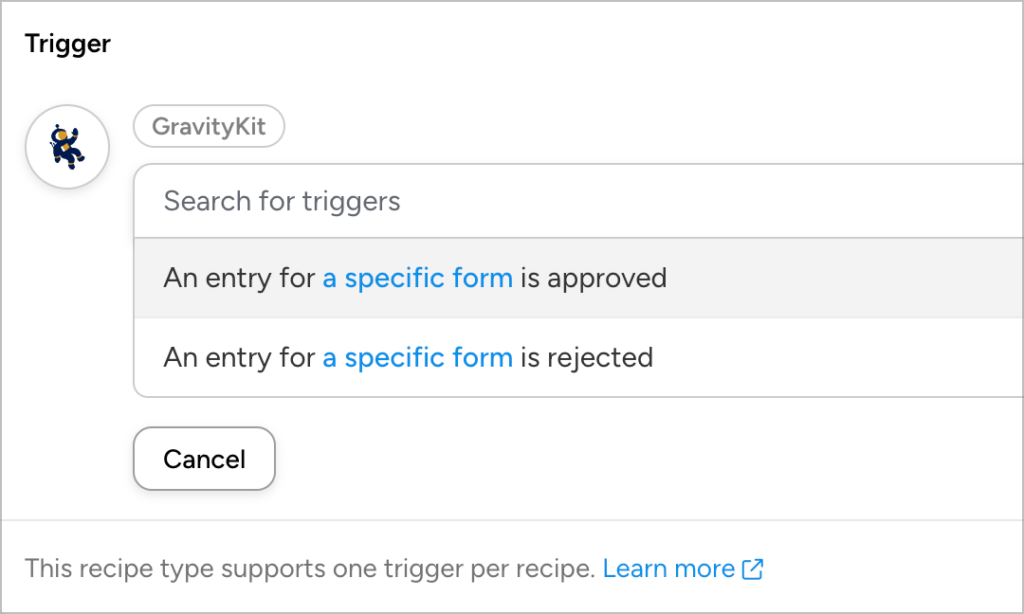
After that, we need to choose a specific trigger that will initiate the workflow. For this example, we’ll select “An entry for a specific form is approved”.
Next, we need to select an existing Gravity Forms form that the trigger will apply to. Let’s go ahead and choose our “Event registrations” form.
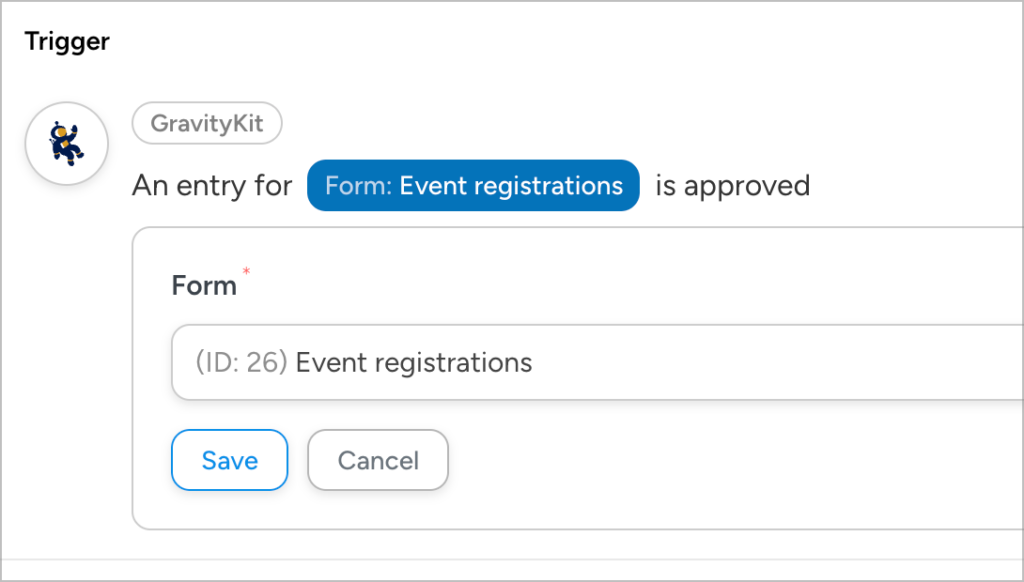
After setting up the trigger event, make sure to hit the “Save” button. After that, you can move on to the action.
The action is the process that occurs after the trigger fires. For the action, we’ll select “Notion” as our integration and choose “Create a database item” as the specific action we want to perform.
After that, Uncanny Automator will scan our linked Notion page for databases and allow us to select one from the dropdown field.
Finally, we’ll need to map the fields from our Gravity Forms form to the specific columns in our Notion database. We can do this by clicking on the asterisk to the right of each field and choosing a value to populate it with.
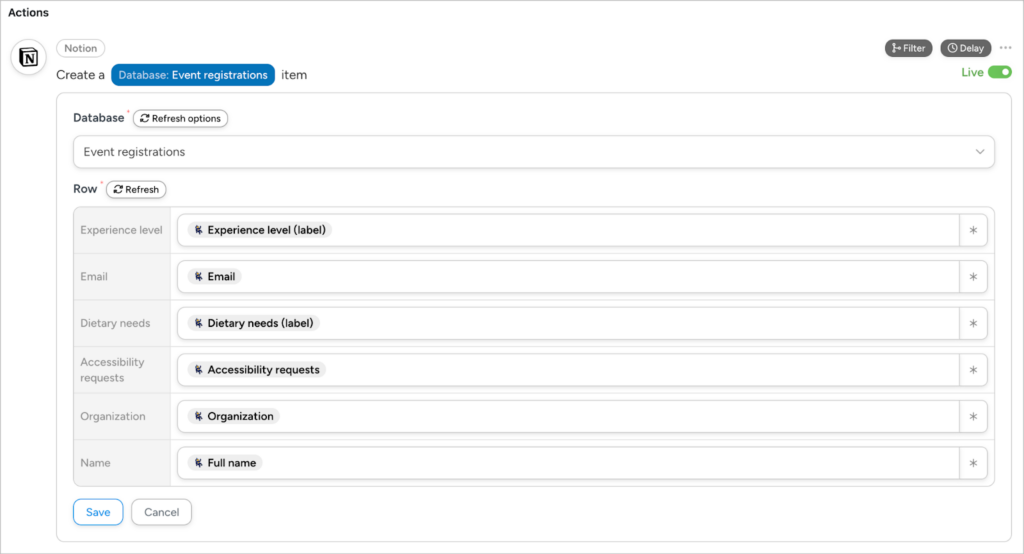
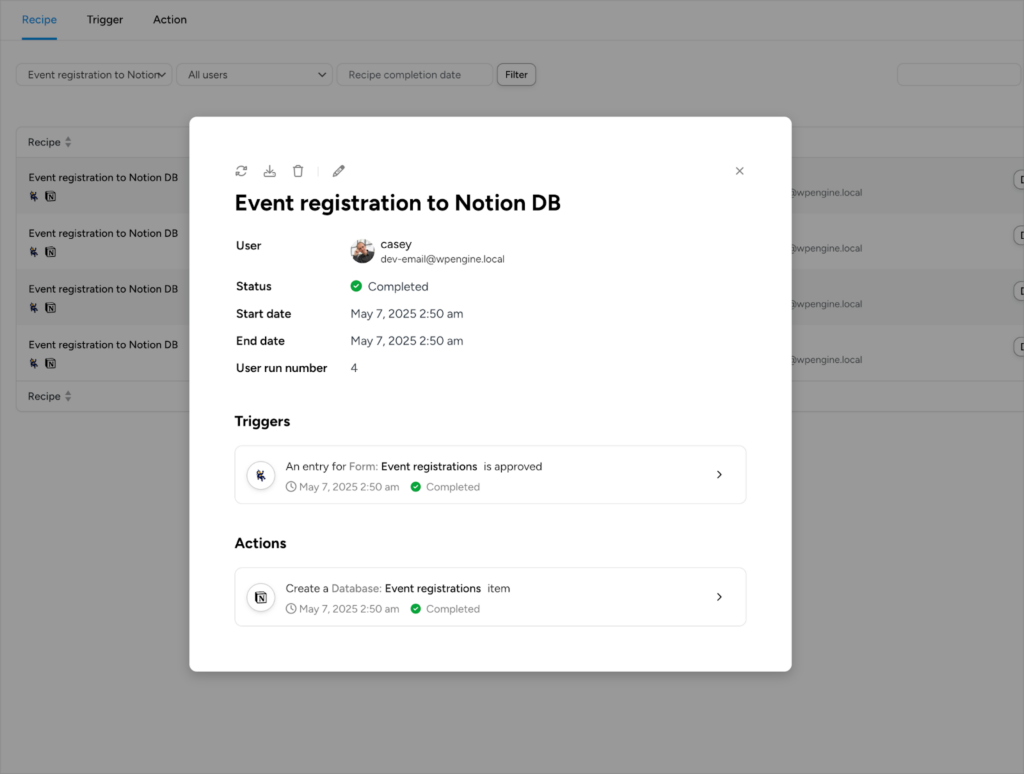
That’s it! Now that our recipe is set up, we’ll hit save and toggle it “Live”.
The final thing to do is test the connection to ensure everything is working correctly.
4. Testing the connection
To test the automation, we’ll open up our event registrations form and add a new entry.
Next, we’ll head over to our View and approve the entry (you can also approve entries from the Gravity Forms Entries page in the backend).
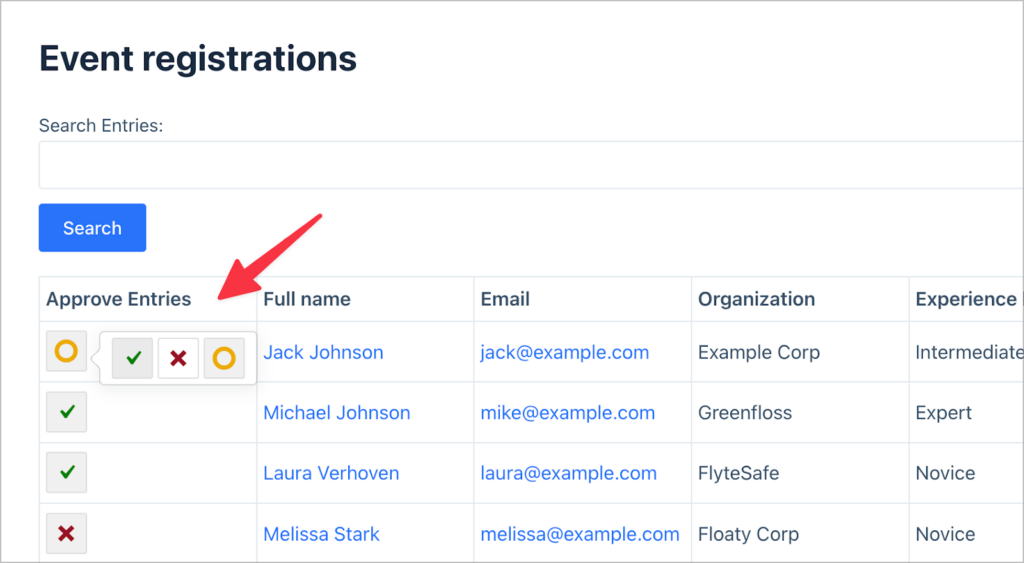
As soon as we approve the entry in GravityView, it’s sent to our Notion database:
That’s it!
Sending custom data
Not only does Uncanny Automator enable you to send form field values to a Notion database, but you can also send entry and form meta data. Supported meta values include:
- Form title
- Form ID
- Entry ID
- User IP
- Entry submission date
- Entry source URL
Uncanny Automator also supports site and user meta, along with custom date and time values.
Field type limitations
It’s important to highlight a few limitations when it comes to sending data from Gravity Forms to Notion via Uncanny Automator.
For example, you can’t send data from a Gravity Forms Checkboxes field to a Notion Multi-Select field due to differences in the way the field values are stored. Instead, you’ll need to send that data to a Notion Text field.
And while you can pass file uploads to Notion, you’ll need to check the length of your filenames as Notion has a hard limit of 100 characters.
It’s possible there are further limitations that I haven’t run into yet. If you encounter any other issues, you can check the logs in Uncanny Automator to view error messages..
Connect your GravityView apps with Notion
Connecting GravityView to Notion using Uncanny Automator opens up a smooth, no-code way to send approved form entries into a Notion workspace. Whether you’re managing event registrations, job applications, or internal requests, this integration helps centralise and organise your data without manual copy-pasting.
While there are a few limitations to be aware of, the setup process is straightforward—and once it’s live, it just works. Hopefully this guide helped you get everything connected and running!

Helpful tips right in your inbox.
Subscribe to get the latest articles, information on releases and helpful Gravity Forms tips!
More articles

How to build a searchable directory on Gravity Forms by chatting with AI
Build a searchable directory from your Gravity Forms entries by chatting with AI. See how the free GravityKit MCP creates a GravityView directory in minutes.

10 things you can ask AI to do with Gravity Forms (using the free GravityKit MCP)
See 10 practical things you can ask AI to do with Gravity Forms using the free GravityKit MCP: create forms, manage entries, build Views, and more.

Launch Log: theme template editing in Block MCP, Shield silentCAPTCHA for Zero Spam, and GravityView fixes
Block MCP adds safe theme template editing, Gravity Forms Zero Spam gains Shield silentCAPTCHA support, and GravityView fixes lightbox and notice bugs.