Published
•
Updated
How to import Gravity Forms entries from an Excel file
Import Gravity Forms entries from an Excel file in three steps. Export your spreadsheet to CSV, then use GravityImport to map columns and bring in all your records cleanly.
Are you looking for a way to import form entries from an Excel file to Gravity Forms?
In this step-by-step guide, we’ll show you how easy it is to import entry data from an Excel spreadsheet using the GravityImport plugin.
Wanna try it?
Spin up a demo
See GravityImport in action on its live demo site.

Export your entries from Excel to CSV
The first thing you need to do is export your entry data to a CSV file. You can do this in Excel with a few simple clicks! Why is this even necessary? Because it’s easier to import data from a CSV file than from an XLSX file.
Here’s how to convert your Excel worksheet to a CSV file:
- Click “File” and then “Save As”.
- In the “Save as type” box, choose “CSV (Comma delimited)”.
- Save the file
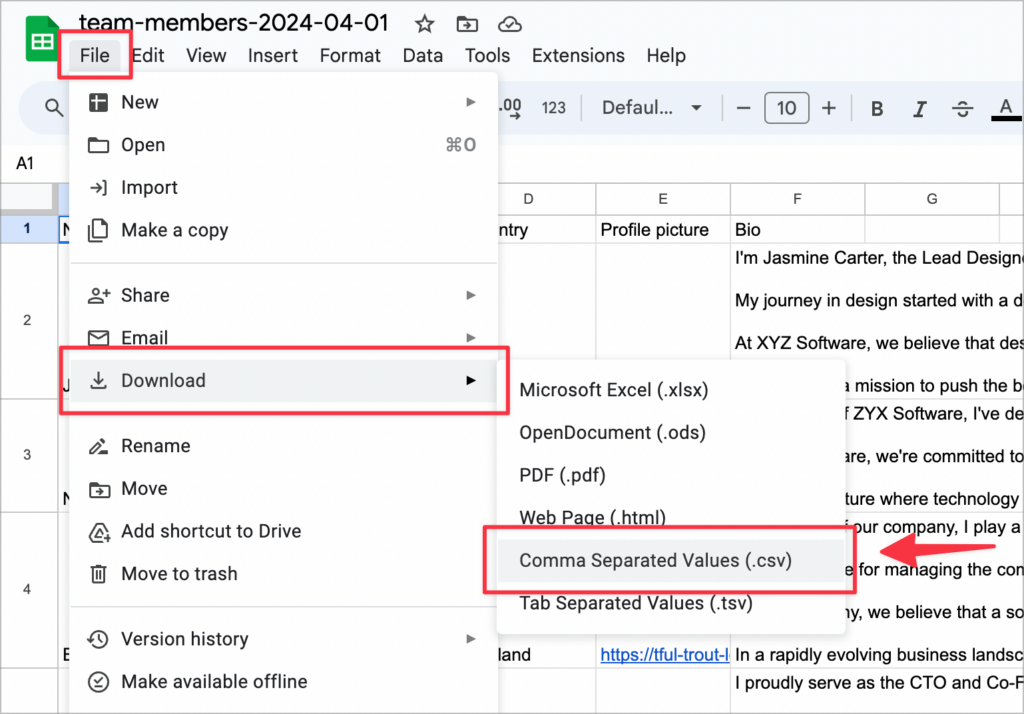
If your data is in a Google Sheet, you can export it to CSV format by clicking “File”, hovering over “Download”, and selecting “Comma Separated Values (.csv)”.
Now that you’ve saved your form entry data to a CSV file, you’ll need a way to import it to Gravity Forms.
Install GravityImport
There is no way to import data into Gravity Forms without using a plugin. That’s why you’ll need to install GravityImport—the only certified import entries plugin for Gravity Forms!

Import your entry data using GravityImport
Now that you have your data ready in CSV format, and GravityImport installed on your site, you can begin the process of importing your entries to Gravity Forms!
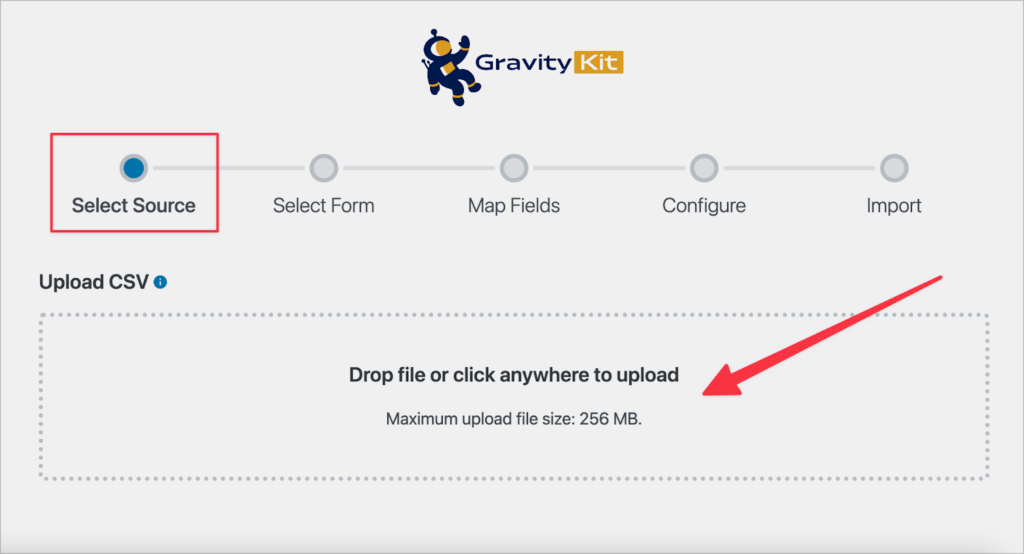
1. Select the source of your entry data
Start by hovering over “Forms” and click “Import/Export”. Now, click on the “Import Entries” tab on the left.
Here, you can upload the CSV file containing your form entry data. To do this, either click inside the box and select the file, or simply drag and drop it into the box. GravityImport will now process your uploaded CSV file.
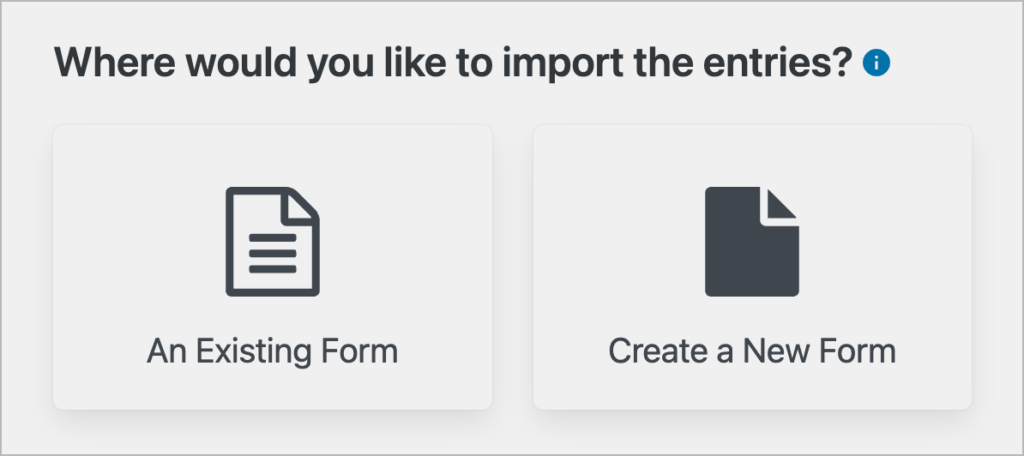
2. Select a form
After uploading your CSV file, you will need to choose where to import the entries. You can either select an existing form in Gravity Forms, or you can create a brand new form!
If you choose “Create a New Form”, GravityImport will create a new form for you automatically based on the data in your CSV file—Pretty cool, right?
3. Map your form fields
After choosing where you want to import your data, you’ll need to map the columns in your CSV file to the correct field types in Gravity Forms.
To select a field type, simply click on the “Field Type” dropdown and select the correct type from the list. Do this for each column and ensure they are all correct before moving on to the next step.
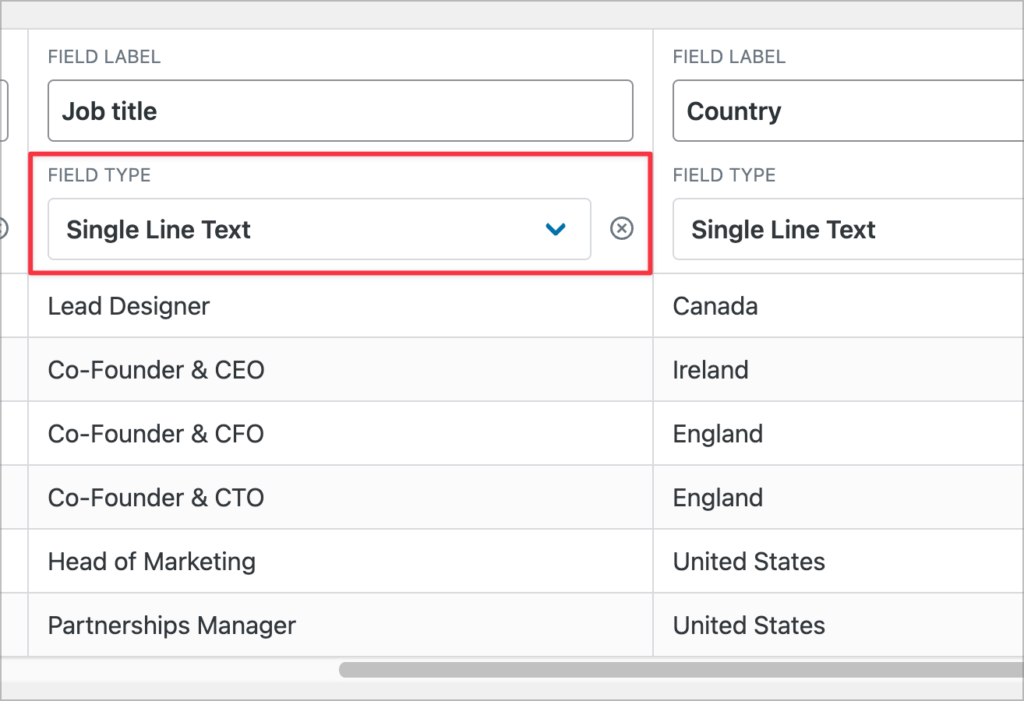
Pro tipIf there’s a column in your CSV file that you don’t want to import at all, you can ignore it by clicking on the ‘x’ icon.
4. More import options
The final step in the import entries process is to configure the remaining import options. For example, you can filter entries using conditional logic, trigger email notifications, skip field validation, and more.
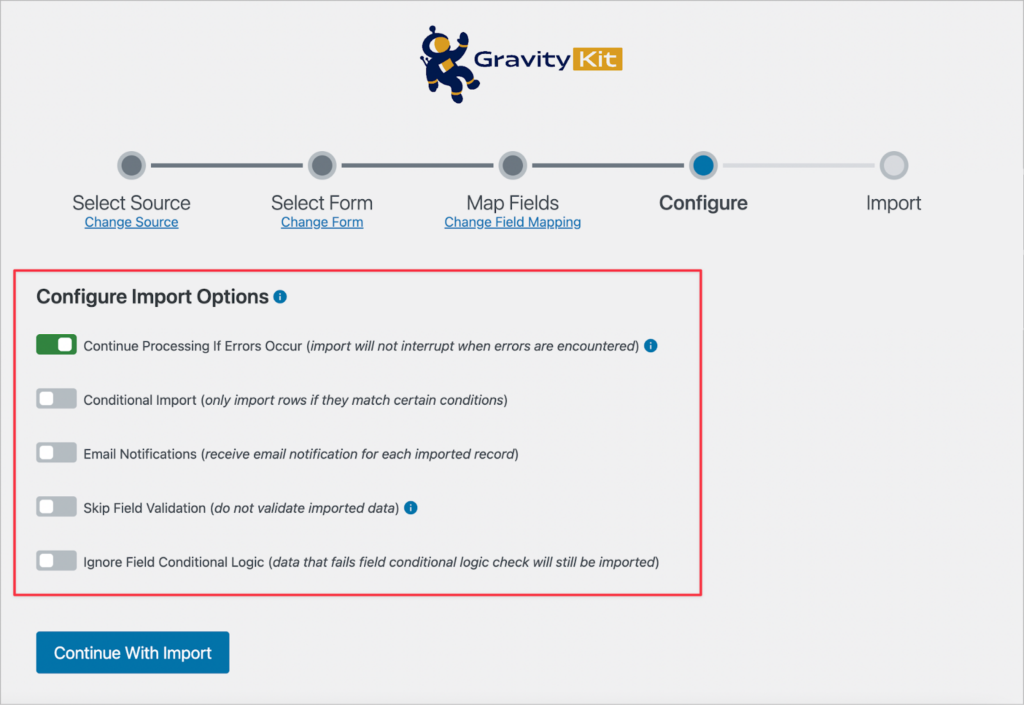
After configuring the various options, click “Continue With Import” to import your entries to Gravity Forms.
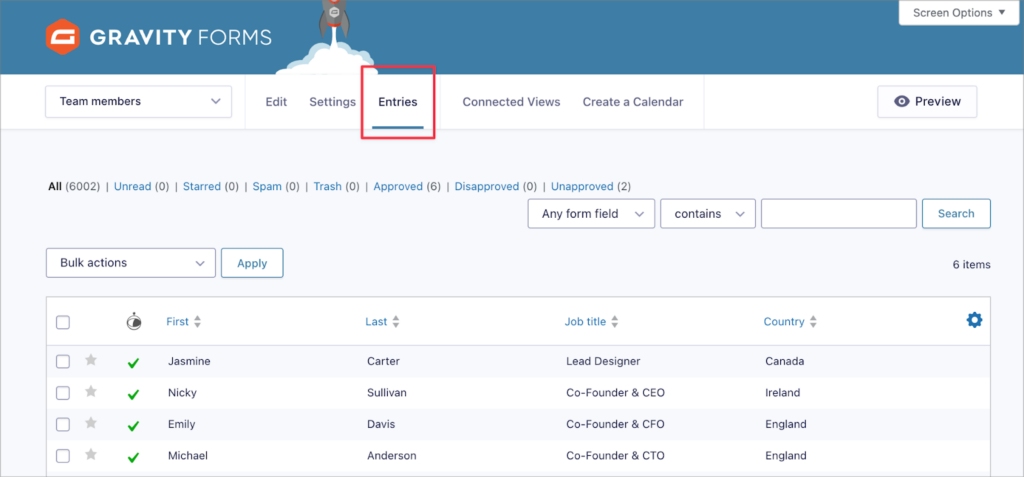
5. View the imported data
GravityImport will now import your entries to Gravity Forms. When the importer has finished, click “View Imported Records” to see your new form entries.
That’s it!
GravityImport vs WP All Import
If you’ve been researching ways to import entries into Gravity Forms, you may have come across the WP All Import Gravity Forms Add-On. It’s another option worth knowing about, so here’s a quick comparison.
WP All Import is a general-purpose WordPress import tool that supports CSV, Excel, XML, and Google Sheets. Their Gravity Forms add-on lets you import entries using a drag-and-drop interface.
However, there are some key differences:
| GravityImport | WP All Import | |
|---|---|---|
| Built for Gravity Forms | Yes. Purpose-built and certified by Gravity Forms | No — general-purpose import tool with a Gravity Forms add-on |
| File formats | CSV | CSV, Excel, XML, Google Sheets |
| Auto-create forms | Yes. Can generate a new form from your CSV | No |
| Field mapping | Automatic with manual override | Drag-and-drop |
| Pricing | Starts at $99/year | Starts at $199/year (Import Pro package) |
If you’re already using other GravityKit plugins (like GravityView or GravityExport), GravityImport is the most seamless choice since it’s designed specifically for Gravity Forms and included in your existing license. WP All Import may be a better fit if you need to import data from XML files or if you already use it for other WordPress imports.
Import your Gravity Forms entries from Excel
In this post, we showed you how to import Gravity Forms entries from an Excel file. It starts with converting your spreadsheet to a CSV file, then you can use the GravityImport add-on to efficiently import your form data to a new or existing form!
If you found this tutorial helpful, subscribe to our newsletter below so we can notify you when we publish new content.

Helpful tips right in your inbox.
Subscribe to get the latest articles, information on releases and helpful Gravity Forms tips!
More articles

Launch Log: WordPress 7 polish, cloud storage monitoring, and a GravityView 3.0 beta update
GravityView 2.61.0 adapts to WordPress 7, GravityExport adds cloud storage monitoring, plus fixes across GravityImport, Maps, and a GravityView 3.0 beta update.

What is a WordPress MCP server? (And which ones are worth using)
A WordPress MCP server lets AI agents read and edit your site through a standardized protocol. Here is what they do, why they matter, and how six popular options compare.
How to build an internal admin dashboard on WordPress without code
Build an internal WordPress admin dashboard with GravityView Dashboard Views. Embed forms data, charts, and KPIs inside wp-admin with role-based access.