Published
•
Updated
How to import Gravity Forms entries from a CSV file
Import Gravity Forms entries from a CSV file in three simple steps using GravityImport. Note: Gravity Forms native import only handles form JSON configs, not entry data.

Are you looking for a way to import Gravity Forms entries?
You may have noticed that Gravity Forms does not support entry importing. However, you can import entries to Gravity Forms using a plugin!
In this comprehensive tutorial, we’ll show you how to import Gravity Forms entries from a CSV file in three simple steps. Let’s get started!
Important distinction: Gravity Forms does have a native Import/Export feature (under Forms > Import/Export in your dashboard), but this is designed for importing and exporting form configurations as JSON files—not entry data. So if you’re looking to import entries from a CSV, you’ll need a plugin like GravityImport. For more details on what Gravity Forms supports natively, see the official Import/Export documentation.
Wanna try it?
Spin up a demo
See GravityImport in action on its live demo site.

Install the GravityImport plugin
Before you can start importing entries, you’ll need to install the GravityImport add-on for Gravity Forms. GravityImport enables you to mass import form entries to Gravity Forms using a simple user interface!
GravityImport is the only Certified Gravity Forms add-on for importing entry data.
Create a CSV file of your entries
GravityImport will turn each row in your CSV file into a Gravity Forms entry. If your entry data exists in a different format, you’ll need to convert it to CSV first. Here are some common ways to do this.
Export existing entries from Gravity Forms
If you’re migrating entries from one site to another, you can export your existing form entries to CSV format.
To do this, hover over “Forms” and click “Import/Export”. Next, select a form from the dropdown menu, and choose the fields you want to export.
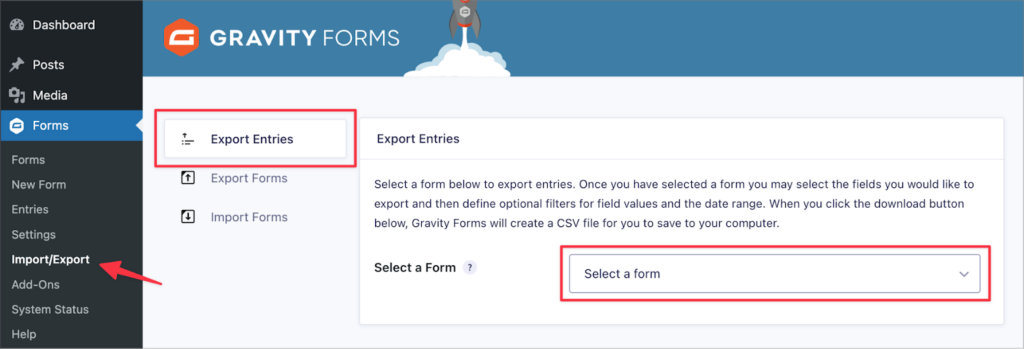
After configuring the export, click “Download Export File” to download your entry data as a CSV file.
Use a spreadsheet program to save entry data to CSV
If your form entry data exists outside of Gravity Forms, you can use a spreadsheet program to convert it to CSV format. Excel, Apple Numbers, and LibreOffice all have this functionality.
Now that you’ve installed GravityImport and exported your entry data to CSV, follow these 3 steps to import you form entry data into Gravity Forms.
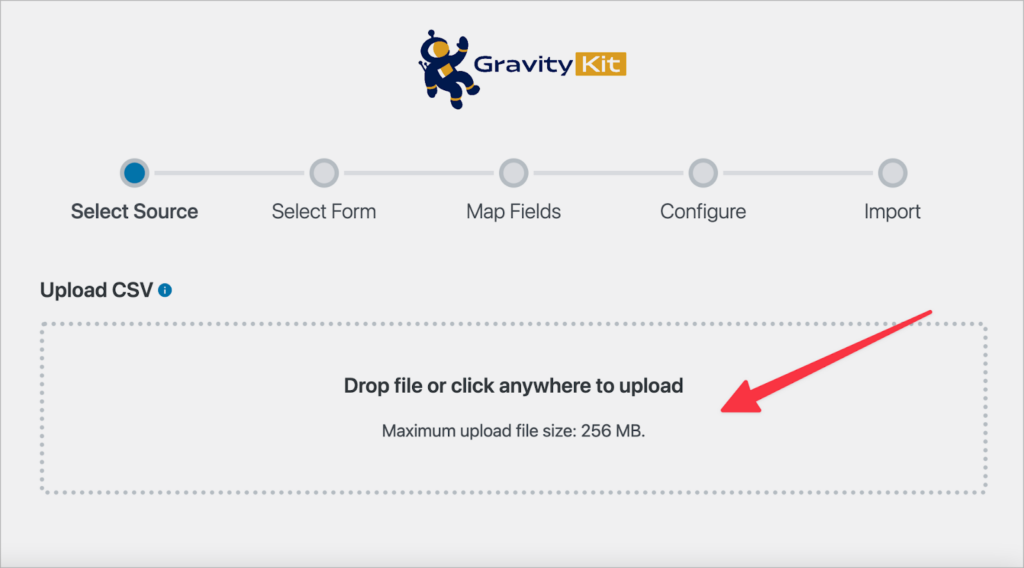
Step #1: Upload your CSV file of entries
Now that you have your form data in CSV format, the first step is to upload it to your site using GravityImport. To do this, hover over “Forms”, click “Import/Export”, and select “Import Entries”. You can now drag and drop your CSV file to upload it.
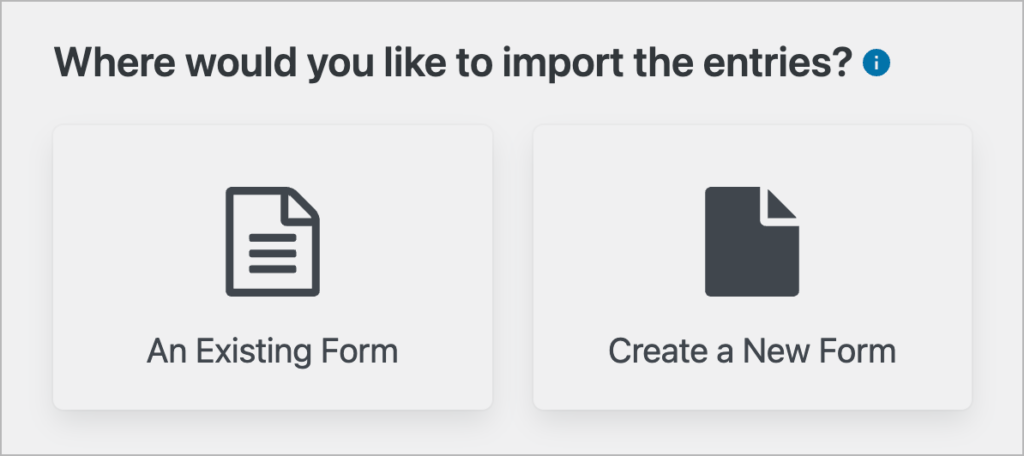
After uploading the CSV file with your form entries, choose whether you want to import the data to an existing form, or a new form. If you select “Create a New Form”, GravityImport will build a new form for you automatically during the import process.
And choosing where to import your entries, click “Continue With Import”, and move on to step two.
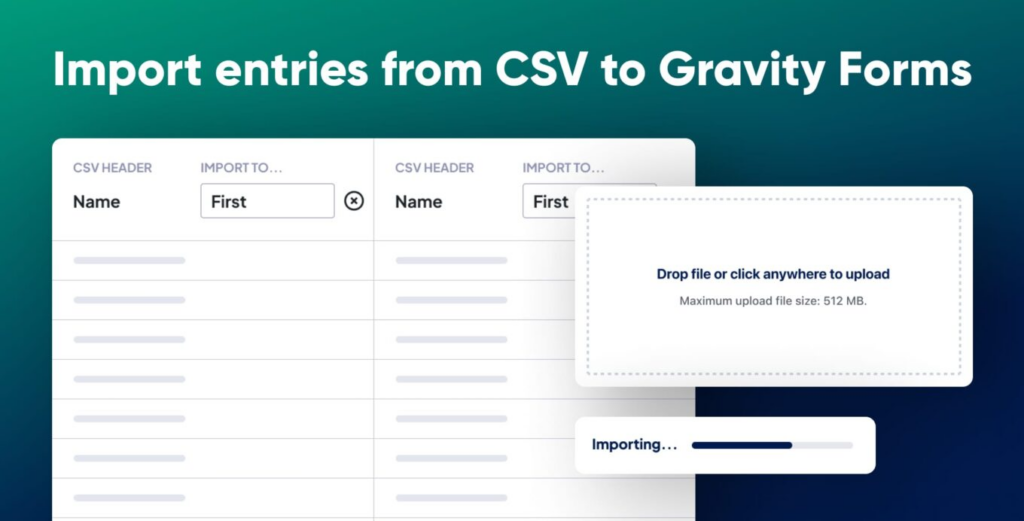
Step #2: Map your form fields to the correct field types
The next step is to map each column in your CSV file to the correct field type. If you’re importing data to an existing form, you will be able to choose from the existing form fields.
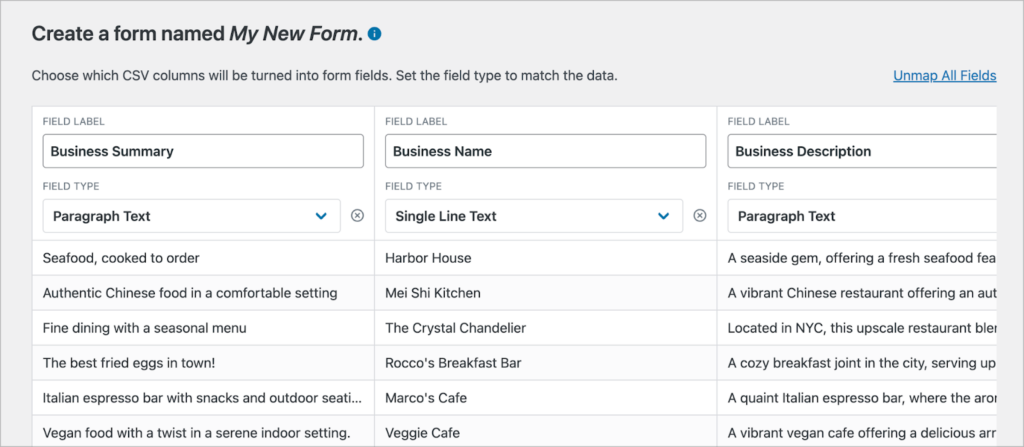
You also have the ability not to import certain columns in your file. To remove a column from the import, simply click on the ‘x’ icon to the right of the “Field Type” dropdown.
When you’re done, click “Continue With Import”.
Step #3: Configure the import options
The final step is to configure the import options. There are several options here, enabling you to customize the import process.
For example, you can filter rows using conditional logic, enable email notifications for each imported record, skip field validation, and more! If you’re importing entries to an existing form that includes active feeds, you can choose whether to trigger these for each imported record.
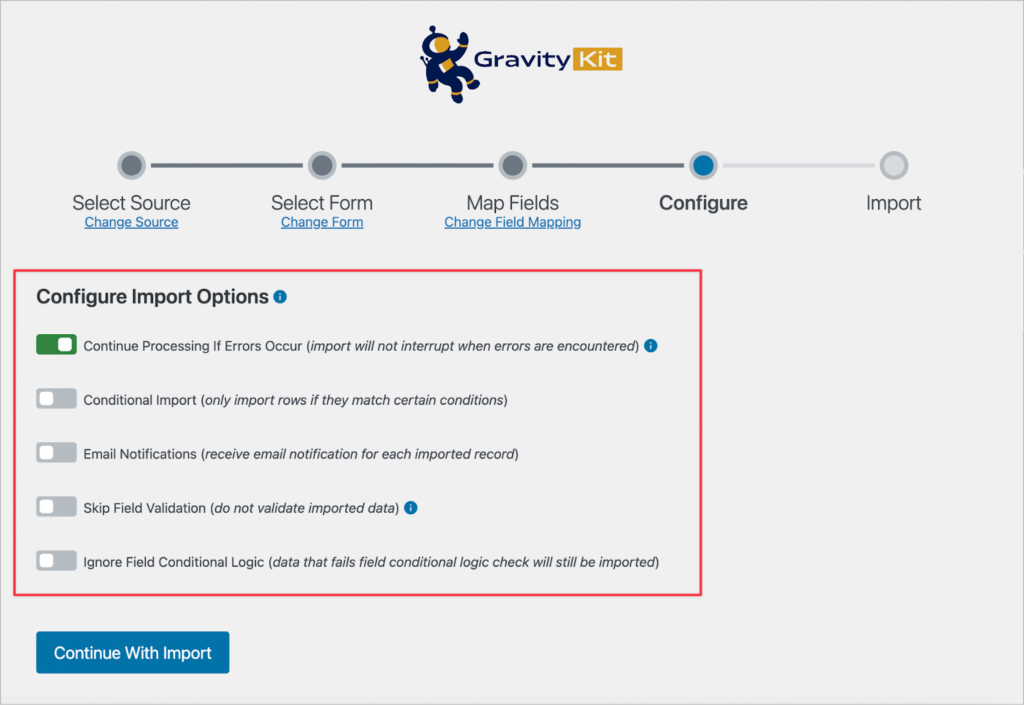
After configuring the import options, click “Continue With Import”. GravityImport will now import your form entries from the CSV to Gravity Forms!
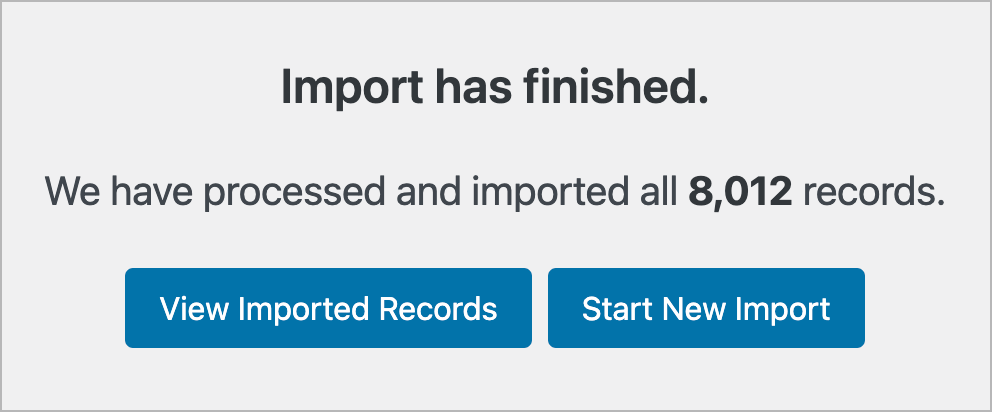
When the import is finished, you’ll be able to view all the imported entries.
Gravity Forms import not working?
While unlikely, you may get an error when trying to import your Gravity Forms entries from a CSV file. This may be due to WordPress’s default security settings blocking the upload of certain file types (including CSV files). To allow uploading of CSV files, you can install the WP Add Mime Types plugin.
Import form data using the GravityImport plugin
Having the ability to import Gravity Forms entries from a CSV file is helpful if you need to migrate to a new website, or move data from a different platform.
In this post, we showed you how to import Gravity Forms entries from a CSV file in three simple steps! Using GravityImport, you can mass import form entry data to Gravity Forms quickly and easily.
If you found this post helpful, subscribe to our newsletter below so we can notify you when we publish new content!

Helpful tips right in your inbox.
Subscribe to get the latest articles, information on releases and helpful Gravity Forms tips!
More articles

Launch Log: GravitySearch arrives, plus AI spam review and GravityView fixes
This week, releases are anchored by a brand-new product! GravitySearch joins the GravityKit suite with cross-form entry search for Gravity Forms. Alongside it, Gravity Forms Zero Spam picks up an AI-powered review step, and GravityView sees fixes for Enhanced Security, Edit Entry, and Entry…

Meet GravitySearch: advanced global search for Gravity Forms
GravitySearch adds cross-form search to Gravity Forms: find any entry from one screen, build advanced filters, and preview results without leaving the page.

Block MCP is now a free WordPress plugin (and it sets itself up)
Block MCP is now a free WordPress plugin. Connect Claude or any MCP client to your site in minutes and let AI edit your content without breaking blocks.