Published
•
Updated
How to export multiple Gravity Forms forms to one Excel workbook
Learn how to export entries from multiple Gravity Forms into a single Excel file with separate worksheets using GravityExport Lite (free).
If you’re running multiple Gravity Forms on your site, chances are you’ve needed to pull data from more than one form at a time. Maybe you manage separate forms for different departments, events, or locations.
If you’re exporting each one individually and then manually combining them in a spreadsheet, there’s a much easier way.
With the free GravityExport Lite plugin, you can select multiple forms and download all their entries as a single Excel file, with each form on its own worksheet. No copy-pasting, no juggling files.
I’ll walk you through the entire process step by step.
Wanna try it?
Spin up a demo
See GravityExport in action on its live demo site.

What you’ll need
- A WordPress site with Gravity Forms installed
- The free GravityExport Lite plugin
- Two or more forms with entries you want to export
Step 1: Install GravityExport Lite
First, we’ll install GravityExport Lite. It’s completely free and available from the GravityKit website.
- Log in to your WordPress admin dashboard
- Navigate to Plugins and click Add New
- Search for “GravityExport Lite” and click Install Now
- Once installed, click Activate
That’s it. GravityExport Lite doesn’t require any configuration. Once it’s active, a new bulk action becomes available on the Gravity Forms page.

Pro Tip
GravityExport Lite is all you need for the basic multi-form export covered in this tutorial. If you need more advanced features like filtering, field selection, or automated delivery, you can upgrade to GravityExport later.
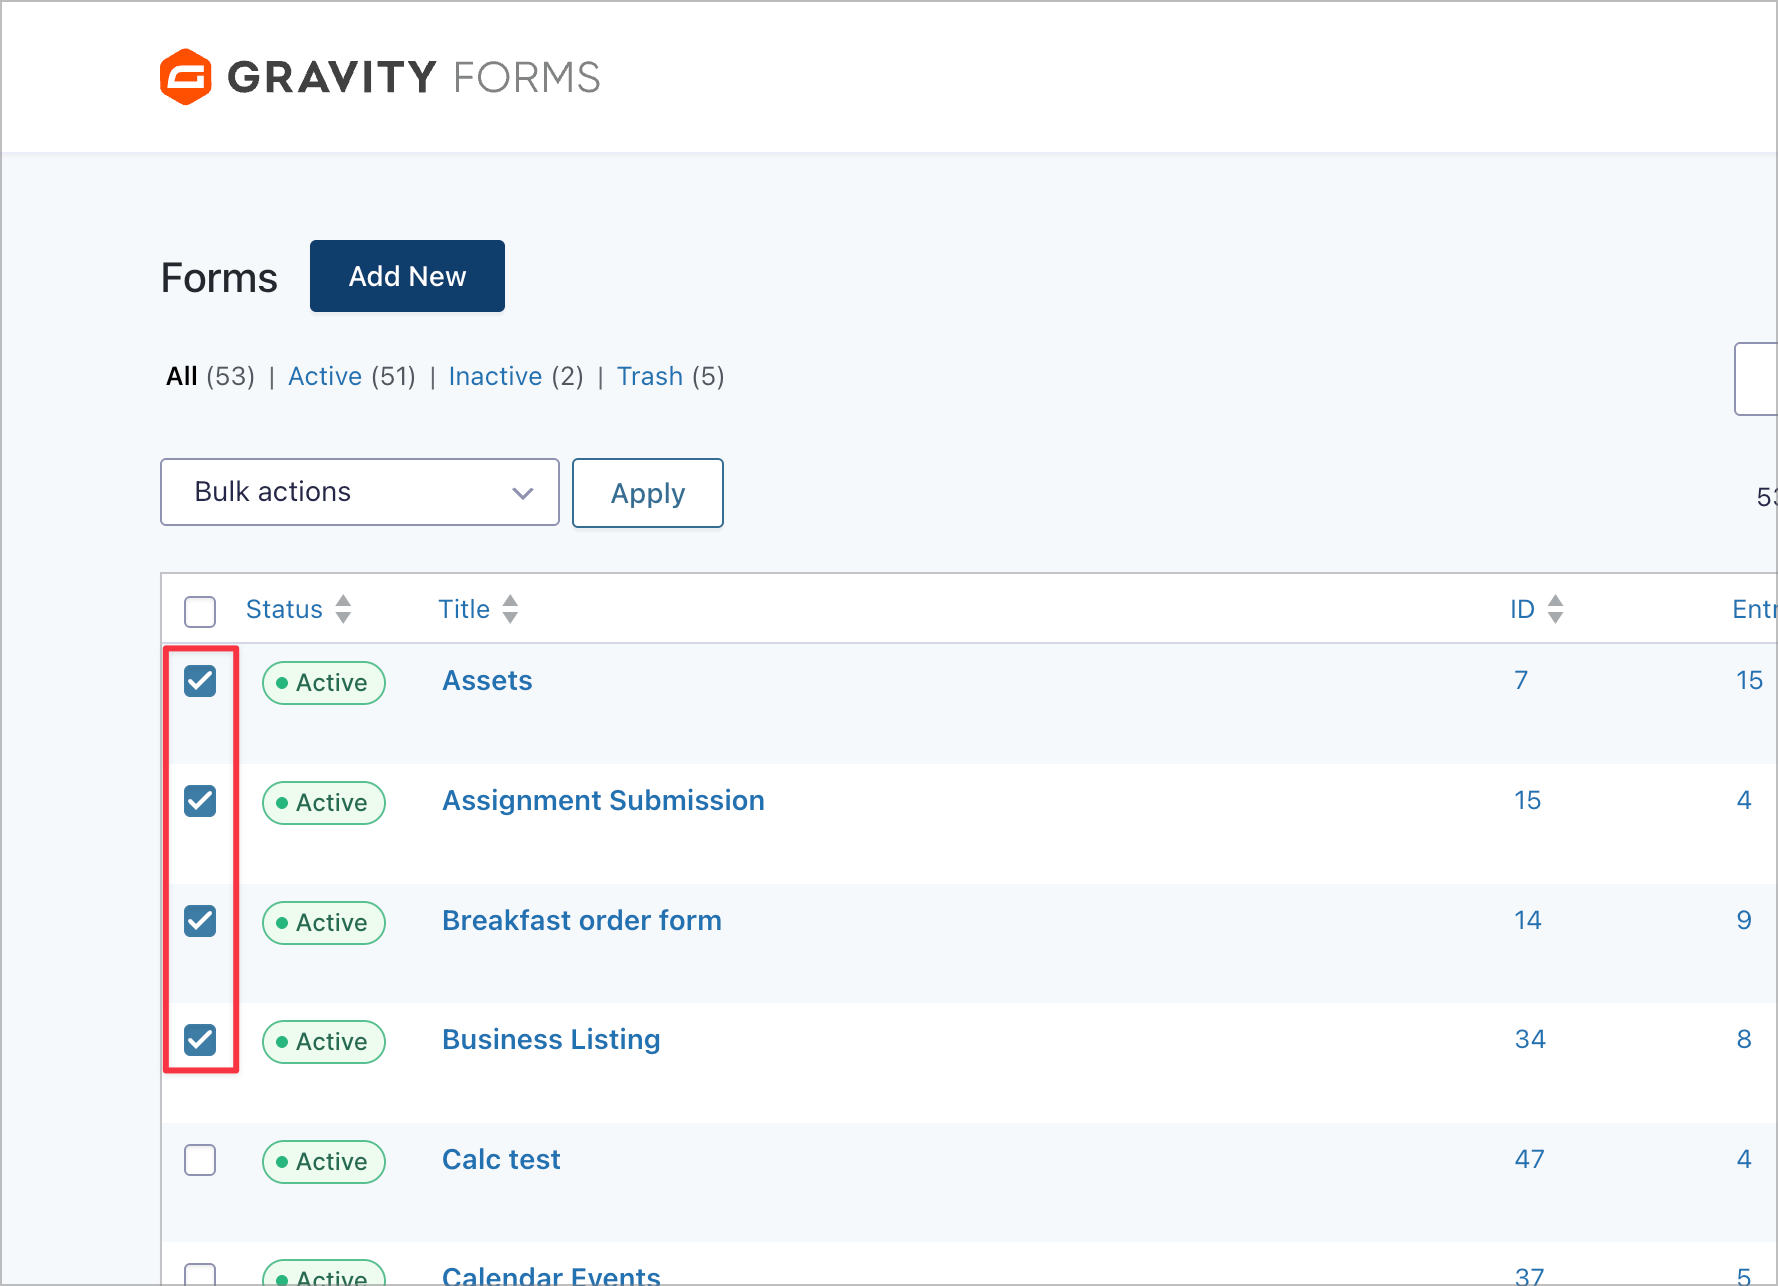
Step 2: Select the forms you want to export
Now we’ll choose which forms to include in the export.
- In your WordPress admin, hover over Forms and click Forms
- You’ll see a list of all your Gravity Forms
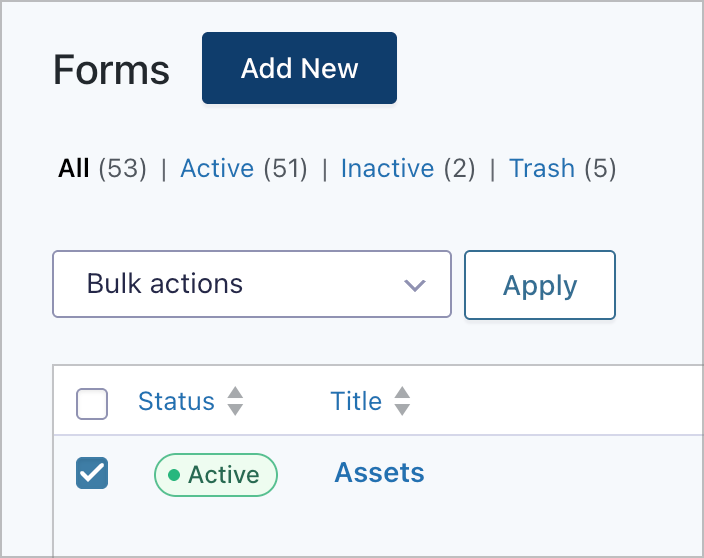
- Use the checkboxes on the left to select the forms you want to export
You can pick as many or as few forms as you need. To select all forms at once, click the checkbox in the header row.
Step 3: Run the bulk export
With your forms selected, the next step is to run the export. First, click the Bulk actions dropdown at the top of the forms list.
Next, select Download as one file from the dropdown menu.
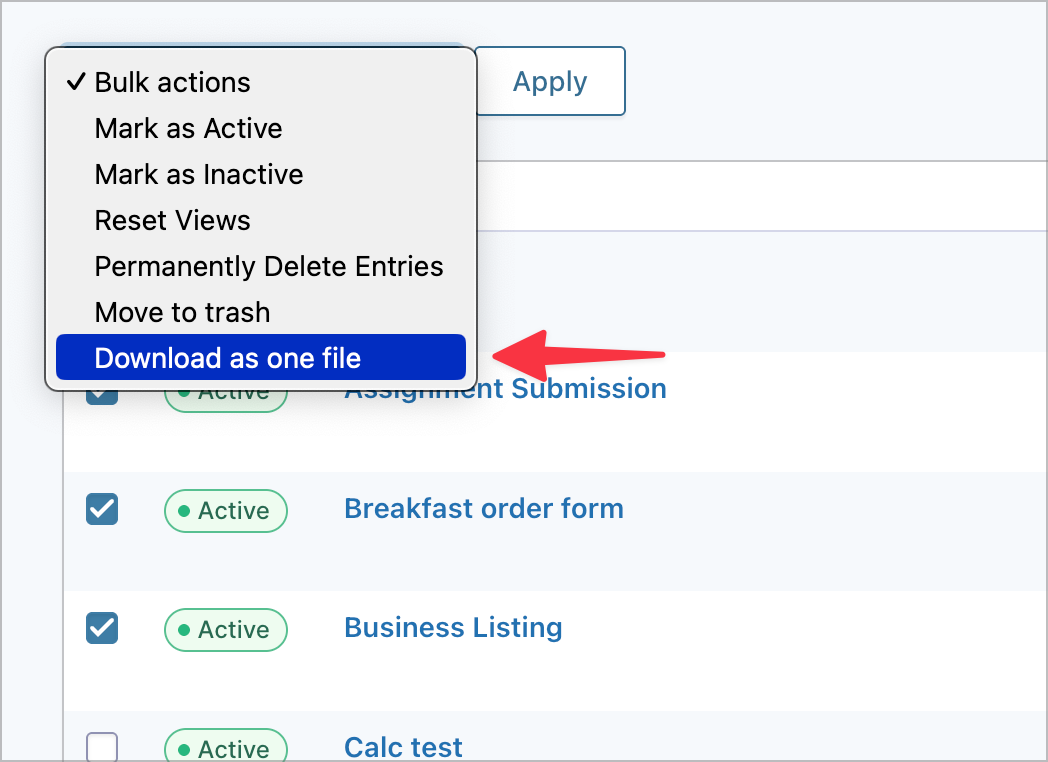
Finally, click Apply. Your browser will immediately download a single .xlsx file containing all the entries from your selected forms!
Step 4: Review the exported file
When you open the downloaded Excel file, here’s what you’ll see:
- Each form gets its own worksheet tab at the bottom of the file
- Each tab is named after the corresponding form
- Rows represent individual entries
- Columns represent the form fields (Entry ID, date, name, email, etc.)
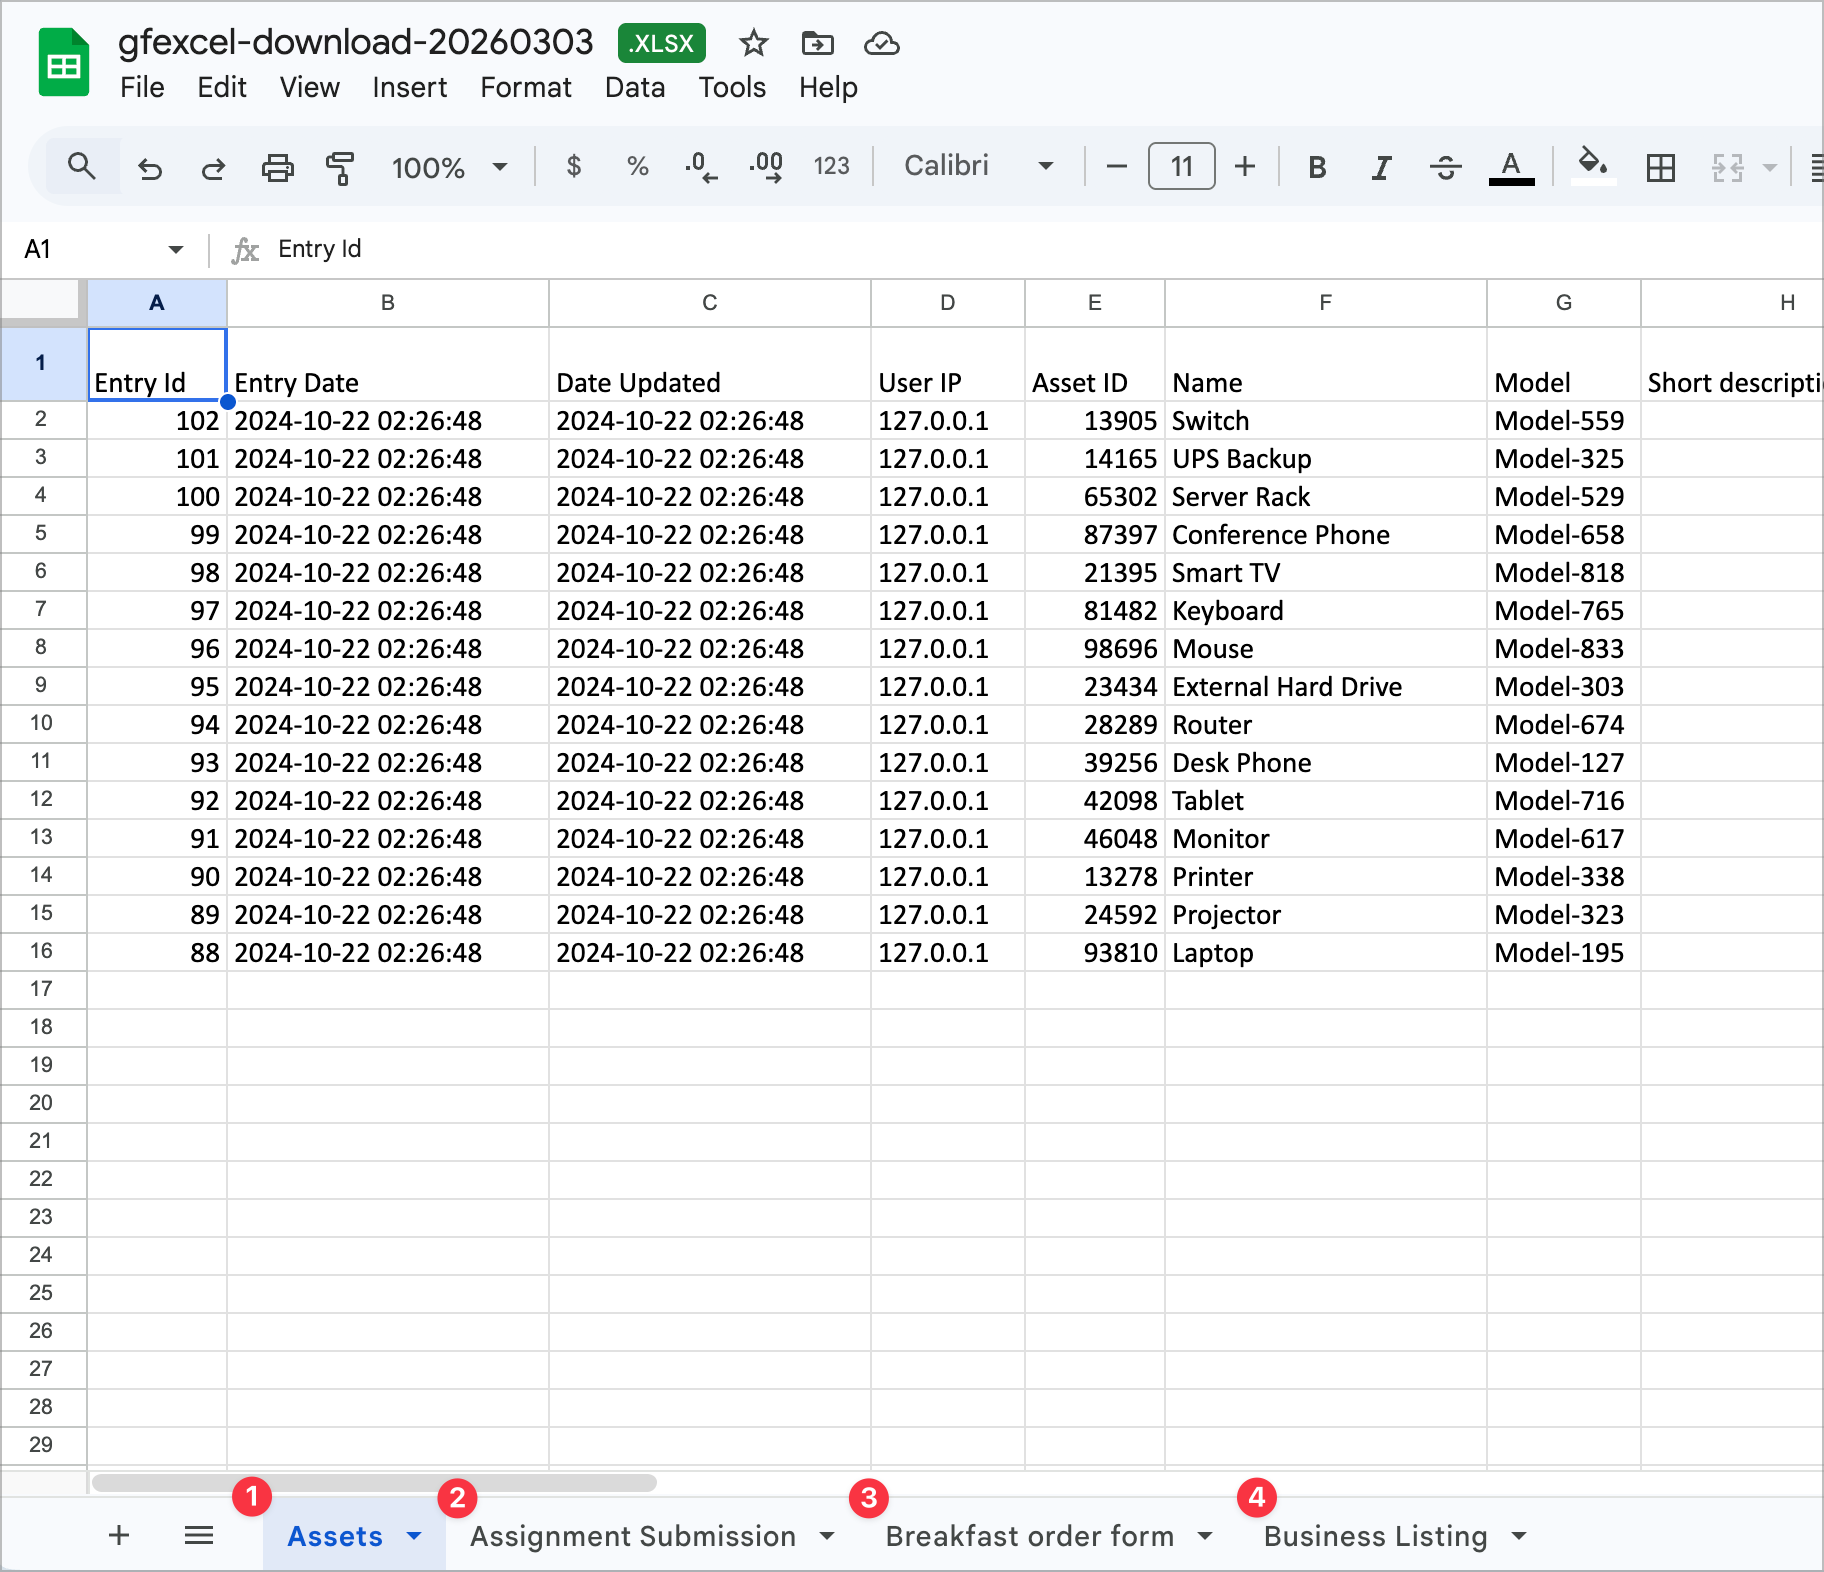
In this example, we exported four forms (Assets, Assignment Submission, Breakfast order form, and Business Listing). Each one appears as a separate tab, making it easy to switch between datasets without opening multiple files.
Pro Tip
The bulk export creates one worksheet per form. It does not merge entries from different forms into a single combined sheet. If your forms share similar fields and you need the data in one flat table, you’ll need to combine the worksheets manually in your spreadsheet application.
Going further with GravityExport (premium)
The free bulk export covers the basics, but if you need more control, GravityExport (the premium version) adds several powerful features:
- Automate delivery — Send reports automatically to Dropbox, FTP/SFTP, or local storage.
- Filter entries with conditional logic — Export only entries matching specific criteria, such as entries from the last 30 days or entries submitted by a specific user.
- Choose which fields to include — Select exactly which fields appear in each export instead of exporting everything.
- Split multi-value fields — Break checkbox and multi-select responses into separate rows for easier analysis in pivot tables.
- Create shareable download links — Generate secure URLs that let team members download the latest report without logging into WordPress.
For a detailed comparison of what’s included in each version, see How is GravityExport Lite different from GravityExport?
Wrapping up
Exporting data from multiple Gravity Forms doesn’t have to mean juggling separate downloads and copying data between spreadsheets. With GravityExport Lite, you can select the forms you need, click one button, and get a single organized Excel file,
Ready to try it? Download GravityExport Lite and start exporting in minutes.

Helpful tips right in your inbox.
Subscribe to get the latest articles, information on releases and helpful Gravity Forms tips!
More articles

Launch Log: Row headers for screen readers, smarter conditional logic, and multi-View fixes
GravityView 3.1 adds row headers for screen readers, plus smarter conditional logic in GravityCalendar and fixes for DataTables, Maps, and Dynamic Lookup.

Ecommerce platform market share 2026: WooCommerce leads the web, Shopify leads the top tier
Ecommerce platform market share in 2026, from HTTP Archive data. WooCommerce leads the whole web at 6.64%, but Shopify already leads the top 1M sites.

Launch Log: 3D map enhancements, smarter filtering, and improved performance on large data sets
GravityKit’s July 9 launch log: 3D map starting views and viewport loading, searchable field-to-field filtering, and fixes across DataTables and more.