
Published
•
Updated
Announcing Visual Merge Tags: tags you can read, edit, and preview in Gravity Forms
Visual Merge Tags turns Gravity Forms merge tags into chips you can read, change from a settings panel, and preview with real entries before you save.

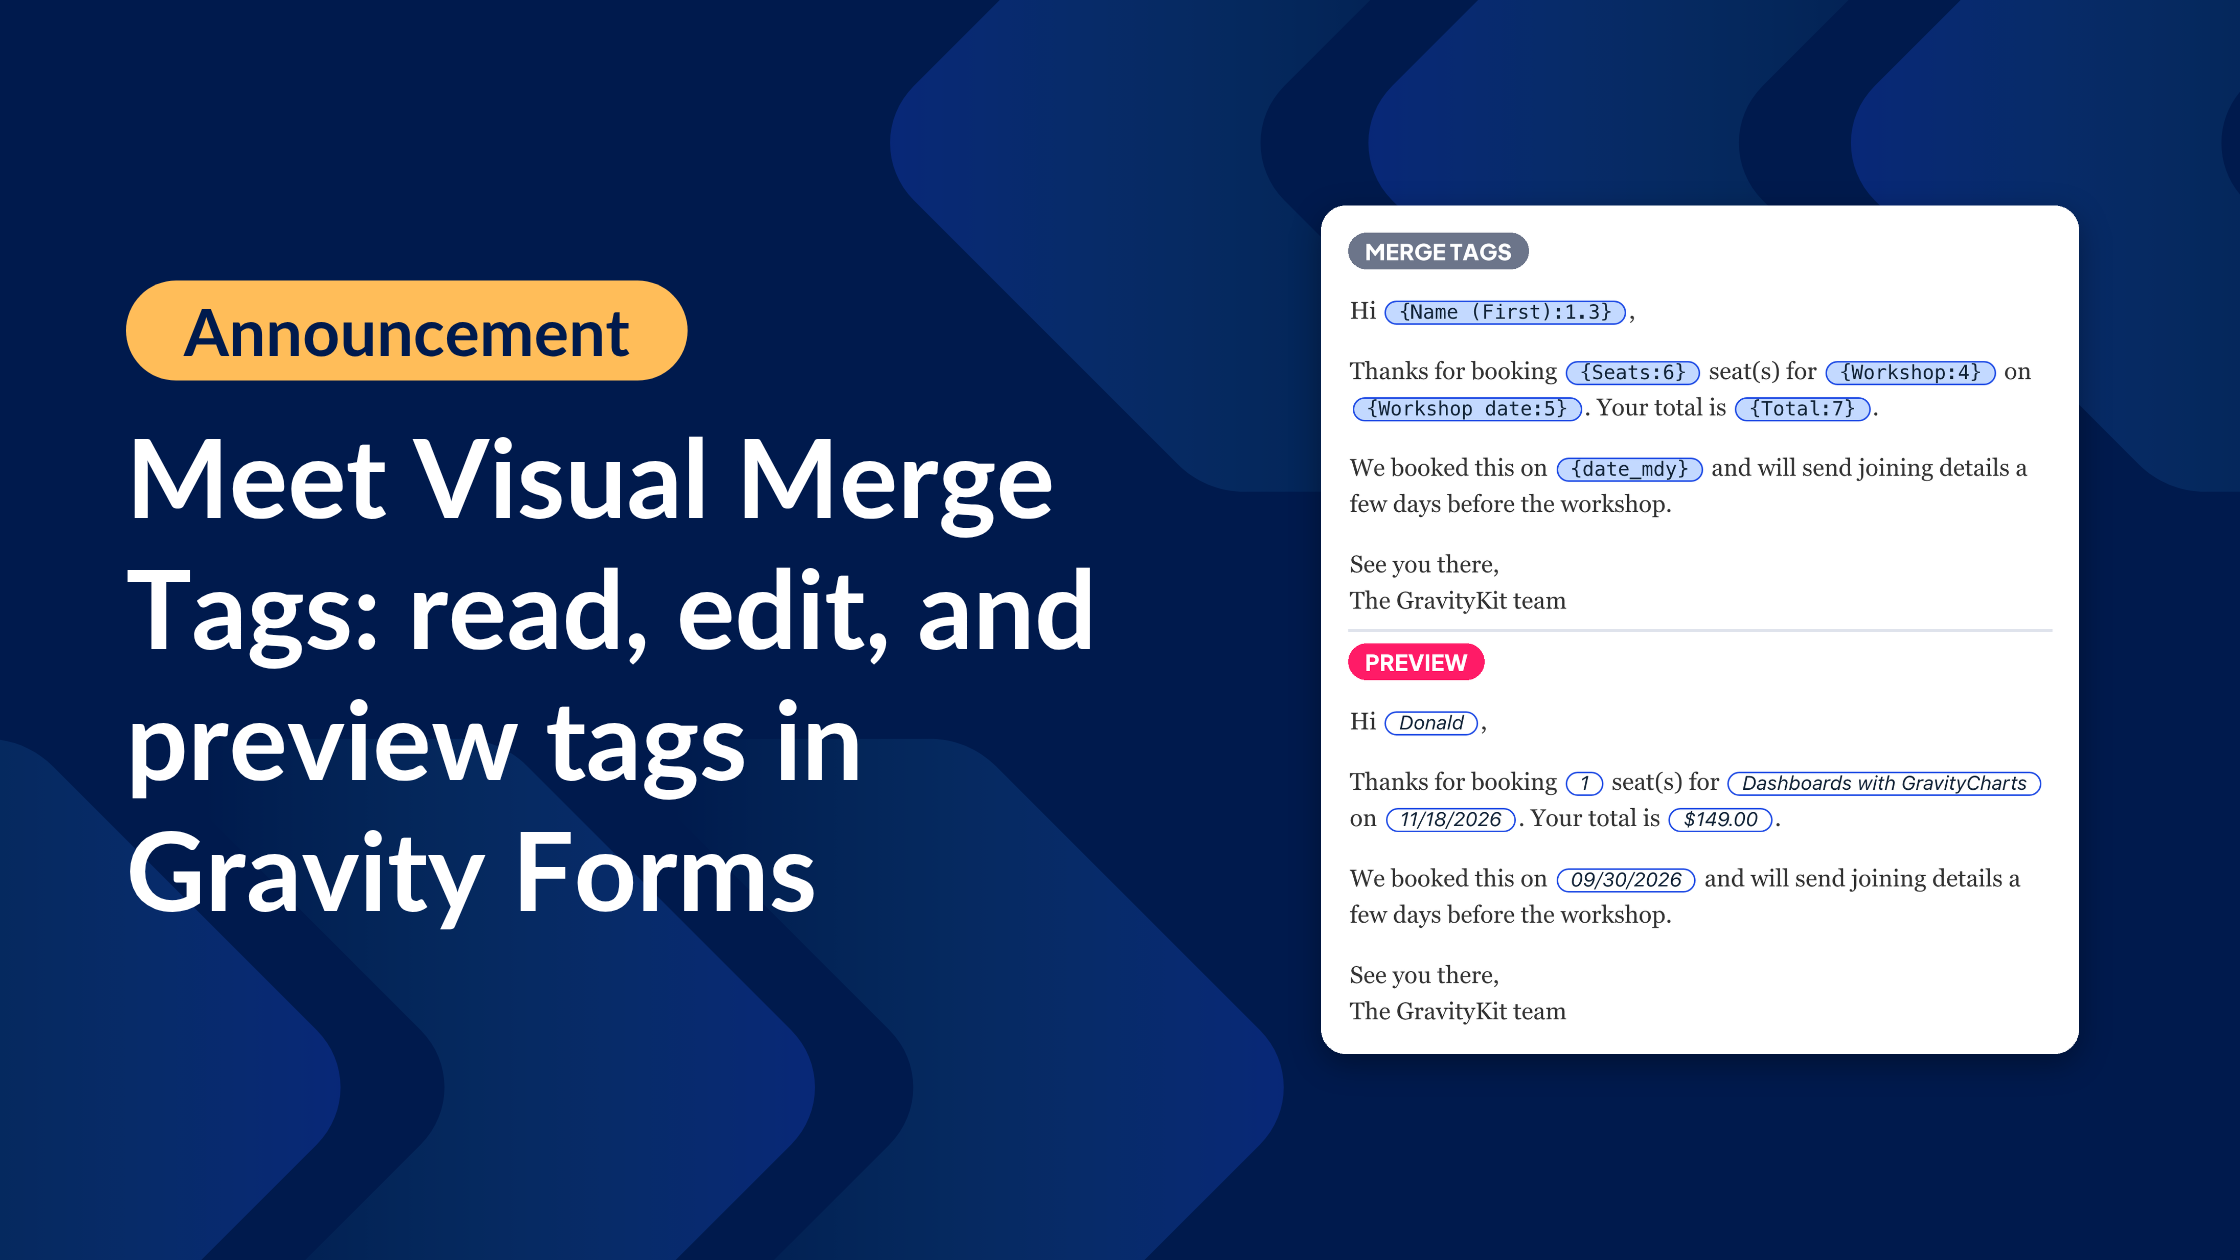
Merge tags are the placeholders, like {Name (First):1.3}, that Gravity Forms replaces with values from an entry. You’ll find them in notifications, confirmations, calculations, add-on feeds, and GravityView Views, and they’re how an email says “Hi Ada” instead of “Hi there.” If they’re new to you, start with our guide to Gravity Forms merge tags.
Writing them is the hard part. A message full of {Seats:6}, {Workshop:4}, and {Workshop date:5} is hard to read, and a missing brace breaks a tag without any warning. Changing a tag’s output means memorizing modifiers like :strtoupper, and the only way to check the result is to submit a test entry and see what comes out.
Visual Merge Tags turns every merge tag into a chip that stands out from the text around it. Click a chip and a settings panel opens, where you can change what the tag outputs and preview it with real entries from your form. It’s free, and it works wherever Gravity Forms offers a merge tag picker, on Gravity Forms’ own screens as well as GravityKit’s.
Merge tags you can read
In Gravity Forms’ default editor, a merge tag is plain text that looks like the sentence around it. With Visual Merge Tags, each tag is a clickable chip:
- It stands out from the text, so you can spot every tag in a long message without reading it brace by brace
- It moves and deletes as one piece, so a stray keystroke can’t leave half a tag behind
- It opens its settings when you click it, so you don’t have to edit modifier syntax by hand (you still can: double-click a chip to edit it as text)
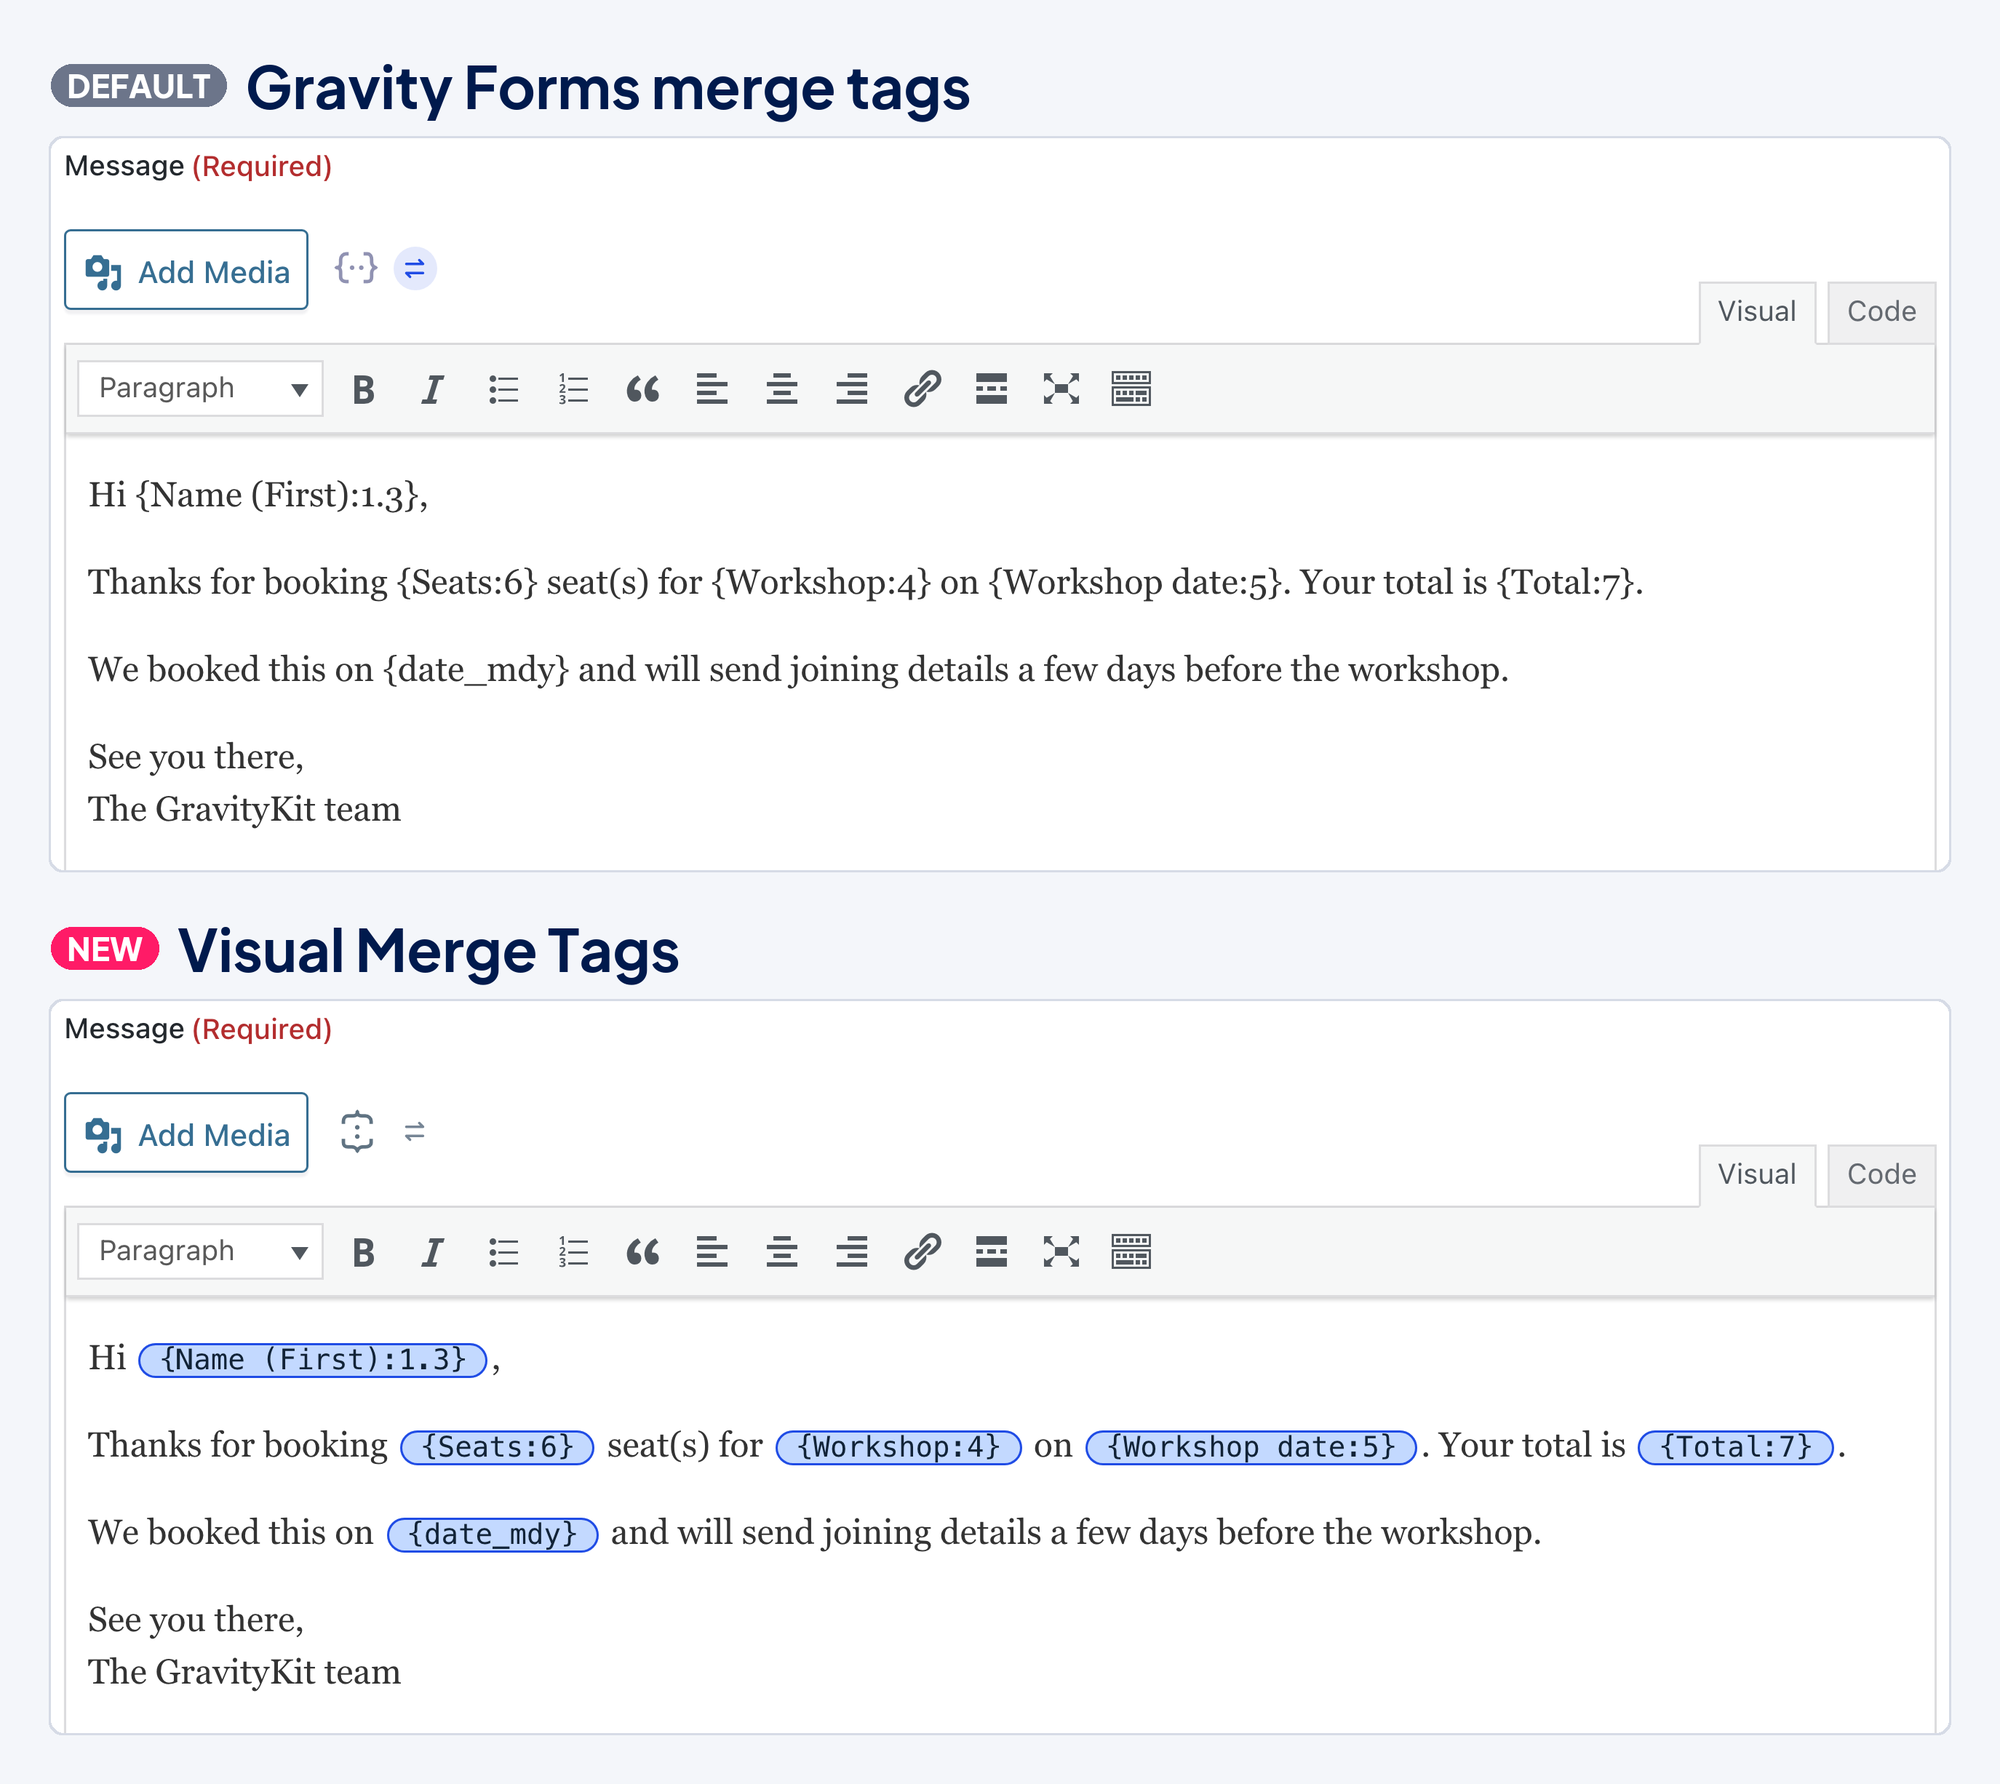
What gets saved doesn’t change. A chip is a display of the same plain merge tag text Gravity Forms has always stored, so your existing merge tags keep working wherever you’ve used them, and a tag you type by hand still works.
Insert a merge tag by typing a brace
Type { in any merge tag field and a list of tags opens under your cursor. Keep typing to filter it, then press Enter to insert the tag you want. The list only offers tags that work in that field: a calculation formula, for example, leaves out tags like {all_fields} that a calculation can’t use.
You can also open the same list with the merge tag picker icon above the field. It’s the Gravity Forms merge tag icon turned on its side, so a rotated icon tells you the field uses Visual Merge Tags.
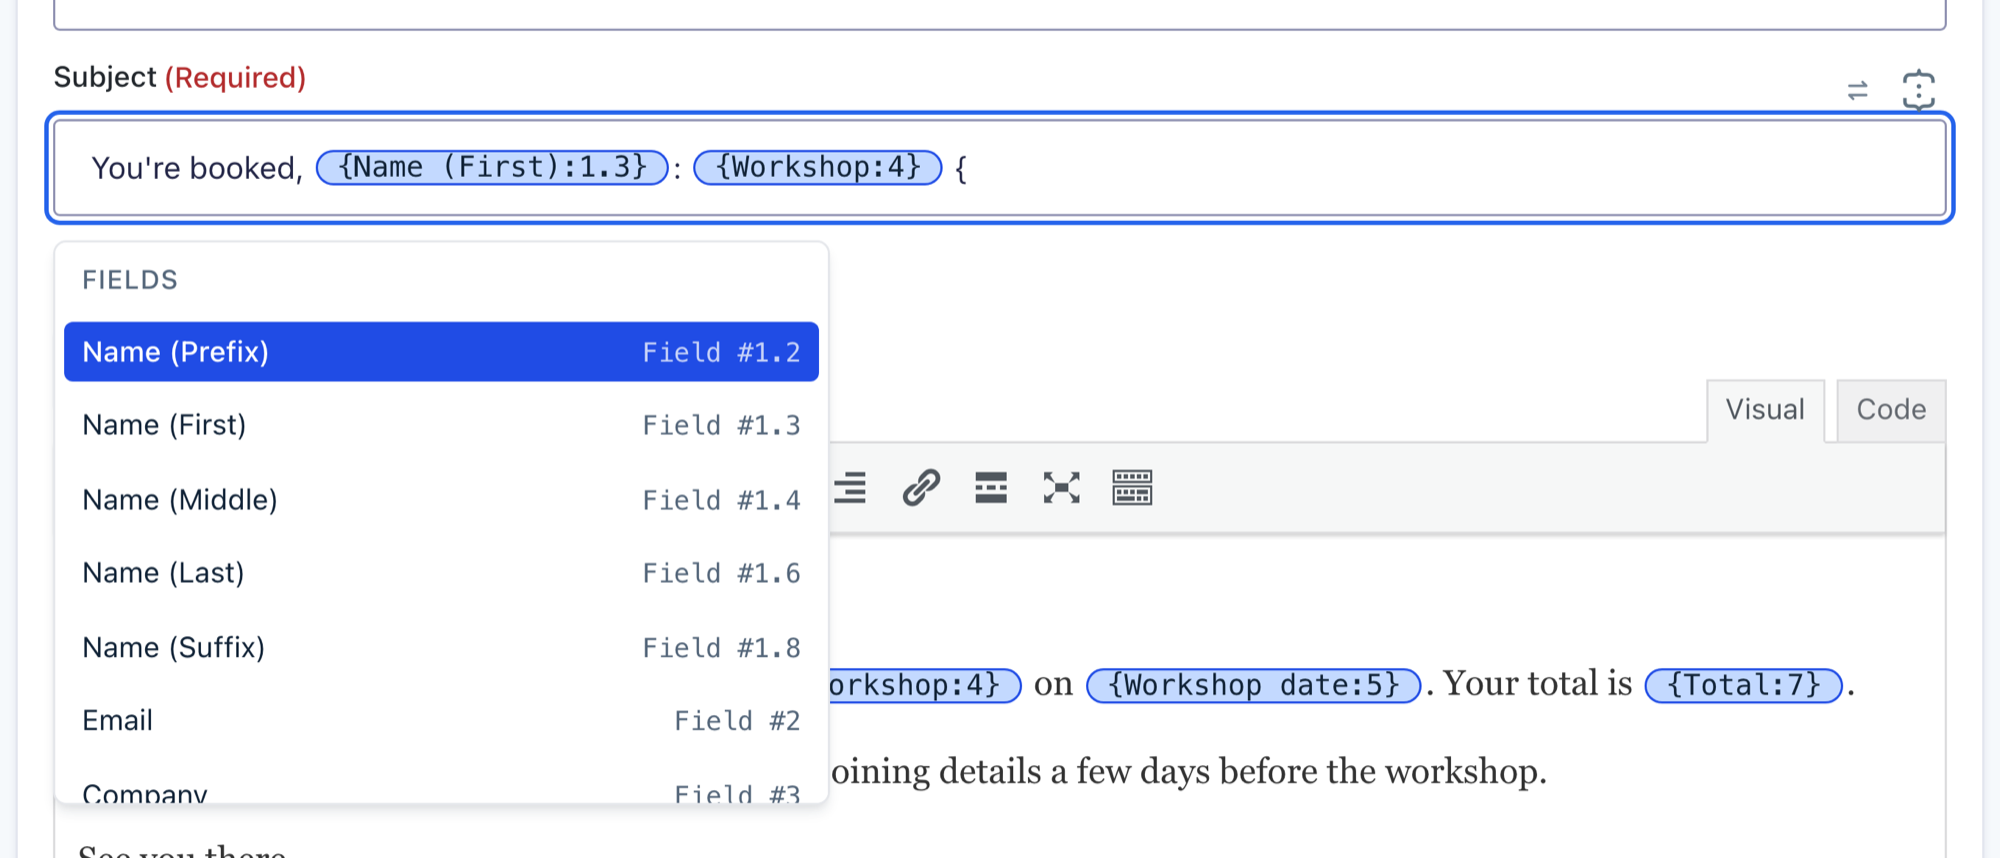
The rest of the editor works from the keyboard too. The arrow keys step onto a chip and select it, and from there:
- Enter – Opens the chip’s settings panel.
- Shift+Enter – Turns the chip back into text so you can edit it by hand.
- Delete or Backspace – Removes the whole tag.
- Esc – Closes the settings panel.
The docs cover inserting a merge tag and editing a tag as text in more detail.
Change the output without memorizing modifiers
Modifiers change what a merge tag outputs: uppercase text, the first few words, a web-address-friendly slug, or a particular date format. Until now, using one meant remembering its syntax and typing it inside the braces.
Click a chip and its settings panel lists the options that apply to that tag. You can choose which field it reads, show the field’s label instead of its value, and add changes like UPPERCASE, Limit to N words, or Make it a URL slug. Changes apply from top to bottom, and you can reorder them or remove one at any time.
Dates get their own format builder. Click tokens to build the format and see what each one outputs, so there are no PHP date codes to look up. Whatever you choose, the panel writes it back as ordinary merge tag syntax.
See Change what a merge tag shows for every option.
Preview real values before you save
The right side of the settings panel shows what the tag outputs for a real entry from your form. Use the arrows to step through entries and check the output against different submissions, such as a long company name or a date in another month.
Turn on “Preview values in all merge tags” and every chip in the field shows its value at once, so you can read the whole message the way a recipient will. The preview goes through the same rendering your site uses when it sends the email or displays the View, so what you see is what gets sent.
Some tags are never previewed, and the panel tells you why. A Magic Links or entry approval tag would create a real, working link to an entry, and tags that read account security data never show a value. The preview also needs at least one entry on the form and permission to view entries.
Preview a merge tag with real entries explains which entries the preview uses and when a preview isn’t shown.
Works wherever you type a merge tag
Visual Merge Tags runs in every field where Gravity Forms offers a merge tag picker, including:
- Notifications and confirmations
- The form editor, such as a field’s default value and calculation formulas
- Add-on feed settings
- The GravityView View editor, including Custom Content fields, field labels, and single entry titles
Tags that other plugins add show up too, such as the PDF tags from Gravity PDF (Blue Liquid Designs). For developers: tags you register through Gravity Forms’ gform_custom_merge_tags filter appear automatically, with no extra code.
Learn how those tags behave in Merge tags from other plugins.
Prefer the old picker? Switch back in one click
Visual Merge Tags is on by default. To use Gravity Forms’ picker instead, click the swap icon beside the merge tag picker icon on any field. Hover over it and its tooltip reads “Switch to Gravity Forms’ native merge tag picker”. Every merge tag field on the screen switches at once, and your browser remembers the choice for other screens too. Click it again to switch back.
To change it for the whole site, go to GravityKit, then click Settings and find the Visual Merge Tags section. Show Visual Merge Tags can be set to Everywhere (the default), GravityKit screens only, or Off.
Choose where Visual Merge Tags appear walks through each option.

Get Visual Merge Tags
Visual Merge Tags is part of Foundation, the framework that powers GravityKit plugins. It arrives with Foundation 1.35.0, which rolled out in this week’s releases, and every GravityKit product will include it soon. Your site always runs the newest Foundation among your installed GravityKit plugins, so updating one plugin from the Manage Your Kit screen is enough to get Visual Merge Tags. There’s nothing separate to install and no license to activate.
Don’t use GravityKit yet? Soon all of our free add-ons will have Visual Merge Tags built in!
For the full walkthrough, read Using Visual Merge Tags. The Visual Merge Tags page shows each part of the feature in a short clip.

Get better at Gravity Forms, one email a week
New GravityKit releases, practical Gravity Forms tutorials, and subscriber-only discounts. One short email every week, unsubscribe anytime.
More articles
Announcing Visual Merge Tags: tags you can read, edit, and preview in Gravity Forms
Visual Merge Tags turns Gravity Forms merge tags into chips you can read, change from a settings panel, and preview with real entries before you save.

Launch Log: Visual Merge Tags, Elementor widget style settings, and security updates
Visual Merge Tags arrives with Foundation 1.35.0, GravityView and Magic Links get security fixes, and the Elementor widget gains the form block’s style settings.

10 school apps you can build with Gravity Forms and GravityKit
Ten apps schools and universities build on Gravity Forms without custom code: application review, enrollment, student portals, report cards, libraries, calendars, and more. Walkthroughs for each.