Published
•
Updated
How to import WordPress users as Gravity Forms entries
Import WordPress users in bulk using Gravity Forms and GravityImport. Skip manual entry and bring existing user records from a spreadsheet in just a few steps.

Using the Gravity Forms User Registration add-on, you can register users on your site when they submit a form. But what if you want to mass import users from a spreadsheet?
Instead of spending hours manually adding your users, automate the process with GravityImport—the only Gravity Forms Certified plugin for importing entries!
In this step-by-step tutorial, we’ll show you how to import new users to your site en masse using Gravity Forms and GravityImport. Let’s get started!
Wanna try it?
Spin up a demo
See GravityImport in action on its live demo site.

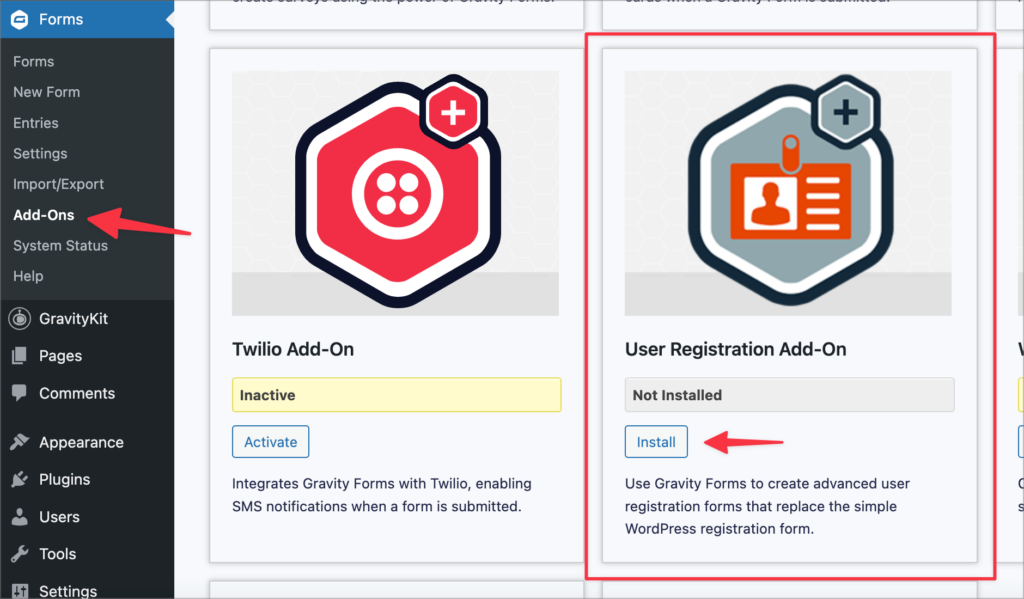
Install the Gravity Forms User Registration Add-On
First, log in to your WordPress website, hover over “Forms” in the admin sidebar and click “Add-Ons”. Next, scroll down the User Registration Add-On, and click “Install”. After installation is complete, activate the add-on by clicking “Activate”.
Create a user registration form and feed
Now that we have installed the User Registration add-on, the next step is to create a user registratin form and feed.
Gravity Forms makes this easy as they already have a preset “User Registration” form template! All we need to do is hover over “Forms”, click “New Form” and select the template.

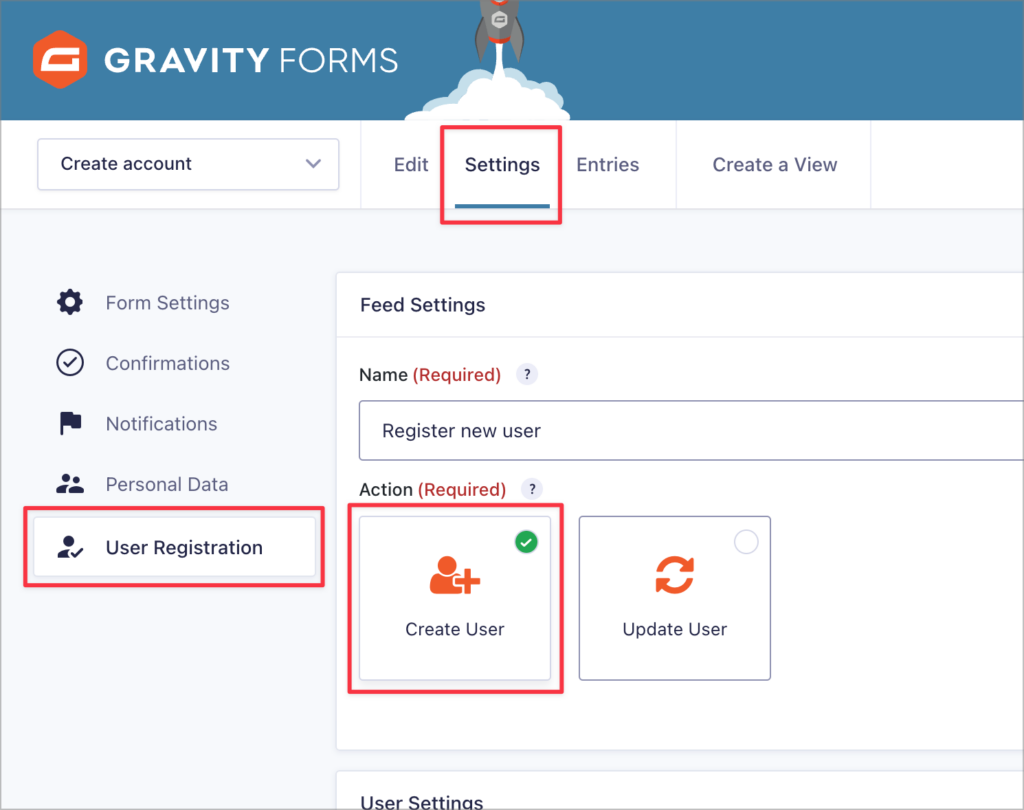
The template contains all the fields we need to register new users on our site. All we have to do now is create a User Registration feed. The feed ensures that new user accounts will be created when the form is submitted.
To create a new feed, go to the form settings and click on the “User Registration” tab. After giving the feed a name, select “Create User” under “Action”.
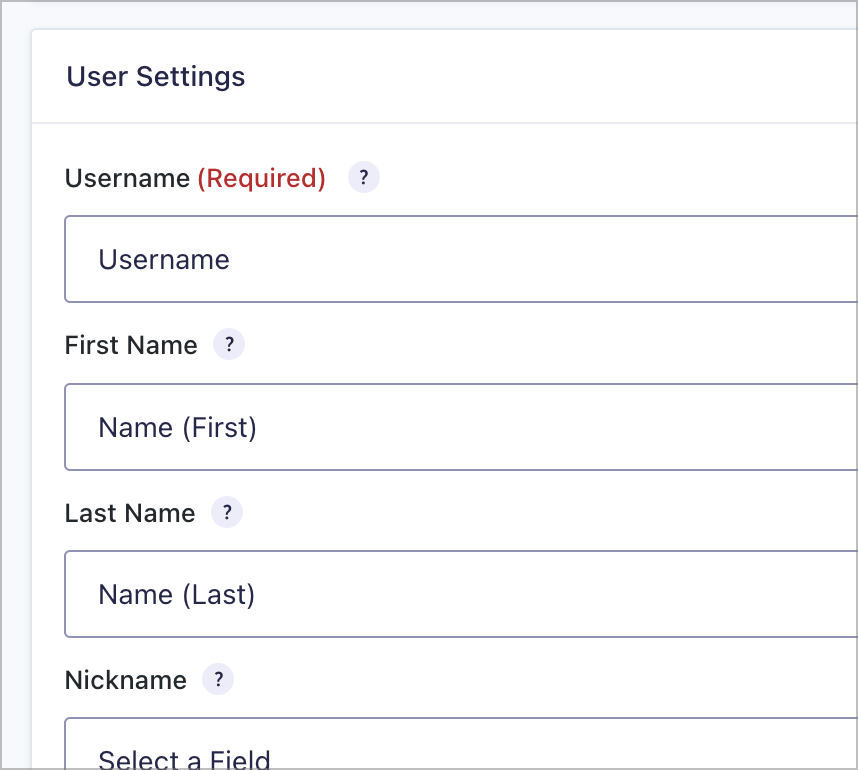
Now, scroll down and map the fields in your form to the correct user profile fields.
After configuring the remaining feed settings, save the feed.
Install GravityImport
The next step is to install GravityImport. This add-on for Gravity Forms enables you to import form entries into Gravity Forms from a CSV file. You can also create users from these entries when used in combination with the User Registration add-on!
The plugin allows you to import users to Gravity Forms in 5 simple steps:
- Upload a CSV file containing user data
- Select your form in Gravity Forms
- Map your fields
- Enable the User Registration feed
- Run the import to mass import users
Now let’s go though each step below.
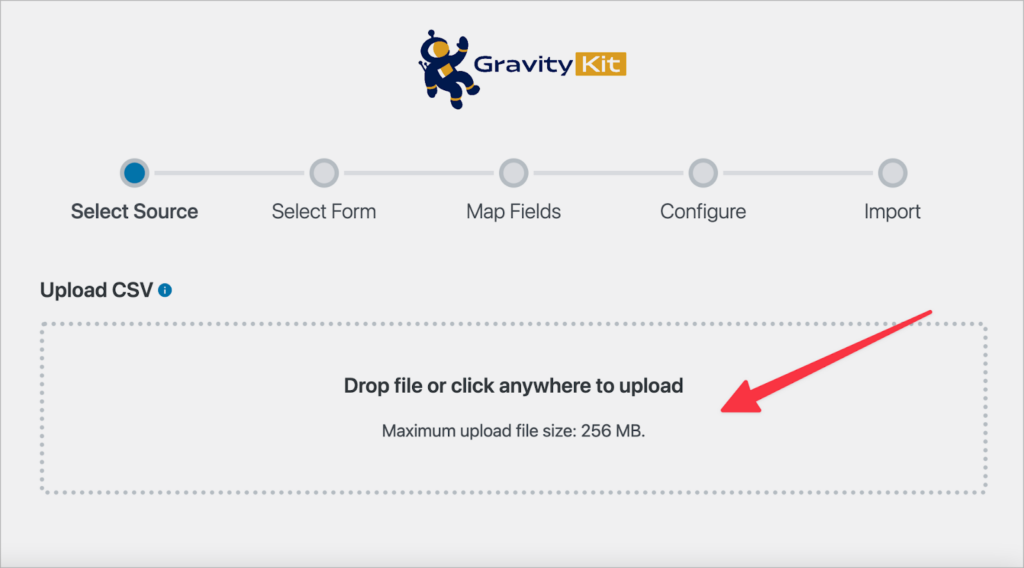
Upload a CSV file of user profiles
Now that you’ve installed all the necessary plugins, created a user registration form, and set up the required feed, you’re ready to start mass importing users to Gravity Forms! GravityImport only supports CSV files, so ensure your user data is in this format. If your data is in Excel or another spreadsheet program, simply export it to CSV format.
Hover over “Forms”, click “Import/Export” and then select “Import Entries”. Next, drag and drop the CSV file containing your user data to upload it.
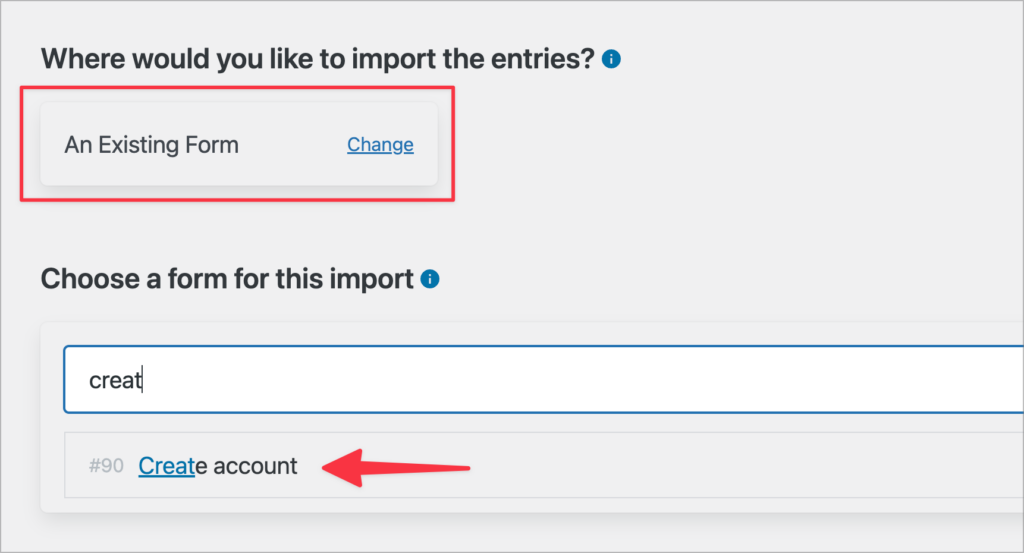
After uploading your CSV file, the plugin will give you the option to import users into an existing form or create a new form. Select “An Existing Form”, and then choose the User Registration form you created in the previous step!
Map your form fields
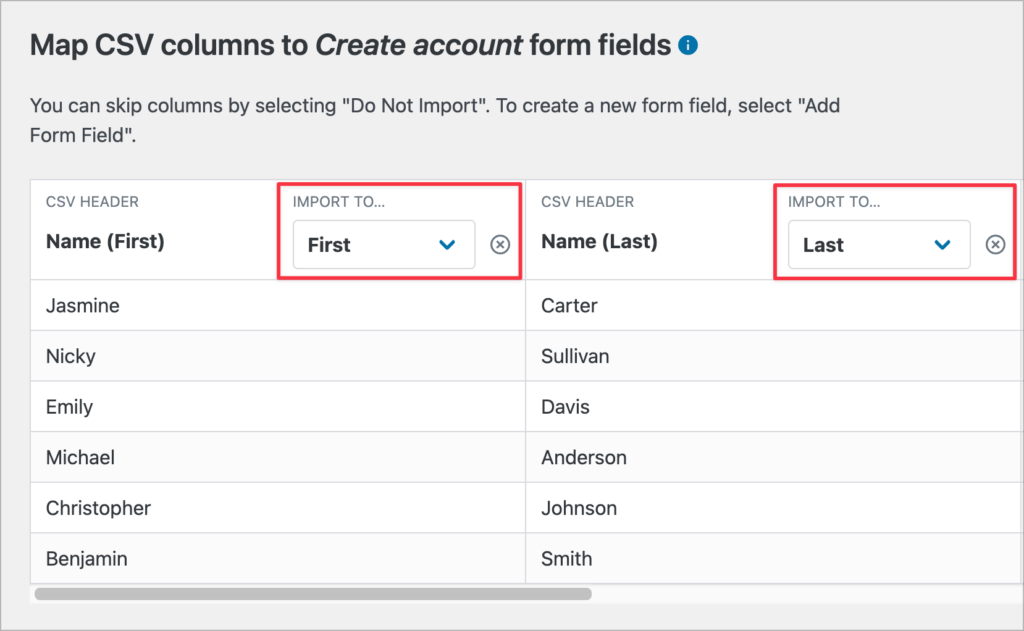
After choosing where to import your data, the next step is to map the columns in your CSV file to the correct form field in Gravity Forms. You can select a field by clicking on the “Import to…” dropdown.
After mapping your form fields, click “Continue With Import”.
Enable the User Registration feed
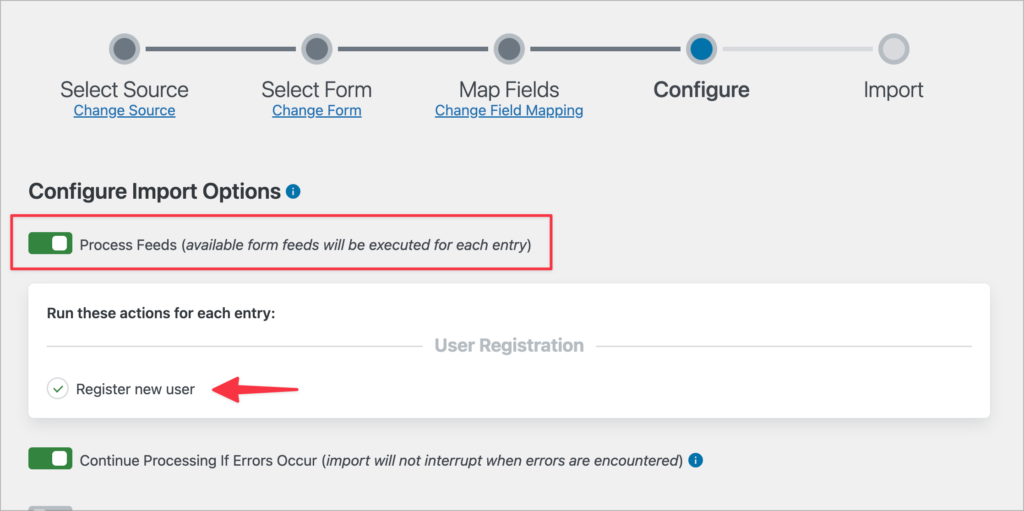
The final step of the process is to configure the import options. You’ll see an option here for processing form feeds when new entries are imported. Enable this option and then select the User Registration feed you created previously.
This will ensure that a new user is registered on your site each time an entry from your CSV is successfully imported!
That’s it! All that’s left to do is configure the remaining options and click “Continue With Import”. GravityImport will then begin the process of importing users from the CSV file you uploaded.
Bonus: Bulk updating existing users
What if you don’t want to import new users, but instead, update existing users? This is also possible using GravityImport! As long as the users were registered through Gravity Forms, you can export the entries, make the necessary edits, and then re-import them.
For this to work, you’ll need to create a new User Regsitration feed and change the action from “Create User” to “Update User”. You’ll also need to export the entry ID along with the user information from Gravity Forms; if your CSV contains an entry ID column, GravityImport will overwrite the existing entry with that ID with the new data you provide.
Import users to Gravity Forms today
The Gravity Forms User registration add-on enables you to register users on your WordPress website using Gravity Forms. Using the GravityImport plugin, you can import users to a form or bulk update existing users.
GravityImport provides a fast and efficient way to import entries into Gravity Forms! To learn more about importing different kinds of data to Gravity Forms, read How to Import WooCommerce Products to Gravity Forms.

Helpful tips right in your inbox.
Subscribe to get the latest articles, information on releases and helpful Gravity Forms tips!
More articles

Launch Log: Row headers for screen readers, smarter conditional logic, and multi-View fixes
GravityView 3.1 adds row headers for screen readers, plus smarter conditional logic in GravityCalendar and fixes for DataTables, Maps, and Dynamic Lookup.

Ecommerce platform market share 2026: WooCommerce leads the web, Shopify leads the top tier
Ecommerce platform market share in 2026, from HTTP Archive data. WooCommerce leads the whole web at 6.64%, but Shopify already leads the top 1M sites.

Launch Log: 3D map enhancements, smarter filtering, and improved performance on large data sets
GravityKit’s July 9 launch log: 3D map starting views and viewport loading, searchable field-to-field filtering, and fixes across DataTables and more.