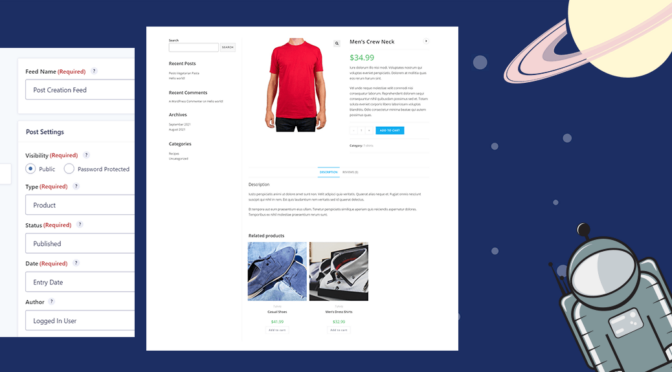
WooCommerce + GravityForms is a match made in heaven. In fact, did you know that you can import WooCommerce products into Gravity Forms?
Using Import Entries together with the powerful Advanced Post Creation Add-On, you can import form entries from a CSV file and turn them into WooCommerve products.
In this post, we’re going to show you how to use Gravity Forms to import WooCommerce products using Advanced Post Creation and Import Entries.
Table of contents
- So How Does This Work?🤔
- WooCommerce Product Fields
- Creating a WooCommerce Product Form in Gravity Forms
- Installing the Advanced Post Creation Add-on
- Configuring the Post Creation Feed
- Installing Import Entries
- Upload Your WooCommerce Products as a CSV File
- Gravity Forms WooCommerce Product Import: Final Thoughts
So How Does This Work?🤔
There are several steps involved in setting up a process that’s going to allow us to import WooCommerce products into Gravity Forms. This includes installing a couple of add-ons.
First, we’ll need to create a form in Gravity Forms that allows us to capture the necessary information to create a new product in WooCommerce. Next, we’ll install the Gravity Forms Advanced Post Creation Add-On and configure a Post Creation feed to automatically turn each submitted form entry into a WooCommerce product.
Finally, we’ll install the Import Entries add-on which allows us to import entries into Gravity Forms from a CSV file. Thanks to the Advanced Post Creation Add-On, the entries that we import will be turned into WooCommerce products!
Sound confusing? Don’t worry, we’ve laid it all out for you, step by step 😃
WooCommerce Product Fields
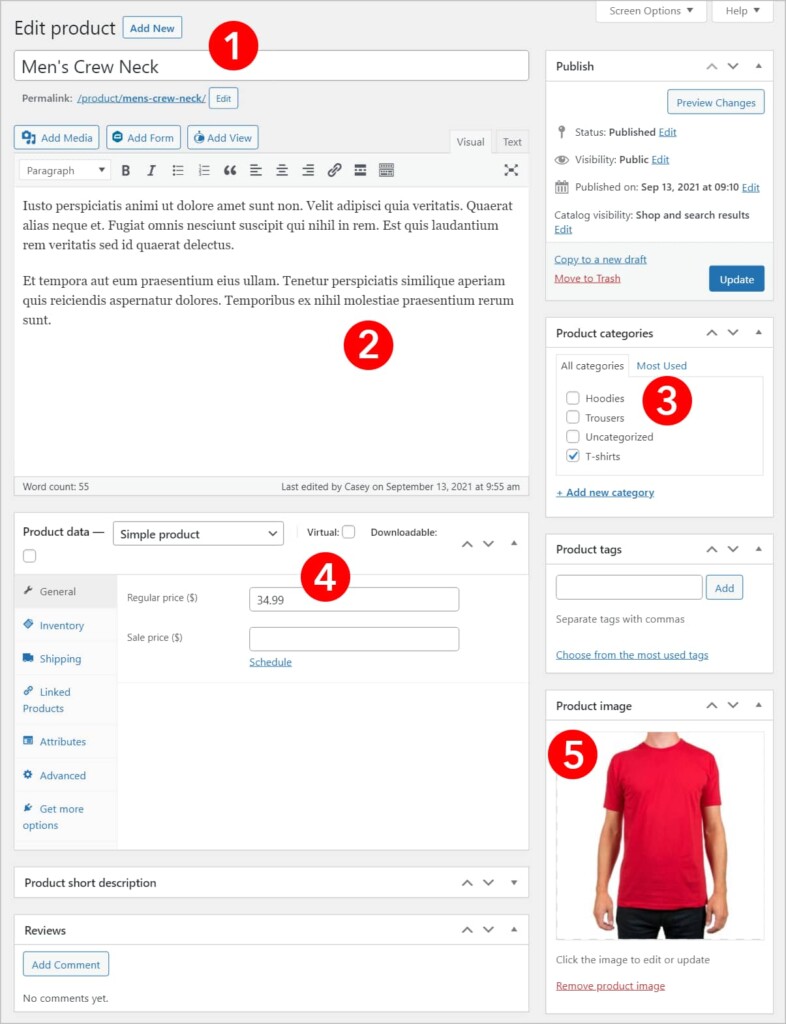
Before we can set up the form and product creation feed, we need to get an idea of what data WooCommerce requires for the creation of a new product. A WooCommerce “Product” is a custom post type within WordPress that contains a range of custom field types. However, not all of them are required.
Here are the 5 most important fields that constitute the minimum requirement for creating a new WooCommerce product.

- Product Title – the name of the product
- Product Description – description (product page content)
- Product Category – which category the product belongs to
- Regular Price – the price of the product
- Product Image (featured image) – the main product image that displays on the shop page as well as the product page
Now that we know what fields we need to account for in our form, the next step is to create a form in Gravity Forms that allows us to capture information for new products that we want to sell.
Creating a WooCommerce Product Form in Gravity Forms
Start by hovering over Forms in the WordPress admin panel and clicking New Form.
After giving your form a name you can start adding fields to it using the drag and drop form builder. For this example, we’ll add five different fields, corresponding to the five most important fields on the WooCommerce product page.
- Title (Single Line Text)
- Description (Paragraph)
- Price (Number)
- Feature Image (File Upload)
- Category (Drop Down)
After adding the File Upload field, make sure to open the Field Settings on the right and set the allowed file extensions to common image formats.

Next, click on the Category dropdown and add options corresponding to the different product categories in your store. In this example, we’re importing clothing items to our apparel store so we’ll add the following categories.

Here’s what our form looks like on the front end.

Now that our form is set up, we can move on to the next step, which is to install the Gravity Forms Advanced Post Creation Add-On.
Installing the Advanced Post Creation Add-on
The Advanced Post Creation Add-On is included in the Gravity Forms Elite license. To install the add-on from inside WordPress, hover over Forms and click on Add-Ons.

Next, scroll down to the Advanced Post Creation Add-On and click Install. After installation is complete, activate the plugin by clicking Activate.

Now let’s move on to the next step – setting up the Post Creation feed.
Configuring the Post Creation Feed
To create a new Post Creation feed, head over to your Form Settings, click on Post Creation, and then click Add New.

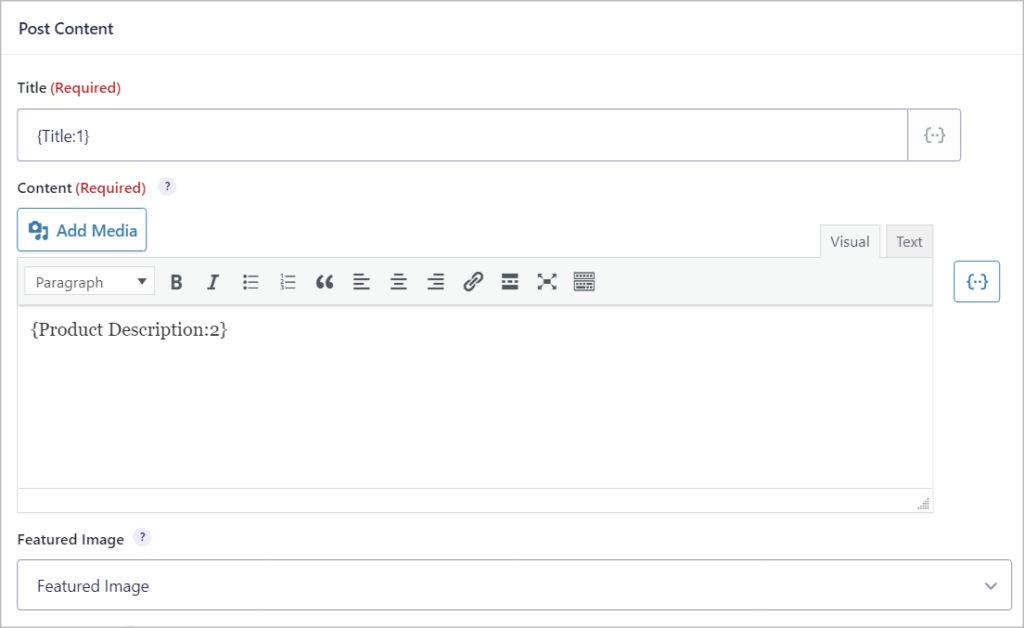
Now we need to configure the feed. Start off by giving your feed a name and setting the Post Type to Product.

Under Post Content, you can map most of your fields, including the Product Title, Description, and Featured Image.

However, the other WooCommerce fields are custom fields so you’ll need to map them manually. You can do this by scrolling down to where it says “Custom Fields” and adding them one by one.
To do this, click on the dropdown that says “Select a Custom Field Name” and select the option at the bottom that says “Add New Custom Field Name”. Now input the name of the field and select the value you want to map it to using the “Value” dropdown menu.

Note: Ensure that you map both the Price and the Regular Price fields as WooCommerce requires both of them to have a value.
Here is a list of other custom field names for easy reference:
- _product_image_gallery
- _regular_price
- _price
- _weight
- _sku
Finally, scroll down to Taxonomies and set the Product Type, Category, Tags, and other important information.

After mapping your fields, click Save Settings and move on to the next step.
Installing Import Entries
Import Entries in an add-on for Gravity Forms that allows you to import data into Gravity Forms from a CSV file.
If you have a GravityView All Access license, you can install Import Entries from inside the Manage Add-Ons page in WordPress. Alternatively, you can purchase Import Entries as a standalone plugin from our website.
Upload Your WooCommerce Products as a CSV File
After installing Import Entries, hover over Forms, select Import/Export and then click on the Import Entries tab on the left.
Now you’ll see the Import Entries page prompting you to upload your CSV file. Upload a CSV file containing your WooCommerce products by simply dragging and dropping it inside the box.

After the file has finished uploading, scroll down to where it says “Where would you like to import the entries?” and select “An Existing Form”. A list of your forms will now appear – make sure to choose the one you created in the previous step.

The next step is to map the columns in your CSV file to the fields in your form.
Map Your WooCommerce Product Fields to Gravity Forms
The Import Entries plugin will automatically detect the different fields in your CSV file and map them to the appropriate fields in Gravity Forms. However, you can override this by manually selecting a field from the “Import To…” dropdown menu.

After mapping your fields, click “Continue With Import” and move on to the next step.
Enabling Feed Processing
The final (and most important) step is to configure the Import Options. Enabling the Process Feeds option will ensure that the Post Creation feed we set up previously runs for each entry that we import. In other words, by enabling this option, Gravity Forms will turn each of our imported entries into a product in WooCommerce.

On this page, you’ll see other options as well that allow you to skip field validation, import entries based on conditional logic, and more! When you’ve configured the Import Options click “Continue With Import”. The Importer will now import your WooCommerce Products to Gravity Forms.

As you can see, our products have been imported and are visible inside the WooCommerce Products page.

Gravity Forms WooCommerce Product Import: Final Thoughts
WooCommerce is the most powerful eCommerce plugin for WordPress, allowing you to create and sell products on your website. By using the Advanced Post Creation Add-On for Gravity Forms, you can create WooCommerce products on the front end!
In this post, we showed you how to import WooCommerce products into Gravity Forms by using the Advanced Post Creation Add-On together with Import Entries. If you found this post helpful, sign up for our email list so we can notify you when we publish new content! 🙌
Join Our Newsletter!📧🙌
✅ Helpful Gravity Forms content straight to your inbox
✅ Be the first to hear about new updates and releases
