Published
•
Updated
How to build an editorial calendar on WordPress to manage your publishing workflow
Managing content without an editorial calendar is like trying to navigate without a map. You miss deadlines, duplicate topics, and struggle to coordinate with your team. Yet most WordPress editorial calendar plugins are either too basic or overcomplicated for what you actually need. With Gravity Forms and GravityBoard, I’ll show you how to create a…
Managing content without an editorial calendar is like trying to navigate without a map. You miss deadlines, duplicate topics, and struggle to coordinate with your team. Yet most WordPress editorial calendar plugins are either too basic or overcomplicated for what you actually need.
With Gravity Forms and GravityBoard, I’ll show you how to create a visual editorial calendar directly inside your WordPress site. You’ll be able to track content from idea to publication, manage deadlines, and collaborate with your team. Let’s dive in!
What is an editorial calendar?
An editorial calendar is your content command center, a visual system that tracks every piece of content through its journey from idea to publication. Think of it as a bird’s-eye view of your content strategy, showing what’s being written, who’s responsible, when it’s due, and where it stands in your workflow.
For WordPress users, a good editorial calendar does more than just list posts and dates. It helps you visualize your content pipeline, spot gaps in your publishing schedule, and ensure nothing falls through the cracks. Whether you’re managing a blog with multiple contributors or running a content-heavy website solo, an editorial calendar can help you transform chaos into clarity.
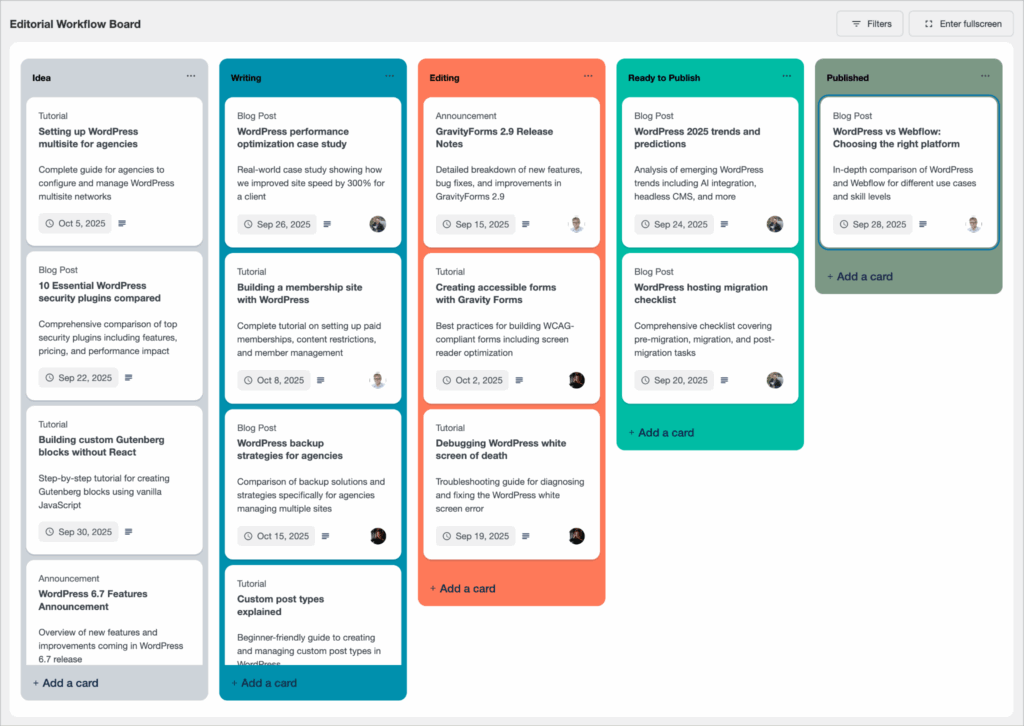
Sneak peek
Here’s a sneak peek at the editorial publishing workflow board:
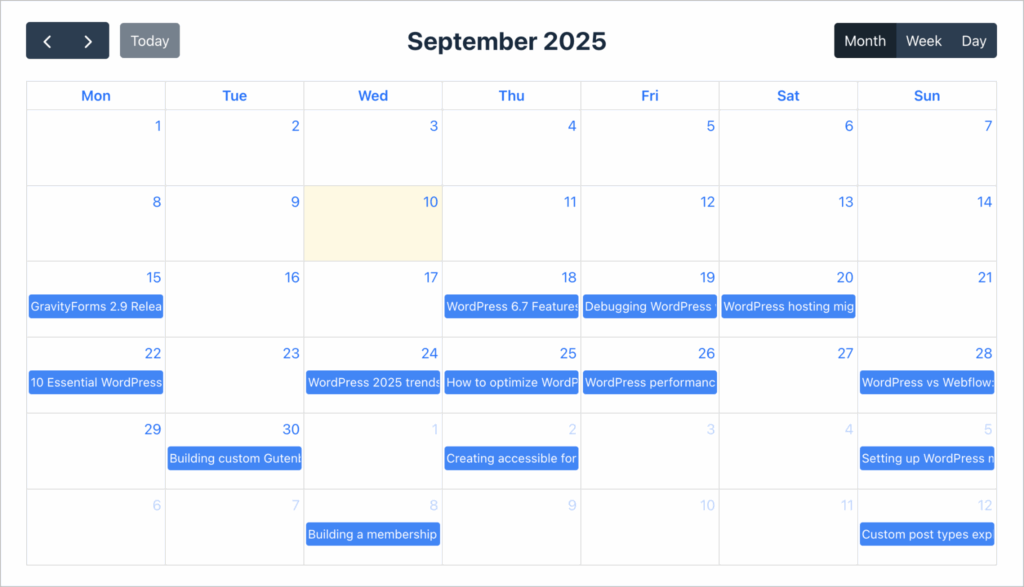
And here’s the actual calendar view:
What you’ll need
Here are the plugins you’ll need to create an editorial calendar like the one in this tutorial:
- Gravity Forms – For creating the content submission form.
- GravityBoard – For creating the editorial board.
- GravityCalendar (optional) – For adding an actual calendar view of the content.
Step 1: Create the content submission form
First, we’ll need to create the form that captures all our content details. To do this, we’ll hover over “Forms”, click “New Form”, and start with a blank form.
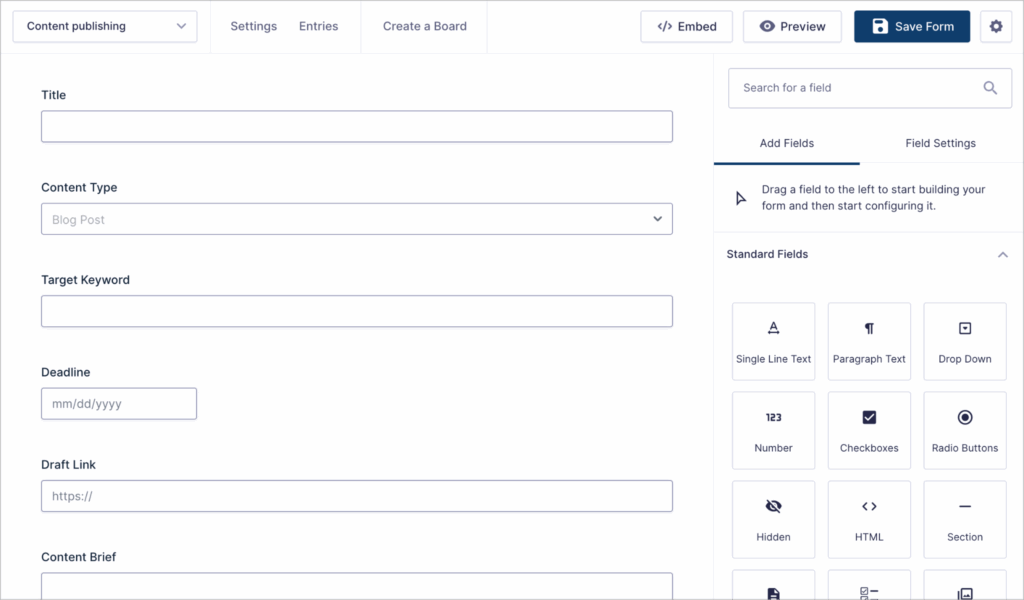
From the Gravity Forms visual editor, we’ll add fields like:
- Title (Single Line Text)
- Content Type (Drop Down field: Blog Post, Tutorial, News, etc.)
- Target Keywords (Single Line Text)
- Draft Link (Website field)
- Deadline (Date field)
- Content Brief (Paragraph Text)
This form will feed content ideas directly into our editorial calendar board!
Step 2: Define your editorial workflow stages
Now, let’s map out how content moves through our editorial process. To do this, we’ll add a new administrative field to our form:
- Editorial Stage – A Dropdown field representing our content pipeline. For this example, we’ll use: Idea, Writing, Editing, Ready to Publish, Published.
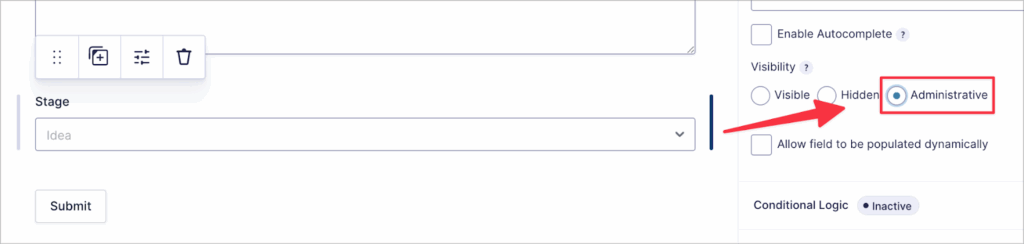
💡 Pro tip: By marking fields as “Administrative” in the field settings, they won’t show up on the front-end form but you can still update them from your board.
This field will power the lanes that make our publishing pipeline visual and actionable.
Step 3: Build the editorial workflow board
Next, we’ll create a new editorial calendar board in GravityBoard. From the form settings, we’ll select “GravityBoard” and click “Add New”.
We’ll name our board (e.g., “Editorial Calendar Board”), and map our form fields to card display areas:
- Lane field: Editorial Stage
- Card title: Article Title
- Card description: Content Brief
- Label: Priority Level
- Due date: Publication Date
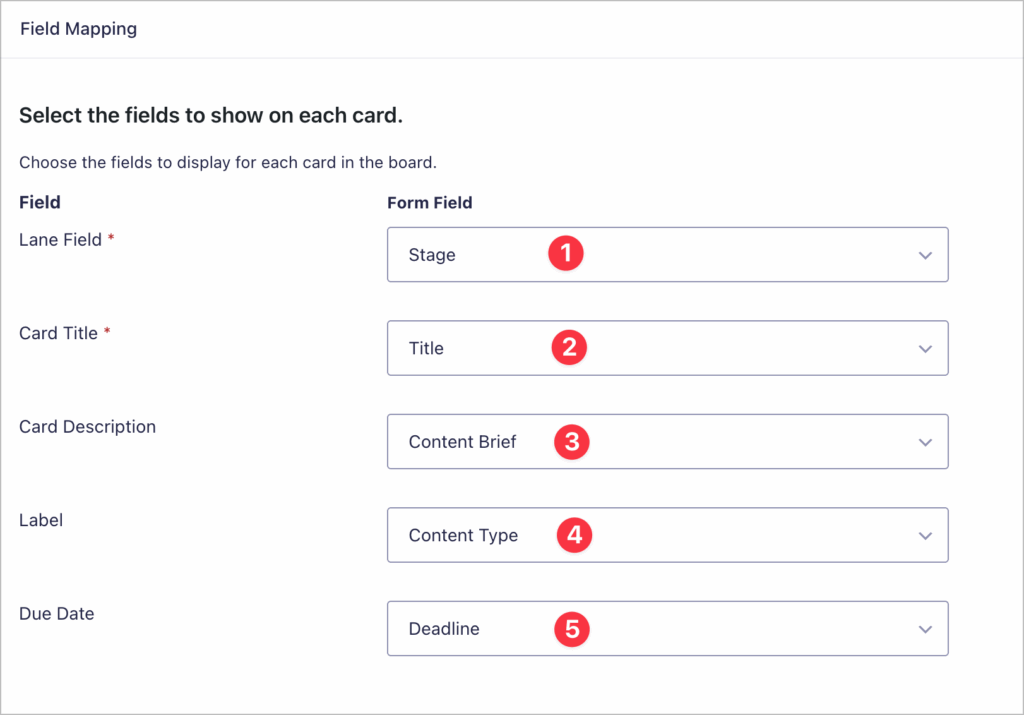
Once saved, your board instantly transforms into a visual editorial calendar. Each content piece appears as a card you can drag between stages—from “Idea” all the way to “Published”. It’s like having a digital whiteboard that automatically updates as your content progresses.
Step 4: Customize your workflow
GravityBoard includes powerful features that make content management smoother. For editorial calendars, the most useful include:
- Attachments & Notes – Add research links, style guidelines, or draft documents directly to content cards.
- Assignees – Assign articles to specific writers, editors, or reviewers.
- Email notifications – Automatically notify team members when content moves stages or deadlines approach.
- Permissions – Control who can move content between stages (e.g., only editors can mark content as “Ready to Publish”).
- Filtering – Use conditional logic to filter content by author, type, or publication month.
These features help create a calendar that mirrors your actual editorial workflow. For instance, you could set up automatic notifications when the status of a content piece is updated, or filter the board to show only this month’s scheduled posts.
Step 5: Track content through the workflow
With your editorial calendar in place, tracking content becomes visual and intuitive. Drag cards between columns as work progresses. Click any card to see full details, add comments, or update fields.

This visual approach eliminates the guesswork from content management. You’ll instantly see if you have too much content stuck in editing, if next week’s pipeline is empty, or if certain authors are overloaded. It’s the difference between managing content in a spreadsheet versus seeing your entire workflow in a visual format.
Step 6 (optional): Display deadlines in a calendar view
Want to see your content in a traditional calendar format? GravityCalendar integrates seamlessly with your editorial board, displaying all your publication dates in a monthly, weekly, or daily view. This gives you the best of both worlds—a workflow board for process management and a calendar for deadline visualization.
The beauty of GravityKit add-ons is how well they work together. Your content lives in one place (Gravity Forms entries) but displays in multiple useful ways. Switch between board and calendar views depending on what you need to see.
Planning next month’s content? Use the calendar. Managing this week’s production? The board view has you covered.
Step 7 (optional): Automate email notifications
GravityBoard leverages Gravity Forms’ powerful notification system to keep everyone on track. You can create automated emails for any scenario—when a deadline is updated, a card changes lane, or a new user is assigned.
Here are some notifications worth setting up:
- Alert authors when they are assigned to a piece of content
- Notify editors when content enters the “Editing” stage
- Notify managers when a card is updated
To create these, navigate to your form’s notification settings and select the event that should trigger the notification. You can then customize the message body using merge tags to pull in dynamic content.
Try it yourself: Spin up a demo of GravityBoard
Want to see it in action before setting it up on your site? You can explore the GravityBoard demo right now. The demo site lets you test the editorial calendar workflow, drag cards between stages, and experience the features firsthand. You can even clone the entire setup for free and experiment on your own site for 7 days.
Create your WordPress editorial calendar today
With Gravity Forms and GravityBoard, you can build a powerful, visual editorial calendar right inside WordPress. No more juggling between spreadsheets, project management tools, and your publishing platform. Your entire content workflow now lives where your content does: in WordPress!
Ready to transform your publishing workflow? Learn more about GravityBoard today.

Helpful tips right in your inbox.
Subscribe to get the latest articles, information on releases and helpful Gravity Forms tips!
More articles

10 things you can ask AI to do with Gravity Forms (using the free GravityKit MCP)
See 10 practical things you can ask AI to do with Gravity Forms using the free GravityKit MCP: create forms, manage entries, build Views, and more.

Launch Log: theme template editing in Block MCP, Shield silentCAPTCHA for Zero Spam, and GravityView fixes
Block MCP adds safe theme template editing, Gravity Forms Zero Spam gains Shield silentCAPTCHA support, and GravityView fixes lightbox and notice bugs.

GravityKit turns 12: a year in review, and 30% off Lifetime All Access
GravityKit turns 12. A look back at a year of GravityView 3.0, GravitySearch, and AI-assisted building, plus a birthday sale on the Lifetime All Access Pass.
