Published
•
Updated
How to build a dynamic testimonial wall using Gravity Forms and GravityView
In this tutorial, I’ll show you how to build a dynamic testimonial wall that updates automatically as new testimonials are submitted. Using Gravity Forms to collect submissions and GravityView to display them, you can build a visually engaging display that showcases real feedback from your customers—without needing to manually update your site! Whether you’re highlighting…
In this tutorial, I’ll show you how to build a dynamic testimonial wall that updates automatically as new testimonials are submitted.
Using Gravity Forms to collect submissions and GravityView to display them, you can build a visually engaging display that showcases real feedback from your customers—without needing to manually update your site!
Whether you’re highlighting client reviews, student feedback, or success stories, this setup makes it easy to keep your testimonials fresh and authentic.
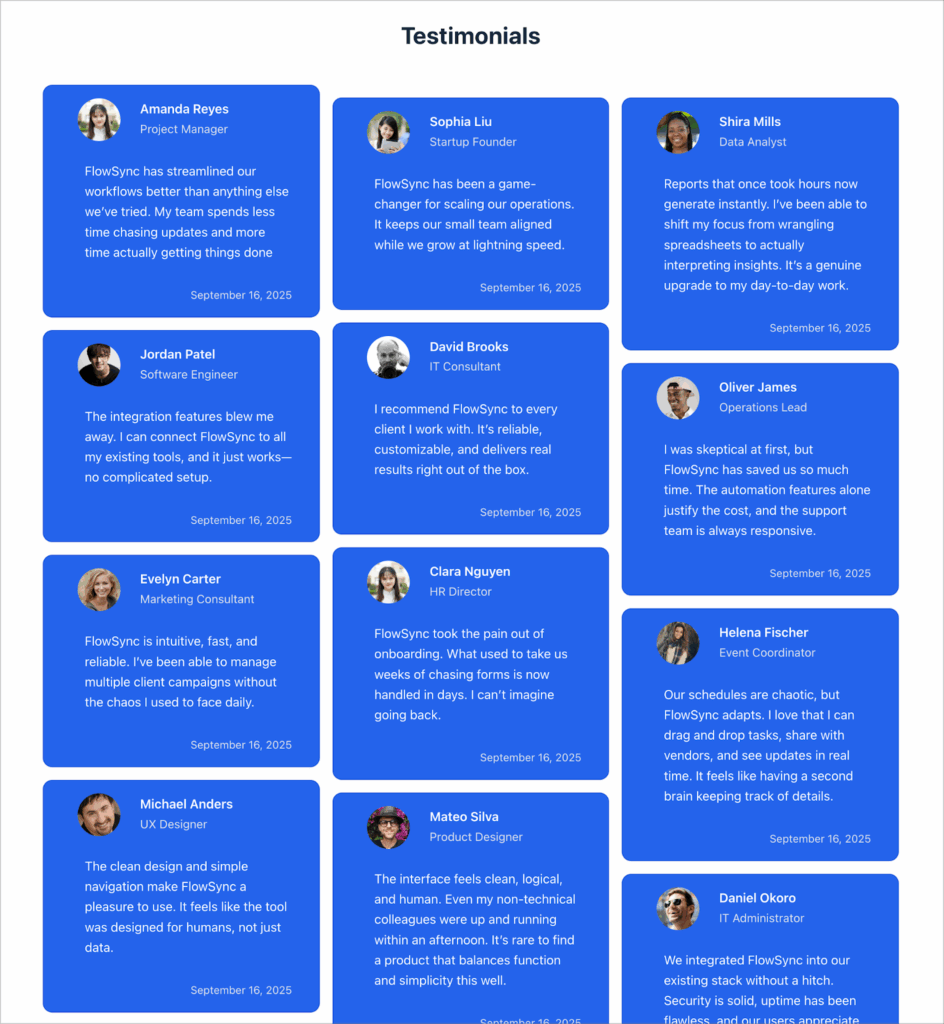
Sneak peek
Here’s a look at the finished testimonial wall that we’re going to create in this tutorial:
Wanna try it?
Spin up a demo
See a live testimonial wall built with GravityView — explore the demo.

What you’ll need
Here are the plugins you’ll need to create a testimonial wall like the one in this tutorial:
1. Create a testimonial submission form
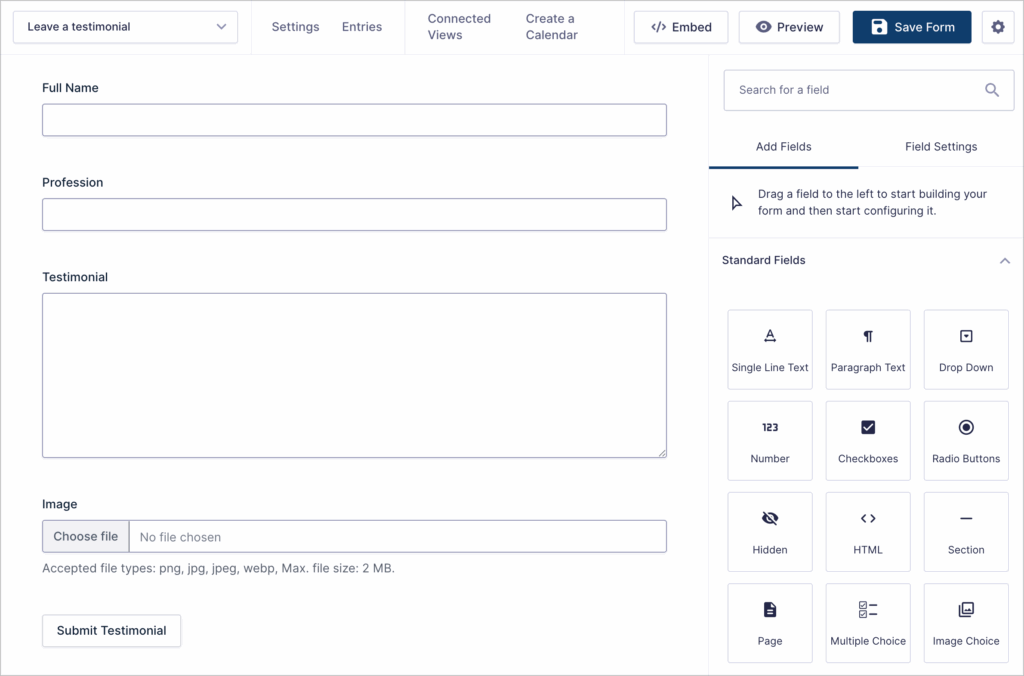
Let’s start by creating a form (“Leave a testimonial”) that we can embed on our site for customers to submit testimonials. To create a new form, we’ll hover over “Forms” and click “New Form”. We’ll start from a blank form and use the Gravity Forms visual builder to add the fields we need.
To keep things simple, we’ll add the following fields:
- Full Name (Single Line Text field)
- Profession (Single Line Text field)
- Testimonial (Paragraph Text field)
- Image (File Upload field)
2. Build a View to display testimonials on the frontend
The next step is to create a View that displays testimonials on the frontend. To create a new View, we’ll hover over “GravityKit” and click “New View”. After giving our View a name, we’ll select our “Leave a testimonial” form as the data source and choose the Layout Builder as our View type.
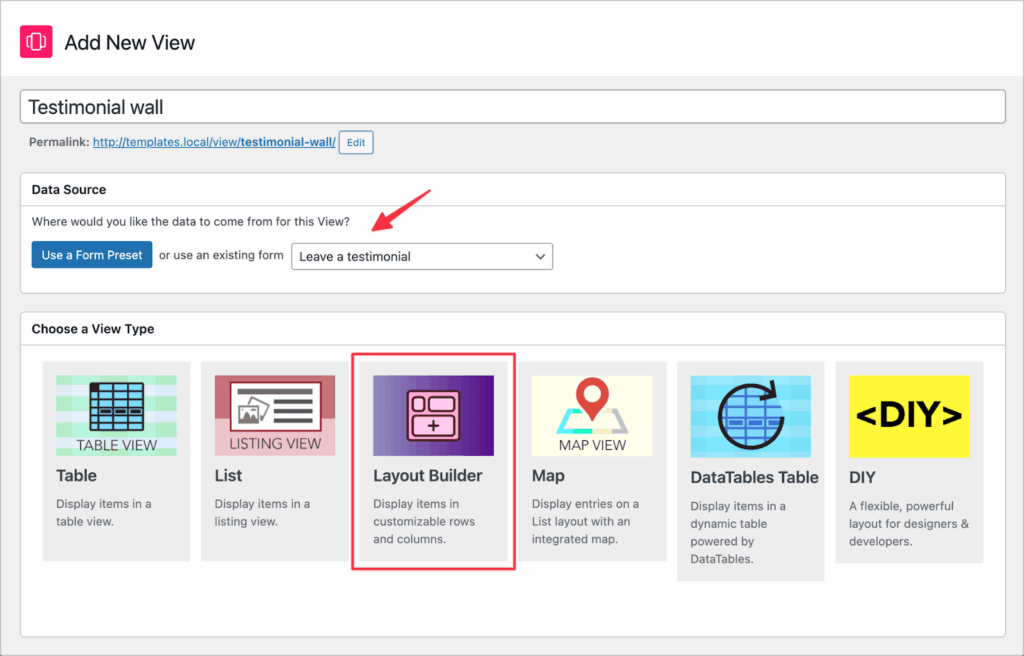
The Layout Builder is a flexible View type that allows you to display fields in custom layouts that you design using drag and drop. This is the perfect option for a testimonial wall where we need fine control over the layout!
In the View editor, we’ll start by removing all top and bottom widgets. As we’re building a feed of all submitted testimonials, we don’t need a search bar or anything like that!
After removing all widgets, we can turn our attention to the construction of the individual testimonial cards. Using the Layout Builder, we’ll create a basic structure, then we’ll add some extra styles using CSS to round out the design.
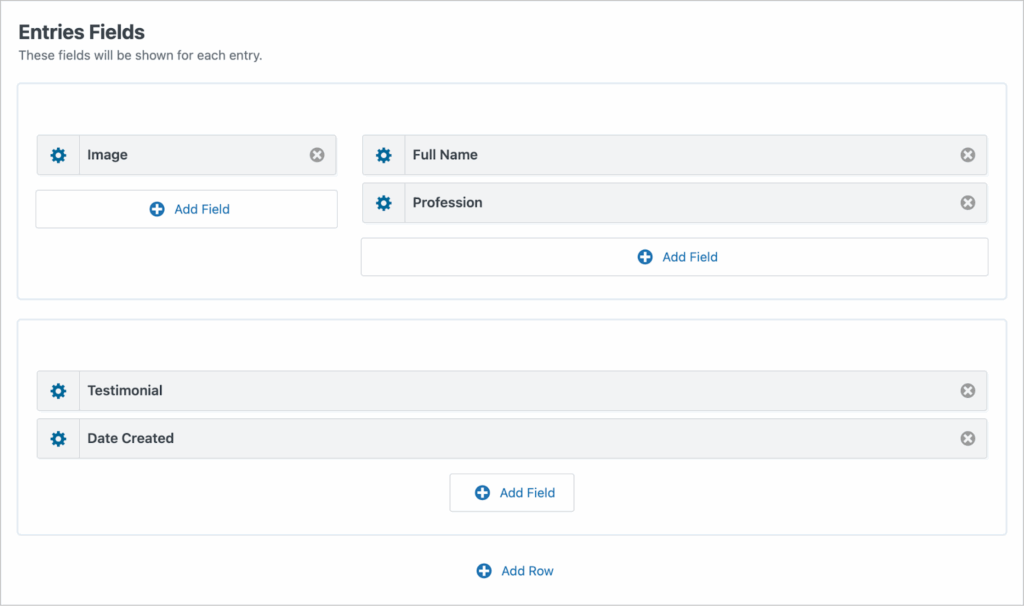
For our testimonial structure, we’ll start by adding one 33/66 row. We’ll add the Image field to the left-hand column and then we’ll add the Full name and Profession fields to the wider right-hand column.
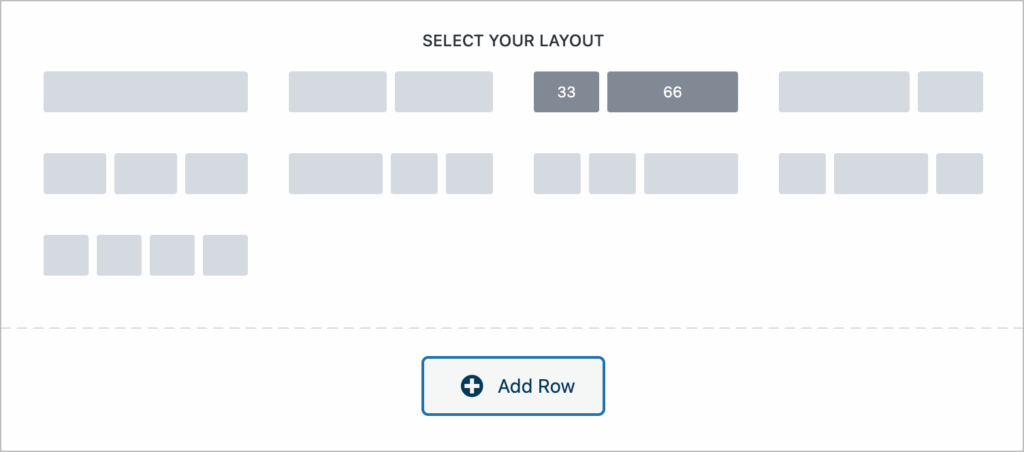
Below that we’ll add a full-length row containing the Testimonial and Date Created fields.
Now that we have a basic structure set up for our individual testimonials, we can move on to the next step.
3. Add CSS classes and styles
To create a modern testimonial wall with a masonry grid design, we need to add some custom CSS to our View.
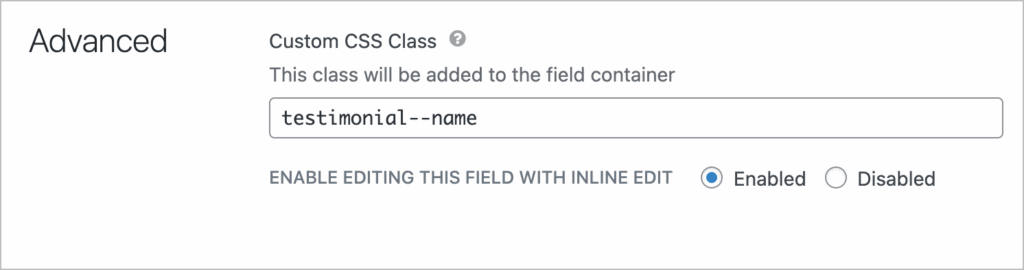
To target each field individually, we’ll start by adding custom CSS classes. GravityView supports custom CSS classes in the advanced field settings.
- Full Name:
testimonial--img - Profession:
testimonial--profession - Testimonial:
testimonial--text - Date Created:
testimonial--date
Next, we’ll scroll down to the View settings meta box, click on the “Custom Code” panel, and add this CSS code into the box.
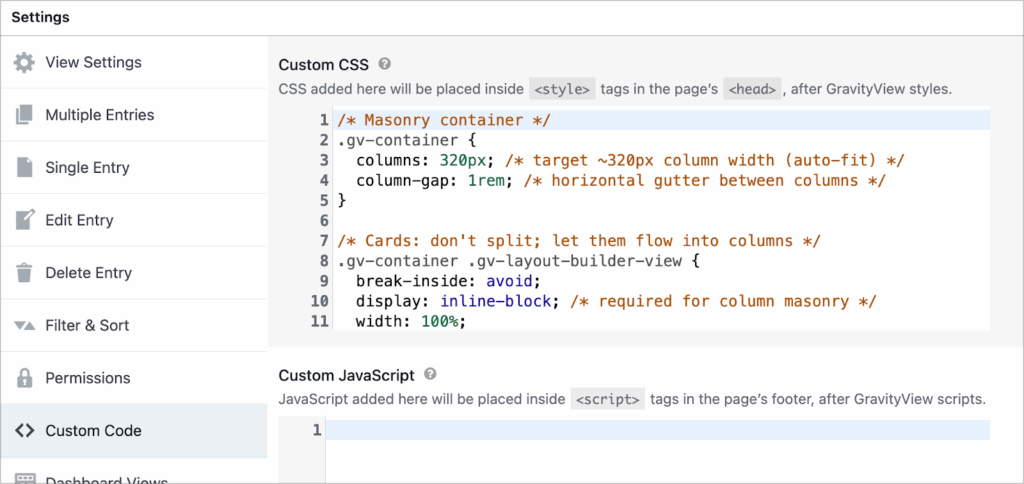
Feel free to adjust the styles to match your preferred look and feel.
4. Configure the View settings
The final step is to configure the remaining options in the View settings. There are a range of options here, but I’m just going to highlight a few that you may want to use.
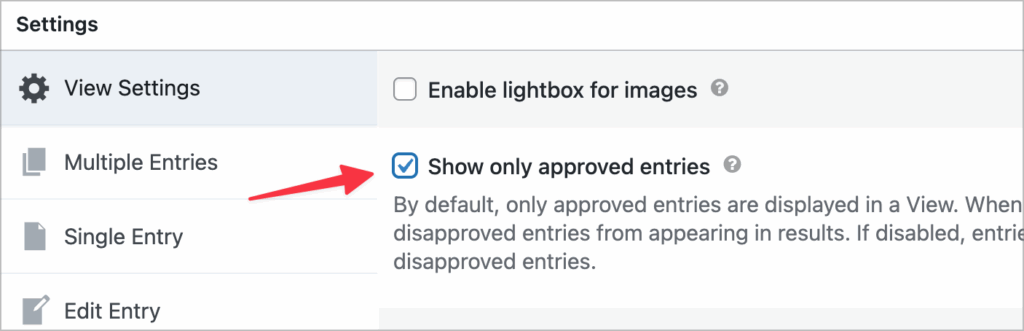
First, by default GravityView requires all entries to be approved before they show up in a View (you can turn this option off if you want). This is done for security purposes, but you may want to leave it on in case you receive spam or negative comments you don’t want displayed on your site.
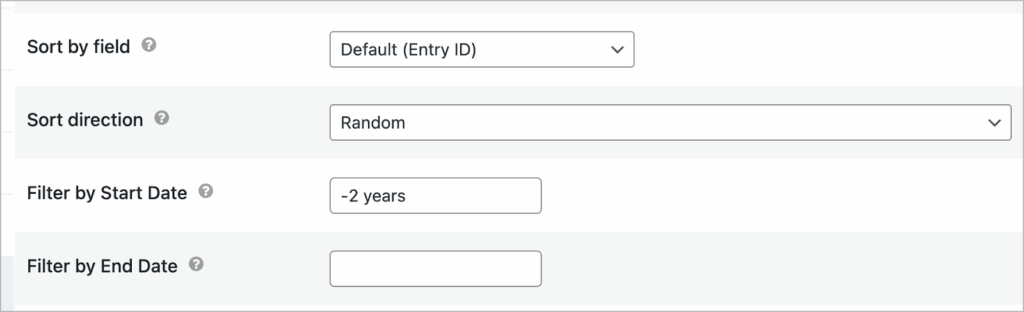
Next, in the “Filter & Sort” settings, you have the option to sort entries by a specific field value. Setting the sort direction to random ensures that testimonials appear in a new order each time the View is loaded.
You can also filter by start date to ensure that older testimonials are filtered out.
That’s it! Here’s what the finished testimonial wall looks like on the frontend:

Create a testimonial wall for your website
In this tutorial, I showed you how to build a fully dynamic testimonial wall that updates automatically every time someone submits a new testimonial.
Using Gravity Forms to collect feedback and GravityView to display it, you now have an easy, no-code way to keep your testimonials page fresh and engaging.
Ready to take it further? Try adding rating fields, filters for categories (like products or services), or different layouts using GravityView’s flexible View types.

Helpful tips right in your inbox.
Subscribe to get the latest articles, information on releases and helpful Gravity Forms tips!
More articles

Launch Log: theme template editing in Block MCP, Shield silentCAPTCHA for Zero Spam, and GravityView fixes
Block MCP adds safe theme template editing, Gravity Forms Zero Spam gains Shield silentCAPTCHA support, and GravityView fixes lightbox and notice bugs.

GravityKit turns 12: a year in review, and 30% off Lifetime All Access
GravityKit turns 12. A look back at a year of GravityView 3.0, GravitySearch, and AI-assisted building, plus a birthday sale on the Lifetime All Access Pass.

Launch Log: Row headers for screen readers, smarter conditional logic, and multi-View fixes
GravityView 3.1 adds row headers for screen readers, plus smarter conditional logic in GravityCalendar and fixes for DataTables, Maps, and Dynamic Lookup.
