Connect an AI Assistant to Your Site
New to AI assistants? If terms like “AI assistant” or “MCP” are unfamiliar, start with What is a WordPress MCP server?, which explains the idea in plain language. Is this for you? If you can install a WordPress plugin and chat with an AI app, then yes — the recommended setup needs no coding and no command line.
Block MCP lets an AI assistant like Claude write and edit the pages and posts on your WordPress site for you in a few clicks, with no terminal and no config files. This guide walks you through connecting one.
The assistant works through a dedicated, limited account: it can create and edit your posts, pages, and custom post types, but it can’t change your settings, delete other people’s content, or sign in as you. You can disconnect it at any time.
What you’ll need #
- A WordPress site reachable over HTTPS.
- An MCP-capable AI app — Claude Desktop, Claude Code, Cursor, or any other MCP client.
- An administrator account on your site (to approve the connection).
Prefer to watch the video? #
Step 1: Open the Connect screen #
In your WordPress dashboard, go to Settings → Block MCP and stay on the Connect tab.
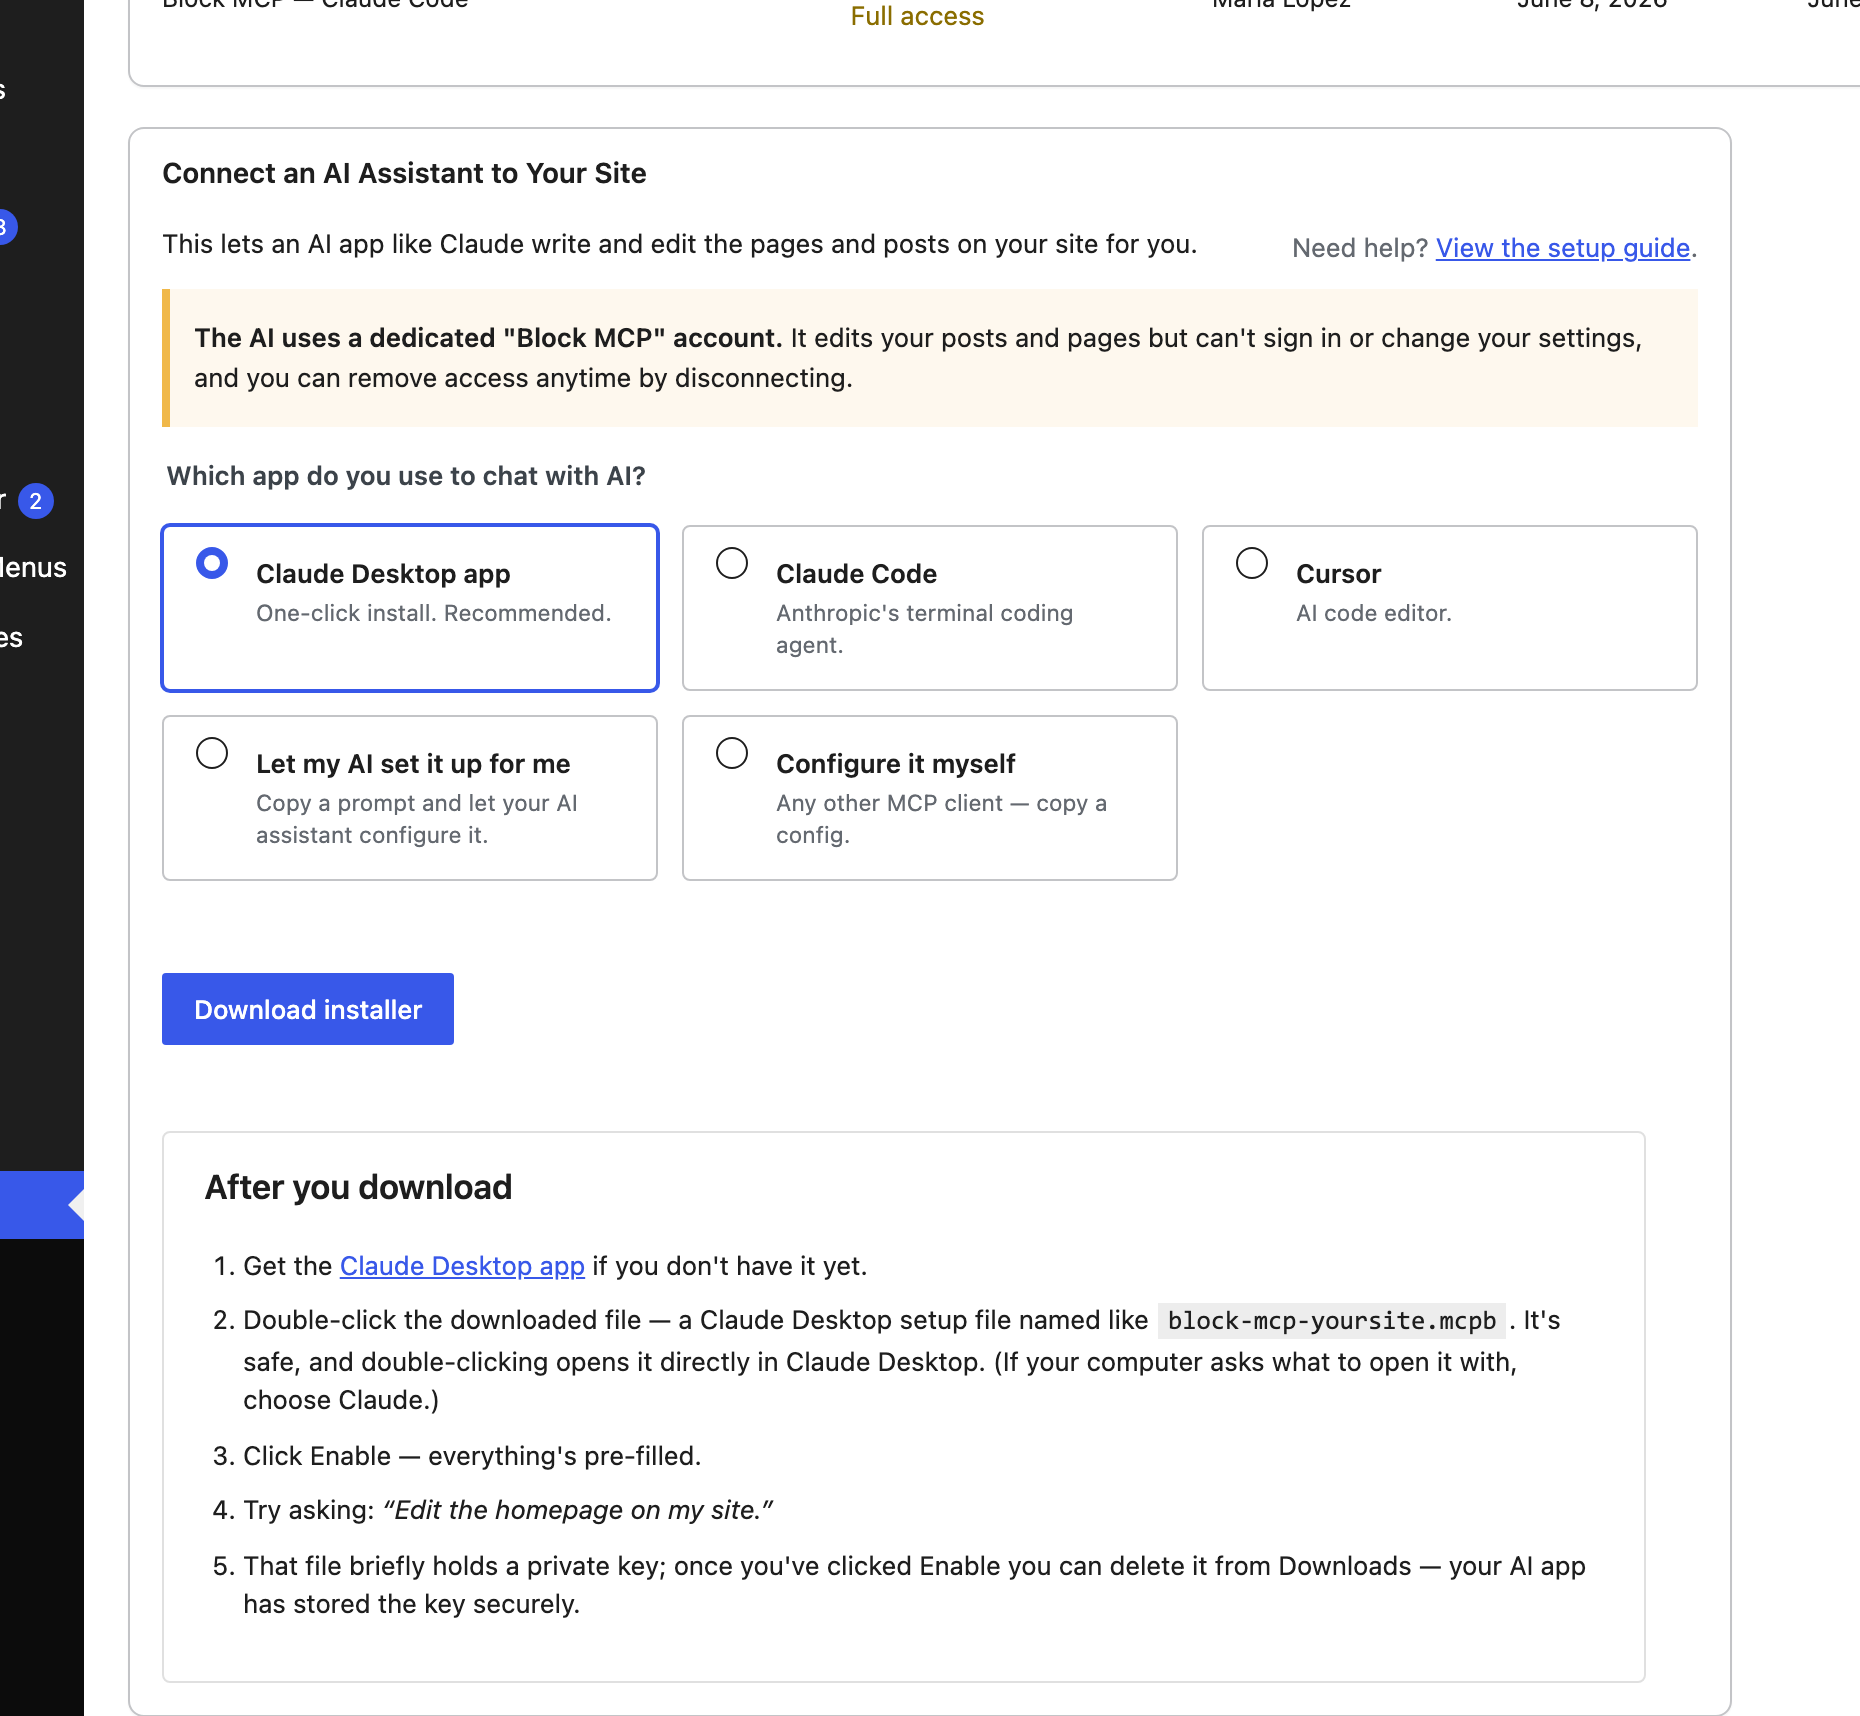
Step 2: Choose the app you use #
Pick the app you chat with your AI in. Your choice changes what happens next.
Claude Desktop app (recommended)
Click Download installer to get a small setup file (named like block-mcp-yoursite.mcpb). Double-click it to open it in Claude Desktop, then click Enable — everything is pre-filled. (Install the Claude Desktop app first if you don’t have it.) The file briefly holds a private key; once you’ve clicked Enable you can delete it from your Downloads.
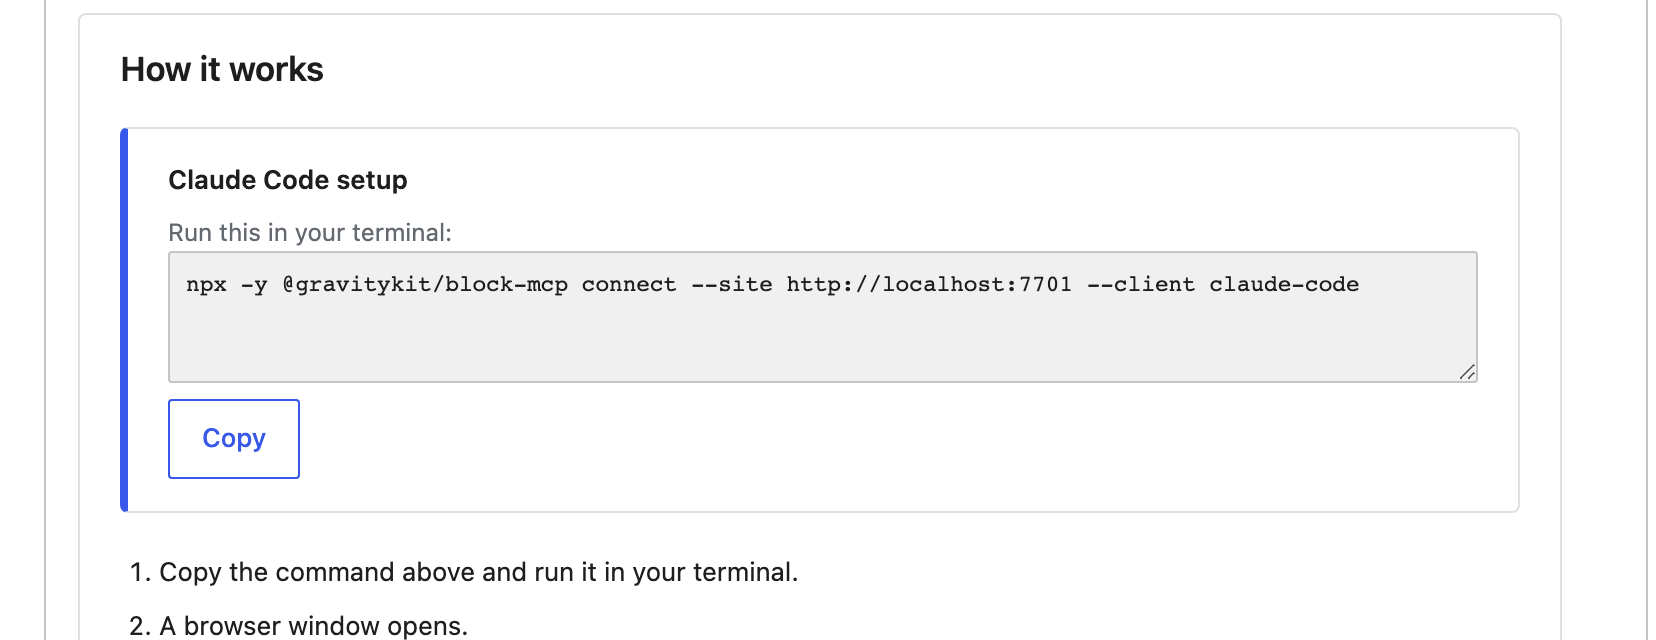
Claude Code or Cursor
Choose your app to get a one-line command to run. It opens your browser to an Approve screen on your site; once you approve, your app is configured automatically.
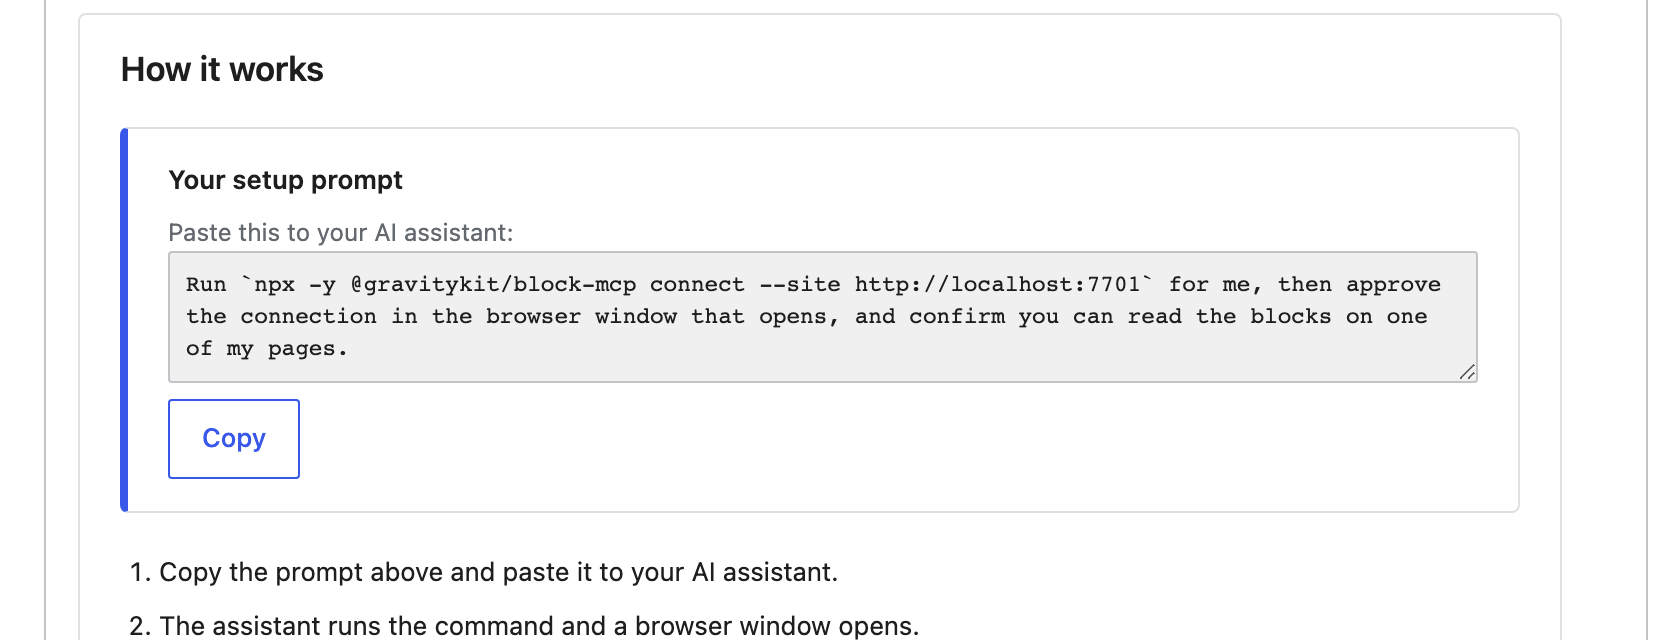
Let my AI set it up for me
Prefer to let the assistant do the work? Choose this to copy a short prompt, then paste it into your AI app — it will run the setup for you.
Configure it myself
For any other MCP client, choose this to copy a ready-made configuration you can paste into your client’s MCP settings.
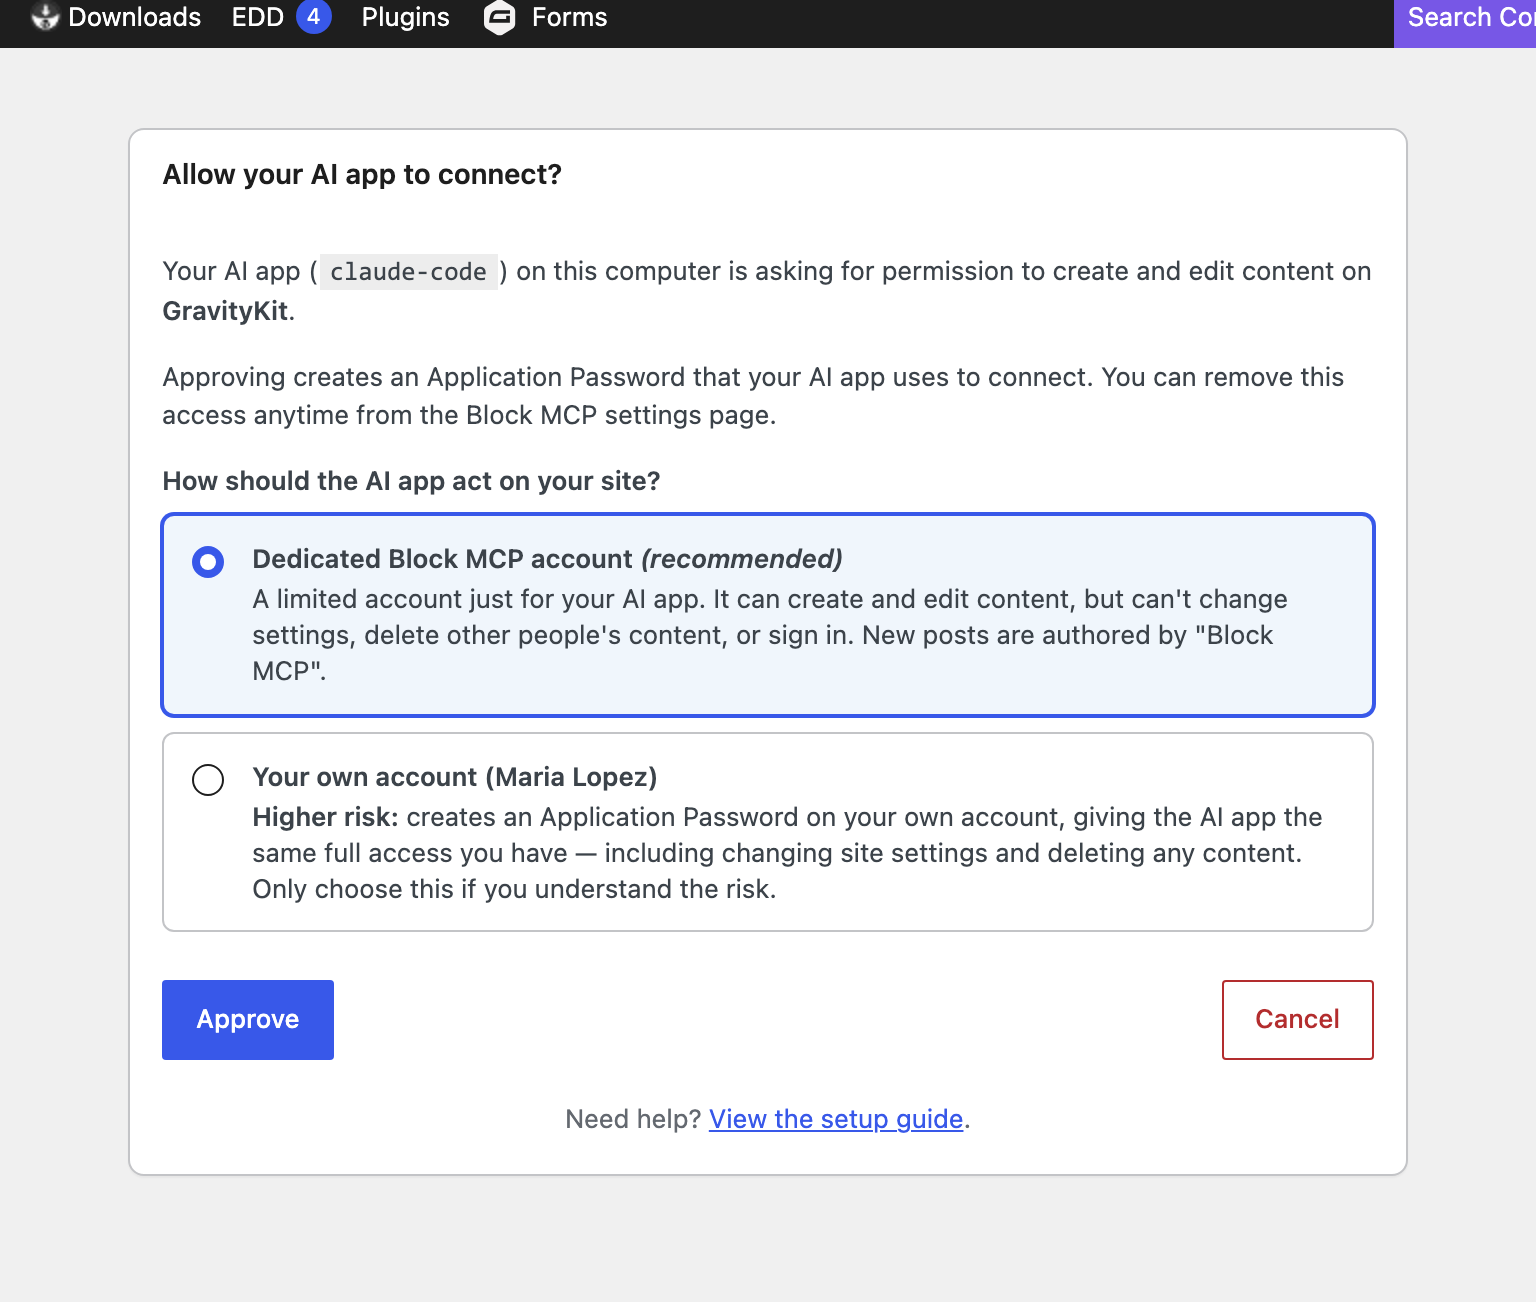
Approving the connection #
For the browser-based options, your site shows an Approve screen before anything connects. Here you choose how the assistant signs in:
- The dedicated Block MCP account (recommended) — a limited account that can edit content but nothing else.
- Your own account — gives the assistant the same access you have. This is the higher-risk choice, so you’re asked to confirm you understand before continuing.
Click Approve to finish.
How do I know it worked? #
Back on the Connect screen, every connected app appears under Active connections — including which account it uses and who approved it. Try asking your assistant something like “Edit the homepage on my site.”
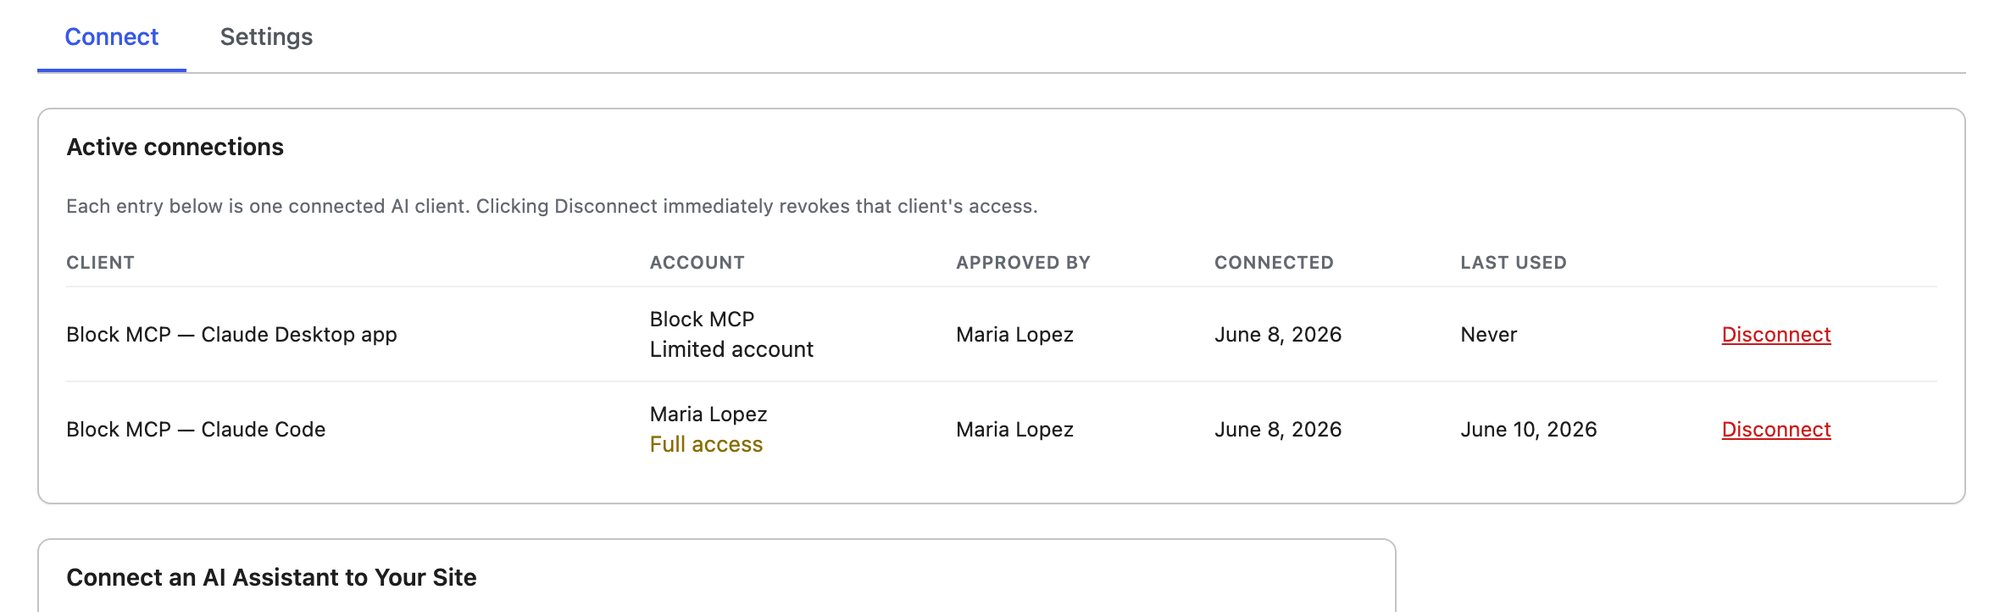
Disconnecting #
To revoke an app’s access, click Disconnect next to it in the Active connections list. The change takes effect immediately.
Is this secure? #
- The assistant uses a dedicated, limited account by default — it can’t change settings, delete other people’s content, or sign in interactively.
- Your site credential is never placed in a web address or your browser history, and any config files are written so only you can read them.
- You can disconnect any app instantly, and uninstalling Block MCP removes its access entirely.
Troubleshooting #
- “Sorry, you are not allowed to view this page.” Make sure you’re logged in as an administrator and that Block MCP is active.
- The browser didn’t open, or the command failed. Confirm your site is reachable over HTTPS, and that Node.js (
npx) is installed for the command-based options. - The assistant says it can’t edit a content type. Make sure that content type is allowed under Settings → Block MCP → Settings.
