Published
•
Updated
Gravity Forms vs Ninja Forms: Best Form Builder 2023
Compare Gravity Forms vs Ninja Forms across features, pricing, entry display, and add-ons. A detailed breakdown to help you choose the right WordPress form builder for your site.

Are you struggling to decide whether to use Gravity Forms or Ninja Forms?
Both Gravity Forms and Ninja Forms are advanced form builders for WordPress. Both plugins make it easy to create powerful web forms for capturing data, generating leads, and much more. However, there are some key differences that are important to understand before you make your choice.
In this post, we’re going to compare Gravity Forms vs Ninja Forms to help you decide which form builder is right for you. Keep reading to find out more!
Table of contents
- Gravity Forms vs Ninja Forms: Feature Comparison
- Comparing Pricing Plans for Gravity Forms and Ninja Forms
- Gravity Forms vs Ninja Forms: Displaying Form Entries on the Front End
- Gravity Forms vs Ninja Forms: Form Calculations
- Advanced Features
- Customer Support
- Certified Developer Add-Ons Give Gravity Forms the Edge
- Gravity Forms vs Ninja Forms: Which Form Builder Is Right for You?
Gravity Forms vs Ninja Forms: Feature Comparison
When deciding whether to start using Gravity Forms instead of Ninja Forms, it’s important to compare the features offered by both plugins. Both form builders offer more advanced functionality than the majority of other contact form plugins, so it’s also important to consider the different add-ons and integrations that each supports.
Below, we’ll compare Gravity Forms and Ninja Forms in terms of the various features that they offer.
Form Types
Both Gravity Forms and Ninja Forms support a wide range of form types. This includes protected forms, multi-page forms, regular contact forms, polls and forms for creating posts from user-submitted content.
It’s worth noting that while Gravity Forms supports multi-page forms out of the box, to have this functionality in Ninja Forms requires an extension. Gravity Forms and Ninja Forms also allow you to create user registration forms but this also requires an add-on.
Form Builder
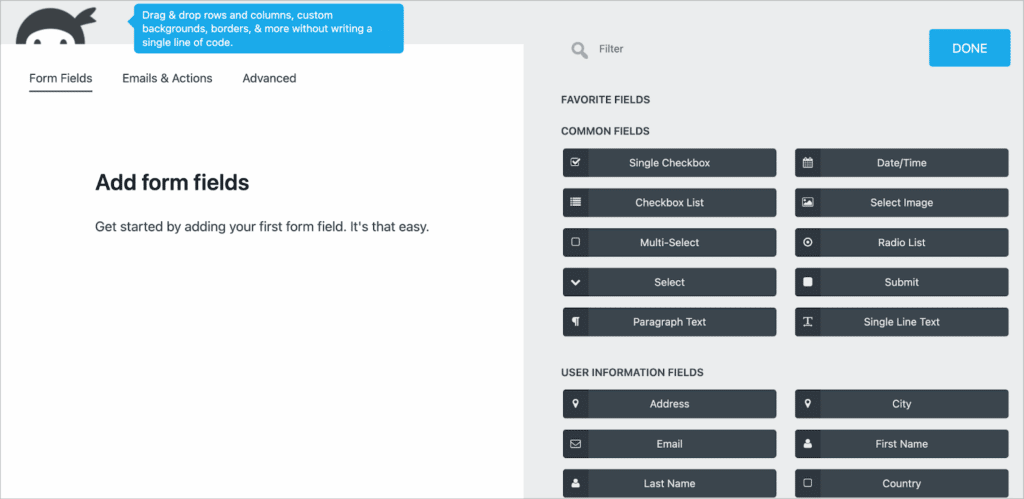
Gravity Forms and Ninja Forms both have a visual, drag-and-drop form builder. This makes it easy to build custom forms without writing any code. However, there are some important differences between the two editors.
For example, while Ninja Forms uses its own, custom builder inside WordPress, the Gravity Forms builder feels similar to the WordPress block editor. This makes it more intuitive to use and reduces the learning curve for new users.
The Gravity Forms visual editor is also built for ease-of-use and accessibility, which makes building new forms a breeze, even for users who use a screen reader.
Finally, Gravity Forms allows you to easily edit column layouts by dragging and dropping fields next to each other in the editor.

Ninja Forms supports this functionality too, but it requires the “Layouts & Styles” add-on.
Now let’s take a look at what field types each form plugin supports.
Field Types
When it comes to choosing a between Gravity Forms and Ninja Forms, one of the most important features to look at is field types. Having a wide range of field types to choose from allows you to build forms for any use case.
Both Ninja Forms and Gravity Forms support numerous Standard and Advanced field types including Checkboxes, Radio Buttons, Single Line Text, Email and Phone fields. Both plugins also support Product, Pricing and Payment fields, allowing you to build checkout forms and sell products on your website.
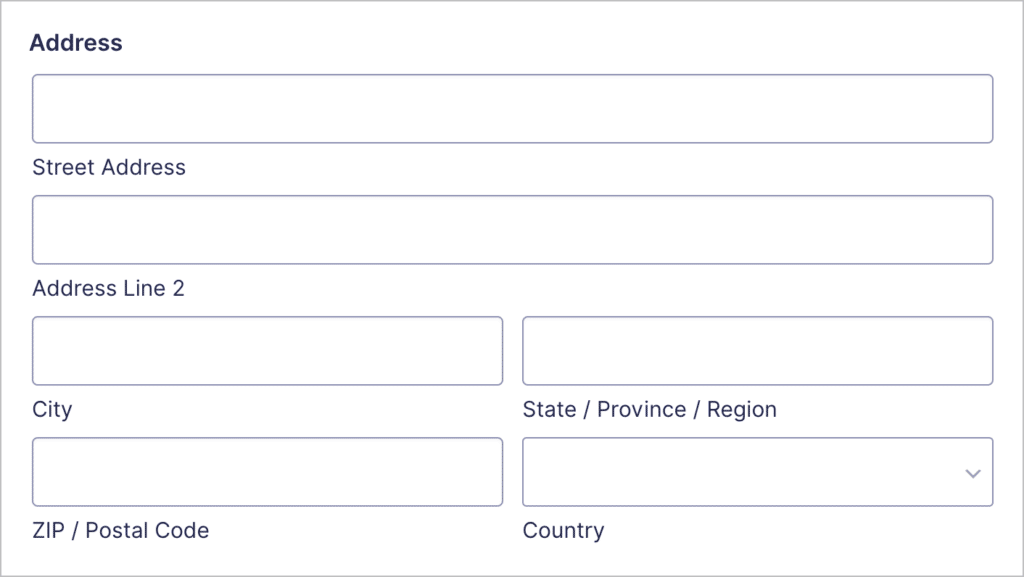
The Gravity Forms Address field is a lot more powerful than the Ninja Forms equivalent. The Ninja Forms Address field is simply a single line text input, whereas the Gravity Forms Address field includes inputs for each aspect of the address.

Gravity Forms also supports a Survey field type (requires the Survey add-on) while Ninja Forms does not.
Next up, let’s see how both form plugins handle conditional logic.
Conditional Logic
Conditional logic is a decision-making process that allows you to show/hide form fields based on user inputs. Using conditional logic, you can improve the user experience and build personalized forms that convert.
Gravity Forms’ powerful conditional logic settings are part of what makes it the best form plugin for WordPress and the best Ninja Forms alternative. While conditional logic comes baked into the Gravity Forms core plugin, you’ll need an add-on to use conditional logic in Ninja Forms.
You can add conditional logic to any field in Gravity Forms and the settings open in a fly-out menu for added accessibility.

💡 Pro tip: Check out our ultimate guide to learn more about conditional logic in Gravity Forms.
Form Submission Management
Now we’ll compare Gravity Forms and Ninja Forms in terms of how each plugin manages form submissions.
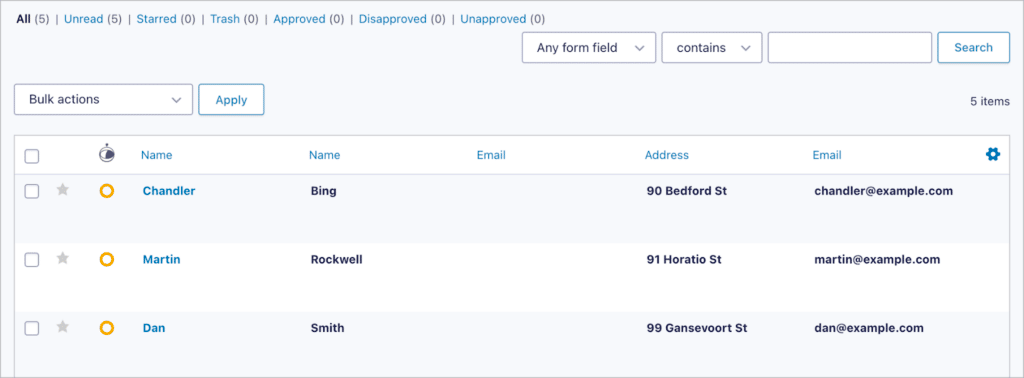
Both form plugins allow you to create an unlimited number of forms, each allowing you to collect an unlimited number of submissions. Each submission you receive is stored in your WordPress database and is easily accessible (and searchable) from within the Admin backend.
Both form plugins also allow you to create custom notifications and confirmations. Notifications are emails that get sent after you receive a new submission (either to you or the user). Confirmations, on the other hand, are messages that the user sees after submitting your form.
When it comes to the more advanced aspects of form submission management, Gravity Forms is the clear winner. For example, there are several add-ons for Gravity Forms, allowing you to do more with your form entries.
- GravityView allows you to display your Gravity Forms entries on the front end of your site and build powerful web applications.
- GravityExport allows you to send form submissions to remote storage (Dropbox or SFTP) and export entries to Excel, CSV or PDF.
- GravityRevisions allows you to track changes made to your Gravity Form submissions and restore prior versions of an entry.
- GravityEdit allows you to edit your Gravity Forms submissions faster, and GravityActions allows you to bulk update hundreds of entries at once.
Now let’s take a look at the different add-ons and integrations offered by each plugin.
Add-Ons and Integrations
Ninja Forms and Gravity Forms offer several add-ons and integrations, allowing you to connect your forms with third-party applications.
Ninja Forms and Gravity Forms integrate with payment processors, email marketing platforms, and CRMs. Popular integrations supported by both plugins include Mailchimp, Aweber, PayPal, Stripe and Zapier. (The add-ons you have access to will depend on your license!).
There are certain features in Gravity Forms that require an add-on in Ninja Forms. For example, multi-step forms, conditional logic, date picker, and file uploads are all add-ons for Ninja Forms, whereas these features all come standard with Gravity Forms.
Form Spam Handling
When comparing Gravity Forms vs Ninja Forms, one of the most important factors to consider is spam prevention.
There are countless bots out there that crawl the internet looking for forms to submit! Spammers use these bots to secure backlinks and promote their products and services.
Both Ninja Forms and Gravity Forms integrate with Akismet anti-spam and Google reCAPTCHA. However, sometimes even that isn’t enough to prevent those pesky spam submissions!
Luckily, Gravity Forms offers additional solutions for preventing contact form spam, including a powerful honeypot feature. You can also install our free Gravity Forms Zero Spam add-on, the most simple and elegant way to eliminate form spam in WordPress!
💡 Pro tip: To learn more about the Gravity Forms plugin, read our ultimate guide on how to use Gravity Forms.
Comparing Pricing Plans for Gravity Forms and Ninja Forms
Finally, let’s compare Ninja Forms and Gravity Forms in terms of pricing. Both form plugins handle pricing differently, so we’ll take a look at each of their pricing structures below.
Gravity Forms has a straightforward pricing structure. There are three tiers – Basic, Pro and Elite.
- The Basic license costs $59 per year, includes Basic add-ons and is for a single website.
- The Pro license costs $159 per year, includes Pro add-ons and is for unlimited websites.
- The Elite license costs $259 per year, includes all add-ons and is for unlimited websites.
While the Ninja Forms Core plugin is free to download from WordPress.org, it lacks basic features such as file uploads and conditional logic. The Ninja Forms pricing structure is also more complex, making it slightly confusing when trying to choose the right package.
Here’s an overview of the Ninja Forms paid plans:
- À La Carte – This option allows you to just choose the features you need. Ninja Forms add-ons range in price from $29 all the way up to $129, so the least you’ll pay on this plan in $29 (billed annually).
- Personal – This plan gives you access to Ninja Forms and all their essential add-ons. It costs $49.50/year for the first year and renews at $99/year.
- Professional – This plan includes everything in the Personal plan plus some additional add-ons. It costs $99.50/year initially and renews at $199/year.
- Agency – This is the highest pricing tier, starting at $249.50/year and renewing at $499/year. The Agency plan includes all Ninja Forms add-ons, current and future.
Gravity Forms vs Ninja Forms: Displaying Form Entries on the Front End
Sometimes you may wish to collect data using a form and then display it on the front end of your website.
In Gravity Forms, you can display form submissions on the front end using the GravityView add-on. GravityView includes a drag-and-drop visual builder and a range of View types, allowing you to display your form data using different layouts.
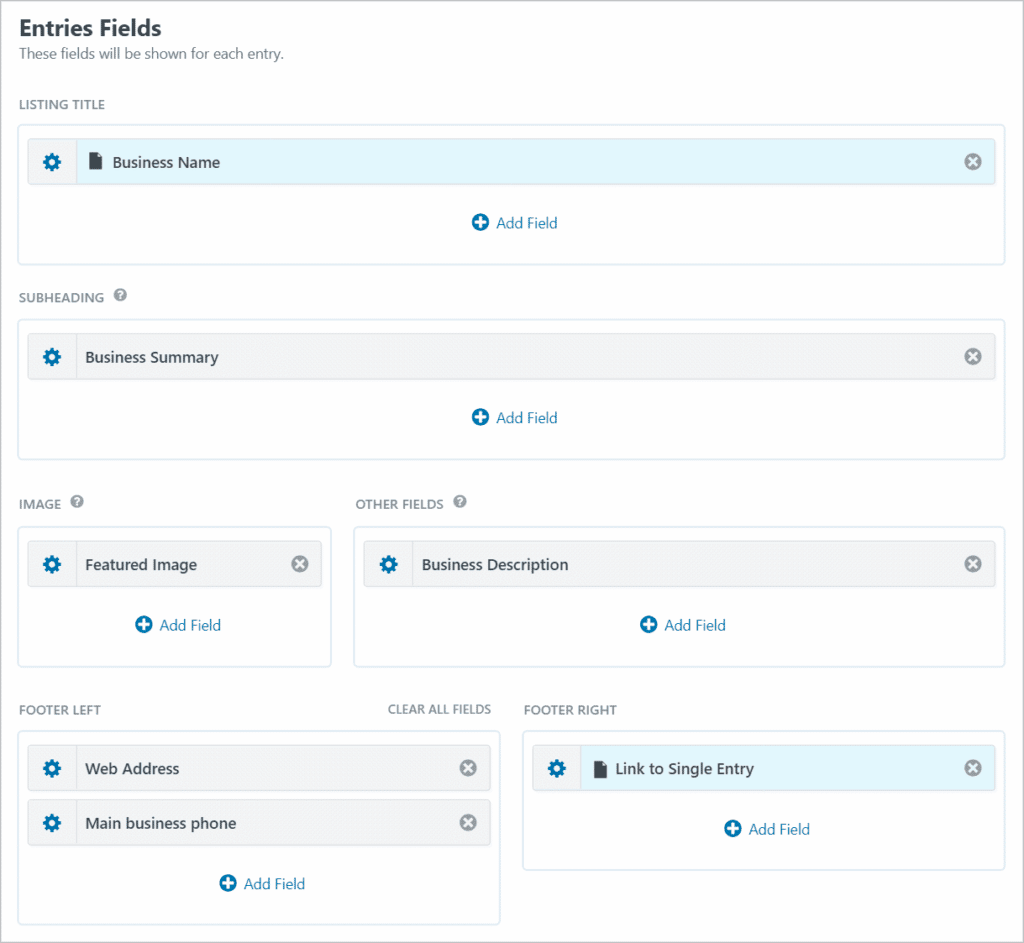
Moreover, GravityView includes a wide range of options and features, enabling you to create powerful web applications using your form data. Here are some things you can do when displaying Gravity Forms entries on the front end:
- Allow users to edit form submissions on the front end
- Display form entries on a Google Map
- Build directories and databases
- Display fields based on conditions that you set
- Approve entries before they show up on the front end
- Display custom content such as merge tags, shortcodes and HTML
Here are some more examples of apps you can build:
GravityView is a certified Gravity Forms add-on offered by GravityKit (more on certified add-ons below).
If you want to display Ninja Forms entries on the front end, you’ll need to install a third-party add-on called NF Views. This add-on allows you to display your Ninja Forms entries in a table or a list.
Gravity Forms vs Ninja Forms: Form Calculations
Gravity Forms allows you to create field-based, dynamic calculations inside your forms. This is helpful if you want to build a loan calculator or a quote calculator for your customers to use.
In Gravity Forms, you can use calculations inside a “Number” field by enabling the calculation option. In the box below that, you can write your calculation by using merge tags to reference user-input values.
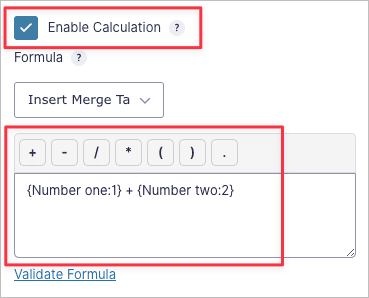
As you can see, creating a calculation is simple and can be done directly inside the form editor. When you enable calculations in a Number field, the field will populate in real-time as the user fills in the form. In other words, the result of the calculation will be displayed within the Number field itself.
Ninja Forms also includes support for calculations, but the process is rather confusing when compared to Gravity Forms.
In order to use this feature, you’ll need to enable “Developer mode”. After that, edit your form, select the “Advanced” tab and click on “Calculations”.
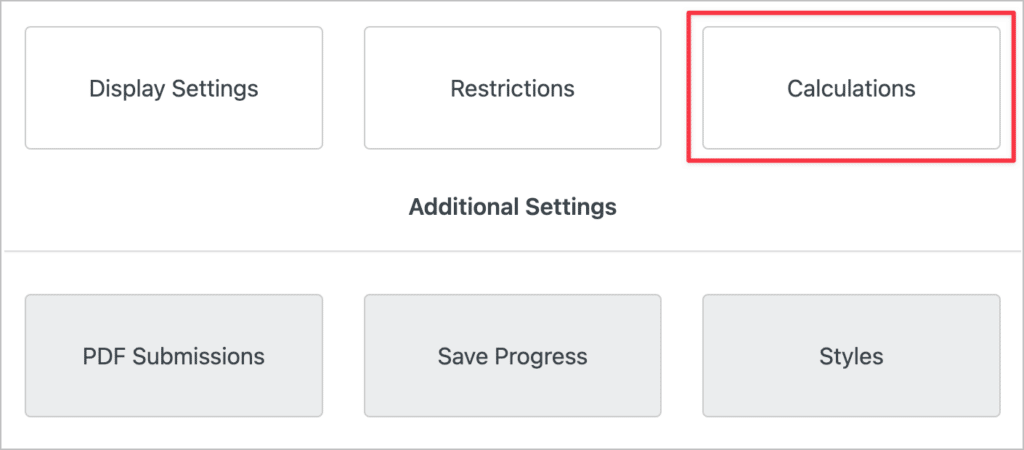
Next, you’ll need to label your calculation by giving it a variable name. Now, you can enter your calculation in the box using field merge tags.

Displaying the calculation is a little more complicated as it requires you to add an HTML field to your form and then reference the calculation using a merge tag.
💡 Pro tip: This is the easiest way to migrate from Ninja Forms to Gravity Forms.
Advanced Features
Now let’s compare Gravity Forms vs Ninja Forms in terms of various advanced features.
Multi-Step Forms
Both Gravity Forms and Ninja Forms support multi-step forms. However, Ninja Forms requires you to install an add-on for this functionality, whereas Gravity Forms includes this feature already.
When you have a long form that contains a lot of fields, it’s easier for the user if you break it up into multiple steps. To create a multi-step form in Gravity Forms, all you need to do is add a page field where you want one step to end and another to begin.
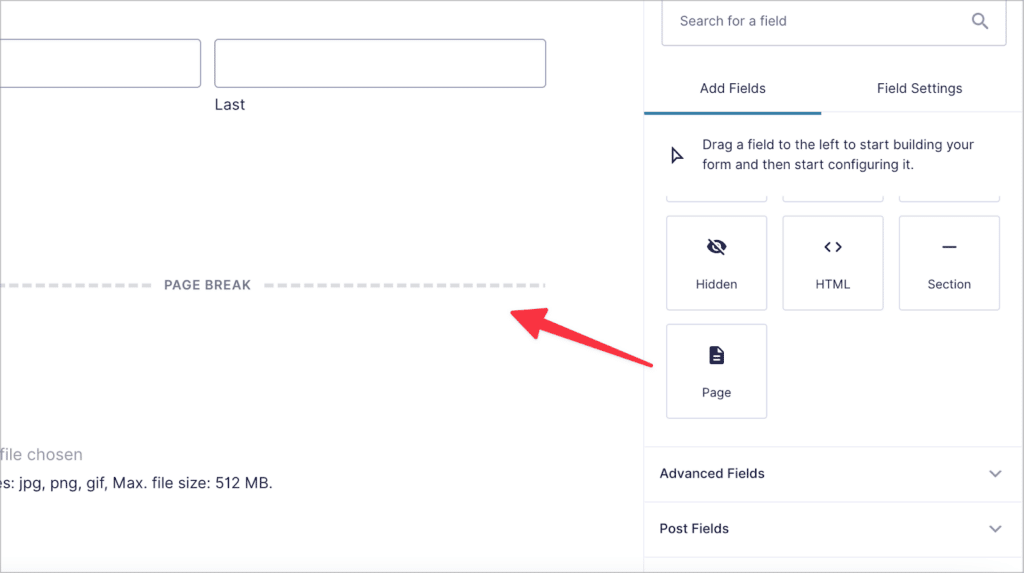
In Ninja Forms, you can add a new step to your form by clicking on the gray plus icon in the bottom right of the form editor.
Creating Posts
Gravity Forms allows you to turn form submissions into posts on your website. In the form editor, you’ll see a section labeled “Post Fields”. Each of these fields allow you to generate WordPress posts from user submissions.

If you want finer control over creating posts from form submissions or you want to create multiple posts for a single submission, you can use the Gravity Forms Advanced Post Creation Add-On.
If you’re looking for this functionality in Ninja Forms, you’ll need to install the Front-End Posting Add-On. After that, you can add a new post creation “action” to your form.
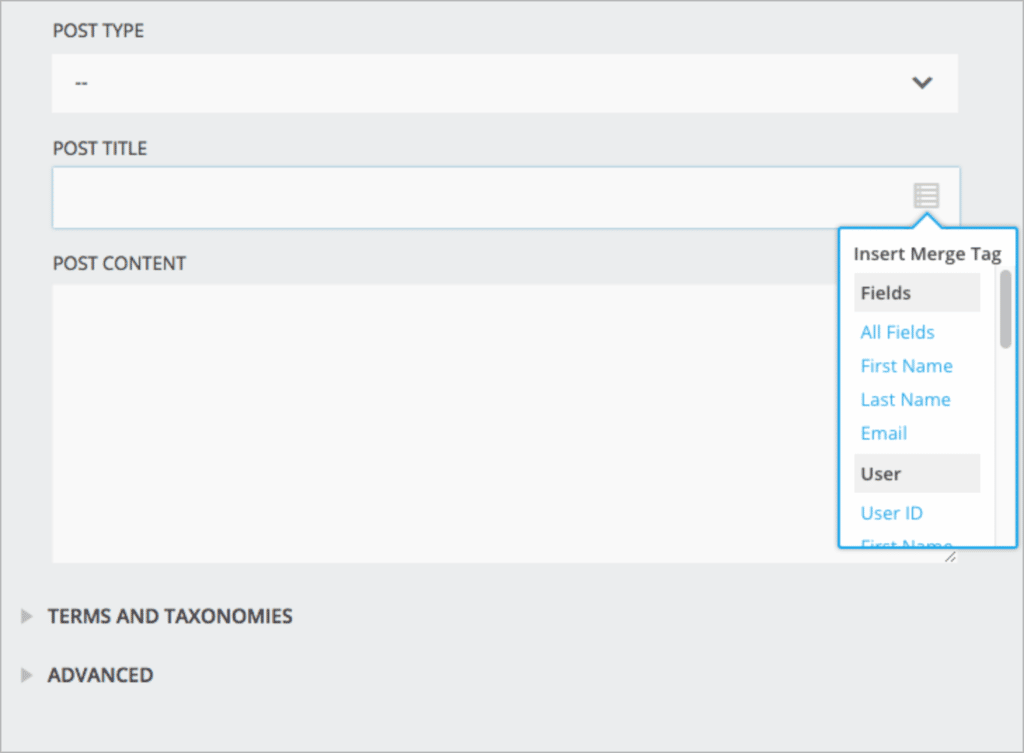
You can now dynamically populate the post title and content using merge tags.
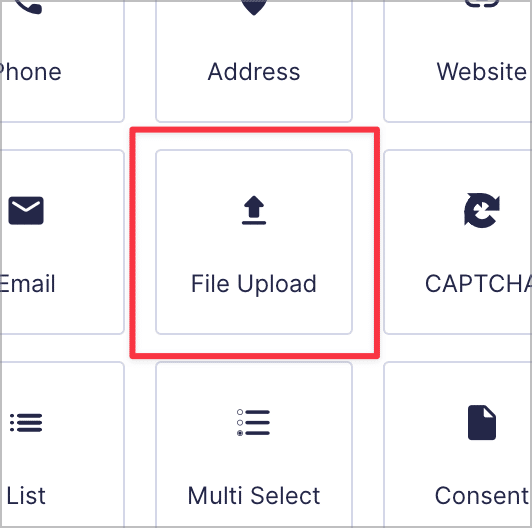
File Uploads
Gravity Forms includes a File Upload field (you’ll find it under the “Advanced Fields” tab), allowing users to upload documents or images as part of their submission
In the field settings, you can specify allowed field types and enable the multi-file upload option, which lets users upload multiple files at once.
If you want to add a file upload field to your form in Ninja Forms, you’ll first need to install the File Uploads add-on. The Ninja Forms file upload field does not allow users to upload multiple files at once.
eCommerce Fields
Gravity Forms includes a range of Pricing fields, allowing you to easily showcase and sell products on your website.
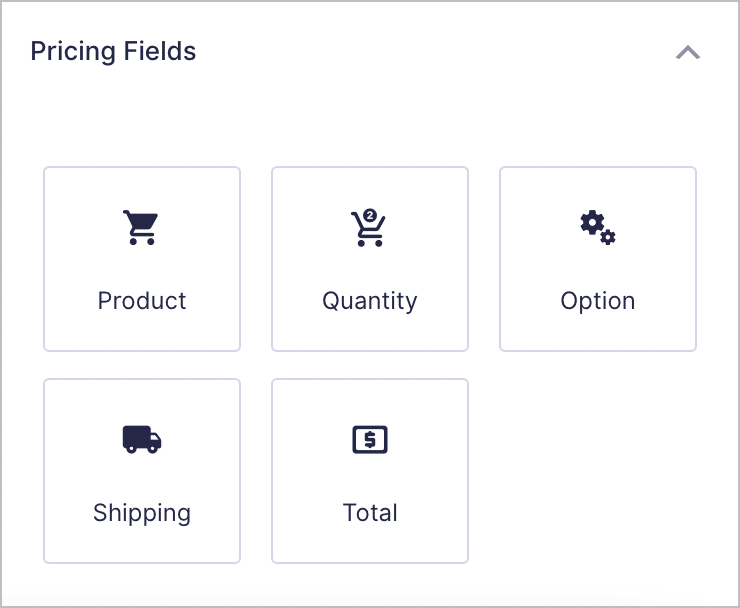
Here’s an overview of each pricing field:
- Product: Add a product in your form with a specified price.
- Quantity: Allows a quantity to be specified for the product.
- Option: This field allows you to add selectable options for your products that increase (or decrease) the total price.
- Shipping: Allows you to add a shipping fee, which is then added to the total cost.
- Total: Displays the order total, including options and shipping.
In order to take payments in Gravity Forms, you’ll need to install one of the available payment gateway add-ons such as PayPal, Stripe or Mollie.
Ninja Forms allows you to accept payments via PayPal, Stripe, Recurly, Authorize.net and Elavon. Depending on the payment processor you choose, you’ll need to download and install that specific add-on.
Ninja Forms does not include any eCommerce specific fields. However, you can add products using regular field types by assigning them a value. If you want to add product options or additional calculations, you’ll need to create them manually. This can be slightly confusing (especially for new users).
Save Progress
When you create a form in Gravity Forms, you can enable the “Save and Continue” feature. This allows users to save their progress and come back to the form later on to complete their submission.
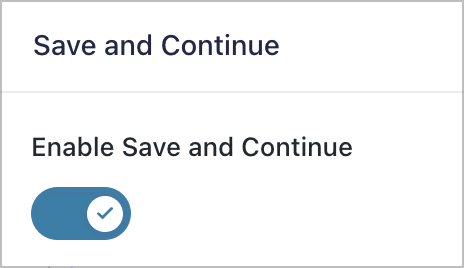
To use this feature in Ninja Forms, you’ll need to install the “Save Progress” add-on. After installing the add-on, you can add a “Save” field to your form, allowing users to save their form progress.
💡 Pro tip: Want to learn more about Gravity Forms? Check out this post where we answer the most commonly asked questions!
Customer Support
When investing in a WordPress plugin, it’s important to ensure that they offer responsive and helpful support. There’s nothing worse than running into an issue that you can’t solve and not knowing what to do.
Luckily, Gravity Forms is well-known for providing top-notch support to their customers. In fact, Gravity Forms has a rating of 4.7/5 on G2 with over 200 reviews! Gravity Forms also includes an extensive knowledge base, covering a wide range of topics.
If you need further assistance, you can always submit a support request and a Gravity Forms technician will get back to you.
Ninja Forms also provides a satisfactory customer support experience. They have a rating of 4.3/5 on G2. Ninja Forms also has extensive documentation that is well categorized and easy to navigate.
Certified Developer Add-Ons Give Gravity Forms the Edge
No analysis of Gravity Forms vs Ninja Forms would be complete without mentioning the Gravity Forms Certified Developer program.
According to Gravity Forms, Certified Developer add-ons are “the best of the best, helping you do even more with Gravity Forms”. There are seven certified developers in total, all developing and maintaining a powerful range of add-ons, allowing you to use Gravity Forms for more advanced use cases.
The added flexibility that certified add-ons provide is yet another reason why Gravity Forms has the edge over Ninja Forms.
Gravity Forms vs Ninja Forms: Which Form Builder Is Right for You?
Almost every website uses forms to collect data. Choosing the right form builder for your WordPress website can be challenging unless you have all the information.
When it comes to Gravity Forms vs Ninja Forms, it’s clear that the former comes out on top. Gravity Forms contains a range of powerful features, advanced field types, dozens of integrations and a wealth of add-ons. In Ninja Forms, even some basic features require you to install an add-on.
In this article, we compared two of the most popular form builders for WordPress: Gravity Forms and Ninja Forms. If you found this post helpful, subscribe to our newsletter below!

Helpful tips right in your inbox.
Subscribe to get the latest articles, information on releases and helpful Gravity Forms tips!
More articles

How to build a conference website on WordPress (attendee registration + abstract submission)
Build a conference registration and abstract submission site on WordPress with GravityKit, no code: forms, an attendee directory, sessions, and PDF certificates.

How to build a WordPress CRM without code (a contact database you own)
Build a simple WordPress CRM with GravityView. Turn the Gravity Forms entries you already collect into a no-code contact database you own, with no monthly fees.

Launch Log: Distance sorting for radius searches, DataTables search improvements, and import reliability fixes
The latest GravityKit releases add distance sorting to map searches, bring built-in search to DataTables, and fix GravityCharts and GravityImport edge cases.