Are you looking to combine Gravity Forms’ powerful data management capabilities with the unrivaled eCommerce functionality of WooCommerce?
In this post, I’ll show you how to integrate WooCommerce with Gravity Forms, bolstering your online store with advanced product selection forms and an improved user experience. Let’s dive in!
Table of contents
- What is WooCommerce?
- Does Gravity Forms work with WooCommerce?
- Why use Gravity Forms with WooCommerce
- When NOT to use Gravity Forms and WooCommerce
- 1. Adding custom products using GS Product Configurator
- 2. Connecting Gravity Forms to WooCommerce using Product Add-ons
- Adding multi-page product forms to WooCommerce
- Can you add a Gravity Form to the WooCommerce checkout?
- How to create WooCommerce products with Gravity Forms
- Advanced Product pricing with Gravity Forms and WooCommerce
- Displaying Gravity Forms data on the WooCommerce Account page
- Configure your Gravity Forms WooCommerce integration now
What is WooCommerce?
WooCommerce is a WordPress plugin created by Automattic that enables you to turn your website into an online store. WooCommerce takes the WordPress system and transforms it into a powerful and flexible eCommerce solution.
In fact, WooCommerce is the single most popular eCommerce solution for website owners, powering over 10% of the top 1 million eCommerce websites!
Does Gravity Forms work with WooCommerce?
In short, yes. While there is no official integration between the two plugins, there are two popular third-party add-ons that enable you to integrate both platforms. As the most powerful and flexible form plugin for WordPress, many site owners choose to integrate Gravity Forms with their WooCommerce stores.
Why use Gravity Forms with WooCommerce
Gravity Forms enables you to build versatile web forms using an intuitive drag and drop builder. Gravity Forms gives you a range of field types to choose from, as well as a range of advanced features such as conditional logic.
Integrating Gravity Forms with your WooCommerce store allows you to add custom pricing to your products, create versatile product forms, add new products to your store from the front end, and much more!
Here are some other reasons why you may want to set up a Gravity Forms WooCommerce integration:
- Fundraising/donations: Are you building an online store to raise money for your charity? Gravity Forms can help you accept online donations through your website.
- Promoting events: If your organization specializes in organizing and promoting events, Gravity Forms can help you register participants for events and sell tickets through your website.
- Trips and excursions: If you need users to fill out a sign-up form before making a payment, Gravity Forms is the perfect solution.
- Online profile registrations: Do you run an online directory or membership website? You can use Gravity Forms to register new users on your website after they make a payment.
When NOT to use Gravity Forms and WooCommerce
Many people don’t know this, but Gravity Forms itself can function as an eCommerce solution! That’s right, you don’t need WooCommerce to set up an online store. Simply install Gravity Forms, along with one of their many payment add-ons, and you’re good to go!
Of course, WooCommerce is a more “complete” solution in that it offers a wealth of powerful features and extensions. However, if you’re only planning to sell a couple of small products, Gravity Forms may be a better fit.
And if you’re planning to build a classifieds website like Craigslist where users can list items for sale, Gravity Forms combined with GravityView is the ideal solution.
GravityView is an add-on for Gravity Forms that enables you to display form entries on the front end of your website. After collecting product listings using Gravity Forms, use GravityView to display them in a searchable ‘directory’ style layout.
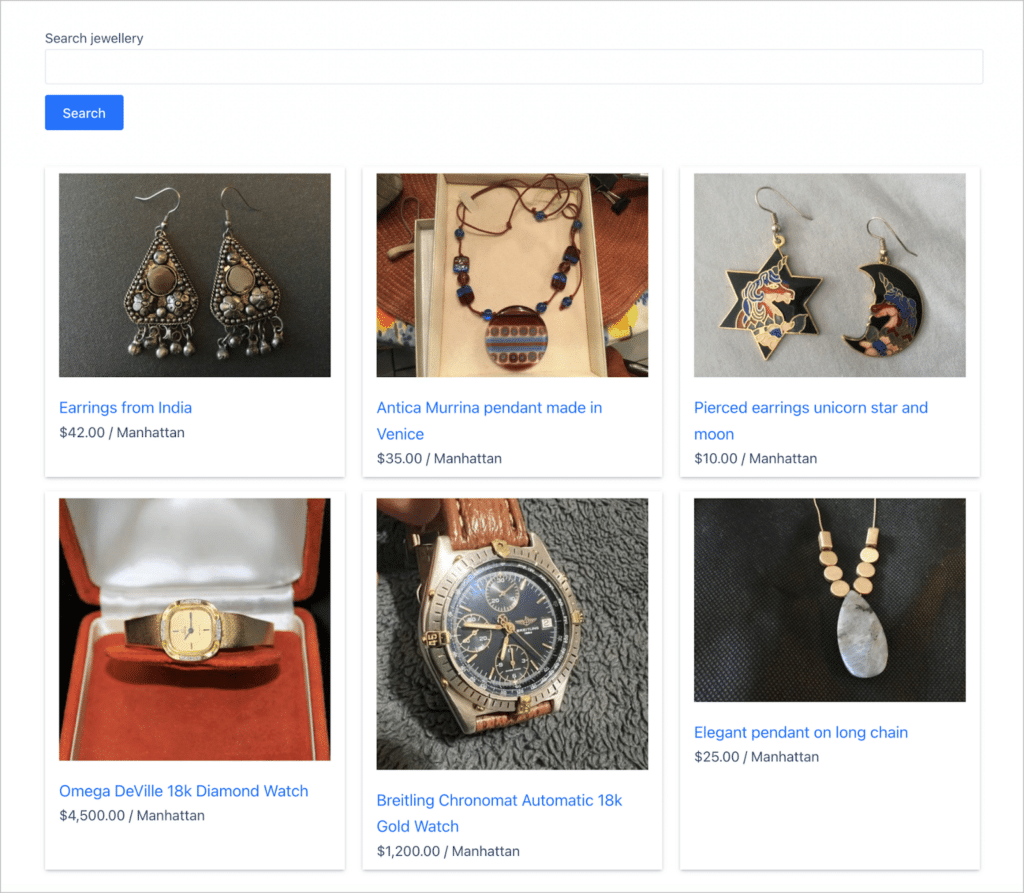
💡 Pro tip: To learn more about what you can build with Gravity Forms and GravityView, check out our “build it” guides here.
1. Adding custom products using GS Product Configurator
GS Product Configurator by Gravity Wiz is our recommended plugin for integrating Gravity Forms with WooCommerce. The plugin allows you to create highly customizable products by embedding a Gravity Form directly on the product page.
With this add-on, you can configure products with dynamic options that adjust pricing or capture additional details. It enables Gravity Forms features—like conditional logic, multi-page forms, and file uploads—directly inside WooCommerce, while also bringing WooCommerce’s eCommerce capabilities, such as payment gateways and shipping, into Gravity Forms workflows.
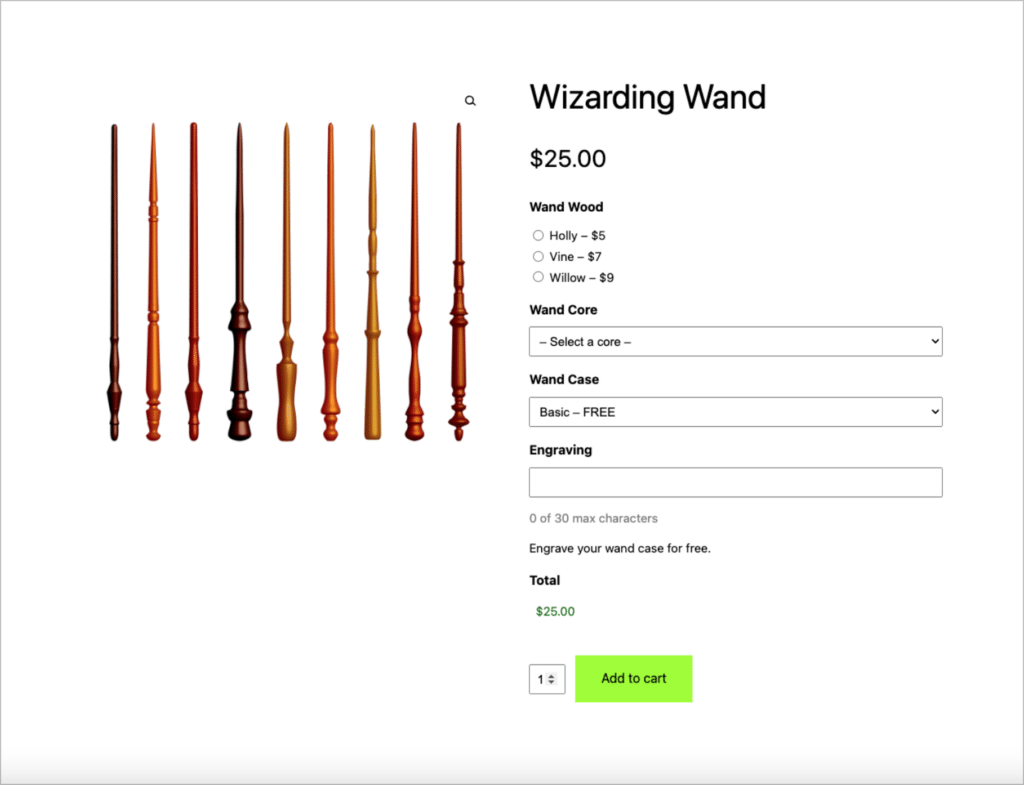
The plugin also integrates with other Gravity Wiz add-ons such as GP Advanced Calculations and GP Conditional Pricing, unlocking additional functionality.
2. Connecting Gravity Forms to WooCommerce using Product Add-ons
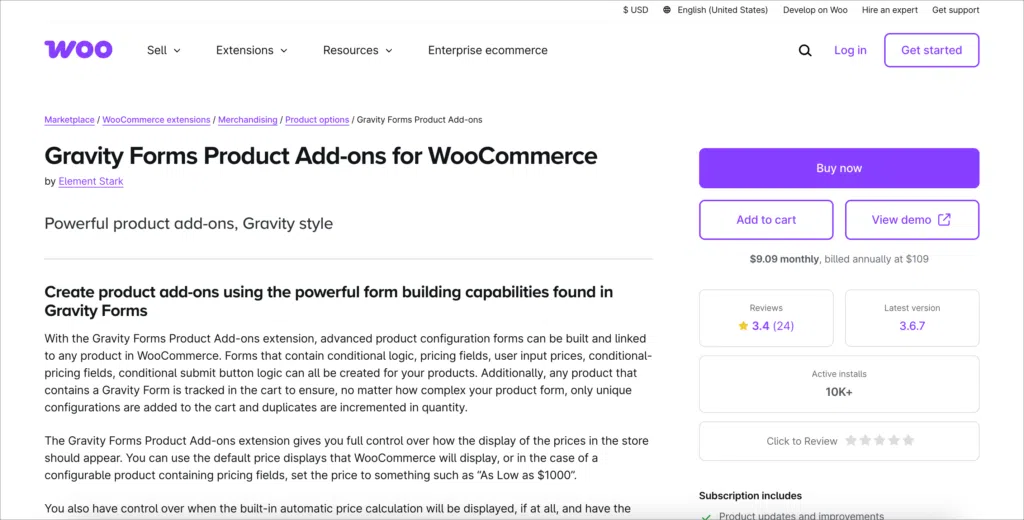
The Gravity Forms Product Add-ons plugin is another possible solution if you need a way to capture more detailed information from your customers. For example, if you sell jewelry and offer custom engraving, you may need a way for customers to supply the specific text that they want to be engraved.
Alternatively, if you sell custom-built computers, you may need a way for customers to specify which parts they want.
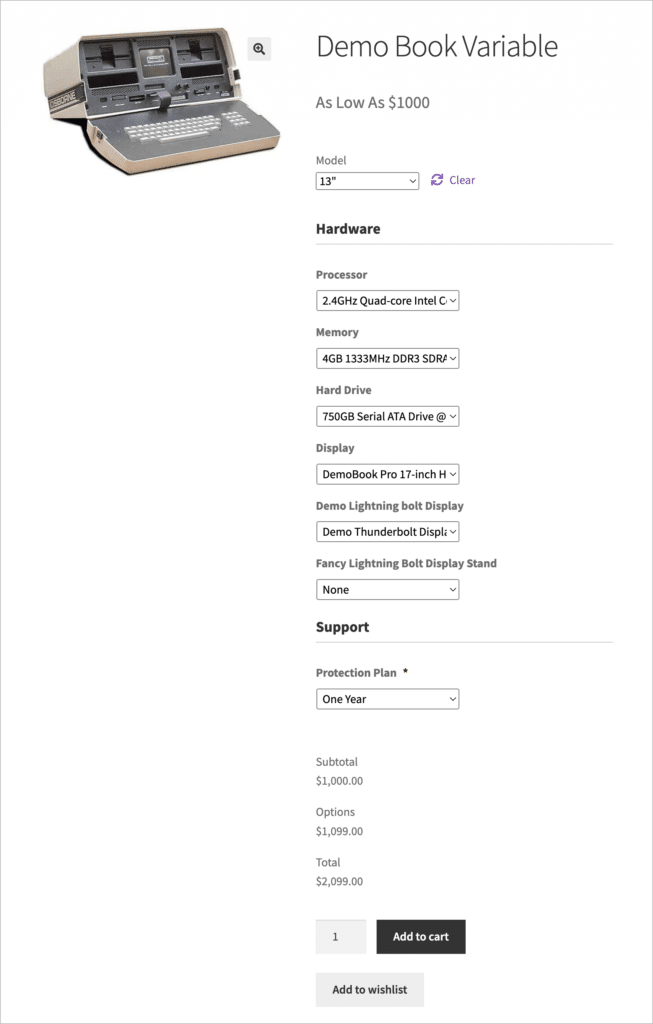
It’s worth noting, that in our experience, this particular add-on does not seem to offer the same level of support as GS Product Configurator.
Adding multi-page product forms to WooCommerce
Both GS Product Configurator and Gravity Forms Product Add-ons support multi-page forms! Multi-page forms allow you to break up long forms into more manageable sections, thereby improving the user experience.
To turn a regular form into a multi-page form in Gravity Forms, all you need to do is use the drag and drop editor to add a “Page” field where you want to insert a page break. You can find the “Page” field under the “Standard Fields” tab.
Can you add a Gravity Form to the WooCommerce checkout?
While both plugins allow you to add Gravity Forms to your product pages, they do not allow you to replace the WooCommerce checkout form!
However, there are other ways to customize the default WooCommerce checkout form. For example, the Checkout Field Manager add-on allows you to collect additional user information and customize the checkout process based on user role.
How to create WooCommerce products with Gravity Forms
Using the Gravity Forms Advanced Post Creation Add-On, you can submit new products via a form and send them directly to your WooCommerce store. This enables you to create new products on the front-end of your site. Here’s how to do it:
1. Create a product submission form
After installing the add-on, the first step is to build a product form that captures all the necessary information to create a new product in WooCommerce. At minimum, your form will need to have the following fields:
- Product Title
- Product Description
- Product Category
- Regular Price
- Product Image
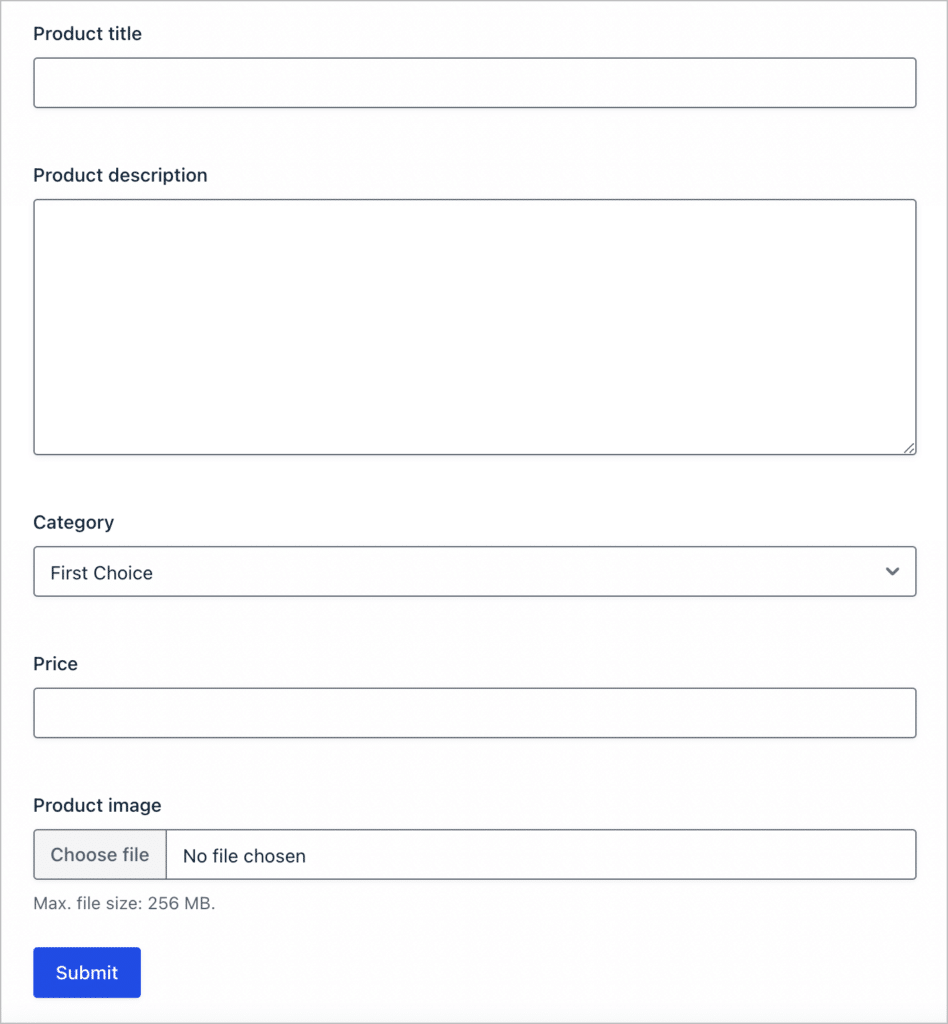
After creating your product form, embed it on a page or post. Next, you’ll need to configure a Post Creation feed.
2. Configure the Post Creation feed
To set up a new Post Creation feed, go to the form settings page, select the “Post Creation” tab and click “Add New”.
Next, give your feed a name and set the “Type” to “Product”. Now scroll down to the “Post Content” section. Here you can map the “Product Title”, “Product Description” and “Featured Image” fields using Gravity Forms merge tags.
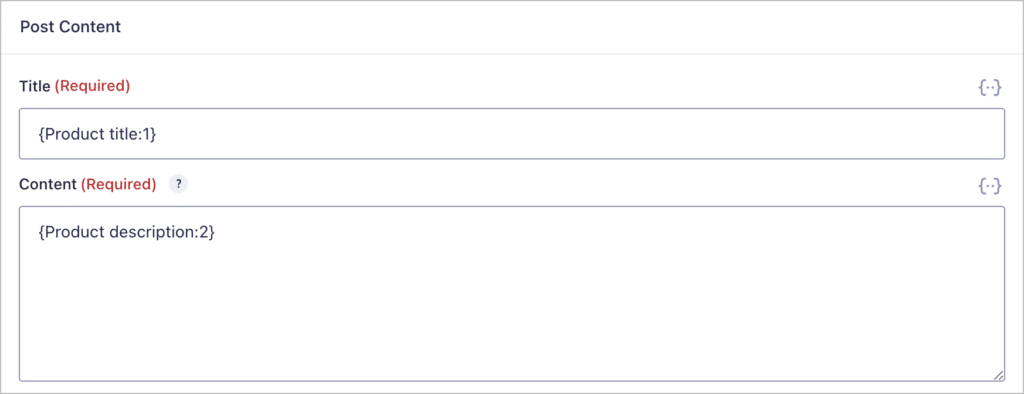
The remaining WooCommerce product fields are custom fields, so you’ll need to map them manually. You can do this by adding them one-by-one under where it says “Custom Fields”.

The final step is to set the “Product Type”, “Category”, and “Tags”. When you’re done, click “Save Settings”.
3. Start adding your WooCommerce products one by one
After configuring the Post Creation feed, you can open your form on the front end and start adding new WooCommerce products to your store.
Simply fill in the product information, and click “Submit”. The Post Creation feed will then run automatically, creating a brand new product for you inside WooCommerce!
Advanced Product pricing with Gravity Forms and WooCommerce
After configuring your Gravity Forms WooCommerce integration, you’ll be able to take full control of your product pricing.
Conditional pricing for your WooCommerce products
Using GS Product Configurator along with GP Conditional Pricing Add-On by GravityWiz, you can add multiple pricing levels for individual products based on the quantity ordered. This is helpful for adding discounts to your products using Gravity Forms.
Here’s an example of a pricing condition:
If a user orders less than 4 of this product, charge them $20 per product. However, if they order more than 4, charge them $15 per product.
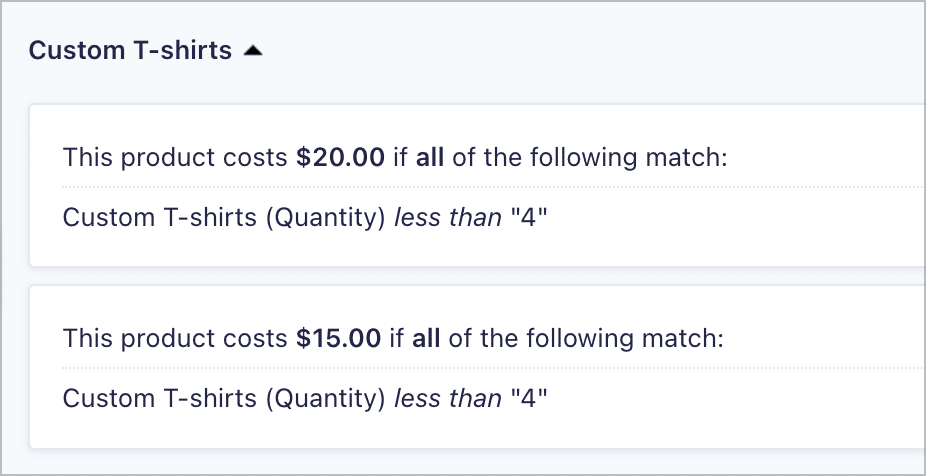
With the Conditional Pricing add-on, you can create as many different pricing levels as you want!
Calculating product prices based on user inputs
Another Gravity Wiz add-on, GP Advanced Calculations enhances Gravity Forms with powerful mathematical functions and conditional logic, making it ideal for complex pricing scenarios. For example, you could calculate costs for custom-sized materials or personalized product orders.
Displaying Gravity Forms data on the WooCommerce Account page
Using the GravityView add-on for Gravity Forms, you can embed Gravity Forms entry data on the WooCommerce Account page. This opens up some exciting use-cases. For example, embedding a View on the WooCommerce Account page enables you to create enhanced customer dashboards, and display data from Gravity Forms entries beside product order information.
This is handy for creating client portals with downloadable documents, or interactive account pages that contain more data than what WooComerce provides.
Configure your Gravity Forms WooCommerce integration now
Integrating Gravity Forms with WooCommerce unlocks powerful customization options for your online store, improving user experience and data collection. With the help of a third-party add-on like GS Product Configurator or Product Add-ons, you can create personalized product forms and streamline order management!

Helpful tips right in your inbox.
Subscribe to our weekly newsletter for tips, special offers, and more!
Helpful tips right in your inbox.
Subscribe to our weekly newsletter for tips, special offers, and more!
