If there’s one thing that almost every website owner has encountered at some point in their life, it’s contact form spam! Like any contact form plugin for WordPress, Gravity Forms is prone to spam submissions.
Dealing with spam is no fun! That’s why we wrote this post—to help you eliminate Gravity Forms spam once and for all! In this guide, we explore no less than 8 proven methods of combating spam submissions.
When our contact form was being flooded with spam submissions, we tried basically everything, so we know what works! To save you time, we’ve ranked each method by effectiveness (based on our own experience). Feel free to mix and max different solutions here until the spam entries stop.
We’re proud to bring you the most comprehensive guide on preventing Gravity Forms spam. Let’s dive in!
Table of contents
- 1. Installing the free Gravity Forms Zero Spam plugin
- 2. Enabling the Gravity Forms anti-spam honeypot
- 3. Using the Cloudflare Turnstile add-on
- 4. Using a paid service like Akismet
- 5. Hiding the submit button using conditional logic
- 6. Integrating Google reCAPTCHA
- 7. Adding a block list to Gravity Forms
- 8. Using the Moderation add-on
- Stop spam entries in Gravity Forms today!
1. Installing the free Gravity Forms Zero Spam plugin
The point of this guide is to save you time, so lets not beat around the bush: in our experience, the Gravity Forms Zero Spam plugin is the simplest and most elegant way to stop Gravity Forms spam.
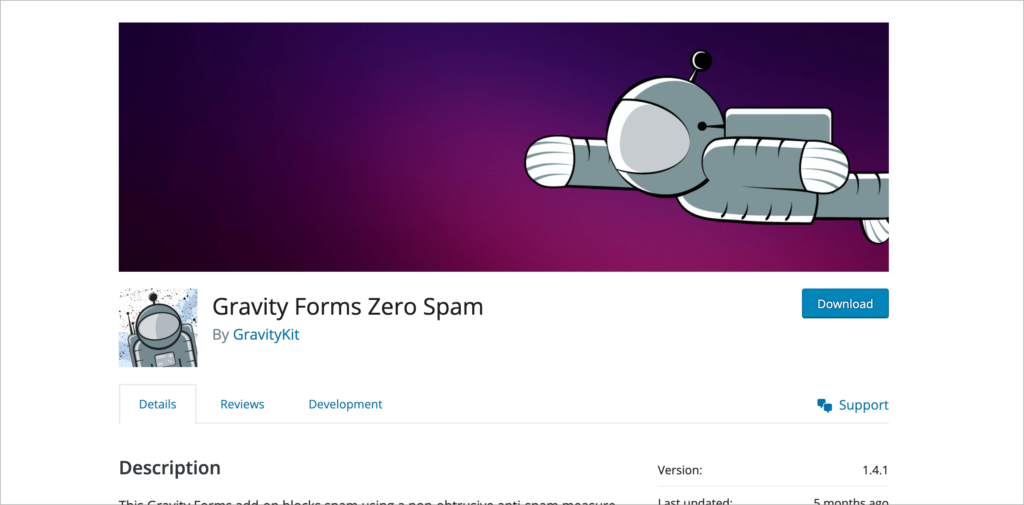
Here’s why you should use Gravity Forms Zero Spam:
- It blocks spam without a CAPTCHA and has no impact on the user experience
- It doesn’t require users to solve puzzles or answer trivial questions
- It removes spam with minimal configuration or fuss
- Zero Spam also lets you receive spam summary email reports on a daily/weekly/monthly basis
- Finally, Zero Spam is 100% free on WordPress.org!
To install the plugin, simply log in to your WordPress site, hover over “Plugins” in your sidebar menu and click “Add New Plugin”. Search for “Gravity Forms Zero Spam” and click “Install”.

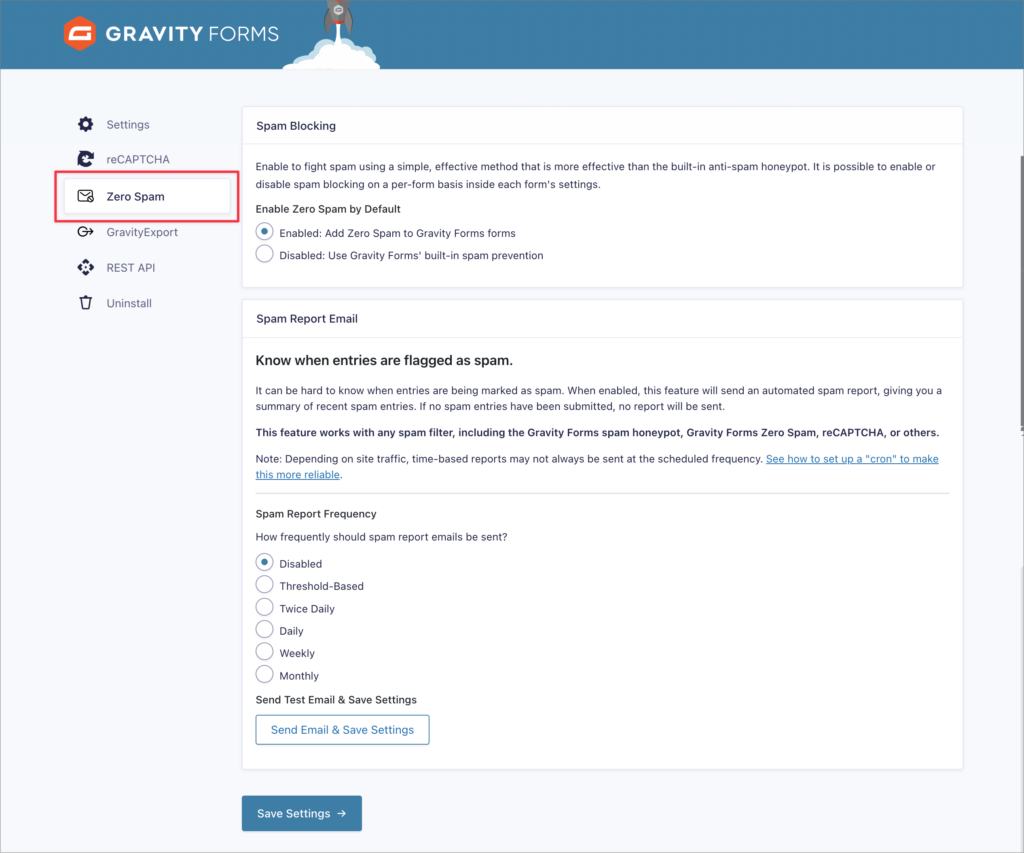
After activating the plugin, you’re good to go! Zero Spam works in the background to filter out spam submissions. If you would like to receive a spam report via email, you can enable this in the Zero Spam settings on the Gravity Forms settings page.
We believe that spam prevention shouldn’t impact the user experience. That’s why we took over maintaining the Gravity Forms Zero Spam plugin in February 2021 and continue to update it regularly. This is definitely an effective way of removing spam (we use it on our own contact form!).
2. Enabling the Gravity Forms anti-spam honeypot
Gravity Forms comes with a built-in anti-spam honeypot that helps to identify and prevent spam submissions. A honeypot is a hidden field that only bots can see. If a submission comes through with an answer supplied, it will be rejected as spam.
Honeypots are a good way to reduce form spam as they don’t impact the user experience. However, they aren’t perfect. For example, if a user’s browser auto-fills their submission, it may populate the hidden field, wrongly signaling that they’re a bot.
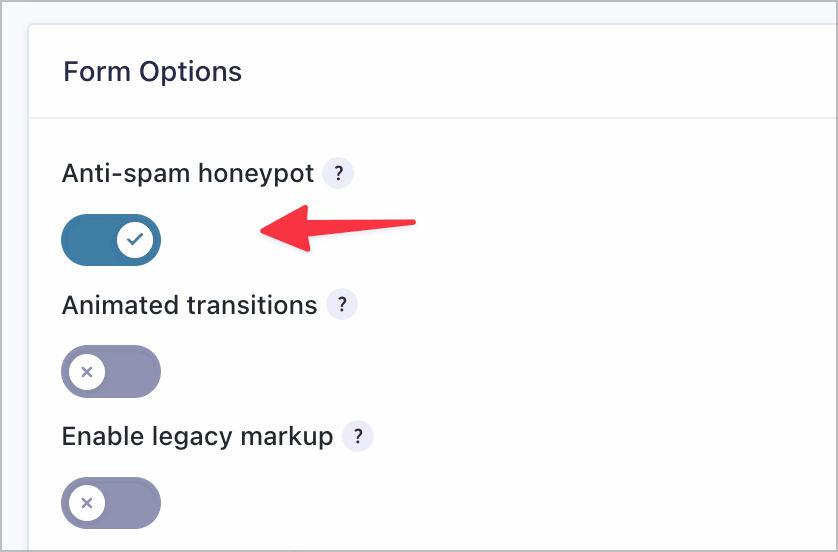
Having said that, many users have reported great success is combating spam using this feature, so it’s worth testing it out. To enable the Gravity Forms honeypot field, go to your Form Settings, scroll down to “Form Options” and enable the Anti-spam honeypot option.
You may find the anti-spam honeypot to be very effective, but it varies from website to website. For example, after enabling the feature on our own website, the amount of spam we received did not decrease.
3. Using the Cloudflare Turnstile add-on
Turnstile is a Cloudflare alternative to Google’s reCAPTCHA that does not utilize intrusive visual puzzles to validate users.
Instead, Turnstile runs in the background, using browser-based “challenges” to determine whether a user is a human or a bot. All of this happens without site visitors noticing, ensuring no negative impact on the user experience.

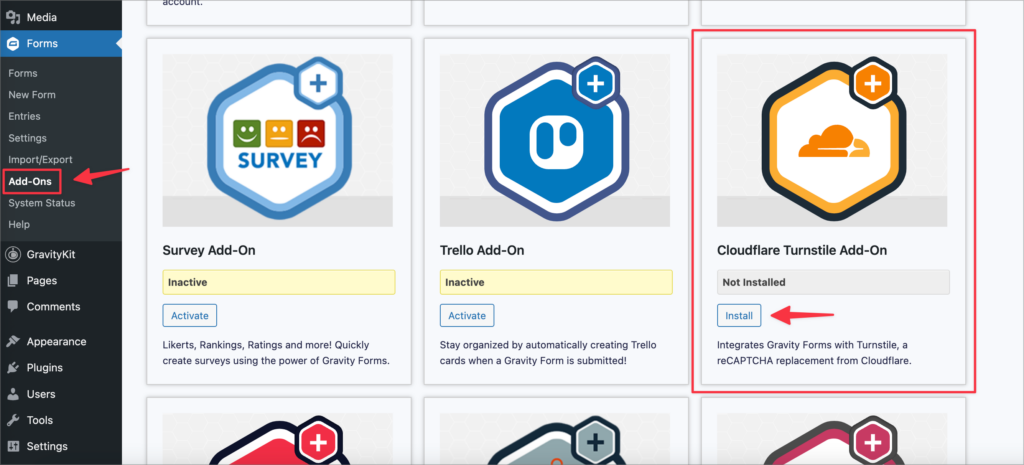
The Cloudflare Turnstile add-on is an official Gravity Forms add-on, included with any Basic License plan. To install the add-on, hover over “Forms” in your WordPress sidebar menu and click “Add-Ons”. Scroll down untill you see “Cloudflare Turnstile Add-On” and click “Install”.
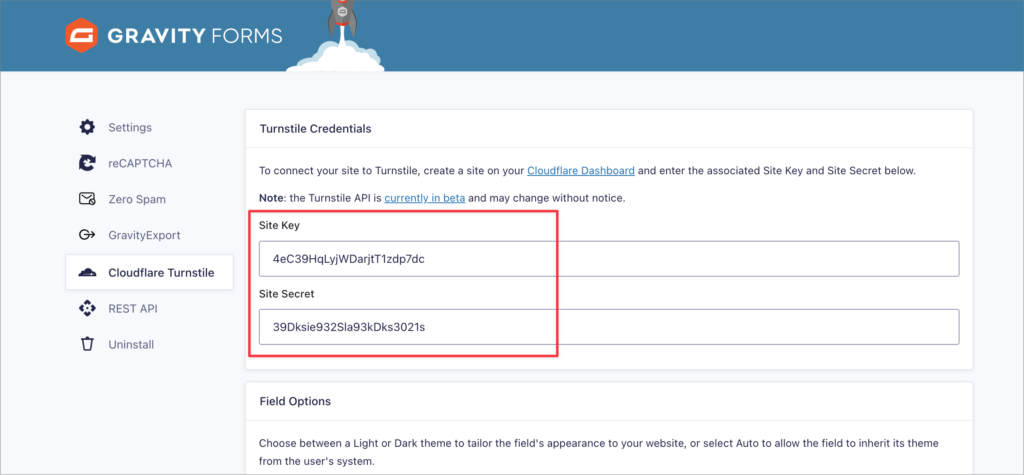
After installing and activating the add-on, you’ll need to log in to your Cloudflare account (or create a free account here if you don’t have one) and obtain a new sitekey and secret key.
After that, go back to your site, navigate to the Gravity Forms settings page, click on “Cloudflare Turnstile”, paste your site and secret keys into the boxes, and save the settings.
The final step is to add the Cloudflare Turnstile field to your form! You will find the “Turnstile” field type under “Advanced fields” in the Gravity Forms visual editor.
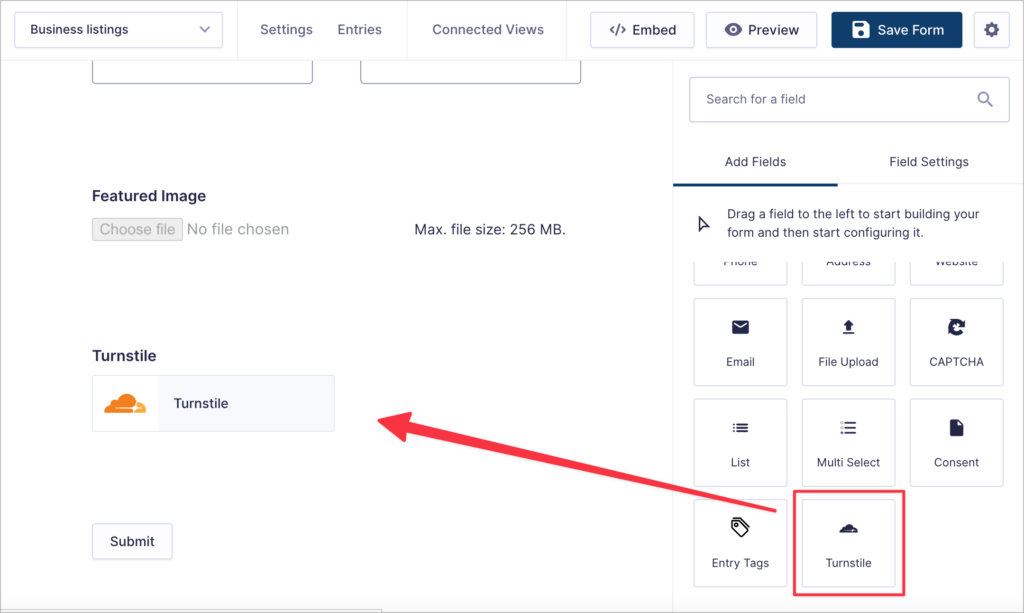
Although Turnstile still adds a visual box to your forms that users need to click, the way it functions is far superior to traditional CAPTCHAs. While we still prefer solutions that don’t include a visual element, Cloudflare Turnstile is a powerful anti-spam tool that’s free to use and well worth trying out.
4. Using a paid service like Akismet
Akismet is the most well-known anti-spam plugin for WordPress. It’s maintained by Automattic, the company behind WordPress.com. It’s also one of the few plugins that come pre-installed with WordPress itself.
Now I know what you’re thinking: “Seriously, I have to pay for it?”. If you’d rather not consider a paid solution (totally understandable), then you’re better off choosing one of the other methods in this guide. We’re throwing Akismet in here for those running large sites that don’t mind forking out for a near surefire spam prevention solution.
Akismet works by scanning form submissions and comparing them against its extensive global spam database to identify, learn from, and filter out harmful entries.
To get started, install the official Gravity Forms Akismet add-on from the “Add-Ons” page.
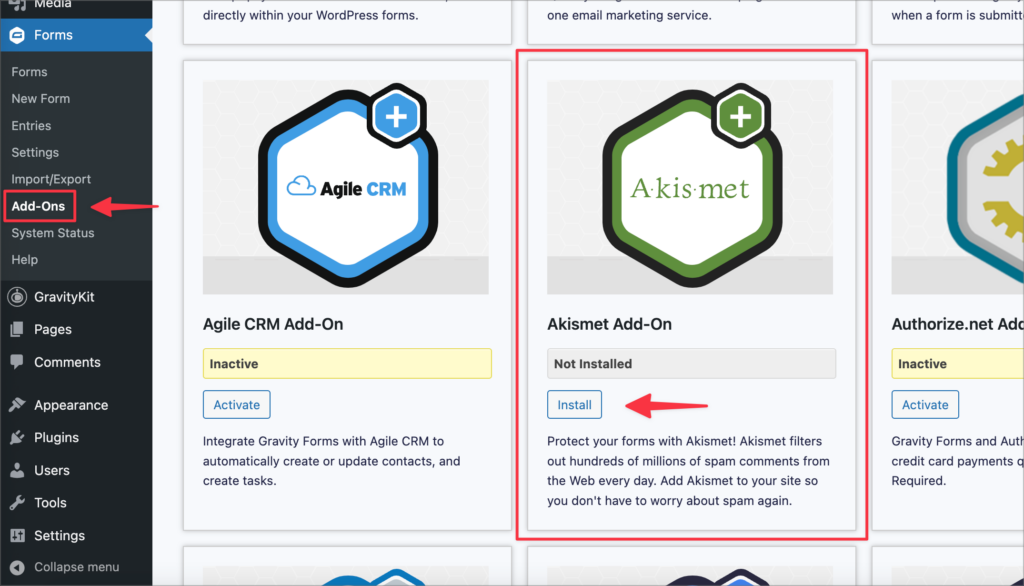
Next, you’ll need to install the Askismet Ani-spam plugin for WordPress. You can find this plugin free in the WordPress plugin repository by simply searching for “Akismet”.
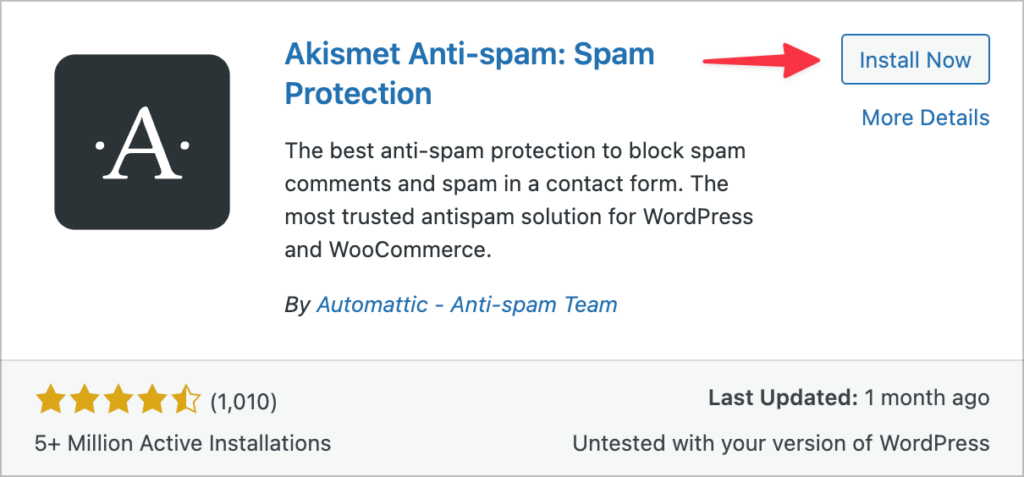
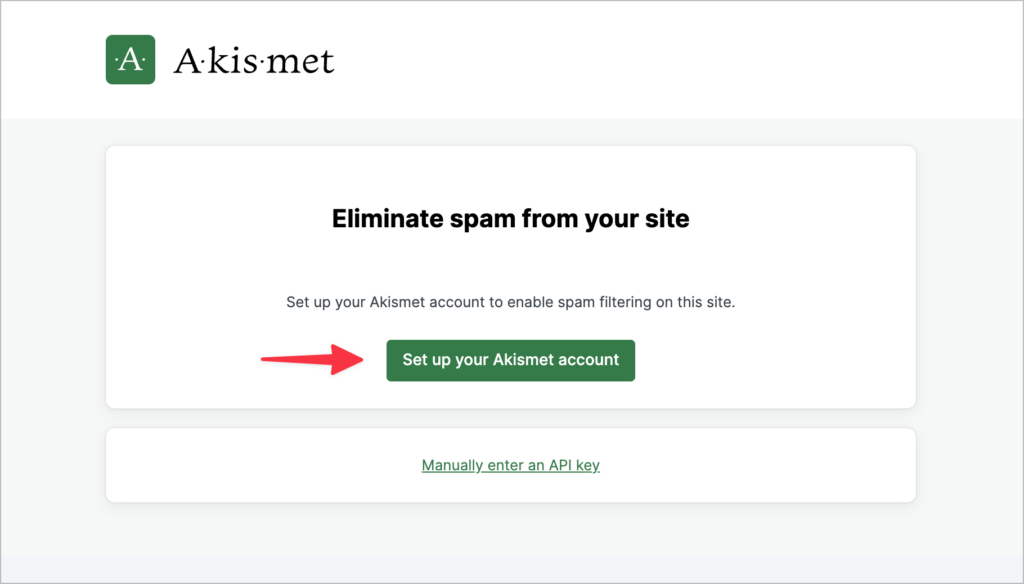
After installing both plugins, hover over “Settings” in your WordPress sidebar and click “Akismet Anti-Spam”. Here you can begin setting up your Akismet account, which is required for the plugin to work.
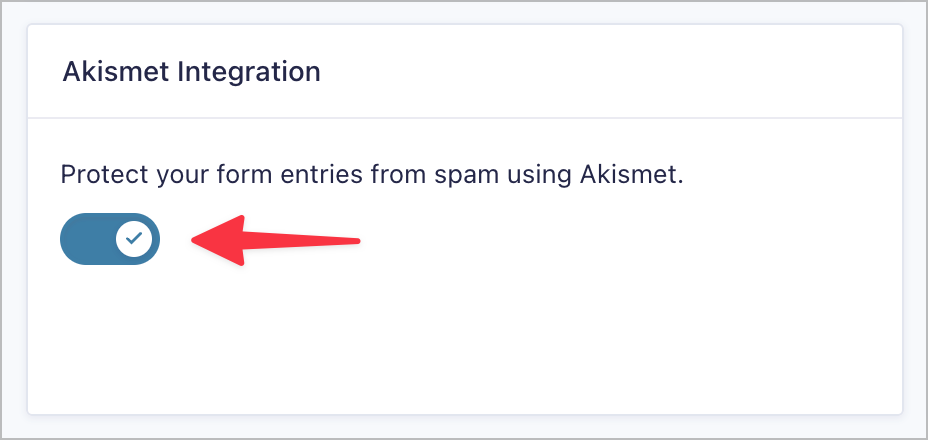
After setting up your Akismet account, go back to Gravity Forms to ensure Akismet is set up correctly to identify spam form submissions; on the settings screen, ensure the integration is toggled on.
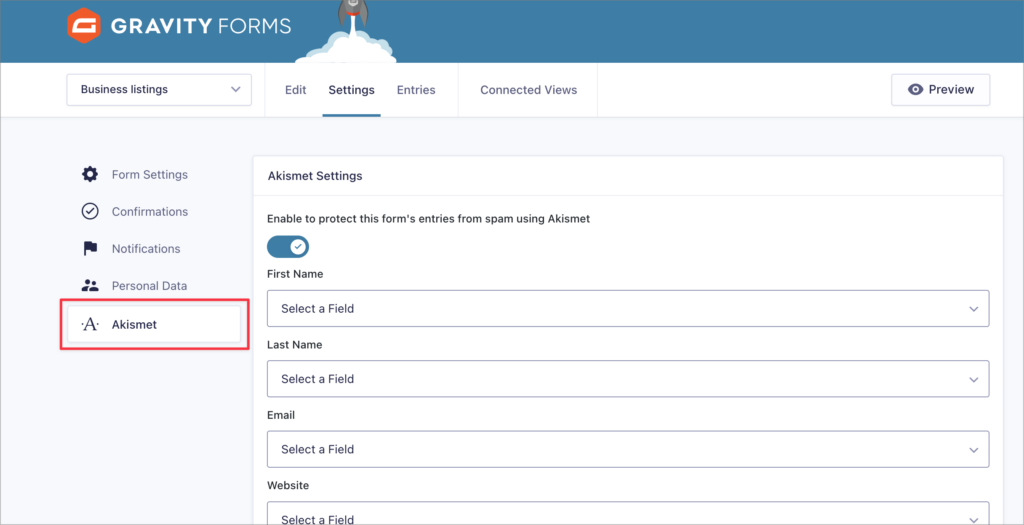
There are also several form-level settings that you can configure for each of your forms where you want to use Akismet anti-spam.
For greater accuracy, you’ll need to map your form fields to Akismet fields for passing to the Akismet anti-spam service. For more information about this, see this helpful guide.
There’s a reason Akismet is the number one WordPress anti-spam plugin: it works. However, it’s also a paid solution and, depending on the size of your website, it can amount to a substantial monthly investment.
5. Hiding the submit button using conditional logic
One of the simplest ways to prevent Gravity Forms spam entries is by adding a test question to your form. The question should be something that’s easy for humans to answer, but difficult for bots to get right.
After setting up your test question, you can use conditional logic to hide the “Submit” button until the question is answered correctly. This prevents bots from submitting your form in the first place.
Here are some examples:
- 13 + 4 = ?
- What color is the sky?
- What’s the 5th letter of the alphabet?
To add conditional logic to your form’s “Submit” button, edit your form and click on the “Submit” button at the bottom of the form editor to open the Field Settings panel on the right.

Now click on the tab that says “Submit Button Conditional Logic” to open the conditional logic settings. Here, you can hide the submit button until a certain condition is met.
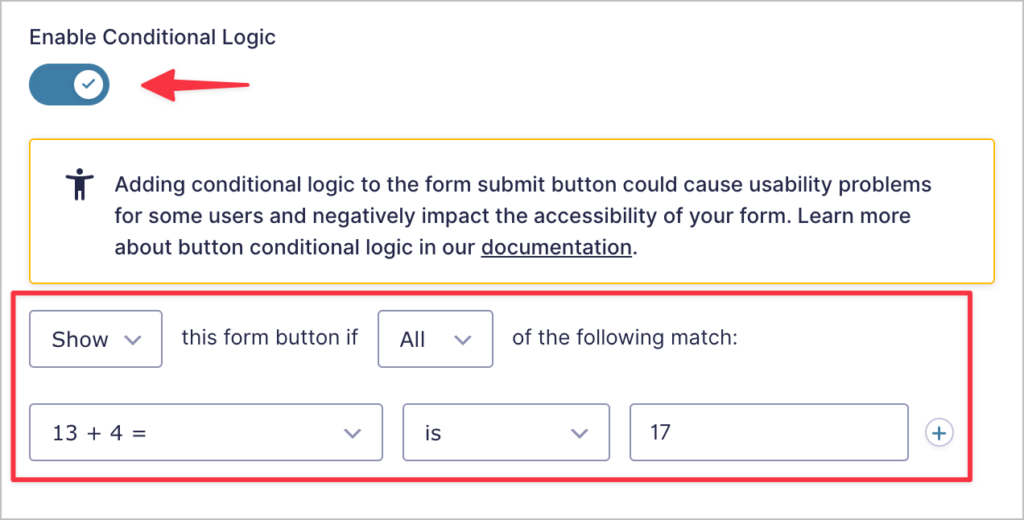
In this example, we’re only displaying the “Submit” button when the answer to the test question “13 + 4 =” is the correct one (i.e., “17”).
If you’re not using Gravity Forms 2.6, you won’t find the “Submit” button in the form editor. Instead, you’ll need to go to your form settings, scroll down to the “Form button” section and add the same conditional logic rule there.
So, is this effective at preventing spam? While this method may be effective at reducing spam from bots, it may not be able to eliminate your form spam altogether. It’s also not a good solution if you’re conscious about web accessibility. Use with care!
6. Integrating Google reCAPTCHA
Next on the list is the infamous Google reCAPTCHA. If you’re a regular internet user, you’ve probably encountered Google reCAPTCHA at least once before. In fact, many websites use it as their primary defense against spam.
Google’s reCAPTCHA technology requires users to check a box confirming they aren’t a bot. After doing that, Google receives all sorts of information about the user, including their IP address and mouse movements.

Google uses this information to identify bots and block them from sending form submissions. In some cases, Google struggles to make a prediction based on the information received and asks the user to complete a second challenge: image selection.
This is unfortunate and can often result in a poor user-experience. Even if the image selection only takes 30 seconds, it results in an unecessary burden on the user who just wants to submit the form! However, if you’ve tried all our previous suggestions to no avail, reCAPTCHA may be worth a shot.
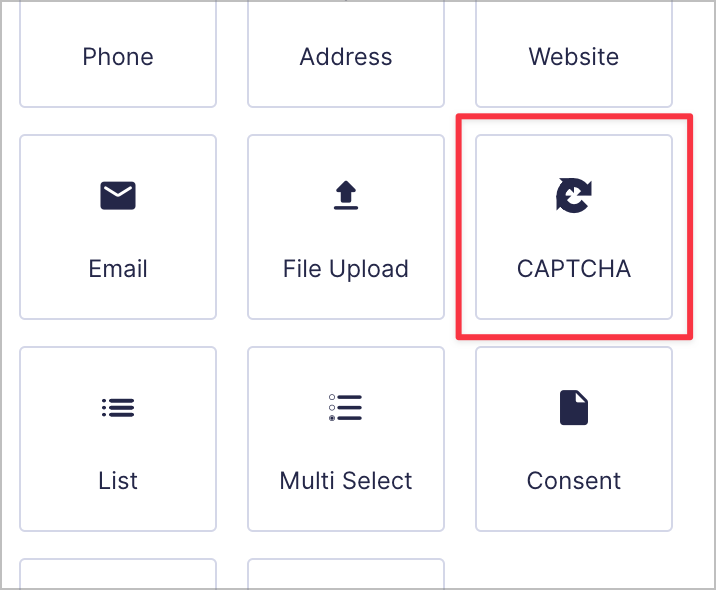
Gravity Forms supports Google reCAPTCHA v2 out of the box. To add a capture field to your form, open the “Advanced Fields” tab and select the “CAPTCHA” field.
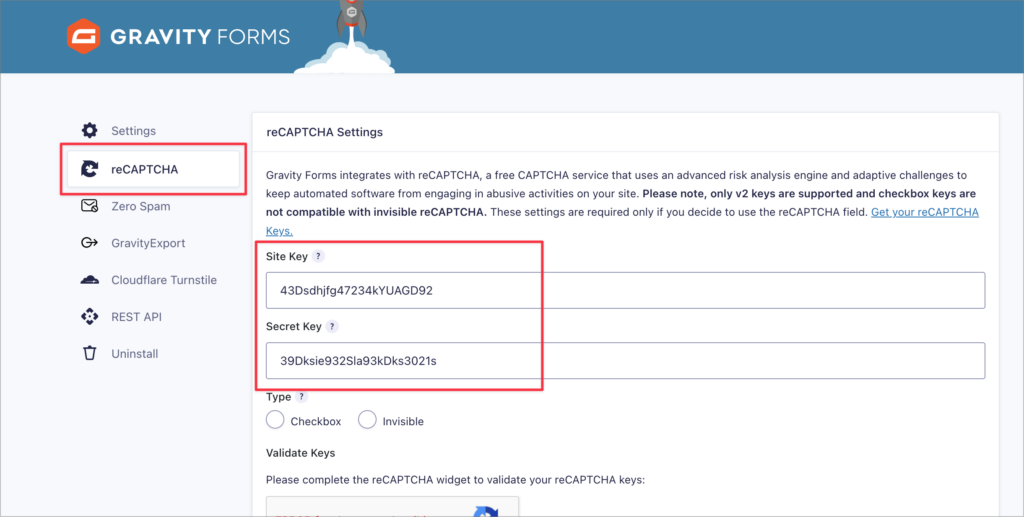
For Google reCAPTCHA to work, you’ll need to sign-up for a reCAPTCHA API key pair and enter these keys in the reCAPTCHA settings on the Gravity Forms Settings page.
Gravity Forms also supports reCAPTCHA v3 but this requires you to install an add-on.
So, is reCAPTCHA effective? Well, most of the time it is. reCAPTCHA is not perfect though and as bots become more sophisticated, new vulnerabilities are found and exploited. Furthermore, CAPTCHAs require users to perform annoying tasks, negatively impacting the user experience. This shouldn’t be your go-to anti-spam solution.
7. Adding a block list to Gravity Forms
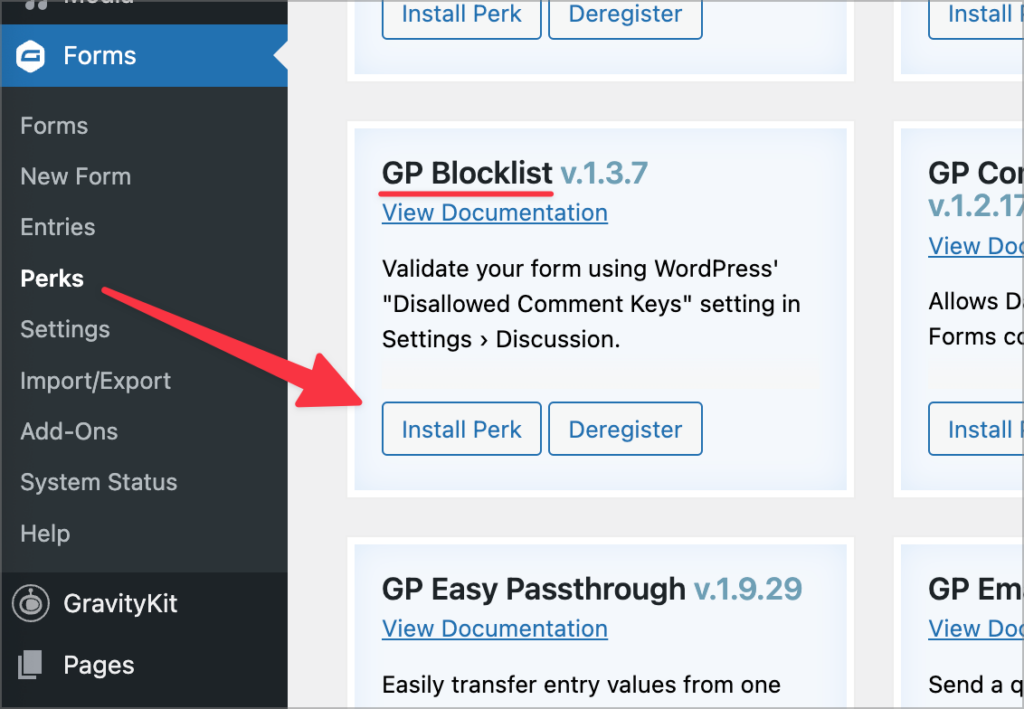
Another way to block spam in Gravity Forms is by using the GP Blocklist plugin by Gravity Wiz. This plugin allows you to validate a field’s value against the WordPress Disallowed Comment Keys—this is a list of words and/or IP addresses that you provide. If any of these words or IPs are detected, the entry is marked as spam.
If you have Gravity Perks installed already, you can install GP Blocklist from the “Perks” page under “Forms” in your WordPress sidebar.
After that, hover over “Settings” in your WordPress sidebar and click “Discussion”. Scroll down to “Disallowed Comment Keys” to add your list of disallowed words and IP addresses.
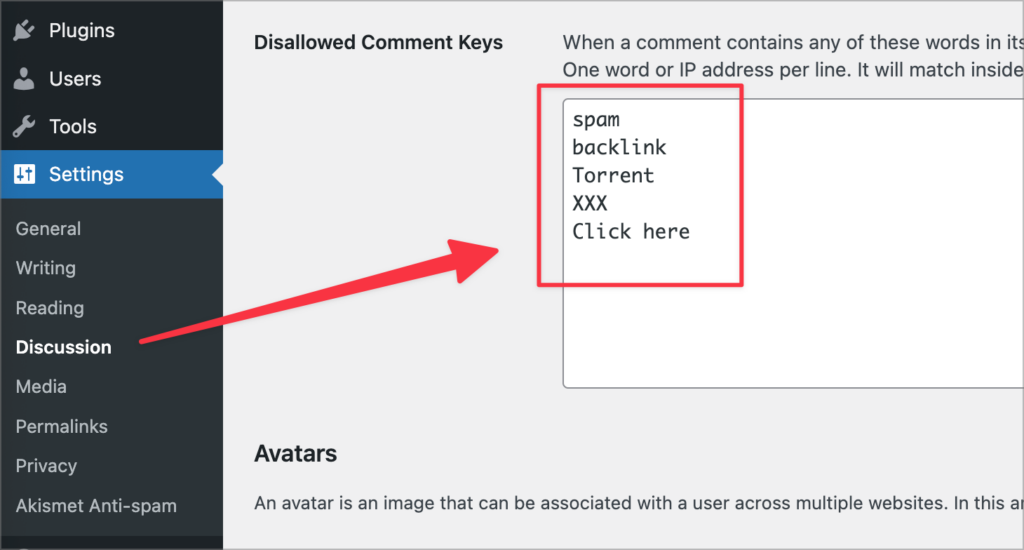
After saving your list, you’ll need to enable the blocklist for each of your active forms. You can do this by checking a box in the form settings.

The blocklist can also be enabled on a per-field basis.
How effective are blocklists at preventing Gravity Forms spam? This method is best for eliminating certain kinds of spam entries, or preventing users from using certain language in their submissions. While it won’t stop spam outright, it can be useful in certain circumstances.
8. Using the Moderation add-on
Finally, last but not least is the official Gravity Forms Moderation add-on. Why is this last on our list? Technically, it isn’t an anti-spam device; it’s actually for filtering out toxic entries to protect yourself from online abuse.
The Moderation add-on uses the Perspective API provided by Google to analyze form submissions, filtering out those containing toxic language. The Moderation Add-On is avilable in the Gravity Forms Elite license.
To get started, install the add-on from the Gravity Forms “Add-Ons” page.
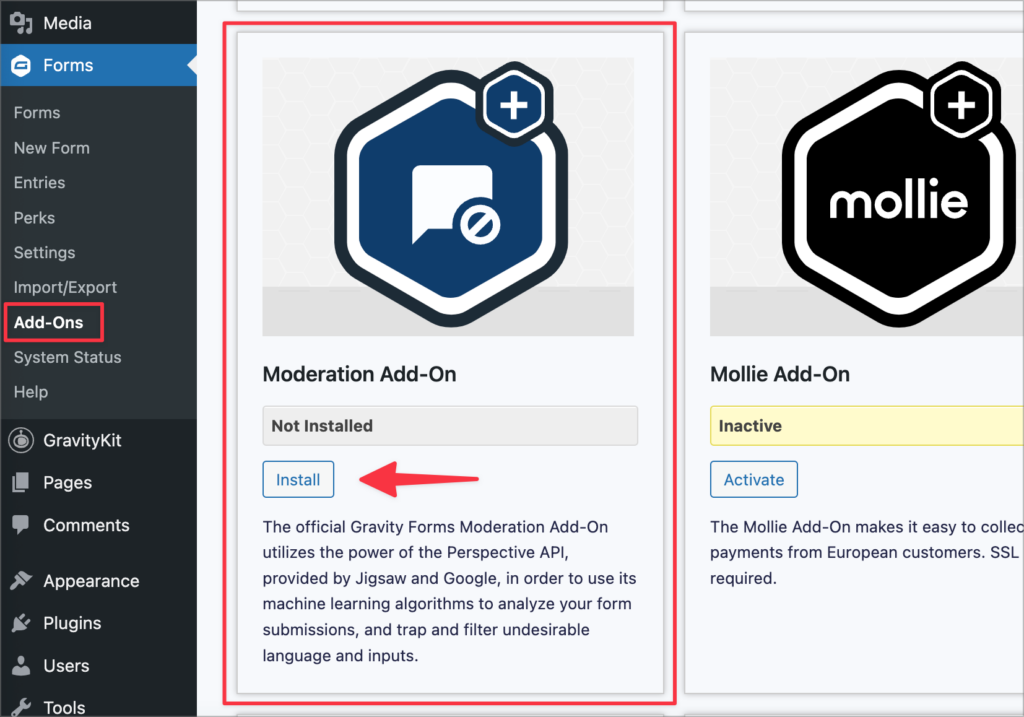
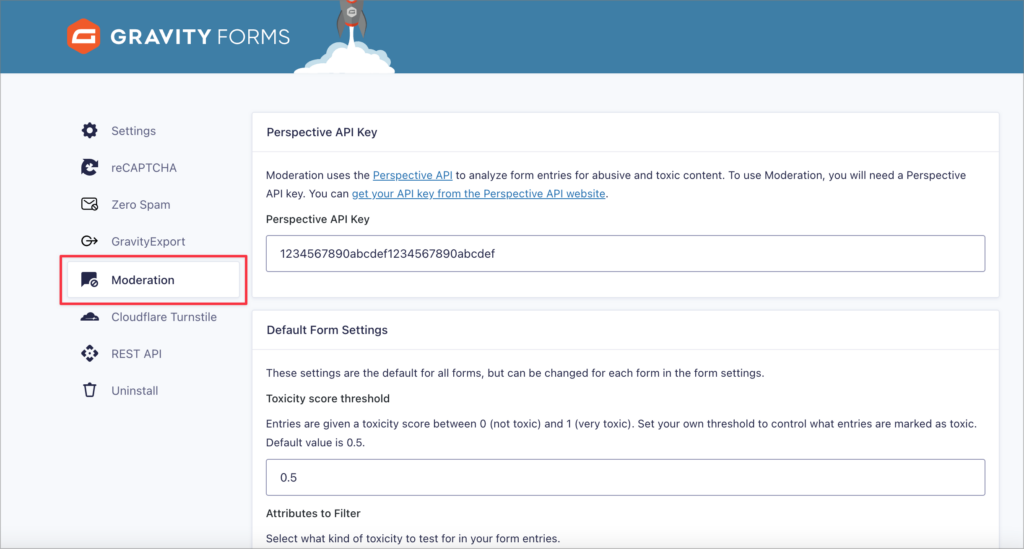
After installing the add-on, you’ll need to enable it in the Gravity Forms settings. To do this, you’ll need to get a Perspective API key (you can generate one from the Perspective API website).
The final step is to configure Moderation on each of your forms. The Moderation feed settings allow you to disable the add-on on a per-form basis. If you leave it enabled, you can select what level of toxicity to test for in your form entries.
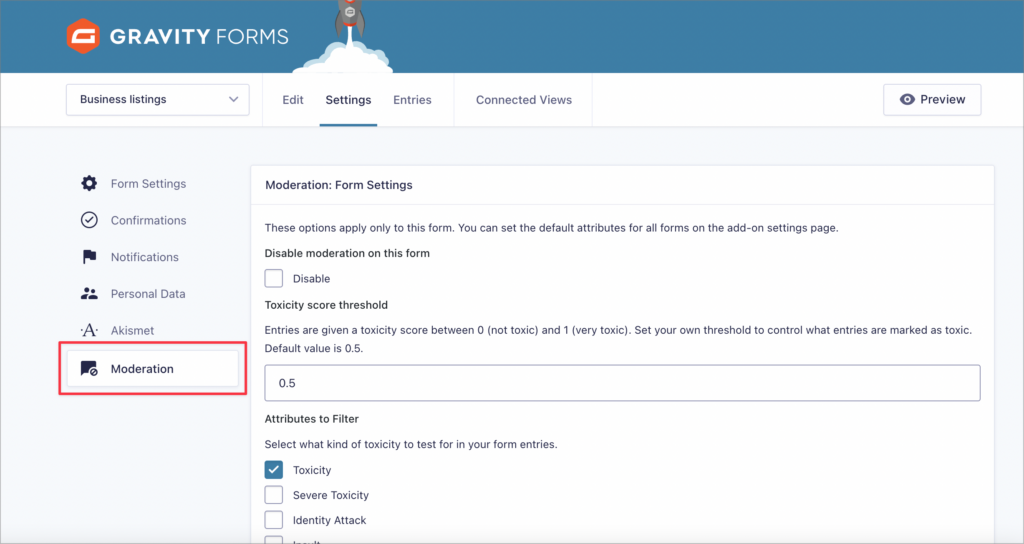
Any entries that are flagged as toxic by Perspective’s machine learning algorithms will be held up. While not a purely anti-spam measure, the Moderation add-on does give you a way to deal with toxic content if that’s the problem you’re encountering.
Stop spam entries in Gravity Forms today!
Let’s face it, contact form spam is one of the most annoying things to deal with as a website owner. All websites are open to form spam, including WordPress websites running Gravity Forms.
In this post, we showed you 8 ways to eliminate Gravity Forms spam! Our favorite way to reduce form spam is by using the Gravity Forms Zero Spam plugin. This plugin runs in the background, without impacting the user experience; it’s simple, elegant, and free to use.
If you enjoyed this anti-spam guide, subscribe to our newsletter below so we can notify you when we publish new content!

Helpful tips right in your inbox.
Subscribe to our weekly newsletter for tips, special offers, and more!
Helpful tips right in your inbox.
Subscribe to our weekly newsletter for tips, special offers, and more!
