Published
•
Updated
How to set up an entry approval workflow in Gravity Forms (2 simple methods)
If you use Gravity Forms to collect data on your WordPress site, having an approval workflow can help you manage and moderate entries before they’re published or processed. Whether you’re handling job applications, event registrations, or user-generated content, an approval system helps ensure control...
If you use Gravity Forms to collect data on your WordPress site, having an approval workflow can help you manage and moderate entries before they’re published or processed. Whether you’re handling job applications, event registrations, or user-generated content, an approval system helps ensure control and quality.
In this guide, you’ll learn how to set up Gravity Forms approval workflows using two powerful tools:
- GravityView – Great for front-end entry moderation and customizable workflow interfaces.
- Gravity Flow – Ideal for multi-step workflow automation.
Wanna try it?
Spin up a demo
See what you can build with GravityView — explore the live demo.

Common use cases for entry approval workflows
Here are some common use cases for form-based approval workflows:
- Content submissions: If you run a website or blog that accepts user-generated content, you can use form entry approval to ensure that all submitted content meets your quality standards before being published.
- Job applications: When you receive job applications through Gravity Forms, implementing an approval workflow allows you to review and vet applicants before moving them through the hiring process.
- Event registrations: Do you organize events or conferences and collect registrations through Gravity Forms? An approval workflow can help you verify attendee information and confirm their participation.
- Membership applications: For organizations or websites that have a membership system, using form entry approval ensures that all membership applications are reviewed and approved before granting access to exclusive content or benefits.
- Support requests: If you use Gravity Forms for customer support ticketing, an approval workflow can be used to assign and route support requests to the appropriate team members for efficient resolution.
- Survey responses: When conducting surveys or market research through Gravity Forms, an approval workflow allows you to validate and review responses for accuracy and relevance.
- User account creation: If you have a user registration system, form entry approval can be used to review and approve new user registrations before granting access to the platform or website.
Now, let’s look at how to implement a form entry approval system using two powerful solutions—GravityView and Gravity Flow.
Option 1: Front-end entry approval with GravityView
GravityView lets you display Gravity Forms entries on the front end of your WordPress site using pre-built views. A standout feature is its built-in approval system, which lets admins approve or reject entries before displaying them to users.
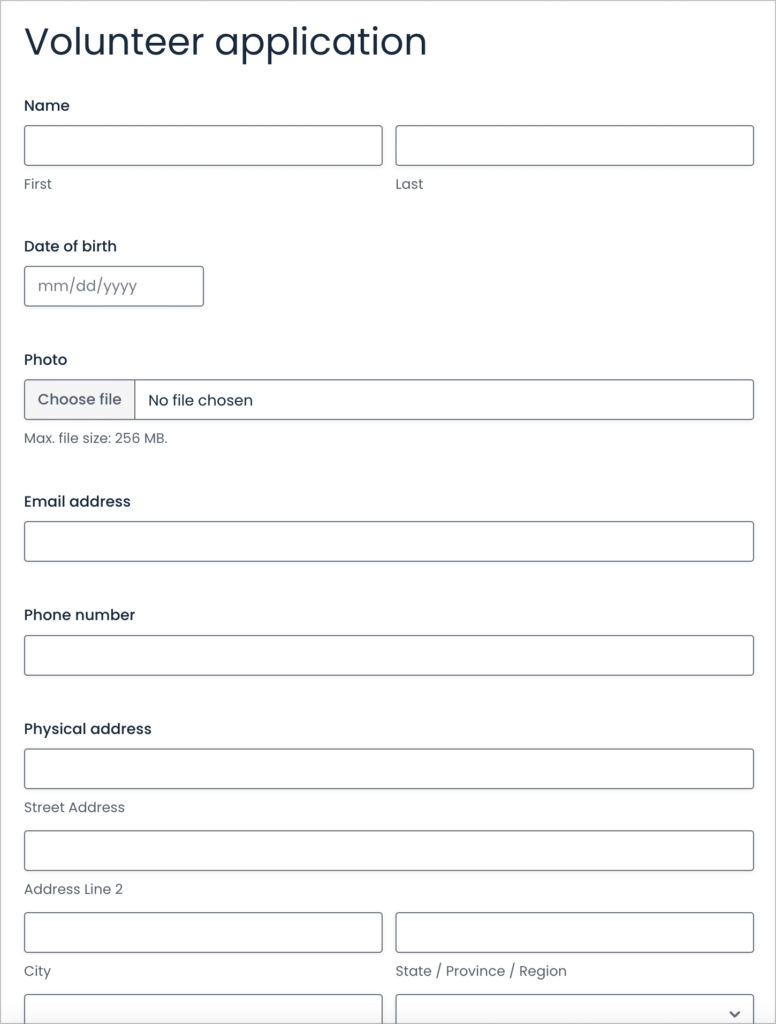
Step 1: Build your form
Start with a form that collects the data you want. In this example, let’s say it’s a volunteer registration form.
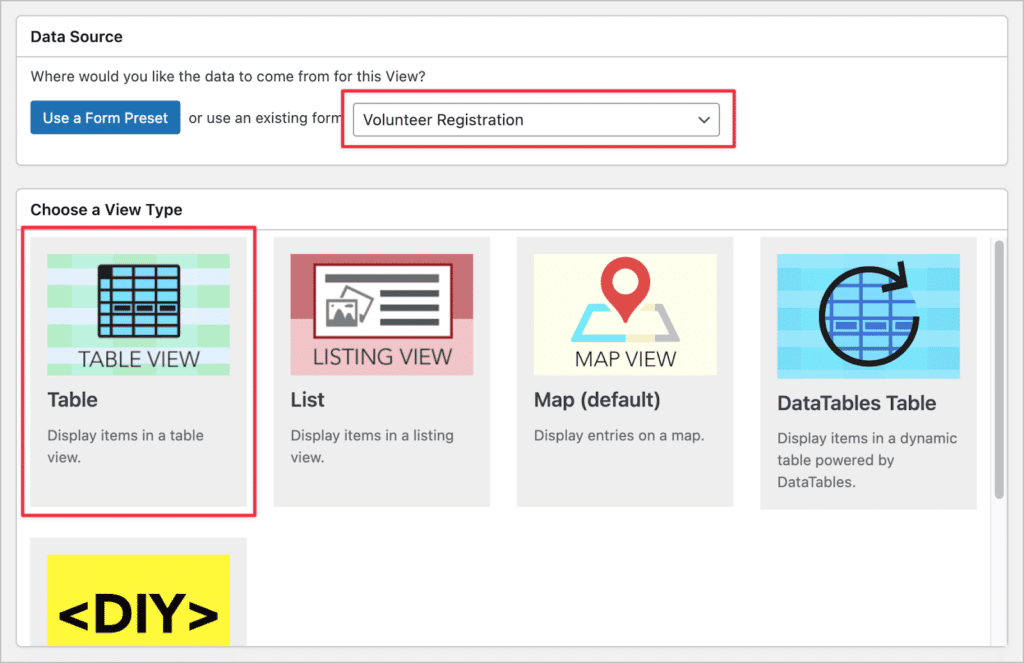
Step 2: Create a View
Next, we’ll create a new View and use our new volunteer registration form as the data source. We can also select a View Type (e.g., Table) to control how our data is displayed.
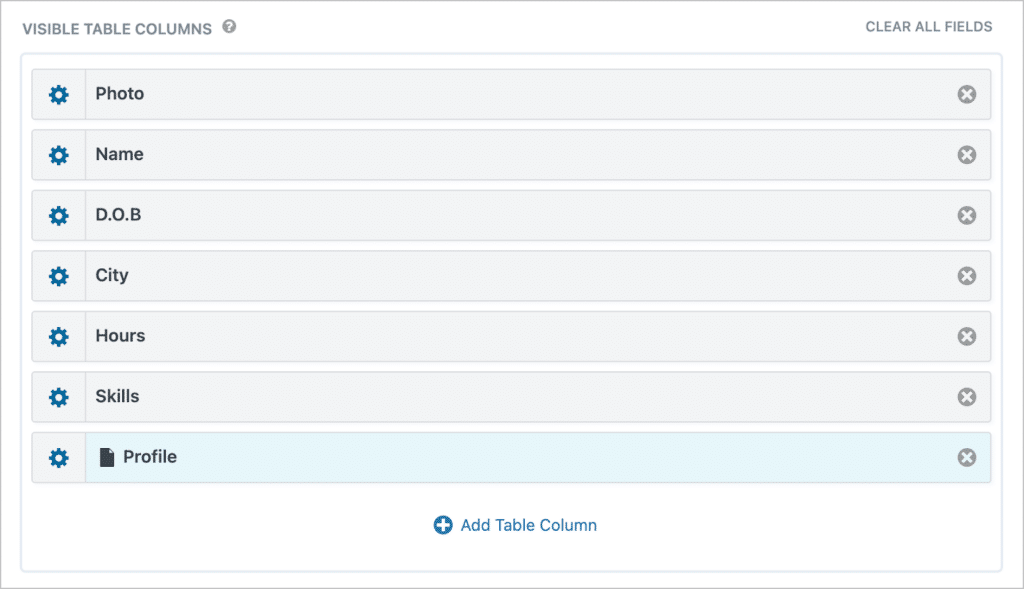
Finally, we’ll use the drag-and-drop interface to set up how entries will appear.
Here’s what our volunteer database looks like on the front end:
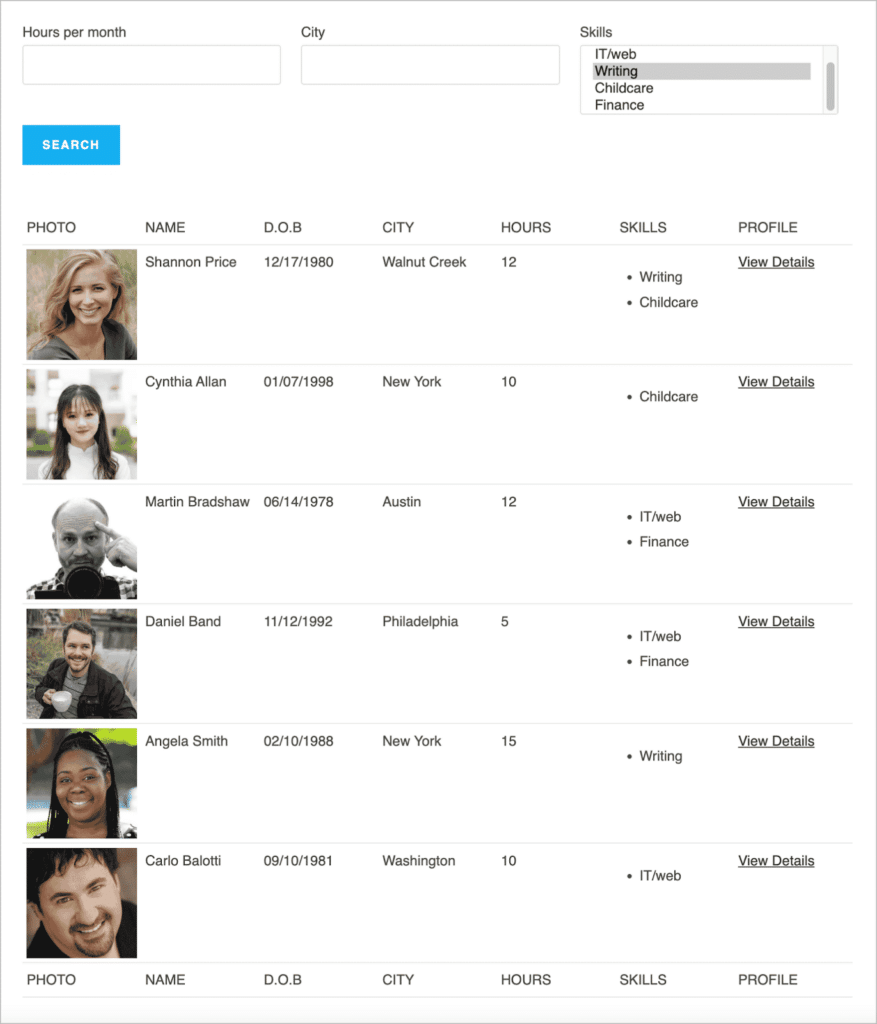
Now we need to add the approval step, ensuring that new volunteers are approved before they are added to the system.
Step 3: Enable entry approval
Entry approval is an optional feature in GravityView that you can enable or disable as you see fit. From inside the View editor, scroll down to the View Settings and check the box labeled “Show only approved entries”.
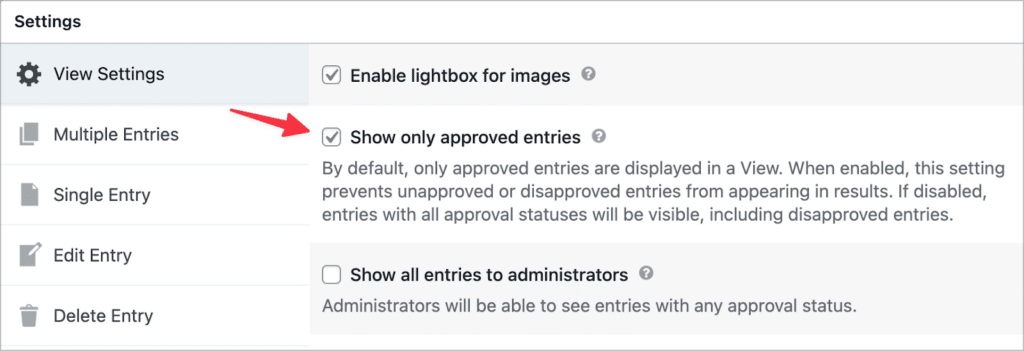
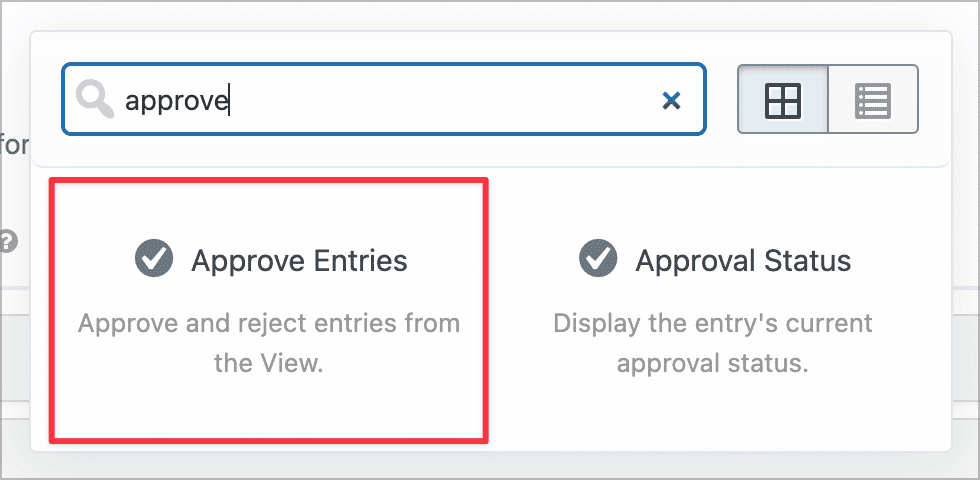
If you want to approve/reject new submissions from the frontend, you should also check the box labeled “Show all entries to administrators”. Next, scroll up to the View editor, click on the “Add Field” button and select the “Approve Entries” field to add it to your View.
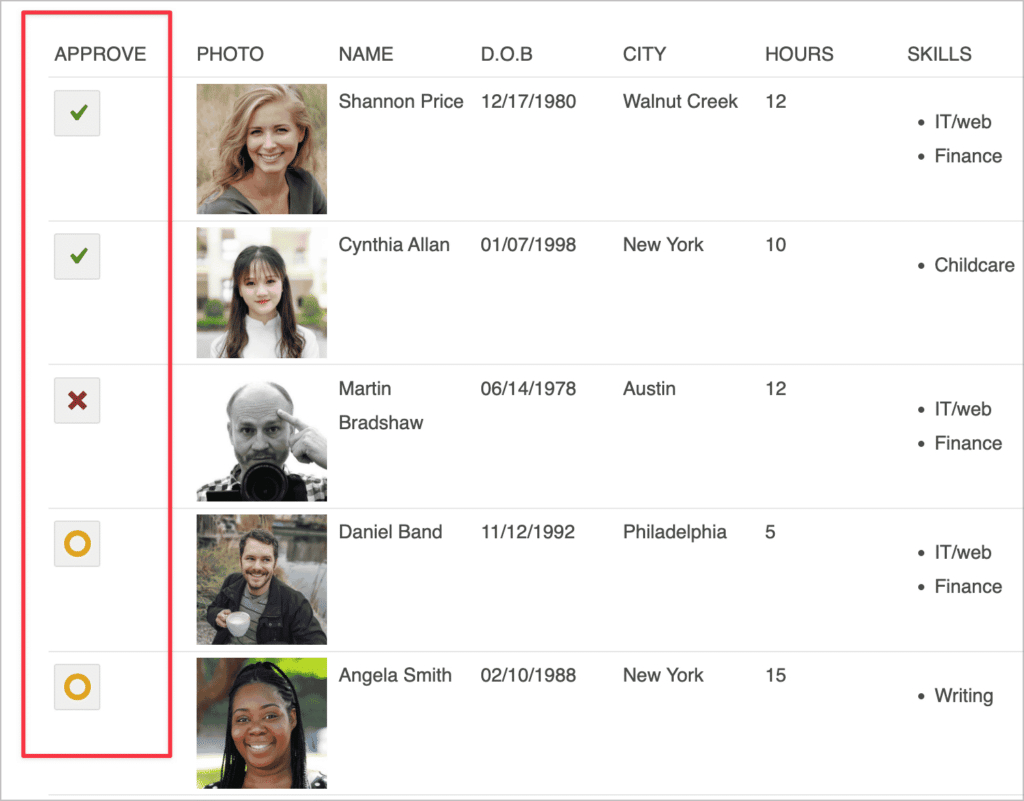
As you can see, this adds a new column to the View where Admins have the ability to either approve (green check mark) or reject (red cross) new submissions!
Using GravityView’s approval system, you can also approve/reject entries from the admin interface, or automate the process using form fields! Learn more about entry approval here.
Step 4: Trigger email notifications when approval status changes
Finally, we have the option to trigger email notifications when a new entry has been approved or rejected. This is helpful for notifying users that a change has been made to the status of their submission.
Pro tipInterested in learning more? Read our full tutorial on building a volunteer management system using Gravity Forms and GravityView.
Option 2: Multi-step approval workflows with Gravity Flow
If you want to implement a multi-step approval workflow for new entries in Gravity Forms, your best option is to use Gravity Flow.
Gravity Flow is a powerhouse workflow automation add-on for Gravity Forms. Ideal for businesses needing more control over multi-stage approval processes, Gravity Flow allows you to build custom workflows without writing code.
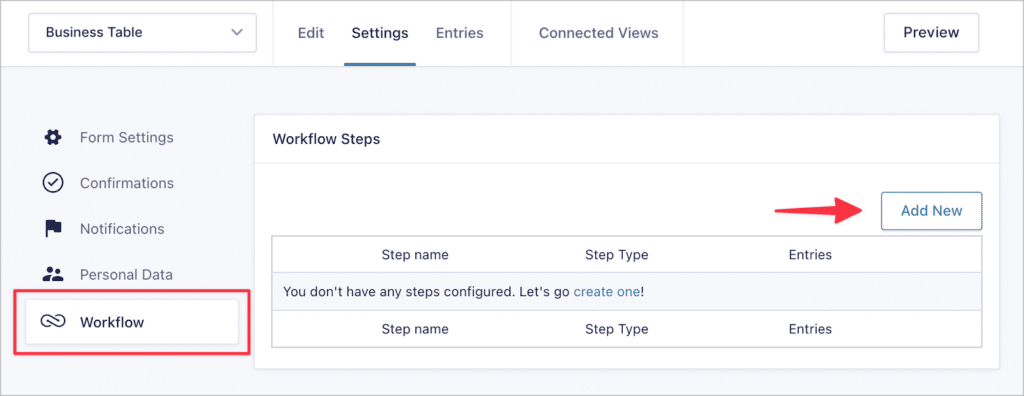
Step 1: Add a new workflow feed to your form
To add a new workflow feed, go to the form settings, click on the “Workflow” tab on the left and then click “Add New”.
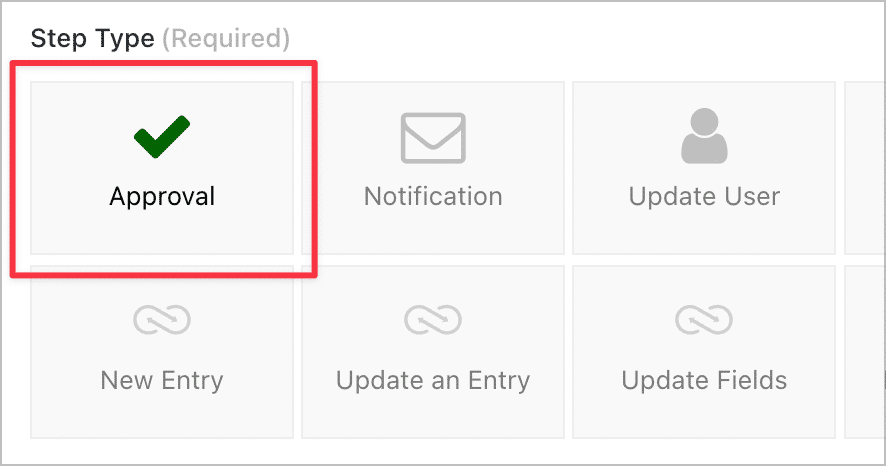
Step 3: Add an approval step
You can now select a workflow step. To create an approval process, select the “Approval” step type.
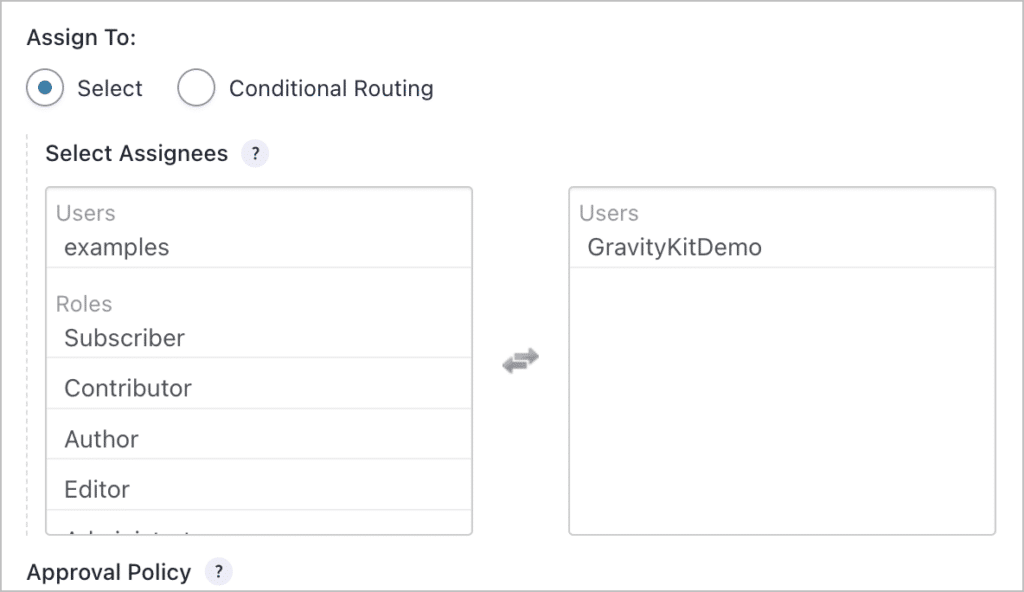
Now you need to choose a user to assign the step to. This should be the users (e.g., HR manager, support agent, content editor) responsible for reviewing new form submissions. These submissions could be applications to join a directory, support tickets, or any kind of data you collect through your forms.
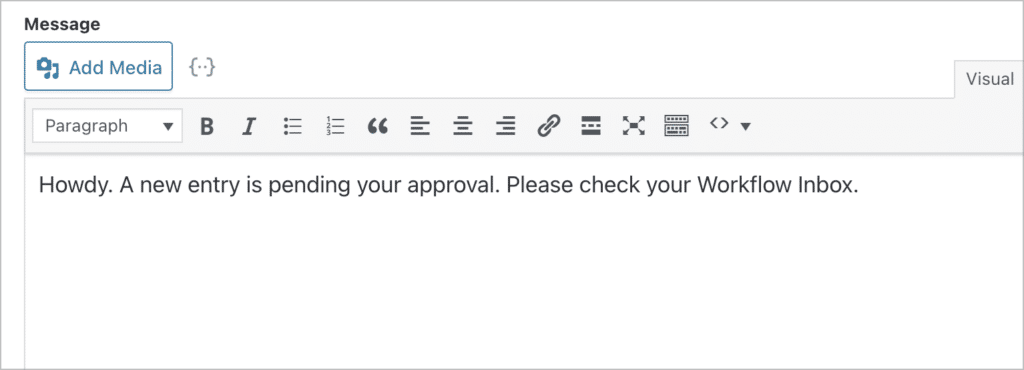
Step 4: Configure the assignee email notification
To ensure the user responsible for approving new entries sees the new entry come in for approval, you can enable the assignee email and add a short message reminding them to check their workflow inbox.
Step 5 (optional): Add more notifications or steps
For more complex workflows, you can set up additional workflow steps like updates, conditional routing, or feedback loops. You can also customize:
- Notification emails to users
- Automatic actions on approval
To learn more about creating multi-step approval workflows using Gravity Flow, you can read our Gravity Flow tutorials here:
- How to build a content publishing pipeline using GravityView and Gravity Flow
- Using Gravity Flow to add a feedback and review loop for new directory submissions
- How to add “claim entry” functionality to your Gravity Forms directory using Gravity Flow
That’s it!
Final thoughts: Choose the right tool for your workflow needs
Gravity Forms offers a strong base for form building, but to implement approval workflows, you’ll need to add the right tools:
- Use GravityView if you need to moderate submissions from a customizable front-end interface, or display approved submissions on your site
- Use Gravity Flow if you require multi-step, automated workflows with conditional logic
To learn more about GravityView, check out our guide to building an application review system.

Helpful tips right in your inbox.
Subscribe to get the latest articles, information on releases and helpful Gravity Forms tips!
More articles

Launch Log: Distance sorting for radius searches, DataTables search improvements, and import reliability fixes
The latest GravityKit releases add distance sorting to map searches, bring built-in search to DataTables, and fix GravityCharts and GravityImport edge cases.

WordPress page builder market share 2026: Elementor leads at 32.67%
Elementor reaches 32.7% of WordPress sites. WordPress Block Editor 20.6%, wpBakery 8.5%, Divi 5.7%. Latest HTTP Archive crawl, share-of-WordPress basis throughout.

Launch Log: GravityView 3.0, plus upgrades to Block MCP and GravityKit MCP
GravityView 3.0 lands with the new Vantage theme, frontend bulk actions, and AI-assisted View creation. This launch log also covers updates to GravityKit MCP, Block MCP, and Dashboard Views.