Published
•
Updated
How To Add “Claim Entry” Functionality to Your Gravity Forms Directory Using Gravity Flow
Let users claim ownership of existing business listings in a GravityView directory. This tutorial uses Gravity Flow to create an approval workflow for entry ownership.
So you’re operating a directory built using GravityView, and now you need a way for users to claim ownership of entries?
For this type of functionality, Gravity Flow offers the perfect solution. Using Gravity Flow, we’ll create an approval workflow, allowing new users to take ownership of existing business listings.
This is helpful if you’re running a business directory and you want users to have control over their own profiles, including the ability to update information from the front end.
Keep reading to find out how GravityView and Gravity Flow work together to help you build powerful web apps with advanced workflows.
Is there a “GravityView Claim Entry” add-on?
No. There is no standalone “Claim Entry” plugin or add-on for GravityView, and “Claim Entry” isn’t a toggle you enable on a View. The functionality is a custom workflow you build by combining GravityView (to display the directory and render the claim link conditionally) with Gravity Flow (to run the approval, account creation, and ownership transfer steps).
Gravity Flow is the approach we recommend because the process needs multiple moving parts: admin approval, optional user registration, reassigning ownership of the existing entry, and notifications. That’s exactly what Gravity Flow is built for. You could replicate parts of this with custom code, but the end-to-end flow below is the most reliable path without writing a line of PHP.
Sneak Peek
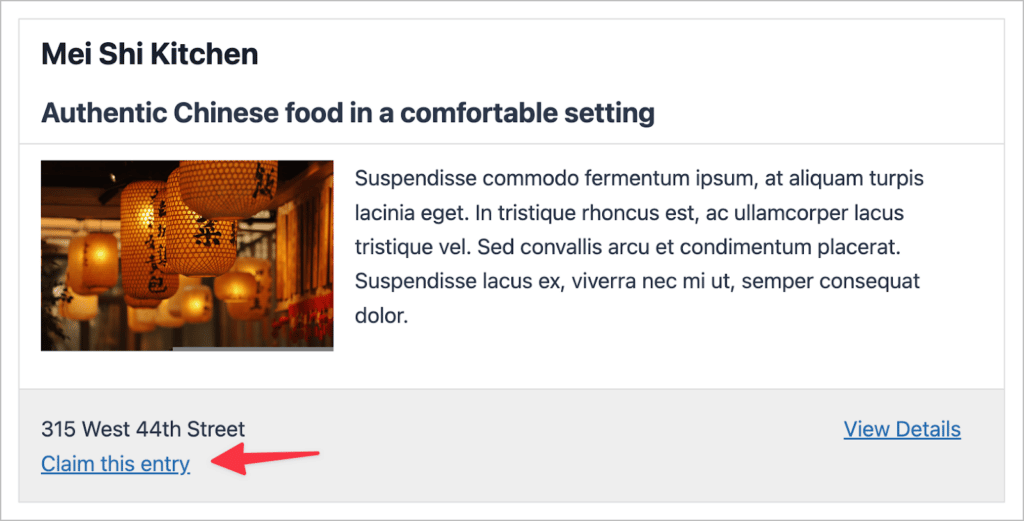
Here’s how the claim entry functionality will work. We’ll add a link on each directory listing allowing users to claim ownership of it (the link will only appear if the entry has not already been claimed).
When the user clicks “Claim this entry”, they will be taken to a page with a form on it allowing them to submit a claim for the entry.
After submitting the form, a complex workflow will begin in order to approve the request and grant ownership of the entry to the user.
Wanna try it?
Spin up a demo
See what you can build with GravityView — explore the live demo.

Requirements and limitations at a glance
Before building the workflow, here’s what you need, what happens when, and what to watch for.
Required plugins
| Plugin | Role in the workflow |
|---|---|
| Gravity Forms | Hosts the directory listing form and the claim form |
| GravityView | Renders the directory and the conditional “claim entry” link |
| Gravity Flow | Runs the four-step approval workflow |
| Gravity Flow Form Connector | Required to update the original directory entry from the claim form’s workflow |
| Gravity Forms User Registration add-on | Optional — only needed if claimants don’t already have WordPress accounts |
Workflow at a glance
The claim process is four Gravity Flow steps configured on the claim form:
- Approval — an admin reviews the request and approves or rejects it.
- User registration — runs the User Registration feed to create a WordPress account if one doesn’t exist.
- Update an entry — reassigns the directory entry’s
Created Byto the claimant and flips the hidden “Has this entry been claimed?” field toYes. - Notification — emails the new owner to confirm the transfer.
Limitations to be aware of
- Only one claimant can own an entry at a time. Once the hidden “claimed” field flips to
Yes, the[gvlogic]shortcode hides the claim link from later visitors. - The approval step is manual by default. Gravity Flow supports routing and conditional logic if you want to auto-approve based on criteria, but that’s outside the scope of this tutorial.
- Ownership transfer updates the entry’s
Created Byfield. It does not retroactively rewrite historical notifications, prior approvals, or audit trail entries tied to the original creator. - If you rename or change the type of the “Has this entry been claimed?” field, update the
[gvlogic]condition in the Custom Content field to match — otherwise the claim link will stop appearing (or stop hiding) correctly.
Introducing Gravity Flow
In this tutorial, we’re going to use Gravity Flow, a premium add-on for Gravity Forms. Gravity Flow allows you to create complex business processes and automations using Gravity Forms as a starting point.
Gravity Flow supports a wide variety of action steps, allowing you to create powerful processes involving approvals, notifications, assignments and more.
First, You’ll Need a Directory
We’re not going to cover the creation of a business directory in this post. Instead, we’ll assume you already have a directory and you’re just looking to add “claim entry” functionality to it.
If you need help setting up a directory from scratch, read our tutorial on how to build a business directory with Gravity Forms.

After building your directory, edit your directory listing form and add a new Radio Buttons field with the label “Has this entry been claimed?” and two options – “Yes” or “No”. Make sure this field is hidden and set the default value to “No”.
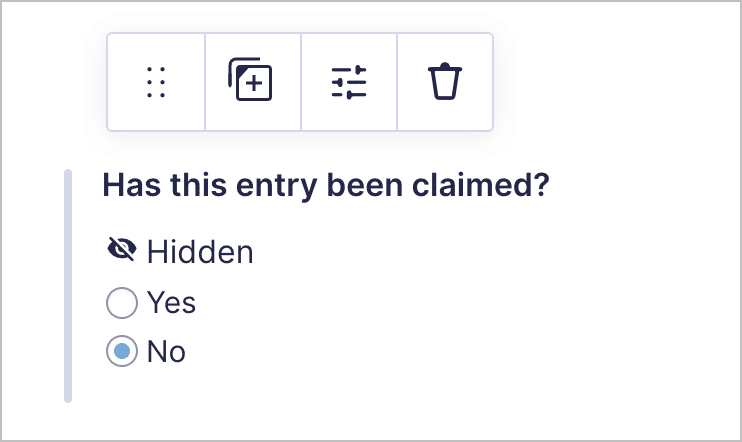
This will help us determine which entries have already been claimed so we know when to display the “claim entry” link. Now we can move on to the next step – creating the “claim entry” form.
Creating the “Claim Entry” Form
This is the form that will allow users to claim ownership of a specific entry. To create a new form, hover over Forms and click New Form.
Add the following fields to your form:
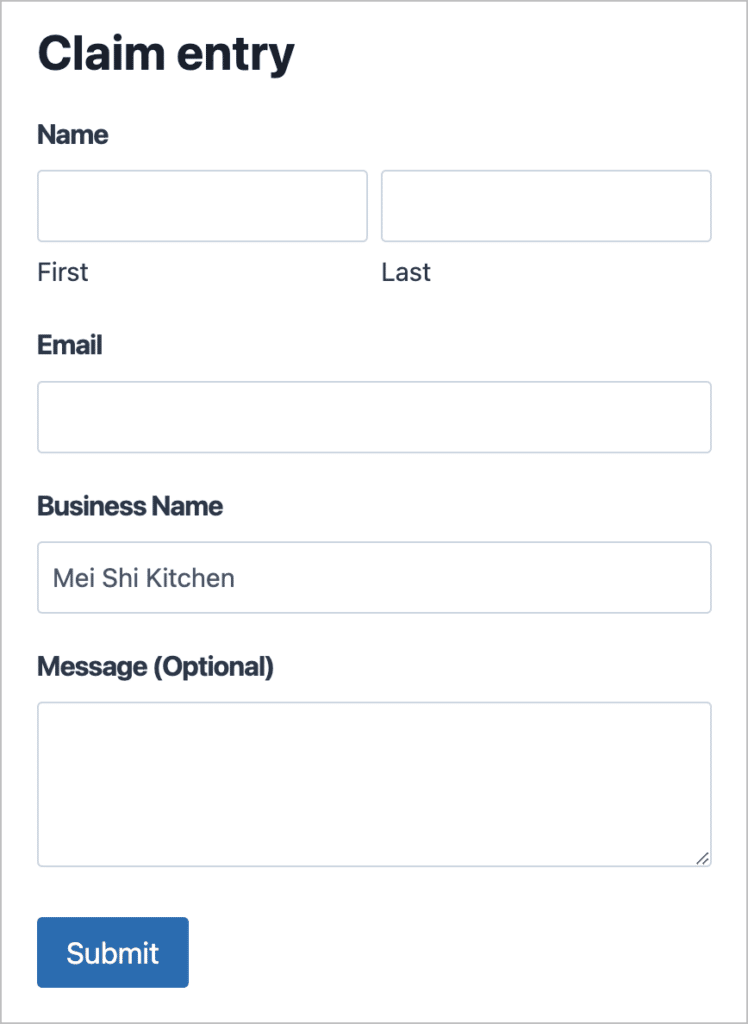
- Name (Name field)
- Email Address (Email field)
- Business Name (Single Line Text field)
- Business Entry ID (Number field)
- Message (Paragraph field)
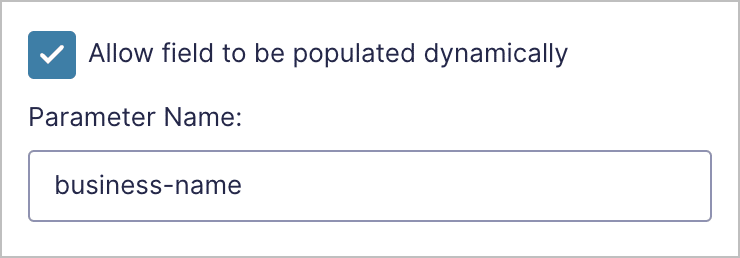
The Business Name and Business Entry ID fields will be dynamically populated. To set this up, click on the Business Name field, open the Advanced field settings, enable dynamic population and give it the parameter business-name.
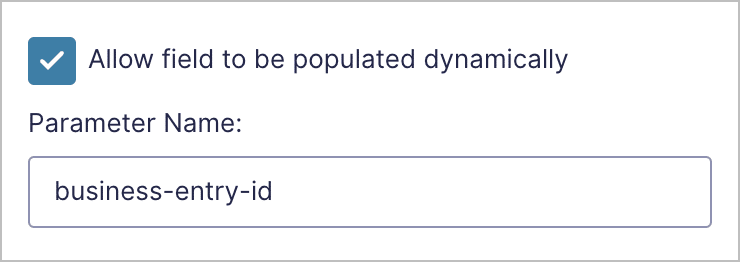
Now do the same thing for the Business Entry ID field but change the parameter to business-entry-id. You should also make this a hidden field so that it’s not visible to the user.
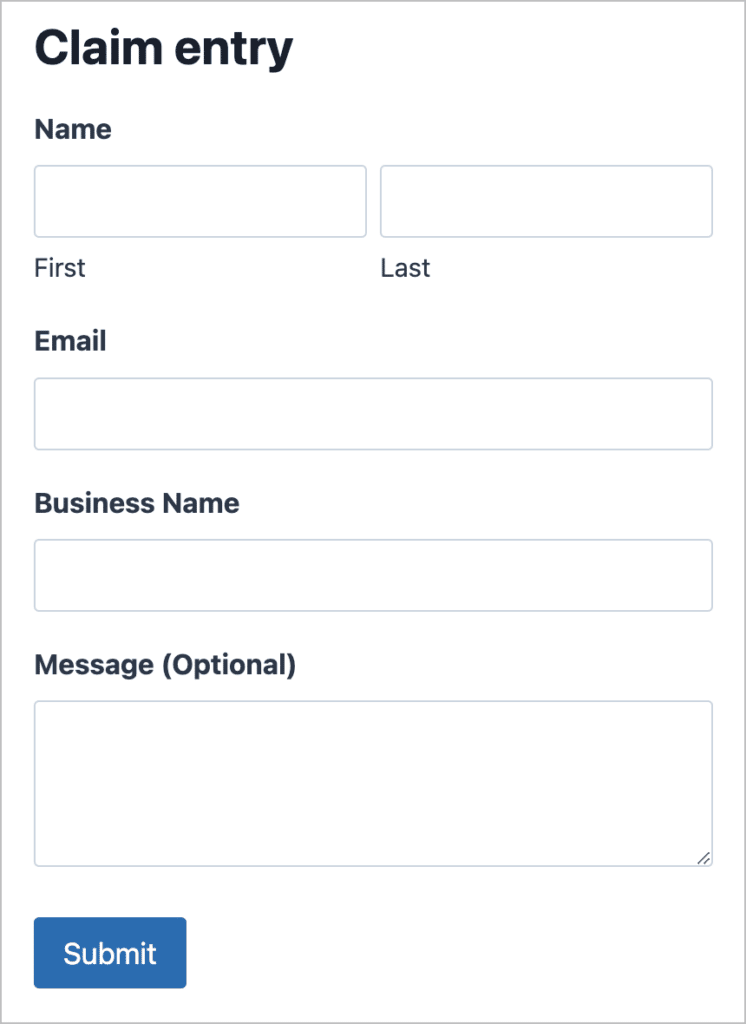
Here’s what our form looks like on the front end:
Creating the User Registration Feed
After creating the “claim entry” form and embedding it on a page on your website, it’s time to create the workflow that begins when a user submits the form. However, if your users don’t have accounts on your site, you’ll need to create a user registration feed first.
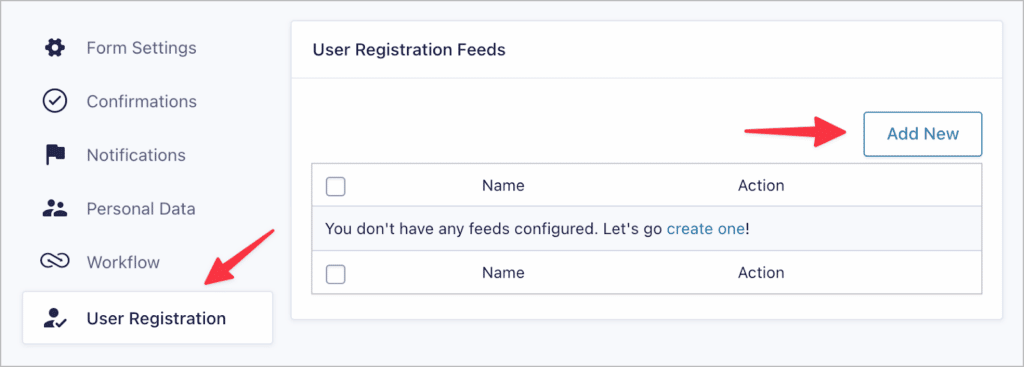
To do this, you’ll need to install the Gravity Forms User Registration add-on. Now go to the form settings for your “claim entry” form, click on “User Registration” on the left and select “Add New”.
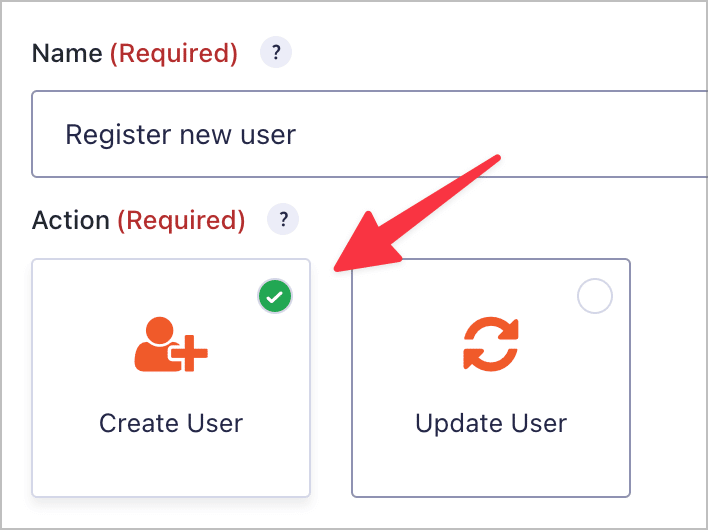
After giving your feed a name, select “Create User” as the action.
After configuring the remaining settings, save the user registration feed.
Creating the Workflow
Now that you’ve created the claim entry form and set up the user registration feed, it’s time to build out the approval workflow using Gravity Flow. The finished workflow will consist of four steps. Here they are:

Here’s a brief overview of each step:
- Approval – The claim entry request is sent to an administrator for approval.
- User Registration – If approved, an account is automatically created for the user.
- Update an entry – Here we’re updating the entry creator to the user who “claimed” the entry. We will also update a hidden form field to indicate the entry has already been claimed.
- Notification – An email to notify the new entry owner.
Step 1: Approval
The first step of the workflow in an Approval step. During this step, the entry claim request will be sent to a site administrator for assessment. If they think the request is just spam, they can deny it. If, however, they think the request is legitimate, they can approve it and trigger the next step in the workflow.
After giving the step a name, select “Approval” as the step type.

Now select the assignee as your website administrator.

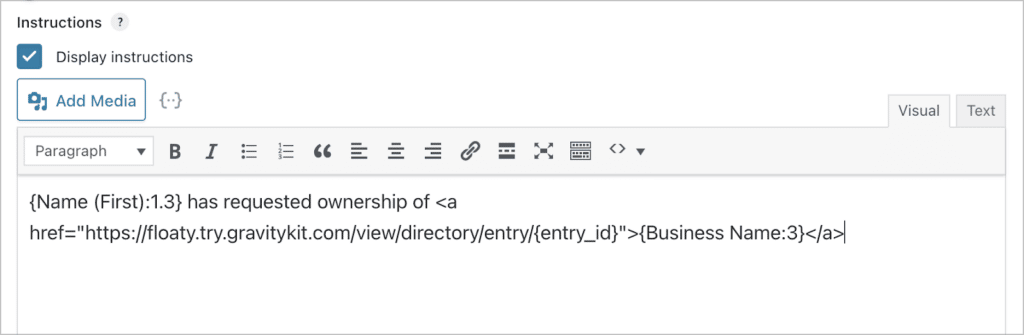
You may also want to add a link to the entry in question. You can do this in the “instructions” by using an anchor link and some Gravity Forms merge tags.
Finally, you may want to enable the Assignee Email so that the assignee is notified when they have a new request to approve.
Step 2: Create User Account
The next step of the workflow is to run the user registration feed so that the user has an account on the site. In order to become the owner of an entry, the user will need to be logged in so this is an important step.
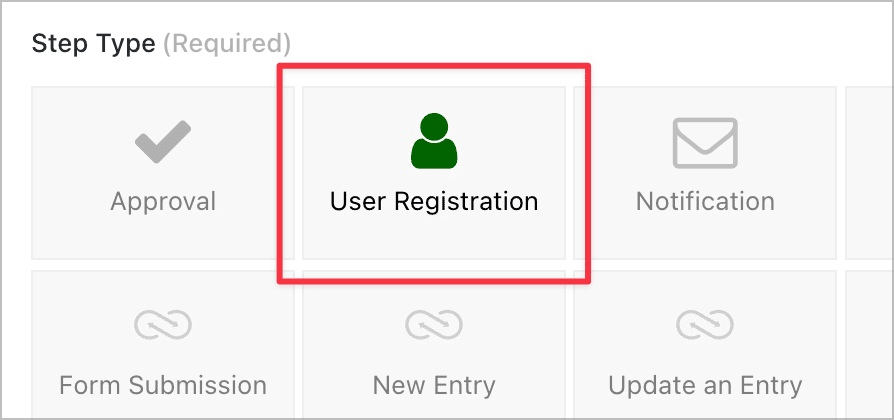
After creating the step, select “User Registration” as the step type.
Now choose the user registration feed you want to run.

That’s it!
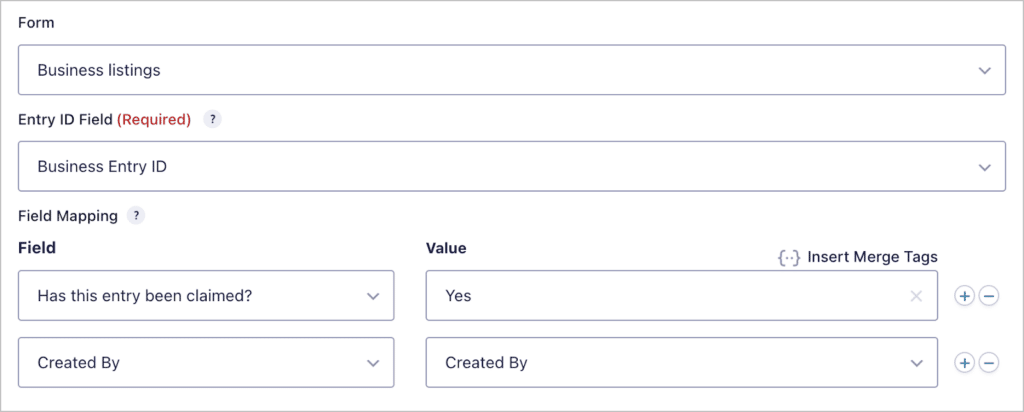
Step 3: Update Entry Owner
In this step of the workflow, we’re going to change the owner of the directory entry to the user that claimed the entry.
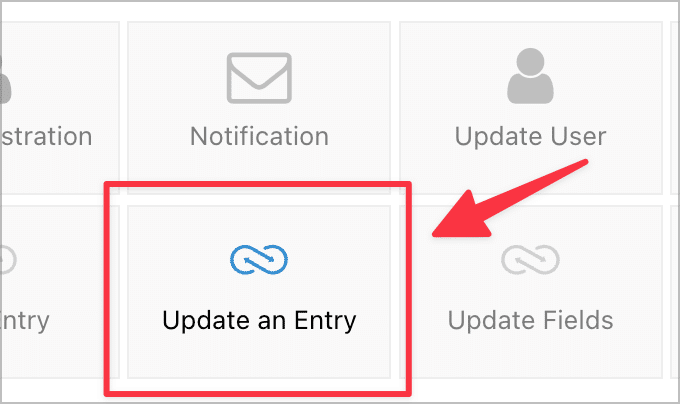
After giving the step a name, select “Update an Entry” as the step type.
Now you need to select the form with the entry you want to update (in this case, the “Business listings” form) and select the Entry ID field.
Finally, under “Field”, there are two fields we need to update. The first is the “Created By” field and the second is the “Has this entry been claimed?” field.
Now we can configure the final step of the workflow.
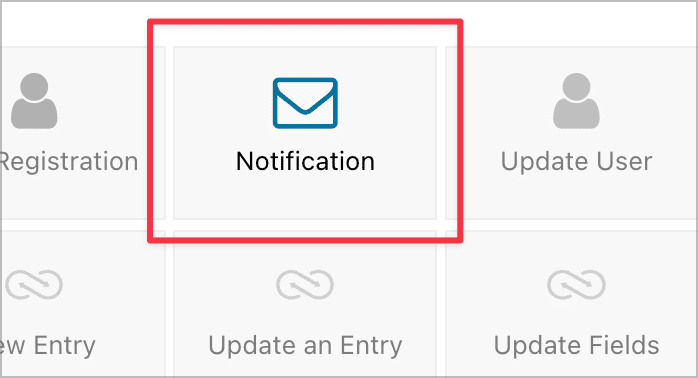
Step 4: Notify the New Owner
The final step is to send a notification email to the new entry owner, notifying them that the entry now belongs to them.
After naming the step, select “Notification” as the step type.
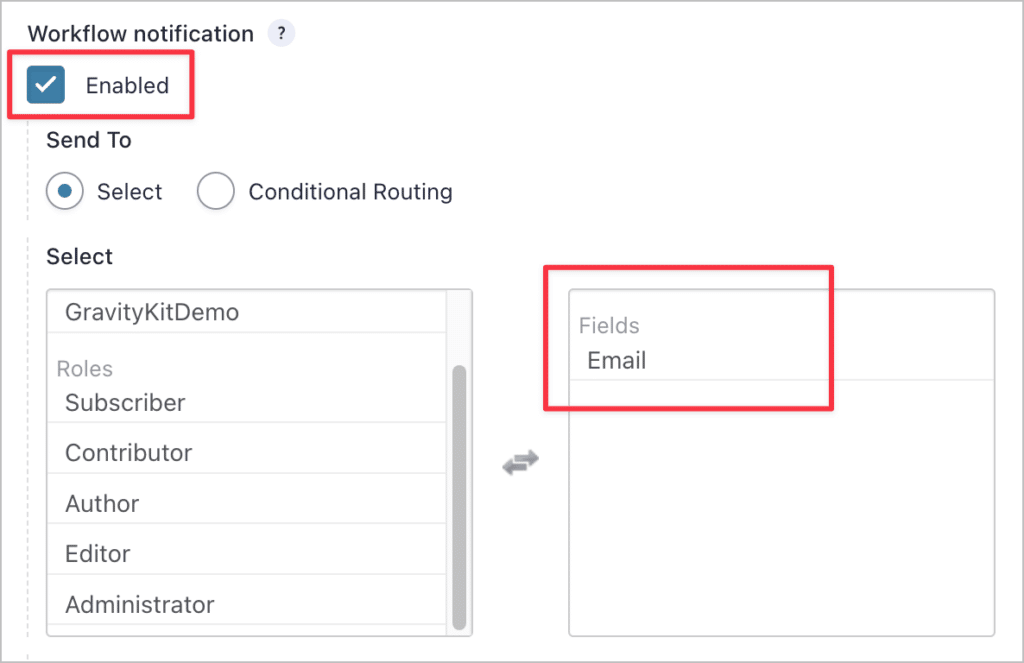
Now scroll down and enable the workflow notification. After that, select the Email Address field for sending the notification to.
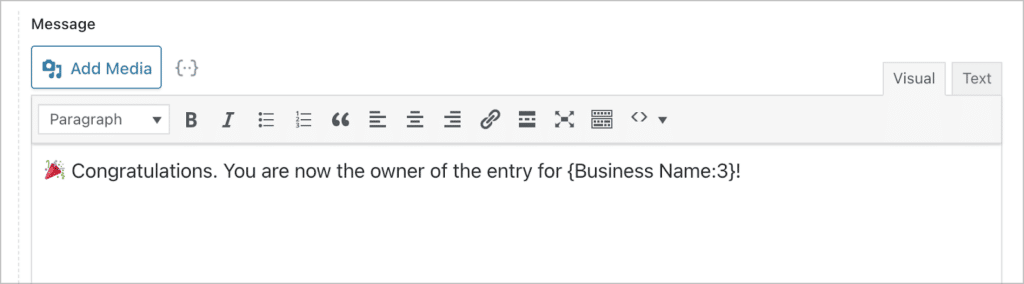
Finally, scroll down and update the notification email text.
That’s it!
Adding the Claim Entry Link
Now we need to add the “claim entry” link to our View. This will allow users to claim entries that belong to them.
The link should only be displayed if the “has this entry been claimed?” field is set to “No”. If the entry has already been claimed, the link should not appear. Luckily, this is easy to implement using the powerful [gvlogic] shortcode.
The link itself should also include the parameters for the fields that need to be dynamically populated.
To add the link to each entry in our View, we’ll add the following code to a Custom Content field.
![The [gvlogic] shortcode inside the custom content field](https://www.gravitykit.com/wp-content/uploads/2022/10/image-94-1024x405.png)
Here’s what the link looks like on the front end:
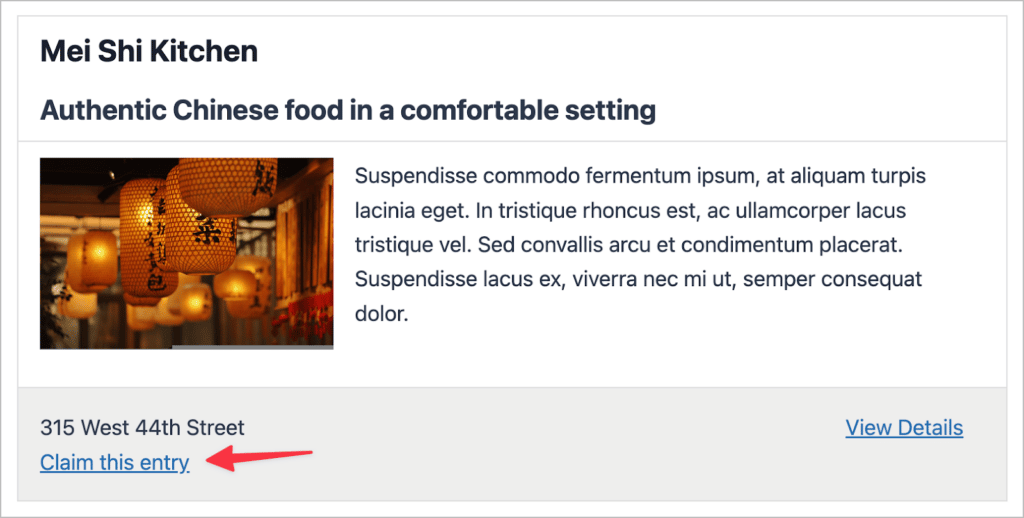
That’s it! Now a user can click on this link and they’ll be taken to the claim entry form where they can submit a request for ownership of the entry. When they submit the form, the workflow we created with Gravity Flow will begin.
After the user has been granted ownership of the entry, they’ll be able to update it as they see fit.
Add a “Claim Entry” Link to Your GravityView Directory
If you’re operating a directory built using GravityView, you may need a way for users to claim ownership of entries. For this type of functionality, Gravity Flow offers the perfect solution!
In this tutorial, we showed you how to add a “claim entry” link to your GravityView directory using the powerful Gravity Flow add-on For Gravity Forms. If you found this post helpful, check out more articles from our blog!

Helpful tips right in your inbox.
Subscribe to our weekly newsletter for tips, special offers, and more!
Helpful tips right in your inbox.
Subscribe to our weekly newsletter for tips, special offers, and more!

Helpful tips right in your inbox.
Subscribe to get the latest articles, information on releases and helpful Gravity Forms tips!
More articles

Launch Log: theme template editing in Block MCP, Shield silentCAPTCHA for Zero Spam, and GravityView fixes
Block MCP adds safe theme template editing, Gravity Forms Zero Spam gains Shield silentCAPTCHA support, and GravityView fixes lightbox and notice bugs.

GravityKit turns 12: a year in review, and 30% off Lifetime All Access
GravityKit turns 12. A look back at a year of GravityView 3.0, GravitySearch, and AI-assisted building, plus a birthday sale on the Lifetime All Access Pass.

Launch Log: Row headers for screen readers, smarter conditional logic, and multi-View fixes
GravityView 3.1 adds row headers for screen readers, plus smarter conditional logic in GravityCalendar and fixes for DataTables, Maps, and Dynamic Lookup.
