Published
•
Updated
How to build a WordPress job board (without code)
Build a niche WordPress job board using Gravity Forms and GravityView without writing any code. Connects job seekers with employers using front-end entry display and search filters.

Job boards play an important role in our daily lives by helping to connect job seekers with employers. If online job boards didn’t exist, it would be very difficult for businesses to find suitable talent. In this post, we’re going to show you how to build a WordPress job board using Gravity Forms and GravityView.
GravityView is a plugin that extends Gravity Forms by allowing you to display form entries on the front end of your website. By taking advantage of GravityView’s powerful functionality and flexibility, you can create a niche job board without writing any code.
If that interests you, keep reading to find out more!
Check out a live demo of the job board and get your own free trial site preloaded with all GravityKit add-ons!
Download the free job posting form template now!
Import the template into Gravity Forms and customize as necessary.
Sneak peek
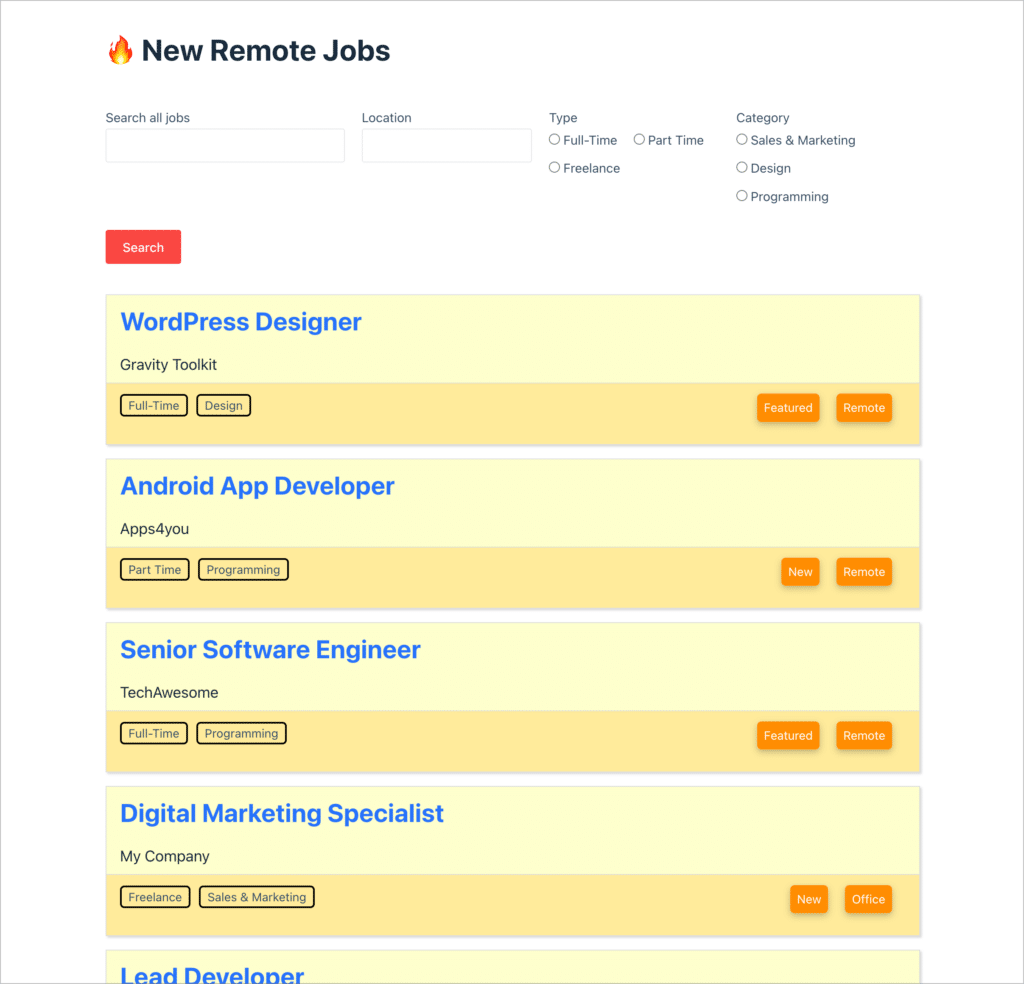
Here’s a preview of our finished job board:
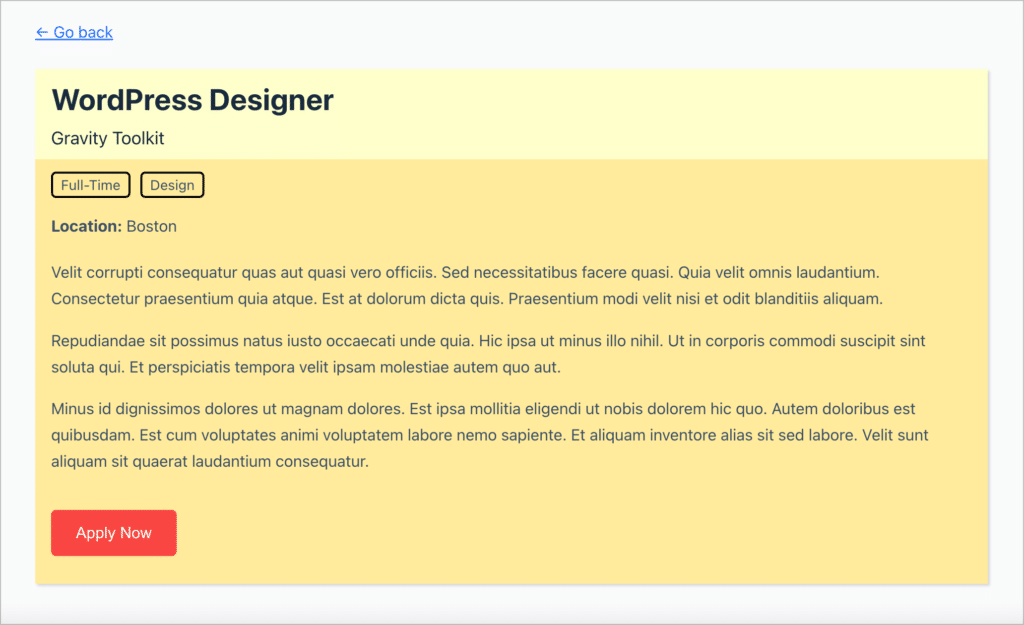
When clicking on a job to view more information, here’s what the user will see:
What you’ll need
Here are the plugins you’ll need to build a job board like the one in this tutorial:
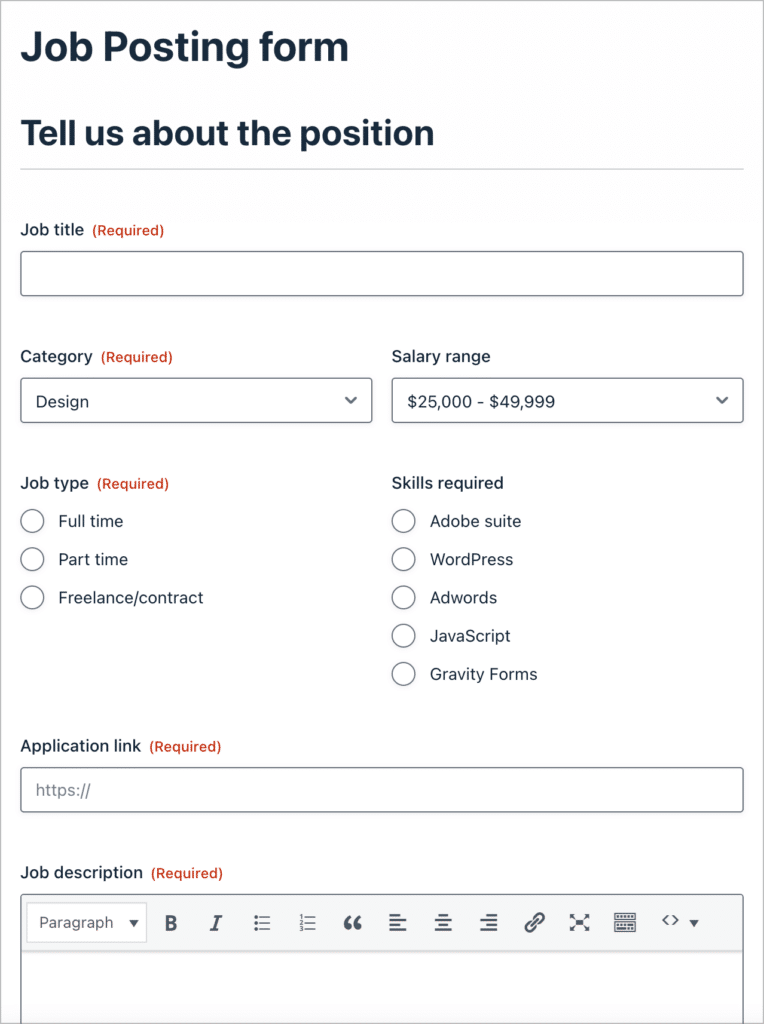
Creating the job listing form in Gravity Forms
Let’s start by creating a job posting form in Gravity Forms. First, log in to your WordPress admin panel, hover over “Forms”, and click “New Form”.
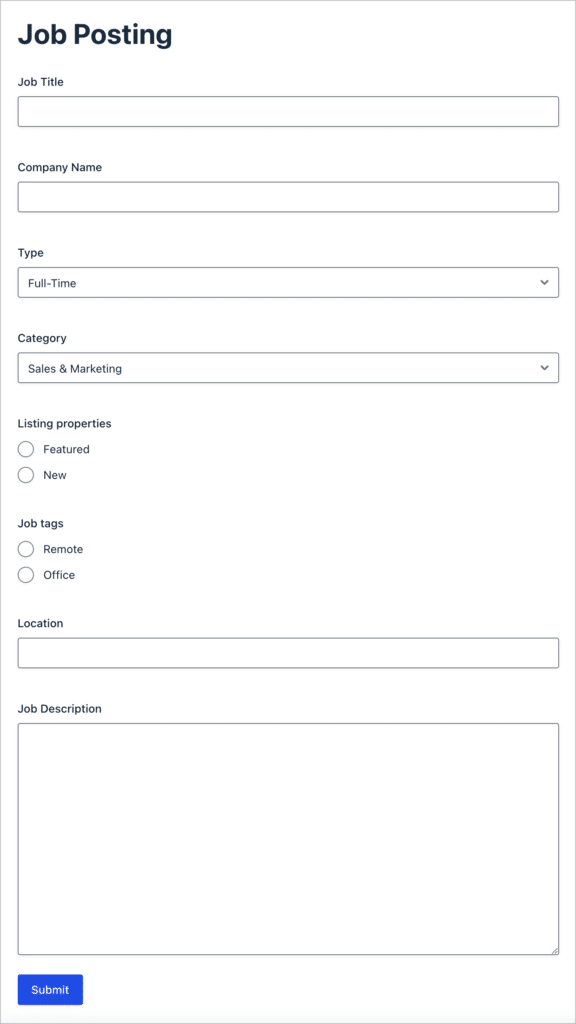
After giving our form a name, we can start adding fields to it using the drag and drop form builder. We’ll start by adding a “Single Line Text” field called “Job Title” and another one called “Company Name”.
Next, we’ll add two Drop Down fields – one called Type (with the options “full-time”, “part-time”, or “freelance”) and one for the job category. To keep things simple, we’ll add three categories – “Sales & Marketing”, “Design”, and “Programming”.
We’ll also add two Radio Buttons fields for job tags and properties. Finally, we’ll add another “Single Line Text” field called “Location” and then a “Paragraph” field called “Job Description”.
Here’s what our completed form looks like:
The next step is to embed our form on a post or page!
Adding your form to a post or page
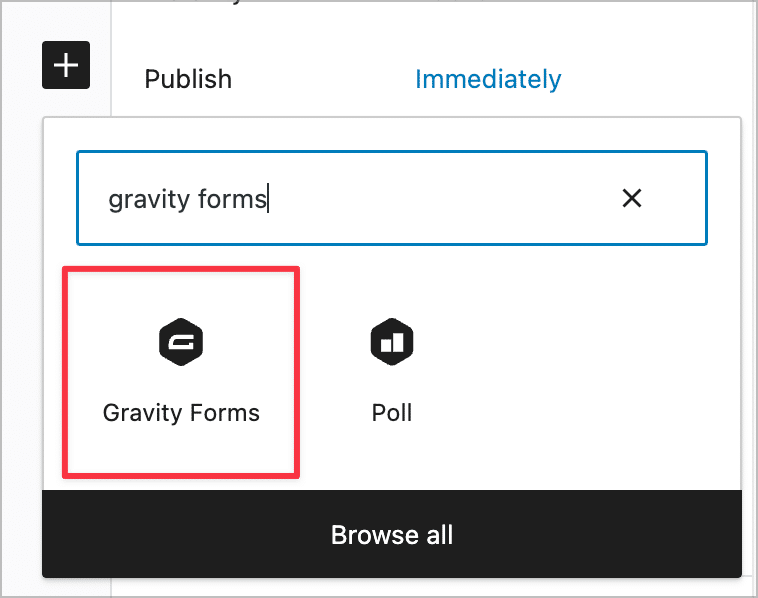
Okay, now that our form is ready, the next step is to embed it on a post or page. If you’re using the WordPress block editor (Gutenberg), you can do this by adding a Gravity Forms block to your page layout.
All you need to do is click on the ‘+’ icon to add a new block, search for “Gravity Forms” and add the Gravity Forms block to your page. Now, select your job posting form from the dropdown menu and you’re done!
Now it’s time for the fun part – using GravityView to display job listings on the front end!
Displaying jobs on the front end using GravityView
GravityView allows you to harness your Gravity Forms data to create powerful web apps and meaningful website content. GravityView also makes for one of the best WordPress job board plugins.
After installing and activating GravityView, you’ll be able to create your first View. A View allows us to display Gravity Forms data using a drag and drop interface.
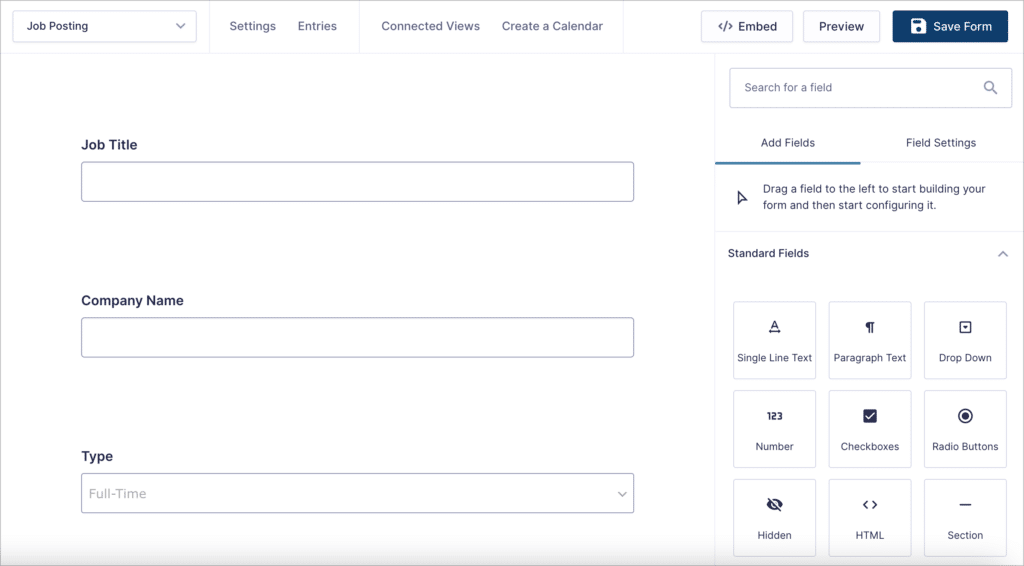
Creating a View
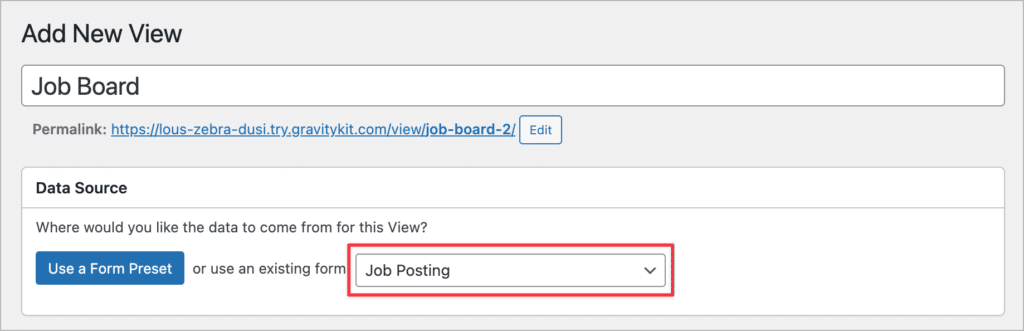
To create our job board View, we’ll hover over “GravityKit” and click “New View”. Next, we’ll give our View a name (something like “Job Board”) and select our job posting form as the View’s data source.
Now, under where it says “Choose a View Type”, we’ll select the “List” layout.
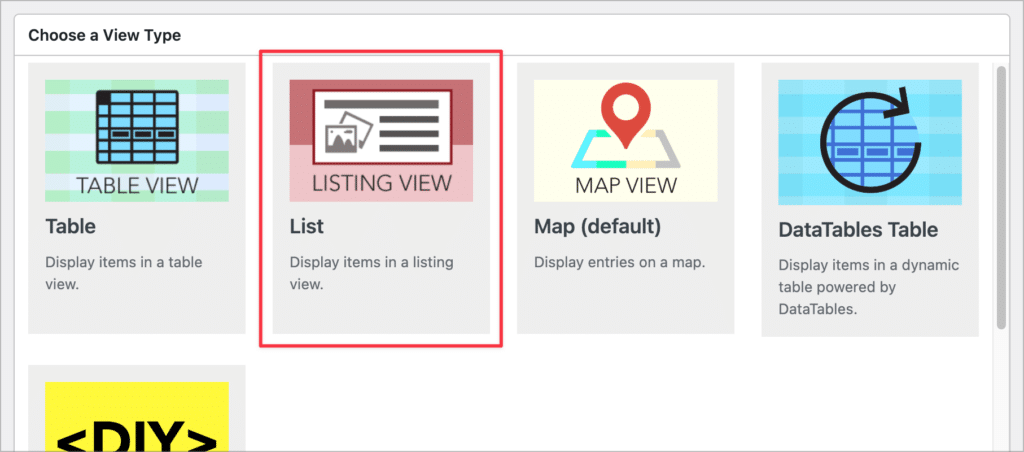
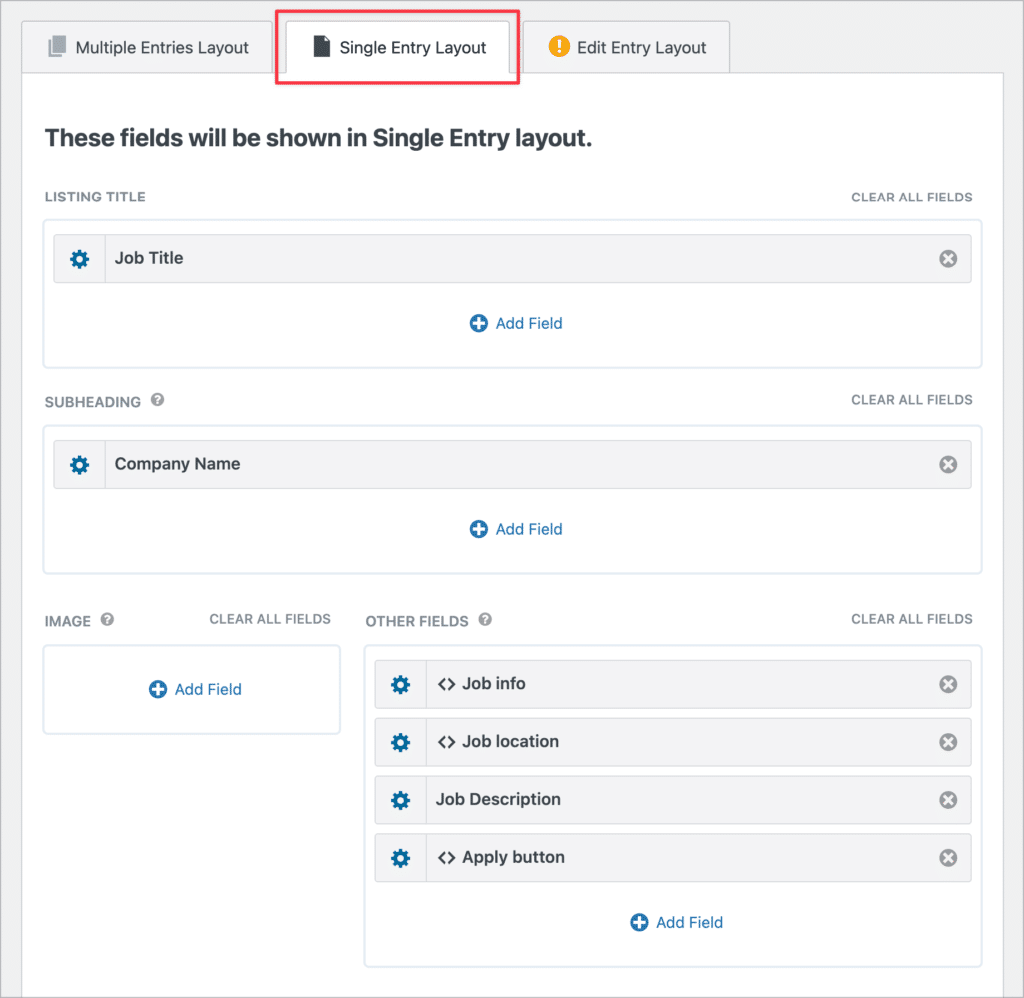
Okay, now we can start constructing our View layout to display job listings on the front end. There are three layouts that make up a View – the Multiple Entries layout, Single Entry layout, and Edit Entry layout.
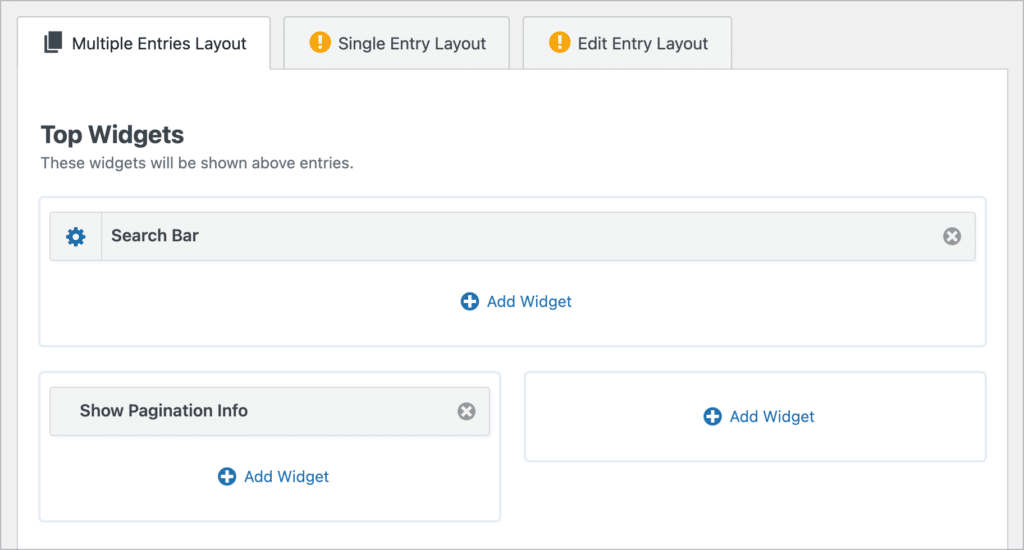
Configuring the Multiple Entries Layout
Let’s start by customizing the Multiple Entries layout – this is our main job board page, where all of our job listings will be displayed. At the top, there are spaces to add widgets. Widgets are tools that help users navigate through your View.
To help users search job listings, let’s add a Search Bar widget at the top and pagination info on the left. You can add new widgets to widget areas by clicking the “Add Widget” button.
To configure the search settings, we’ll click on the gear icon next to the widget label. Here we can add different search inputs, specify the search mode, and more.
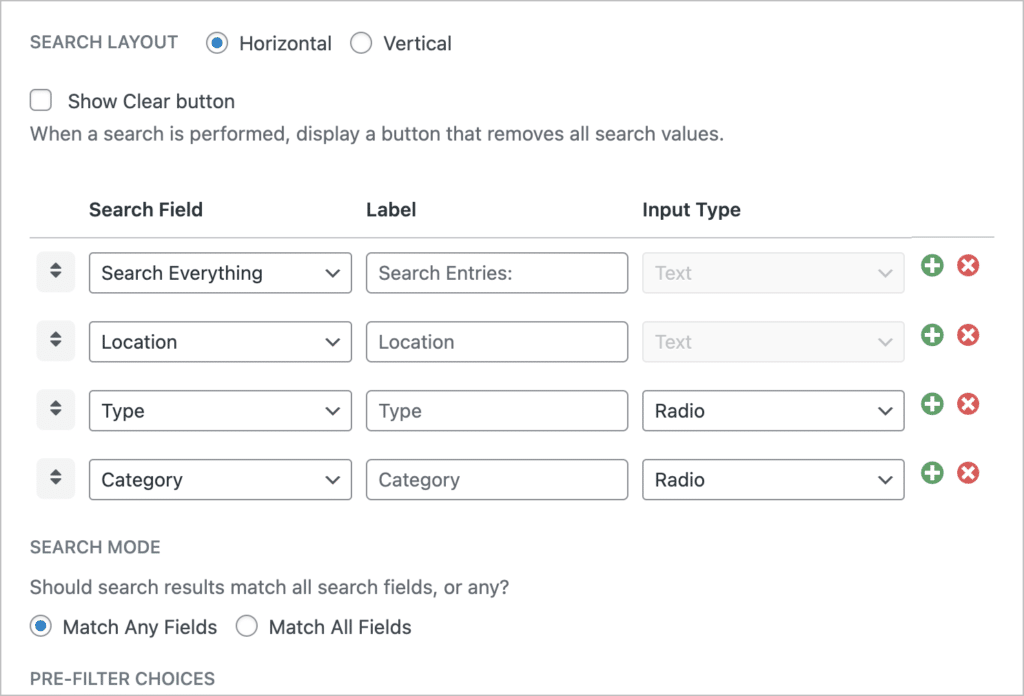
Let’s add search inputs for the location, job type, job category, and keywords. Now that we’re done configuring the search bar widget, we can start adding fields to our View.
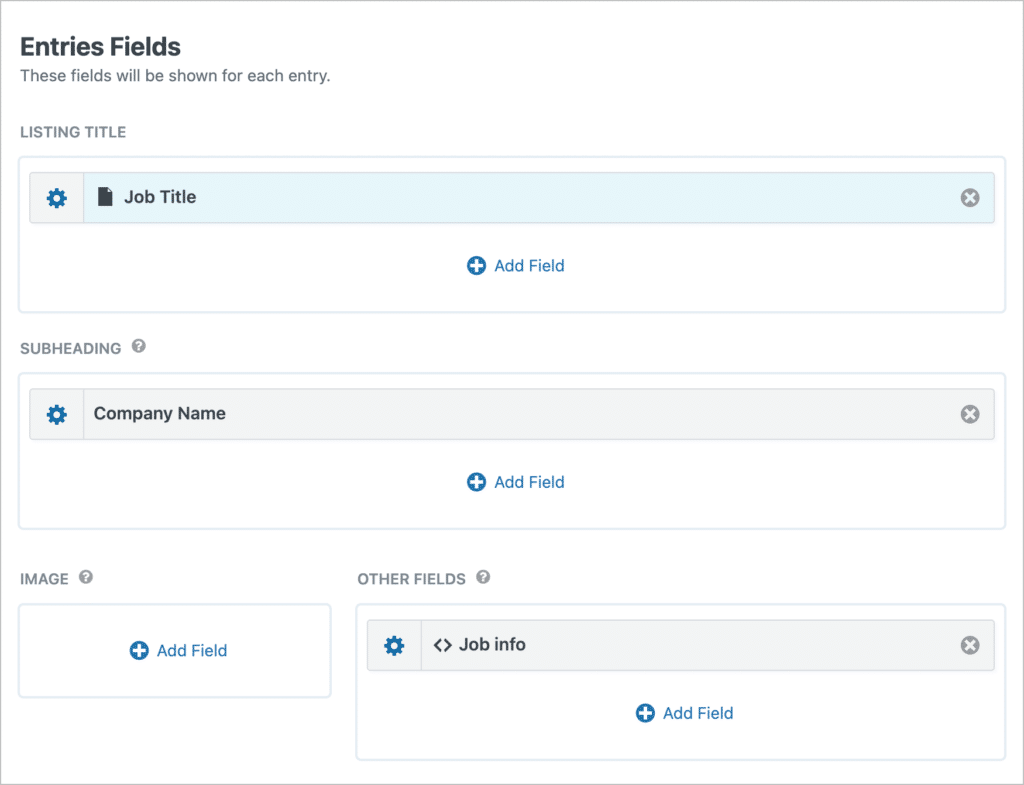
We’ll scroll down to the ‘Entries Fields’ section of the View editor and add the “Job title” and “Company name” fields to the “Title” and “Subheading” areas.
Next, we’ll add the remaining job information using a Custom Content field. This will allow us to use our own HTML structure and CSS styles! With GravityView, it’s absolutely possible to build great looking web apps without writing a single line of code. However, custom code is fully supported, and this allows you to construct more complex layouts with custom styles.
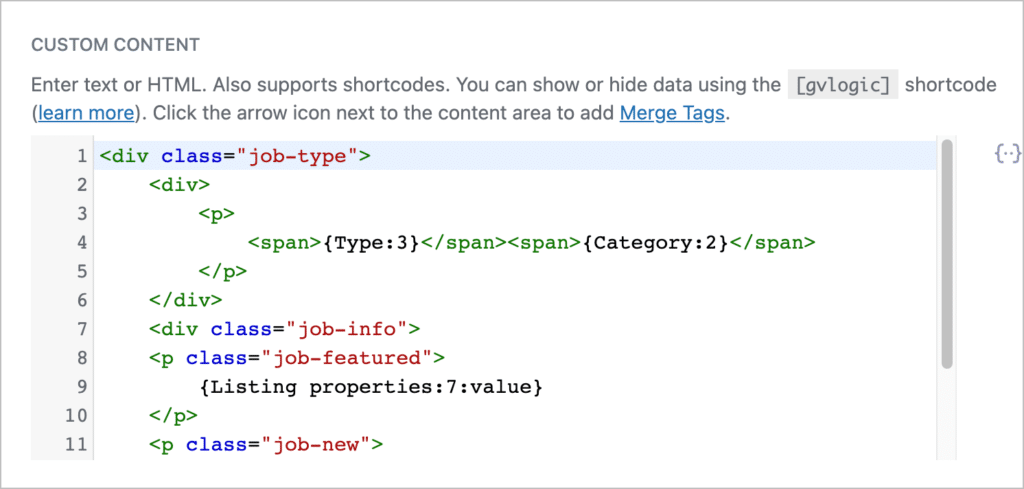
Here is the code (HTML and CSS) we used to achieve the look in this tutorial. You’re welcome to use and/or adapt this code for your own use-case, just remember to update the merge tags.
Pro tipCustom Content fields allow you to add plain text, HTML, merge tags, shortcodes, and other custom content to your View layouts.
Here’s what the Multiple Entries layout looks like on the backend:
Configuring the Single Entry Layout
Now let’s turn our attention to the Single Entry layout. This is where users go to find out more information about a particular job posting. Before we can configure the Single Entry layout, we need to add a link to the Single Entry from the Multiple Entries screen.
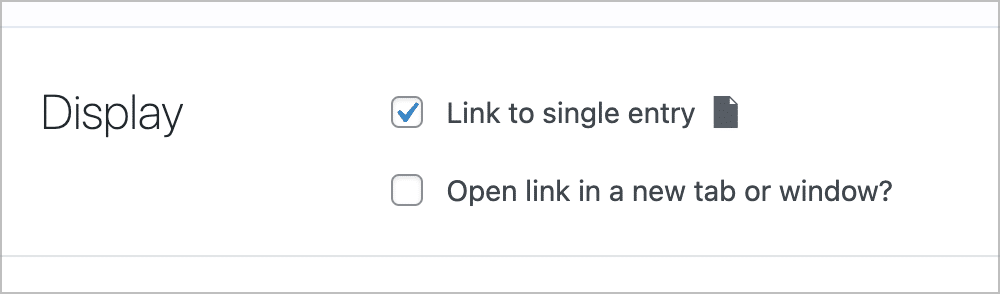
Let’s make the “Job Title” field link through to the Single Entry. To do this, click on the gear icon next to the field name and check the box that says “Link to single entry”.
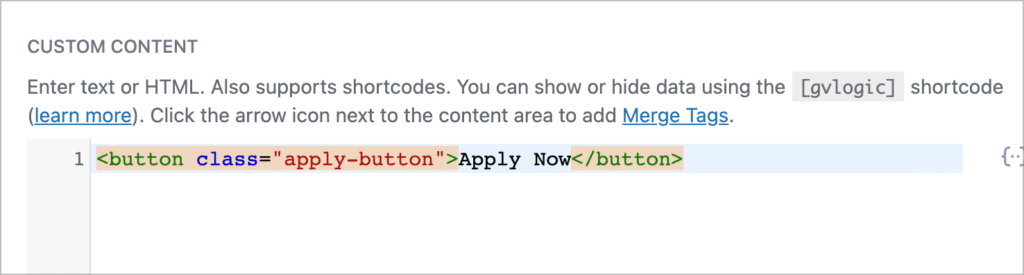
On the Single Entry page, we’re going to add additional information about the job, as well as a button that users can click to apply.
We’ll create the apply button using a simple HTML <button> element inside a Custom Content field. You should link this button to the job application page. If you want to insert a dynamic link, you can add an “application link” field to your job posting form and then insert the field merge tag as the button URL!
After setting up our View, it’s time to embed it on a post or page. To do this, all we need to do is add the “GravityView View” block to our page layout.
Checking out our WordPress job board on the front end
Here’s what the Multiple Entries screen looks like on the front end using the WordPress 2020 theme. As you can see, there’s a search bar at the top with the job listings appearing below, one after the other.
Clicking on the job title takes you through to the Single Entry page where you can view more information about that particular job, such as the location and job description.
It’s looking good, isn’t it?
Taking it further
In this post, we created a relatively simple WordPress job board, but if you want to build something more sophisticated, that’s also possible!
For example, using the GravityView Featured Entries extension you can add “featured” listings to your job board that show up at the top of the results. And if you’re looking to create a private job board that’s only available to registered members, you can restrict your View by login status or user role.
Finally, if you want to use GravityView to manage job applications as well, read our tutorial Making a job application management system with GravityView.
Build your WordPress-powered job board today
GravityView is an add-on for Gravity Forms that allows you to display your form entries on the front end of your website. In this post, we demonstrated the versatility of GravityView by showing you how to create an online job board powered by WordPress.
Job boards are important tools for connecting companies with potential employees. While most job boards are general, allowing anyone to post listings, niche job boards for smaller, specialist industries are growing in popularity.
If you enjoyed this tutorial, check out how to build an online petition or learn how to create a custom real estate listing site!

Helpful tips right in your inbox.
Subscribe to get the latest articles, information on releases and helpful Gravity Forms tips!
More articles

Launch Log: Distance sorting for radius searches, DataTables search improvements, and import reliability fixes
The latest GravityKit releases add distance sorting to map searches, bring built-in search to DataTables, and fix GravityCharts and GravityImport edge cases.

WordPress page builder market share 2026: Elementor leads at 32.67%
Elementor reaches 32.7% of WordPress sites. WordPress Block Editor 20.6%, wpBakery 8.5%, Divi 5.7%. Latest HTTP Archive crawl, share-of-WordPress basis throughout.

Launch Log: GravityView 3.0, plus upgrades to Block MCP and GravityKit MCP
GravityView 3.0 lands with the new Vantage theme, frontend bulk actions, and AI-assisted View creation. This launch log also covers updates to GravityKit MCP, Block MCP, and Dashboard Views.