Published
•
Updated
How to build an audio library on WordPress (without code)
Are you wondering how to build a WordPress audio library? The popularity of audio content is growing. In 2021, the average time spent listening to digital audio among the US population was a staggering 1 hour and 34 minutes per day! Using GravityView’s DataTables...
Are you wondering how to build a WordPress audio library?
The popularity of audio content is growing. In 2021, the average time spent listening to digital audio among the US population was a staggering 1 hour and 34 minutes per day!
Using GravityView’s DataTables layout, you can embed, categorize and group audio tracks from SoundCloud, Spotify and other popular music platforms. Display songs, podcasts, audiobooks or audio lectures in a table layout and allow users to search, filter and listen without leaving the page.
Keep reading to find out how to build an audio library on WordPress!
Sneak peek
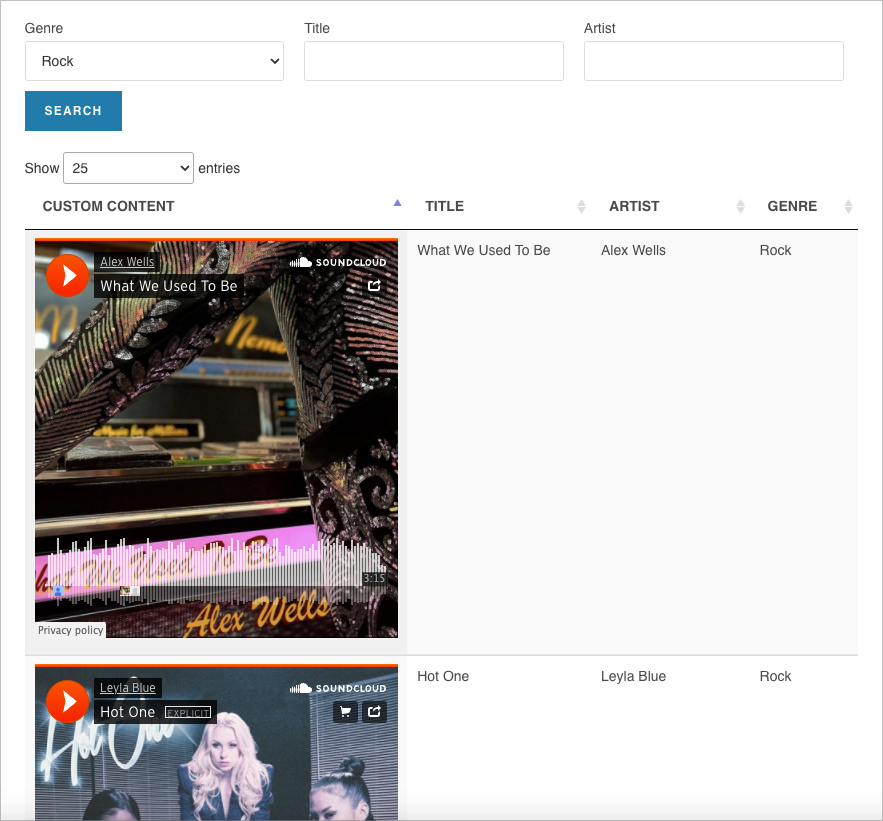
Here’s a preview of our finished audio library.
Wanna try it?
Spin up a demo
See what you can build with GravityView — explore the live demo.

Why create a WordPress audio library?
There are several reasons why you might want to create a music gallery or a searchable audio library.
If you’re a musician, you may want to display your tracks on a single page with information about the song and the genre of music. Perhaps you’re building a music directory where users can submit their own music for others to rate and review.
Alternatively, you might need a way to display learning materials like audio lectures, podcasts or language learning resources.
The best WordPress music library plugin
GravityView is the perfect plugin to embed music players on your site from third-party audio streaming websites like Spotify.
You submit links to songs and other audio tracks using Gravity Forms and GravityView displays them in a searchable table layout. Each entry in the table contains an embedded audio player, allowing you to listen to music without leaving the page.
GravityView also includes a powerful search bar, allowing users to filter music by genre, title, artist and more. Moreover, GravityView’s searching and filtering functionality allows you to group audio tracks into playlists for online courses, and other uses.
GravityView is an add-on for Gravity Forms that allows you to display form entries on the front end.
What type of audio can you add to your WordPress music library?
Using GravityView, you can embed music, podcasts and other audio tracks from a variety of third-party websites. This includes:
- Mixcloud
- ReverbNation
- SoundCloud
- Spotify
- YouTube
- … And other platforms.
Pro tipSee the full list of websites you can embed from.
Building a WordPress audio library using GravityView DataTables
To build an audio library using GravityView, you’ll first need a form that allows you to submit URLs to third-party audio content. After that, you can create a View to display embedded audio players on the front end.
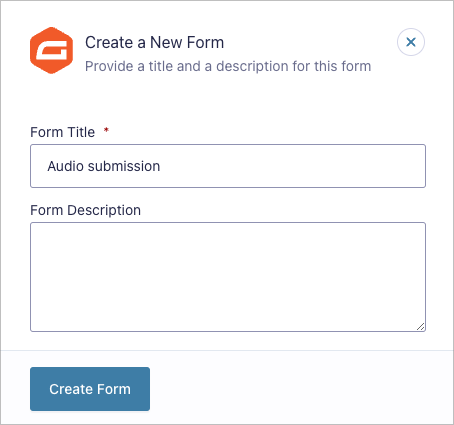
Create the audio submission form
Hover over Forms and select New Form. Now, give your form a name and optional description and when you’re done, click Create Form.
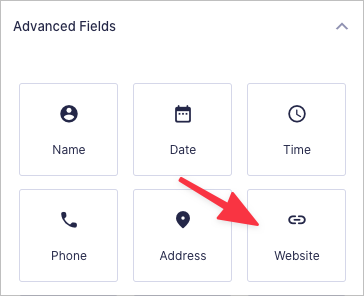
You can now start building your form using Gravity Forms’ drag and drop editor. The only field that’s required to create a WordPress audio gallery is a Website field.
The Gravity Forms Website field allows you to include URLs to third-party websites as part of your submission. GravityView will then take these URLs and display them as embedded audio players.
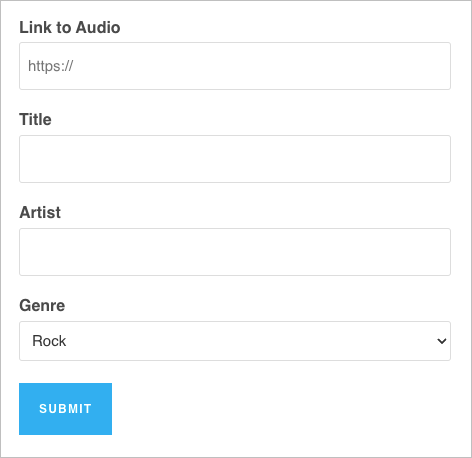
After adding the Website field, feel free to add any other fields. For example, you may want to add fields for the Artist Name, the Title of the audio track, and the Genre of the music. When you’re done, click Save Form.
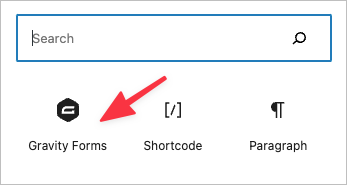
The final step is to embed your form on a page or post. You can do this using the Gravity Forms Gutenberg block. Simply click on the ‘+’ icon, search form “Gravity Forms”, add the block to your page and select your form from the dropdown menu.
Here’s what our form looks like on the front end:
Now that your form is set up, you can start constructing your WordPress music library using the GravityView DataTables layout.
Create a new View
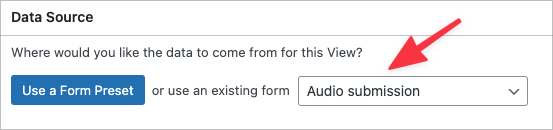
Create a new View by hovering over Views and clicking New View. Under Data Source, select the form that you created in the previous step.
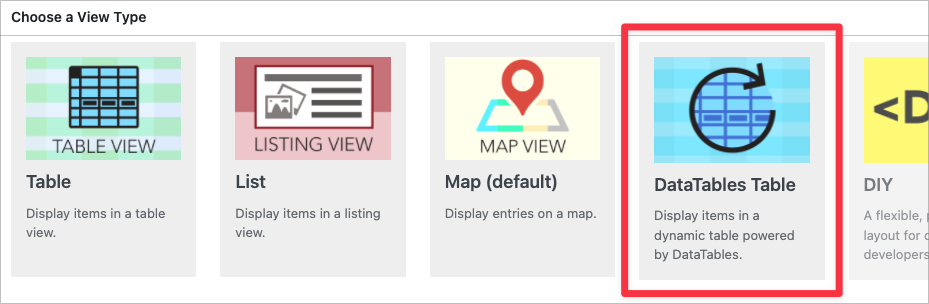
Now you need to choose your View Layout. Select “DataTables Table”.
Pro tipLearn more about layout types in GravityView.
The next step is to start building your audio library layout using GravityView’s drag and drop editor.
Configure the audio library layout
Scroll down to the Entries Fields section. Here you can add fields to your audio library. To add a new field, click on the ‘+ Add Field’ button and select a field from the list.
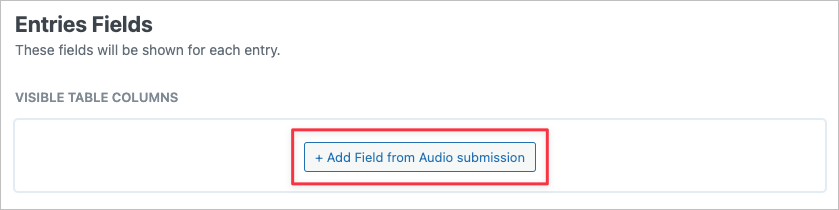
Start by adding a Custom Content field. This will allow you to display URLs as embedded audio players.
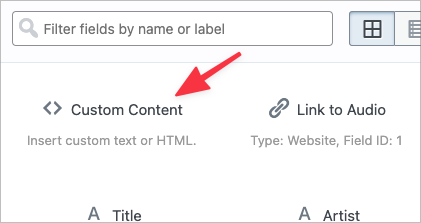
The Custom Content field allows you to add plain text, HTML, shortcodes, or merge tags to your View layouts.
After adding the Custom Content field to your View layout, click on the gear icon to open the field settings. In the text editor, add the merge tag corresponding to your form’s Website field. Next, enable the option to render oEmbeds.
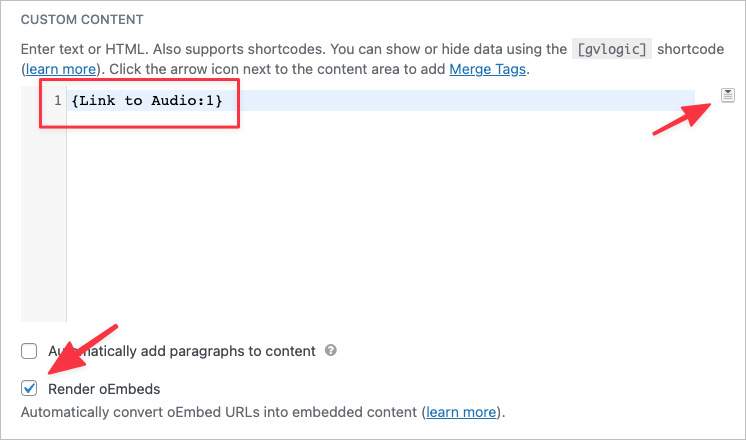
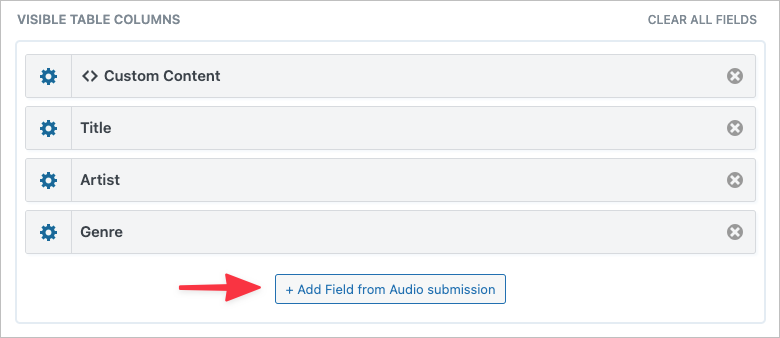
When you’re done, add the remaining fields.
The next step is to add a search bar so users can search and filter music from the front end!
Add a search bar
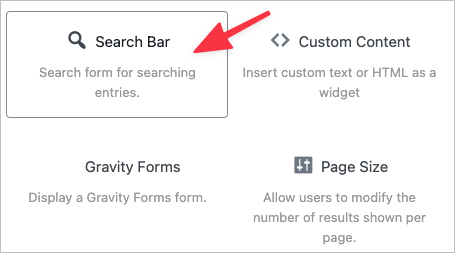
To add a search bar to the top of your View, scroll up to the Top Widgets area, click on the ‘+ Add Widgets’ button and select the Search Bar widget.
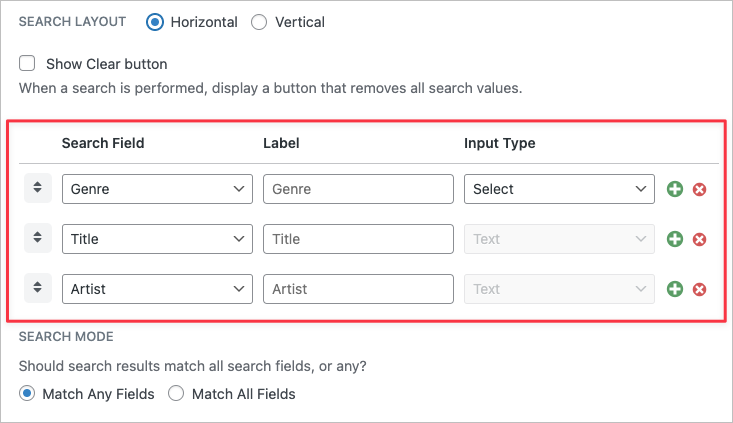
Now click on the gear icon next to the widget label to open the search settings. Here you can add multiple search inputs, allowing users to filter songs by genre, title, artist or any other field in your form.
After configuring the search settings, the next step is to modify the view settings.
Modifying the View Settings
The DataTables layout includes some powerful settings that you may wish to enable. To see the available settings, scroll down to the View Settings and click on the DataTables tab on the left.
The two options you may wish to enable are Responsive Tables and Auto-Update.
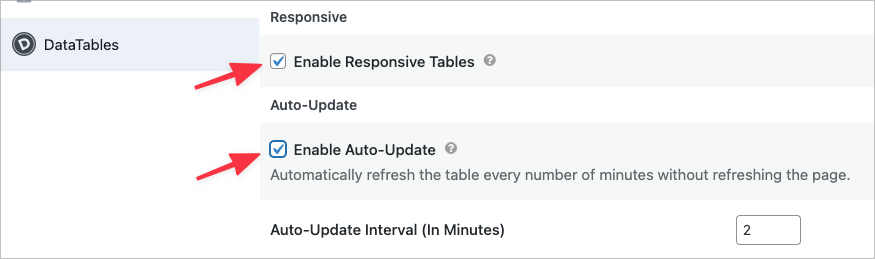
By enabling Responsive Tables, your audio library will automatically adjust for different screen sizes, ensuring it looks good on desktop, tablet and mobile devices.
By enabling Auto-Update, your table will refresh its data automatically on a schedule that you set (e.g. every 2 minutes). This means that new songs will show up in the table as they’re added, without needing a page refresh.
That’s it! You can now access your new audio library using the View URL, or you can embed it on a new page or post.
Embedding your WordPress music library on the front end
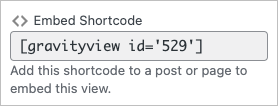
To embed your WordPress audio library on a new post or page, copy the GravityView embed shortcode and paste it into your page editor. If you’re using Gutenberg, paste the shortcode into a Shortcode block.
When you’re done, open your new audio library on the front end.
Here’s how you can add new songs to your audio library…
Adding songs to your WordPress audio library
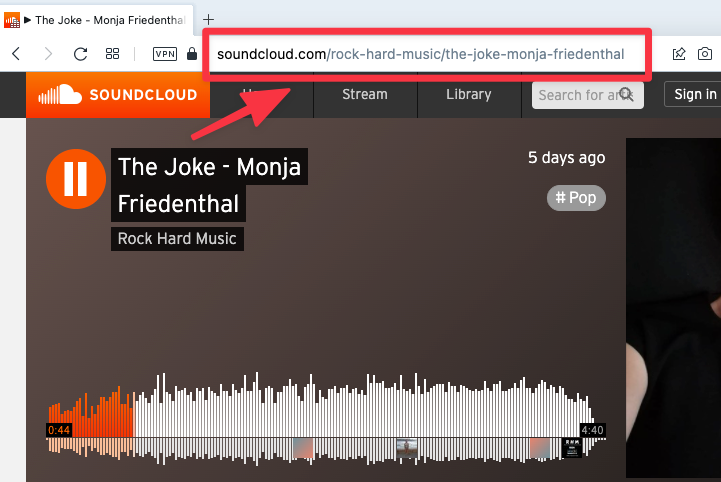
First, head over to SoundCloud, Mixcloud, Spotify or another supported music platform and copy the URL of a song you want to add to your library.
Next, open your audio submission form and fill out all of the relevant fields.
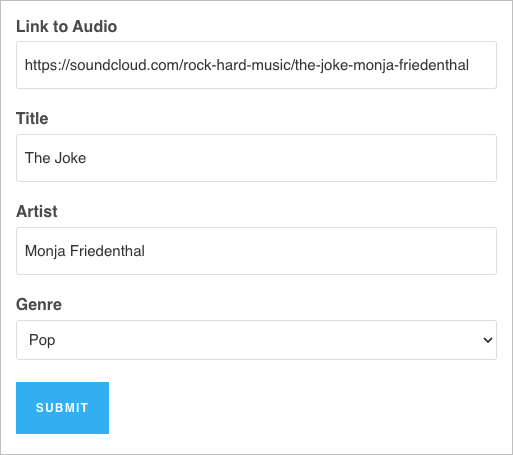
After submitting the form, your audio track will show up in your audio library as an embedded audio player.
What else can you do using GravityView DataTables?
The GravityView DataTables layout isn’t just for embedding audio players. You can use DataTables to build a host of powerful front end applications. Here are some examples:
- Build a WordPress video gallery
- Create a custom task-management app
- Display a book list
- Build a searchable, front-end database
You’re only limited by your imagination, so get those creative juices flowing!
Build your new WordPress audio gallery now
In this tutorial, we showed you how to build a WordPress audio library using GravityView DataTables.
Creating an audio library is the perfect way to embed songs, podcasts, and audiobooks on your website. Using GravityView you can embed, categorize and group audio tracks from SoundCloud, Spotify and other popular platforms.
To start building web apps using the GravityView DataTables layout, you’ll need a GravityView Core + Extensions license. Thanks to our money-back guarantee, you can try GravityView risk-free for 30 days!

Helpful tips right in your inbox.
Subscribe to get the latest articles, information on releases and helpful Gravity Forms tips!
More articles

Launch Log: GravityView 3.0, plus AI-assistant upgrades in Block MCP and GravityKit MCP
GravityView 3.0 adds the Vantage theme, frontend bulk actions, and AI-assisted View creation, plus Block MCP and GravityKit MCP updates for AI assistants.

Announcing GravityView 3.0: a fresh new look, AI View creation, and native page builder support
GravityView 3.0 is here: restyle Views with the new Vantage theme, build them with AI, embed them in any page builder, and run bulk actions on the front end.

Launch Log: GravitySearch arrives, plus AI spam review and GravityView fixes
This week, releases are anchored by a brand-new product! GravitySearch joins the GravityKit suite with cross-form entry search for Gravity Forms. Alongside it, Gravity Forms Zero Spam picks up an AI-powered review step, and GravityView sees fixes for Enhanced Security, Edit Entry, and Entry…