Published
•
Updated
How to build a store locator for WordPress with no code
Build a store locator for WordPress using Gravity Forms and GravityView. Display business locations on an interactive map and let users search for nearby stores without any code.
Well known chains like Starbucks and Panda Express have store locators on their websites to help users find the nearest location.
A store locator is a map or directory that displays the location of businesses within a certain area. Users can search for stores near them or type in an address to see stores close by.
In this post, we’ll show you how to build a store locator for WordPress using Gravity Forms and GravityView. Using these two plugins gives you the flexibility to build a store locator map for your business, and customize it as you see fit.
Let’s get started!
Check out a live demo of the finished store locator and get your own free trial site preloaded with all GravityKit add-ons!
Download the free business listing form template now!
Import the template into Gravity Forms and customize as necessary.
Sneak peek
Here’s what our finished WordPress store locator (powered by Google Maps) looks like on the front end.
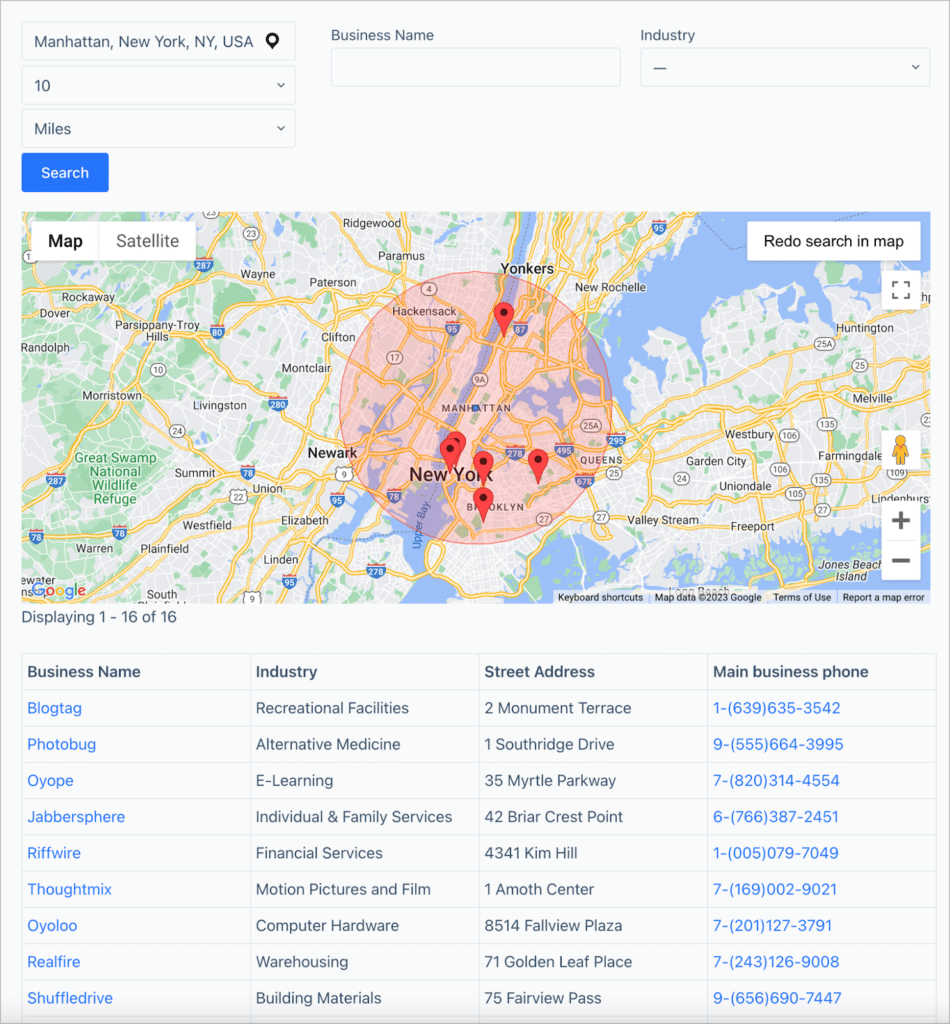
As you can see, users will have the ability to search for businesses within a defined radius around their current location or chosen address! Here’s a video demo of the radius search feature in action:
What you’ll need
Here are the plugins you’ll need to follow along with this tutorial:
- Gravity Forms
- GravityView
- GravityView Maps layout (included in the GravityKit All Access Pass).
- GravityImport (optional)
What is a store locator?
A store locator helps users find a business close to them. Store locators usually display the location of businesses as markers on a map. Apart from the address/location, a store locator will often show related information about the business, such as its operating hours, contact information and photos.
Businesses with multiple branches use store locators to help users find the nearest branch. Examples of popular chains that have store locators includes Starbucks, Panda Express, and Chipotle.
Store locators don’t necessarily have to show stores under the same brand name. A store locator could also help users find businesses that offer certain services, or businesses in specific industries.
Benefits of having a store locator for your business
There are many reasons to create a store locator for your business. Giving users an easy way to search for store locations near to them, or within a specific area, makes it easier for customers to find and do business with you.
A store locator may also improve your SEO, giving you a better chance of showing up in the search results when users search for your products or services. By helping customers find your business, you will increase customer satisfaction and loyalty, resulting in a boon to your business!
Now let’s start building our store locator for WordPress using Gravity Forms and GravityView.
Creating a form to add new stores
The first step is to create a form for adding new stores to our locator app. If you already have your store information in the form of a CSV file, you can import those to Gravity Forms and create a new form automatically using GravityImport. We show you how to do this later in the tutorial.
However, if you don’t have your store location info yet, you’ll need to start by creating a new form. To create a new Gravity Form, hover over “Forms” and click “Add New”. You can now add fields to your form using the drag-and-drop builder.
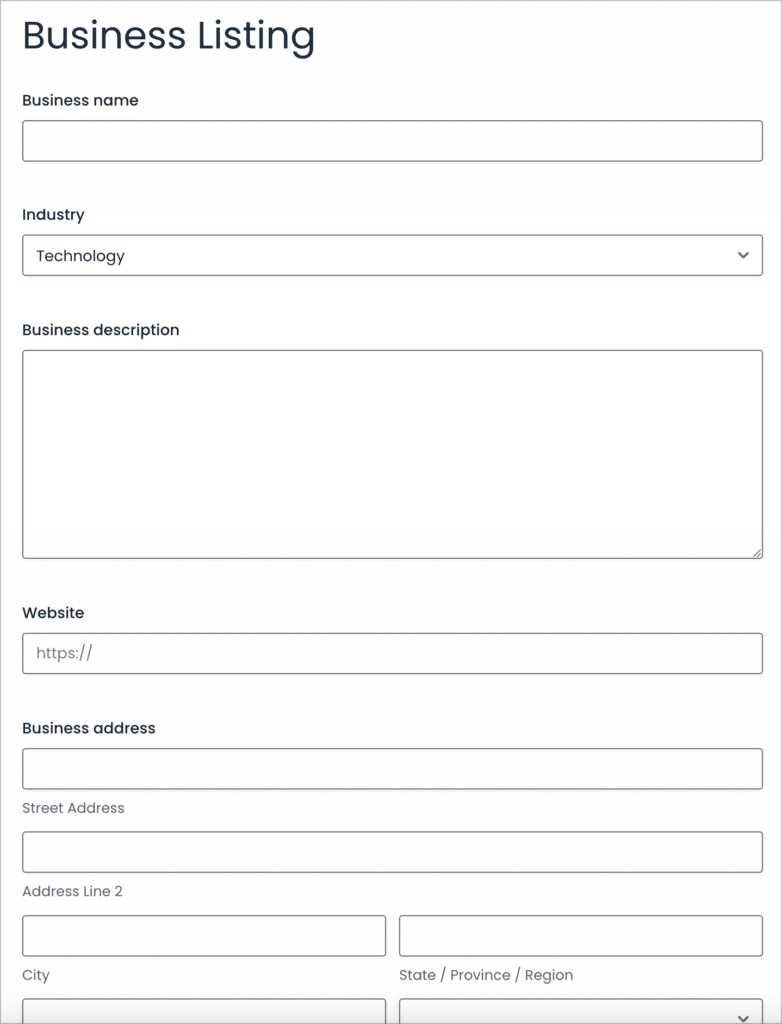
The most important field is the Address field (found under “Advanced Fields”). Capturing the address for each store will allow you to display them as markers on a map.
After adding the “Address field”, you may want to enable the “geolocation autocomplete” feature. With this enabled, the address field will show suggestions as the user begins to type in their address.
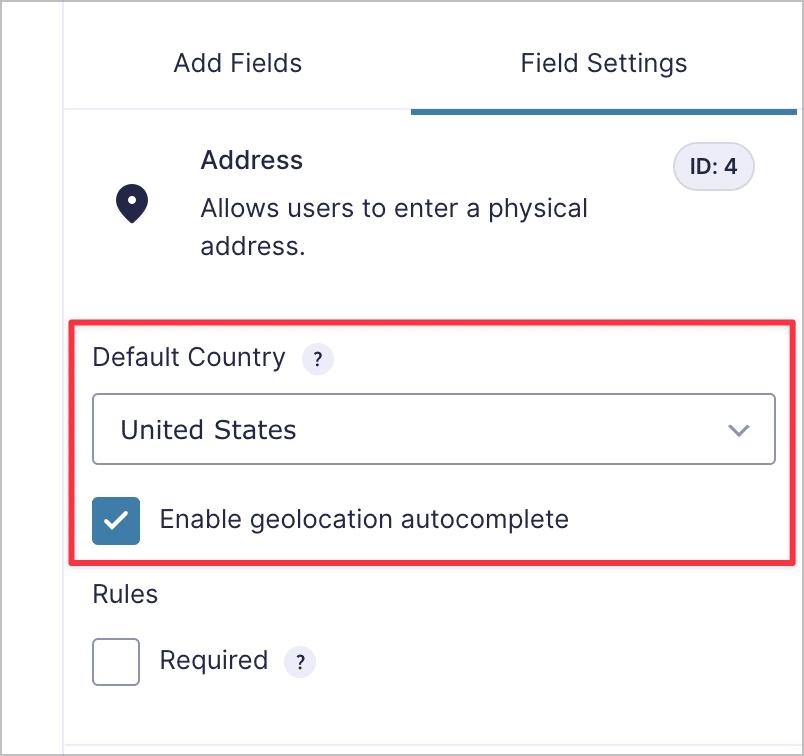
You can enable this feature in the field settings. Here’s how it works:
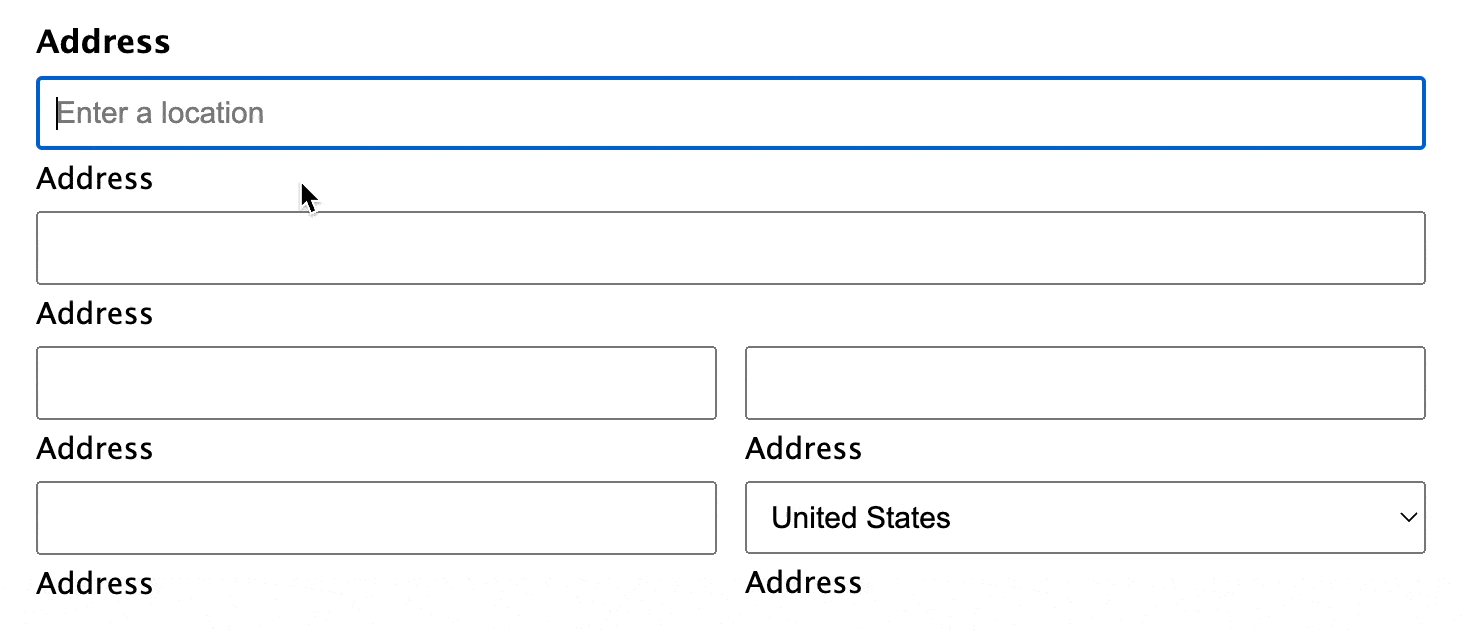
Apart from the Address field, you can add any other fields you feel are necessary. The fields you add to your form will depend on the information you want to display in your store locator.
For this example, we’re going to add the following fields:
- Business name
- Phone number
- Industry
- Address
Here’s what our form looks like on the front end:

Save time by downloading the free business listing form template now!
After creating your form, you’ll need to configure the Google Maps integration.
Configuring the Google Maps integration
After installing the GravityView Maps layout, you’ll need to create a Google Maps API key and enter it in the box on the Maps settings page. Without a valid API key, you won’t be able to display a Google Map on your website.
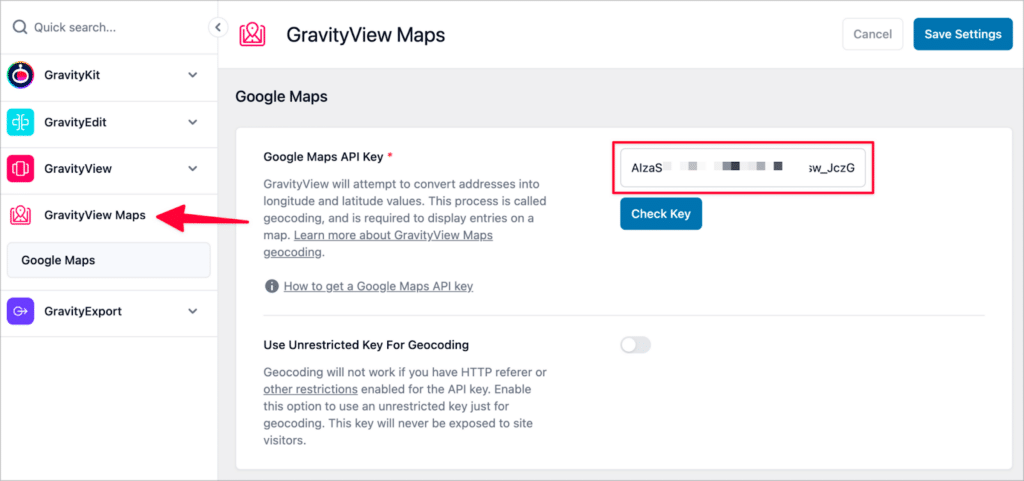
You can create a new API key by following the instructions on the Google Developer site.
Pro tipCheck out our live demos to see the GravityView Maps View in action.
Creating the store locator using GravityView
After installing the Maps layout and entering your API key, you can start building your store locator using GravityView!
To create a new View, hover over “GravityKit” and click “New View”. After giving your View a name, and select your form as the data source. This will form a link between your form and the front-end store locator, meaning any entries in your form can be displayed on the map!
The next step is to select a View Type. GravityView supports several View Types, allowing you to display Gravity Forms entries using different layouts. You can add a map to any View Type, so you’re not limited in your selection.
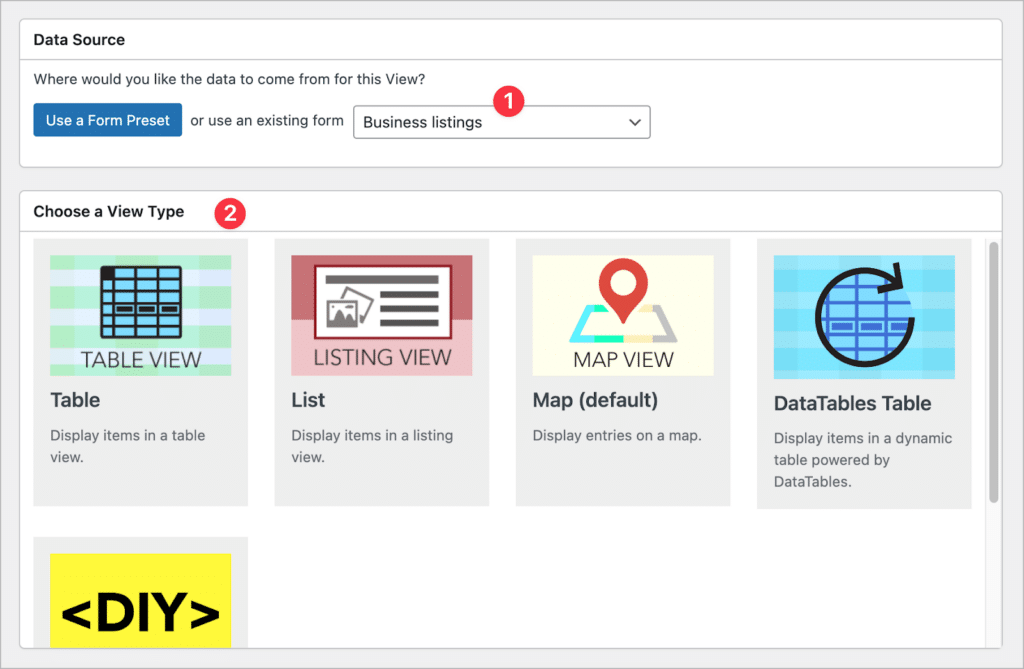
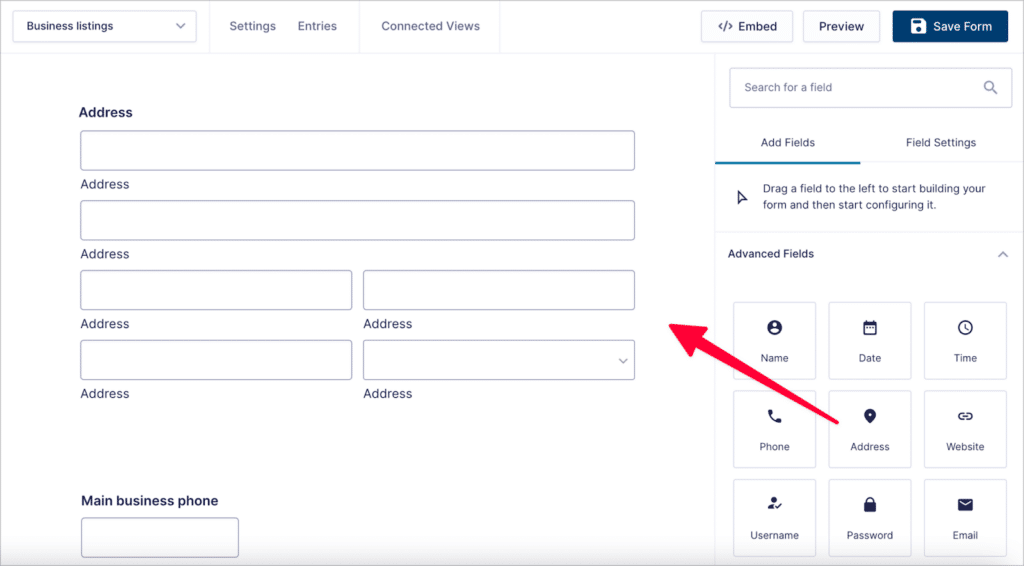
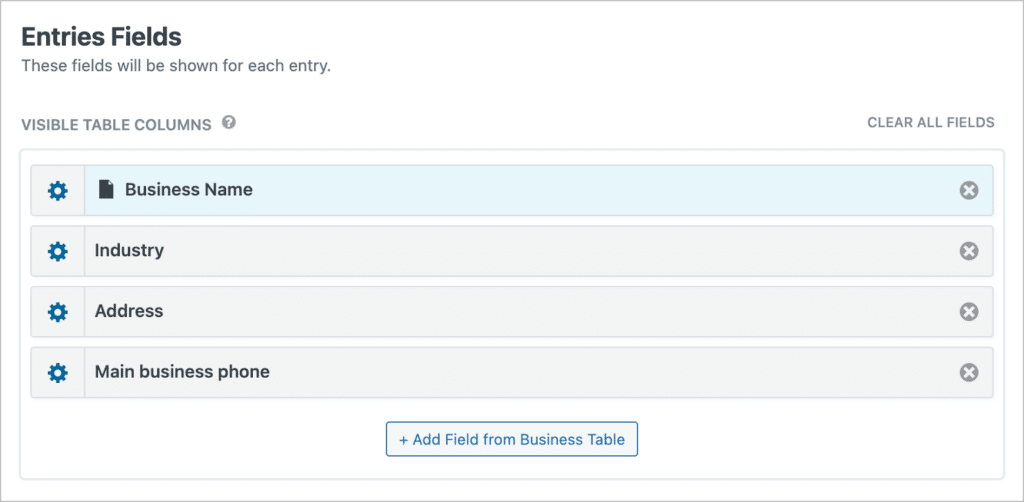
For this example, we’ll select the “Table” layout. After selecting a View type, you can start constructing the front-end display using GravityView’s drag-and-drop, visual editor.
We’ll go ahead and add the “Business Name”, “Industry”, “Address” and “Phone” fields to the “Entries Fields” section of the View editor, as this is the information we want to display in our store locator.
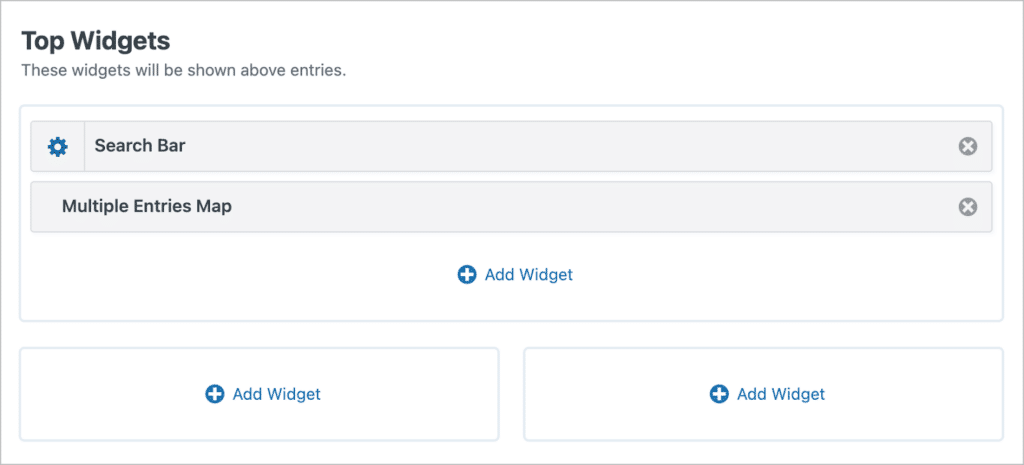
Next, we can add the map by adding the “Multiple Entries Map” widget to the “Top Widgets” area. We’ll also add a search bar, allowing users to search for businesses by location or other parameters.
After adding a Search Bar widget to your View, click on the gear icon to open the search settings. Here you can customize the search inputs. To allow users to search by location, ensure you add the “Geolocation Radius” search field.
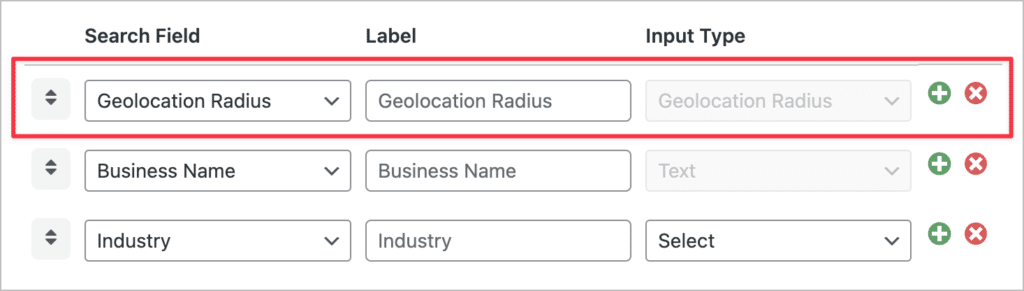
The “Geolocation Radius” field gives users the ability to type in a specific address (or use their current location), the map will then display all stores within a certain radius of that location (calculated in either miles or kilometers).
The next step is to configure the Maps settings.
Configuring the Maps settings
You can customize the look, feel and functionality of the map in the View settings. Simply scroll down to the “Settings” panel and click on the “Maps” tab. Here you can select the Address field you want to geocode, choose a custom map marker, change the map type, and much more!
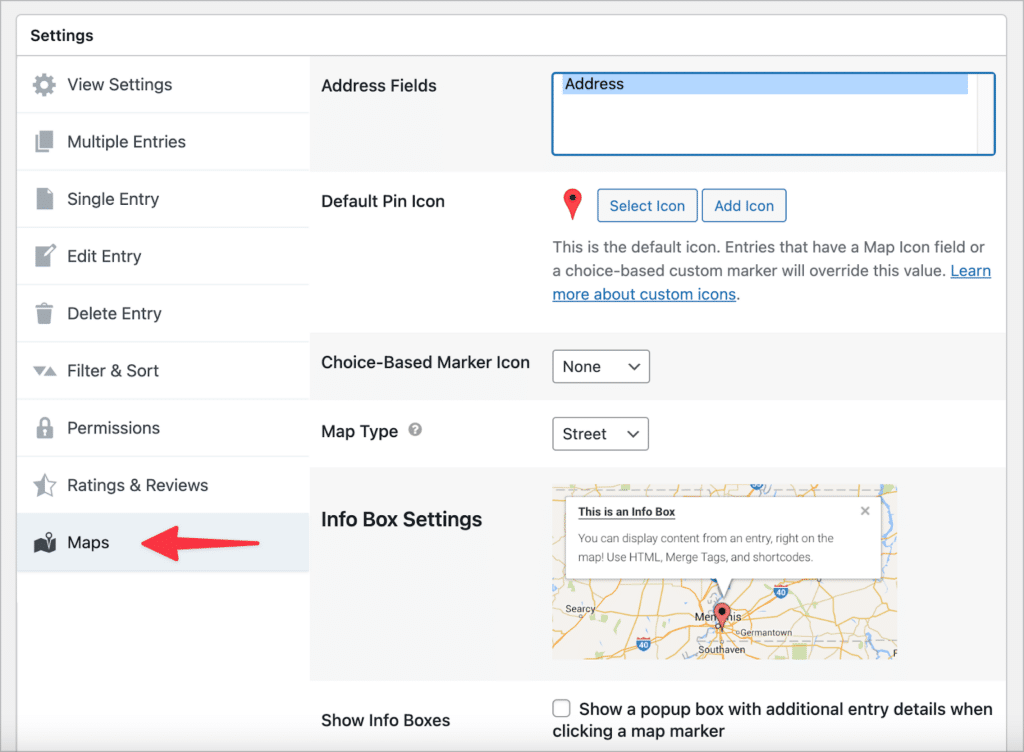
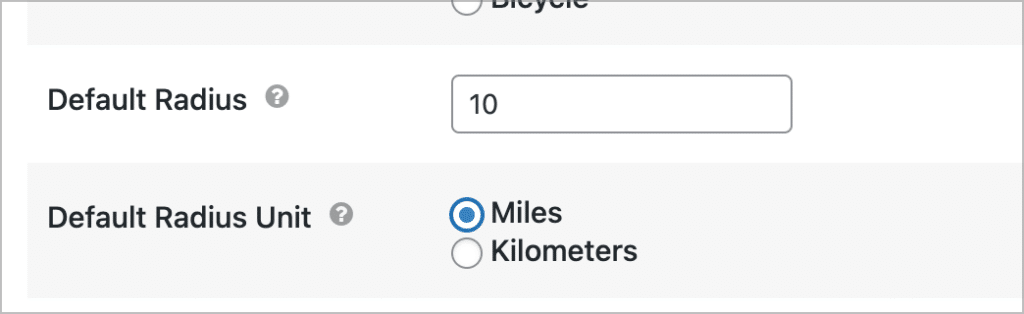
For the geolocation feature, you may wish to specify the default radius size and units (i.e. miles or kilometers).
Pro tipYou can add info boxes to your map that display information about a store when a user clicks on its marker.
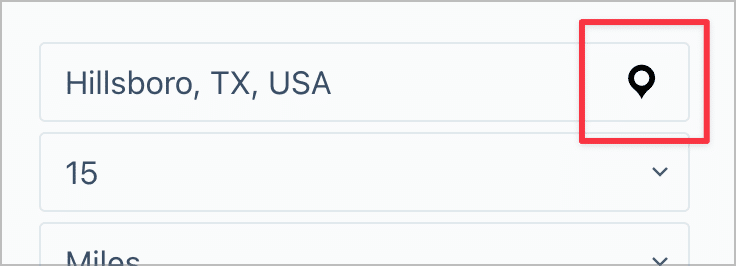
Searching for store locations
The user has two ways to search for store locations. They can either enter an address into the search bar, or they can click on the pin icon to center the map on their current location.
Importing new stores from a CSV file
Adding stores to your map directory may be time-consuming if you’re doing it one-by-one.
To save time, you can import store information directly to Gravity Forms using GravityImport—you don’t even have to create a form first!
GravityImport is a powerful add-on for Gravity Forms that allows you to import entries from a CSV file. If you don’t have an existing form, the plugin can create one for you automatically during the import process.
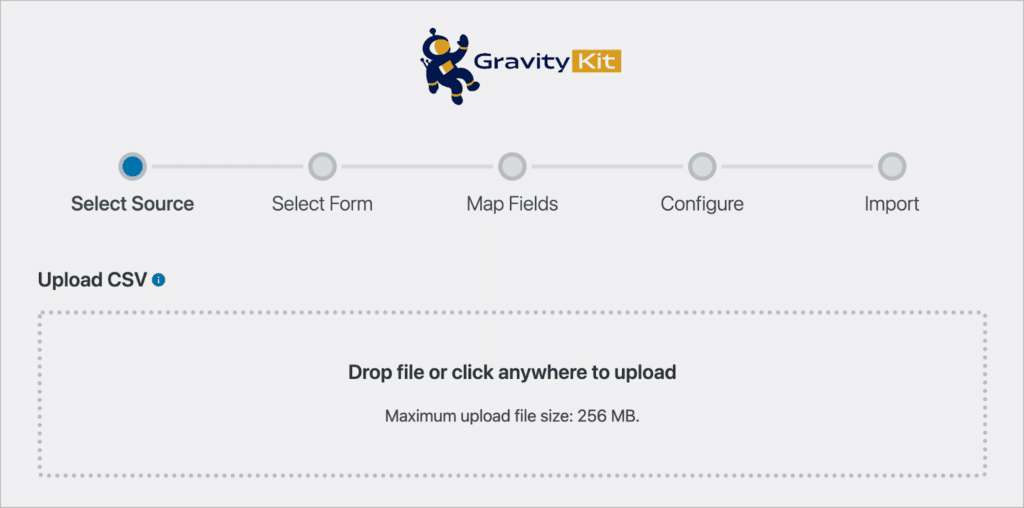
After installing GravityImport, hover over “Forms”, click “Import/Export” and then select “Import Entries”. The first step of the import process is to upload your CSV file.
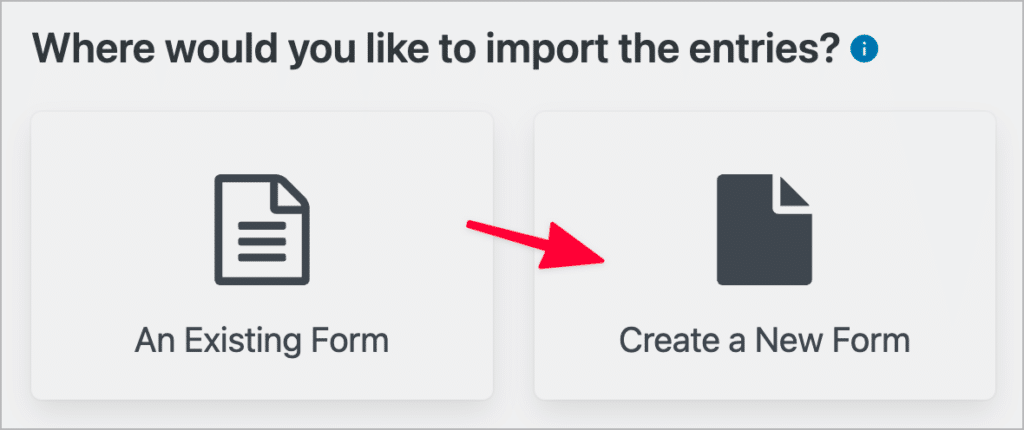
After that, you can select whether you want to import entries to an existing form or create a new form.
After choosing where you want to import your entries, simply map the columns in your CSV file to the correct fields/field types in Gravity Forms!
Pro tipLearn more about GravityImport by reading our ultimate guide.
Why use GravityView and not a WordPress store locator plugin?
There are other WordPress store locator plugins available that support Google Maps, so why should you use GravityView? There are several reasons why it makes sense to use GravityView instead of specialized store locator plugins.
Robust and scalable
Some businesses have hundreds, or even thousands of locations. Gravity Forms and GravityView are robust plugins and can easily handle a large number of stores!
Gravity Forms is a flexible data collection tool
GravityView complements the data collection functionality of Gravity Forms. Using Gravity Forms you can create powerful forms that include different field types, conditional logic, and much more.
This gives you the flexibility to collect any kind of business data you need to! You can also take advantage of Gravity Forms’ other powerful features such as notification emails, custom confirmations, and dynamic population.
Easily export your data
GravityView includes an in-built export feature, allowing you to export entries directly from the front end of your website. To export entries in a View, simply add /csv/ to the end of the View URL. This can be helpful for sending data to external platforms, such as Google Sheets.
Flexibility in creating layouts
GravityView includes several preset layouts, allowing you to customize the look of your store locator. You can display store information in a table, in a directory-style layout, or any other way you want to! GravityView gives you full control over the data.
Easy to extend with additional add-ons
Gravity Forms and GravityView are both powerful plugins, but they can be made even more powerful with add-ons and extensions. Both plugins are highly extensible and can grow as your website grows. For example, by adding Gravity Flow, you can build store locators with the ability for owners to claim entries and manage their own stores.
With the GravityView Ratings & Reviews extension, you can give users the ability to rate stores and leave reviews. Using the Social Sharing & SEO extension, you can add social sharing buttons to your store locator and boost its position in the search results.
Build your store locator for WordPress using GravityView!
A store locator helps users find a business close to them. Store locators usually display the location of businesses as markers on a map.
In this post, we showed you how to build a powerful store locator fo WordPress using Gravity Forms and GravityView. With GravityView’s Maps layout, you can easily display store information as markers on a Google Map, and allow users to filter by region, or search by radius.
To build your own store locator, get GravityView today!

Helpful tips right in your inbox.
Subscribe to get the latest articles, information on releases and helpful Gravity Forms tips!
More articles

How to build a WordPress CRM without code (a contact database you own)
Build a simple WordPress CRM with GravityView. Turn the Gravity Forms entries you already collect into a no-code contact database you own, with no monthly fees.

Launch Log: Distance sorting for radius searches, DataTables search improvements, and import reliability fixes
The latest GravityKit releases add distance sorting to map searches, bring built-in search to DataTables, and fix GravityCharts and GravityImport edge cases.

WordPress page builder market share 2026: Elementor leads at 32.67%
Elementor reaches 32.7% of WordPress sites. WordPress Block Editor 20.6%, wpBakery 8.5%, Divi 5.7%. Latest HTTP Archive crawl, share-of-WordPress basis throughout.