Published
•
Updated
GravityView vs Ninja Forms Views: In-depth comparison
I compare GravityView and NFViews (Ninja Form Views), two popular plugins for displaying form data on WordPress. In this article, I explore the features, functionality, and user experience offered by both plugins to help you make an informed decision on which one is right...

I compare GravityView and NFViews (Ninja Form Views), two popular plugins for displaying form data on WordPress.
- GravityView is a no-code application builder for Gravity Forms, created by GravityKit—a Certified Gravity Forms Developer.
- Ninja Forms Views is an add-on for Ninja Forms that enables you to display Ninja Forms entries on the front-end of your site.
In this article, I explore the features, functionality, and user experience offered by both plugins to help you make an informed decision on which one is right for your needs. Let’s get started!
TL;DR
GravityView and Ninja Forms Views both let you display form entries on your WordPress site, but they cater to different users and offer different levels of flexibility. GravityView (for Gravity Forms) includes a full-featured drag-and-drop builder, advanced layouts (like Maps and DataTables), front-end editing, robust filtering, and export tools—ideal for building complex, no-code web apps.
Additionally, GravityView benefits from integrations with other GravityKit add-ons, as well as the wider Gravity Forms ecosystem.
Ninja Forms Views offers a similar drag-and-drop experience with core layouts and front-end editing, but some advanced features like entry restriction, maps integration and data exports are missing. If you’re using Gravity Forms, GravityView is a powerful choice; for Ninja Forms users, NFViews is a solid, integrated solution.
Layouts
Both GravityView and NFViews allow you to display form entries on the front end of your website. Both plugins support preset layouts, making it easier to structure your data in different ways.
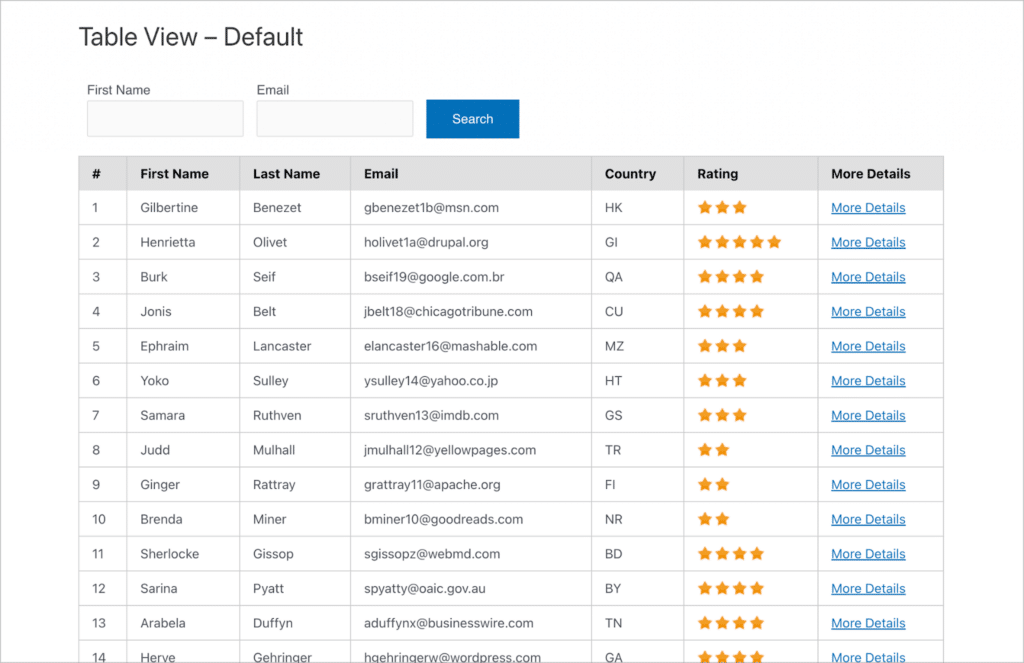
The GravityView core plugin includes three layouts—Table, List and Layout Builder. The Table and List layouts are preset layouts while the Layout Builder gives you full control by allowing you to design custom layouts using rows and columns (all drag and drop).
GravityView Pro includes additional layouts:
- DataTables: A live-updating table with advanced export capabilities.
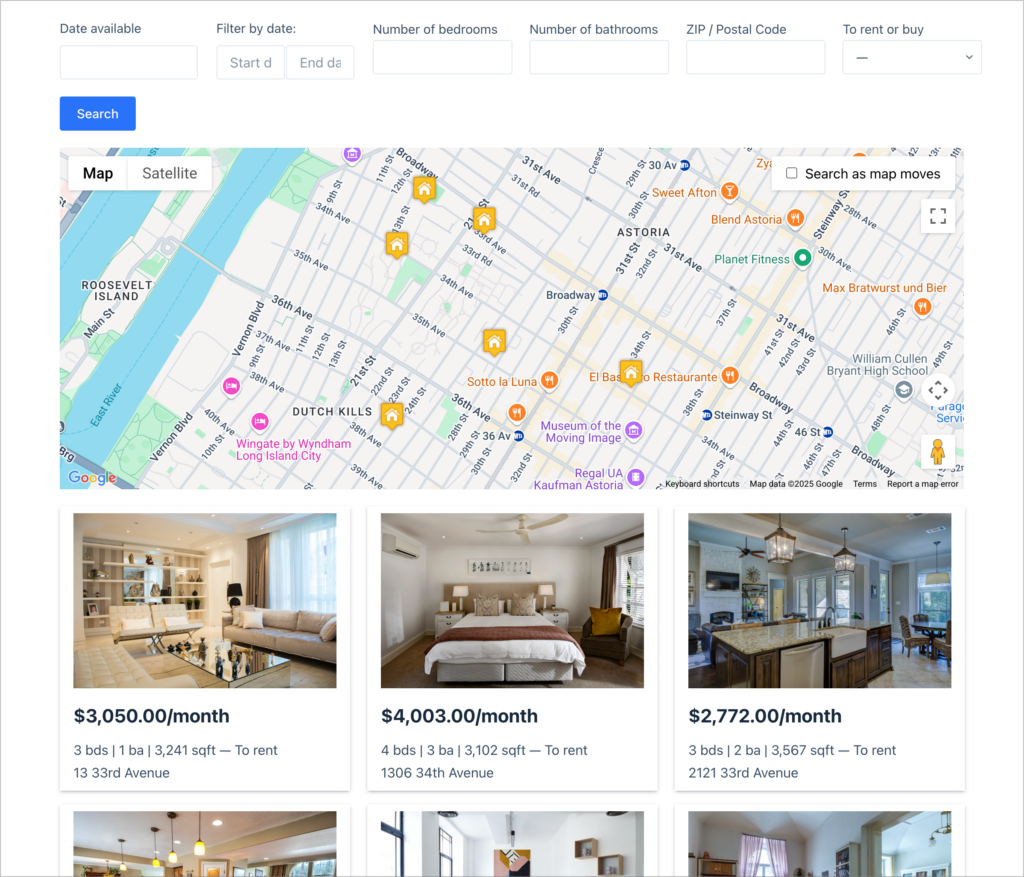
- Maps: Display entries as markers on a Google Map
- DIY: Build layouts with HTML and CSS.
Ninja Forms Views includes a basic table layout in its free version. The paid version includes a list layout, and their developer license includes a DataTables layout (with built-in export capabilities).
Summary
| Feature | GravityView | NFViews |
|---|---|---|
| Table layout | ✅ | ✅ |
| List layout | ✅ | ✅ |
| DataTables layout | ✅ | ✅ |
| Maps layout | ✅ | ❌ |
| Custom layout builder | ✅ | ❌ |
User interface
Both GravityView and NFViews have a drag-and-drop interface, making it easy to build Views for your data.
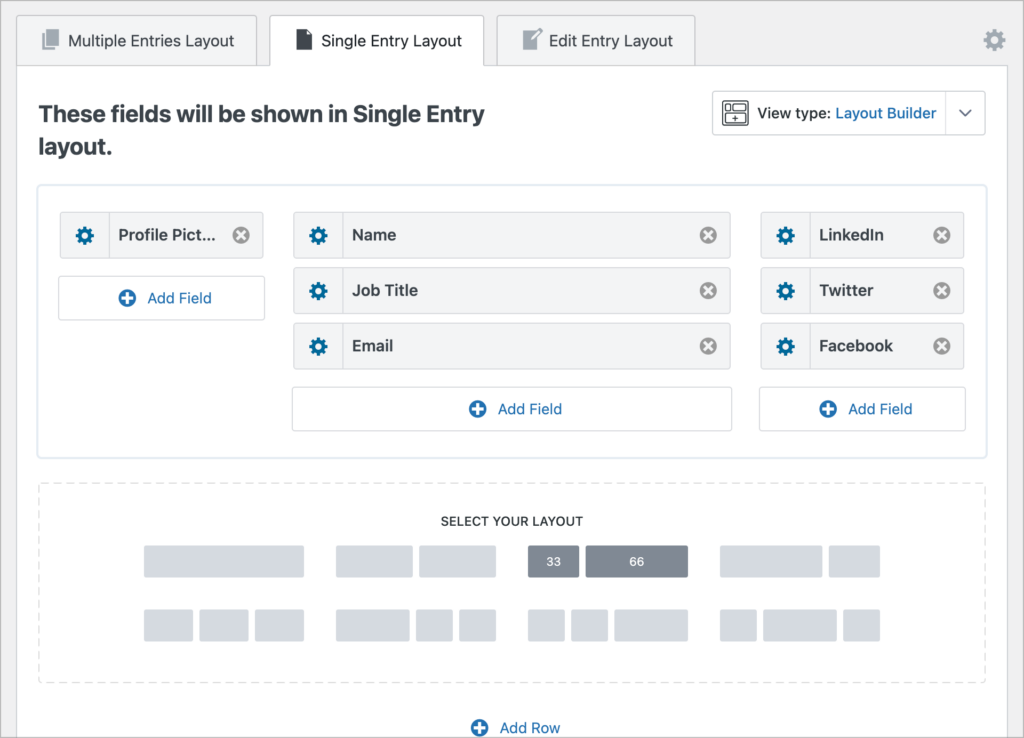
GravityView’s editor makes it easy to create front-end layouts and interfaces. You can build your layout with rows and columns and then simply add the fields you want to display. You can also reposition fields and rows by dragging and dropping them.
GravityView also allows you to add widget—tools for navigating a View or providing additional visualisations, such as a search bar, page links or a map. All widgets and fields are fully customizable.
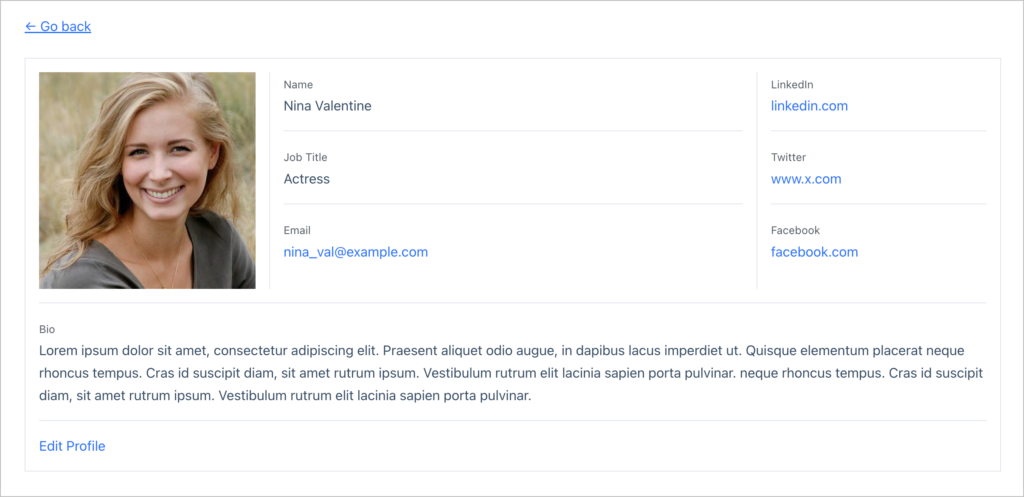
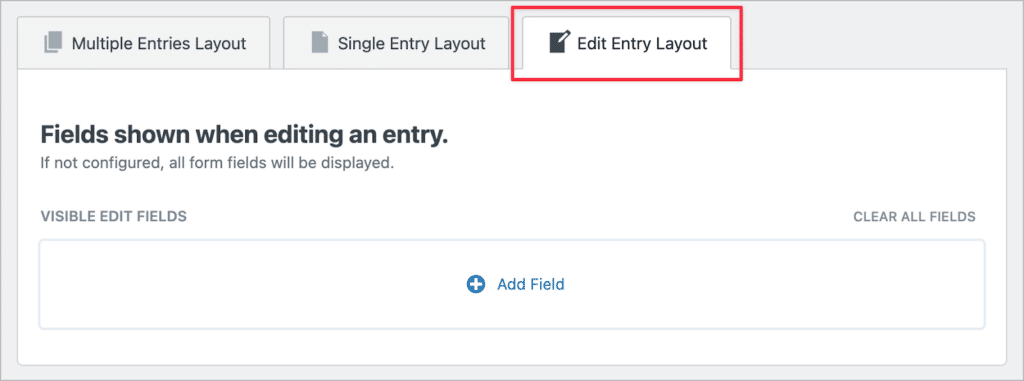
Lastly, at the top of the View editor, you’ll see three tabs—Multiple Entries, Single Entry and Edit Entry. These allow you to edit different aspects of your View. The Multiple Entries layout is the page where each of your entries will be displayed one after the other, while the Single Entry page displays additional information about a specific entry. Finally, the Edit Entry page is where logged-in users can update their entries from the front end!
The setup process for NFViews is very similar to GravityView. First you need to select a View Source (i.e., a form with the data you want to display), and after that you need to choose a View Type (layout).
After doing this, you can start adding fields. While GravityView distinguishes between “fields” and “widgets”, everything is a field in NFViews. As you can see, the View editor is very similar to GravityView’s.

NFViews also gives you the ability to add rows with different numbers of columns. Not all functionality is available in the free version, though. The Single Entry layout builder is only available with a Pro license for example.
| Feature | GravityView | NFViews |
|---|---|---|
| Drag and drop builder | ✅ | ✅ |
| Add rows and column | ✅ | ✅ |
| Extensive customization options | ✅ | ❌ |
Custom content
GravityView includes a powerful Custom Content field. The Custom Content field allows you to add shortcodes, HTML, dynamic merge tags, and more to your View layouts.

The Custom Content field also supports embedding for video and audio players! GravityView also has a Custom Code panel in the settings where you can add your own CSS and JS code.
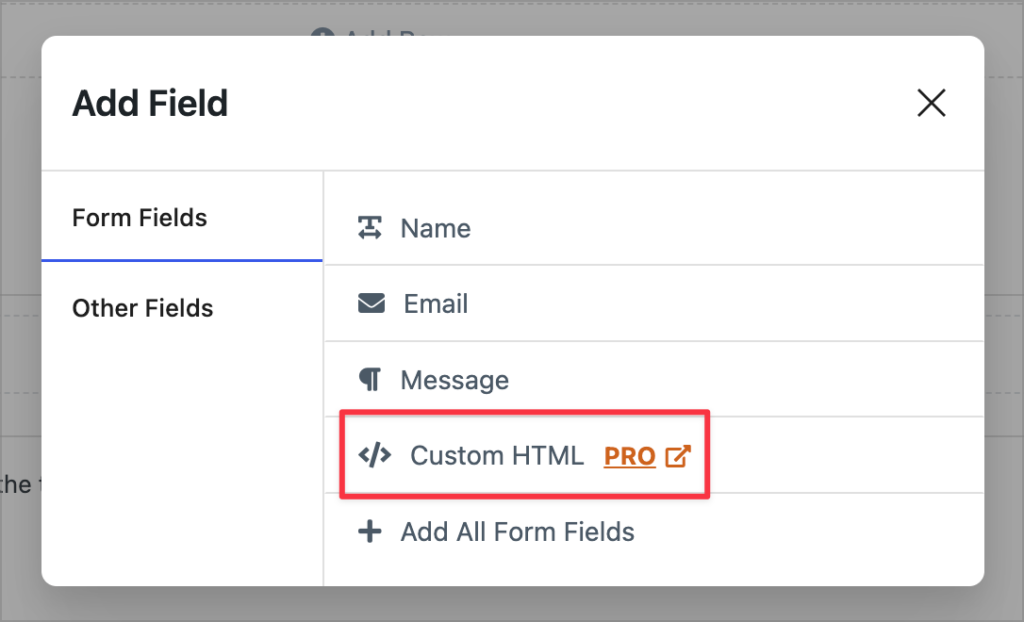
NFViews includes a “Custom HTML” field in its Pro version. However, you can only add this field to either the top or bottom of your View. In other words, you cannot add it to where your data is displayed.
Searching, sorting and filtering
GravityView includes a highly customizable search bar widget that supports multiple search inputs.
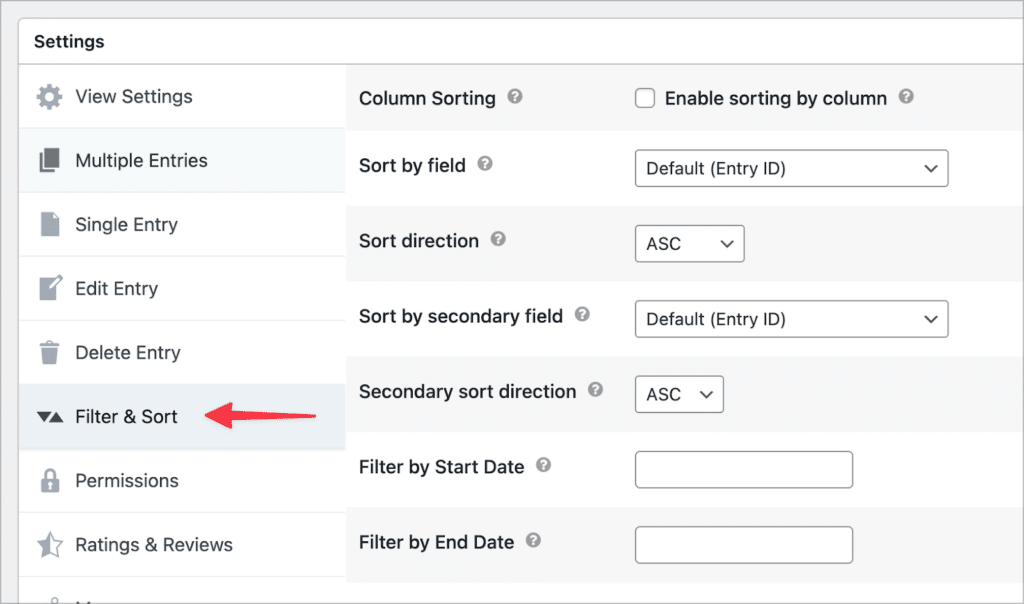
The GravityView core plugin also includes basic sorting capabilities. You can find the sorting options in the View settings at the bottom of the View editor. Here you can sort by field and filter entries by start and end date.
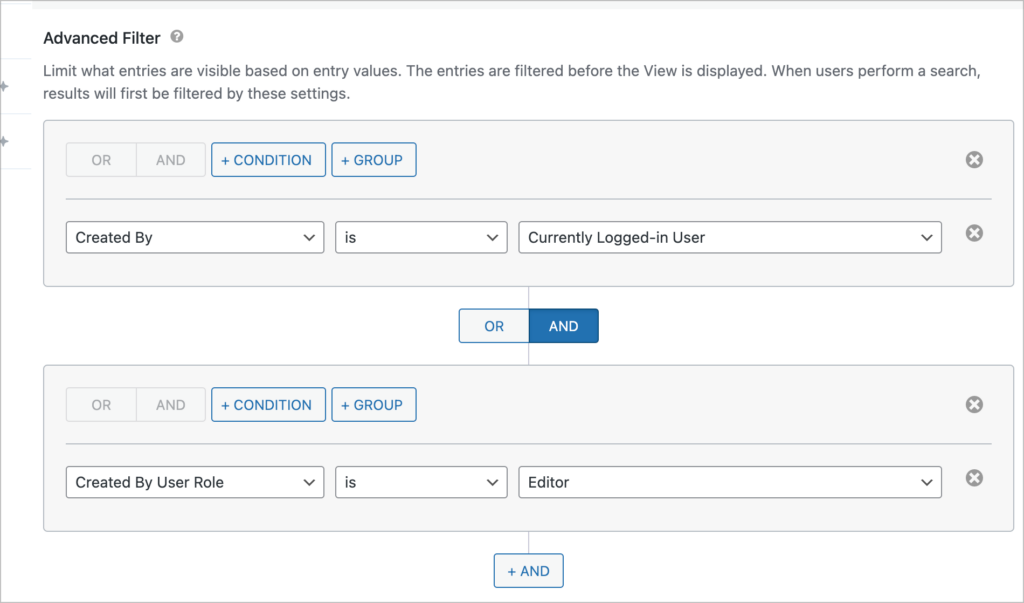
With GravityView Pro, you’ll get access to the Advanced Filtering Extension which gives you finer control over which entries show up in your View. For example, you can filter entries by a specific field value, or restrict entries by login status or user role.
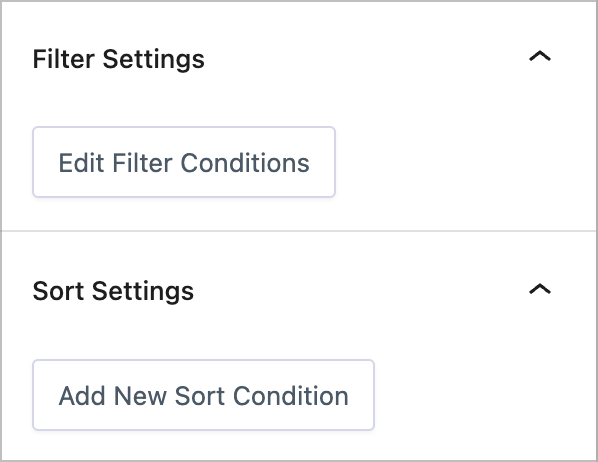
NFViews also includes a search bar in its Pro license. All sorting and filtering capabilities are only available in the Pro version. And while the sorting and filtering functionality in NFViews is similar to GravityView, it doesn’t include as many advanced options.
Summary
| Feature | GravityView | NFViews |
|---|---|---|
| Filter entries based on field values | ✅ | ✅ |
| Show entries submitted by the logged-in user | ✅ | ✅ |
| Restrict entries based on user role | ✅ | ❌ |
| Filter entries based on user meta values | ✅ | ❌ |
| Add multiple condition groups for complex filters | ✅ | ❌ |
Front end entry editing
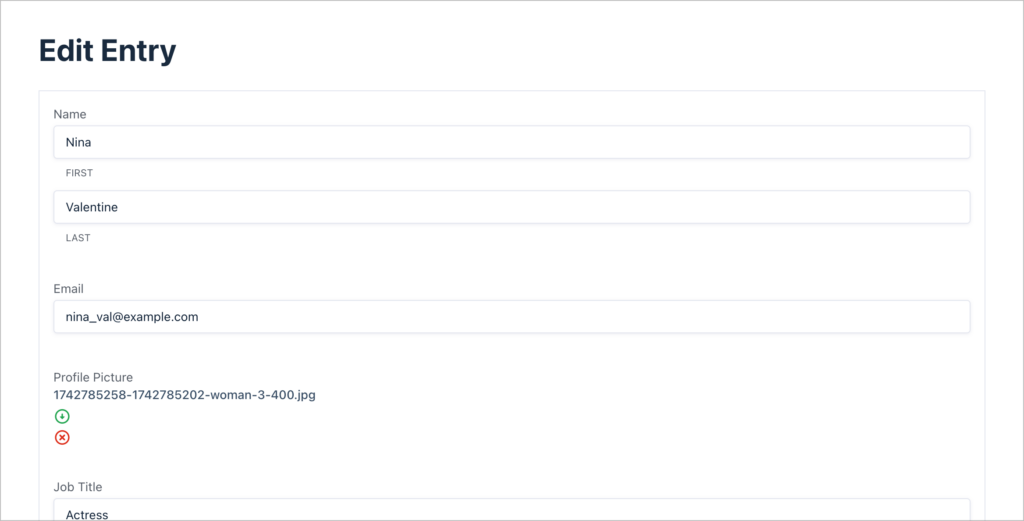
GravityView allows users to edit form entries on the front end. In the GravityView drag-and-drop editor, there is a tab dedicated to configuring this layout. Here you can add fields that you want to be editable on the front end.
By enabling GravityView’s User Edit option, logged-in users will be able to edit the entries that they create! This is a powerful feature for user profiles, or directory listings.
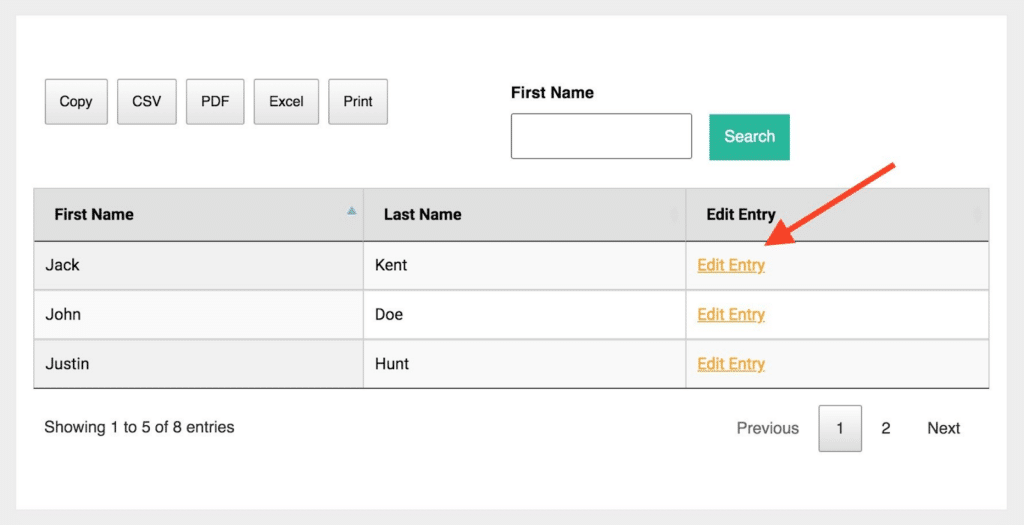
NFViews also allows you to edit entries from the front end. However, this feature is only available in the Developer plan. In NFViews, entry editing redirects the user back to the page where the form is embedded. In contrast, GravityView allows entries to be edited directly from the same page as the View.
Summary
| Feature | GravityView | NFViews |
|---|---|---|
| Edit entries from the front-end | ✅ | ✅ |
| Control which fields are editable | ✅ | ❌ |
| Control the order of editable fields | ✅ | ❌ |
Exporting and reporting
GravityView has built-in export features, enabling you to export data in a View to CSV to TSV format. The DataTables layout enables you to export data to Excel or PDF. GravityView also integrates with GravityExport and GravityCharts for more advanced exporting and reporting capabilities.
NFViews does not support data exports. However, their DataTables layout allows exporting to CSV, Excel and PDF.
Summary
| Feature | GravityView | NFViews |
|---|---|---|
| Export to CSV & TSV | ✅ | ❌ |
| Export to Excel & PDF | Requires DataTables | Requires DataTables |
| Custom PDF reports | Requires GravityExport | ❌ |
| Create charts and graphs | Requires GravityCharts | ❌ |
Demos and free trials
GravityView has a range of live demos, showing off the full spectrum of functionality. You can also create your own, free trial site where you can play around with GravityView yourself and see how it works in the backend.
NFViews also has a demo site, allowing you to see what the Views looks like on the front end. However, NFViews does not offer a free trial.
Pricing
GravityKit offers a simple, 3-tiered pricing structure:
- GravityView ($129): This plan includes the GravityView core plugin with the List and Tables layouts.
- GravityView Pro ($199): This plan includes the core plugin plus all premium Extensions and Layouts.
- All Access Pass ($399): The All Access Pass includes GravityView, all 5 layouts (List, Table, DataTables, Maps, and DIY), all premium extensions, and all other add-ons that GravityKit offers.
Here is the pricing structure for Ninja Forms Views:
- Free: There is a free version of the plugin available on WordPress.org with very limited features.
- Personal ($59): For 1 site. This plan gives you access to the Table and List layouts, sorting, filtering and searching.
- Professional ($99): For 5 sites. This plan gives you access to everything in the previous plans, as well as entry approval.
- Developer ($199): For 20 sites. The Developer license unlocks all NFViews features, including front-end entry editing.
Comparing refund policies
GravityView includes a 30-day money back guarantee, no questions asked. You will receive 100% of your money back.
NFViews offers a 7 day money back guarantee but, as of April 27, 2025, their terms and conditions page says “all purchases made on https://nfviews.com/ are non-refundable or exchangeable”. Assuming that is a mistake with their boilerplate terms, NFViews only will provide a refund if a feature doesn’t work as advertised and if support isn’t able to fix the problem. In addition, NFViews doesn’t provide a 100% refund guarantee: their terms specify that a transaction fee of 4% is not refundable.
Active development and 2026 outlook
Neither vendor publishes a public roadmap, so the most reliable signal of long-term viability is recent release cadence and the substance of what each team is shipping. Here is what each project’s official changelog shows for 2026 to date.
- GravityView has shipped four releases in roughly three weeks of activity, per the GravityView changelog. This is a very healthy release cadence.
- NFViews has shipped five releases so far in 2026 across its free and Pro branches, per the NFViews changelog and the WordPress.org plugin page.
What this means for long-term viability
Both projects are actively maintained as of April 2026 and shipped material 2026 releases. GravityView’s investment is concentrated in search, developer extension points, and Gravity Forms compatibility maintenance, while NFViews’s largest 2026 release has been the Design system overhaul (visual customization without code).
Importantly, neither project has announced a sunset, deprecation, or major architectural rewrite that would affect a multi-year deployment decision today.

Pro Tip
For ongoing visibility into either project’s direction, subscribe to release announcements via the GravityKit newsletter for GravityView and the NFViews blog for NFViews. Both publish a post for major releases.
Community sentiment and third-party validation
A direct vendor comparison is one input — but most readers also want to know what independent sources say.
What independent sources show
| Signal | GravityView | NFViews |
|---|---|---|
| Product ratings | 5 stars as per the GravityView product page. | 4.9 / 5 stars across 16 reviews |
| WordPress.org active installs (lite/free distribution) | n/a — commercial only | 1,000+ |
| On-site rating (vendor page) | 5.0 / 5 stars across 20 reviews | Testimonials only, no aggregate rating shown |
| Gravity Forms Certified Developer | Yes — listed at gravityforms.com/certified-developers-and-add-ons (one of six certified partners) | Not applicable (Ninja Forms ecosystem, not Gravity Forms) |
| Named customer deployments referenced on the product page | Princeton University, Dragonfly, JAXPORT (see case studies) | Customer testimonials on the NFViews homepage, no aggregate count |
Common themes in user feedback
The recurring praise on the NFViews WordPress.org reviews page is fast support response time and ease of getting a basic table view live (“works as advertised,” “best support ever”). The single 4-star review notes that documentation could go deeper for users who want to customize the output with code.
For GravityView, the testimonials surfaced on the product page emphasize the breadth of layouts and the value of the no-code editor for teams that don’t have a developer on hand. The Gravity Forms Certified Developer status is the most concrete external signal—Gravity Forms manually vets that program and currently lists six certified partners across the entire ecosystem.
GravityView or NFViews: Which should you choose?
Both plugins make it easy to display form submissions on your site. Each of them offers a range of features for displaying, editing, and filtering form entries. If you’re already familiar with Gravity Forms or you’re looking to build robust web applications, GravityView is your best choice. On the other hand, if you’re a Ninja Forms user, then NFViews may be for you.
If you found this post helpful, see our comparison of GravityView and Formidable Views next!

Helpful tips right in your inbox.
Subscribe to get the latest articles, information on releases and helpful Gravity Forms tips!
More articles

Launch Log: GravityView 3.0, plus upgrades to Block MCP and GravityKit MCP
GravityView 3.0 lands with the new Vantage theme, frontend bulk actions, and AI-assisted View creation. This launch log also covers updates to GravityKit MCP, Block MCP, and Dashboard Views.

Announcing GravityView 3.0: a fresh new look, AI View creation, and native page builder support
GravityView 3.0 is here: restyle Views with the new Vantage theme, build them with AI, embed them in any page builder, and run bulk actions on the front end.

Launch Log: GravitySearch arrives, plus AI spam review and GravityView fixes
This week, releases are anchored by a brand-new product! GravitySearch joins the GravityKit suite with cross-form entry search for Gravity Forms. Alongside it, Gravity Forms Zero Spam picks up an AI-powered review step, and GravityView sees fixes for Enhanced Security, Edit Entry, and Entry…